Mastering the Art of the Fruit Tray: A Comprehensive Guide for Stunning & Delicious Platters
Are you looking to elevate your next gathering with a vibrant, healthy, and utterly delicious centerpiece? Look no further than the humble yet spectacular fruit tray! Whether you’re a seasoned host or planning your very first get-together, a well-curated fruit platter is a guaranteed crowd-pleaser that appeals to all ages and dietary preferences. It’s not just a snack; it’s a statement of freshness and thoughtful presentation. Today, we’re diving deep into the art of crafting the perfect fruit tray, sharing insider tips, seasonal recommendations, and smart strategies to ensure your platter is a resounding success.

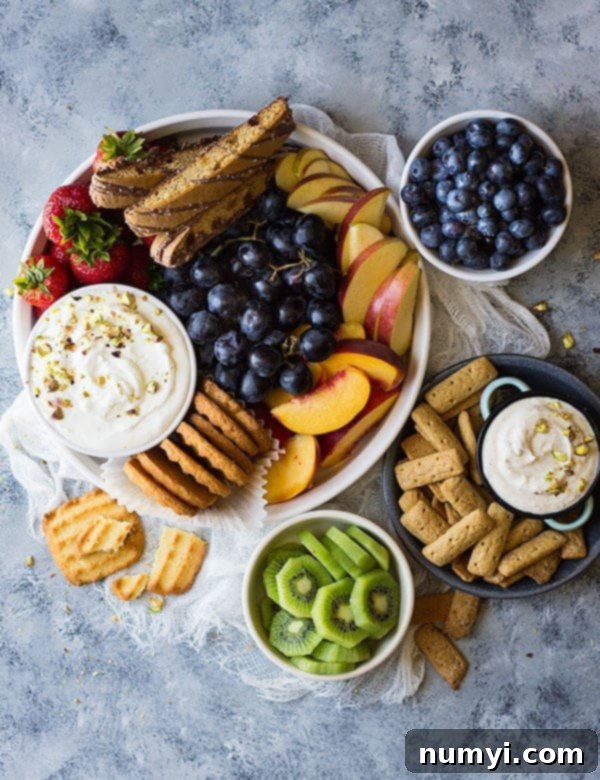
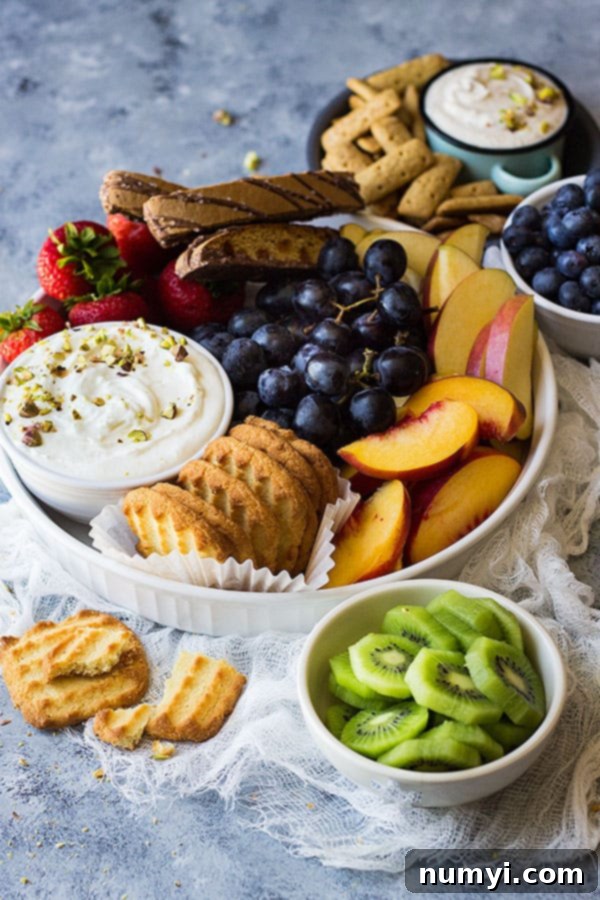
Fruit trays offer incredible versatility. They can serve as a refreshing appetizer, a light dessert, or a healthy alternative amidst heavier party fare. The best part? They require minimal cooking and can often be prepped in advance, freeing you up to enjoy your event. Imagine the delight on your guests’ faces – much like my own kids when they saw this colorful spread after my photoshoot! Their eyes lit up as if it were Christmas morning, proving that the simple joy of fresh fruit is universally appreciated and an excellent way to introduce healthy snacks.
Our comprehensive guide will walk you through every step, from selecting the freshest produce to arranging it artistically. The cornerstone of a truly exceptional fruit tray lies in choosing fruit that is in season. Not only does this ensure peak flavor and sweetness, but it’s also a fantastic way to save money and support local growers. While we highly recommend prioritizing seasonal options, don’t hesitate to include a few “splurge” fruits if they’re favorites or essential to your vision for a truly unique fruit platter. Let’s get started on creating a memorable fruit experience!
Planning Your Fruit Tray: How Much to Make?
One of the most common questions when preparing a fruit tray is how much fruit, dip, and other accompaniments you’ll need. Proper planning ensures everyone gets to enjoy the delicious spread without excessive waste, making your party planning stress-free. Here’s a helpful guide for a typical gathering of about 12 people:
- Fruit Quantity: Aim for approximately 1/2 to 1 cup of fruit per person. For a party of 12 guests, this means you’ll need about 6-12 cups of assorted, chopped fruit. When in doubt, it’s always better to have a little extra than to run out. Remember that larger, denser fruits like melons will take up more space and can be quite filling, while smaller berries might be consumed more quickly due to their snackable nature. Consider the overall menu of your party; if there are many other heavy appetizers, you might lean towards the lower end of the estimate.
- Dips Quantity: Plan for about 3 tablespoons of dip per person. For 12 people, this translates to roughly 1 1/2 cups of dip in total. Offering a variety of dips adds an extra layer of enjoyment and caters to different tastes. Consider these delightful options:
- Healthy Almond Butter Fruit Dip: A wholesome and satisfying choice, perfect for those seeking a nutritious option. Its creamy texture and nutty flavor pair wonderfully with a wide range of fruits, especially apples and bananas.
- Quick and Easy Marshmallow Fruit Dip: A sweet and fluffy favorite that appeals to kids and adults alike. It’s incredibly simple to whip up using just a few ingredients and adds a touch of whimsy and indulgence to your platter.
- Chocolate Cream Cheese Fruit Dip: Indulgent and rich, this dip transforms your fruit tray into a decadent dessert experience. It’s particularly fantastic with berries, sliced apples, and even orange segments.
You can also offer a simple honey-lime yogurt dip or a cream cheese fruit dip as additional options.
- Cookies & Accompaniments: While fresh fruit is the star, complementary items like cookies, small cakes, or even mini pretzels can enhance the tray and help fill in gaps, adding variety to your fruit board. Budget for about 2 cookies or small sweet treats per person, which would be around 24 pieces for 12 guests. I often provide a bit more than this, as cookies can sometimes help the tray last longer by offering an alternative snack, and they often disappear quickly! Good choices include shortbread cookies, ginger snaps, biscotti, or even honey graham cracker sticks for an extra crunch.

Seasonal Fruit Guide: Freshness at Its Best for Your Fruit Platter
Choosing fruits that are in season is not only budget-friendly but also guarantees the freshest, most flavorful experience for your fruit platter. Here’s a detailed guide to help you select the best produce for your fruit tray throughout the year, ensuring peak ripeness and taste:
Winter Fruits (December, January, February):
- Apples: Crisp, sweet, and incredibly satisfying, apples are a winter staple. Opt for varieties like Fuji, Gala, Honeycrisp, or Granny Smith for a range of flavors and textures. Their firm flesh holds up well on a tray.
- Bananas: Creamy and naturally sweet, bananas are a versatile addition. They offer a soft contrast to crispier fruits.
- Oranges & Other Citrus: Bright, tangy, and bursting with Vitamin C, oranges, mandarins, clementines, and grapefruits add a refreshing zest and vibrant color. Their segments are easy to eat.
- Pears: Soft and subtly sweet, pears like Anjou or Bartlett are wonderful when ripe, offering a delicate texture.
- Pineapple: A tropical burst of sweetness and tang, pineapple is surprisingly available year-round and offers a juicy, fibrous texture.
- Kiwi: Offering a tart and sweet contrast with a beautiful emerald green, kiwi is great for visual appeal and a unique flavor profile.
- Pomegranates: Their jewel-like arils add a burst of color and a delightful crunch.
Spring Fruits (March, April, May):
- Apples: Still available and delicious, many varieties store well into spring.
- Apricots: Small, sweet, and slightly tart, apricots bring a delicate flavor and pretty orange hue, signaling warmer weather.
- Bananas: Continually available, a reliable addition.
- Pineapple: Continues to be a fantastic, juicy choice in spring.
- Strawberries: The undisputed queen of spring, fresh strawberries are incredibly sweet and aromatic. Their bright red color is essential for any vibrant fruit platter.
- Cherries: Early varieties of sweet cherries may begin to appear, offering a delightful pop of flavor.
- Rhubarb: While often cooked, thinly sliced raw rhubarb can add a tart crunch (best used sparingly and for adventurous palates).
Summer Fruits (June, July, August):
Summer is a bounty of incredible fruits, offering the widest and most colorful selection for your tray!
- Apricots: Still excellent and plentiful, offering a soft texture and sweet taste.
- Bananas: Always a reliable choice.
- Berries of all kinds: Blackberries, raspberries, blueberries, and more strawberries are at their absolute peak. These are essential for color, flavor, and their high antioxidant content.
- Cherries: Sweet and juicy, fresh cherries are a luxurious addition. Remember to pit them for easy eating if desired.
- Melons of all kinds: Watermelon, cantaloupe, and honeydew are hydrating and incredibly refreshing. Cut them into interesting shapes (balls, stars) for added visual appeal.
- Kiwi: Continues to be a great choice for its vibrant green and unique flavor.
- Mangos: Sweet, tropical, and wonderfully juicy, mangos add an exotic flair and vibrant orange color.
- Nectarines: Smooth-skinned peaches, offering similar sweet, juicy flesh without the fuzz, and often less messy.
- Peaches: Soft, fragrant, and incredibly sweet when ripe, peaches are a summer highlight. Their fuzzy skin and juicy interior are irresistible.
- Plums: Ranging from sweet to tart, plums offer a beautiful range of colors from deep purple to bright red and yellow.
Fall Fruits (September, October, November):
- Apples: Fall is prime apple season! Explore diverse varieties like Gala, Honeycrisp, Fuji, Granny Smith, or Pink Lady. There’s an apple for every preference.
- Bananas: Still a solid option for your platter.
- Grapes: Both red and green grapes are incredibly sweet and make for easy, pop-in-your-mouth snacks. They add elegant clusters to any tray.
- Mangos: Late-season mangos can still be found and are just as delicious, though their peak might be waning.
- Pears: Many varieties of pears are excellent in the fall, offering a delicate sweetness and smooth texture.
- Pineapple: Continues to be a good choice, adding a tropical touch amidst the autumnal flavors.
- Raspberries: While summer is peak, raspberries can still be found fresh and vibrant in early fall, providing a lovely tart-sweet note.
- Figs: For a more gourmet touch, fresh figs are luxurious, subtly sweet, and pair beautifully with other fruits and cheese.
While many of these fruits are often available outside their peak seasons thanks to global sourcing, purchasing them in season almost always guarantees superior flavor and texture, along with better prices. My best advice is to select as many in-season fruits as possible to form the base of your platter, then allow yourself to splurge on a few out-of-season favorites if your budget and preferences allow. For me, berries are a common splurge because I adore their vibrant color and delicate sweetness, even when they’re a bit pricier. Ultimately, the best fruit tray is one that features fruits you and your guests will enjoy the most, creating a truly personalized and delightful experience.

Expert Tips for a Stunning & Successful Fruit Tray
Beyond choosing the right fruits, a few strategic steps can transform your fruit tray from simple to sensational. Follow these tips to ensure freshness, convenience, and a truly impressive presentation that will leave your guests talking:
- Optimal Fruit Shopping Time: For maximum freshness and flavor, purchase your fruit the day before your event, or ideally, on the very day of. Avoid buying fruit too far in advance, as some delicate varieties can spoil quickly or lose their peak ripeness. When shopping, gently inspect each piece for firmness, vibrant color, and a pleasant aroma – these are key indicators of ripeness and quality. Avoid any fruit with bruising, mold, or an off-smell.
- Prepare Dips in Advance: Fruit dips are excellent candidates for make-ahead preparation. You can easily whip them up the day before your party. Once prepared, spoon them into your chosen serving bowls, cover them tightly with plastic wrap to prevent air exposure, and refrigerate. This allows the flavors to meld beautifully and saves you precious time and effort on party day. Most creamy or yogurt-based dips actually benefit from a few hours in the fridge.
- Mastering Fruit Cutting & Storage:
- Timing is Key: While it’s best to cut fruit on the day of the event for peak freshness and appearance, you can cut and store certain, more robust fruits (like melon, grapes, or berries) the day before if you need to save time.
- Bite-Sized Pieces: Cut all fruit into manageable, bite-sized pieces. This makes it easy for guests to pick up and enjoy without the need for extra utensils or plates, promoting a relaxed atmosphere. Think wedges, cubes, or halves depending on the fruit.
- Separate Storage: Store cut fruits in separate airtight containers in the refrigerator. This is crucial for several reasons: it prevents fruit juices from intermingling (which can alter delicate flavors, especially from strong fruits like ripe watermelon), minimizes cross-contamination, and helps prevent faster spoilage for more delicate fruits.
- Combatting Browning: For fruits notorious for browning quickly, like apples and bananas, slice them just before assembling your tray. To further delay oxidation and keep them looking pristine, toss the slices lightly in a small amount of lemon juice (or a mixture of water and a tiny bit of vitamin C powder). This simple trick keeps them looking fresh and appealing for longer.
- Assembling Your Masterpiece: The presentation is where your fruit tray truly shines! A beautifully arranged platter is an inviting sight.
- Timing: Aim to assemble your fruit tray about 10-15 minutes before your guests are expected to arrive. This ensures everything is perfectly chilled and looks its freshest.
- Placement of Dips: Begin by placing your chosen dip or dips on the platter first. Center them or place them strategically to create attractive focal points. Small bowls nested directly within the fruit are often very appealing and practical.
- Artful Arrangement: Now for the fun part! Arrange the fruit in an eye-appealing manner. Don’t be afraid to get creative and think about color, texture, and shape.
- Rainbow Effect: Grouping fruits by color (red, orange, yellow, green, blue/purple) creates a stunning rainbow effect that is incredibly vibrant and visually striking.
- Clustering: Group similar fruits together in neat mounds or distinct sections. This makes it easy for guests to choose their favorites and keeps the platter looking organized.
- Random & Organic: Sometimes a more organic, seemingly “random” arrangement can look beautifully abundant and natural, like a cornucopia.
- Add Height & Texture: Use larger fruit pieces (like pineapple wedges or melon balls) to add height and dimension. Introduce textural contrast with whole berries, elegant grape clusters, or sprigs of fresh mint.
- Filling the Gaps: Use smaller fruits, berries, and your chosen cookies or crackers to fill in any blank areas on the platter. This makes the tray look full, lush, and incredibly inviting, suggesting abundance.
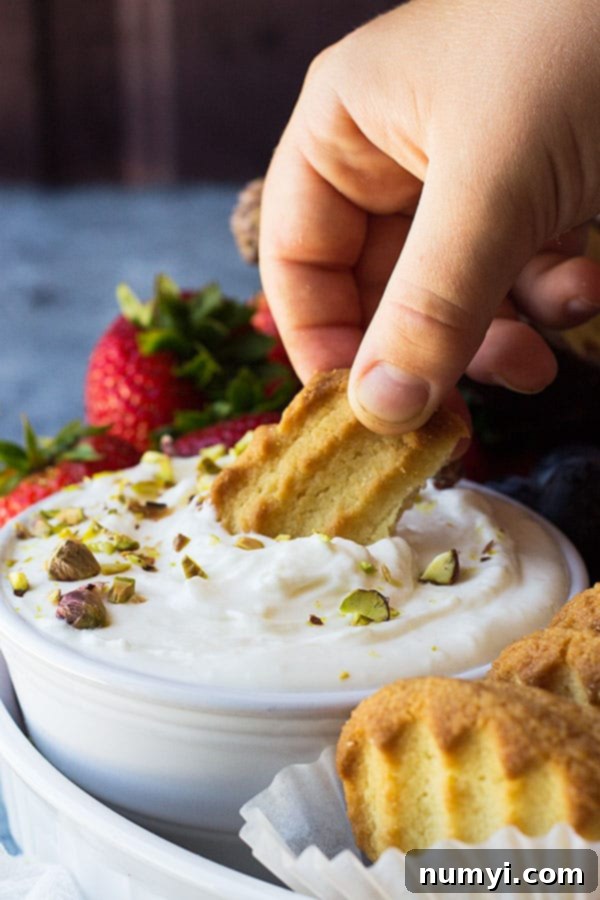
- Optional Garnishes: Elevate your dips or the overall tray with a touch of garnish. A sprinkle of finely chopped nuts on a dip, a few fresh mint leaves scattered among the fruit, or a zest of citrus over certain sections can add visual interest and an extra layer of flavor and aroma.
Most importantly, have fun creating your fruit tray! It’s an opportunity to express your creativity and provide a delightful, healthy, and visually stunning option for your guests. Enjoy your party and the compliments that are sure to come your way – your beautifully crafted fruit platter will undoubtedly be a memorable highlight!
How To Make A Fruit Tray

Ingredients
- Grapes
- Peaches
- Strawberries
- Blueberries
- Kiwi
- Marshmallow Fruit Dip
- Healthy Almond Fruit Dip
- Salted Caramel Biscotti
- Shortbread Cookies
- Honey Graham Sticks
Instructions
-
Buy your fruit the day of or at the earliest the day before. This way the fruit will be fresh and at its peak flavor.
-
Prepare your chosen fruit dips the day before the event. Store them covered tightly in the refrigerator until you’re ready to serve, allowing flavors to deepen.
-
Ideally, cut all fruit into small, bite-sized pieces on the day of the party. If necessary, you can cut non-browning fruits the day before and store them in separate, airtight containers in the refrigerator. Remember to slice apples and bananas just before assembly and consider dipping them in a little lemon juice to prevent browning.
-
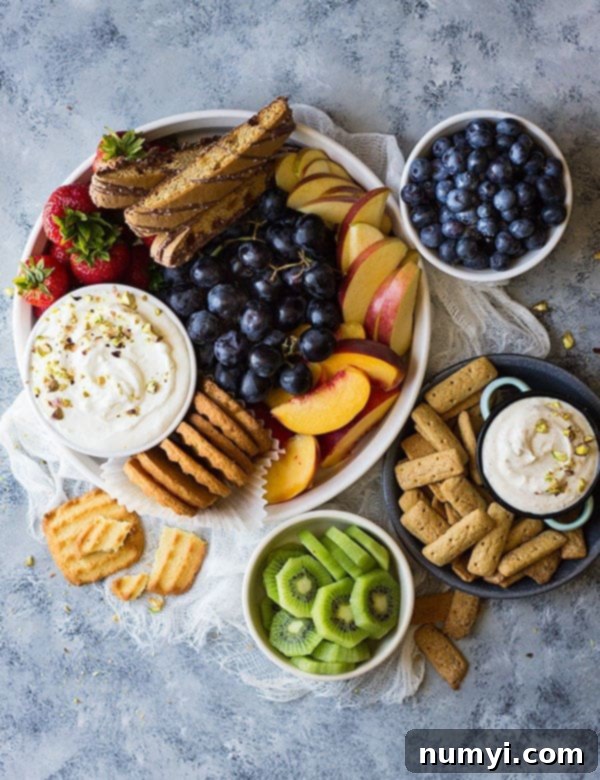
Approximately 10-15 minutes before serving, begin assembling your fruit tray. First, place your fruit dips on the platter. Then, artfully arrange the prepared fruit around the dips in an eye-pleasing manner (e.g., creating a rainbow pattern, grouping similar colors, or using an organic spread). Finally, fill any remaining blank spots with cookies or other accompaniments to make the tray look full and inviting.
Notes
