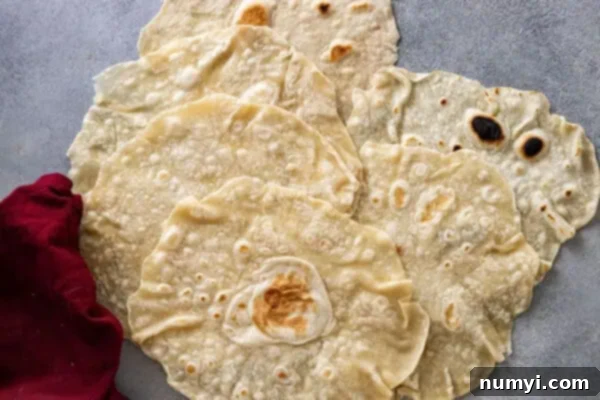
Perfect Homemade Flour Tortillas: Your Ultimate Guide to Soft & Delicious Wraps
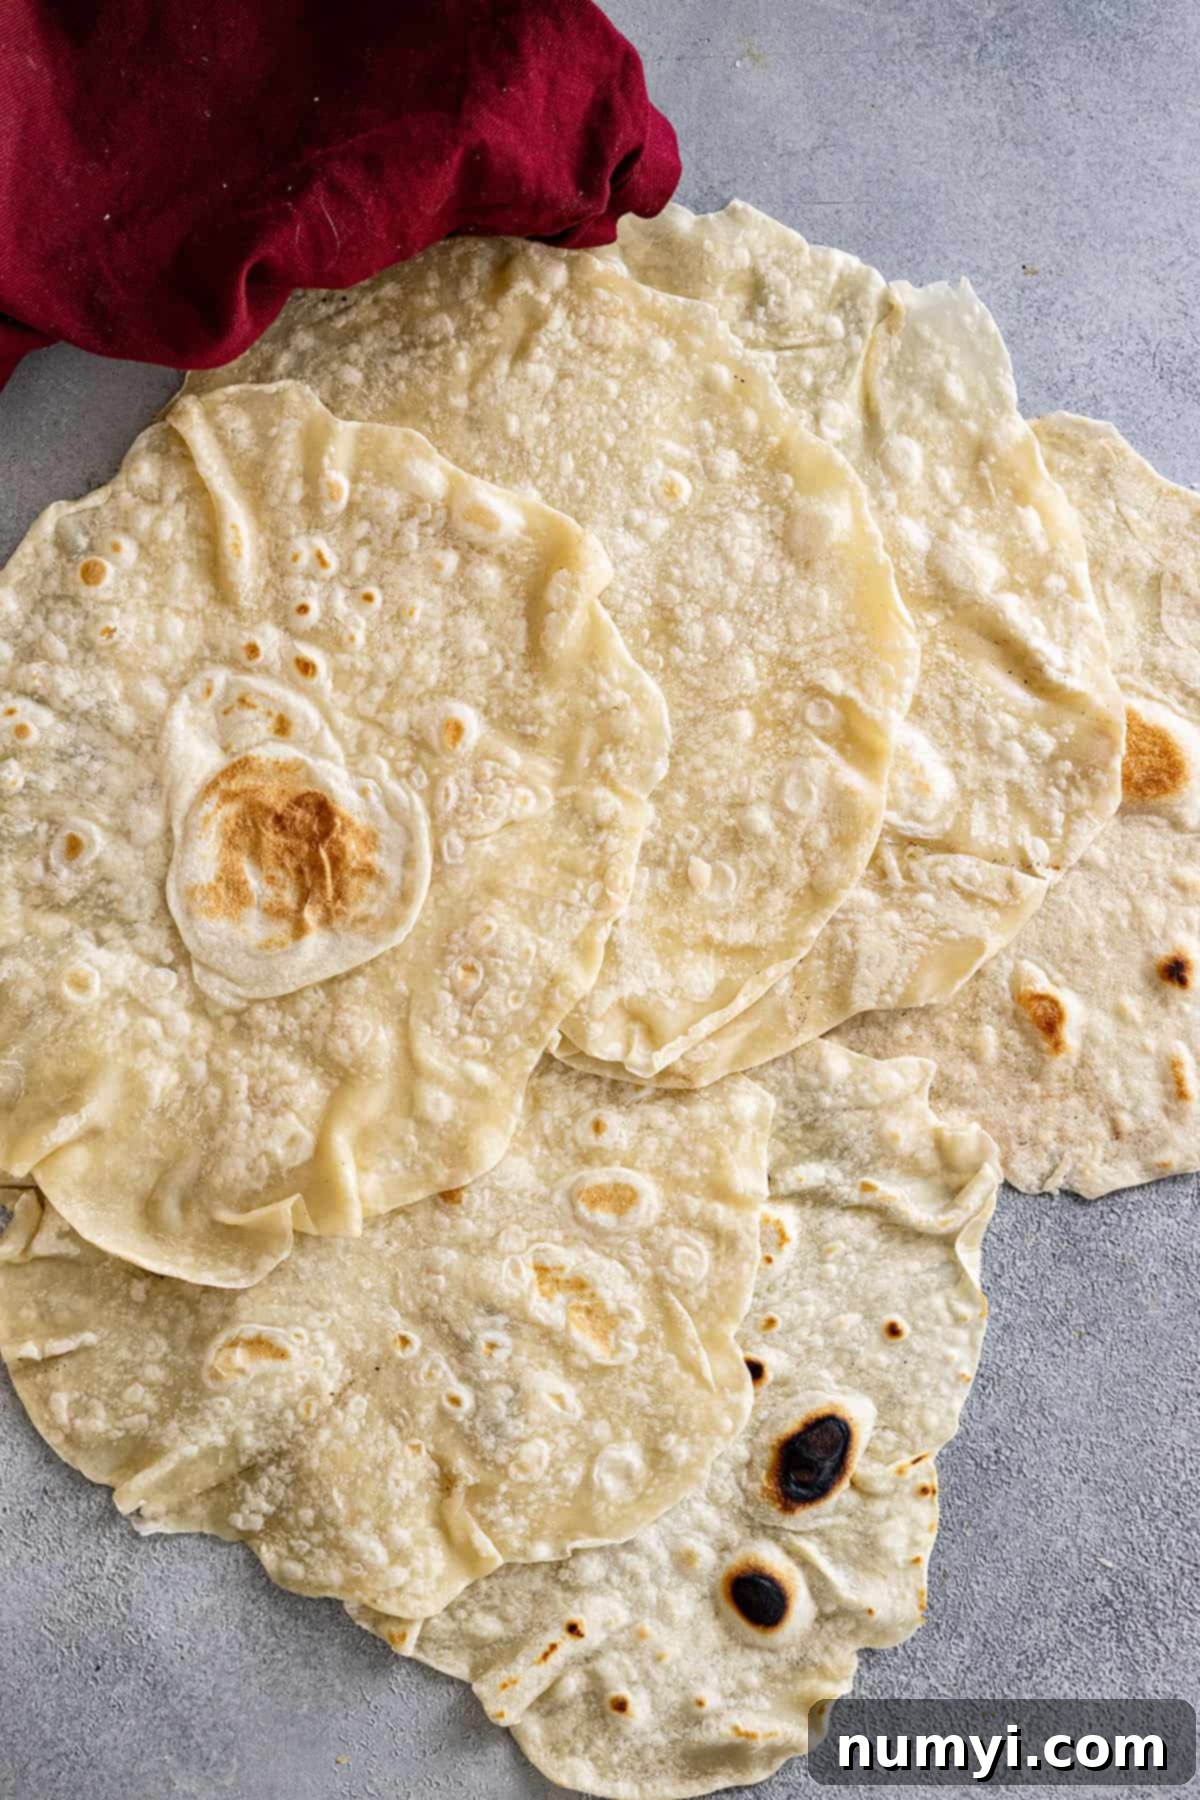
There’s something undeniably magical about homemade flour tortillas. They elevate any meal, transforming a simple taco night or burrito bar into a truly special culinary experience. Forget the stiff, flavorless store-bought versions – once you master this incredibly easy recipe, you’ll discover a world of soft, pliable, and utterly delicious tortillas that you won’t ever want to abandon. Our homemade flour tortillas boast a superior taste and texture, making them a game-changer for your kitchen. They are far from complicated, requiring just a few basic ingredients and a little bit of patience, which pays off tenfold in flavor and satisfaction.
These versatile homemade flour tortillas aren’t just for classic tacos. Imagine them wrapping around juicy Crockpot Chicken Tacos, generously stuffed burritos, or serving as the base for savory White Chicken Enchiladas. They’re also fantastic for quesadillas, fajitas, breakfast wraps, or simply enjoyed on their own with a smear of butter or your favorite dip. You can use them in any recipe where you’d typically reach for a store-bought tortilla, but with the added bonus of incredible homemade goodness.
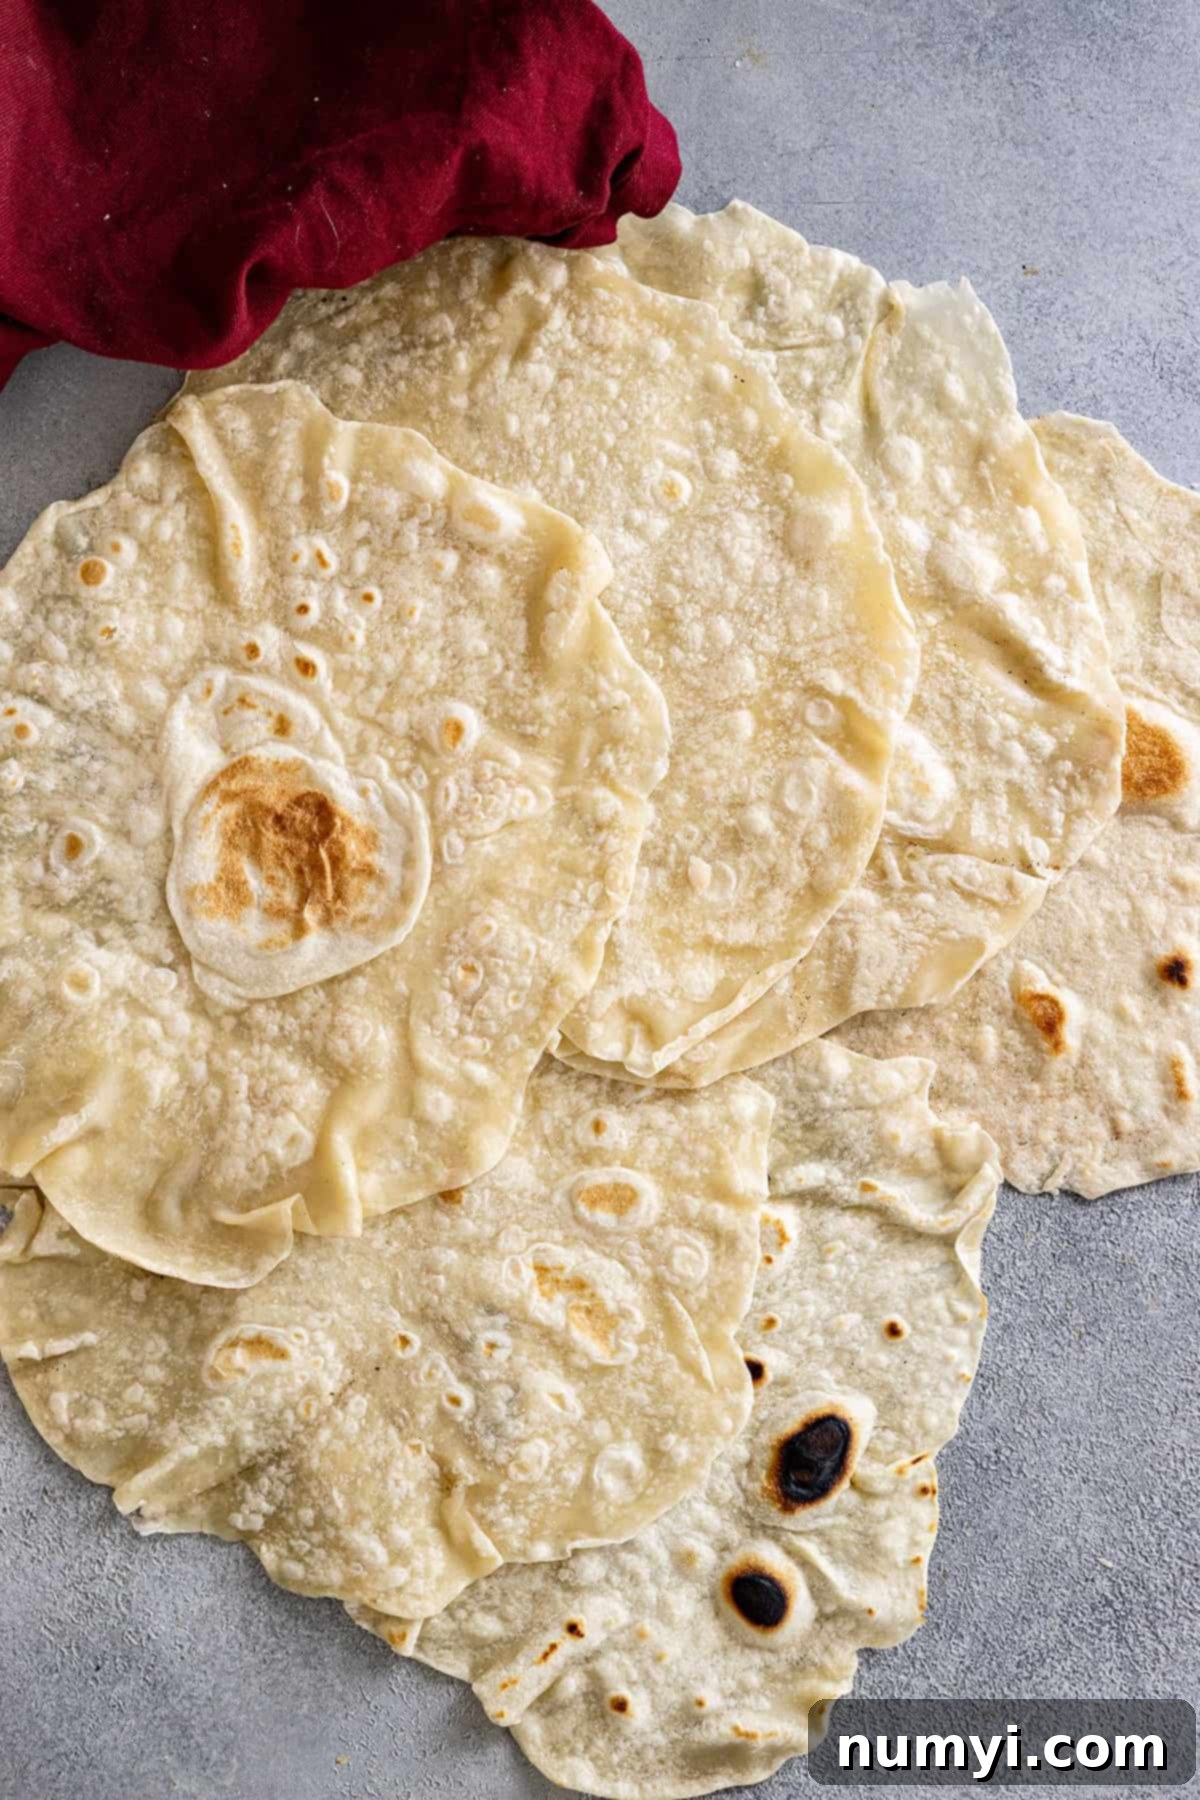
Why Homemade Flour Tortillas Are a Culinary Game Changer
You might be wondering if making tortillas from scratch is truly worth the effort when store shelves are stocked with countless options. The answer is a resounding yes! The difference between homemade and store-bought is night and day. Here’s why you’ll fall in love with making your own:
- Unmatched Freshness and Flavor: Store-bought tortillas often contain preservatives and lack the vibrant, fresh taste of a tortilla made with simple, wholesome ingredients right in your kitchen. Homemade tortillas have a delicate, almost buttery flavor that truly enhances any dish.
- Superior Texture: Say goodbye to brittle, cracking, or rubbery tortillas. Our recipe delivers tortillas that are incredibly soft, pliable, and wonderfully chewy, making them perfect for rolling without fear of breakage. They puff up beautifully when cooked, creating pockets of air that contribute to their delightful texture.
- Customization Options: When you make them yourself, you control every ingredient. You can choose your preferred fat, adjust the saltiness, or even experiment with different flours. You can also make them exactly the size and thickness you desire.
- Economical: Flour, water, salt, and fat are inexpensive ingredients. Making your own tortillas is significantly more cost-effective than regularly purchasing packaged ones, especially if you go through a lot of them.
- A Rewarding Experience: There’s immense satisfaction in creating something delicious from scratch. The aroma of fresh tortillas cooking is intoxicating, and serving them to family and friends is a truly gratifying experience.
Key Ingredients for Authentic Tortillas
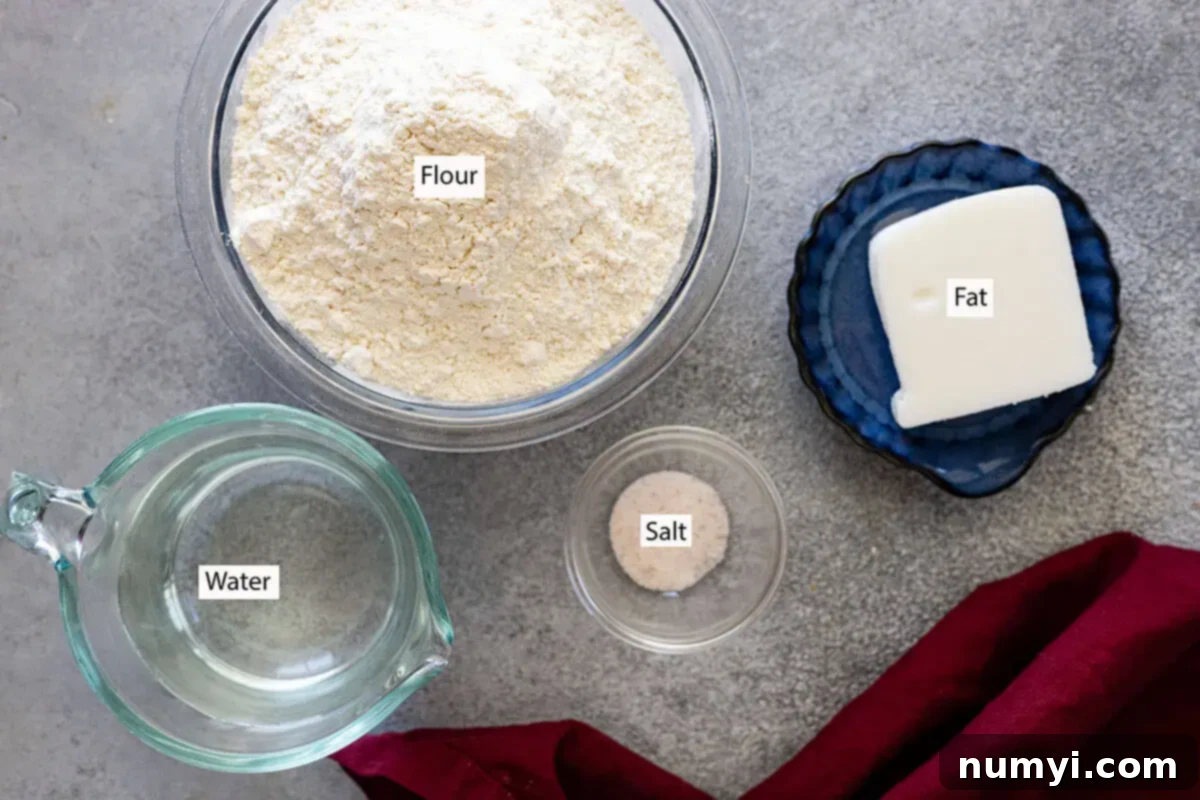
Making delicious flour tortillas requires just a few pantry staples. Understanding the role of each ingredient will help you achieve the best results:
- All-Purpose Flour: The foundation of our tortillas. All-purpose flour provides the necessary structure and elasticity. While you can experiment with other flours, all-purpose is ideal for achieving the classic soft and pliable texture.
- Fat of Choice: This is crucial for tenderness and flavor. Whether you opt for traditional lard, vegetable shortening, butter, or oil, the fat prevents the gluten from developing too much, ensuring your tortillas remain soft and don’t become tough. We’ll discuss fat options in more detail below.
- Very Hot Water: Hot water helps in two significant ways. Firstly, it assists in melting and evenly distributing the fat throughout the dough. Secondly, the heat helps to quickly hydrate the flour and start the gluten relaxation process, leading to a more pliable dough that’s easier to work with.
- Salt: Essential for flavor! Salt balances the taste and brings out the natural flavors of the other ingredients. Don’t skip it, as unseasoned tortillas can taste bland.
- Baking Powder (Optional, for Fluffier Tortillas): While not traditionally used in all recipes, adding baking powder creates a lighter, fluffier tortilla that puffs up more during cooking. If you prefer a more bread-like, airy texture, this is your secret ingredient.
Essential Tools for Making Homemade Tortillas
You don’t need a lot of fancy equipment to make fantastic tortillas. Most of these items are probably already in your kitchen:
- Large Mixing Bowl: For combining your dry ingredients and then mixing in the wet.
- Measuring Cups and Spoons: For accurate ingredient proportions.
- Rolling Pin: Essential for rolling out the dough balls thinly. Any standard rolling pin will do, but a tapered or French rolling pin can offer more control.
- Large Skillet or Comal: A cast-iron skillet, a non-stick pan, or a traditional Mexican comal (a flat, round griddle) is perfect for cooking the tortillas. Ensure it’s heavy-bottomed for even heat distribution.
- Clean Kitchen Towel or Tortilla Warmer: Crucial for keeping your cooked tortillas soft, warm, and pliable by trapping steam.
- Kitchen Scale (Optional but Recommended): For dividing dough into perfectly equal portions, ensuring consistent tortilla sizes and cooking times.
- Stand Mixer with Dough Hook (Optional): Makes the kneading process effortless, especially if you prefer not to knead by hand.
- Tortilla Press (Optional): If you desire perfectly round and uniformly thin tortillas without the effort of a rolling pin, a tortilla press is a worthwhile investment.
Essential Tips for Perfect Homemade Tortillas
Making tortillas from scratch is a rewarding experience, and these expert tips will help ensure your batch turns out beautifully every time:
- Prioritize Dough Relaxation: This is arguably the most crucial step! After you’ve divided your dough into individual portions, resist the urge to immediately start rolling. Giving the dough ample time to rest – typically around 30 minutes – allows the gluten strands to relax. When gluten is tense, it makes the dough spring back and incredibly difficult to roll thinly. If you find your dough stubbornly resisting your rolling pin, simply cover it and let it rest for an additional 10-15 minutes. A relaxed dough will roll out effortlessly, almost like magic.
- Embrace the Rustic Charm: Don’t stress over achieving perfectly round tortillas! Uneven edges and organic shapes add to the homemade charm and rustic appeal. These unique shapes will still taste absolutely incredible. However, if a uniform, perfectly circular tortilla is your goal, consider investing in a good quality tortilla press. A press makes quick work of shaping and ensures consistent thickness.
- Choose Your Fat Wisely: While traditional Mexican tortillas often use lard for its distinct flavor and unparalleled tenderness, it’s not a strict requirement. The beauty of homemade lies in customization! Feel free to experiment with different fats to match your dietary preferences and desired flavor profile. Whether you opt for vegetable shortening, butter, or various oils, each will impart a slightly different characteristic to your tortillas. We’ll delve deeper into fat options shortly to help you decide.
- Don’t Overcook: Cook tortillas quickly over medium to medium-low heat. You’re looking for light brown spots and a few bubbles, not a crispy chip. Overcooked tortillas will become dry and brittle, losing that desirable soft, pliable texture.
- Stack and Steam: As soon as a tortilla comes off the skillet, stack it on top of the previous one. This creates a natural steaming environment, trapping moisture and ensuring your tortillas stay soft and flexible. Wrap the stack in a clean kitchen towel or place them in a tortilla warmer to maintain warmth and tenderness until serving.
Step-by-Step Guide: How To Make Homemade Flour Tortillas
While the process of making homemade tortillas is straightforward, it does require a dedicated block of time – roughly an hour and a half, including rest time. However, every minute invested is truly worth it for the unparalleled taste and texture you’ll achieve. Let’s walk through each step to ensure your success.
1. Prepare the Liquid Fat Mixture
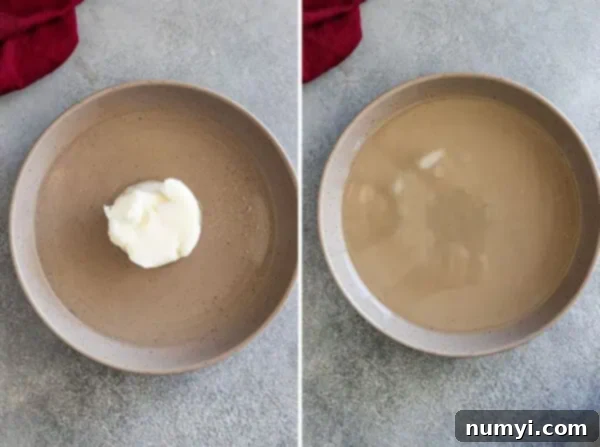
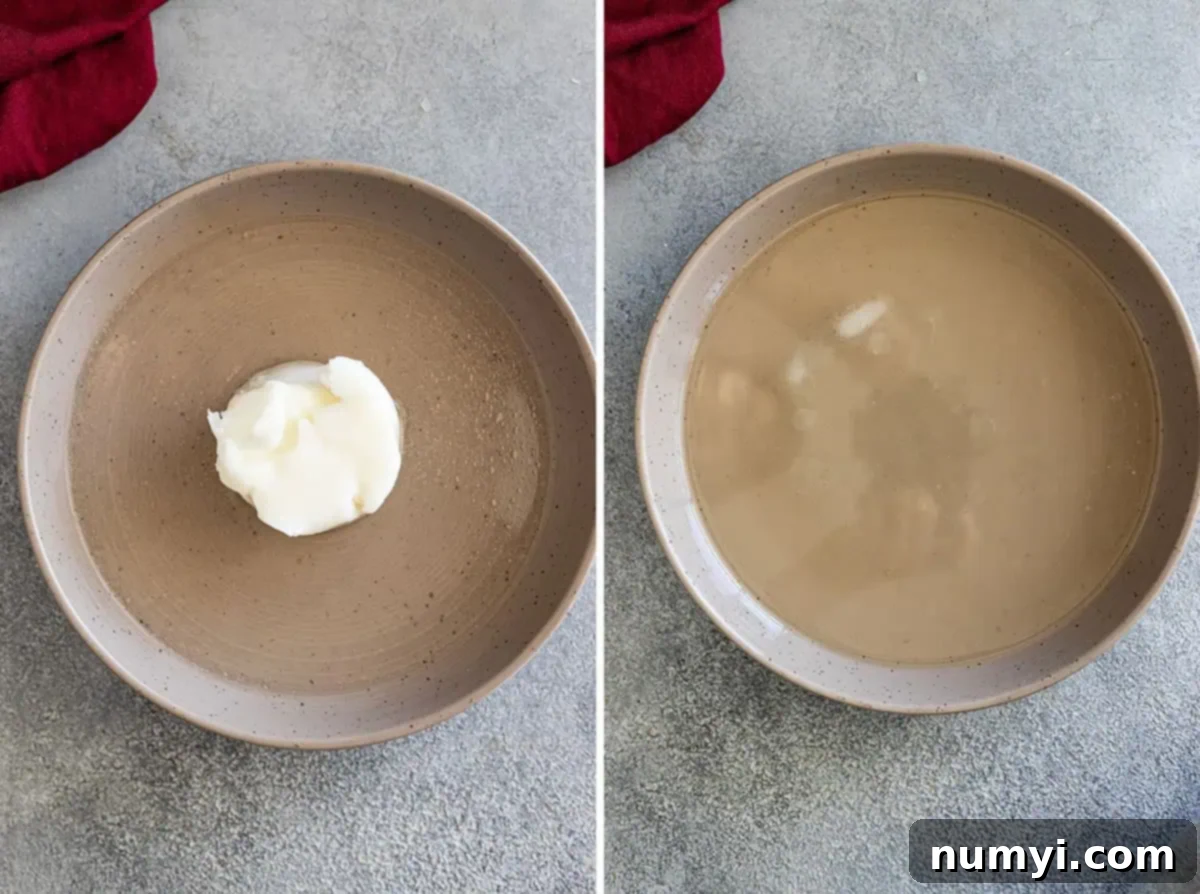
Your first step is to combine your chosen fat with very hot water. Heat the water until it’s steaming but not necessarily boiling. Then, add your fat – for this demonstration, lard is used, which is a traditional choice known for yielding wonderfully soft tortillas. Stir until the fat completely melts and incorporates into the hot water. This method ensures the fat is perfectly emulsified and distributed, making it incredibly easy to blend into the flour without the need for ‘cutting it in’ as you would for pie crusts or biscuits. The warm liquid also helps to hydrate the flour more effectively.
2. Combine Dry Ingredients and Knead the Dough
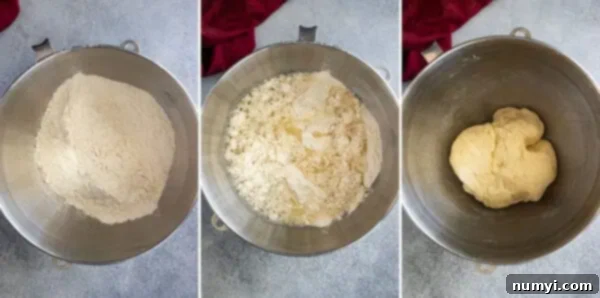
In a large mixing bowl, whisk together the all-purpose flour and salt until well combined. If you’re opting for fluffy tortillas, this is also the stage where you’d add your baking powder. Create a well in the center of the dry ingredients and pour in the warm fat and water mixture. Stir everything together with a spoon or your hands until a shaggy dough forms. Then, turn the dough out onto a lightly floured surface or, if you prefer, use a stand mixer with a dough hook attachment.
Knead the dough for approximately 8-10 minutes. If kneading by hand, you’ll notice the dough transform from a sticky mass into a smooth, elastic, and pliable ball. It should feel soft to the touch and spring back slightly when poked. A stand mixer makes this process effortless, allowing you to multitask while the machine does the work. Whichever method you choose, ensure the dough is thoroughly kneaded to develop the gluten, which is essential for stretchy, non-tearing tortillas.
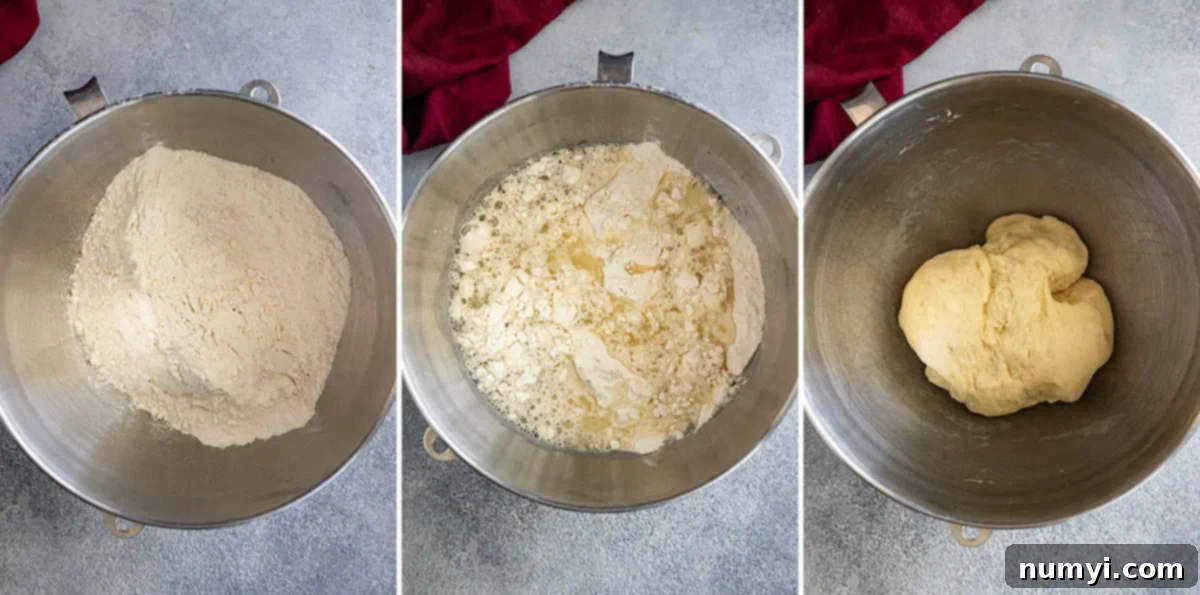
3. Divide and Rest the Dough
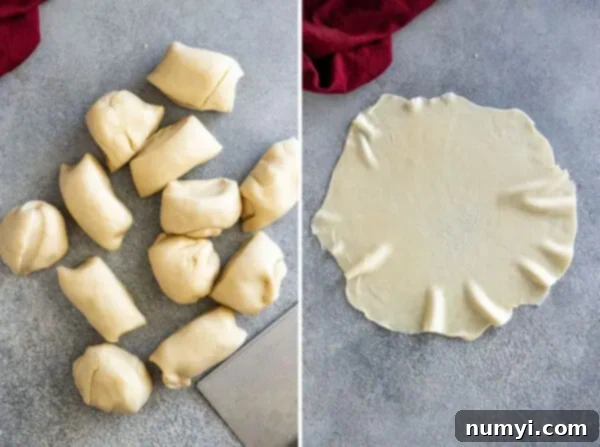
Once your dough is smooth and elastic, divide it into 12 equal portions. The easiest way to do this is to roll the dough into a log and cut it into even pieces, or use a kitchen scale for precise measurements. Form each piece into a smooth ball. This step is critical: arrange the dough balls on a plate or baking sheet, cover them with a clean kitchen towel or plastic wrap, and let them rest at room temperature for at least 30 minutes. This resting period is non-negotiable for tender, easy-to-roll tortillas. It allows the gluten to fully relax, preventing the dough from snapping back when you try to roll it out. Don’t rush this step!
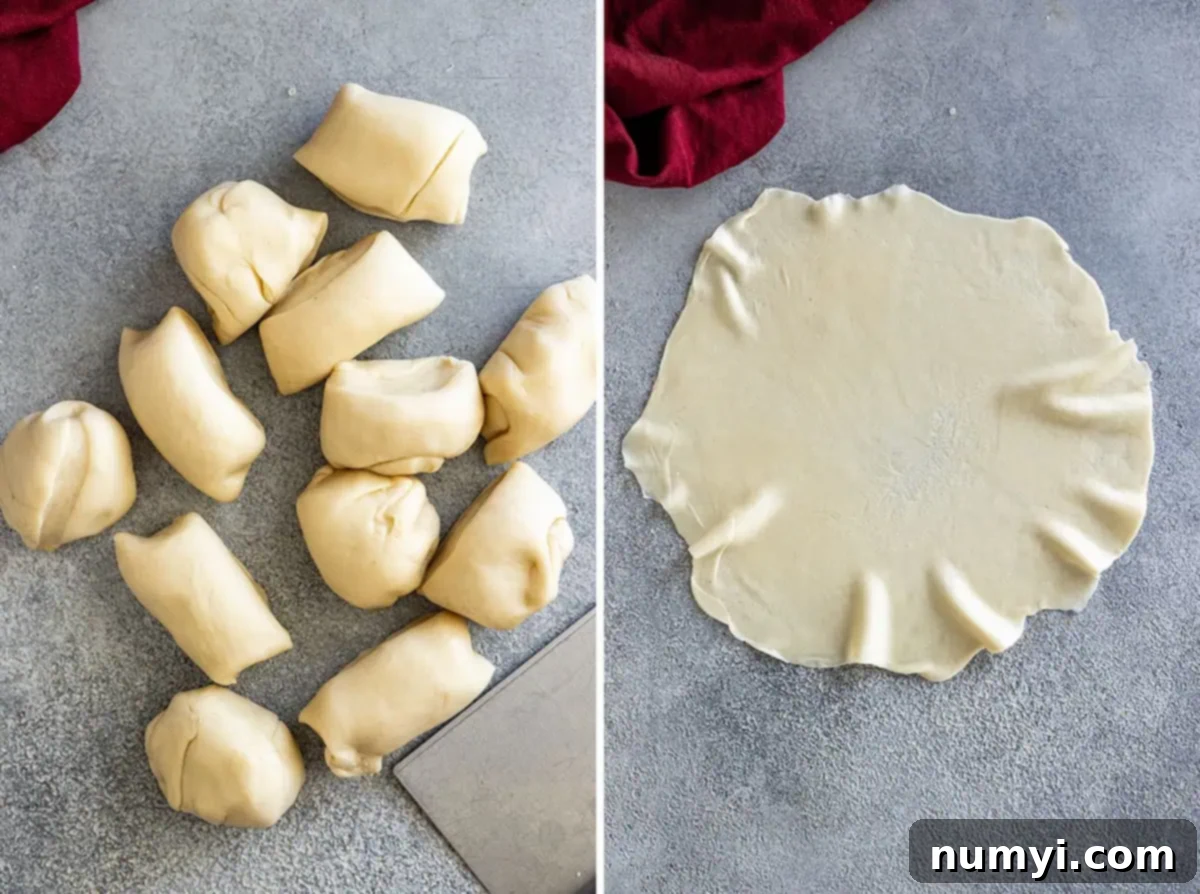
4. Roll Out the Tortillas
Lightly flour your work surface and your rolling pin. Take one dough ball, flatten it slightly with your palm, and begin rolling it out from the center outwards. Rotate the dough frequently to help maintain a somewhat circular shape and prevent sticking. You can roll them out as thin as you like, or leave them a bit thicker if you prefer a chewier texture. Aim for a thickness where they are almost translucent when held up to the light, but not so thin that they tear easily. Avoid making them too thick, as this can result in an undercooked, doughy texture. Remember, rustic shapes are perfectly fine and add character!
5. Cook the Tortillas to Perfection
Heat a dry, cast-iron skillet or non-stick pan over medium to medium-low heat. No oil is needed for cooking the tortillas themselves. Once the pan is hot (a drop of water should sizzle and evaporate quickly), place one rolled tortilla onto the skillet. Cook for about 30-60 seconds on the first side, or until you see small bubbles forming on the surface and light golden-brown spots appearing underneath. Flip the tortilla and cook for another 20-40 seconds on the second side, until it puffs up slightly and develops more brown spots. Be careful not to overcook, as this will make your tortillas dry and stiff.
As each tortilla finishes cooking, immediately transfer it to a plate and stack it on top of the previously cooked tortillas. Cover the stack with a clean kitchen towel or place them directly into a tortilla warmer. The residual heat and steam trapped within the stack will keep them warm, incredibly soft, and pliable, ready for filling with your favorite ingredients.
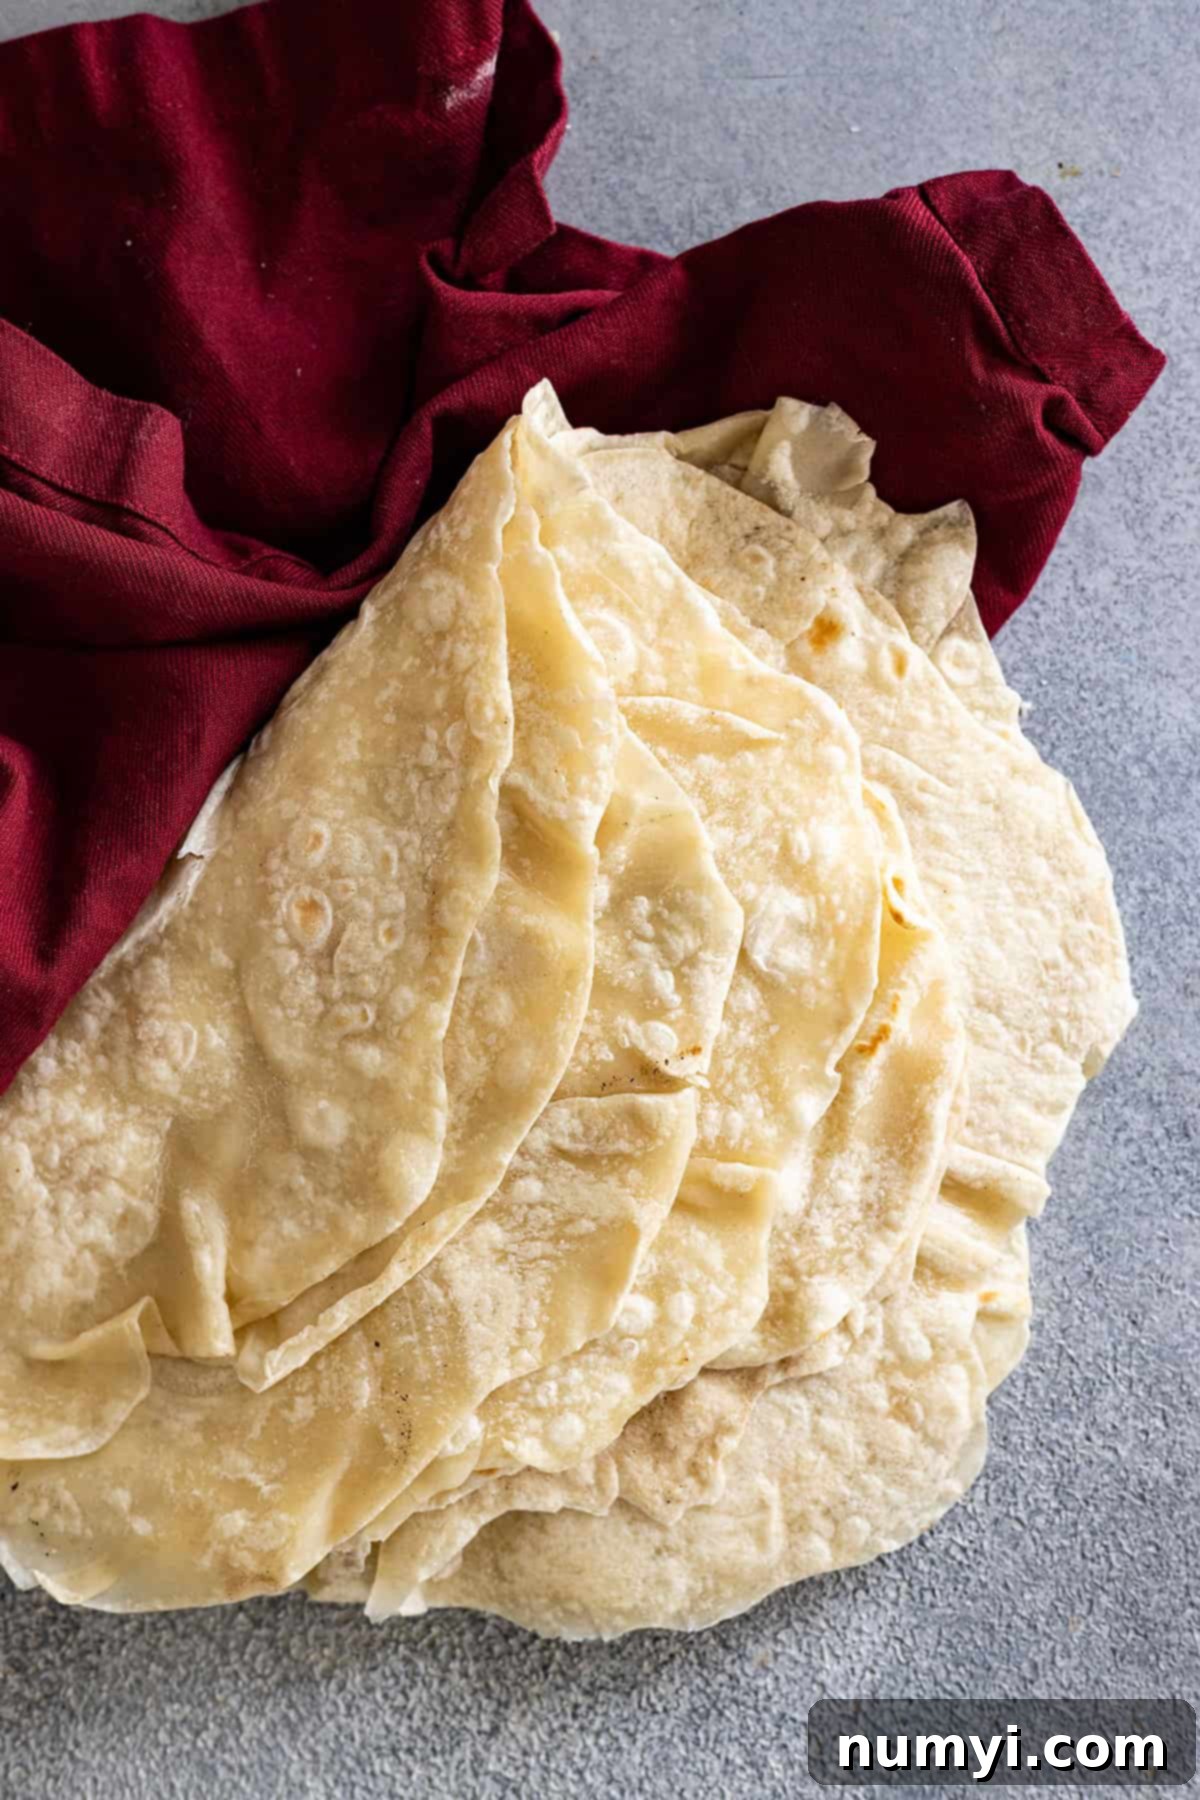
Exploring Your Fat Options for Flour Tortillas
The type of fat you choose significantly impacts the flavor, texture, and overall pliability of your homemade flour tortillas. While the recipe is forgiving, selecting the right fat for your palate and dietary needs can elevate your tortillas from good to extraordinary. Here’s a closer look at common options:
- Lard (Rendered Pork Fat): This is the traditional and arguably the most authentic choice for Mexican flour tortillas. Lard contributes an unparalleled depth of savory flavor and results in tortillas that are exceptionally tender, soft, and pliable. If you’re aiming for that classic, melt-in-your-mouth texture, lard is the way to go. Look for high-quality, unhydrogenated lard for the best results.
- Vegetable Shortening: A popular alternative to lard, vegetable shortening offers excellent tenderness and a wonderfully soft texture. Its neutral flavor means your tortillas won’t have any dominant taste other than the flour itself, which some prefer. While it delivers on texture, some may find the overall flavor profile a bit more “flat” compared to lard or butter. It’s a great choice if you prefer a vegetarian option without distinct flavors.
- Butter: For a rich, buttery flavor in your tortillas, unsalted butter is an excellent choice. The butter will impart a delicious, delicate taste that complements many fillings. Always opt for unsalted butter to control the overall saltiness of your recipe. Keep in mind that butter has a lower melting point than lard or shortening, which might slightly affect the dough’s workability if your kitchen is very warm, but the flavor payoff is certainly worth it.
- Oils (Olive, Avocado, Vegetable, Canola): Various liquid oils can be used as a fat substitute. Olive oil provides a distinct fruity note, while avocado, vegetable, or canola oils are more neutral. While oils will still produce a delicious tortilla far superior to store-bought, they tend to yield a slightly chewier and less soft texture compared to solid fats like lard or shortening. This is because solid fats create a more tender crumb by interfering with gluten development in a different way. If using oil, avoid strong-flavored options like extra virgin olive oil if you don’t want that flavor to dominate. I generally advise against coconut oil unless you specifically enjoy its tropical flavor in savory dishes, as it can be quite pronounced.
Ultimately, the best fat is the one that suits your personal preference and dietary requirements. Don’t hesitate to experiment to find your perfect homemade tortilla!
Achieving Fluffy Tortillas: A Simple Trick
The standard recipe for homemade flour tortillas, as detailed here, yields a delightfully soft, pliable, and slightly chewy result – perfect for wrapping and folding without cracking. However, if you prefer a tortilla with a lighter, more airy, and slightly “fluffy” texture, there’s a simple adjustment you can make.
To achieve a fluffier tortilla, simply add 1 teaspoon of baking powder to your dry ingredients (flour and salt) before incorporating the wet mixture. Baking powder is a leavening agent that reacts with moisture and heat, producing small pockets of carbon dioxide gas within the dough as it cooks. These gas bubbles create a lighter, more tender crumb, resulting in tortillas that puff up more dramatically on the skillet and have a softer, almost bread-like interior. This is a great option if you enjoy your tortillas with a bit more rise and a less dense feel.
Troubleshooting Common Homemade Tortilla Issues
Even with the best instructions, sometimes things don’t go exactly as planned. Here are some common issues you might encounter and how to fix them:
- Tortillas are stiff or dry: This is often a sign of overcooking. Reduce your cooking time per side, ensuring you only cook until light brown spots appear. It can also happen if the dough was too dry (not enough water) or if they weren’t adequately steamed after cooking. Make sure to stack and cover them immediately.
- Dough is too sticky: If the dough is too sticky to handle, add a very small amount of flour, a tablespoon at a time, until it’s more manageable. Be careful not to add too much, or the tortillas will become tough. This can also be a sign of not enough kneading.
- Dough is too tough to roll out/springs back: This is almost always due to insufficient resting time. The gluten needs to relax. Cover the dough balls and let them rest for an additional 15-30 minutes. The longer they rest, the easier they will be to roll.
- Tortillas are tearing when rolling: This can also be a sign of insufficient resting, or the dough might be too dry. If the dough is dry, you can try gently kneading a tiny bit of warm water into it.
- Tortillas aren’t puffing up: While puffing is desirable, it’s not strictly necessary for a good tortilla. However, if they aren’t puffing, it could be due to the pan not being hot enough, rolling them too thick, or not enough baking powder (if using for a fluffy texture). Ensure your skillet is at the right temperature (medium to medium-low).
Storing and Reheating Your Homemade Tortillas
One of the great advantages of making a batch of homemade tortillas is having them on hand for future meals. Proper storage ensures they stay fresh and delicious:
- Room Temperature Storage: Once completely cooled, store your tortillas in an airtight container or a resealable plastic bag at room temperature for up to 1-2 days. This is ideal for short-term use.
- Refrigeration: For longer storage, place cooled tortillas in an airtight container or bag in the refrigerator for up to 4-5 days. They might stiffen slightly when cold, but will soften perfectly upon reheating.
- Freezer-Friendly: Homemade tortillas freeze beautifully! To prevent them from sticking together, place a piece of parchment paper or waxed paper between each cooled tortilla. Stack them, then wrap the entire stack tightly in plastic wrap, followed by heavy-duty aluminum foil, or place them in a freezer-safe bag. They can be frozen for up to 6 months.
- Reheating:
- Skillet Method: Place individual tortillas in a dry, hot skillet (medium heat) for about 15-30 seconds per side, just until heated through and pliable again. This method brings back a fresh-cooked texture.
- Microwave Method: For a quick reheat, wrap a few tortillas in a damp paper towel and microwave for 15-20 seconds, or until warm and soft.
- Oven Method (for larger batches): Wrap a stack of tortillas tightly in aluminum foil and warm them in a preheated oven at 300°F (150°C) for 10-15 minutes.
Frequently Asked Questions About Homemade Flour Tortillas
Here are answers to some common questions you might have:
- Can I make the dough ahead of time? Yes, you can prepare the dough and store it in an airtight container in the refrigerator for up to 24 hours. Let it come to room temperature for about 30 minutes before dividing and rolling.
- Can I use whole wheat flour? You can, but whole wheat flour will result in a denser, chewier tortilla. For a softer whole wheat tortilla, you might want to use a blend of half whole wheat and half all-purpose flour.
- What if I don’t have hot water? While very hot water is recommended for best results (especially for melting fat and hydrating flour), lukewarm water can also work. You might need to knead a bit longer to ensure the fat is fully incorporated and the gluten is developed.
- Why do my tortillas shrink when I roll them? This is a clear sign that the dough hasn’t rested long enough. The gluten is too tight and is snapping back. Cover the dough and let it rest for more time.
- How thin should I roll my tortillas? Aim for them to be thin enough to be somewhat translucent when held up to the light, but not so thin that they tear easily during handling or cooking. Experience will guide you on your preferred thickness.
- Can I use a stand mixer for the whole process? Yes, a stand mixer with a dough hook can handle the kneading process beautifully, saving you time and effort. Just ensure the dough reaches a smooth, elastic consistency.
Homemade Flour Tortillas Recipe
Ingredients
- ½ cup (110g) lard or fat of choice
- 1 cup (235ml) very hot water
- 3½ cups (520g) all-purpose flour
- 1 teaspooon salt
Instructions
-
Heat the water to a hot temperature. Add the lard and stir to melt.½ cup (110g) lard or fat of choice, 1 cup (235ml) very hot water

-
In a large mixing bowl, combine the flour and salt. Add the melted lard mixture and stir to combine then knead for 10 minutes or until dough is smooth.3½ cups (520g) all-purpose flour, 1 teaspooon salt

-
Divide the dough into 12 equal portions. Cover and allow to rest for 30 minutes. Heat a large skillet over medium to medium-low heat. Roll each portion into a relatively thin tortilla. If you hold it up, they should look somewhat translucent.

-
Place a tortilla in the hot skillet and cook for 30-60 seconds or until brown spots appear. Flip and repeat for the other side. Don’t overcook your tortillas or they may dry out. Remove from the skillet and place on a plate or tortilla warmer. Stack them up on top of each other to allow them to steam. This will soften the tortillas. Keep them wrapped in a clean towel if you don’t have a tortilla warmer.

Notes
-
- STORAGE: Store cooled tortillas in an airtight container or bag at room temperature for up to 1 day. Store in the refrigerator for up to 4 days.
- FREEZER-FRIENDLY: Separate completely cooled tortillas with parchment paper or waxed paper. Wrap with plastic wrap, then in heavy-duty foil or place in a freezer-safe bag. Freeze for up to 6 months.
- REHEAT: Place tortillas in a hot skillet just long enough to heat through. Or wrap in a damp paper towel and microwave for 15-20 seconds.
- NUTRITION: Since different brands of ingredients have different nutritional information, the information shown is just an estimate. This website is not intended as nutritional advice, or a diet or health plan. Readers of this website are ultimately responsible for all decisions pertaining to their health.
