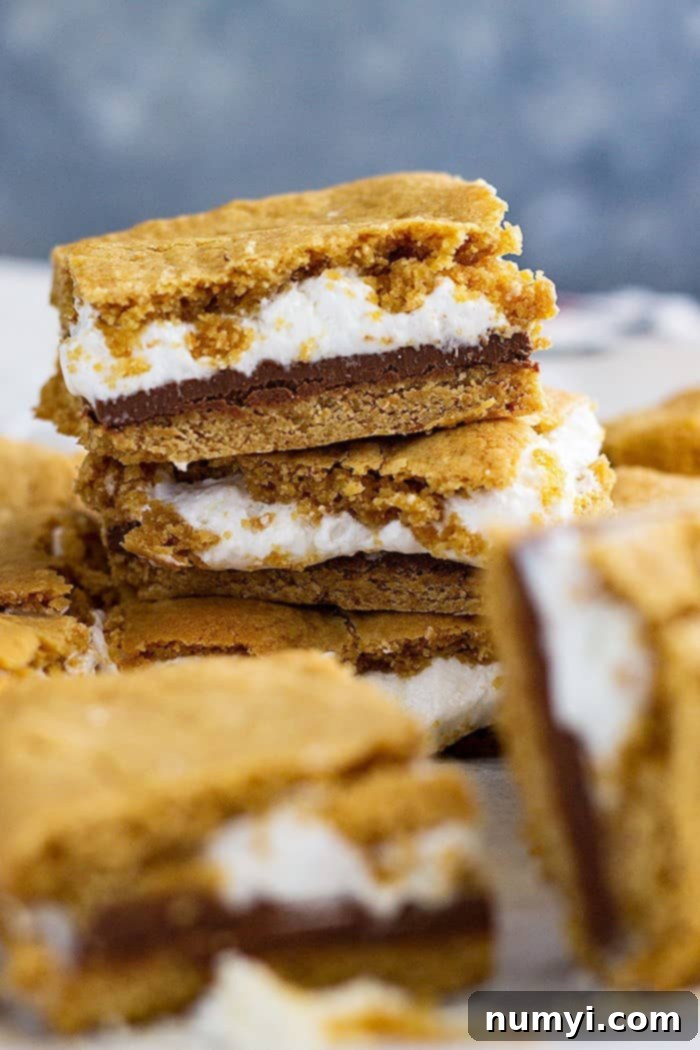
Easy S’mores Cookie Bars: Indulge in Gooey Marshmallow & Rich Chocolate Bliss!
There’s an undeniable magic to s’mores. That perfect trifecta of crunchy graham cracker, melt-in-your-mouth chocolate, and perfectly toasted, gooey marshmallow evokes childhood memories and campfire stories. But what if you could capture that same beloved flavor combination and nostalgic feeling without the need for a campfire, smoke, or sticky fingers? Enter the delightful world of S’mores Cookie Bars!
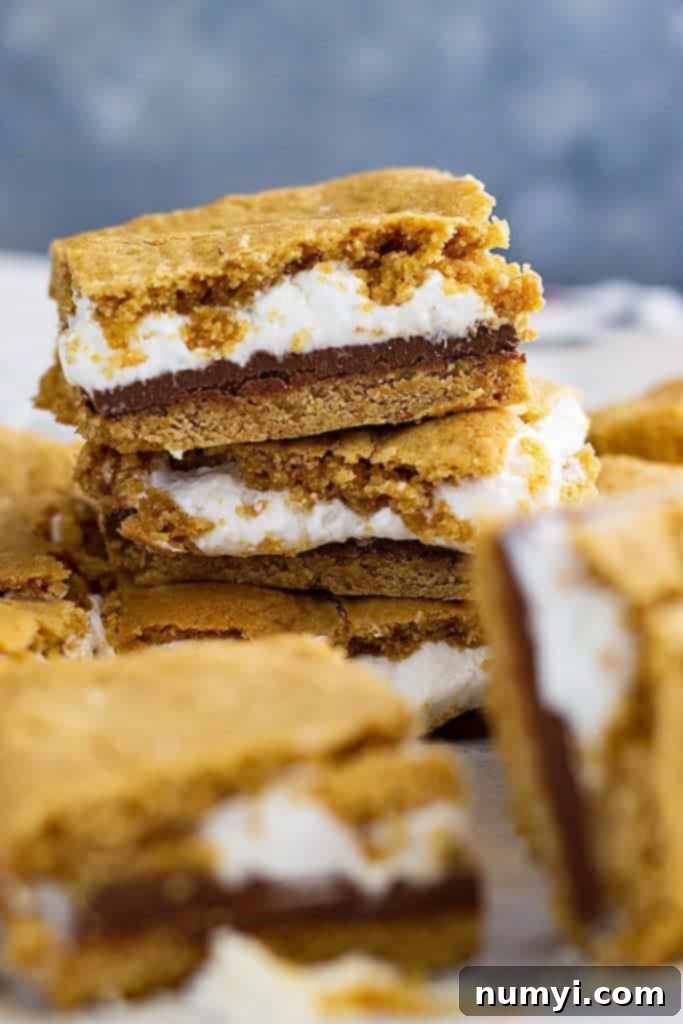
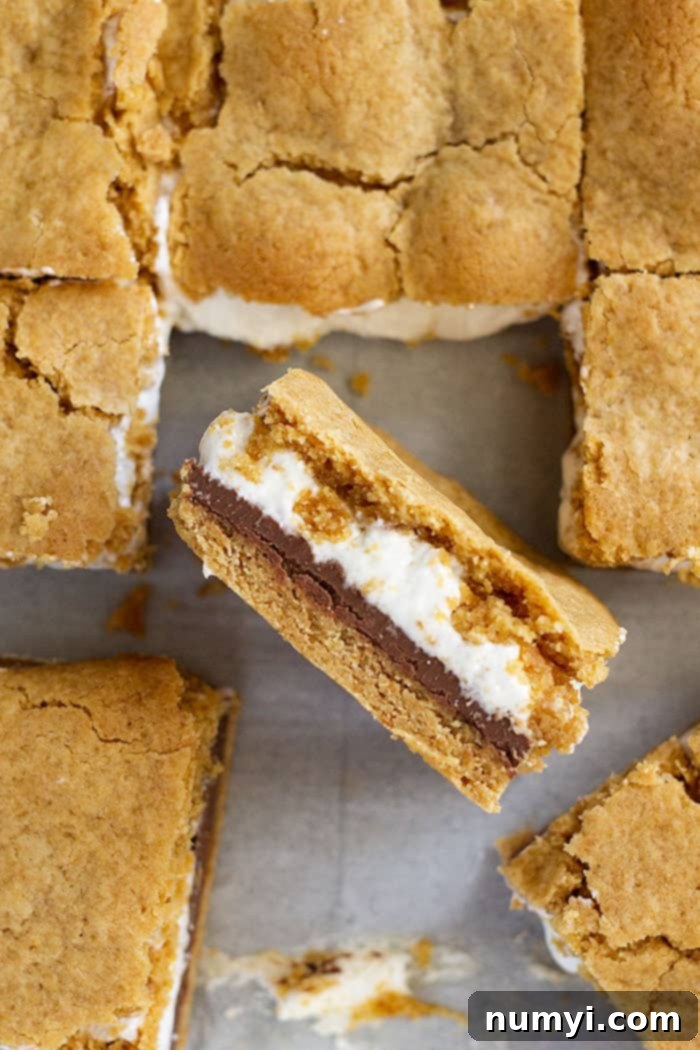
These aren’t just any cookie bars; they’re an easy-to-make, supremely satisfying dessert that brings all the classic s’mores flavors right into your kitchen. Imagine a wonderfully chewy graham cracker cookie crust, generously layered with rich, melty milk chocolate, and crowned with a sweet, irresistibly gooey marshmallow creme topping. Each bite is a symphony of textures and tastes, making them an instant family favorite and a guaranteed crowd-pleaser.
Whether it’s a rainy day, you don’t have access to a fire pit, or you simply crave that s’mores goodness without the outdoor fuss, this recipe is your perfect solution. It transforms a traditional camping treat into a convenient, shareable dessert that’s ideal for parties, potlucks, or just a cozy night in. Get ready to bake up a batch of pure happiness with these homemade s’mores cookie bars!
Why You’ll Love These S’mores Cookie Bars
This recipe isn’t just about making a delicious dessert; it’s about simplicity, versatility, and sheer enjoyment. Here’s why these S’mores Cookie Bars will quickly become a staple in your baking repertoire:
- Incredibly Easy to Make: Forget complicated techniques or obscure ingredients. This S’mores Cookie Bars recipe uses straightforward steps and common pantry items, making it perfect for bakers of all skill levels, from beginners to seasoned pros. You’ll be amazed at how quickly these come together!
- Perfect for Any Season: While s’mores are typically a summer treat, these cookie bars can be enjoyed year-round. No need to worry about the weather or finding a campfire – these are oven-baked to perfection, making them ideal for cozy winter evenings, springtime gatherings, or summer dessert tables.
- Minimal, Accessible Ingredients: You won’t need a special trip to a gourmet store for this recipe. All the ingredients are readily available at any local grocery store, ensuring you can whip up a batch of these chewy s’mores bars whenever a craving strikes.
- Crowd-Pleasing Favorite: Who doesn’t love s’mores? This dessert taps into universal nostalgia, making it an absolute hit with kids and adults alike. They’re perfect for potlucks, parties, or family dessert night, always a popular choice.
- No Campfire Required: Enjoy all the flavors of s’mores without the smoke, fire, or sticky mess often associated with traditional methods. These bars offer a clean and convenient way to savor the classic taste of gooey marshmallow and chocolate.
- Excellent for Make-Ahead & Sharing: These S’mores Cookie Bars hold up beautifully, making them a fantastic make-ahead option. Prepare them in advance for events or portion them out for quick, delightful treats throughout the week. They’re also wonderfully shareable!
Essential Ingredients for Perfect S’mores Cookie Bars
One of the best things about these s’mores cookie bars is that they rely on simple, everyday baking ingredients. You likely have most of these in your pantry already! Here’s what you’ll need to create this delightful treat:
- Brown Sugar: Packed brown sugar, either dark or light, adds moisture and a wonderful caramel-like sweetness to the cookie base, complementing the graham cracker flavor and ensuring a chewy texture.
- Butter: Melted butter is essential for creating that rich, chewy graham cracker cookie crust. Unsalted butter is usually preferred in baking for better control over saltiness, but salted will work if that’s all you have.
- Large Egg: Acts as a binder, helping to hold the cookie dough together and providing structure for the layers.
- Vanilla Extract: A touch of pure vanilla extract enhances all the other flavors, adding warmth and depth to the cookie base, making these s’mores bars even more irresistible.
- All-Purpose Flour: The primary structural component of our cookie dough, providing the perfect foundation for these delicious bars.
- Graham Cracker Crumbs: The iconic s’mores flavor comes alive with these crumbs, forming the delicious base and top layer. You can buy them pre-crushed or easily crush your own graham crackers.
- Baking Powder: A leavening agent that helps the cookie layers rise slightly and achieve a tender, soft texture.
- Salt: A pinch of salt balances the sweetness of the chocolate and marshmallow, enhancing the overall flavor profile of the s’mores cookie bars.
- Milk Chocolate Bars: Classic s’mores use milk chocolate, and bars work perfectly here for easy layering and that signature melt. You can use standard Hershey’s bars or your favorite brand for a rich, melty center.
- Marshmallow Creme: This is the secret ingredient for the ultimate gooey layer! Marshmallow creme melts beautifully and stays soft, providing that irresistible pull-apart texture that traditional s’mores are known for. It’s crucial for the authentic s’mores experience in bar form.
Ingredient Notes & Potential Substitutions:
- Chocolate Choices: While milk chocolate is traditional, feel free to experiment with semi-sweet or dark chocolate bars if you prefer a less sweet profile. Chocolate chips can be used in a pinch, but bars tend to melt more evenly and create a smoother layer.
- Making Your Own Graham Cracker Crumbs: If you don’t have pre-crushed graham cracker crumbs, simply process whole graham crackers in a food processor until fine, or place them in a zip-top bag and crush them with a rolling pin until uniformly fine.
- The Marshmallow Dilemma – Creme vs. Marshmallows: As mentioned in the tips section, marshmallow creme is highly recommended for its superior melt and gooey texture in this recipe. Regular marshmallows (mini or jumbo) tend to stiffen up or become rubbery when baked into bars, and they might not spread as evenly, resulting in a less desirable texture.
- Brown Sugar Options: Both light and dark brown sugar will work effectively in this recipe. Dark brown sugar will lend a slightly richer, deeper molasses flavor to your cookie base.
Step-by-Step Guide to Baking Perfect S’mores Cookie Bars
Creating these heavenly S’mores Cookie Bars is simpler than you might think! Follow these detailed steps to achieve a perfectly gooey, chocolatey, and chewy treat that will impress everyone:
- Prepare Your Oven and Pan: Begin by preheating your oven to 350°F (175°C). This ensures even baking from the moment your bars go in. Next, line an 8×8 or 9×9 inch baking pan with parchment paper, leaving an overhang on the sides. This parchment paper sling will be your best friend, making it incredibly easy to lift the baked bars out of the pan for clean slicing later. Set the prepared pan aside.
- Cream Wet Ingredients: In a large mixing bowl, combine the melted butter and packed brown sugar. Use a hand mixer on medium speed to beat them together until the mixture is smooth and well combined, typically about 1-2 minutes. This step helps to dissolve the sugar and incorporate air, contributing to the cookie’s tender yet chewy texture. Then, beat in the large egg and vanilla extract, mixing just until everything is fully incorporated. Be careful not to overmix at this stage.
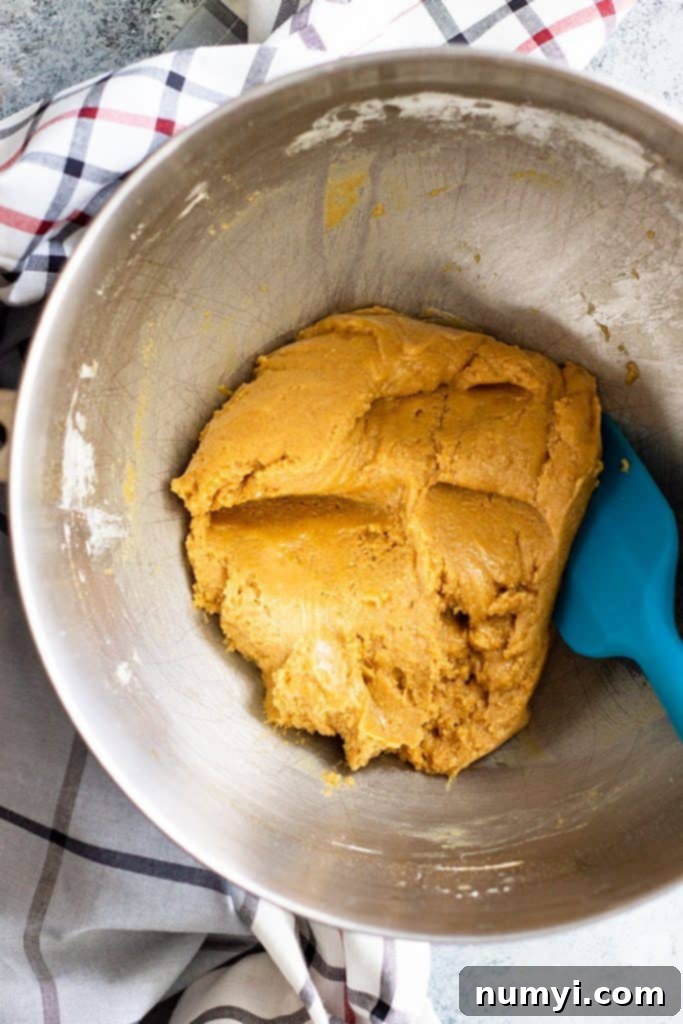
- Combine Dry Ingredients: To the wet mixture, gradually add the all-purpose flour, graham cracker crumbs, baking powder, and salt. Mix on low speed or fold gently with a spatula until the dry ingredients are just combined with the wet. Overmixing the flour can lead to tough cookie bars, so stop as soon as no dry streaks of flour or crumbs remain. The dough will be thick and slightly crumbly, which is exactly what you want.
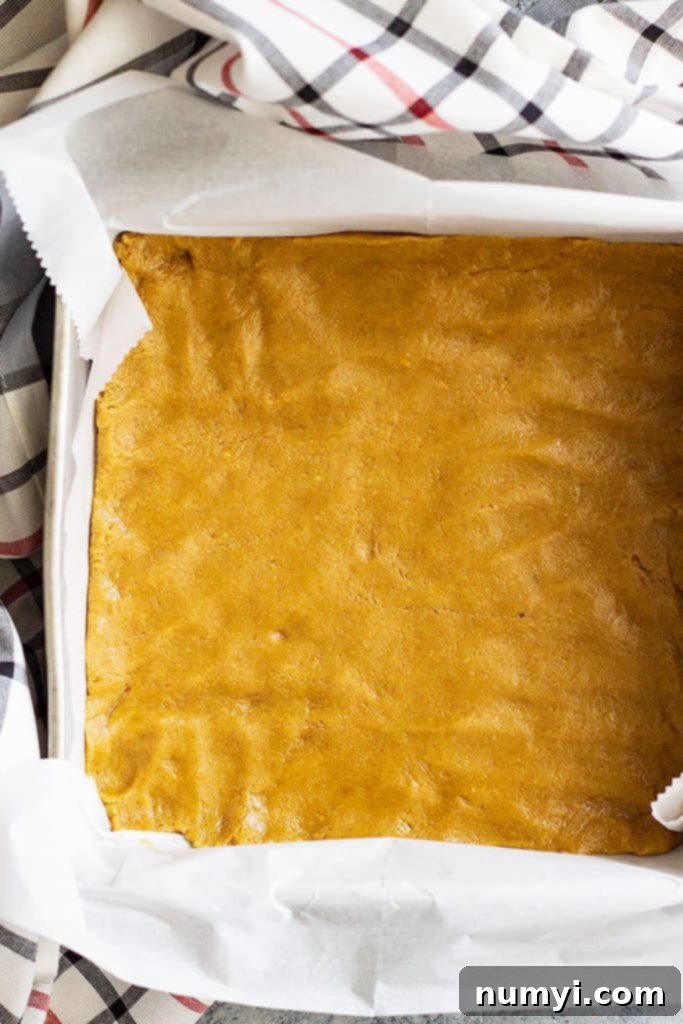
- Form the Cookie Layers (Pro Tip!): This is where a little trick comes in handy for perfect layering. Divide your cookie dough roughly in half. Press one half of the dough evenly into the bottom of your parchment-lined baking pan, spreading it out to cover the entire base. Once pressed, use the parchment paper overhang to carefully lift this bottom cookie layer (still on its parchment) out of the pan and set it aside on a plate or cutting board. Now, line your empty baking pan with a fresh piece of parchment paper. Press the remaining half of the cookie dough into this new parchment-lined pan. This two-parchment method makes assembling the top layer a breeze and ensures a clean release!
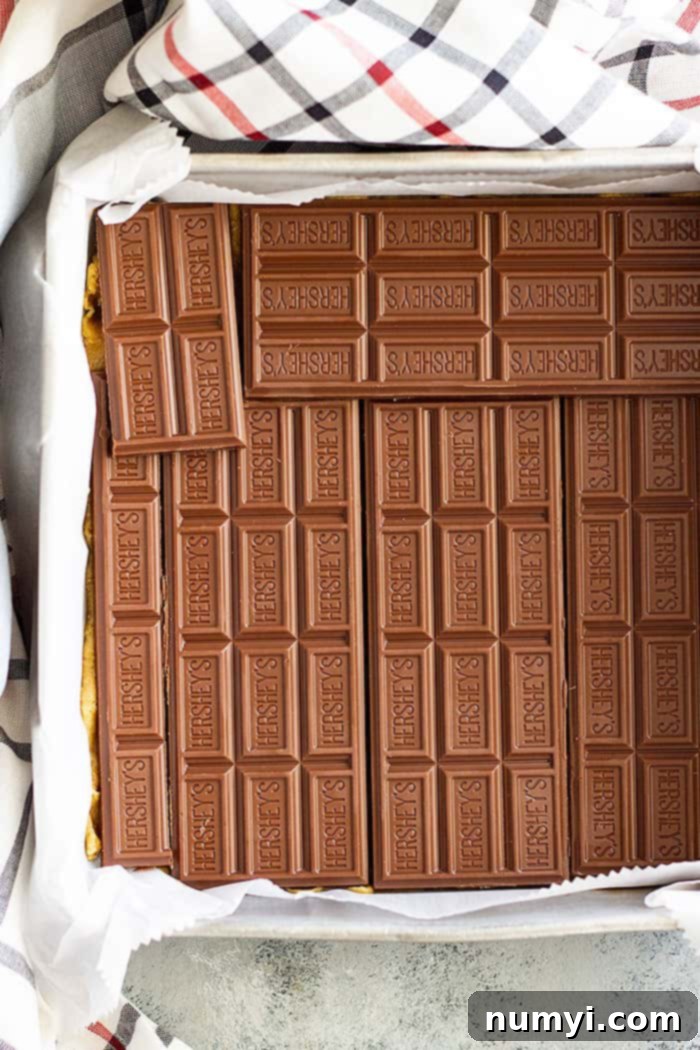
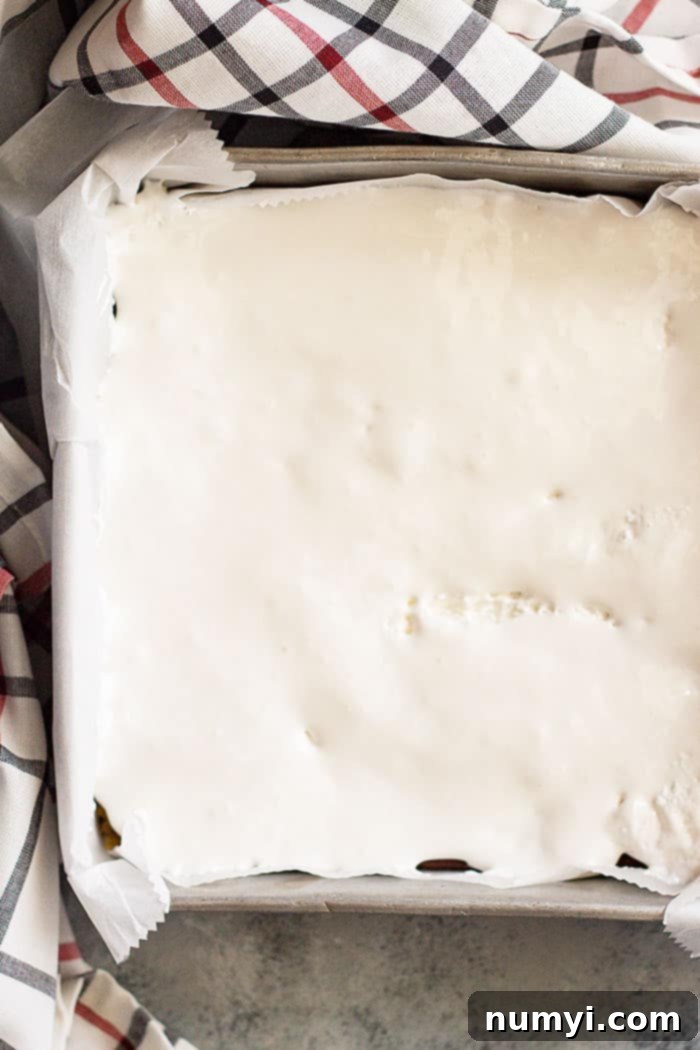
- Layer the Goodness: Onto the cookie dough that’s currently in your pan (this will be your new bottom layer), carefully arrange your milk chocolate bars. Break them into pieces if needed to cover the entire surface, creating a continuous layer of rich chocolate. Next, gently spread the marshmallow creme evenly over the chocolate layer. Be mindful not to press too hard to avoid disturbing the chocolate beneath. Finally, carefully place the reserved first cookie layer (on its parchment) on top of the marshmallow creme, gently peeling off the parchment paper as you lay it down to form the top crust. This delicate step ensures your layers stay distinct and beautiful.
- Bake to Golden Perfection: Place your assembled s’mores cookie bars into the preheated oven and bake for approximately 30 minutes. You’ll know they’re ready when the top cookie layer is lightly golden brown and the marshmallow creme is bubbly and slightly toasted around the edges. Keep an eye on them, as oven temperatures can vary, and adjust baking time as needed.
- Cool Completely for Best Results: This is a crucial step for achieving clean, firm slices. Once baked, remove the pan from the oven and allow the bars to cool completely at room temperature, which can take a couple of hours. For even cleaner cuts and a firmer texture, especially if your kitchen is warm, you can refrigerate the bars for at least 1-2 hours before slicing and serving. Patience truly pays off here for perfectly structured s’mores cookie bars!
Expert Tips for Foolproof S’mores Cookie Bars
Achieving the perfect s’mores cookie bar is easy with a few insider tricks. Keep these tips in mind to ensure your bars are a delicious success every time, delivering that ideal chewy, gooey, and chocolatey experience:
- Master the Two-Parchment Paper Method: As described in the recipe instructions, using two separate pieces of parchment paper for pressing your cookie dough layers is a game-changer. It allows you to easily prepare both the bottom and top layers without sticking, ensuring a seamless transfer and perfectly even layers. This technique significantly simplifies assembly and helps maintain the integrity of your S’mores Cookie Bars. Don’t skip this step – it truly makes the process much smoother!
- Chill for Cleaner Slices: S’mores cookie bars are wonderfully gooey when warm, but this makes them difficult to cut cleanly without a sticky mess. For perfectly neat squares, allow the bars to cool completely at room temperature for at least 2 hours, then transfer them to the refrigerator for an additional 1-2 hours (or even the freezer for 30 minutes). The cold helps the chocolate and marshmallow firm up, allowing for precise, clean cuts without any gooey struggle.
- Marshmallow Creme is King: Resist the urge to substitute regular marshmallows (mini or jumbo) for marshmallow creme. Marshmallow creme has a unique consistency that allows it to melt into a wonderfully gooey, spreadable layer that remains soft and pliable even after cooling. Regular marshmallows, when baked in this manner, tend to melt and then harden into a chewier, sometimes rubbery or brittle texture. Stick to the creme for that authentic, pull-apart s’mores gooeyness!
- Don’t Overbake: Keep a close eye on your oven and baking time. The bars are ready when the top cookie layer is lightly golden brown and the marshmallow is bubbly and slightly toasted. Overbaking can lead to a dry cookie base and a less gooey, more stiff marshmallow layer, diminishing the overall texture of your s’mores bars.
- Use a Sharp, Warm Knife for Slicing: Once chilled, use a sharp knife to cut your bars. For the cleanest possible edges, warm your knife by running it under hot water, wiping it completely dry, and then making your cuts. Repeat this process between each slice for the most pristine s’mores cookie bars.
- Smart Storage Solutions: To keep your homemade S’mores Cookie Bars at their best, store any leftovers in an airtight container at room temperature for up to one week. If your home is particularly warm, or if you prefer a firmer texture, they can also be stored in the refrigerator. For maximum gooeyness, bring them back to room temperature or warm them slightly in the microwave for a few seconds before serving.
- Customization is Key: While milk chocolate is a classic and delicious choice, don’t hesitate to experiment! Try using a mix of milk and dark chocolate bars for a more complex flavor, or even white chocolate for a different twist. A sprinkle of flaky sea salt on top of the marshmallow creme before baking can also enhance and balance the sweetness beautifully.
Frequently Asked Questions About S’mores Cookie Bars
Absolutely! These s’mores cookie bars freeze beautifully, making them an excellent make-ahead dessert. To freeze, ensure they are completely cooled and sliced into individual bars. Place them in a single layer on a parchment-lined baking sheet and freeze for about an hour until firm. Then, transfer the frozen bars to an airtight freezer-safe container or a heavy-duty freezer bag, separating layers with parchment paper to prevent sticking. They can be stored in the freezer for up to 2-3 months. Thaw at room temperature for an hour, or warm gently in the microwave for a few seconds before enjoying that gooey texture.
If stored in an airtight container at room temperature, these delicious s’mores cookie bars will stay fresh and wonderfully chewy for up to one week. In warmer climates or if you prefer them firmer, they can also be kept in the refrigerator, which may extend their freshness slightly. Just remember to let them come to room temperature or give them a quick microwave reheat for the best gooey experience, especially if they’ve been chilled.
This recipe, when baked in an 8×8 or 9×9 inch pan, typically yields 9 generously sized s’mores cookie bars. However, you have complete freedom to cut them into smaller squares if you’re serving a larger crowd, want smaller portions for kids, or simply prefer bite-sized treats! The total quantity remains the same, just the individual size changes.
While milk chocolate is the classic choice for s’mores and provides that traditional creamy sweetness, feel free to get creative! Semi-sweet chocolate bars or even a mix of milk and dark chocolate can be used if you prefer a less sweet or richer flavor profile. Chocolate chips can work in a pinch, but solid chocolate bars tend to provide a more even and satisfying melt for the chocolate layer in these cookie bars.
If your marshmallow layer turned hard, stiff, or rubbery after baking and cooling, it’s most likely due to using regular marshmallows (mini or jumbo) instead of marshmallow creme. Marshmallow creme is specifically formulated to remain wonderfully gooey and soft even after baking, providing that signature s’mores texture. Regular marshmallows, on the other hand, tend to melt and then stiffen up significantly once they cool, so using creme is crucial for the intended outcome of these delicious S’mores Cookie Bars.
Related Recipes for Your Sweet Tooth
If you loved these S’mores Cookie Bars, you’re sure to enjoy these other delightful dessert recipes. Perfect for satisfying any sweet craving, these are great additions to your baking repertoire:
- No Bake Lemon Blueberry Cheesecake
- Easy Berry Cheesecake Cups
- Homemade Oatmeal Cream Pies
- Lemon Blueberry Poke Cake
- S’mores Icebox Cake
- Caramel S’more Dip
A few other great summertime desserts are: No Bake Lemon Blueberry Cheesecake, Easy Berry Cheesecake Cups, Homemade Oatmeal Cream Pies, Lemon Blueberry Poke Cake, or just visit my desserts page for tons of options!
S’more Cookie Bars
Ingredients
- 3/4 cup (125g) packed brown sugar (dark or light)
- ½ cup (115g) butter, melted
- 1 large egg
- 1 teaspoon vanilla
- 1 ¼ cups (160g) all purpose flour
- 1 cup (100g) graham cracker crumbs
- ½ teaspoon baking powder
- ½ teaspoon salt
- 4 (1.55oz)(43g) milk chocolate bars
- 1 (7oz)(198g) marshmallow creme
Instructions
-
Preheat oven to 350 degrees F (176 degrees C). Line an 8×8 or 9×9 baking pan with parchment paper and set aside.
-
Beat the brown sugar and butter on medium speed until well combined. Add the egg and vanilla and mix just until combined. Add flour, graham cracker crumbs, baking powder, and salt. Mix just until combined.
-
Divide dough in half and press one half of the dough into the bottom of the pan. Lift the parchment paper and dough out of the pan and set aside (this is the top layer). Line baking pan with a clean piece of parchment paper and press remaining dough into the pan. Layer with chocolate bars, marshmallow creme, and top cookie layer.
-
Bake for 30 minutes or until lightly golden on top. Cool bars completely or even refrigerate if your house is warm for cleaner cut bars.
Notes
- This will make 9 nice sized bars but feel free to cut into smaller squares!
Nutrition
