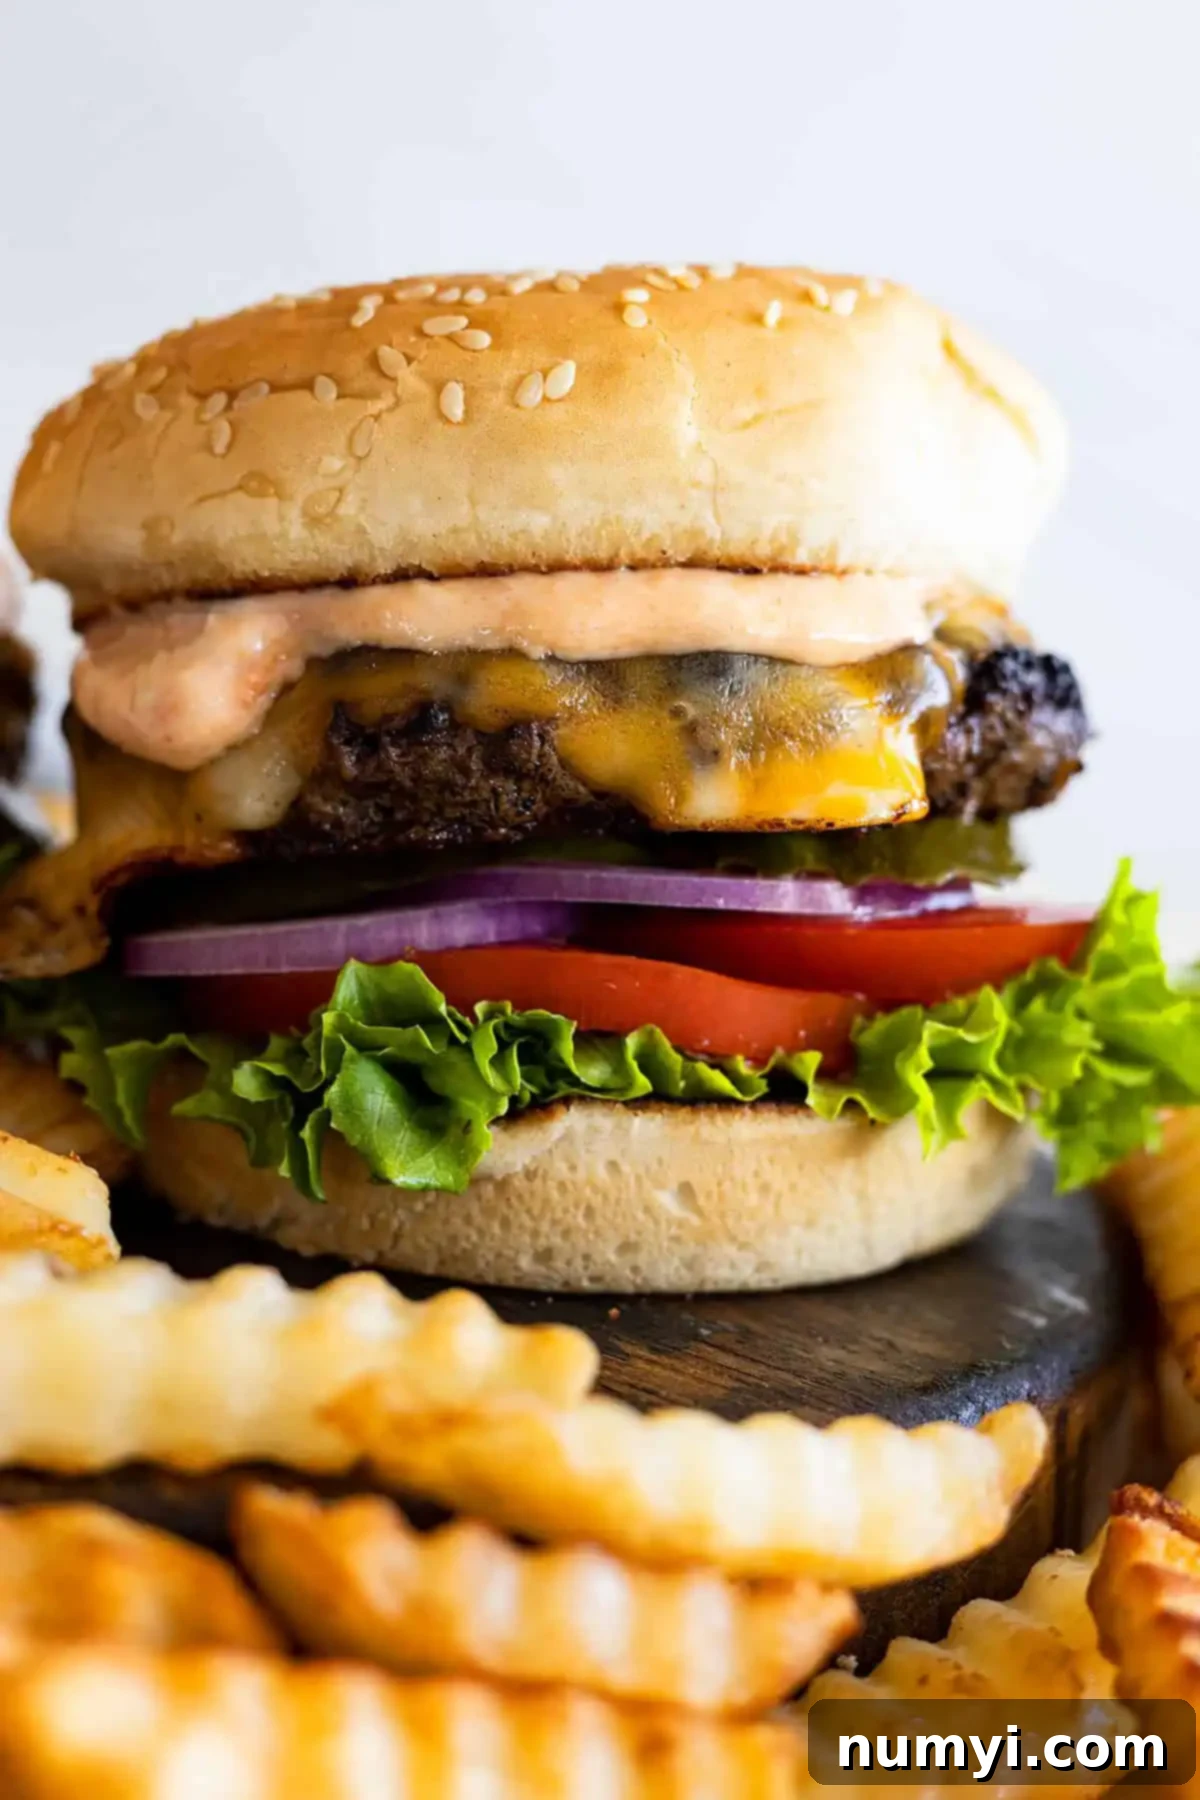
The Ultimate Classic Burger Recipe: Master the Art of Juicy Homemade Burgers
There’s nothing quite like sinking your teeth into a big, juicy, All-American burger. The Classic Burger, a timeless favorite, is crafted with simple, high-quality ingredients and can be cooked to perfection on your grill or stovetop. It’s the ultimate canvas for piling on your favorite toppings and creating a truly memorable meal!
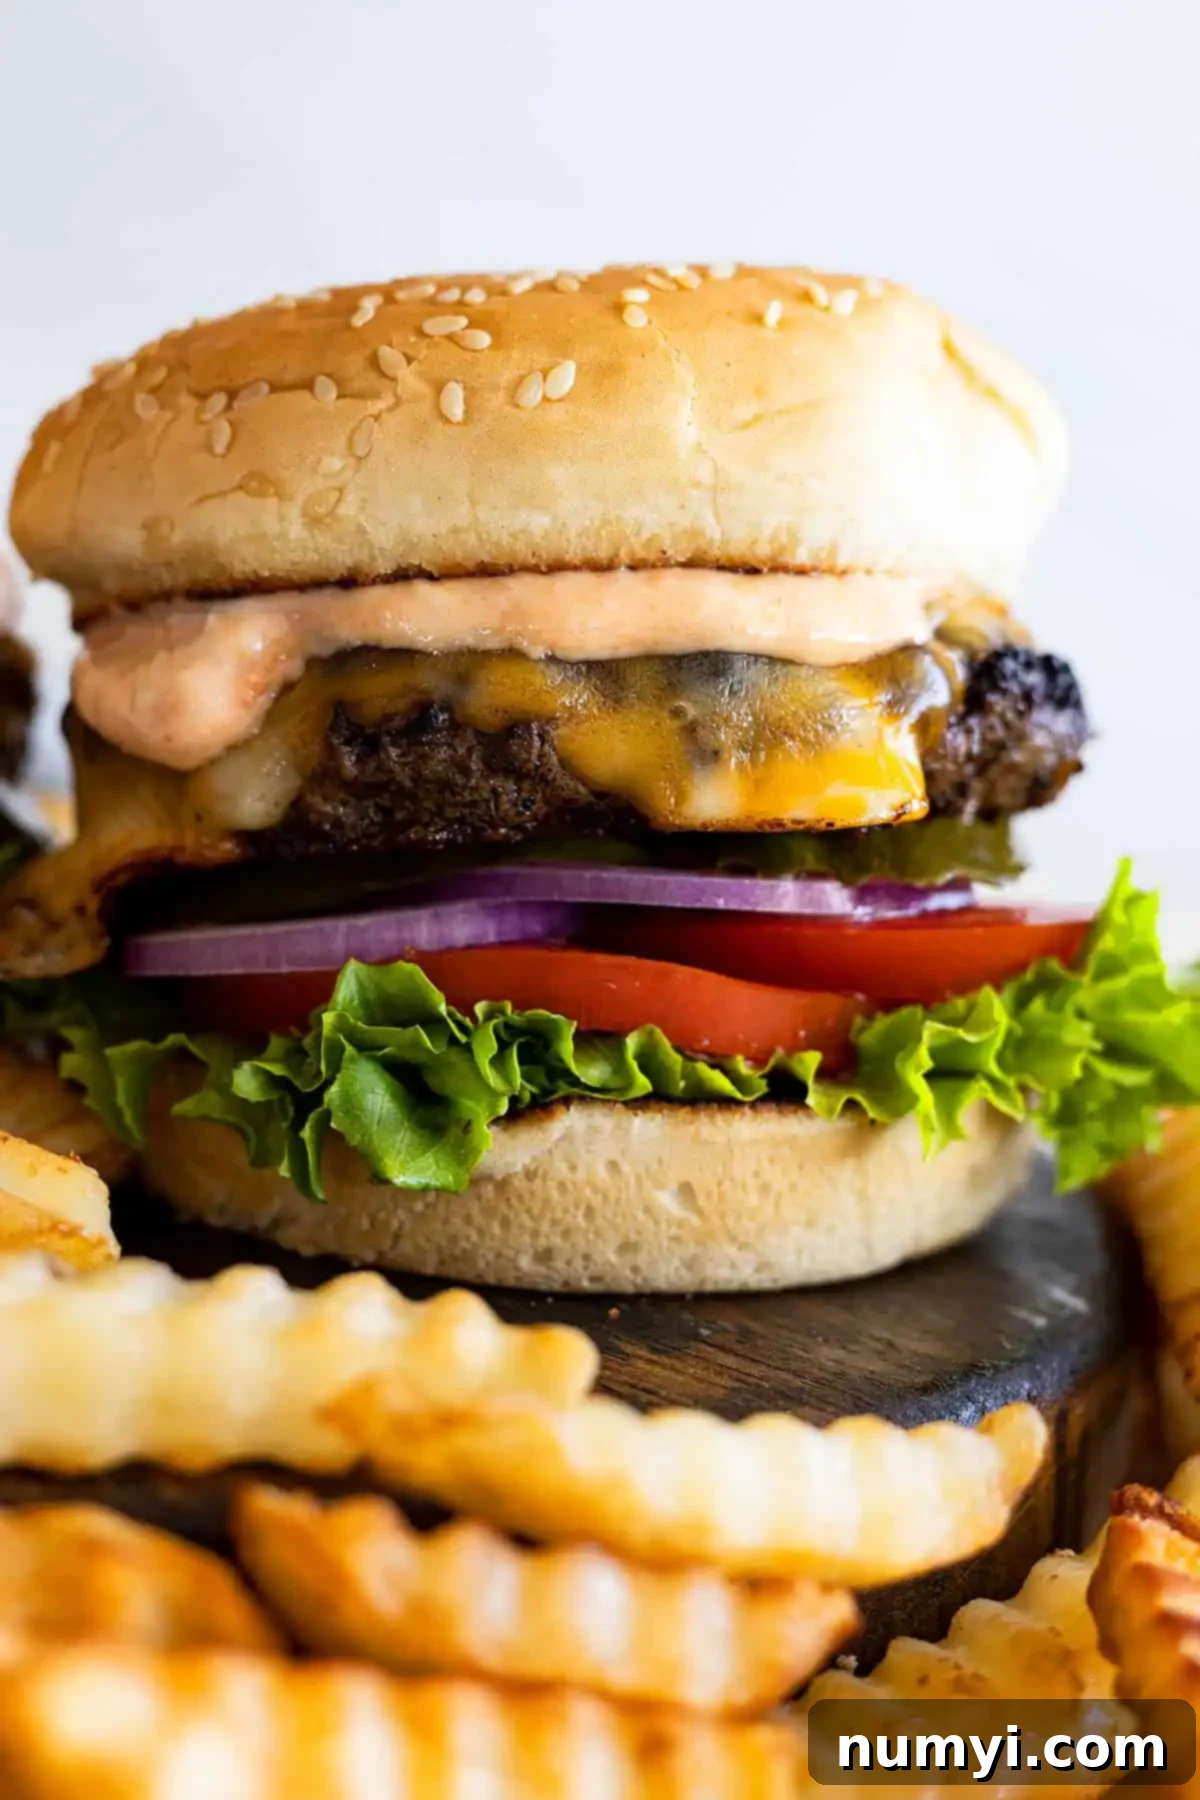
In the vast world of culinary delights, some dishes stand the test of time, cherished for their simplicity and satisfying flavors. The classic hamburger is undoubtedly one of them. While many recipes try to reinvent the wheel with complex additions, the true brilliance of a great burger lies in its straightforward approach. This guide will show you how to create the best classic burger at home, focusing on premium ingredients and fundamental techniques. You’ll discover that you don’t need fancy binders like breadcrumbs, eggs, or milk to achieve a burger that rivals your favorite diner. Top restaurants often rely on just fatty beef, salt, and pepper – and we’ll embrace that philosophy. I’ll share a few optional seasonings for those who enjoy a subtle flavor boost, but the core remains pure, beefy goodness.
Why This Is The Best Homemade Classic Burger Recipe You’ll Ever Make
Prepare to say goodbye to dry, crumbly, or bland patties. This classic burger recipe is designed for maximum flavor and juiciness with minimal fuss, making it your ultimate guide to burger perfection for any occasion:
- Effortlessly Simple to Prepare: This recipe prioritizes ease and efficiency. With a short list of ingredients and straightforward steps, you can have incredibly delicious burgers ready without spending hours in the kitchen. It’s perfect for both novice cooks and seasoned grill masters.
- Excellent for Make-Ahead & Freezing: Planning a summer barbecue, a casual get-together, or simply looking for convenient meal prep options? These burger patties can be formed in advance and frozen, saving you time and stress when you’re ready to cook.
- Versatile for Any Kitchen: Grill or Stovetop: Whether you crave the smoky char and sizzle from the outdoor grill or the consistent, even cook from a cast iron skillet on your stovetop, this recipe yields outstanding results on both. No matter your cooking setup, a perfect burger is within reach.
- Irresistibly Juicy and Beefy Flavor: The core of this recipe focuses on selecting the right cut of meat and employing techniques that lock in moisture and natural beef flavor. Each bite promises a succulent, rich experience that highlights the quality of the beef, creating a flavor profile that’s truly hard to resist.
- The Perfect Foundation for Customization: While the burger itself is a masterpiece, its inherent simplicity makes it an ideal canvas for any array of toppings. From classic cheese, lettuce, and tomato to gourmet additions like avocado or fried eggs, you can customize each burger to perfectly suit individual tastes.
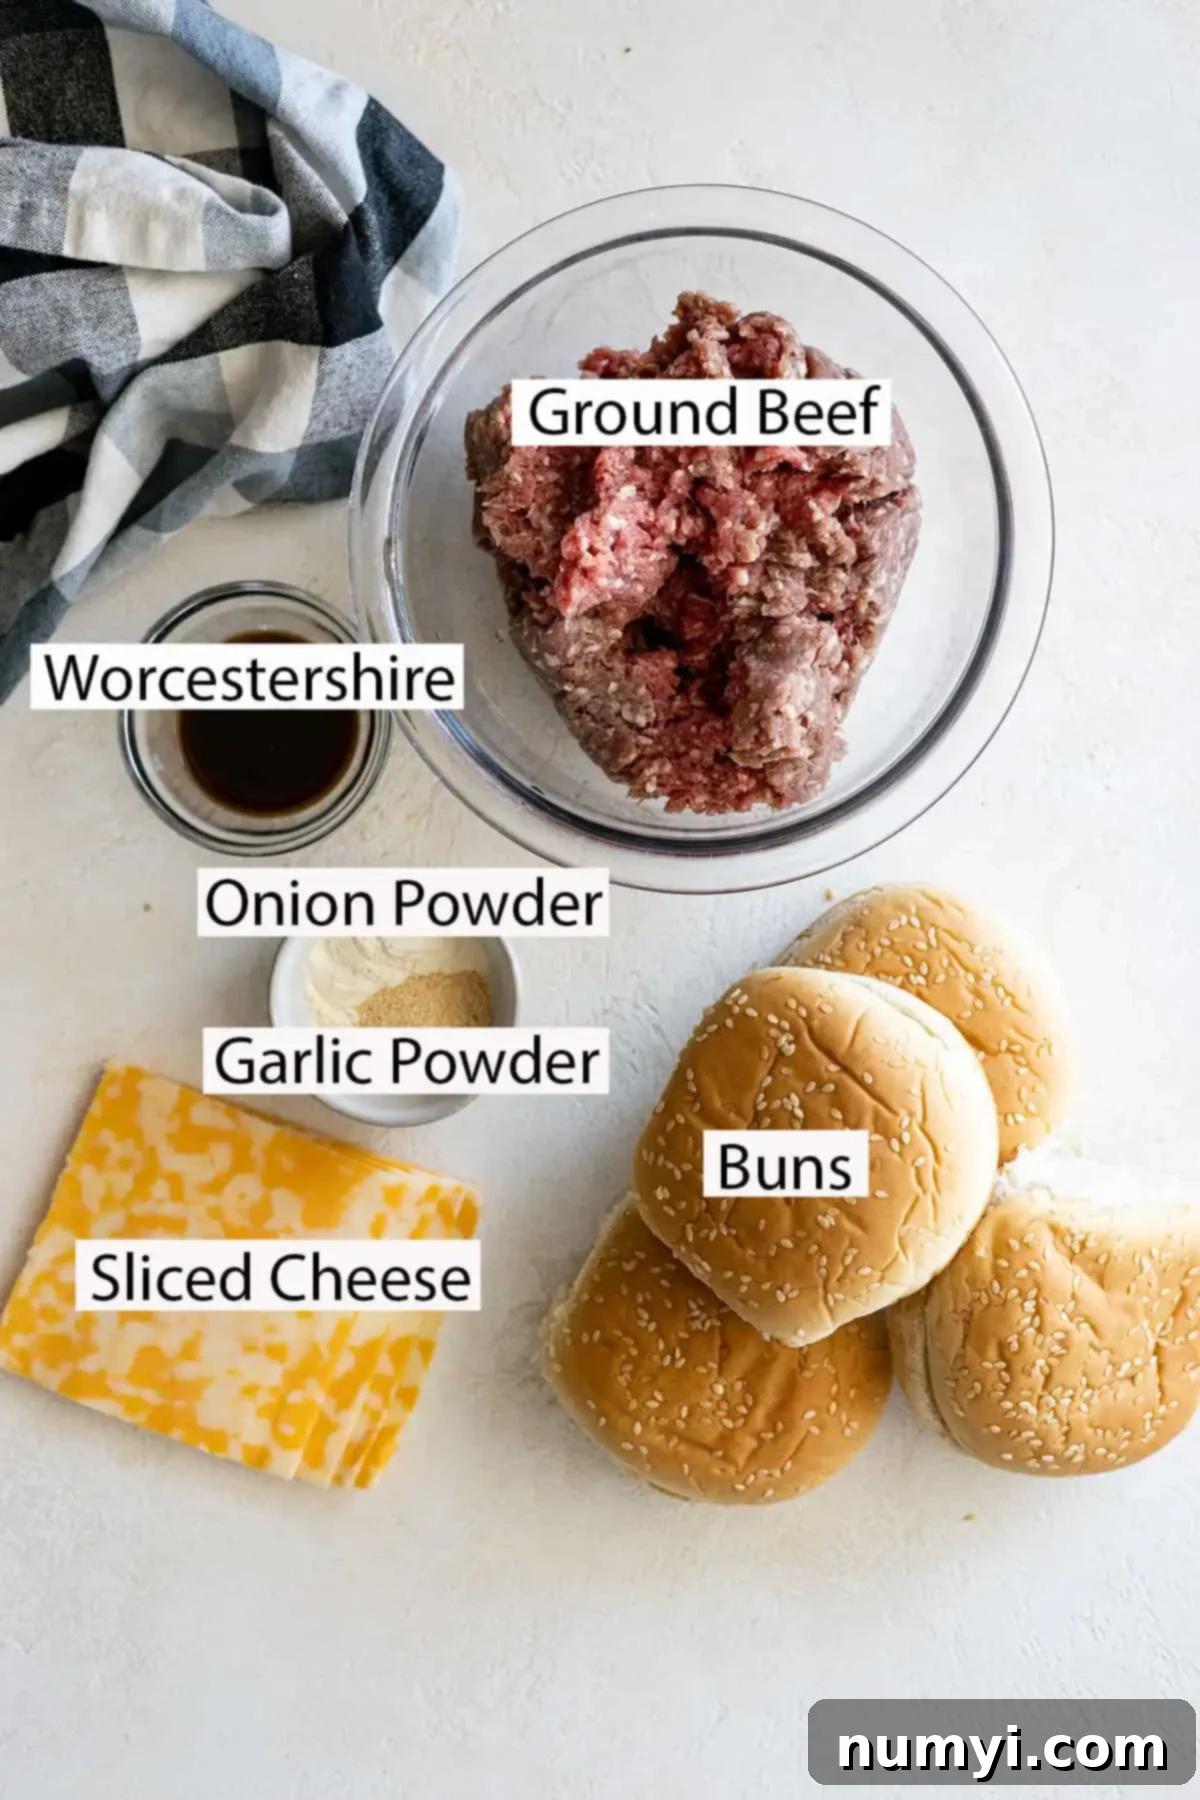
Key Ingredients For Unforgettable Homemade Classic Hamburgers
The secret to an exceptional burger isn’t in complex mixtures or hidden ingredients; it’s in the careful selection of high-quality components and how you prepare them. Here’s a detailed look at what you’ll need for this classic burger recipe:
- Premium Ground Beef: This is, without a doubt, the most critical ingredient. For the absolute best flavor and unparalleled juiciness, I strongly recommend using ground chuck with an 80/20 lean-to-fat ratio.
- Why 80/20? The 20% fat content is crucial. Fat is where much of the beef’s flavor resides, and it also renders during cooking, keeping your burger incredibly moist and tender. Without enough fat, you risk a dry, less flavorful patty.
- Ground Chuck: This cut naturally possesses a robust, rich beefy taste that is perfect for the savory profile of a classic burger.
- Alternatives: While 80/20 ground chuck is ideal, you can use other blends like 85/15 or 90/10. However, be aware that leaner meats will result in a less juicy and potentially drier burger. If opting for leaner ground beef, be extra vigilant to avoid overcooking.
- Optional Flavor-Enhancing Seasonings: The beauty of a classic burger is that quality beef shines with just salt and pepper. However, for those who appreciate a deeper flavor profile, these optional additions integrate beautifully without overwhelming the natural taste of the beef:
- Onion Powder: Adds a subtle, savory, and aromatic complexity that enhances the beef’s natural flavors.
- Garlic Powder: Provides a mild, fragrant garlic essence, complementing the meat without being too pungent.
- Worcestershire Sauce: A small dash (typically ½ to 1 teaspoon per pound of meat) is a fantastic secret weapon. It boosts the umami and amplifies the overall beefy taste, adding a layer of savory richness.
Remember, these are entirely optional. The truly essential seasonings – salt and freshly ground black pepper – will be applied just before cooking for maximum impact, a technique we’ll delve into shortly.
- Quality Hamburger Buns: Don’t underestimate the bun! Choose sturdy yet soft buns that can comfortably hold a juicy burger and your chosen toppings without falling apart. Brioche buns offer a rich, slightly sweet touch; potato buns are wonderfully soft and classic; while a traditional sesame seed bun provides a familiar flavor. Lightly toasting them is highly recommended to prevent sogginess and add a pleasant texture.
- Sliced Cheese (If Desired): For cheeseburger lovers, have your favorite cheese slices ready. American, sharp cheddar, provolone, or Swiss are popular choices that melt beautifully.
How To Make The Perfect Juicy Classic Burger: A Step-by-Step Guide
Crafting a mouth-watering classic burger at home is simpler than you might imagine. By following these detailed steps, you’ll achieve burger perfection every single time, whether you’re grilling outdoors or cooking indoors:
STEP 1: Gently Combine the Meat with Optional Seasonings
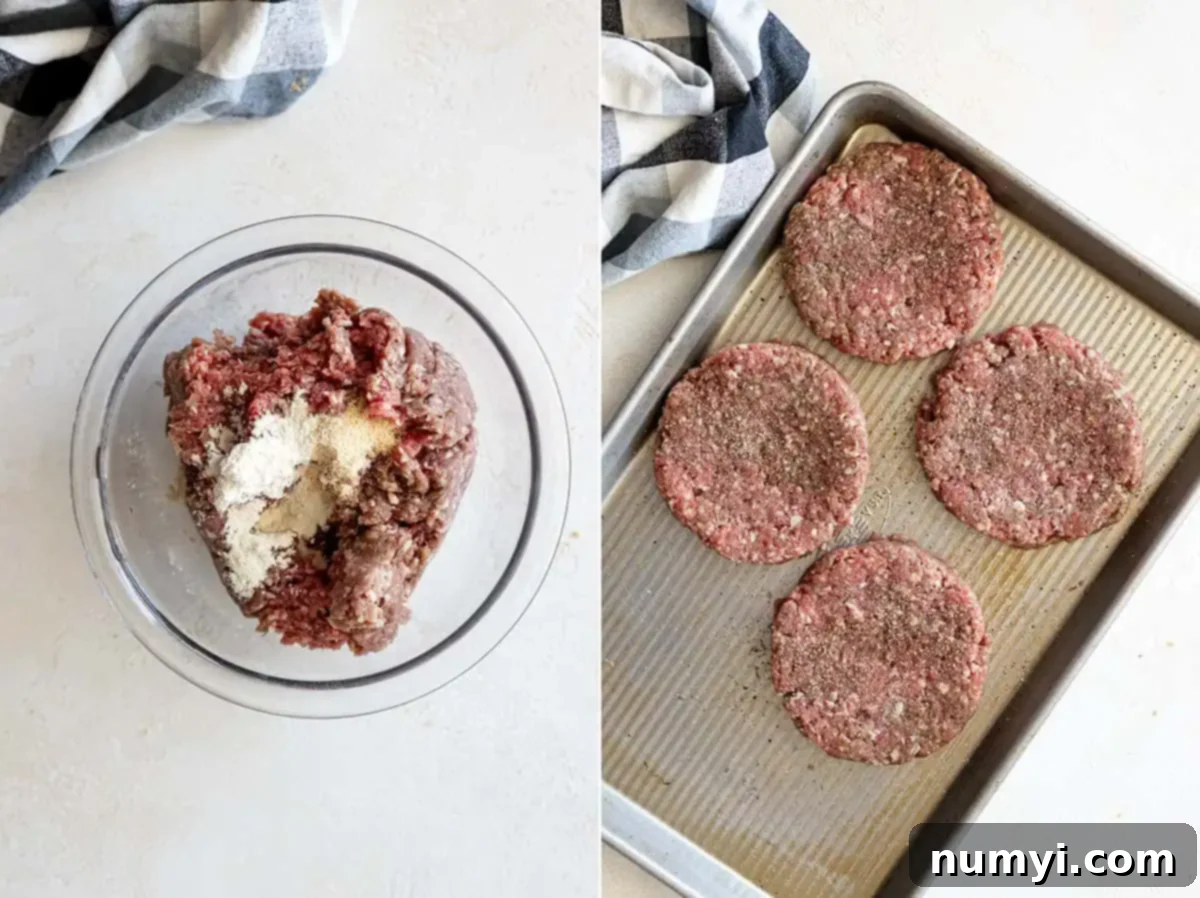
Begin by placing your cold ground beef into a large mixing bowl. If you’ve decided to incorporate the optional onion powder, garlic powder, and a dash of Worcestershire sauce, add them now. Using your hands, gently combine the meat and seasonings. The absolute key here is to handle the beef as little as possible. Overworking the meat compacts its fibers, which can result in a dense, tough, and less juicy burger. Mix just enough until the seasonings are evenly distributed – usually about 15-20 seconds. This gentle touch ensures a tender, melt-in-your-mouth texture.
STEP 2: Form the Patties with Precision and a Secret Trick
Divide your seasoned ground beef into four equal portions. Now it’s time to form your burger patties. A crucial tip for a perfectly fitting burger is to make your patties slightly larger than your hamburger buns. Burgers naturally shrink a bit during cooking, so starting larger ensures your cooked patty will perfectly fill your bun from edge to edge. You have a few options for forming them:
- Using an Old Lid or Burger Press: These tools are excellent for creating uniform, perfectly rounded, and consistently thick patties.
- Using Your Hands: If forming by hand, gently shape the meat into discs that are approximately ¾ to 1 inch thick and about an inch wider than your buns.
Pro Tip for Patty Forming: The Dimple Trick! Before cooking, make a small, shallow indentation in the center of each patty with your thumb. This simple dimple is a genius trick that helps prevent the burger from puffing up into a spherical shape in the middle, ensuring it cooks evenly and remains flat. This also helps the burger fit perfectly on the bun after cooking.
STEP 3: The Crucial Timing of Salt and Pepper Application
This step is a true game-changer for both the flavor and texture of your burger. As emphasized earlier, salt and freshly ground black pepper are the non-negotiable seasonings for an authentically delicious classic burger. The most important secret is to season your patties generously with salt and pepper just moments before placing them on the hot cooking surface. Why this last-minute seasoning? Applying salt too far in advance can actually draw moisture out of the meat and alter its protein structure, potentially resulting in a firmer, tougher, and less juicy burger. This valuable piece of culinary wisdom comes straight from acclaimed sources like America’s Test Kitchen! So, remember to season liberally right before the patties hit the heat to maximize flavor and maintain that desired tender texture.
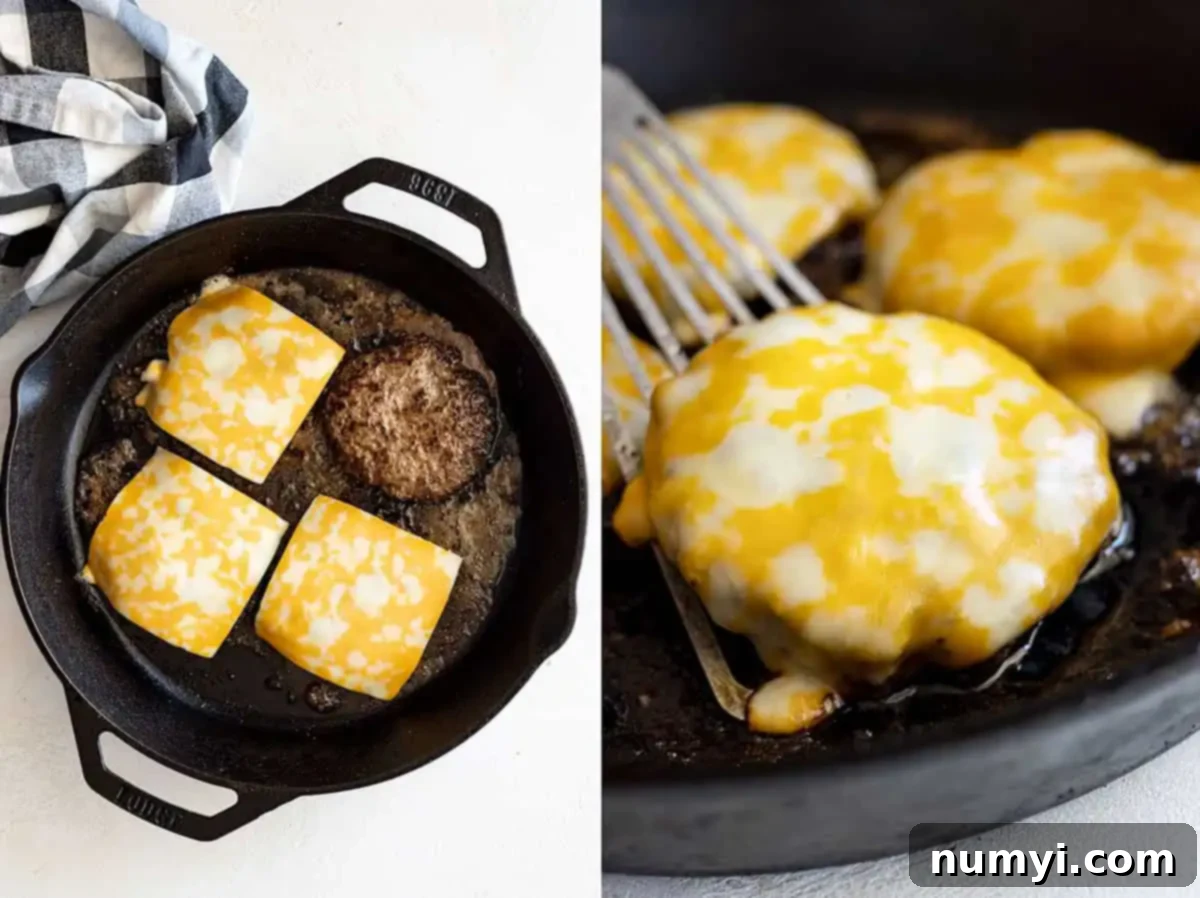
STEP 4: Cook Your Burgers to Perfection (Choose Your Method)
Both grilling outdoors and cooking on the stovetop can yield incredible, juicy burgers. Choose whichever method suits your preference and setup, but ensure your cooking surface is adequately preheated to achieve that coveted crust and sear.
- On the Grill:
- Preheat your grill to a medium-high temperature, aiming for about 375-400°F (190-205°C). Ensure the grates are clean and lightly oiled to prevent sticking.
- Carefully place the freshly seasoned patties directly onto the hot grill grates. Resist the urge to press down on the burgers with your spatula; this squeezes out valuable juices and fat, leading to a dry burger.
- Cook for approximately 3 minutes on the first side. The burger is ready to flip when it has developed a beautiful brown crust and easily releases from the grill grate. If it’s sticking, it likely needs a little more time to form that crust.
- Flip the burger only once. If you’re adding cheese, place a slice on top immediately after flipping so it melts perfectly as the other side cooks.
- Continue cooking for another 2-3 minutes for a medium-rare to medium burger, or longer if you prefer well-done (refer to internal temperature guidelines in the FAQs).
- Once cooked to your desired doneness, remove the burgers from the grill and transfer them to a plate.
- On the Stovetop (Cast Iron Skillet):
- A heavy cast iron skillet is an excellent choice for stovetop burgers due to its superior heat retention, which creates an amazing crust. Preheat your cast iron skillet over medium-high heat until it’s very hot and just beginning to show wisps of smoke.
- Place the freshly seasoned patties in the hot skillet. Do not overcrowd the pan; cook in batches if necessary to maintain a consistently high temperature.
- Cook for about 3 minutes on the first side. Just like with grilling, the burger is ready to flip when it naturally releases from the pan with ease.
- Flip once, add cheese if desired, and cook for another 2-3 minutes or until it reaches your preferred level of doneness.
- Remove the cooked burgers from the skillet and place them on a clean plate.
The Golden Rule: Remember to Rest Your Burgers!
This step is absolutely critical for a truly juicy burger. Just like a perfectly cooked steak, allow your burgers to rest for 3-5 minutes after they come off the heat. This resting period allows the internal juices, which have migrated to the center during cooking, to redistribute evenly throughout the patty. The result? A significantly juicier, more tender, and intensely flavorful burger from the first bite to the last. While they rest, you can quickly toast your buns!
Crafting the Ultimate Classic Burger Sauce to Elevate Your Meal
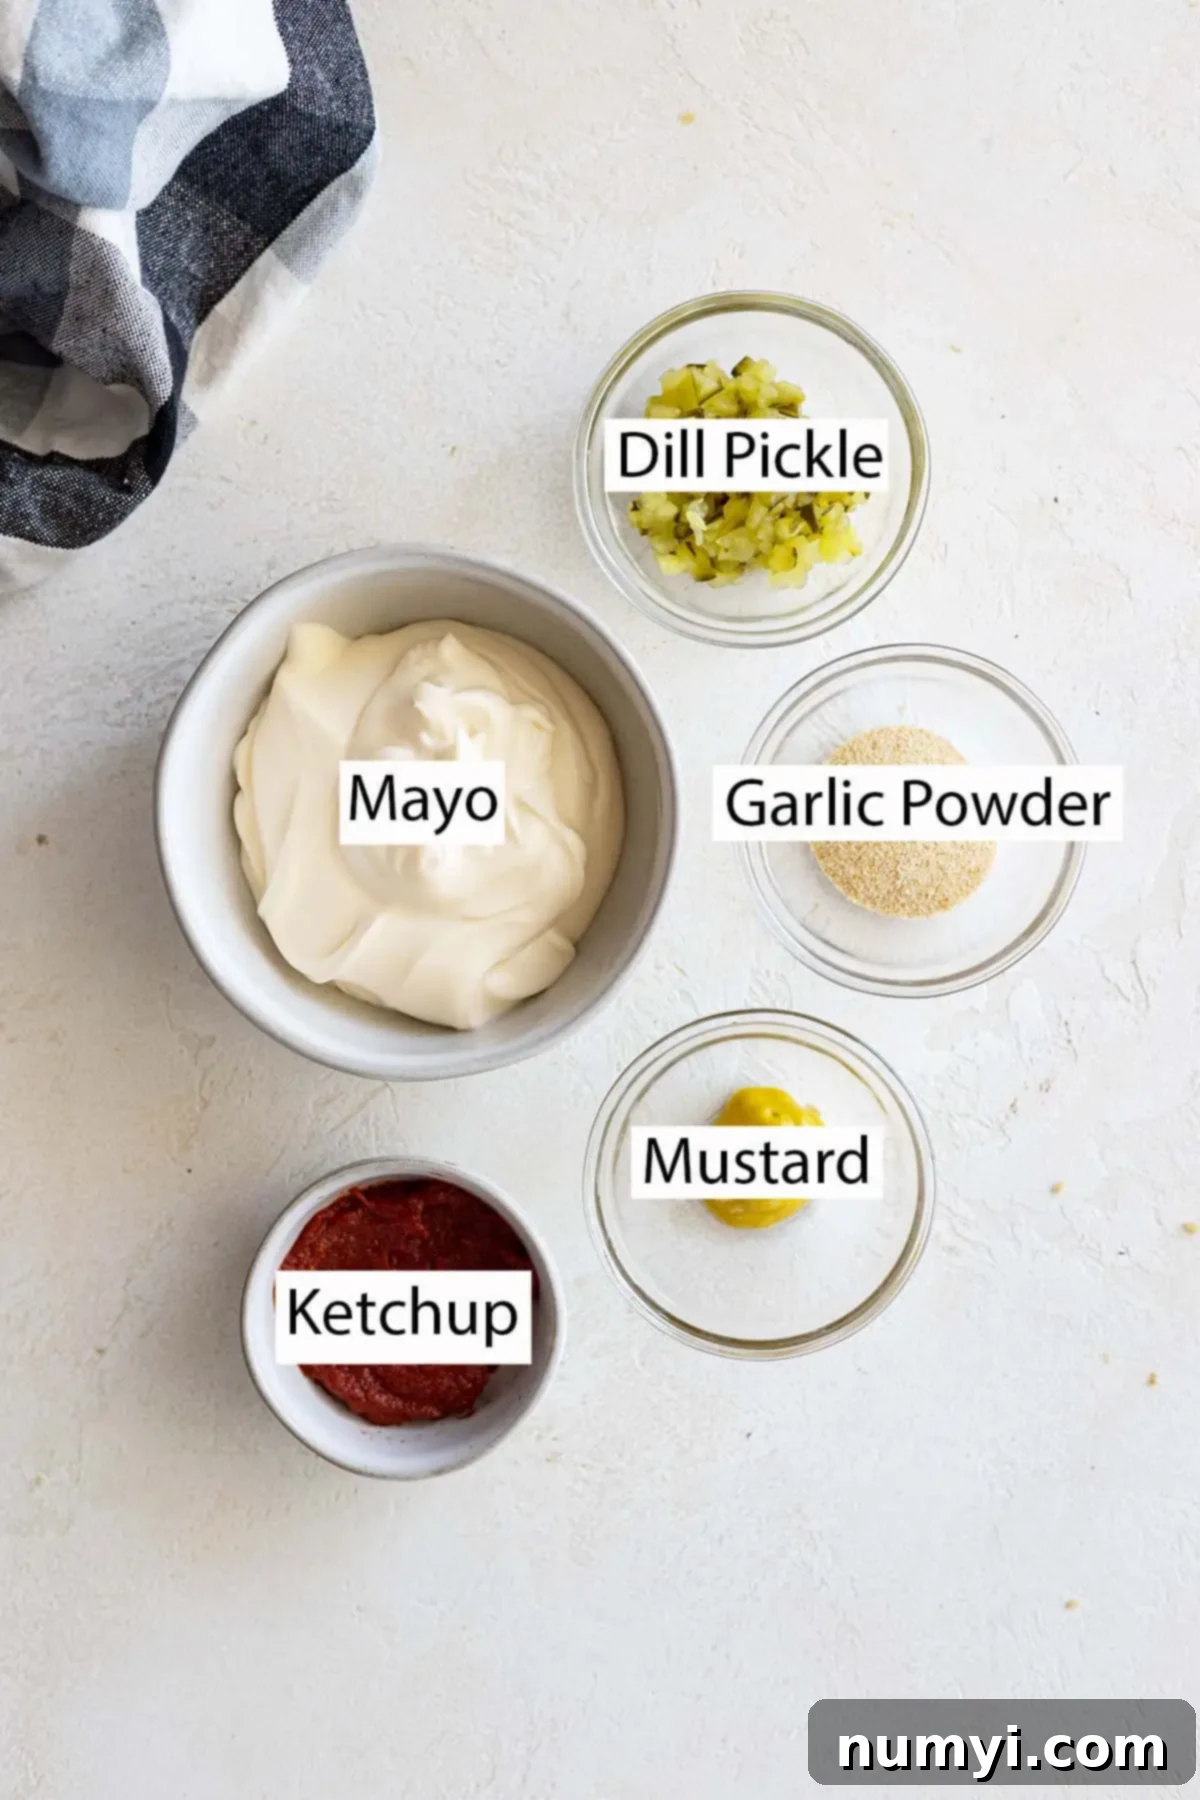
While the timeless combination of mustard and ketchup will always have its place, a homemade burger sauce can truly elevate your classic burger experience from good to absolutely unforgettable. My personal favorite recipe for a simple yet incredibly flavorful burger sauce combines a few common pantry staples, creating a creamy, tangy, and savory condiment:
- Mayonnaise: Forms the creamy, rich base, providing a luxurious mouthfeel.
- Ketchup: Adds a touch of essential sweetness and a tangy acidity that brightens the sauce.
- A Dash of Mustard: Just a hint of mustard (yellow or Dijon) provides a subtle, piquant kick that cuts through the richness.
- Finely Chopped Dill Pickle: This is the secret ingredient that truly sets this sauce apart! Unlike sweet relish, the finely minced dill pickle brings a refreshing briny crunch and a robust tangy flavor that perfectly complements the savory beef. It adds depth and texture without overwhelming the other ingredients.
- Garlic Powder: Enhances the savory notes of the sauce, adding a gentle aromatic warmth.
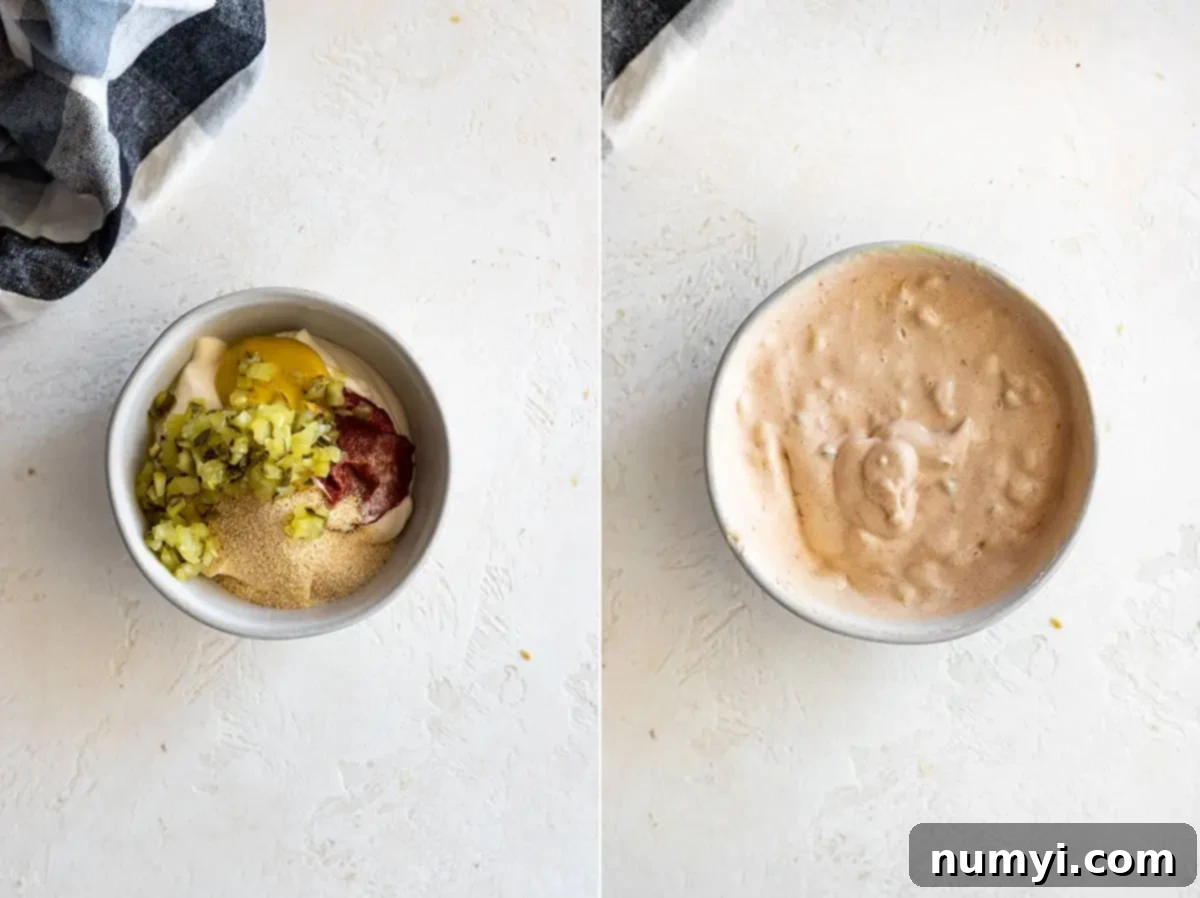
Simply combine all these ingredients in a small bowl and mix until they are thoroughly blended and smooth. You’ll instantly have a creamy, tangy, and utterly delicious sauce ready to generously slather on your toasted buns and burger patties. Of course, feel free to experiment with other condiments too, such as a smoky BBQ sauce, a spicy sriracha aioli, or even a zesty special sauce of your own culinary creation! The beauty of a classic burger is its endless customization.
Frequently Asked Questions About Homemade Classic Burgers
Preventing burger patties from falling apart is key to a successful homemade burger. Several factors play a role:
- Keep the Meat Cold: Always start with cold ground beef. Cold meat has better binding properties than room-temperature meat.
- Avoid Overworking: Mix the meat and seasonings gently and briefly. Overworking can break down the proteins and make the patty crumbly.
- Proper Patty Formation: Ensure your patties are firmly (but not overly tightly) pressed together, with no visible cracks.
- Preheat Your Cooking Surface: Cook on a properly preheated surface. A grill between 375-400°F (190-205°C) or a skillet over medium-high heat is crucial. The high heat quickly sears the outside, helping the patty hold its shape.
- Patience is Key: Don’t try to flip the burger too soon. Wait until it naturally releases from the grate or skillet, indicating a good crust has formed on the first side, which provides structural integrity.
The beauty of a classic burger lies in its incredible versatility with toppings! The perennial favorites that define a “classic” experience include:
- Cheese: American, sharp cheddar, Swiss, or provolone for that gooey, melty goodness.
- Fresh Vegetables: Crisp lettuce (like iceberg or romaine), ripe tomato slices, and thinly sliced red onion.
- Pickles: Tangy dill pickle chips or slices add a refreshing crunch and acidity.
But don’t feel limited! For gourmet variations, consider adding creamy avocado, a perfectly fried egg, savory sautéed mushrooms, crispy bacon, spicy green chilies, caramelized onions, or even a dollop of your favorite ranch dressing. The possibilities are truly endless, allowing you to customize each burger to perfection.
For the safest and most accurate way to determine doneness, especially with thicker patties, an instant-read meat thermometer is your best friend. Insert it into the side of the patty, making sure the tip reaches the center without touching the cooking surface. Here are the recommended internal temperatures:
- Rare: 125-130°F (52-54°C)
- Medium-Rare: 130-135°F (54-57°C) – often preferred for juiciness.
- Medium: 140-145°F (60-63°C)
- Medium-Well: 150-155°F (66-68°C)
- Well-Done: 160°F (71°C) or above (for ground beef, 160°F is generally recommended by food safety authorities).
Visually, you can look for a nicely browned exterior and watch for the juices – for well-done burgers, they should run clear. Always remember to factor in resting time, as the internal temperature will continue to rise slightly (known as carryover cooking) after removing the burger from the heat.
Pro Tips For The Best Classic Burger Every Time
Transforming a good burger into a truly great one involves a few simple, yet crucial, techniques. Embrace these expert tips to master the art of the perfect classic burger:
- Handle the Beef as Little as Possible: This is perhaps the most important rule. Overworking the ground beef causes the meat fibers to become dense and tightly packed, resulting in a burger that is tough, dry, and lacks that desirable tender texture. Mix seasonings gently and form your patties with a light, delicate touch to ensure maximum tenderness.
- Make an Indent in the Middle of Thick Patties: Have you ever noticed how burgers can puff up in the center while cooking, turning into an uneven sphere? This happens because the edges cook and shrink faster than the middle. Creating a small dimple (thumbprint) in the center of each patty helps to counteract this phenomenon, ensuring your burger cooks flat and evenly, making it much easier to pile on toppings and fit perfectly on your bun.
- Don’t Flip Them Constantly: Patience is truly a virtue when cooking burgers. Flipping your patties too frequently prevents a proper, flavorful crust from developing on the surface. This crust is essential for locking in juices and creating that desirable texture. Cook one side until it has developed a beautiful sear and releases easily from the grate or skillet (typically 3-4 minutes), then flip it just once to finish cooking the other side to your desired doneness.
- Allow Your Burgers to Rest: Just like a perfectly cooked steak or roast, burgers benefit immensely from a brief resting period after they come off the heat. Transfer them to a plate or cutting board and let them rest for 3-5 minutes. This allows the internal juices, which tend to concentrate in the center during cooking, to redistribute evenly throughout the entire patty. The result is a significantly juicier, more tender, and intensely flavorful burger from the first bite to the last.
- Toast Your Buns for the Ultimate Experience: Don’t underestimate the power of a perfectly toasted bun! Lightly toasting your hamburger buns – whether on the grill, in a hot pan, or quickly under the broiler – serves multiple purposes. It adds a delightful textual contrast, providing a slight crispness to each bite. More importantly, it creates a protective barrier that prevents the bun from becoming soggy from the burger’s delicious juices and sauces, ensuring a superior eating experience.
- Resist the Urge to Press the Patties: This is a common mistake that many home cooks make. Pressing down on your cooking burgers with a spatula might seem like a way to speed up cooking or flatten them, but it actually forces out all the precious, flavorful juices and vital fat. This inevitably leads to a dry, less flavorful, and less enjoyable patty. Let the heat do its work naturally, and trust the dimple trick to keep them flat.
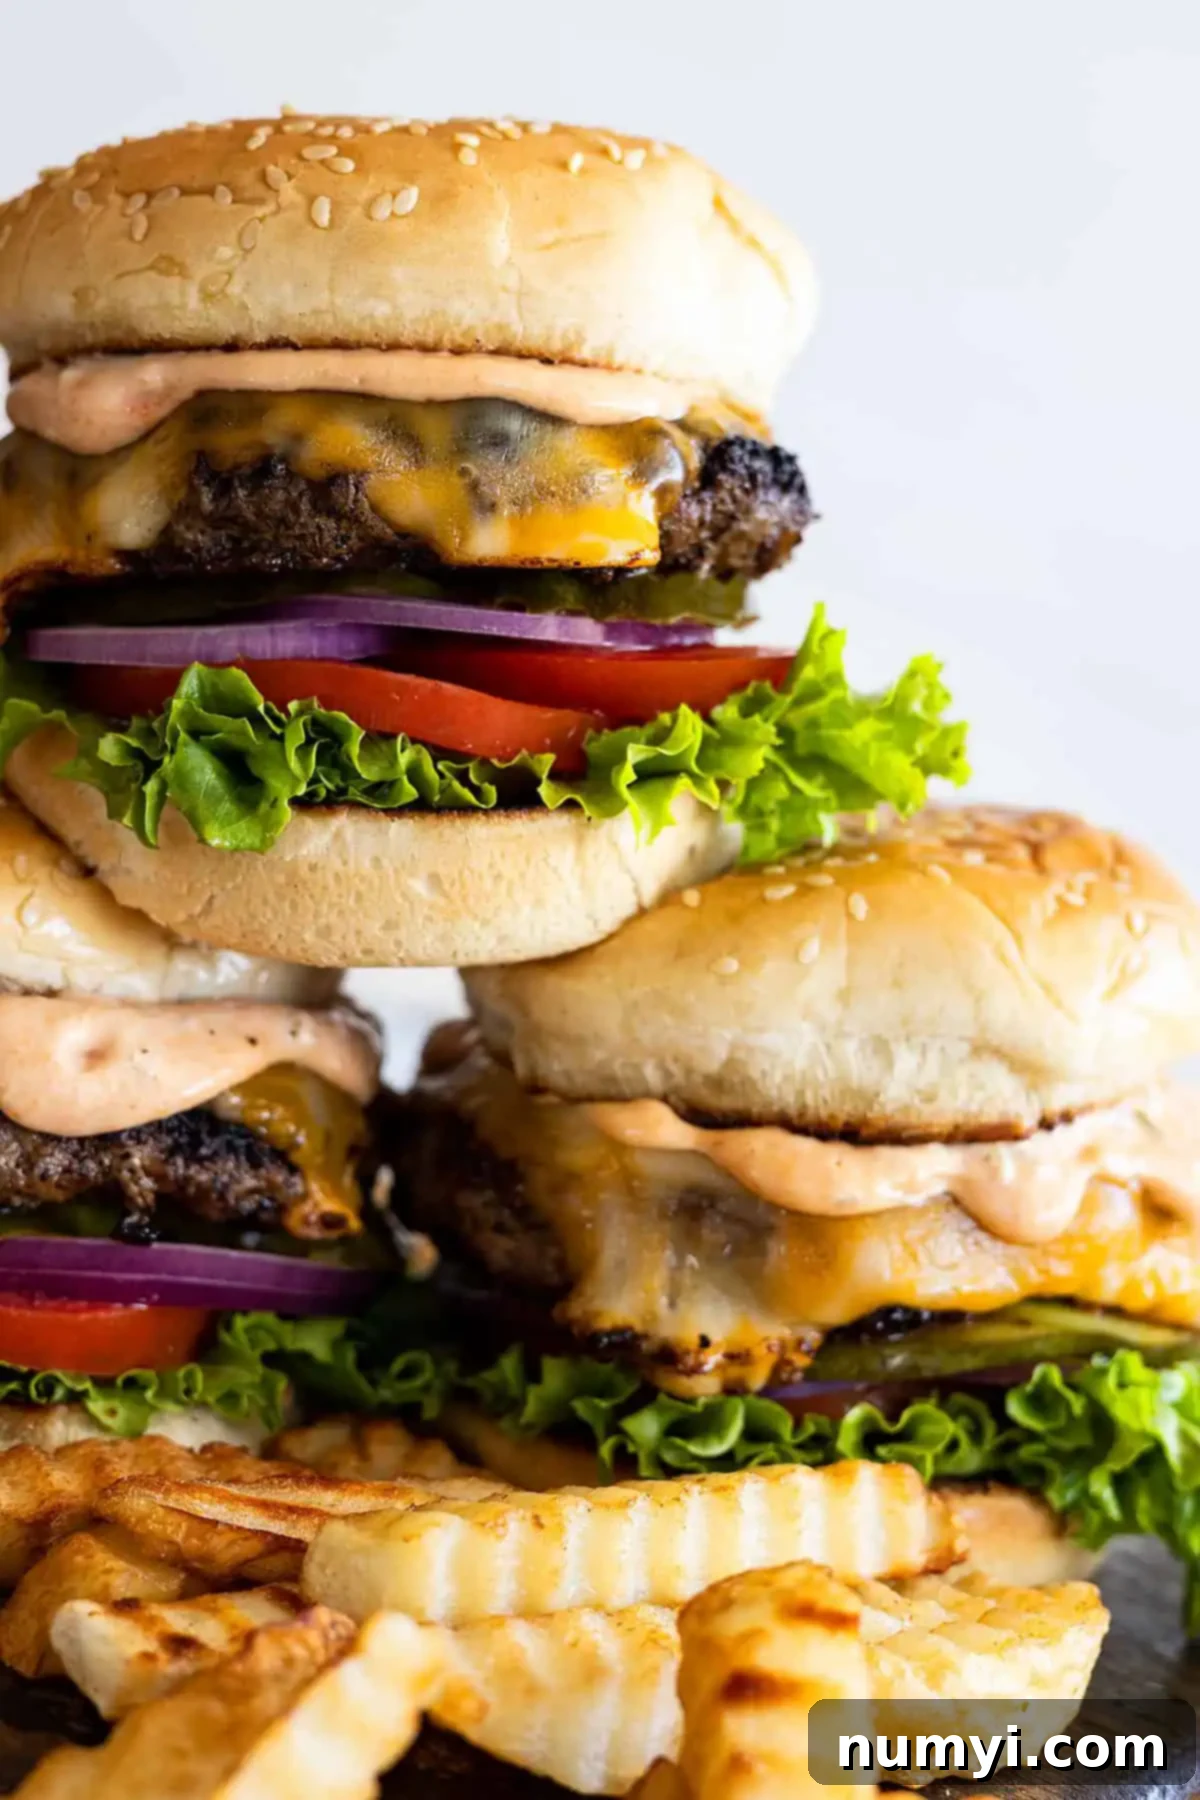
Make-Ahead and Freezing Instructions for Ultimate Convenience
Preparing delicious homemade burgers doesn’t have to be a last-minute rush. This classic burger recipe is incredibly well-suited for both make-ahead preparation and freezing, offering fantastic convenience for planned gatherings or quick weeknight meals when time is short:
MAKE-AHEAD INSTRUCTIONS:
You can prepare your burger patties up to two days in advance, allowing for easy planning. Follow Step 1 and 2 for combining the meat and forming the patties, including the dimple trick. However, it’s crucial to not season them with salt or pepper at this stage. Salt, when applied too early, can draw moisture out of the meat, adversely affecting the texture of your patties over time. To store, place a piece of wax paper or parchment paper between each formed patty to prevent them from sticking together. Stack them in an airtight container or wrap them tightly in plastic wrap to keep them fresh and prevent them from drying out. Store them safely in the refrigerator for up to 2 days. When you’re ready to cook, simply remove the patties from the fridge, allow them to sit at room temperature for about 15-20 minutes (this helps ensure more even cooking), and then season generously with salt and pepper just before they hit the hot cooking surface.
FREEZER-FRIENDLY INSTRUCTIONS:
Homemade burger patties freeze exceptionally well, making them an excellent option for long-term storage and future meals. Prepare the patties following the same make-ahead guidelines: form them gently without any salt or pepper seasoning. Place a piece of wax paper or parchment paper between each patty. Stack them carefully into a freezer-safe bag or an airtight container, ensuring it’s sealed tightly to protect against freezer burn and maintain freshness. These patties can be stored in the freezer for up to 3 months. When you’re ready to enjoy them, the best method is to thaw them overnight in the refrigerator. Once completely thawed, proceed with seasoning and cooking as you normally would. For a quicker alternative, you can cook them directly from a partially frozen state, but be aware that they will require a longer cooking time. In this case, using an instant-read meat thermometer is absolutely essential to ensure they reach a safe internal temperature.
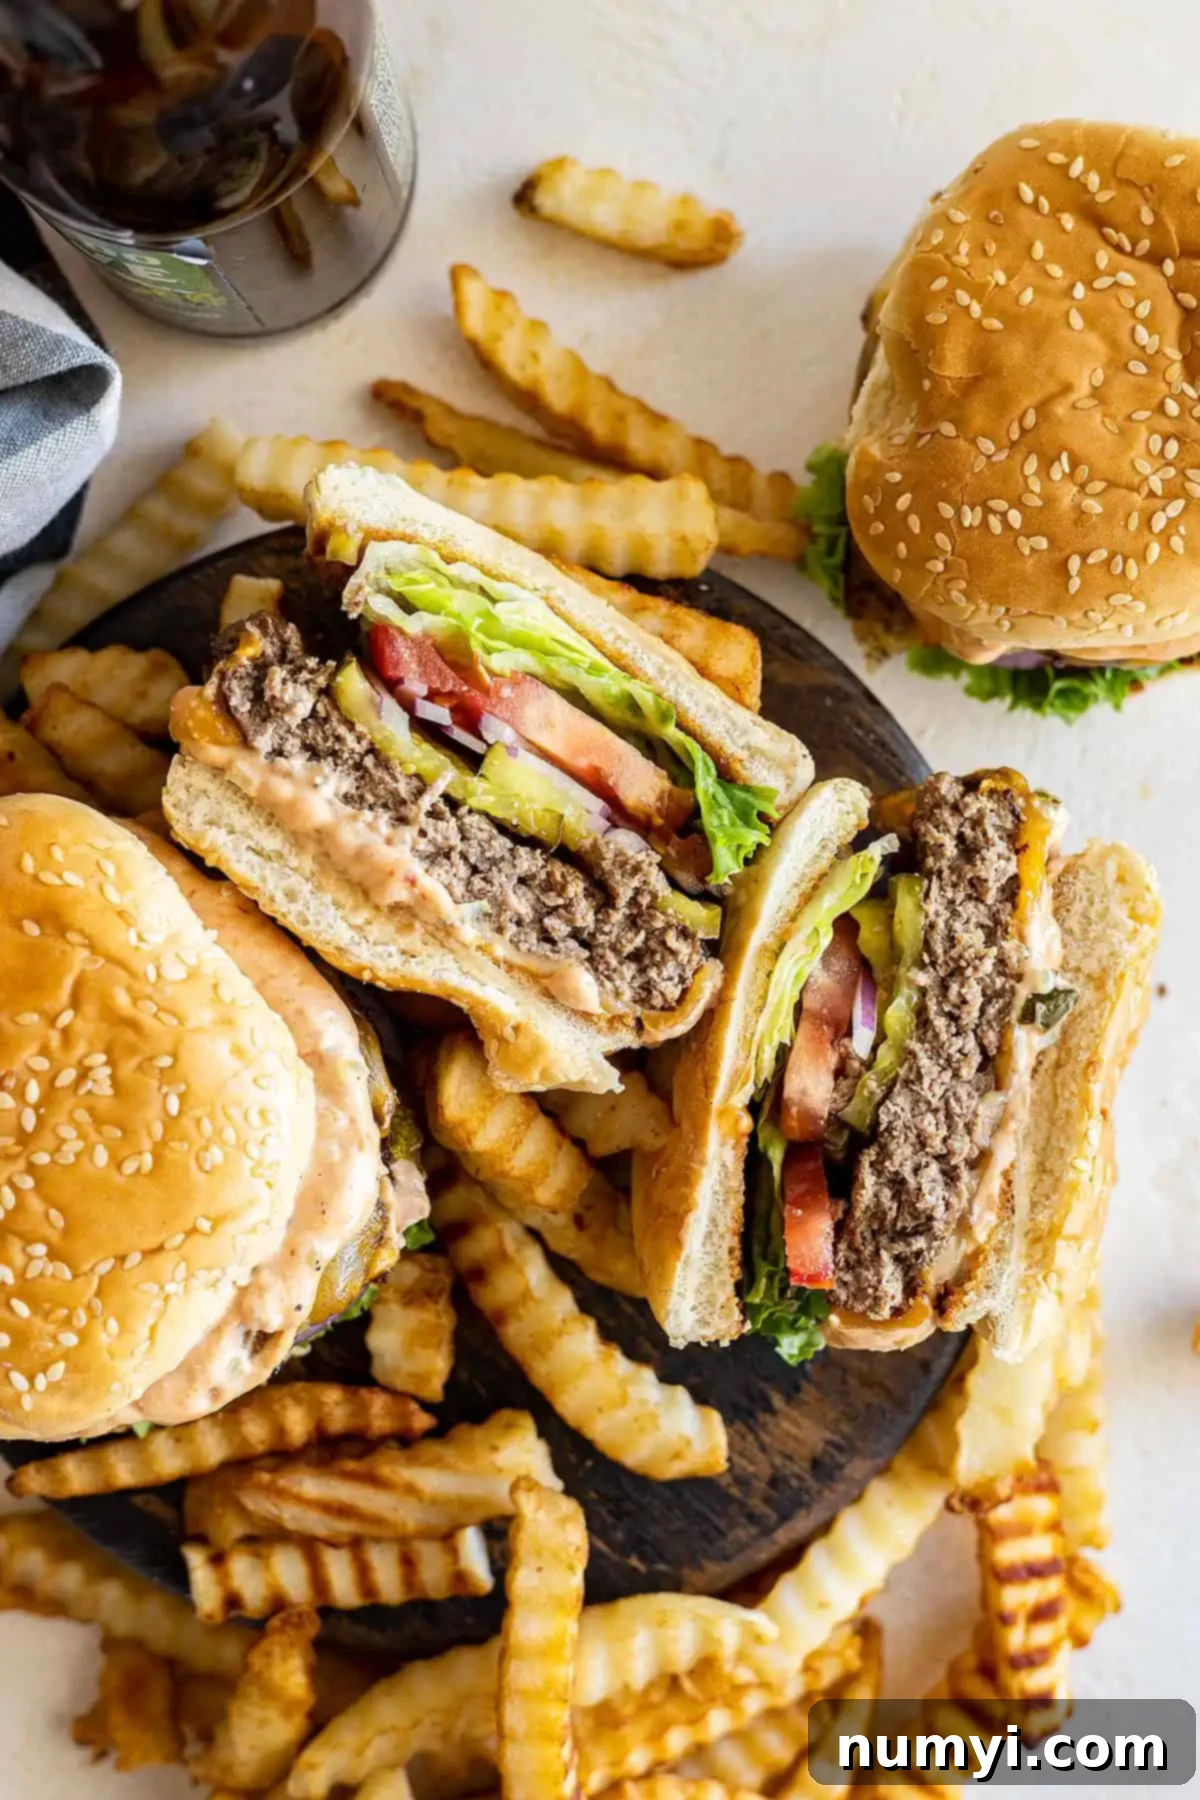
Perfect Serving Suggestions for Your Classic Burger Feast
A phenomenal classic burger deserves equally fantastic accompaniments to complete the meal. Here are some of our favorite classic and creative pairings that will turn your burger night into a true feast:
- Classic French Fries: The quintessential burger companion! Crispy, golden, and perfectly seasoned French fries are always a winner and undeniably the most popular choice.
- Crispy Potato Chips: For a simpler and quicker side, a bowl of crunchy potato chips offers a satisfying texture contrast.
- Old Fashioned Potato Salad: A creamy, savory, and tangy potato salad is a timeless picnic and barbecue favorite that beautifully complements the richness of a burger.
- Classic Macaroni Salad: With its tender pasta and creamy dressing, macaroni salad provides a delightful tang and substantial texture alongside your burger.
- Fresh Tomato, Cucumber, and Avocado Salad: For a lighter, refreshing counterpoint to a hearty burger, this vibrant salad offers bright flavors and healthy fats.
- Sweet Watermelon Slices: Especially during warmer months, juicy and sweet watermelon provides a refreshing and palate-cleansing contrast to the savory burger.
- Bacon Ranch Pasta Salad: A flavorful and hearty pasta salad, loaded with bacon and a creamy ranch dressing, adds a rich and satisfying element to your meal.
- Marinated Tomatoes: Simple, zesty, and bursting with fresh flavor, marinated tomatoes are a wonderful way to enjoy summer’s bounty alongside your burger.
- Creamy Coleslaw: A cool, crisp, and creamy coleslaw offers a delightful textural and flavor contrast, cutting through the richness of the beef.
- Crispy Onion Rings: Another beloved fried side dish, offering a sweet and savory crunch that pairs wonderfully with a juicy burger.
HUNGRY FOR MORE? Don’t miss out on delicious recipes and cooking tips! Subscribe to my exclusive newsletter and make sure to follow along on Pinterest, Facebook, and Instagram for all my latest updates, recipes, and behind-the-scenes glimpses!
Classic Burger
Ingredients
BURGERS:
- 1-1½ pounds (453-680g) 80/20 ground beef
- Optional: 2 teaspoon onion powder; 1½ teaspoons garlic powder; ½-1 teaspoon Worcestershire sauce; sliced cheese
- 4 hamburger buns
BURGER SAUCE:
- ½ cup (115g) mayonnaise
- 2 tablespoons ketchup
- 2 tablespoons finely minced dill pickle
- 1 teaspoon garlic powder
- ½ teaspoon mustard
TOPPINGS:
- 4 large leaves of lettuce
- 1 large tomato, cut into slices
- ½ small red onion, sliced into rounds
- dill pickle chips
Instructions
-
If using optional seasonings (onion powder, garlic powder, Worcestershire sauce), gently mix them into the cold ground beef. Divide the meat into 4 equal portions and lightly form them into patties that are slightly larger than your hamburger buns, creating a small indentation in the center of each with your thumb.
-
GRILL METHOD: Preheat your grill to medium-high heat (375-400℉ or 190-205°C). Just before placing the patties on the grill, generously sprinkle both sides with salt and freshly ground black pepper. Place on the hot grill grates and cook for about 3 minutes until the burger easily releases. Flip once, add a slice of cheese if desired, and cook for another 2-3 minutes or until your desired doneness. Remove from grill and let rest for 3-5 minutes before serving.
-
STOVETOP METHOD: Preheat a cast-iron skillet over medium-high heat until it’s very hot. Season both sides of the burger patties generously with salt and freshly ground black pepper just before cooking. Place them in the hot skillet, ensuring not to overcrowd the pan. Cook for about 3 minutes per side, or until the meat easily releases from the skillet. Flip, add a slice of cheese if desired, and continue to cook for 2-3 minutes to reach your preferred doneness. Remove from skillet and allow to rest for a few minutes before serving.
-
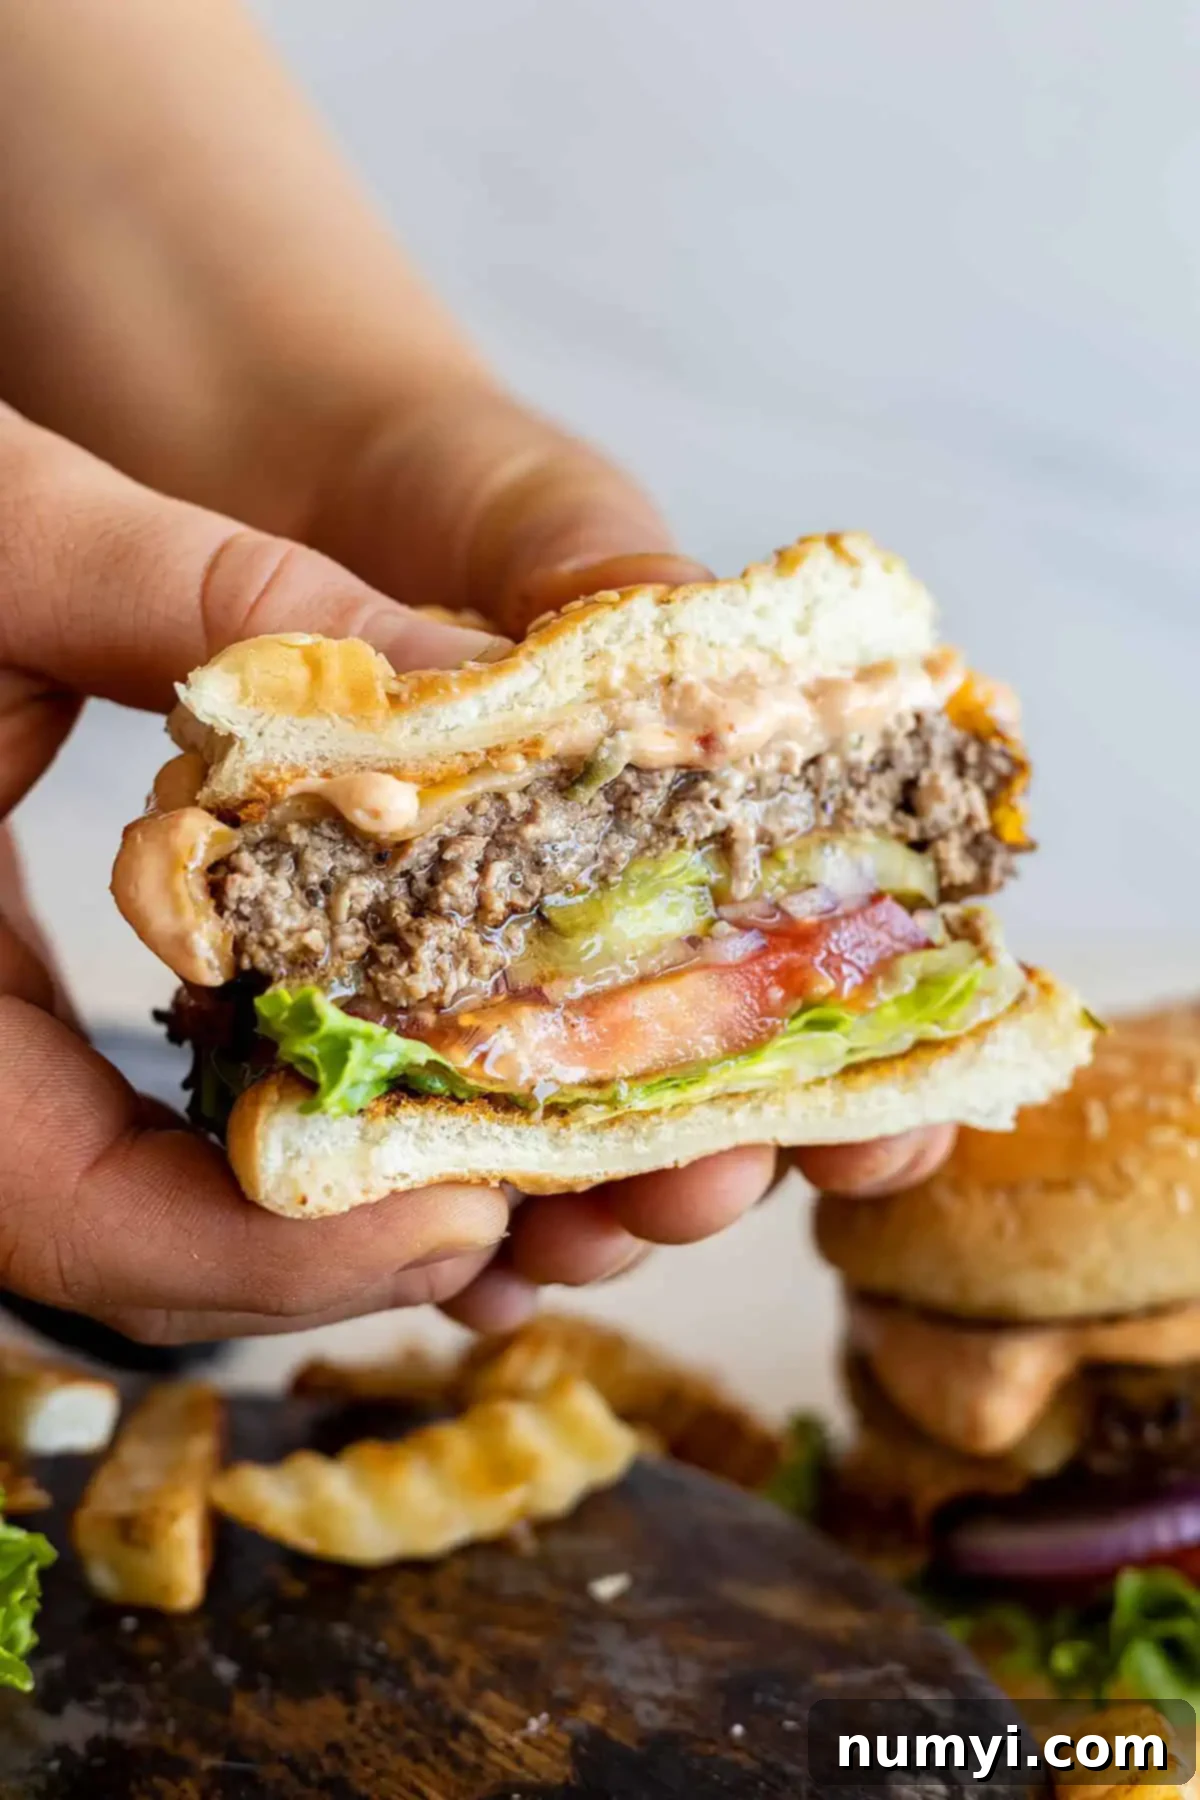
Lightly toast your hamburger buns. Spread your homemade burger sauce on the buns, then assemble your classic burgers with the cooked patties and all your desired toppings. Serve immediately and enjoy!
Notes
- NUTRITION: The provided nutrition facts are calculated for the burgers, buns, and standard toppings (lettuce, tomato, onion, pickle) only, assuming 1.5 pounds of ground beef. Optional burger sauce, extra seasonings beyond salt and pepper, and added cheese are not included in these calculations.
- For a comprehensive guide and additional expert tips on achieving the absolute best classic burger, be sure to read through the entire article.
- For thicker patties or precise doneness, use a meat thermometer. Recommended internal temperatures: Medium-rare = 130-135℉ (54-57°C) and Medium = 140-145℉ (60-63°C). For well-done, aim for 160℉ (71°C) or higher.
Nutrition
