Irresistible Pepperoni Pizza Sliders on Hawaiian Rolls: The Ultimate Easy Appetizer for Any Occasion
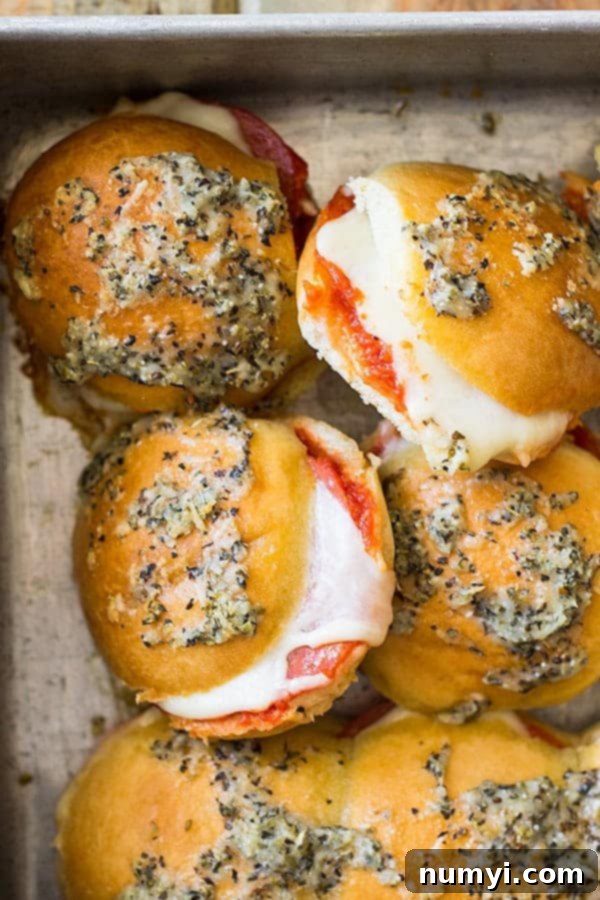
These Pepperoni Pizza Sliders are more than just an appetizer; they are a delightful culinary experience! Packed with layers of melted cheese, rich pasta sauce, and savory pepperoni, all nestled within soft Hawaiian rolls and crowned with a fragrant garlic butter rub, they are truly perfect for game day, festive holiday parties, or any casual get-together. Prepare for rave reviews and an empty platter!
Delightful Pizza Sliders: A Crowd-Pleasing Favorite
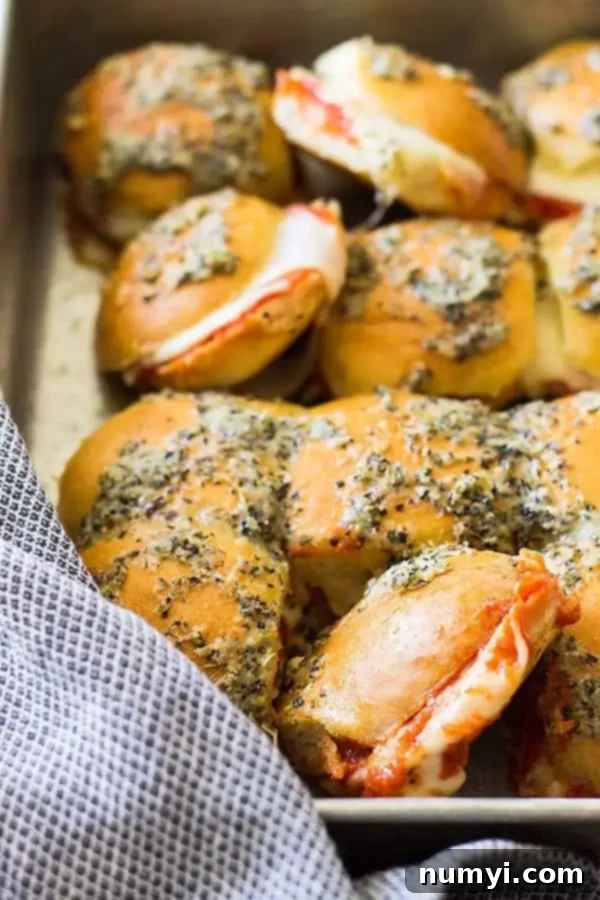
If you’re on the hunt for an appetizer that’s not only incredibly easy to prepare but also guarantees to be a massive hit with everyone, look no further than these sensational pizza sliders. Featuring a generous filling of spicy pepperoni and gooey mozzarella cheese, all baked to golden perfection on sweet Hawaiian rolls, this recipe is specifically designed for you!
These savory sliders aren’t just an ordinary snack; they’re a celebrated staple for any occasion that calls for delicious finger food. They shine as exceptional game-day appetizers, bringing cheer to any sports viewing party. Beyond that, they’re absolutely wonderful for barbecues, casual backyard parties, school functions, potlucks, or pretty much any gathering where a crowd is involved. I can confidently say that every single time I whip up a batch of these pepperoni pizza sliders, someone inevitably asks for the recipe. And the best part? There are rarely any leftovers to speak of, a true testament to their irresistible appeal.
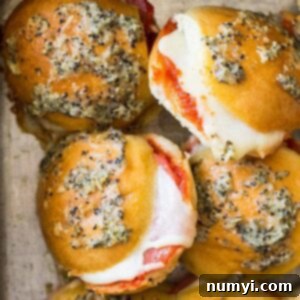
Crafted with a simple yet brilliant combination of soft Hawaiian rolls, zesty pepperoni, creamy fresh mozzarella, and a unique homemade garlic butter rub generously brushed over the tops, these sliders truly are “to die for.” The flavors meld together beautifully, creating a harmonious blend that mimics your favorite pizza in a convenient, mini sandwich form. Even my own children adore this pizza sliders recipe so much that they’ve started requesting them for their birthday celebrations. Yes, they are genuinely that good!
For an even more impressive spread, consider serving these Hawaiian roll pizza sliders alongside other fantastic game day options. Imagine a platter featuring Reuben Sliders for another savory sandwich bite, a warm and comforting Homemade Chili Cheese Dip, or some crispy Toasted Ravioli. This combination would make for quite the memorable feast!
Why These Pepperoni Pizza Sliders Will Be Your New Favorite
- Incredibly Easy to Prepare: Forget complicated recipes and lengthy ingredient lists! These pizza sliders come together with minimal effort and common pantry staples. Simply assemble, bake, and enjoy. They’re a stress-free solution for any busy weeknight or last-minute gathering, making them accessible even for novice cooks.
- Quickly Ready in Just 45 Minutes: From initial prep to the moment they emerge from the oven, you can have these delicious, cheesy bites on your table in under an hour. This rapid cooking time is perfect for when hunger strikes, unexpected guests arrive, or you need a speedy appetizer for a party.
- Perfect for Feeding a Crowd: Whether it’s a lively game day party, a festive holiday get-together, or a casual backyard BBQ, this recipe is designed to serve many. The batch-friendly nature of these sliders ensures everyone gets a satisfying taste, making you the hero of any gathering without extra hassle.
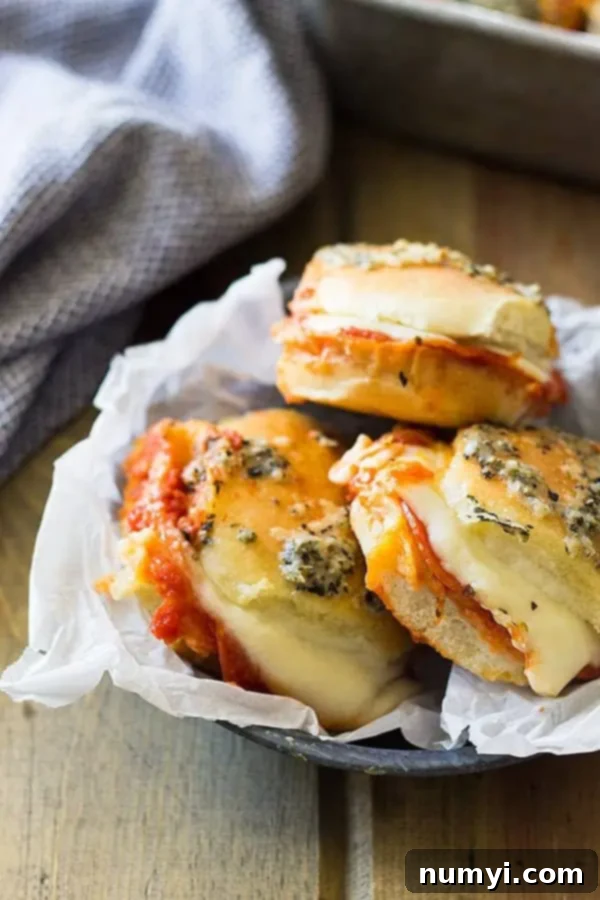
- The Ultimate Mini, Hand-Held Pizza Experience: Imagine all the savory flavors you adore in a classic pepperoni pizza, perfectly scaled down into a convenient, bite-sized slider. They offer that irresistible combination of zesty sauce, gooey melted cheese, and spicy pepperoni, all encased in a soft bun – no plates and forks required!
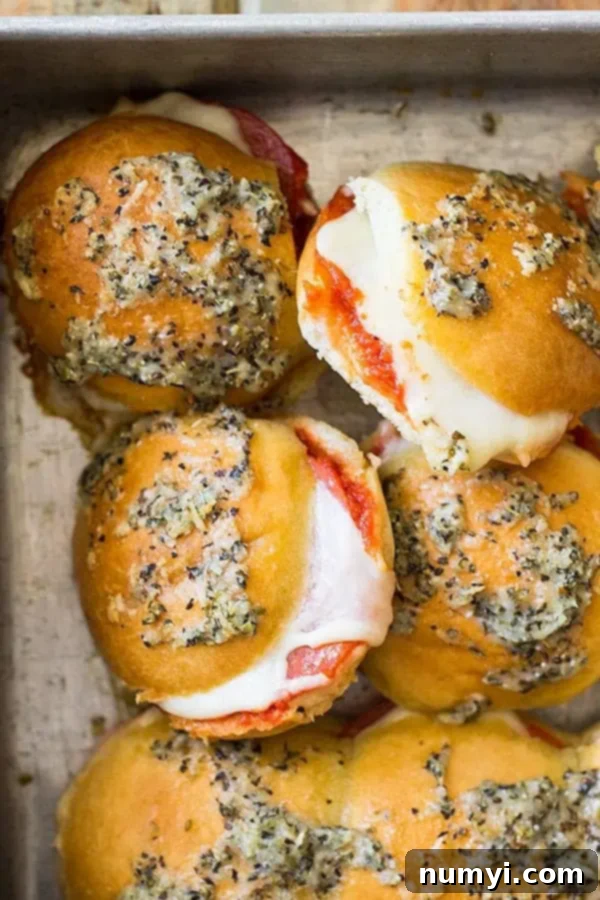
- Bursting with Savory Flavor from Our Special Garlic Herb Butter Topping: What truly elevates these sliders from good to absolutely outstanding is the homemade garlic butter rub generously brushed over the tops of the rolls. This aromatic mixture of Parmesan, melted butter, garlic powder, basil, and oregano infuses every bite with an amazing depth of savory, herbaceous goodness that’s simply irresistible. It adds a golden crust and incredible aroma.
Key Ingredients for Mastering Hawaiian Roll Pizza Sliders
The beauty of this recipe lies in its simplicity and the quality of its core ingredients. Choosing wisely here will make a noticeable difference in the final taste and texture of your pizza sliders.
- HAWAIIAN ROLLS – These are my absolute favorite for making pizza sliders. Their inherent sweetness beautifully complements the savory and slightly spicy fillings, while their soft, fluffy texture provides the perfect base. However, if Hawaiian rolls aren’t available or you prefer something different, you can certainly use any small, soft dinner bun or slider bun. The key is to keep them small enough to maintain that ideal appetizer size.
- PASTA SAUCE – The foundation of your “pizza” flavor! You can use any brand and flavor of pasta or marinara sauce you enjoy. A classic marinara, a rich tomato and basil, or even a spicy arrabbiata could work. Feel free to use your favorite store-bought jar for convenience, or if you have a special homemade recipe, that would be fantastic too! Just ensure it’s not too watery, as that can lead to soggy buns.
- PEPPERONI – I always strive to use a high-quality pepperoni, as its flavor truly shines through in these sliders. Look for a brand that offers a good balance of spice and richness. However, don’t hesitate to use whatever brand you usually buy and love. For a slightly different twist, you could also consider using mini pepperonis, or even finely diced cooked ham or sausage as an alternative or addition.
- FRESH MOZZARELLA – Ah, the star of the show for that perfect cheese pull! I personally prefer fresh mozzarella because it’s incredibly easy to slice into uniform pieces that fit perfectly on each bun. Plus, it melts exceptionally well, creating that desirable, stringy, gooey texture that everyone craves. However, if fresh mozzarella isn’t handy, pre-sliced or shredded mozzarella will work just fine and still deliver a delicious, cheesy result. Provolone, Monterey Jack, or even an Italian cheese blend are also great options for varying the flavor profile.
- GARLIC BUTTER RUB – This is the secret weapon that elevates these sliders from good to extraordinary! You’ll need a simple yet potent combination of grated Parmesan cheese, melted butter, garlic powder, dried basil, and dried oregano. I combine these ingredients thoroughly and then brush this aromatic mixture generously over the tops of the sliders just before baking. Please, whatever you do, do not skip this step! It adds an incredible depth of savory, herbaceous flavor and a beautiful golden crust that makes all the difference to these pepperoni sliders. You can even add a pinch of dried parsley or a tiny sprinkle of red pepper flakes for an extra kick.
Step-by-Step Instructions to Make Delicious Pepperoni Sliders
Making these pepperoni pizza sliders is incredibly straightforward, perfect for cooks of all skill levels. Follow these simple steps for a mouthwatering result.
RECIPE PREP: Begin by preheating your oven to a steady 350 degrees F (175 degrees C). While the oven heats, lightly grease the bottom of a standard 9×13-inch baking pan with nonstick cooking spray. This crucial step prevents the sliders from sticking and ensures even baking. Set your prepared pan aside for the assembly process.
ASSEMBLE THE PEPPERONI PIZZA SLIDERS: Take your Hawaiian rolls or slider buns and carefully slice them in half horizontally, keeping all the tops together and all the bottoms together. Gently lift the top halves and set them aside. Place the bottom halves of the buns snugly into your prepared baking pan, arranging them closely to form a single layer. Evenly spread your chosen pasta or pizza sauce over the bottom half of each bun. Don’t overload them – a thin, even layer is perfect to avoid sogginess. Next, generously top the sauce with pepperoni slices. You can be as liberal as you like with the pepperoni! Finally, add the fresh mozzarella. If using a log of fresh mozzarella, slice it into 12 even discs, ensuring one slice of cheese is placed on top of the pepperoni for each slider. This guarantees maximum melty goodness. Carefully place the top halves of the rolls back over the cheese, completing your slider sandwiches.
COAT WITH GARLIC BUTTER: In a small bowl, combine your secret weapon: the melted butter, grated Parmesan cheese, garlic powder, dried basil, and dried oregano. Stir these ingredients together until well combined, creating a fragrant, herby mixture. Using a pastry brush, generously spread this savory garlic butter mixture over the entire top surface of the assembled buns. This step is key for a golden, flavorful crust.
BAKE AND SERVE: Once coated, cover the baking pan containing your pizza sliders with aluminum foil. Place the covered pan into your preheated oven and bake for 25 minutes. This initial covered baking period allows the cheese to melt perfectly and the flavors to meld without the tops browning too quickly. After 25 minutes, carefully remove the foil and continue baking for another 5 minutes uncovered. This final uncovered bake will give the tops of the sliders a beautiful golden-brown finish and slightly crisp the garlic butter. Serve your delicious pepperoni pizza sliders immediately while the cheese is still warm and gooey, and prepare for them to disappear quickly!
Expert Tips for Making the Best Pepperoni Pizza Sliders
Achieving perfectly delicious pizza sliders is simple, but a few key tips can elevate your results:
- Layer Ingredients Evenly for Optimal Flavor and Texture: When assembling your pizza sliders, pay close attention to layering the ingredients uniformly. This isn’t just for aesthetics; it helps to distribute the flavors evenly throughout each slider, ensuring that you get a perfect balance of sauce, pepperoni, and cheese in every single bite. Even layering also prevents any one area from becoming too soggy or dry.
- Prioritize High-Quality Ingredients for Superior Taste: As this pizza sliders recipe requires minimal ingredients, the quality of each component really shines through. I’ve already emphasized my preference for fresh mozzarella and good-quality pepperoni because they make a significant difference in flavor and texture. The same principle applies to your Parmesan cheese and butter – opt for the best you can reasonably get. Better ingredients translate directly into a more delicious, gourmet-tasting slider.
- Customize Your Hawaiian Roll Pizza Sliders with Extra Toppings: Don’t be afraid to get creative and personalize your sliders! These Hawaiian roll pizza sliders are incredibly versatile and can accommodate a variety of extra ingredients. Consider adding sautéed mushrooms, thinly sliced bell peppers (red, green, or yellow), or caramelized onions for added depth. Other popular pizza toppings like sliced black olives, banana peppers, or even a sprinkle of red pepper flakes for a kick would also work wonderfully. Just make sure any vegetable toppings are pre-cooked and drained to prevent excess moisture.
- Prevent Soggy Sliders: A common concern with sliders is a soggy bottom. To avoid this, ensure your oven is fully preheated, don’t use excessive sauce (a thin layer is sufficient), and for extra protection, you can lightly toast the bottom halves of the buns before adding wet ingredients, or even spread a very thin layer of cheese directly on the bun before the sauce to create a barrier.
- Storing Leftovers: If you happen to have any leftover pizza sliders (a rare occurrence!), store them in an airtight container in the refrigerator for up to 2-3 days.
- Reheating Instructions: To reheat, you can pop them back into a preheated oven (around 300°F/150°C) for 10-15 minutes, or until warmed through and the cheese is melty again. Covering them with foil initially can help prevent drying out. A microwave can also be used for a quicker reheat, but the texture might not be as crispy.
Frequently Asked Questions About Pizza Sliders
To prevent your Hawaiian roll pizza sliders from getting soggy, there are a few key steps you can take. Firstly, always make sure your oven is fully preheated to the recommended 350 degrees F (175 degrees C) before baking. Secondly, apply the pizza sauce carefully and resist the temptation to add too much; a thin, even layer is all you’ll need. Excessive sauce is the primary culprit for mushy bottom buns! Some also suggest lightly toasting the bottom halves of the buns before adding the wet ingredients, or even placing a thin slice of provolone cheese directly on the bun before the sauce to create a moisture barrier.
While I absolutely adore the melty goodness of fresh mozzarella, you absolutely can experiment with other cheeses to customize your pizza sliders! Provolone offers a milder, slightly sweet flavor and excellent melt. Cheddar can add a sharper, more robust taste, while Monterey Jack provides a creamy, buttery texture. A blend of Italian cheeses (like mozzarella, provolone, and parmesan) can also offer a more complex flavor profile. Feel free to mix and match to find your favorite combination!
Yes, absolutely! Making your pepperoni sliders in advance is a fantastic way to save precious time on the day of a party or event. You can assemble the sliders as instructed, right up to the point before adding the garlic butter topping. Then, cover the pan tightly with plastic wrap or foil and refrigerate them for up to 24 hours. It’s best to add the garlic butter topping just before you pop them into the oven to prevent the buns from absorbing too much moisture and going soggy, ensuring a perfectly crisp and flavorful crust.
Yes, you can! You can freeze assembled, unbaked sliders (without the garlic butter topping). Wrap the pan tightly in plastic wrap and then foil, and freeze for up to 1-2 months. Thaw overnight in the refrigerator before baking as directed, adding the garlic butter just before baking. Alternatively, you can fully bake the sliders, let them cool completely, then individually wrap them and freeze. Reheat them from frozen in a preheated oven until warm and melty.
Absolutely! To make these sliders vegetarian, simply omit the pepperoni. You can replace it with a variety of delicious vegetable toppings such as sautéed mushrooms, bell peppers, onions, spinach, or even sun-dried tomatoes. Consider adding some sliced black olives or banana peppers for extra flavor. You can also experiment with different cheeses like a smoky provolone or a blend of Italian cheeses for added richness.
What to Serve With Your Perfect Pizza Sliders Recipe
These versatile pizza sliders can be the star of an appetizer spread or even transform into a satisfying main course with the right accompaniments.
For a spectacular game day spread of appetizers, I’d highly recommend pairing them with:
- Toasted Ravioli: Another Italian-inspired crowd-pleaser, perfect with a side of marinara for dipping.
- Fresh Vegetable Tray: A refreshing contrast to the richness of the sliders, offering a healthy and colorful option with a delicious dip.
- Reuben Sliders: For variety, offer another popular slider option with distinct flavors, adding more excitement to your party table.
- For dessert, something sweet and easy to grab like No Bake Chocolate Peanut Butter Bars (cut into bite-sized pieces for easy serving) or delightful Easy Berry Cheesecake Cups.
Or, for a more complete and hearty meal, elevate these sliders by:
- Making them into larger sandwiches: Simply use larger buns or rolls to serve these as the main dish, alongside some classic sides.
- Any crisp side salad: A fresh green salad with a light vinaigrette will balance the richness of the pizza sliders beautifully.
- Vegetable Tray: Continues to be a great choice for a full meal, adding essential nutrients and a refreshing crunch.
- Your favorite bag of chips: A simple, classic side that always hits the spot with sandwiches.
- For dessert, a creamy and light No Bake Vanilla Cheesecake served with your desired fruit topping for a refreshing end to the meal.
More Delicious Pizza-Inspired Recipes To Try
If you’re a fan of pizza, you’ll love exploring these other fantastic recipes:
- Easy Zucchini Pizza Bites
- Homemade Three Cheese Pizza
- Homemade Pizza Dough
- Chicken Bacon Ranch Pizza
Thanks so much for reading and diving into this incredibly delicious pizza sliders recipe! I truly hope these become a staple in your kitchen for all your gatherings and casual cravings. Let me know what you think when you give them a try!
HUNGRY FOR MORE? Subscribe to my newsletter and follow along on Pinterest, Facebook, and Instagram for all my latest updates and culinary inspirations!
Pepperoni Pizza Sliders with Hawaiian Rolls
Ingredients
- 12 slider buns or Hawaiian rolls
- ¾-1 cup (175-235ml) pasta or pizza sauce
- 1 (6 oz)(170g) package pepperoni slices
- 1 (8 oz) (226g) package fresh mozzarella
- ½ cup (60g) grated Parmesan cheese
- ¼ cup (28g) butter melted
- ½ teaspoon garlic powder
- ½ teaspoon dried basil
- ½ teaspoon dried oregano
Instructions
-
Preheat oven to 350 degrees F (175°C). Lightly grease the bottom of a 9×13 baking pan and set aside.
-
Cut buns or sliders in half horizontally and set the tops aside. Place the bottom halves of the buns in the prepared pan and spread evenly with pasta sauce. Top each bun with pepperoni slices, using as many as desired (I typically use the whole package for good coverage). Slice the fresh mozzarella into 12 even slices and place one slice on top of the pepperoni for each bun. Carefully place the top halves of the rolls back on top of the cheese.
-
In a small bowl, combine the grated Parmesan cheese, melted butter, garlic powder, dried basil, and dried oregano. Stir well to combine. Generously spread this mixture over the entire top surface of the assembled buns using a pastry brush. Cover the pan with aluminum foil and bake for 25 minutes. After 25 minutes, remove the foil and continue baking for an additional 5 minutes, or until the tops are golden brown and the cheese is bubbly. Serve immediately while hot and enjoy!
Notes
- Nutrition Facts: Since different brands of ingredients have different nutritional information, the information shown is just an estimate. It’s provided for informational purposes only.
- Storage and Reheating: Store any leftover sliders in an airtight container in the refrigerator for up to 2-3 days. Reheat in a 300°F (150°C) oven for 10-15 minutes or until warm and cheese is melted.
Nutrition
*Originally published January 2017. Text updated, expanded, and optimized for SEO in [Current Month Year].*
