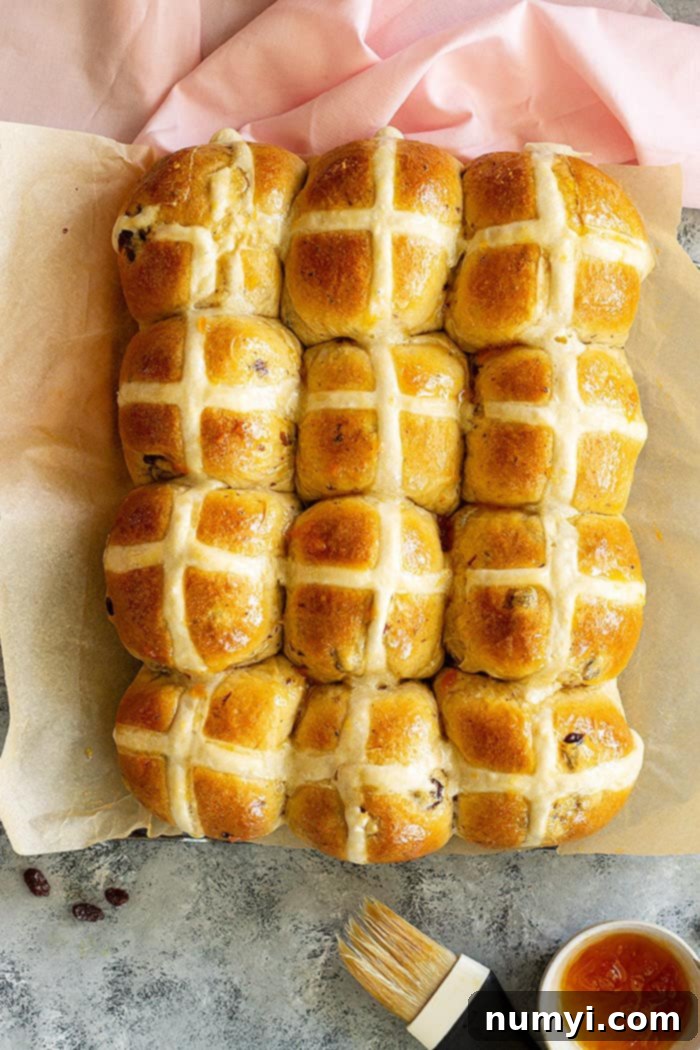
Easy Traditional Hot Cross Buns Recipe: Soft, Spiced, and Perfect for Easter
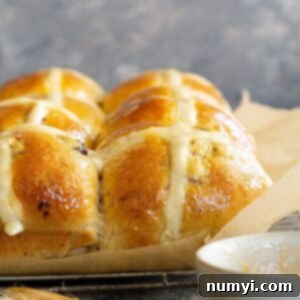
Discover how to make the ultimate old-fashioned Hot Cross Buns with this straightforward recipe. You’ll achieve irresistibly soft, lightly spiced rolls, generously studded with raisins, adorned with a traditional cross, and finished with a luscious apricot glaze.
There’s a special kind of magic that fills the kitchen when Hot Cross Buns are baking – the comforting aroma of cinnamon and nutmeg, the anticipation of biting into a warm, fluffy roll. While I personally adore the classic raisin-filled version, I know not everyone shares my enthusiasm (my husband included!). If dried fruit isn’t your favorite, feel free to explore other delicious yeast roll recipes like these Honey Wheat Rolls or our super flakey Crescent Rolls. And for those moments when you crave something without yeast, these incredible Buttermilk Biscuits are a perfect alternative. But for a true taste of tradition, especially as spring approaches, these Hot Cross Buns are simply essential.
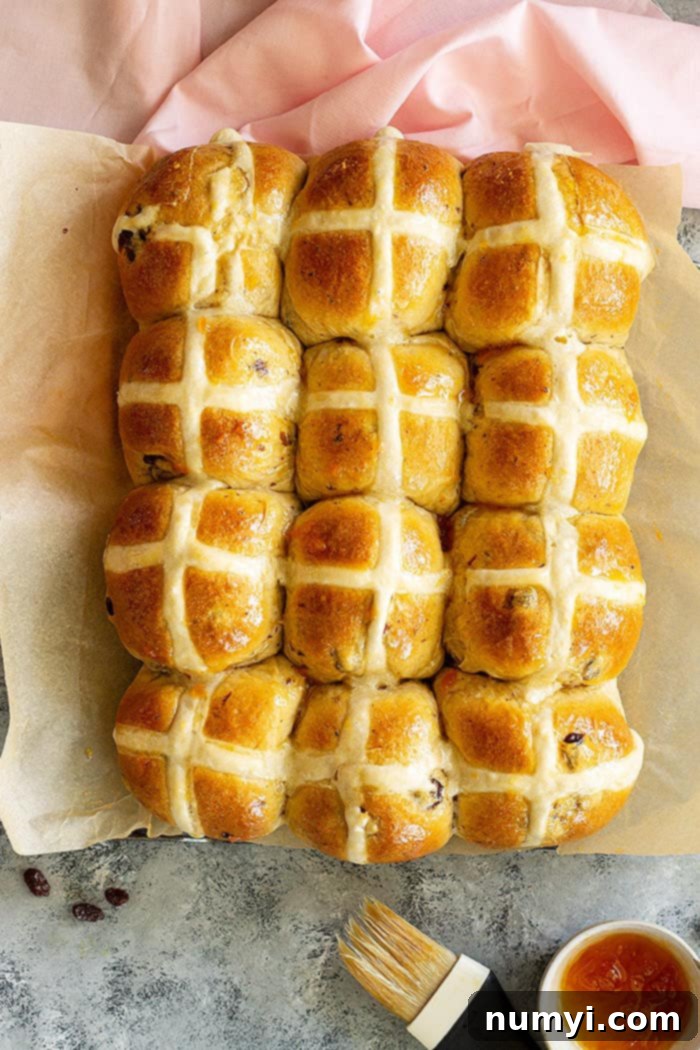
What Exactly Are Hot Cross Buns? A Taste of History and Tradition
Hot Cross Buns are more than just a delicious treat; they are deeply rooted in history and tradition, particularly associated with Christianity and the Easter season. These sweet, spiced rolls were traditionally baked and consumed on Good Friday, symbolizing the crucifixion of Jesus Christ with the distinctive cross piped on top. Their origins trace back to the 12th century, with some accounts attributing their popularization to a monk who marked them with a cross as a tribute to Good Friday.
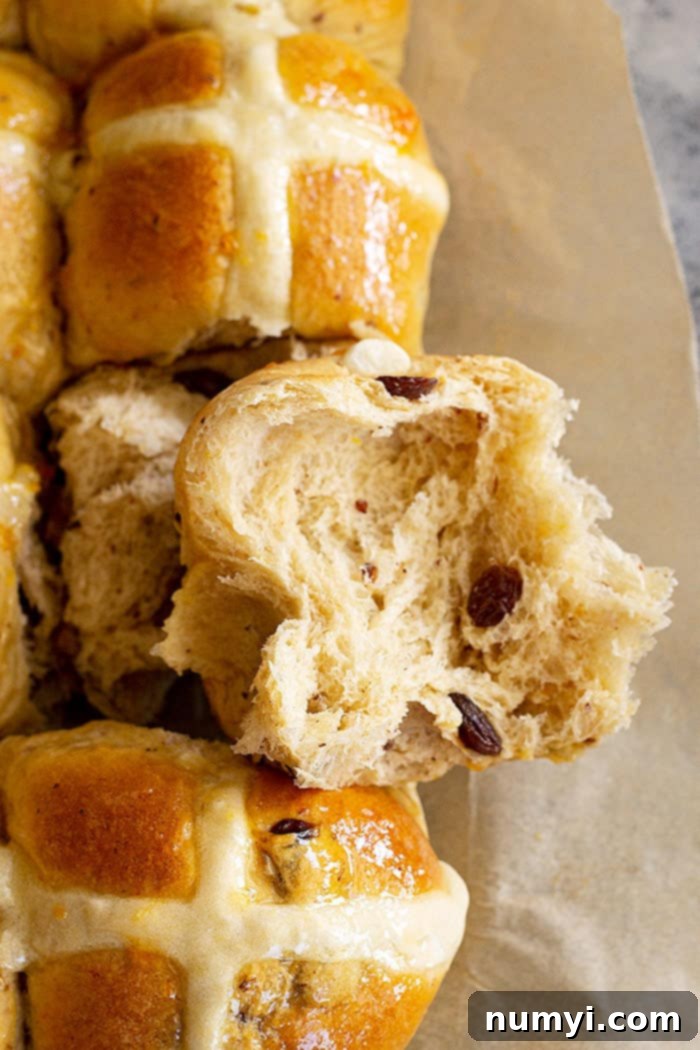
While Good Friday remains their most traditional day, many people recall enjoying them throughout the entire Lenten period, leading up to Easter Sunday. These delightful buns are characterized by their soft, slightly sweet dough, which is infused with warming spices like cinnamon, nutmeg, and clove, often complemented by a hint of orange zest and vanilla. The dough is traditionally studded with dried fruits such as raisins, currants, or sultanas, adding pockets of chewiness and natural sweetness to each bite.
The hallmark of a Hot Cross Bun, of course, is the cross. Historically, this was formed by either making shallow cuts into the dough before baking or by piping a simple flour and water paste onto the buns. In more modern interpretations, bakers often opt for an icing cross, drizzled onto the buns after they’ve cooled. Both methods yield equally delicious results and contribute to the iconic appearance of these beloved rolls.
Why Bake Homemade Hot Cross Buns?
While store-bought Hot Cross Buns are readily available, there’s nothing quite like the experience of baking them from scratch. Homemade buns offer an unparalleled freshness, a melt-in-your-mouth texture, and the ability to customize them exactly to your liking. The process itself is incredibly rewarding, filling your home with an inviting aroma that signifies spring and celebration. Plus, making them yourself allows you to control the quality of ingredients and ensures that each bun is packed with flavor and love – a truly special touch for your Easter or Good Friday feast.
Crafting These Traditional Hot Cross Buns: A Step-by-Step Guide
Making these classic spiced buns might seem daunting, but with a clear, step-by-step approach, you’ll find the process enjoyable and the results incredibly rewarding. This recipe is designed to be accessible, guiding you through each crucial stage to ensure light, fluffy, and perfectly flavored Hot Cross Buns every time.
- Activate the Yeast: The Foundation of Fluffy Buns. This initial step is critical. You’ll combine warm milk, yeast, and a touch of sugar. The warmth of the milk (around 110°F or 43°C) is key – too hot will kill the yeast, too cold won’t activate it. After about 5 minutes, your mixture should look foamy, indicating that your yeast is alive and ready to work its magic. If you don’t see foam, your yeast may be old or inactive, and it’s best to start with a fresh batch.
- Prepare the Dough: Mixing for Perfection. Once your yeast is bubbly, add the remaining ingredients, including bread flour, egg, softened butter, salt, and the wonderful array of spices and orange zest. Stir everything together until just combined. You can use a stand mixer with a dough hook for ease, or mix by hand.
- Kneading for Elasticity: Developing Gluten. The next vital step is kneading. This process develops the gluten in the flour, which gives the buns their structure and chewiness. With a stand mixer on a low speed (like 1 or 2), you’ll knead for approximately 10 minutes. If kneading by hand, it will take a bit longer, perhaps 15-20 minutes. You’re looking for a smooth, elastic dough that springs back when gently poked. If you’re new to kneading dough by hand, this video from King Arthur Flour offers excellent guidance.
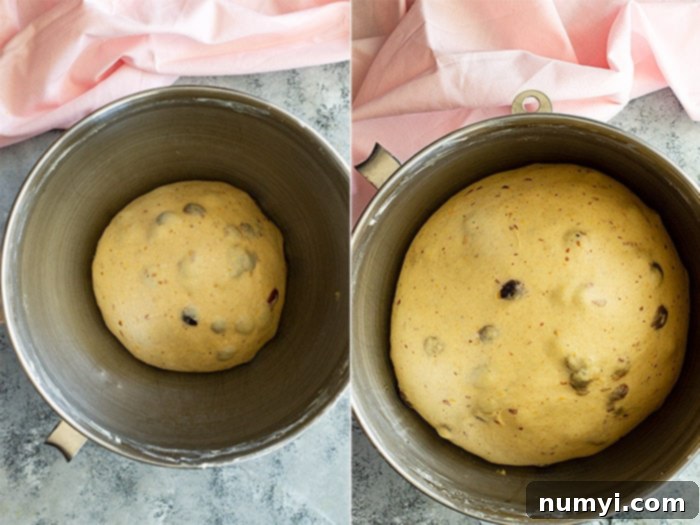
- First Rise (Bulk Fermentation): Patience is a Virtue. After kneading, place your dough in a lightly greased bowl, cover it loosely with plastic wrap, and let it rise in a warm, draft-free spot. This first rise allows the yeast to ferment, creating air bubbles that contribute to the buns’ light texture. The dough should roughly double in size, which can take 1 to 1.5 hours depending on your kitchen’s temperature.
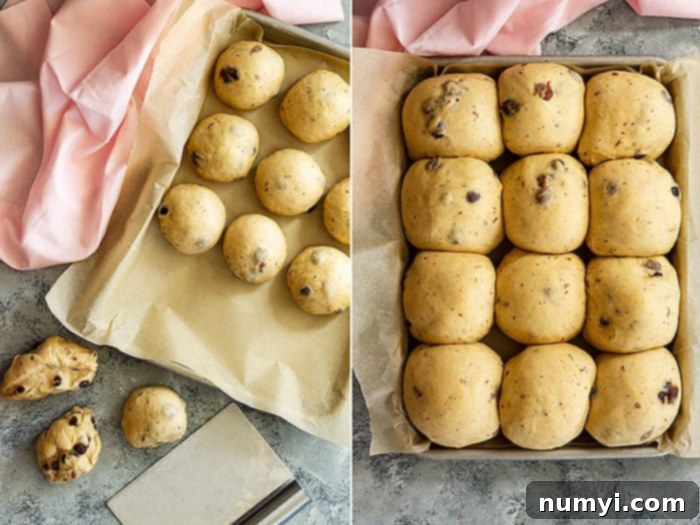
- Shape and Second Rise (Proofing): From Dough to Buns. Once the first rise is complete, gently punch the dough down to release the air. Turn it out onto a clean work surface (avoid adding extra flour, as this can make the buns tough). Knead it a few times to evenly redistribute the yeast, then divide the dough into 12 equal portions. Shape each portion into a smooth, round ball and arrange them in a greased 9×13 baking pan. Cover again and let them undergo a second rise until almost doubled. This proofing stage is essential for achieving an airy, tender crumb.
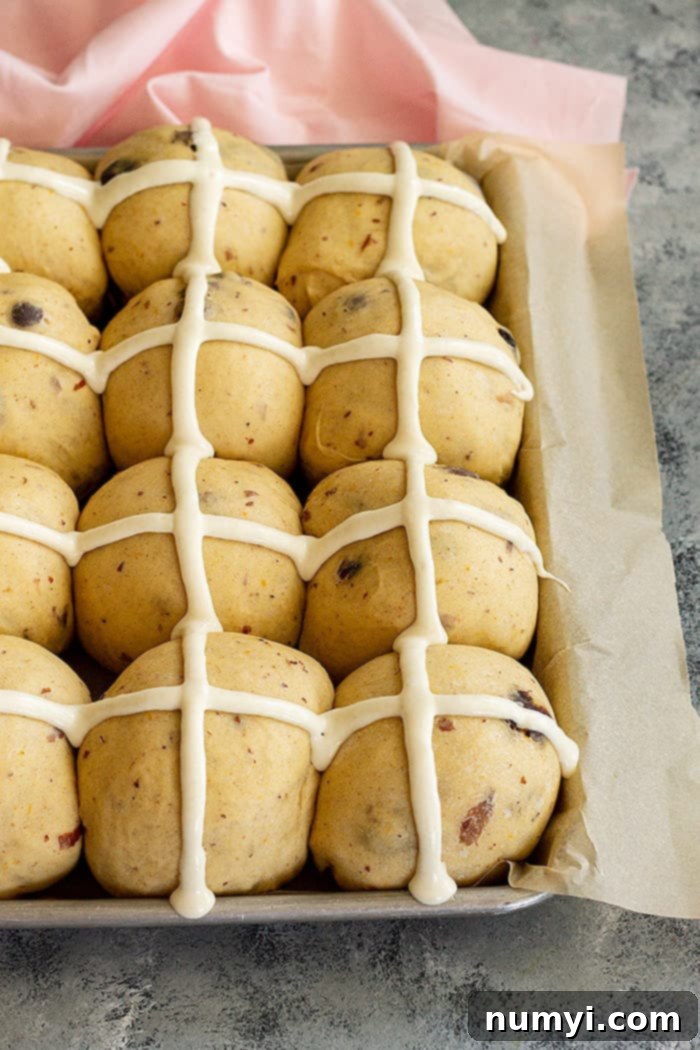
- Pipe the Crosses: The Signature Touch. Before baking, prepare your cross mixture (either flour paste or icing, as detailed below) and pipe a thick cross onto the top of each risen bun.
- Bake to Golden Perfection: Place the buns in a preheated oven and bake until they are beautifully golden brown. This usually takes between 20-25 minutes.
- Glaze for Shine and Flavor: Once the buns are out of the oven and slightly cooled, brush them with your chosen sweet glaze. This adds a lovely shine and an extra layer of flavor.
The Iconic Cross: Two Traditional Methods
The cross is the defining feature of a Hot Cross Bun, and there are two primary methods to achieve it. Both are authentic, offering slightly different textures and aesthetics.
Traditional Flour Paste Cross (Before Baking)
This is the older, more rustic method that gives the buns their characteristic slightly chewy cross, contrasting with the soft dough.
- To create the paste, simply combine all-purpose flour with just enough water. You’re aiming for a consistency that is thick enough to hold its shape but still smooth and easily pipeable. Start with less water and add tiny amounts until you reach the desired texture.
- Spoon the paste into a piping bag fitted with a small round tip, or use a sturdy sandwich bag with a tiny corner snipped off.
- Carefully pipe a cross over the top of each bun after the second rise, just before they go into the oven. For a visual guide, RecipeTin Eats has a great video demonstrating how to pipe these crosses effectively.
- Buns marked this way will have a distinct, slightly chewy texture to the cross, which many find delightful and authentic.
Sweet Icing Cross (After Baking)
This method results in a softer, sweeter cross that stands out more visually against the baked bun. It’s often preferred for a cleaner, more decorative finish.
- Once your buns have baked and cooled completely, it’s time for the icing cross. Mix powdered sugar with a small amount of milk or water. The key here is thickness: you want an icing that is thick enough to maintain its shape when piped, not runny.
- Transfer the icing to a piping bag or a sandwich bag with a snipped tip.
- Pipe the crosses onto the cooled buns. If you’re also planning to apply a sweet glaze over the entire bun, do that first and allow it to dry slightly before piping the icing cross. This prevents the icing from melting or smudging into the glaze.
Finishing Touch: The Sweet Glaze
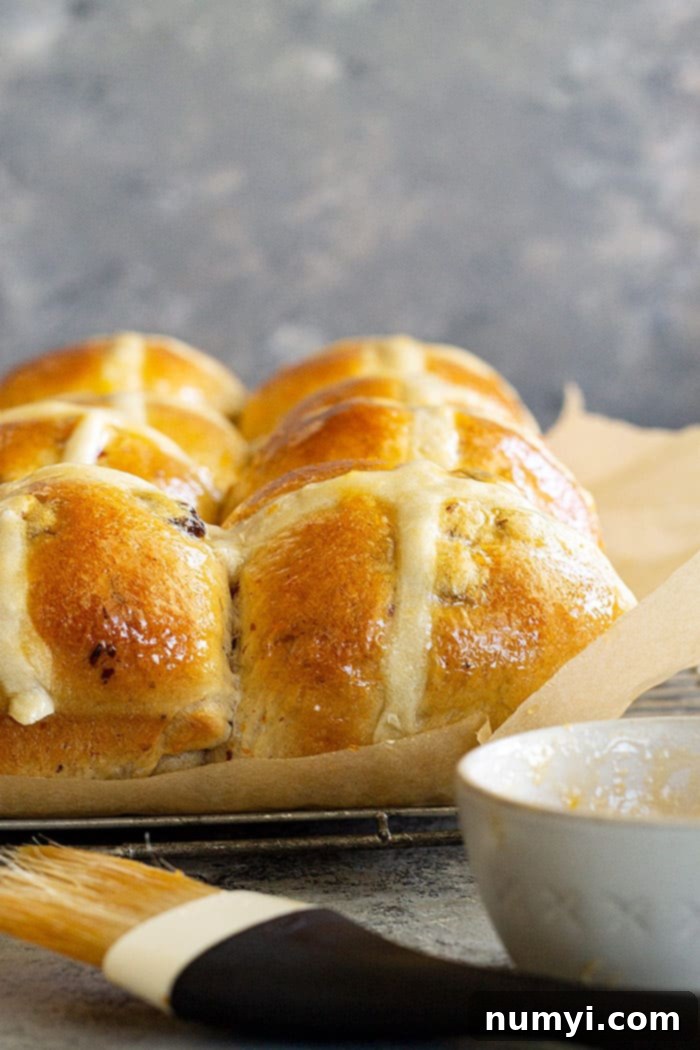
While optional, glazing your Hot Cross Buns adds a beautiful shine, helps keep them moist, and contributes an extra layer of sweetness and flavor. It’s a simple step that elevates your homemade buns to bakery-quality perfection. Here are a couple of excellent options:
- Easy Fruit Jelly Glaze: This is my preferred method for its simplicity and wonderful flavor. Use apricot jelly or orange marmalade. Simply warm a small amount of your chosen jelly or marmalade with a tiny splash of water (about a teaspoon or two) in a saucepan over low heat until it becomes fluid and easily brushable. You can also microwave it briefly. For an extra smooth glaze, you can strain out any fruit bits before brushing it generously over the warm buns. The apricot or orange flavor beautifully complements the spices in the buns.
- Simple Syrup Glaze: A classic choice for adding shine and a subtle sweetness. To make it, combine ½ cup of granulated sugar with ⅓ cup of water in a small saucepan. Bring the mixture to a boil, stirring constantly until the sugar has completely dissolved. Remove from heat and let it cool slightly. Brush this simple syrup over the warm, freshly baked buns. This glaze is clear and allows the golden color of the buns to shine through.
Tips for Baking Perfect Hot Cross Buns
- Don’t Rush the Rise: Dough rising takes time. Be patient and allow the dough to rise in a warm, draft-free place until genuinely doubled in size for the best texture.
- Measure Flour Correctly: For accurate results, spoon your flour into the measuring cup and then level it off with a straight edge. Scooping directly can compact the flour and result in too much, making your buns dry.
- Adjust Liquid as Needed: Humidity and flour type can affect how much liquid your dough needs. If the dough seems too sticky during kneading, add a tiny bit more flour (½ tablespoon at a time). If it’s too stiff and dry, add a touch more milk.
- Fresh Yeast is Best: Ensure your active dry yeast is fresh and active. An easy way to check is with the initial yeast activation step; if it doesn’t foam, discard and start with new yeast.
- Customize Your Dried Fruit: While raisins are traditional, feel free to use a mix of dried fruits like currants, sultanas, or even finely chopped candied peel. If you truly dislike dried fruit, you can omit it entirely or substitute with chocolate chips for a modern twist!
Serving Suggestions
Hot Cross Buns are at their absolute best when served warm, straight from the oven, or gently reheated. Enjoy them simply with a smear of butter, or for an extra treat, pair them with jam, clotted cream, or a dollop of whipped cream. They make a fantastic addition to Easter brunch spreads, a comforting snack with tea or coffee, or a delightful dessert.
HUNGRY FOR MORE? Subscribe to my newsletter and follow along on Pinterest, Facebook, and Instagram for all my latest updates!
Hot Cross Buns
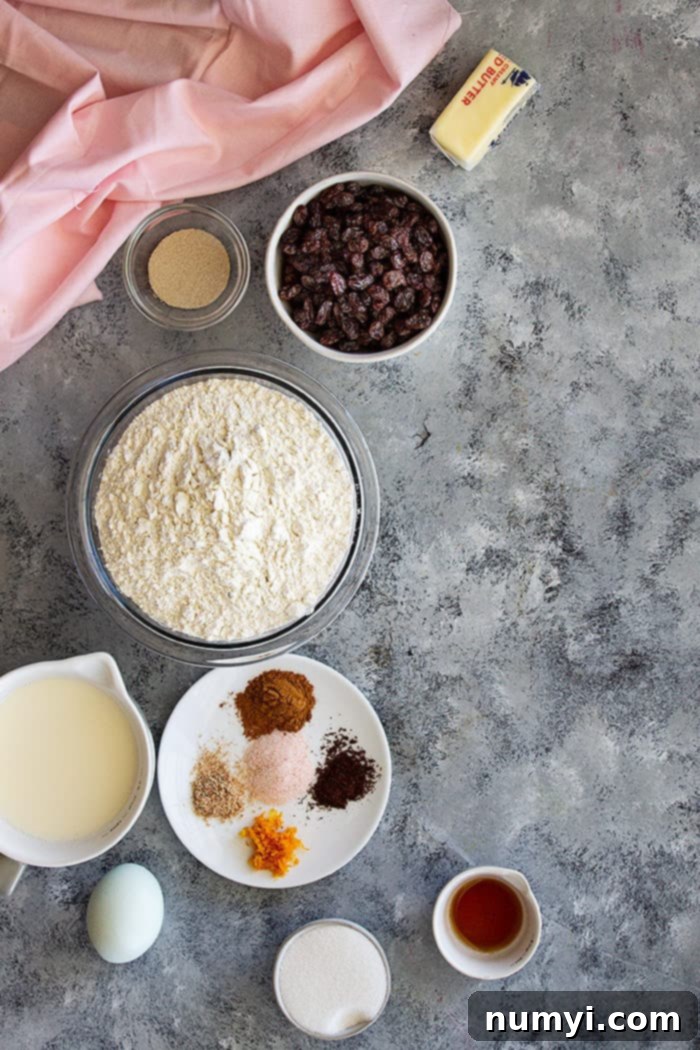
Ingredients
- 1¼ cups (295ml) warm milk (about 110°F)
- 1½ teaspoons active dry yeast
- ¼ cup (55g) sugar
- 3-3½ cups (460g) bread flour
- 1 large egg, lightly beaten
- 3 tablespoons butter, softened
- 1 teaspoon salt
- 1 teaspoon ground cinnamon
- ½ teaspoon ground nutmeg
- ¼ teaspoon ground clove
- 1 teaspoon vanilla
- zest of ½ an orange
- 1 cup (135g) raisins, currants, or sultanas
For the Cross:
- ⅓ cup (45g) all purpose flour
- 3-4 tablespoons water
Sweet Glaze:
- Apricot jelly or orange marmalade (thinned with a tiny bit of water)
Instructions
-
In the bowl of your stand mixer, whisk together the warm milk, active dry yeast, and sugar. Let this mixture stand for 5 minutes, or until it becomes noticeably foamy. This step confirms your yeast is alive and active.
-
Add the remaining ingredients for the dough (bread flour, egg, softened butter, salt, cinnamon, nutmeg, clove, vanilla, orange zest, and raisins/currants/sultanas) to the yeast mixture. Stir until everything is just combined. Attach the dough hook to your mixer and knead on low speed (speed 1 or 2) for about 10 minutes, or until the dough is smooth, elastic, and pulls away from the sides of the bowl. Alternatively, knead by hand for 15-20 minutes. Lightly grease a large bowl, place the dough inside, and cover it loosely with plastic wrap. Let it rise in a warm place until it has doubled in size (approximately 1-1.5 hours).
-
While the dough is rising, lightly grease a 9×13 inch baking pan and set it aside.
-
Once the first rise is complete, gently punch the dough down to release the air. Turn the dough out onto a clean work surface (avoid adding extra flour). Knead the dough a few times to ensure an even distribution of air bubbles. Divide the dough into 12 equal portions. Shape each portion into a smooth, round ball and arrange them evenly in your prepared baking pan.
-
Cover the pan loosely with plastic wrap and let the buns rise in a warm area for a second time, until they are almost doubled in size and look puffy (about 30-45 minutes). Towards the end of the second rise, prepare the cross mixture: In a small bowl, combine the ⅓ cup all-purpose flour with 3-4 tablespoons of water, stirring until you have a thick but pipeable, smooth paste. Spoon this paste into a piping bag or a sandwich bag with a small tip cut off. Carefully pipe a thick cross onto the top of each risen bun. Preheat your oven to 375°F (190°C).
-
Bake the Hot Cross Buns in the preheated oven for 20-25 minutes, or until they are golden brown on top and sound hollow when tapped. Remove the pan from the oven and let the buns cool in the pan for 5-10 minutes. While they are still warm, prepare your glaze: warm a small amount of apricot jelly or orange marmalade with a tiny bit of water until it’s thin and brushable. Brush this sweet glaze generously over the tops of the warm rolls for a beautiful shine and extra flavor. Let cool completely on a wire rack if you plan to pipe an icing cross later.
Notes
- Storage: To maintain their freshness, ensure your Hot Cross Buns are completely cooled before storing. Tightly wrap them in plastic wrap or place them in an airtight container at room temperature for up to 5 days. For extended freshness, store them in the refrigerator for up to 10 days. Reheat gently in the microwave or oven for the best experience.
- Make-Ahead Instructions: For convenience, you can prepare the dough in advance. After you have fully kneaded the dough, place it in a lightly greased bowl and cover it tightly with plastic wrap. Refrigerate the dough for up to 15 hours. When you’re ready to bake, remove the dough from the refrigerator and let it come to room temperature (this usually takes about 2 hours, or until it looks slightly puffy and relaxed) before proceeding with shaping the rolls and the second rise as directed in the recipe.
- Freezer Friendly: Hot Cross Buns freeze beautifully in a couple of ways:
- Unbaked: After the first rise, punch the dough down and shape it into individual rolls. Place the shaped rolls on a lightly greased baking sheet and freeze for several hours until they are completely solid. Once frozen, transfer the rolls to a freezer-safe bag or airtight container. Freeze for up to 3 months. To bake, remove the desired number of frozen rolls, place them on a greased baking sheet, and let them thaw completely at room temperature (this can take 4-5 hours) and undergo their second rise. Once thawed and risen, bake as directed.
- Baked: Allow completely cooled baked buns to be wrapped tightly in plastic wrap and then placed in a freezer-safe bag or container. Freeze for up to 3 months. To serve, thaw at room temperature or gently reheat in a microwave or oven until warm and soft.
- Nutrition Facts: Please note that nutritional information is an estimate. Since different brands of ingredients have varying nutritional values, the information provided may not be exact. The nutrition facts listed do not include the optional apricot glaze, which would add additional sugars and calories.
Nutrition
