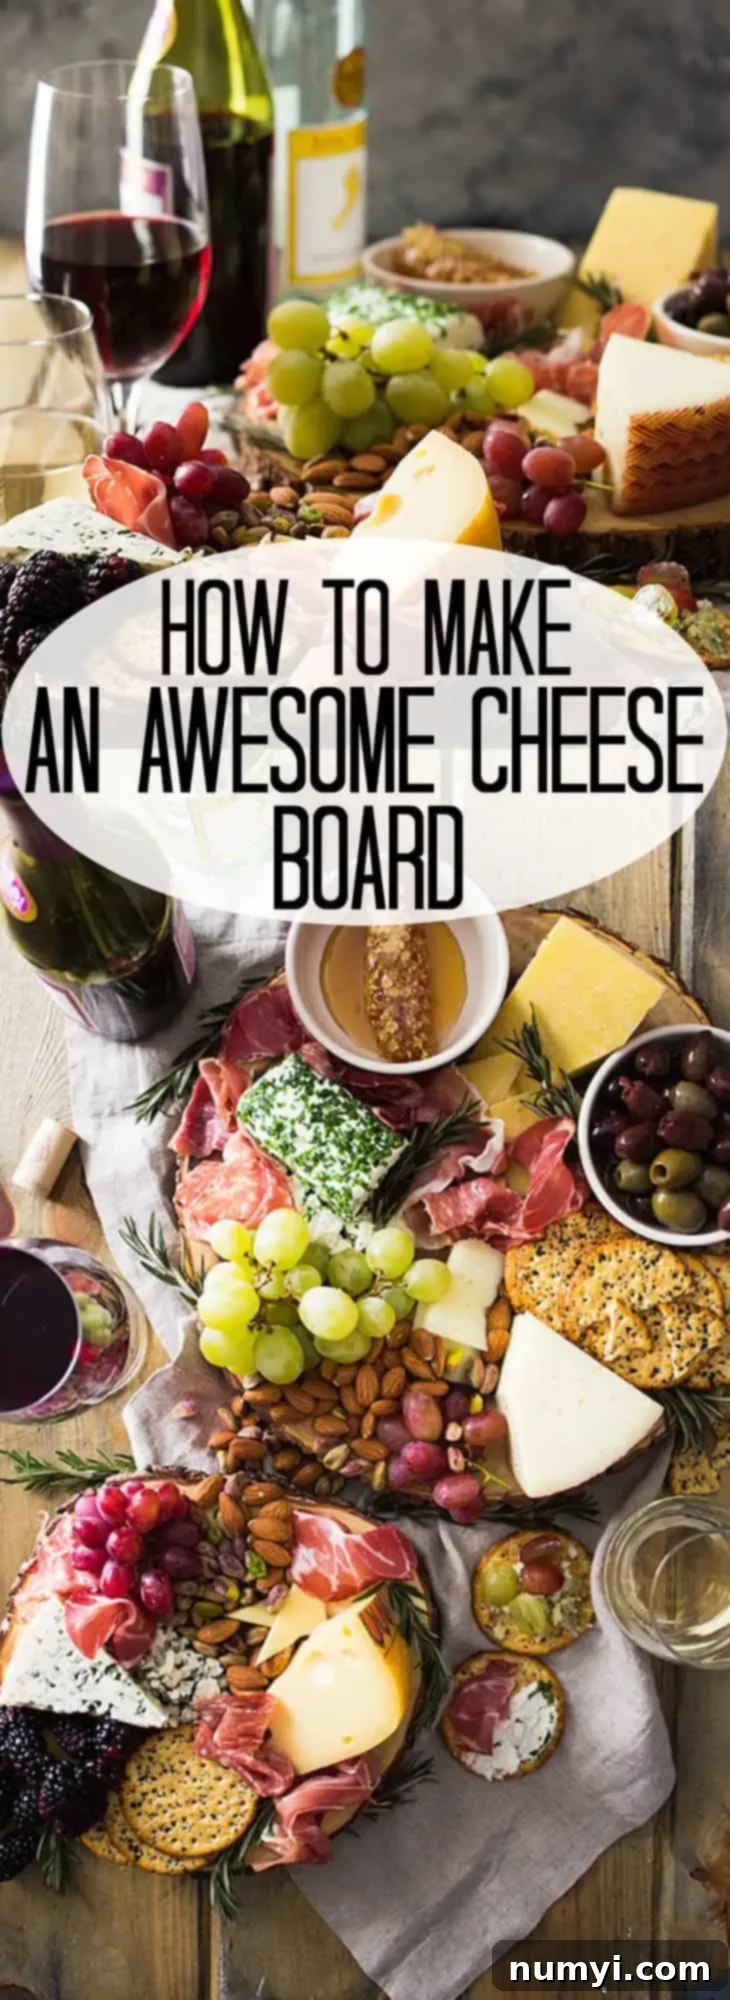
The Ultimate Guide to Crafting an Easy & Impressive Charcuterie Board for Any Occasion
Discover how to make this Easy Charcuterie Board your signature appetizer for every holiday and special gathering! Perfect for Thanksgiving, Christmas, Easter, birthdays, showers, or just a delightful evening with friends, this board is a crowd-pleaser. Loaded with an exquisite selection of cheeses, fruits, premium charcuterie, and more, this is the ultimate large charcuterie board designed for unforgettable entertaining!
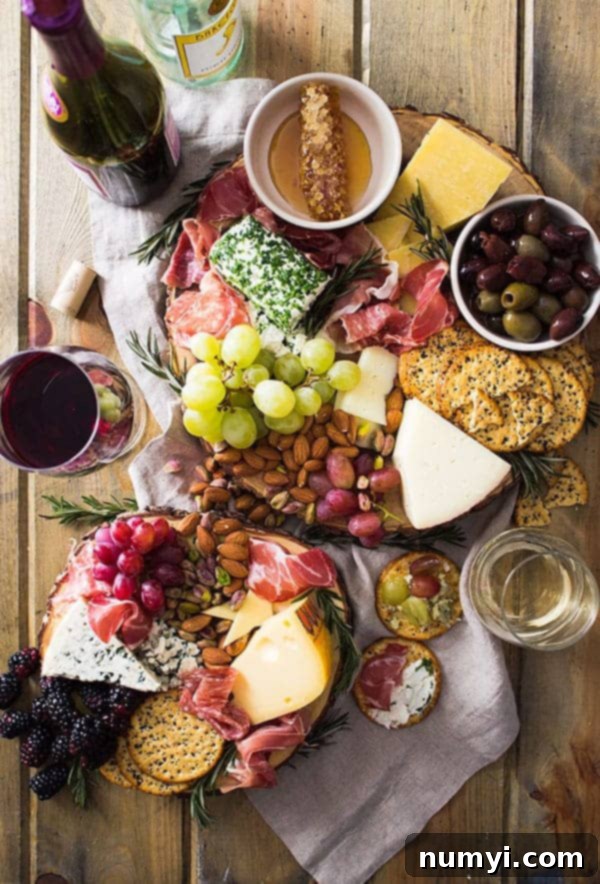
Mastering the Art of the Easy Charcuterie Board
There’s something inherently sophisticated about a well-curated charcuterie board. It transforms a simple appetizer into a culinary experience, offering a delightful array of flavors and textures in every bite. When I first ventured into creating my “real” cheese and meat board, I was genuinely surprised by how enjoyable and utterly delicious the process and the result were! The harmonious blend of sweet honey, savory meats, creamy and sharp cheeses, and fresh, vibrant fruits created a symphony for the taste buds that was truly to die for.
While a gourmet charcuterie board might seem like a luxury, it’s an investment that pays off in compliments and happy guests. Yes, it might cost a bit more than a pre-made grocery store tray, but the quality, freshness, and sheer impressiveness of a homemade board are unparalleled. Plus, I typically reserve this lavish spread for special occasions, ensuring it remains a celebrated highlight rather than a weekly expense. However, be warned – once you and your guests start nibbling on this platter of goodness, you might find yourself looking for more excuses to assemble one!
For those times when I’m hosting, this easy charcuterie board is often in rotation alongside other fantastic spreads like a Bruschetta Board, a refreshing Vegetable Tray, a vibrant Fruit Tray, or my famous Taco Cheese Ball Board. If a large crowd is expected, I almost always double up, pairing this spectacular charcuterie board with cheese with one of those other delightful options to ensure there’s plenty for everyone to enjoy.
If you’ve ever found yourself pondering the best cheese for a charcuterie board, wondering which other ingredients truly elevate the experience, or simply looking for tips on how to arrange it all for that show-stopping presentation, then congratulations – you’ve landed in the perfect spot! This guide is designed to transform you into a charcuterie connoisseur, ready to craft boards that are as easy to make as they are impressive to behold.
Why a Charcuterie Board is Your Go-To Appetizer for Any Gathering
A charcuterie board isn’t just food; it’s an experience. Here’s why this large charcuterie board will quickly become your favorite entertaining secret weapon:
- Perfect for Parties & Socializing: A well-stocked board serves as an instant conversation starter. Guests can graze at their leisure, discovering new flavor combinations and discussing their favorites. It encourages mingling and creates a relaxed atmosphere, making it ideal for any social event, from casual get-togethers to elegant holiday celebrations.
- Big Enough to Satisfy a Crowd: Forget endless trips to the kitchen for refills. A thoughtfully assembled large charcuterie board is designed to feed many, ensuring everyone gets their fill without you constantly tending to appetizers. With proper planning, it can even serve as a light meal for smaller groups.
- Made with Wholesome and Delicious Ingredients: Beyond the indulgence, a charcuterie board incorporates a variety of fresh, wholesome elements like fruits, nuts, and quality cheeses. It’s a balanced offering that combines rich flavors with nutritious components, appealing to a wide range of tastes and dietary preferences.
- Totally Customizable to Your Taste: This is where the fun truly begins! A charcuterie board is incredibly versatile. You can tailor it to specific themes, seasons, dietary restrictions (gluten-free, vegetarian options), or simply your personal favorites. No two boards have to be identical, allowing for endless creativity and culinary exploration.
- Impressive, Instagram-Worthy Presentation: There’s no denying the visual appeal of a bountiful charcuterie board. With a little strategic placement, even a novice can create a stunning centerpiece that looks like it came straight from a gourmet magazine. The vibrant colors, varied textures, and artful arrangement make it an absolute showstopper that will leave your guests in awe.
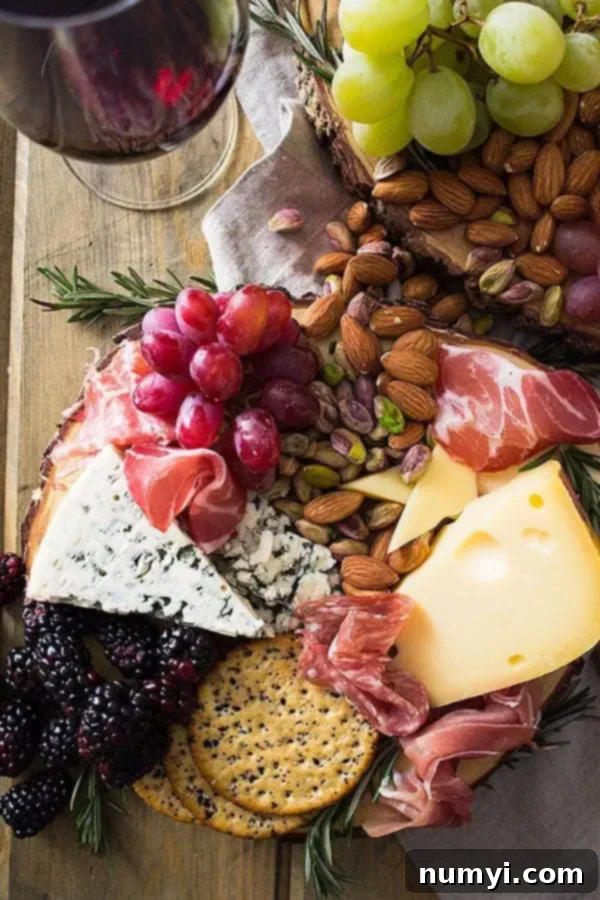
Essential Ingredients for Your Perfect Charcuterie & Cheese Board
The beauty of a charcuterie board lies in its flexibility. While you can certainly get creative and experiment with different flavor profiles, having a solid foundation of key ingredients will ensure a balanced and delightful spread. Think of these as your jumping-off points, but remember: the sky’s the limit for customization!
- CHEESES – The Star of the Show: A diverse cheese selection is crucial. Aim for 3-5 different types to offer variety in flavor and texture. A good rule of thumb is to plan for about 3 ounces of cheese per guest.
- SOFT – Creamy & Luxurious: These melt-in-your-mouth cheeses are always a hit. Think Goat cheese (chèvre) rolled in chopped fresh herbs (a personal favorite!), rich Brie, decadent Camembert, or the visually striking Humboldt Fog.
- SEMI-SOFT – Versatile & Approachable: These offer a good middle ground. Excellent choices include nutty Gouda, mild Jarlsberg, buttery Havarti, or a creamy Fontina.
- SEMI-HARD – Flavorful & Firm: These cheeses provide structure and robust flavor. Consider Spanish Manchego, earthy Gruyère, complex Comté, or a mature Provolone.
- HARD – Sharp & Pungent: Perfect for grating or breaking into shards, these add a salty kick. Options include an Aged cheddar, salty Parmesan (Parmigiano-Reggiano), or sharp Aged Asiago.
- BLUE – Bold & Distinctive (Optional but Recommended): For those who love a strong flavor, a good quality blue cheese is a must. Options like Gorgonzola, Roquefort, or a mild Stilton can be surprisingly delicious, especially when paired with honey.
- NUTS – Crunchy Texture & Savory Notes: Nuts add a satisfying crunch and a good source of healthy fats. Popular choices include Almonds (roasted or raw), earthy Pistachios, or sweet and salty Candied walnuts. Pecans and Cashews are also excellent additions.
- HONEY & Spreads – Sweet & Tangy Accents: Honey is an absolute must for pairing with cheeses, especially blue cheese – trust me, it’s a game-changer! Consider adding other spreads like fig jam, fruit preserves, spicy mustard, or even a savory chutney to offer different flavor dimensions.
- MEATS – The Charcuterie Component: Select a variety of cured meats with different flavor profiles and textures. Prosciutto (thinly sliced), various types of Salami (like Genoa, Soppressata, or Calabrese), Capicola (Coppa), or spicy Chorizo all work wonderfully. Aim for 2-3 types.
- FRUIT – Freshness & Sweetness: Seasonal fresh fruits add color, sweetness, and a refreshing contrast to the rich meats and cheeses. Year-round favorites include Grapes (red and green), plump Blackberries, sliced Apples or Pears, and beautiful fresh Figs when in season. Dried fruits like Apricots, Cranberries, or Dates also provide concentrated sweetness and chewy texture.
- CRACKERS & Bread – The Perfect Scooping Vessels: You’ll need a selection of sturdy, crispy crackers that won’t fall apart. Opt for varieties beyond simple Ritz crackers, such as water crackers, multi-grain crackers, seed crackers, or artisanal crisps. Thinly sliced baguette rounds or crispy breadsticks (grissini) or toasted crostini are also fantastic additions.
- OLIVES & Pickled Items – Briny & Tangy Bites: These offer a delightful pop of brininess and acidity that cuts through the richness of the other ingredients. Include a mix of green and black olives (avoid canned for best flavor), small cornichons (mini gherkins), pickled onions, or marinated artichoke hearts.
- WINE & Beverages – Thoughtful Pairings (Optional): While optional, offering a well-paired wine can elevate the experience. Research which types of wine best complement the specific cheeses you’ve selected. For non-alcoholic options, sparkling cider, flavored seltzers, or a sophisticated mocktail can be just as enjoyable.
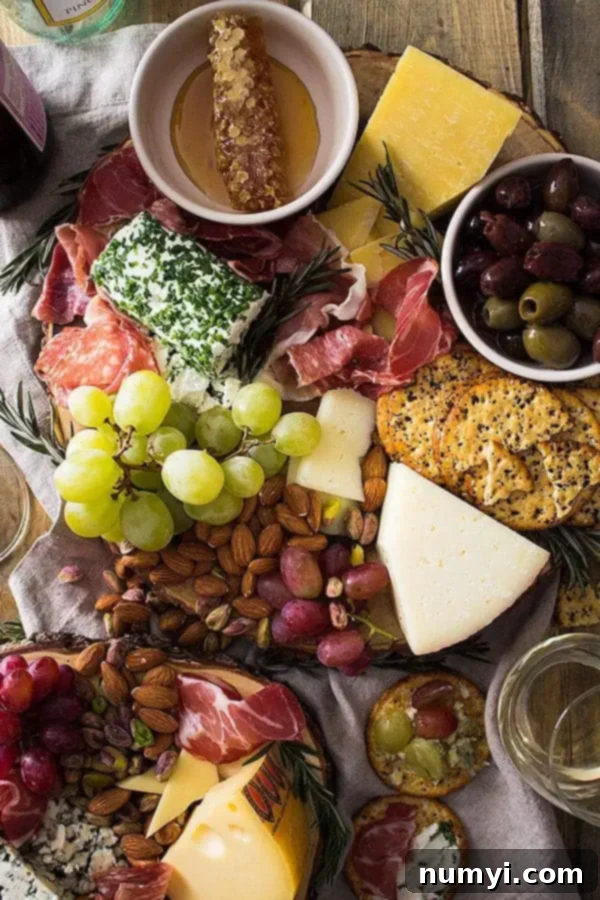
Step-by-Step Guide: Assembling Your Stunning Charcuterie Board
Crafting a beautiful charcuterie board might seem like an art form reserved for culinary experts, but with a few simple steps, you can create a masterpiece. The key is thoughtful preparation and a strategic assembly process that builds layers of flavor and visual appeal.
RECIPE PREP: Before you begin arranging, it’s essential to prepare all your ingredients. Wash and dry all fresh fruits thoroughly. Chop any hard cheeses or larger fruits into manageable, bite-sized pieces. Remove crackers and bread from their packaging and slice as needed. If you’re using honey or jams, get your small serving bowls ready. Pre-preparation makes the assembly process smooth and stress-free.
CREATE SMALL LABELS (Optional, but Highly Recommended): This simple step elevates your charcuterie board from good to extraordinary. Small labels not only add a touch of elegance but are incredibly helpful for your guests. They can inform about specific cheese types, identify meats, and most importantly, assist guests with allergies or dietary restrictions. You can use small chalkboard signs, card stock, or even tiny flags to label each item, making the board interactive and informative.
ASSEMBLE THE EASY CHARCUTERIE BOARD: Now for the creative and fun part! To ensure all flavors are at their peak, I recommend setting up your charcuterie board about 30 minutes before serving. This allows the cheeses to come to room temperature, which enhances their flavor and texture considerably.
- Choose Your Canvas: Start with a generously sized board. Wood, slate, or marble boards all offer a beautiful backdrop for your spread.
- Anchor with Cheese and Bowls: Begin by strategically placing your cheeses on the board. Arrange them with varying textures and shapes. Remember to place a small knife or spreader next to each different cheese variety for easy serving. This is also the time to place any small bowls or ramekins you’re using for honey, olives, jams, or other liquid/messy items.
- Arrange the Meats: Next, artfully arrange the cured meats in between the cheeses and around the bowls. For an appealing presentation, avoid simply laying them flat. Try folding larger slices of prosciutto into ribbons or roses, or layering salami slices in a cascading pattern. This adds volume and visual interest.
- Add the Labels: If you’ve prepared labels, place them beside their corresponding items now.
- Fill the Gaps with Extras: This is where your board truly comes alive! Fill in all the remaining spaces with your “extras.” Scatter nuts (almonds, pistachios, candied walnuts) in clusters. Tuck in fresh fruits like grapes, blackberries, and sliced figs. Place your olives and pickled items in their designated bowls or directly onto the board. Drizzle honey into a small bowl or directly over a block of blue cheese for a stunning effect.
- Place Crackers & Bread: The crackers and bread can either be placed directly on the board, artfully arranged around the edges, or in small bowls to the side for easy access, as shown in the pictures. Offer a variety of shapes and textures.
- Garnish for Flair: To truly go above and beyond, consider garnishing your large charcuterie board. Sprigs of fresh rosemary, thyme, or basil can add an aromatic touch. Edible flowers bring a pop of color, while seasonal elements like small evergreen branches during Christmas, or playful candy eggs for Easter, can tie your board to the occasion.

Frequently Asked Questions About Charcuterie Boards
The 3-3-3-3 rule is a fantastic guideline for beginners who might feel overwhelmed by choices. It suggests including: three types of meat, three kinds of cheese, three “vessels” like bread or crackers, and three “extras” such as nuts, fruit, and honey. This rule helps ensure a balanced board with a good variety without overthinking it. Feel free to adapt it – for a larger crowd, you might aim for 4-4-4-4 or even more!
You absolutely don’t need gourmet ingredients to make a delicious and appealing charcuterie board. Simple, accessible ingredients work wonderfully! Think about budget-friendly cheeses like cream cheese, sharp cheddar, Colby Jack, or provolone. For meats, simple deli slices like ham, turkey, or pepperoni are perfectly acceptable. Olives, basic crackers, apple slices, grapes, and even pretzels can make a fantastic and easy charcuterie board. The goal is variety and appealing presentation, not necessarily expensive items. Make this easy charcuterie your way without breaking the bank!
While most meats, cheeses, and nuts are fair game, it’s best to avoid highly watery fruits that can make your board soggy or messy as they sit. This includes items like large slices of watermelon or pineapple. While fresh tomatoes can be great, stick to cherry or grape tomatoes rather than large sliced ones. Overly pungent or very soft, easily crushed items might also be challenging to manage on a board. Grapes, berries (blackberries, raspberries, blueberries), apple slices, pear slices, and dried fruits like raisins or apricots are generally your best and safest bets for fruit additions.
For optimal freshness and presentation, it’s best to assemble your charcuterie board no more than 1-2 hours before serving. However, you can do a lot of prep work in advance! Wash and cut fruits, slice bread, arrange crackers, and get your cheeses out to come to room temperature (about 30 minutes before assembly). Meats can be fanned or folded ahead of time and kept covered in the fridge. Final assembly should be done just before guests arrive to keep everything looking its best.
If the charcuterie board is a light appetizer, plan for about 2-3 ounces of cheese and 2-3 ounces of meat per person. If it’s intended to be more substantial, or if it’s the main focus of the gathering, increase that to 4-6 ounces of cheese and meat per person. Adjust the quantities of crackers, fruits, and nuts accordingly, aiming for abundance so the board looks full and inviting.
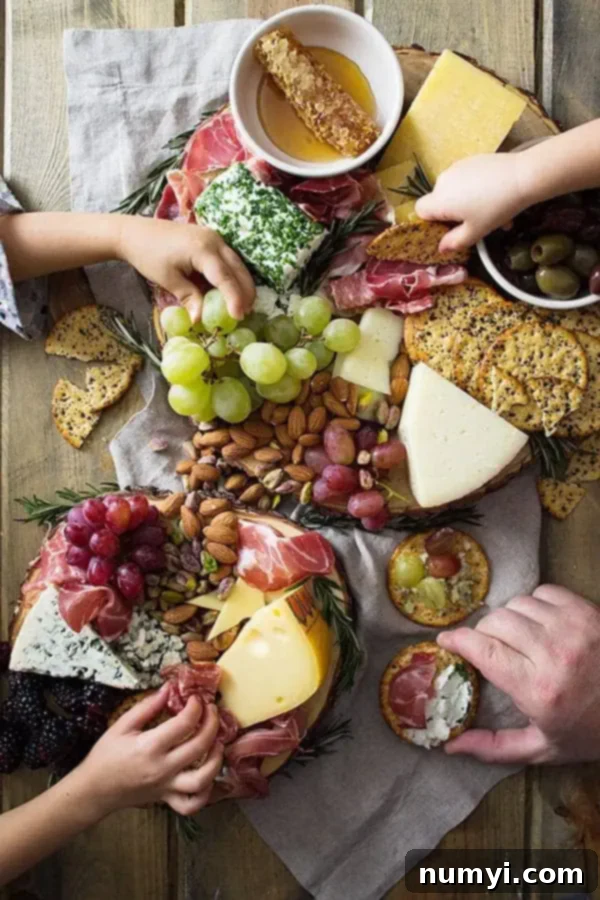
Pro Tips for a Flawless Charcuterie Board
Creating an impressive charcuterie board is easier than you think. Keep these expert tips in mind for a truly flawless and memorable presentation:
- Let Your Cheese Breathe and Bloom: This is arguably the most crucial tip! Always allow your cheeses to come to room temperature for at least 30 minutes (and up to an hour for very hard cheeses) before serving. Chilled cheese is muted in flavor and firm in texture. At room temperature, the fats in the cheese soften, releasing their full aromatic and nuanced flavors, making them far more enjoyable.
- When in Doubt, Embrace Simplicity: While it’s fun to create a sprawling, large charcuterie board with 5-6 different types of cheeses and as many meats, you absolutely don’t have to! The true beauty of an easy cheese board lies in its adaptability. Sometimes, a smaller, carefully selected assortment of high-quality items can be more impactful than an overwhelming spread. Focus on a few favorites and arrange them beautifully. Less can often be more, especially when you’re starting out.
- Be Strategic with Your Assembly Flow: Don’t just haphazardly throw items onto the board. A strategic approach will make assembly effortless and the final result stunning. Start by placing your anchor items: cheeses, then any small bowls for honey, jams, or olives. Next, arrange the larger meats. Then, strategically fill the remaining gaps with fruits, nuts, and crackers. This method creates a lush, abundant look and ensures everything has its place. The board will practically assemble itself if you follow this flow!
- Vary Textures and Colors for Visual Appeal: A visually appealing charcuterie board is a feast for the eyes before it’s a feast for the palate. Aim for a variety of textures – creamy cheeses, crispy crackers, chewy dried fruits, crunchy nuts, and tender meats. Incorporate a wide spectrum of colors through different fruits, vegetables, and garnishes to make your board pop.
- Don’t Forget Dips and Spreads: Beyond honey and jams, consider adding a small bowl of hummus, a flavorful pesto, olive tapenade, or a savory dip. These provide additional flavor dimensions and offer more pairing possibilities for your guests.
- Garnish Liberally: A few sprigs of fresh herbs (rosemary, thyme, mint), edible flowers, or small berry clusters can transform a good board into a great one. These small touches add freshness, aroma, and a professional finish, making your board look more abundant and inviting.
Explore More Delicious Appetizers
If you loved creating and sharing this easy charcuterie board, you’re sure to enjoy these other fantastic appetizer ideas for your next gathering:
- Cowboy Caviar Dip
- Easy Zucchini Pizza Bites
- Fresh Peach Salsa
- Pepperoni Pizza Sliders
Thanks so much for reading and for embarking on this delicious journey with me! I hope this ultimate guide empowers you to create your own stunning and easy cheese board. Let me know what you think and what your favorite combinations are!
HUNGRY FOR MORE? Subscribe to my newsletter and follow along on Pinterest, Facebook, and Instagram for all my latest updates and culinary inspirations!
Easy Charcuterie Board
Countryside Cravings
Save Recipe
Saved!
30 minutes
30 minutes
Prevent your screen from going dark
Ingredients
-
Goat cheese rolled in freshly chopped herbs -
Jarlsburg -
Manchego -
Aged white cheddar -
Blue Cheese -
Prosciutto -
Capocollo -
Salame Calabrese -
Green and red grapes -
Blackberries -
Black and green olives not the ones from the can -
Honey with comb -
Almonds -
Pistachios -
Multi grain crackers
Instructions
-
To assemble: start by placing your cheeses on your board. Cut a few slices from each and lay beside to make the platter feel more inviting. Fill in with your extras and keep things grouped together. If it is something runny like honey place in a small bowl.
-
Don’t forget the cheese knives, plates and napkins.
Notes
**Plan to serve about 3 ounces of cheese per guest.
Did you make this?
Let me know by sharing a picture and tagging @countryside_cravings on Instagram
