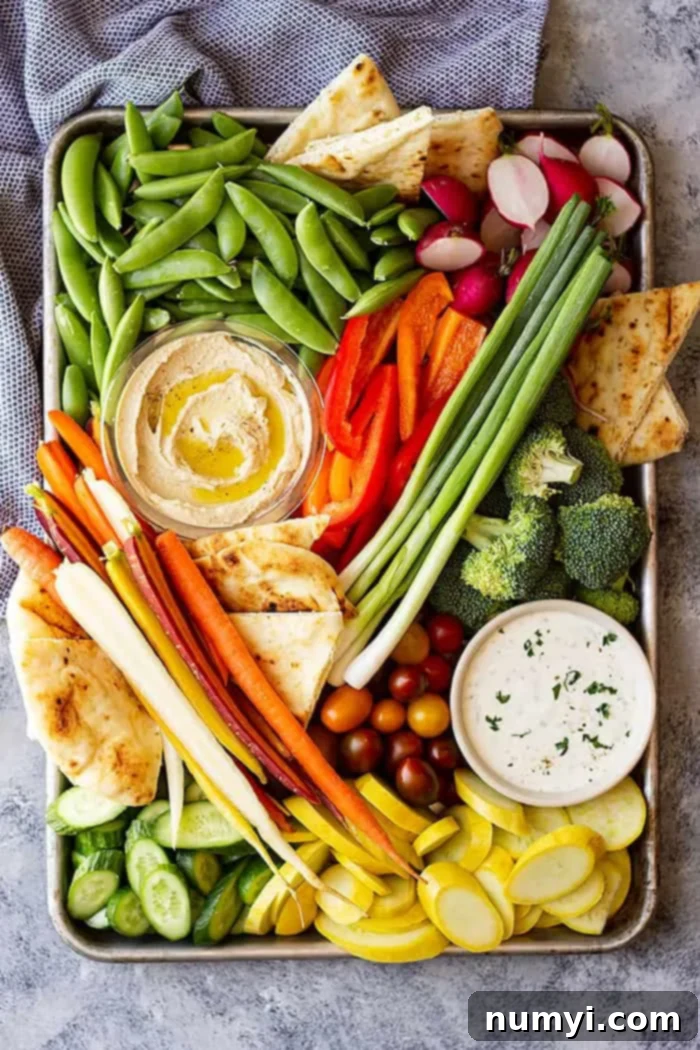
How to Make the Ultimate Crowd-Pleasing Vegetable Tray for Parties & Healthy Snacking
Elevate your next gathering with a stunning and healthy vegetable tray! This comprehensive guide provides all the tips and tricks to create an irresistible veggie platter with fresh, colorful produce and delicious dips in just 20 minutes, perfect for any party or holiday celebration.
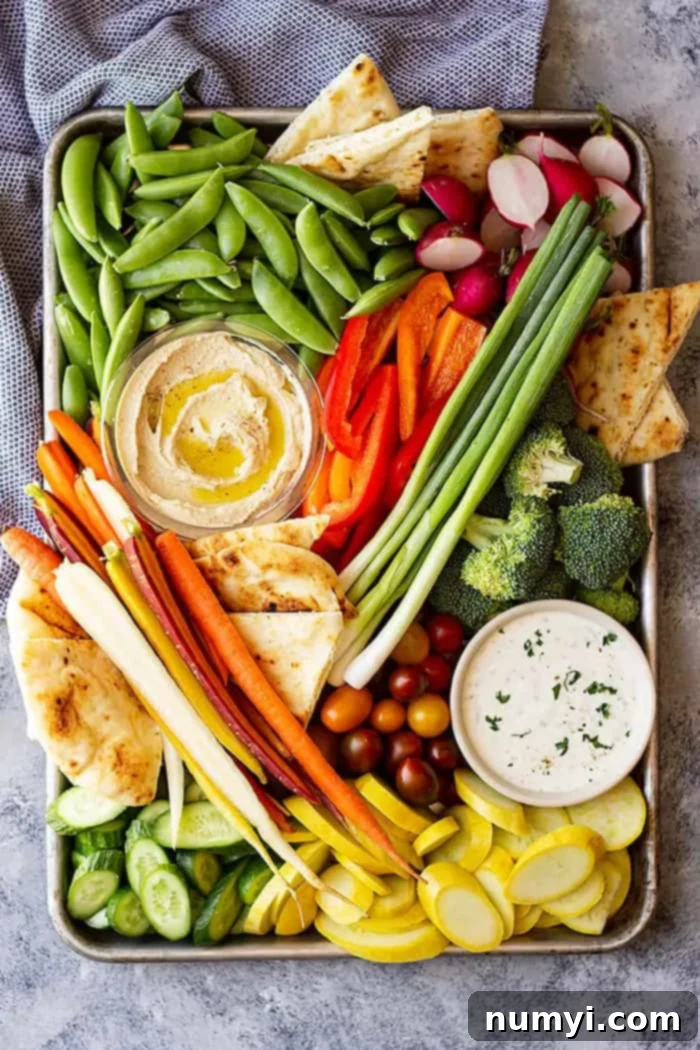
Crafting the Perfect Vegetable Tray: Fresh, Fun, and Fabulous!
A vibrant, eye-catching vegetable tray is more than just a simple appetizer; it’s a statement piece that brings freshness and health to any occasion. Whether you’re hosting a casual get-together, a festive holiday celebration, or need a wholesome snack for a potluck, knowing how to assemble a truly impressive veggie platter is a skill worth mastering. Forget those standard, often uninspired store-bought trays; with this guide, you’ll learn all my secrets to create an amazing, not-so-boring vegetable tray that will delight your guests and be the star of the snack table.
In my family, a colorful veggie tray is a must-have at every gathering, and for good reason! They are incredibly easy to prepare, offer something for every palate, and won’t break your budget. Plus, they provide a much-needed healthy option amidst other tempting treats. If you’re also a fan of fruit, be sure to check out my guide on how to make a fruit tray, which is just as perfect for any party spread.
What truly makes a homemade vegetable platter stand out is the personal touch. Instead of relying on predictable selections, use a variety of unique or seasonal vegetables. Pair them with exciting dips that go beyond the usual ranch dressing. This attention to detail transforms a simple snack into a memorable culinary experience, proving that healthy can also be incredibly delicious and visually appealing.
Why You’ll Love Making Your Own Veggie Tray
Creating your own vegetable platter offers numerous advantages, making it a favorite for hosts and guests alike. Here’s why you’ll quickly fall in love with assembling these delightful and healthy appetizers:
- Completely Customizable: Tailor your tray to any taste, dietary need, or theme. Choose your family’s favorite vegetables, accommodate vegan or gluten-free guests, or select veggies that match a holiday color scheme. The possibilities are endless!
- Budget-Friendly: By choosing seasonal produce and taking advantage of sales, you can create a lavish-looking platter without spending a fortune. It’s often much cheaper than buying pre-made trays.
- Incredibly Easy to Put Together: With minimal cooking required (just washing and cutting!), a stunning veggie tray can be assembled in as little as 20 minutes, making it ideal for last-minute preparations.
- Beautiful Presentation: The natural colors and textures of fresh vegetables, artfully arranged, create a visually appealing centerpiece that enhances any table setting. You truly eat with your eyes first!
- Perfect for Any Party: A veggie tray is a universally loved appetizer. It’s fresh, light, and offers a healthy balance to other party foods, ensuring there’s something for everyone to enjoy.
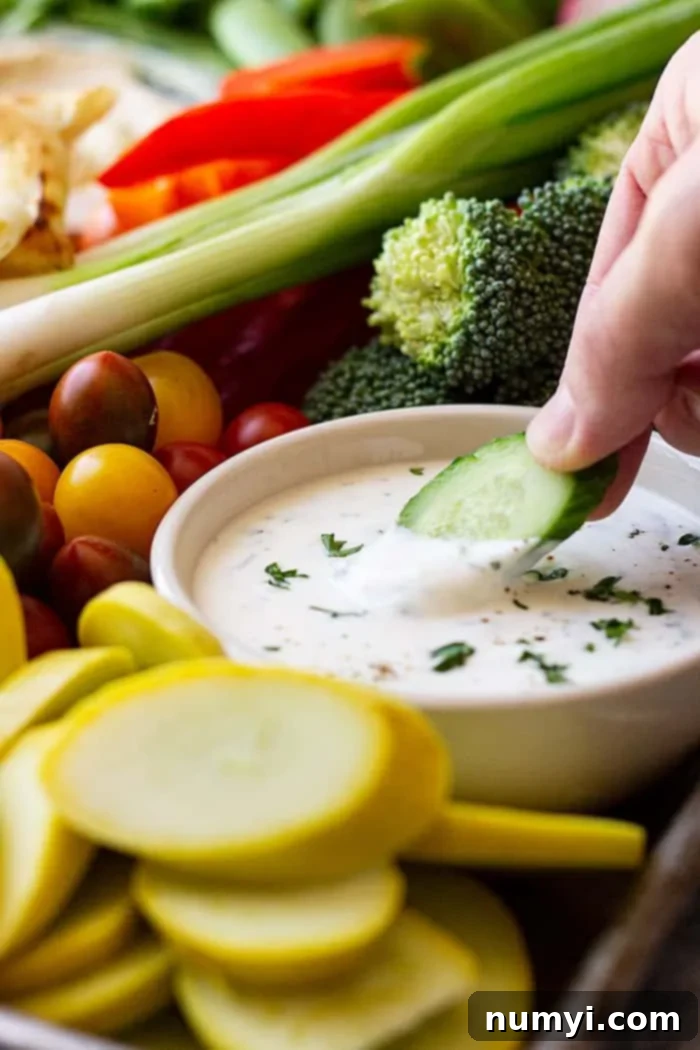
Essential Ingredients for a Standout Vegetable Platter
The beauty of a vegetable platter lies in its flexibility. While I’ll share some of my favorite go-to vegetables, remember that you have the creative freedom to design your tray exactly as you like! This list is a fantastic starting point, offering a mix of colors, textures, and flavors. When selecting your veggies, look for vibrant colors, firm textures, and fresh appearances – these are signs of quality and will make your tray even more inviting.
My Favorite Veggie Tray Ideas:
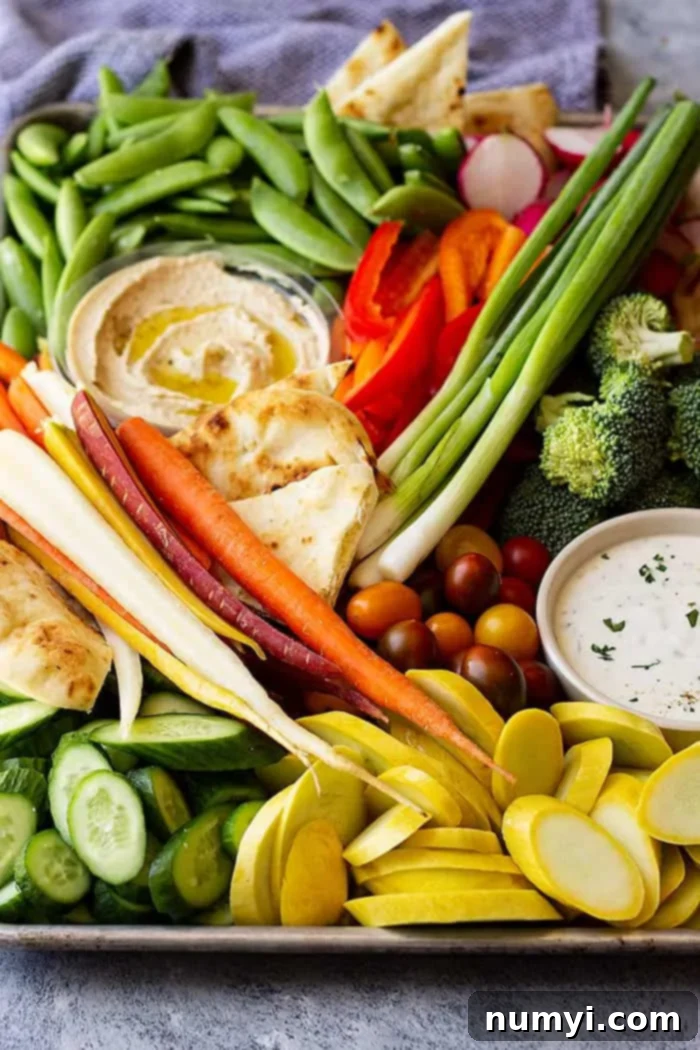
- RAINBOW CARROTS: Beyond orange, look for purple, yellow, and white carrots for an unexpected pop of color and sweet crunch.
- ZUCCHINI: Sliced into coins or sticks, zucchini adds a mild, fresh flavor and a pleasing texture.
- SUMMER SQUASH: Similar to zucchini, yellow summer squash brightens the tray and offers a slightly different, delicate taste.
- SNAP PEAS: Sweet, crisp, and fun to dip, snap peas are always a crowd-pleaser.
- BELL PEPPERS: Use a mix of red, yellow, and orange bell peppers, sliced into strips, for maximum color and a sweet, juicy crunch.
- GREEN ONIONS: A subtle onion flavor and a unique shape, these can be cut into longer pieces or smaller rounds.
- HEIRLOOM CHERRY TOMATOES: Their varied colors and rich flavor make them superior to standard cherry tomatoes. They add a burst of juiciness.
- BROCCOLI FLORETS: A classic choice, offering a satisfying crunch and robust flavor. Ensure they are cut into bite-sized pieces.
- RADISHES: Their peppery bite and striking red color add an exciting element to the platter.
- ENGLISH CUCUMBERS: Known for their thin skin and fewer seeds, they are perfect sliced into rounds or sticks for a refreshing crunch.
- CAULIFLOWER FLORETS: White or even purple/green cauliflower adds a mellow flavor and satisfying texture.
- CELERY STICKS: A quintessential dipping vegetable, providing a crisp texture and a mild, earthy taste.
- ASPARAGUS SPEARS: Blanched briefly, these add an elegant touch and tender-crisp texture.
Pro Tip: Consider the season! Buying vegetables that are in season often means they are fresher, more flavorful, and more affordable. Don’t be afraid to mix and match to create a truly unique and delicious assortment.
Step-by-Step Instructions to Assemble Your Veggie Platter
Learning how to make a veggie tray is surprisingly simple and comes down to just a few key steps. Follow these instructions for a stress-free preparation:
- PREP YOUR DIPS: This is a great task to complete ahead of time! Whether you choose to make your dips from scratch or purchase them, prepare them the day before you plan to serve. This allows flavors to meld and deepen, and ensures they are perfectly chilled when guests arrive. Store them in airtight containers in the fridge.
- PREP YOUR VEGGIES: On the day of assembly (or up to a day before), meticulously wash all your chosen vegetables under cold running water. Once washed, it’s crucial to dry them thoroughly. Excess moisture can make dips watery and cause veggies to lose their crispness faster. Use a salad spinner or pat them dry with paper towels.
- CUT THE VEGETABLES: Some smaller veggies, like cherry tomatoes or snap peas, won’t need cutting. However, any larger vegetables should be cut into uniform, bite-sized pieces that are easy for dipping. Think about sticks, rounds, or florets that are manageable for guests. For example, bell peppers can be sliced into long strips, carrots into sticks, and cucumbers into coins or spears.
- ARRANGE YOUR VEGGIE PLATTER: This is where the fun and creativity truly shine! Start by placing your dips in small bowls strategically on your chosen platter. Then, artfully arrange the vegetables around the dips. I like to group similar colors or textures together, or create a rainbow effect for a truly stunning presentation. Don’t be afraid to refer to photos for inspiration if you’re looking for veggie tray ideas on how to arrange yours. You can assemble your vegetable platter a few hours before serving, or even the day before (see tips below for making ahead).
Expert Tips for Crafting an Irresistible Vegetable Tray
To truly elevate your vegetable platter from good to unforgettable, consider these expert tips and tricks:
- Shop Smart and Seasonally: Always aim to buy vegetables that are in season. They’re not only more flavorful but also generally cheaper. Keep an eye out for sales at your local grocery store or farmers’ market to make your tray even more budget-friendly.
- Embrace the Rainbow: Choose a diverse and colorful variety of veggies. Think about incorporating reds, oranges, yellows, greens, and even purples. Visual appeal is key; a vibrant, colorful spread invites guests to dive in. Pick vegetables that look the freshest – firm, bright, and unblemished.
- Timely Vegetable Purchase: Don’t buy your vegetables too far in advance. For optimal freshness and crispness, purchase them one to two days before your event at most. While veggies are a bit more forgiving than fruit, proper storage (like in the crisper drawer) is essential if bought further ahead.
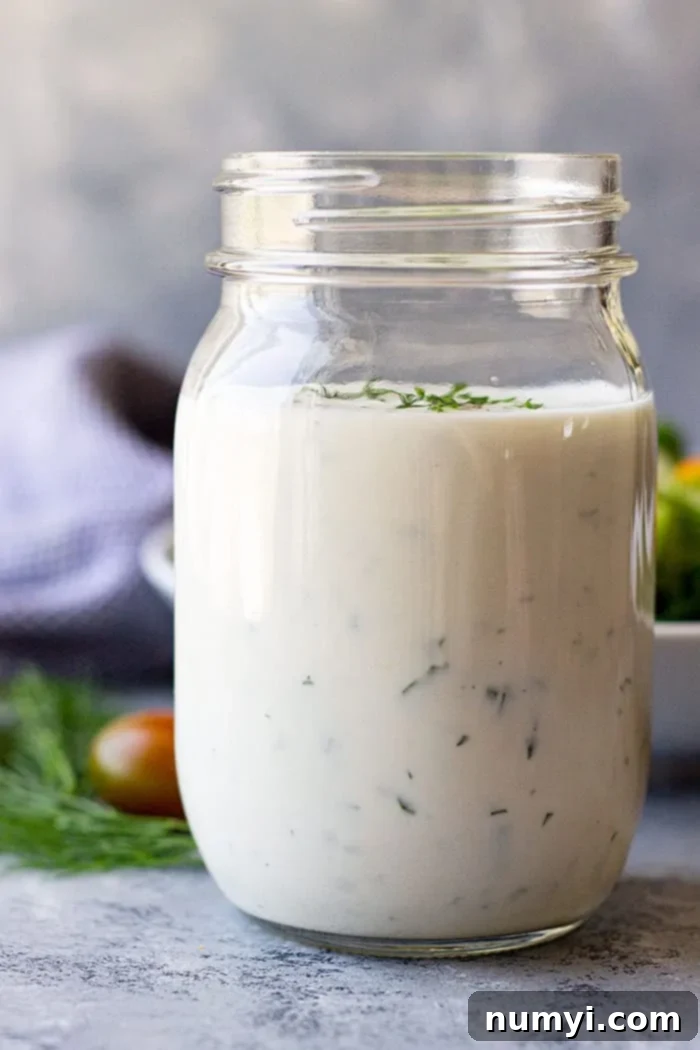
- Offer a Variety of Dips: While a standard dip like this homemade buttermilk ranch is a must-have, also offer something a little more adventurous or “off the beaten path.” This helps spice things up and caters to different preferences. I highly recommend including at least one homemade dip – the fresh flavor makes a huge difference! See my list of dip ideas in the FAQ section below for inspiration.
- Prepare Homemade Dips in Advance: For homemade dips, making them a day ahead is a game-changer. It not only saves you precious time on the day of your party but also allows the flavors of the dips to fully develop and maximize, resulting in a richer, more complex taste.
- Incorporate Non-Vegetable Items: To add variety in texture and flavor, consider adding a non-vegetable item to your platter. I sometimes add garlic naan, but you could also try crunchy breadsticks, toasted baguette slices, pita chips, pretzel chips, a selection of olives, or even a few cornichons or pickles. These items provide different mouthfeels and can be excellent vehicles for your delicious dips.
- Choose the Right Platter: The vessel for your veggie tray matters! A beautiful white ceramic dish provides a clean canvas that makes the colors of the vegetables pop. For larger gatherings, a rustic wooden board or a modern sheet pan works well. For holidays, consider a festive-themed tray to enhance the celebratory mood.
- Master the Art of Arrangement: Arrange your vegetables in a way that is visually appealing and easy for guests to access. I like to start by placing the dip bowls on the tray first, typically in the center or spaced out. Then, I arrange the vegetables around the dips, often grouping similar items or creating radiating lines. Fill in any small gaps with smaller veggies or non-vegetable items like naan. If you are arranging the day before, hold off on adding any bread or crackers until just before serving to prevent them from becoming stale.
Frequently Asked Questions About Making a Vegetable Tray
A good rule of thumb is to estimate about 5 pieces of vegetables per person. So, for a party of 10-12 guests, you’ll need approximately 50-60 pieces of assorted vegetables. For dips, plan on about 3 tablespoons per person, which translates to roughly 1 3/4 – 2 cups of dip for 10-12 guests. If you’re adding non-vegetable items like naan, pretzels, or crackers, aim for about 2 pieces per person, meaning 20-24 pieces for 10-12 guests. Adjust these quantities based on whether the tray is the main appetizer or one of many options.
The best vegetables are those that are fresh, colorful, and easy to dip. Common and popular choices include carrots (baby or sticks), zucchini, baby tomatoes (especially heirloom for variety), snap peas, a mix of colorful bell peppers, crisp broccoli and cauliflower florets, refreshing cucumber (English or regular), radishes for a peppery kick, crunchy celery, vibrant summer squash, and thinly sliced green onions. Don’t hesitate to include seasonal favorites like blanched asparagus or colorful purple cabbage wedges.
A classic and beloved dip is this homemade buttermilk ranch dressing. To offer a delightful variety, consider other flavorful options such as creamy southwest ranch, rich and earthy hummus (classic, roasted red pepper, or garlic flavors), a savory onion dip, a hearty spinach dip, a zesty garlic and herb dip, or a refreshing dill spread. You can also include a spicy salsa or a lighter Greek yogurt-based dip for different flavor profiles.
Absolutely! A vegetable tray can be prepared up to a day in advance, making party planning much easier. If assembling the entire tray, make sure to leave any non-vegetable items (like naan, pretzels, or crackers) off. Wrap the assembled tray tightly in plastic wrap to prevent the vegetables from drying out and store it in the fridge. Add the remaining items just before serving. Alternatively, you can prep all the veggies (wash, dry, and cut) and store them in separate airtight containers in the fridge for 1-2 days, then arrange the platter a few hours before your event.
Starting with super fresh, high-quality vegetables is the first step. Once the tray is arranged, the key to keeping it fresh is to prevent air exposure. Wrap the tray tightly in plastic wrap, pressing it down gently onto the vegetables to minimize air pockets. Some people also place a damp paper towel over the veggies before wrapping to maintain moisture. For the freshest results, vegetable trays are best served within 24 hours of assembly. If you’re storing pre-cut veggies, keep them in airtight containers, potentially with a small amount of water for some types like carrots and celery.
The type of platter can significantly impact the overall presentation. For a clean, elegant look, a large white ceramic or porcelain platter works wonderfully, making the colors of the vegetables pop. A rustic wooden board (like a charcuterie board) adds warmth and natural appeal. For larger gatherings, a sturdy baking sheet lined with parchment paper can be transformed into a functional and stylish serving tray. Glass platters offer a modern touch, while tiered stands can add height and visual interest, especially for buffet-style settings. Choose a size that accommodates all your ingredients without overcrowding.
More Delicious Appetizers and Snacks To Try
Looking for more crowd-pleasing bites for your next gathering? Here are some other fantastic appetizer and snack ideas:
- How to Make a Fruit Tray
- How to Make a Cheese Board
- Create Your Own Bruschetta Bar
- Irresistible Cheese Breadsticks
- Individual Seven Layer Cups
- The Best Homemade Guacamole Recipe
HUNGRY FOR MORE? Subscribe to my newsletter and follow along on Pinterest, Facebook, and Instagram for all my latest updates, recipes, and entertaining tips!
How To Make A Vegetable Tray
Ingredients
- Rainbow carrots
- Zucchini
- Summer squash
- Snap peas
- Bell peppers
- Green onions
- Heirloom cherry tomatoes
- Broccoli florets
- Radishes
- English cucumbers
- Dips: Homemade ranch dressing, hummus, or other flavorful dips of choice.
Instructions
-
Prepare Dips: Make or buy all your dips the day before serving. Cover them tightly and store them in the refrigerator to chill and allow flavors to meld.
-
Prep Vegetables: Wash and thoroughly dry all your chosen vegetables. Cut larger veggies into bite-sized pieces for easy dipping. Store prepped vegetables in an airtight container in the fridge if preparing the day before, or proceed directly to arranging the platter.
-
Arrange Platter: Place dip bowls on your chosen platter first. Then, artfully arrange the prepared vegetables around the dips, considering color and texture for a beautiful presentation. If arranging the day before, cover the platter tightly with plastic wrap and store it in the fridge. Remember to add any non-vegetable items (like crackers or bread) just before serving to maintain their freshness.
Notes
- Comprehensive Tips and Tricks: Be sure to read the entire post above for all my best tips, creative ideas, and detailed advice to make this an awesome, crowd-pleasing veggie tray that truly stands out.
- Vegetable Substitutions: This recipe highlights the vegetables I typically use, but feel free to customize it completely! Swap out any veggie for seasonal favorites, what you have on hand, or whatever your guests prefer. Cauliflower, celery, and sugar snap peas are also great additions.
- Serving Quantity Guide: Plan for about 5 pieces of vegetables per person (so 50-60 pieces for 10-12 guests). For dips, aim for about 3 tablespoons per person (approximately 1 3/4 – 2 cups for 10-12 guests). If adding non-vegetable items like naan or pretzels, prepare about 2 pieces per person (20-24 pieces for 10-12 guests).
- Make-Ahead Instructions: You can prepare your vegetable tray up to a day in advance. If doing so, remember to leave any non-vegetable items (such as naan, pretzels, etc.) off the tray. Wrap the assembled tray tightly in plastic wrap and store it in the refrigerator. Add these remaining items just before serving to ensure they stay fresh and crisp.
- Using Leftover Veggies: Don’t let any leftover vegetables go to waste! They are perfect for incorporating into stir-fries, omelets, frittatas, casseroles, or adding extra nutrition to homemade soups and stews.
Nutrition
