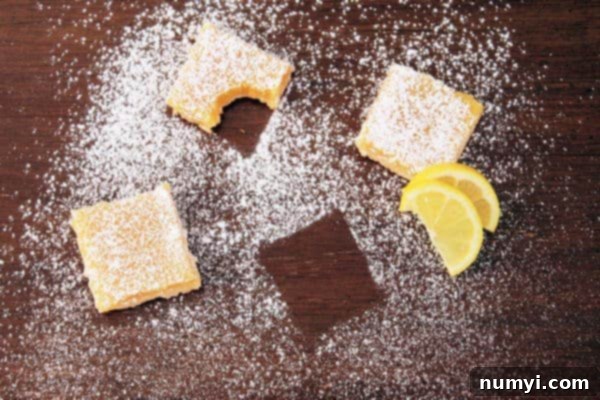
The Best Easy Lemon Bars Recipe: A Zesty & Sweet Treat for Any Occasion
There’s something truly magical about a perfectly crafted lemon bar. That delightful contrast between a tender, buttery shortbread crust and a bright, tangy, yet sweet lemon filling is simply irresistible. For my husband, these homemade lemon bars aren’t just a dessert; they’re a cherished holiday tradition, especially during Christmas time. In our home, they’re always the first treat to disappear from any cookie tray, and I often find him eagerly eyeing them before I’ve even finished arranging the holiday assortments!
While often associated with festive occasions, lemon bars are a fantastic year-round dessert. Their refreshing citrus flavor makes them perfect for spring picnics, summer barbecues, or simply brightening a gloomy day. This recipe, perfected over countless batches, delivers that ideal balance of sweet and tart, ensuring a luscious, smooth filling that melts in your mouth and a sturdy, flavorful crust that holds it all together. The final touch? A delicate dusting of powdered sugar just before serving, adding a touch of elegance and an extra hint of sweetness.

Lemon Bars

Ingredients
- Crust:
- 1 3/4 cups all-purpose flour
- 1 cup unsalted butter melted
- 1/2 cup powdered sugar
- 1 tsp lemon zest
- Filling:
- 4 large eggs beaten
- 2 cups granulated sugar
- 4 Tbsp all-purpose flour
- 8 Tbsp fresh lemon juice
- 3 tsp lemon zest
Instructions
-
Preheat oven to 350°F (175°C).
-
Lightly grease the sides of a 13×9 inch baking pan, or line with parchment paper for easy removal.
-
For the Crust:
-
In a medium bowl, combine the flour, melted butter, powdered sugar, and 1 tsp lemon zest. Mix until well combined and a crumbly dough forms. Press this mixture evenly into the bottom of the prepared baking pan.
-
Bake the crust for 20 minutes, or until lightly golden brown.
-
For the Filling:
-
While the crust is baking, in a separate bowl, whisk together the beaten eggs, granulated sugar, 4 Tbsp flour, 8 Tbsp fresh lemon juice, and 3 tsp lemon zest until smooth and thoroughly combined.
-
Carefully pour the lemon filling mixture over the hot baked crust.
-
Return to the oven and bake for an additional 25 minutes, or until the filling is set and no longer jiggly in the center. The edges may turn a very light golden.
-
Remove from oven and allow to cool completely on a wire rack before cutting into bars. For best results, chill in the refrigerator for at least 2 hours (or overnight) before slicing. Dust with extra powdered sugar just before serving.
Why You’ll Love This Classic Lemon Bar Recipe
This recipe isn’t just another lemon bar; it’s the lemon bar recipe you’ll come back to again and again. Here’s why it stands out:
- Perfectly Balanced Flavor: It strikes an ideal harmony between the tartness of fresh lemon and just the right amount of sweetness, preventing it from being overly sour or cloyingly sweet.
- Buttery Shortbread Crust: The base is a tender, crumbly shortbread, rich with butter, offering a fantastic textural contrast to the smooth filling. The hint of lemon zest in the crust adds an extra layer of flavor.
- Smooth, Velvety Filling: The filling is lusciously smooth and creamy, not overly gelatinous or rubbery. It sets beautifully, making for clean, elegant slices.
- Surprisingly Easy: Despite its gourmet taste, this recipe is straightforward and accessible for bakers of all skill levels. With clear steps, you’ll achieve perfect results every time.
- Crowd-Pleaser: From holiday gatherings to casual brunches, lemon bars are universally loved. They’re bright, refreshing, and always a welcome addition to any dessert table.
Key Ingredients for Flawless Lemon Bars
While the ingredient list is simple, using quality components and understanding their role is key to exceptional lemon bars:
- All-Purpose Flour: Forms the structure of both the crust and helps thicken the filling. Don’t overmix the crust, as it can lead to a tough texture.
- Unsalted Butter: Essential for that rich, tender shortbread crust. Melting it helps bind the crust ingredients easily. Using unsalted butter gives you control over the salt content in your recipe.
- Powdered Sugar (for crust & dusting): Provides sweetness to the crust and dissolves easily, contributing to its tender texture. It’s also the traditional topping, adding visual appeal and a gentle sweetness.
- Fresh Lemons (Juice & Zest): This is the heart of your lemon bars! Always use fresh lemon juice for the best, brightest flavor. Bottled juice simply won’t yield the same vibrant taste. Zest contains essential oils that pack an even more intense lemon punch. Don’t skip it!
- Granulated Sugar (for filling): Balances the tartness of the lemon juice, creating that signature sweet-tart profile.
- Large Eggs: Act as a binder and thickener for the filling, giving it its custardy texture. Ensure they are at room temperature for better emulsification.
Expert Tips for Making the Best Lemon Bars
Achieving bakery-quality lemon bars is easy with a few simple tricks:
For the Perfect Shortbread Crust:
- Don’t Overmix: Mix the crust ingredients just until combined. Overmixing develops gluten, which can make the crust tough.
- Press Firmly: Use the bottom of a glass or your knuckles to press the crust mixture evenly and firmly into the pan. This helps create a solid base that won’t crumble excessively.
- Pre-bake is Key: Pre-baking the crust ensures it’s fully cooked and holds up well to the moist filling, preventing a soggy bottom.
- Add Zest to the Crust: A small amount of lemon zest in the crust enhances the overall lemon flavor profile from the very first bite.
For the Silky Smooth Lemon Filling:
- Use Fresh Lemon Juice: This cannot be stressed enough. The flavor difference between fresh and bottled lemon juice is immense. Invest in fresh lemons!
- Zest Before Juicing: Always zest your lemons before you cut and juice them. It’s much easier to get all that flavorful zest from a whole lemon.
- Don’t Skip the Flour: The small amount of flour in the filling helps stabilize it and gives it that classic custardy texture without being too runny or too firm. It helps prevent the filling from separating.
- Whisk Thoroughly: Ensure all the filling ingredients are completely blended. A smooth mixture will yield a smooth final product.
- Pour Over Hot Crust: Pouring the filling over the hot crust helps the layers adhere better and can prevent the crust from becoming soggy.
Baking and Cooling:
- Don’t Overbake the Filling: The filling is done when the edges are set, and the center has a slight jiggle, similar to a cheesecake. It will continue to set as it cools. Overbaking can lead to a rubbery texture.
- Cool Completely: This is arguably the most important step for clean cuts and the perfect texture. Lemon bars need to cool down entirely, preferably chilled in the refrigerator for at least 2 hours or even overnight. This allows the filling to fully set.
- Use Parchment Paper: Lining your baking pan with parchment paper, leaving an overhang on the sides, makes it incredibly easy to lift the entire batch out of the pan before slicing.
- Clean Cuts: For professional-looking slices, use a sharp, warm knife. Wipe the knife clean between each cut for the cleanest edges.
Creative Variations and Serving Suggestions
While classic lemon bars are perfect as they are, there’s always room for a little customization:
- Lime or Orange Bars: Swap lemon juice and zest for lime or orange for a different citrusy twist.
- Berry Swirl: Swirl a tablespoon or two of berry jam (raspberry or blueberry works wonderfully) into the lemon filling before baking for a fruity addition.
- Coconut Crust: Add a quarter cup of shredded coconut to your shortbread crust mixture for a tropical note.
- Meringue Topping: For a more decadent dessert, top the baked and cooled lemon bars with a torched meringue, transforming them into Lemon Meringue Bars.
- Mini Lemon Bars: Bake in a mini muffin tin for bite-sized delights perfect for parties.
Serve these delectable lemon bars simply dusted with powdered sugar, or elevate them with a dollop of whipped cream and fresh berries. They pair wonderfully with a cup of tea, coffee, or a glass of chilled white wine.
Storing Your Delicious Lemon Bars
Proper storage ensures your lemon bars stay fresh and delicious:
- Room Temperature: Lemon bars can be stored at room temperature for up to 24 hours, covered tightly, especially if your kitchen is cool.
- Refrigeration: For longer storage and best taste, keep them in an airtight container in the refrigerator for up to 5-7 days. The cold helps the filling firm up and keeps them extra refreshing.
- Freezing: Yes, you can freeze lemon bars! Once completely cooled and sliced, place them in a single layer on a baking sheet and freeze until firm. Then, transfer them to an airtight freezer-safe container or bag, separating layers with parchment paper. They will keep for up to 2-3 months. Thaw in the refrigerator before serving.
Frequently Asked Questions About Lemon Bars
- Q: Why are my lemon bars runny?
- A: This is usually due to underbaking. The filling needs to be fully set. Ensure the edges are firm and the center has only a slight jiggle. It also sets further as it cools, so proper chilling is crucial.
- Q: Can I use bottled lemon juice?
- A: While technically possible, it is highly recommended to use fresh lemon juice. Bottled juice lacks the vibrant flavor and acidity of fresh lemons, resulting in a less delicious and often duller-tasting bar.
- Q: How do I get clean cuts?
- A: The secret to clean cuts is patience! Ensure your lemon bars are completely chilled. Use a very sharp knife, and wipe the blade clean with a damp cloth after each slice to prevent sticking and dragging the filling.
- Q: Can I make these lemon bars ahead of time?
- A: Absolutely! Lemon bars are an excellent make-ahead dessert. You can prepare them a day or two in advance and store them in the refrigerator. This allows the flavors to meld beautifully and the filling to fully set, making them easier to cut and enjoy.
- Q: What kind of pan should I use?
- A: A 13×9 inch metal baking pan is ideal. Glass pans can work but may require a slight adjustment in baking time as they retain heat differently. Lining with parchment paper is highly recommended for easy removal.
These classic lemon bars are more than just a dessert; they’re a delightful experience that brings a burst of sunshine to any table. Whether you’re making them for a special occasion or simply to satisfy a citrus craving, this recipe promises consistent, delicious results. So, grab your lemons, preheat your oven, and get ready to enjoy one of the most beloved sweet and tart treats!
Happy baking!
