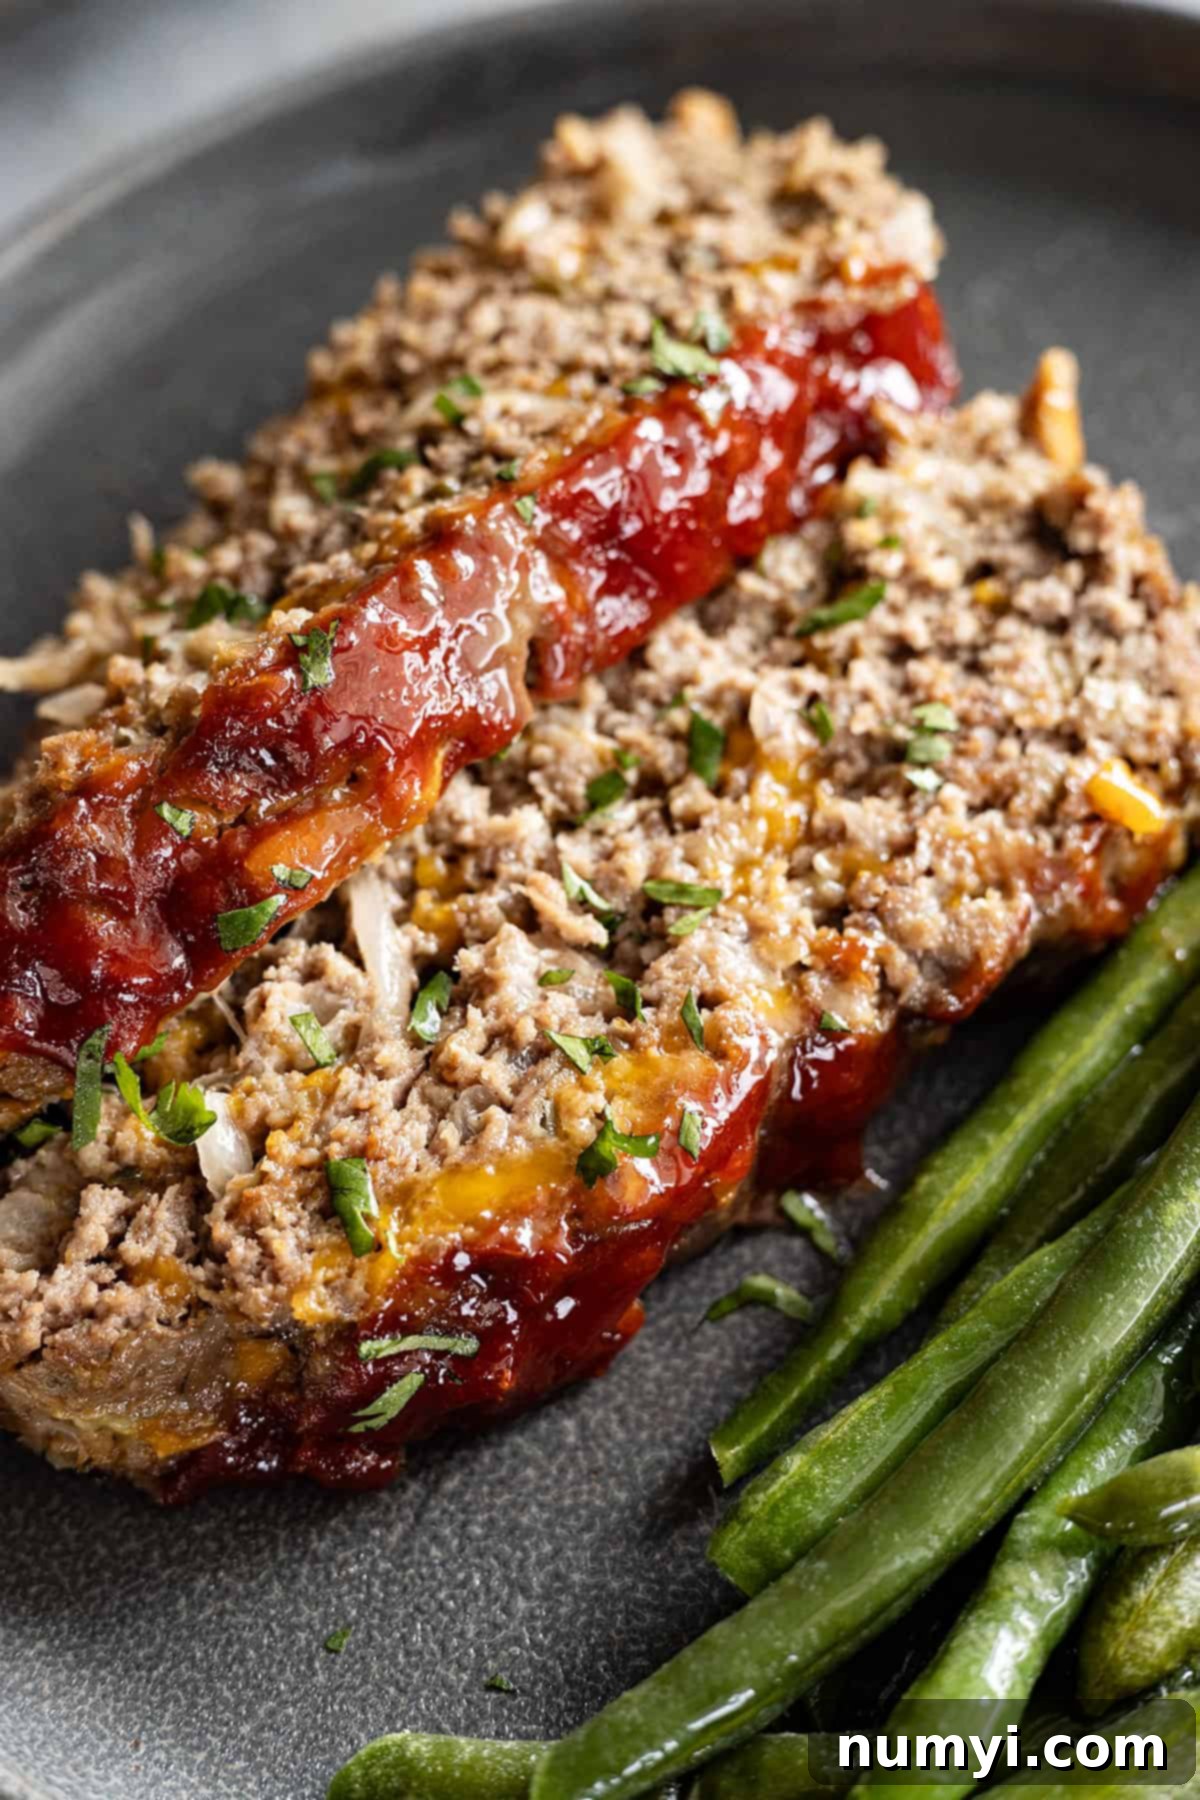
The Ultimate Cheeseburger Meatloaf: Your New Favorite Family Dinner
Get ready to elevate your dinner game with this incredibly delicious Cheeseburger Meatloaf! It’s a delightful spin on the classic, offering a unique blend of flavors that perfectly mimics your favorite cheeseburger. This meatloaf is consistently moist, tender, and bursting with savory goodness, eliminating the need for any extra gravy. Prepare to make it the star of your dinner table!
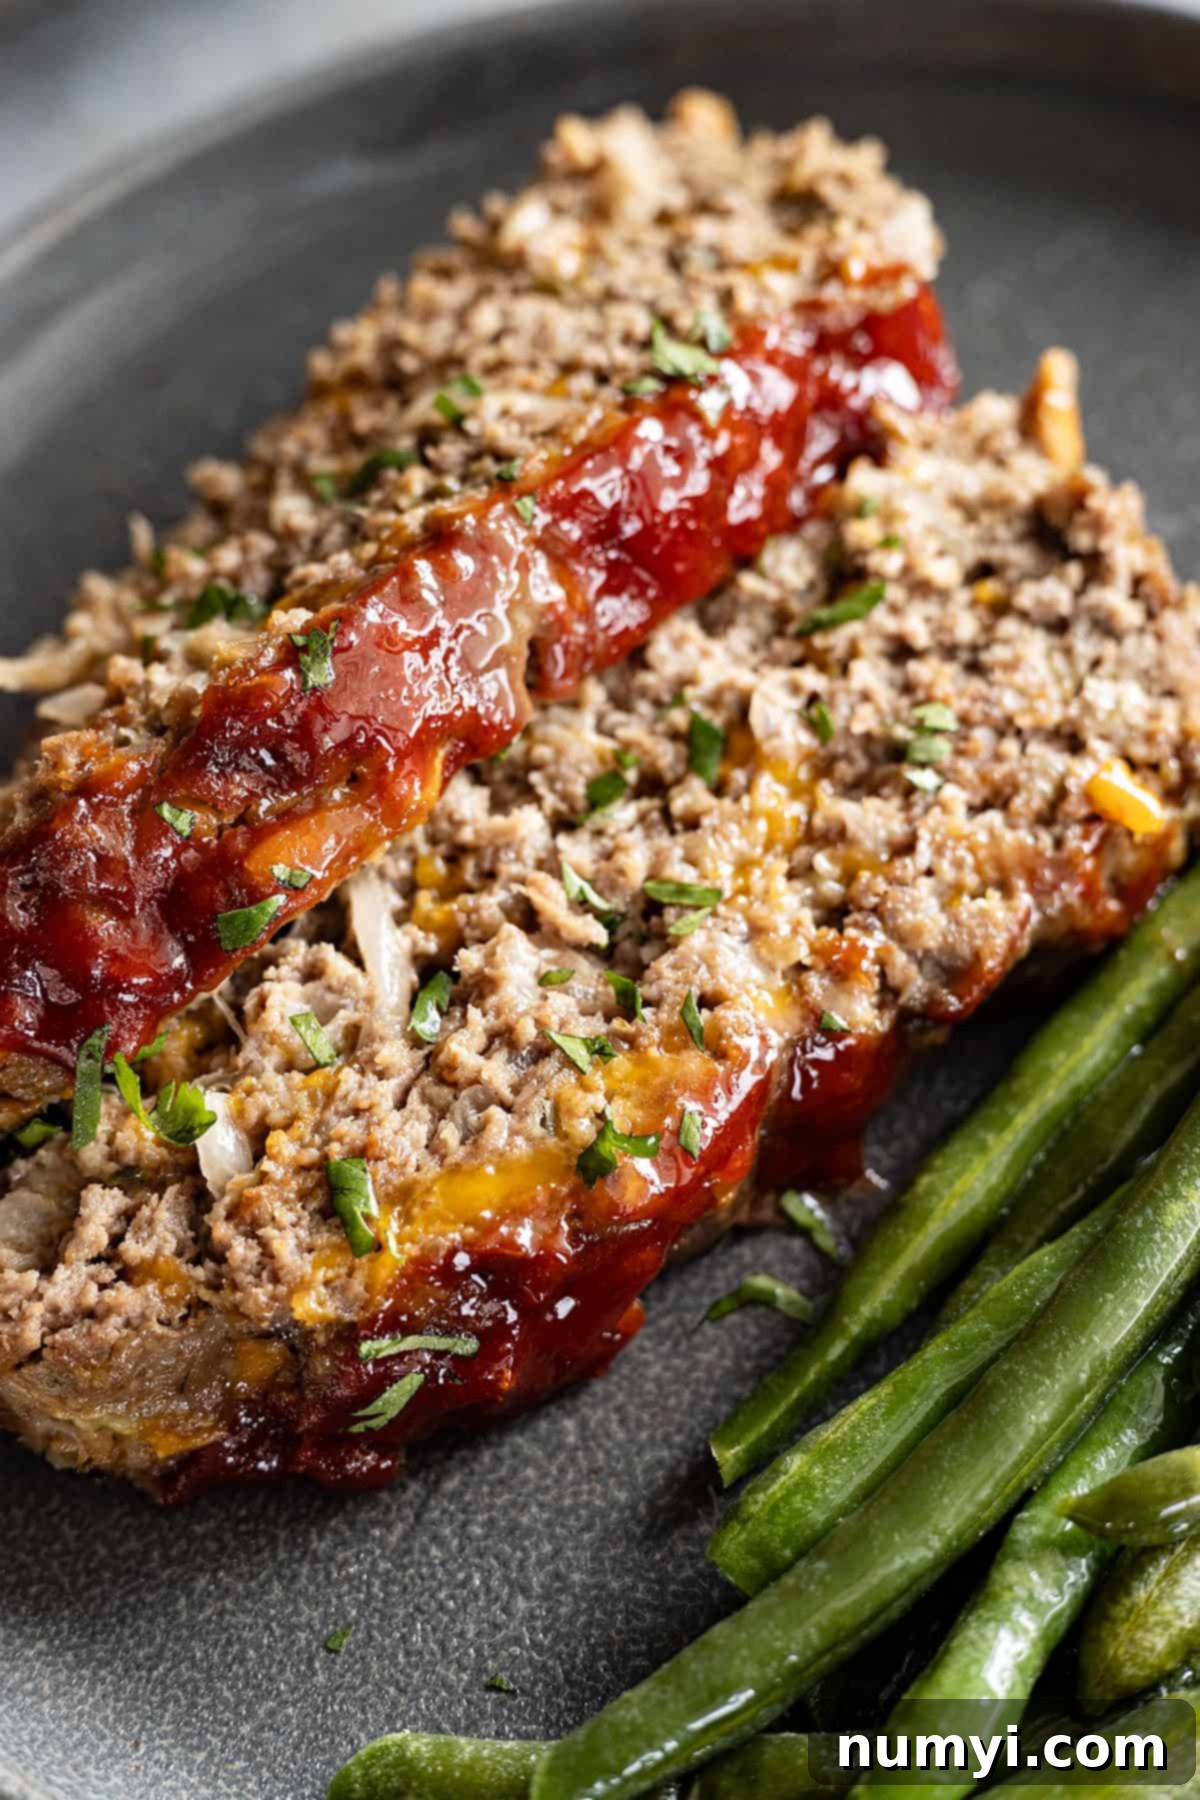
Craving the satisfying taste of a juicy cheeseburger but in a comforting, easy-to-make dinner format? Look no further! This cheeseburger meatloaf recipe takes the beloved Classic Meatloaf and infuses it with all the irresistible flavors of a classic cheeseburger. By using my time-tested meatloaf base, then adding generous amounts of sharp cheddar cheese and a few key seasonings, we create a dish that’s truly extraordinary. It’s a simple yet brilliant way to bring a fun, familiar flavor to a weeknight meal.
Easy and delicious meals like this one are always at the top of my list, especially for busy weeknights. My family absolutely adores this cheeseburger meatloaf, just as they love my Sheet-Pan Mini Meatloaves. What I appreciate most about these types of recipes is how straightforward they are to prepare, often requiring minimal cleanup. This cheeseburger meatloaf is no exception – simple steps, incredible flavor, and fantastic for meal prep or feeding a crowd.
Here’s Why This Cheeseburger Meatloaf Will Be The Spotlight Of Dinnertime:
- Unbelievably Satisfying & Comforting: This isn’t just a meal; it’s an experience. Hearty, rich, and bursting with that classic cheeseburger taste, every bite is a delightful combination of savory beef and gooey cheese. It’s the ultimate comfort food for any day of the week, perfect for warming you from the inside out.
- Made with Simple, Pantry-Friendly Ingredients: You won’t need to hunt for exotic items. This recipe relies on everyday ingredients that you likely already have in your kitchen, making it a convenient choice for last-minute meal planning.
- Budget-Friendly: Ground beef is an economical choice, and when combined with other affordable staples, this meatloaf becomes a wallet-friendly option for feeding your family without compromising on flavor or satisfaction.
- Freezer-Friendly for Easy Meal Prep: Whether you want to prepare it ahead for a busy week or freeze leftovers for quick future meals, this meatloaf freezes beautifully. It’s perfect for stocking your freezer with delicious, homemade convenience.
- Leftovers Make AWESOME Sandwiches: Don’t underestimate the power of next-day meatloaf! Sliced cold or gently reheated, these leftovers transform into incredible sandwiches, making your lunch just as exciting as dinner.
- No Gravy Needed: Thanks to the perfect blend of ingredients, this meatloaf is so incredibly moist and flavorful on its own that you won’t even miss the gravy. It’s truly a standalone masterpiece!
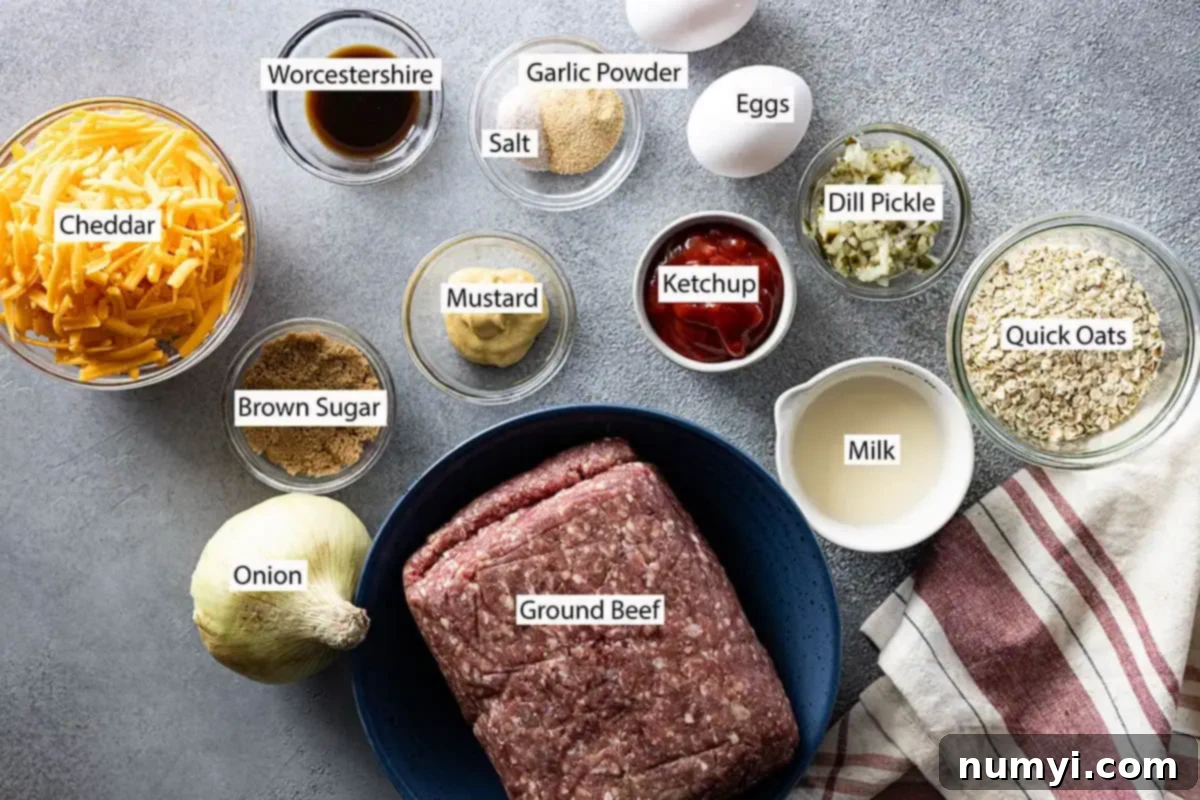
Ingredient Notes: Key Components for the Best Cheeseburger Meatloaf
This section provides a quick overview of the star ingredients for our cheeseburger meatloaf, along with important tips for each. For precise measurements and detailed step-by-step instructions, please refer to the complete printable recipe card located at the very bottom of this post.
Ground Beef Selection:
When it comes to meatloaf, the type of ground beef you choose significantly impacts the final texture and flavor. This is one of the rare instances where I wholeheartedly recommend using a slightly fattier cut, specifically 85% lean ground beef. The higher fat content is crucial for two main reasons: it infuses the meatloaf with an incredible, rich beefy flavor, and it ensures the loaf remains wonderfully moist and tender throughout baking. If you opt for leaner beef (like 90% or 93% lean), you risk a drier, less flavorful meatloaf. If leaner beef is all you have, consider adding a tablespoon or two of olive oil or beef broth to the mixture to help retain some moisture.
The Cheese Factor: Cheddar or Your Favorite!
For that authentic cheeseburger experience, sharp cheddar cheese is my top pick. Its robust flavor melts beautifully, adding a delicious tang and creaminess to every slice. However, remember that this is *your* kitchen! Feel free to customize. If you prefer a milder cheese, medium cheddar works wonderfully. For a truly classic burger vibe, slices of American cheese can also be layered into the center of the loaf or melted on top during the last few minutes of baking. Experiment to find your personal favorite cheesy twist!
The Role of Oats: Binder and Moisture Keeper:
Just like in my traditional meatloaf recipe, I stick with quick oats. They are more than just a binder; they play a vital role in the meatloaf’s success. Oats effectively absorb and hold onto moisture released by the meat during cooking, which helps prevent the meatloaf from drying out and keeps it incredibly tender. Furthermore, they act as a natural binding agent, ensuring your meatloaf holds its shape beautifully and doesn’t crumble when sliced. For those who need a gluten-free option, ensure you use certified gluten-free quick oats.
Other Flavor Boosters:
- Onion: Grated onion provides essential moisture and a foundational savory flavor without large chunks.
- Dill Pickle Relish: This is a secret weapon for the “cheeseburger” flavor! It adds tanginess and a slight crunch, mimicking the pickles on a burger.
- Worcestershire Sauce & Mustard: These add depth, umami, and that signature savory, slightly tangy note characteristic of a good burger.
- Garlic Powder & Salt: Essential seasonings that enhance the beef’s natural flavor and create a well-rounded taste. Don’t be shy with the salt; it truly brings out the best in the meat.
- Eggs & Milk: These are crucial for binding the ingredients together and adding moisture, resulting in a tender loaf.
- Ketchup & Brown Sugar Glaze: This simple topping caramelizes beautifully, adding a sweet and tangy finish that perfectly complements the savory meatloaf, much like a classic burger sauce.
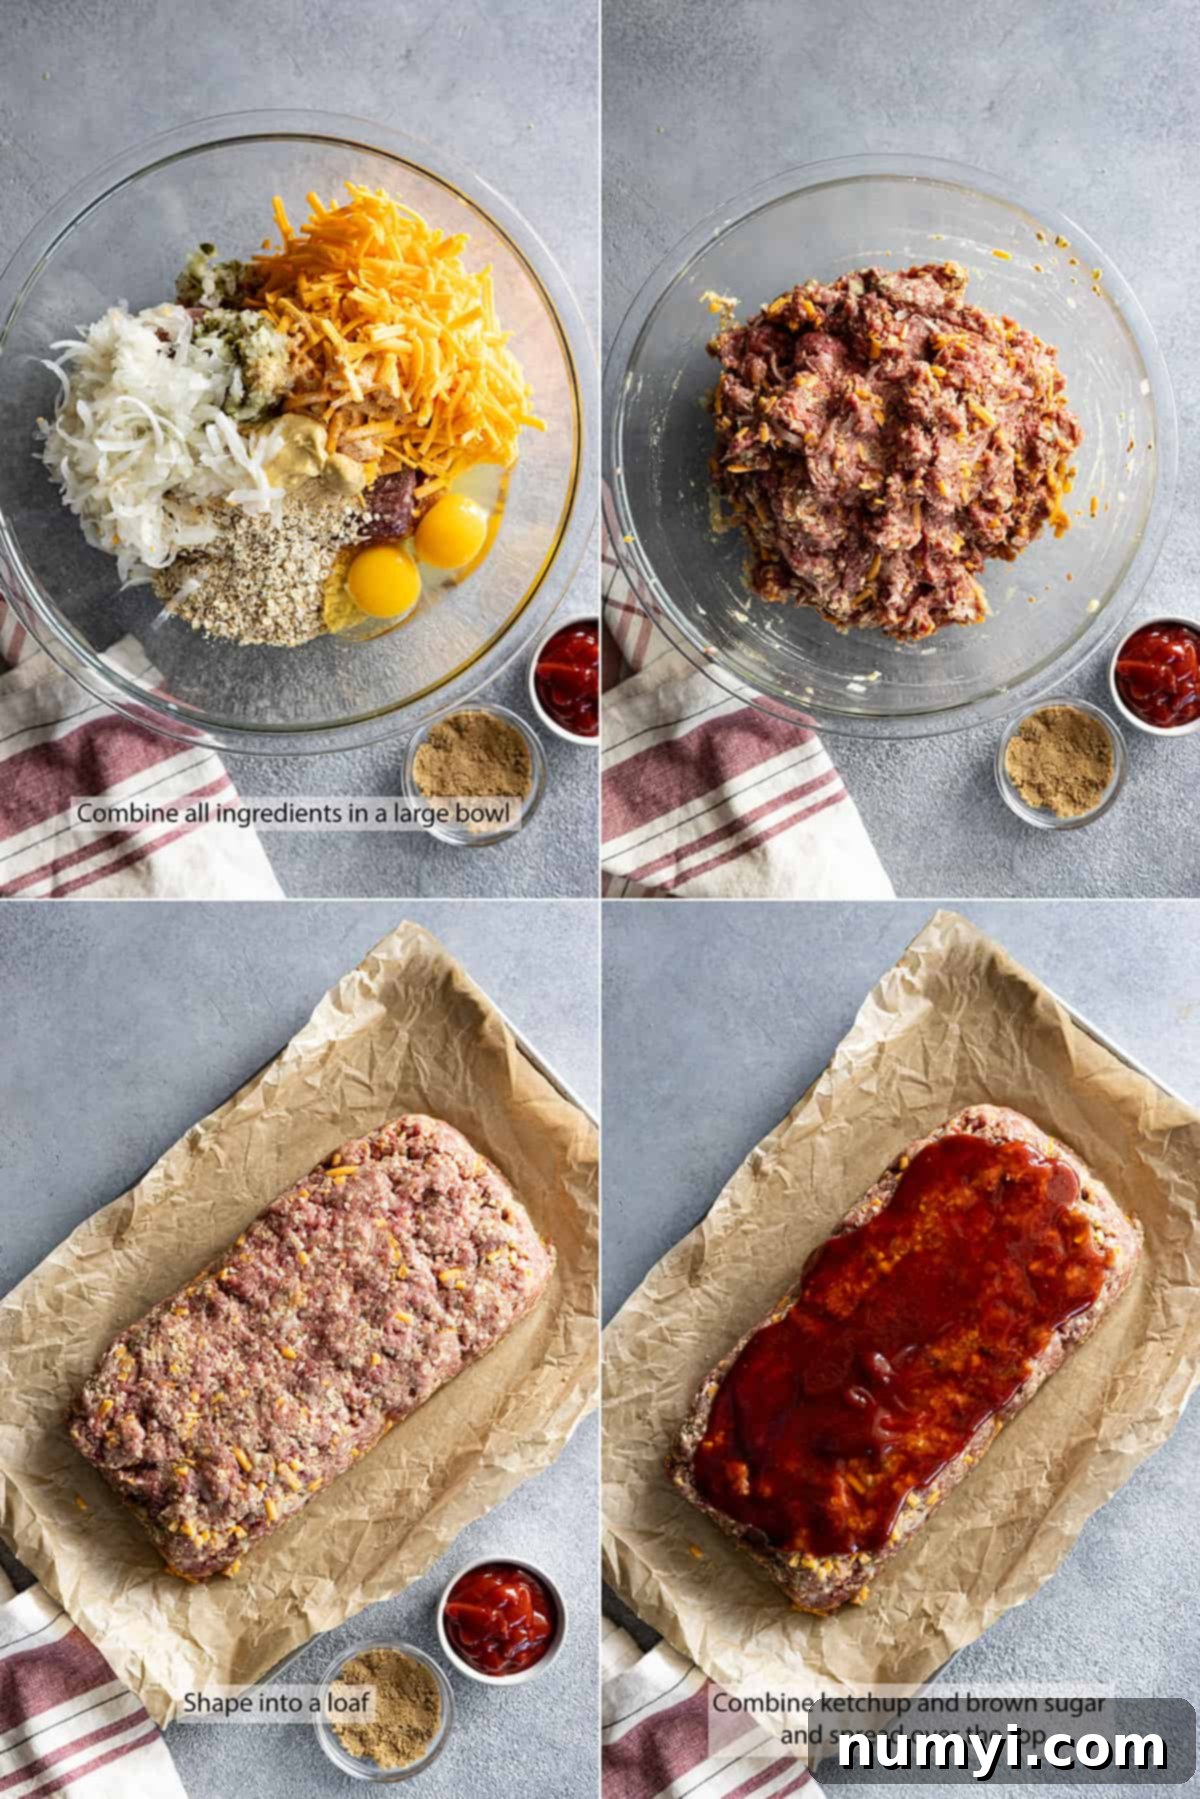
How To Make Cheeseburger Meatloaf: A Simple Guide
Crafting this delicious cheeseburger meatloaf is surprisingly simple, making it perfect for even novice cooks. Follow these straightforward steps to achieve a perfectly moist and flavorful result every time.
STEP 1: Prepare Your Base Mixture & Preheat Oven.
In a large mixing bowl, combine the quick oats, finely grated onion, and milk. Give it a gentle stir and allow the mixture to sit for at least 5 minutes. This crucial step allows the oats to absorb the milk, ensuring they soften and effectively bind the meatloaf while adding to its moisture. While the oats are soaking, preheat your oven to 350°F (175°C). Line a large baking sheet with foil or parchment paper – this will be your secret weapon for easy cleanup later!
STEP 2: Combine All Ingredients & Mix Carefully.
To the bowl with the oat mixture, add the ground beef, shredded cheddar, dill pickle relish, Worcestershire sauce, prepared mustard, garlic powder, salt, and eggs. Now, here’s a key tip for a tender meatloaf: mix the ingredients just until everything is combined. Overmixing the meat can lead to a tough, dense meatloaf, so be gentle. Your hands are often the best tool for this job, ensuring an even distribution of ingredients without excessive handling.
STEP 3: Shape the Loaf & Apply the Tangy Glaze.
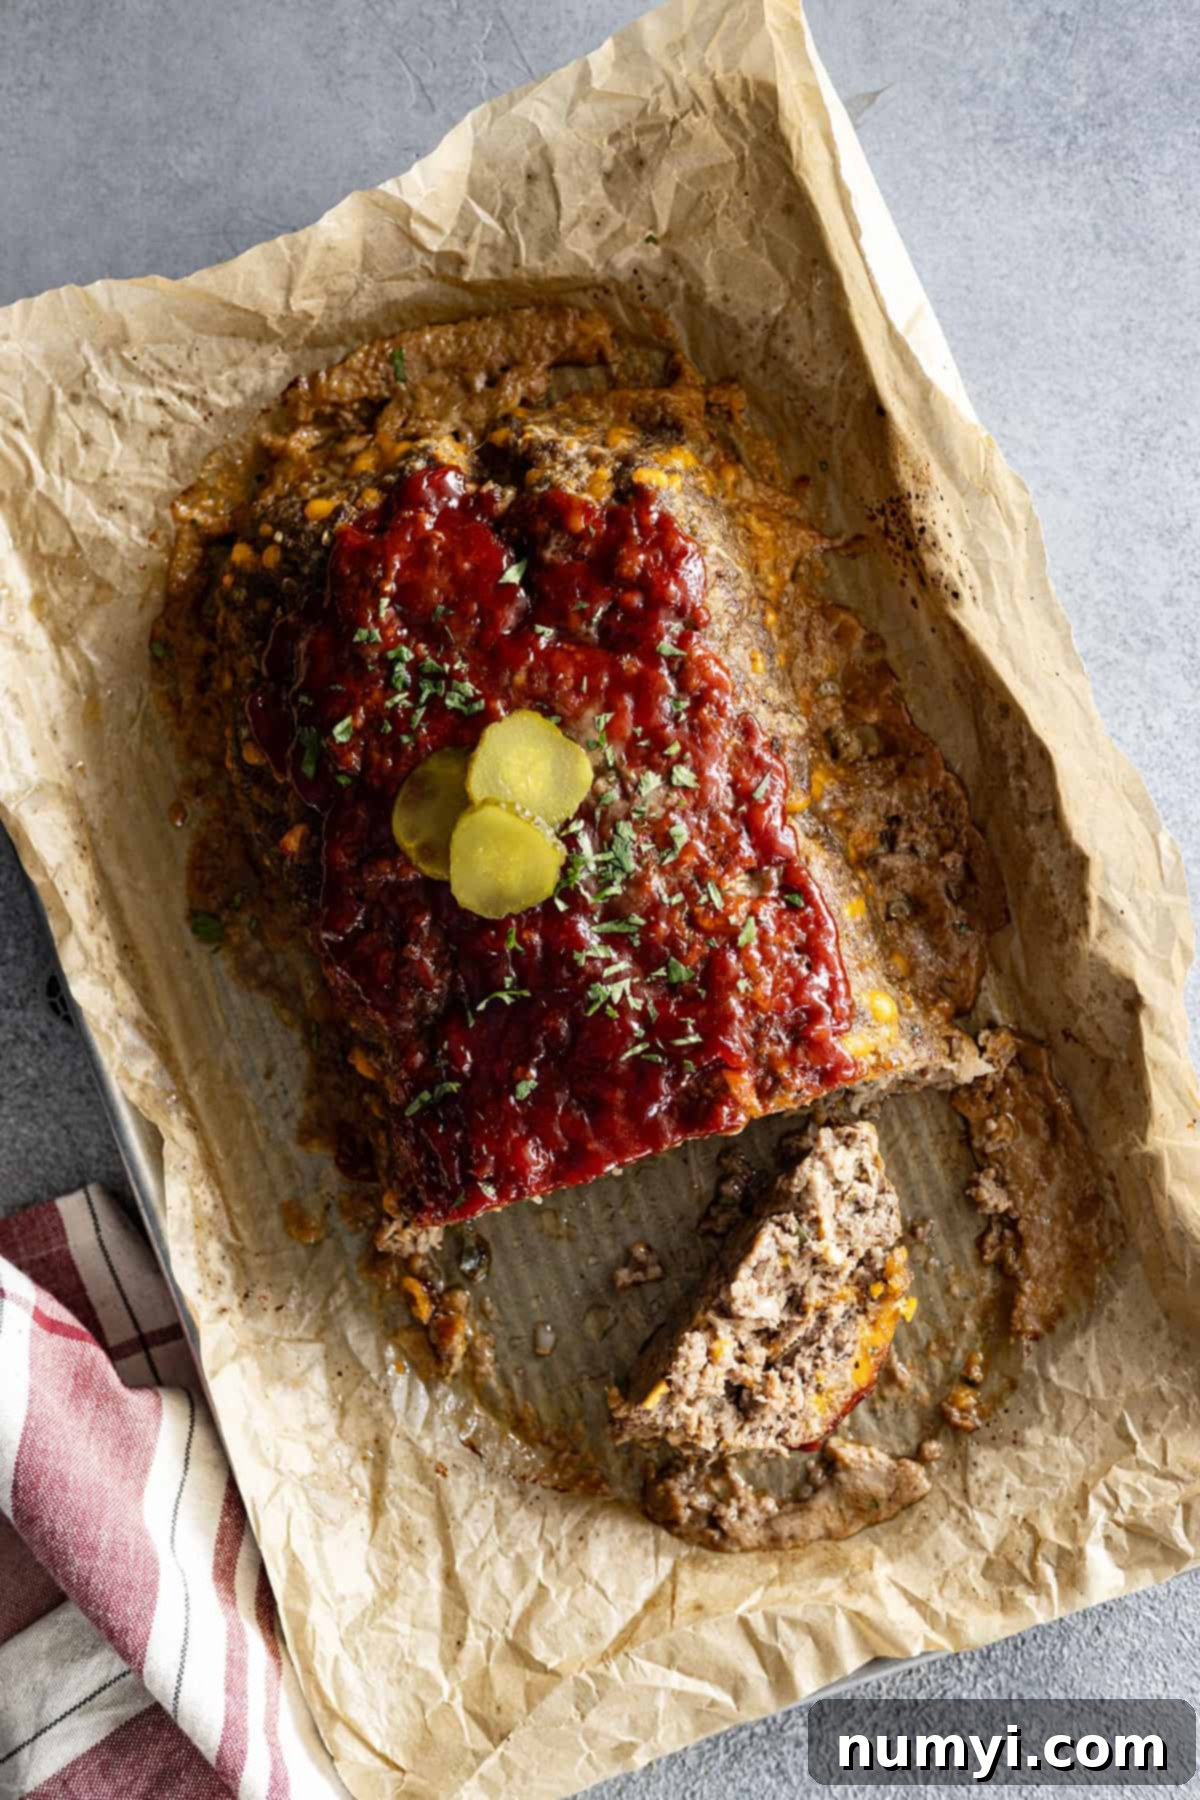
Transfer the meat mixture onto your prepared baking sheet. Using your hands, gently shape it into an even, oblong loaf. Aim for a consistent thickness throughout the loaf to ensure even cooking. In a small separate bowl, whisk together the ketchup and brown sugar until well combined. This creates a beautifully sweet and tangy glaze that caramelizes as it bakes. Spread this glaze evenly over the top of the shaped meatloaf, covering it completely. This topping is not just for flavor; it also helps keep the meatloaf moist and adds a fantastic crust.
STEP 4: Bake to Perfection & Rest.
Place the baking sheet in your preheated oven and bake for approximately 1 hour. The most accurate way to determine doneness is by using a reliable meat thermometer. Insert it into the thickest part of the loaf; it should reach an internal temperature of 160°F (71°C). Once it hits this temperature, remove the meatloaf from the oven. Resist the urge to slice it immediately! Allow the meatloaf to rest on the baking sheet for at least 10 minutes before cutting. This resting period is vital for the juices to redistribute throughout the loaf, ensuring every slice is incredibly moist and flavorful.
FAQs About Cheeseburger Meatloaf
Proper storage is key to enjoying your delicious leftovers. Once the meatloaf has completely cooled to room temperature, transfer any remaining portions into an airtight container. It can be safely stored in the refrigerator for up to 4 days. When reheating, individual slices can be warmed in the microwave for a quick meal. For larger portions or a more even reheat, place slices on a baking sheet with a splash of beef broth (to add moisture). Cover the baking sheet tightly with foil and bake at 350°F (175°C) until thoroughly warmed through. The exact reheating time will depend on the thickness of the slices and the quantity being reheated.
Freezing meatloaf is a fantastic way to prep meals ahead of time or preserve leftovers. Here’s how to do it effectively:
BEFORE BAKING: This method is great for future meal planning. Line a loaf pan with plastic wrap, ensuring enough overhang on the sides to cover. Press your raw meatloaf mixture firmly into the lined pan. Cover tightly with the plastic wrap and then wrap it again with heavy-duty aluminum foil. Freeze until solid. Once solid, you can remove the frozen loaf from the pan, re-wrap it even more securely, and freeze for up to 3 months. When ready to bake, thaw the meatloaf overnight in the refrigerator, then bake according to the recipe directions. Note that it might require a little longer baking time since it starts cold.
AFTER BAKING: For cooked leftovers, ensure the meatloaf has completely cooled. Wrap individual slices or the whole cooled loaf tightly in plastic wrap, then an additional layer of heavy-duty foil. This double-layer helps prevent freezer burn. Freeze for up to 3 months. To enjoy, thaw overnight in the refrigerator and then reheat as described above.
Preparing meatloaf ahead can save you valuable time on a busy day. Follow all the preparation steps for the meatloaf, combining the ingredients and shaping it into a loaf on your baking sheet. Instead of baking it immediately, cover the shaped loaf securely with plastic wrap. Refrigerate for up to 24 hours. When you’re ready to cook, simply remove it from the refrigerator, uncover, apply the glaze, and bake according to the recipe instructions. Since the meatloaf will be starting from a colder temperature, you may need to add an extra 10-15 minutes to the baking time to ensure it reaches the proper internal temperature.
Secrets To Great Meatloaf: Ensuring a Perfect Result Every Time
Achieving a truly spectacular meatloaf isn’t difficult, but a few key practices can elevate your dish from good to unforgettable. These tips are essential for ensuring your cheeseburger meatloaf is moist, flavorful, and perfectly cooked.
BAKING SHEET for Superior Results: This is, in my strong opinion, a non-negotiable step! Baking your meatloaf directly on a baking sheet (lined with foil or parchment for easy cleanup, of course) rather than in a loaf pan makes all the difference. Why? It allows the excess fat to drain away, preventing your meatloaf from becoming a soggy, greasy mess. Furthermore, it promotes maximum surface browning, creating a delicious, caramelized crust all around the loaf. Just ensure you shape the loaf as evenly as possible for consistent cooking.
Proper Seasoning is Paramount: A common mistake in cooking is under-seasoning, and meatloaf is no exception. Properly seasoned meatloaf will have a depth of flavor that an under-seasoned one simply cannot achieve. Don’t be shy with the salt and other seasonings listed in the recipe! Salt doesn’t just make food “salty”; it actually enhances and brings out the natural, inherent flavors of the meat and other ingredients. Taste your mixture (before adding eggs, if you want a safe taste) and adjust as needed. A well-seasoned meatloaf is a truly delicious meatloaf.
The Indispensable Meat Thermometer: For food safety and to prevent overcooking (which leads to dry meatloaf!), a meat thermometer is your best friend. Always use one to check the internal temperature of your meatloaf. Bake until it reaches 160°F (71°C) in the thickest part. This temperature ensures it’s safely cooked through. Once removed from the oven, the meatloaf will continue to cook slightly during its resting period, rising to the FDA-recommended safe temperature of 165°F (74°C) for ground meat. Investing in a good instant-read thermometer is a game-changer for all your cooking.
The Power of the Rest: Patience is a virtue, especially after baking meatloaf. After removing your beautifully cooked meatloaf from the oven, allow it to rest undisturbed for at least 10 minutes. This resting period is critical. During cooking, the meat fibers contract and push the juices towards the center. Resting allows these juices to redistribute throughout the entire loaf, resulting in a much more tender, moist, and flavorful slice. If you cut into it too soon, those precious juices will simply run out onto your plate, leaving you with a drier meatloaf.
Serving Suggestions for Your Cheeseburger Meatloaf
This savory cheeseburger meatloaf pairs wonderfully with a variety of classic side dishes. Here are some of my favorite recommendations to complete your comforting meal:
- Creamy Garlic Mashed Potatoes: A timeless pairing that soaks up all the delicious meatloaf flavors.
- Effortless Slow Cooker Mashed Potatoes: For when you want perfectly fluffy mashed potatoes with minimal fuss.
- Rich and Cheesy Easy Potatoes au Gratin: Layers of thinly sliced potatoes baked in a creamy, cheesy sauce.
- Crisp Oven Roasted Green Beans: A healthy and flavorful vegetable side that adds a pop of color.
- A Simple Side Salad: A light, fresh salad with a vinaigrette dressing provides a nice contrast to the richness of the meatloaf.
- Fluffy Homemade Dinner Rolls: Perfect for soaking up any juices or making mini meatloaf sliders.
- Classic French Fries or Onion Rings: Lean into the cheeseburger theme with these ultimate diner sides.
DID YOU KNOW….
Rating and sharing recipes is one of the best ways you can support your favorite food bloggers? If you make this delicious cheeseburger meatloaf recipe, I would absolutely love it if you clicked the stars when commenting below to leave a rating and/or shared a photo of your creation on Instagram, Facebook, or Pinterest! Your support means the world and helps others discover these recipes too.
Cheeseburger Meatloaf
Ingredients
- ½ cup (52 grams) quick cooking oats
- 1 large onion, grated
- ⅓ cup (80 ml) milk
- 2 large eggs
- ¼ cup (60g) dill pickle relish
- 1 tablespoon Worcestershire sauce
- 1 tablespoon prepared mustard
- 2 teaspoons garlic powder
- 1 teaspoon salt
- 8 ounces (226g) shredded cheddar
- 2 pounds (1kg) 85% lean ground beef
- ¼ cup (65g) ketchup
- 1 tablespoon packed brown sugar
Instructions
-
In a large bowl, combine the quick oats, grated onion, and milk. Let stand for at least 5 minutes to absorb. Preheat oven to 350℉. Line a baking sheet with foil or parchment paper; set aside.
-
Add the remaining ingredients EXCEPT for ketchup and brown sugar to the bowl. Mix just until everything is combined. Using your hands does the best job.
-
Place mixture on lined baking sheet and shape into an even loaf. Combine the ketchup and brown sugar in a small bowl and spread on top of the loaf. Bake for 1 hour or until center reads 160℉. Remove from oven and allow to rest for 10 minutes before cutting.
Notes
- STORAGE: Place cooled leftovers in an airtight container and refrigerate for up to 4 days. Reheat individual portions in the microwave or place on a baking sheet with a little beef broth. Cover with foil and bake at 350 degrees F. The amount of time will vary greatly depending on how much is being reheated and if it is in slices.
- NUTRITION: Since different brands of ingredients have different nutritional information, the information shown is just an estimate. This website is not intended as nutritional advice, or a diet or health plan. Readers of this website are ultimately responsible for all decisions pertaining to their health.
Nutrition
