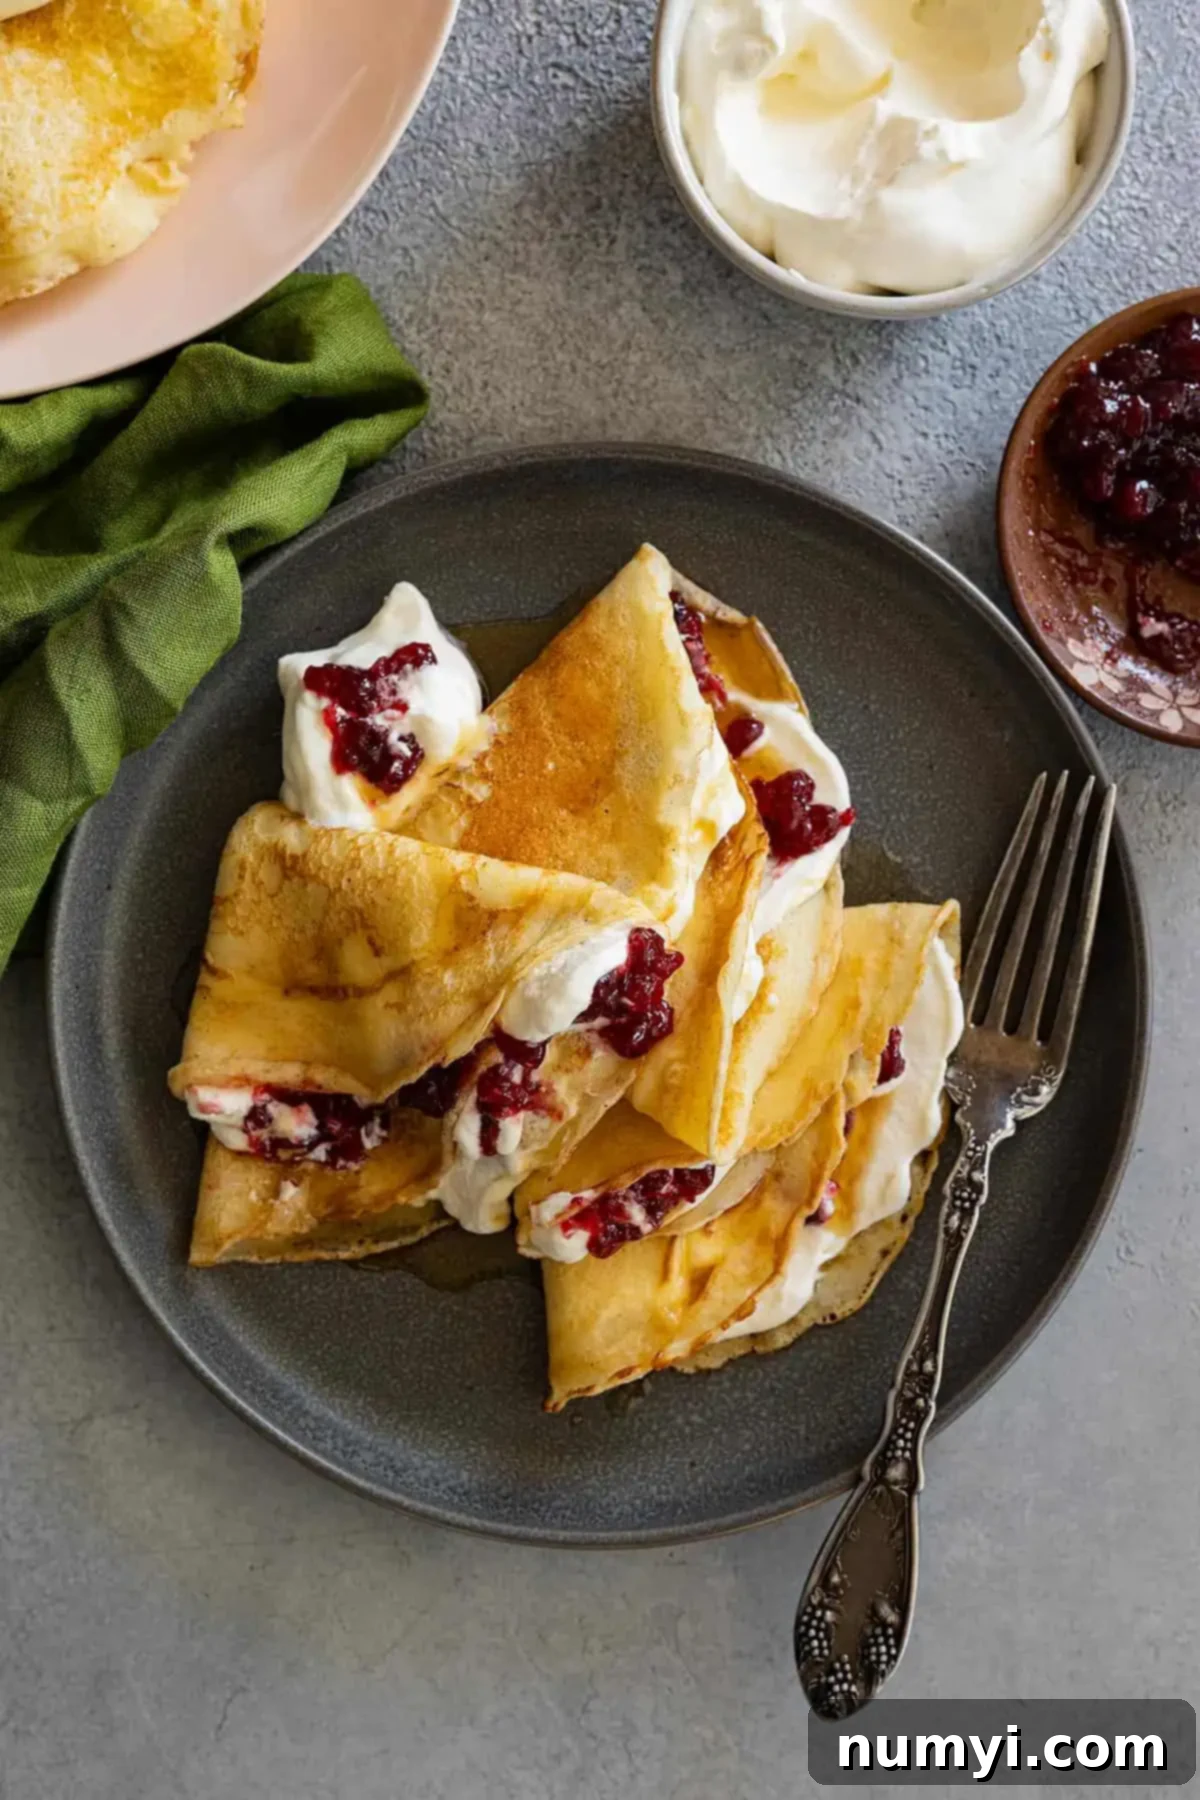
Authentic Swedish Pancakes (Pannkakor) Recipe: Thin, Delicate, and Delicious!
Swedish Pancakes, known as “Pannkakor” in their homeland, are an exquisite culinary delight perfect for any occasion! These thin, delicate pancakes boast a tender texture and a satisfying chew, making them a truly unique breakfast, brunch, or even dinner option. Whether you prefer to load them with sweet toppings or savory fillings, these delightful pancakes are destined to become your new favorite family tradition.
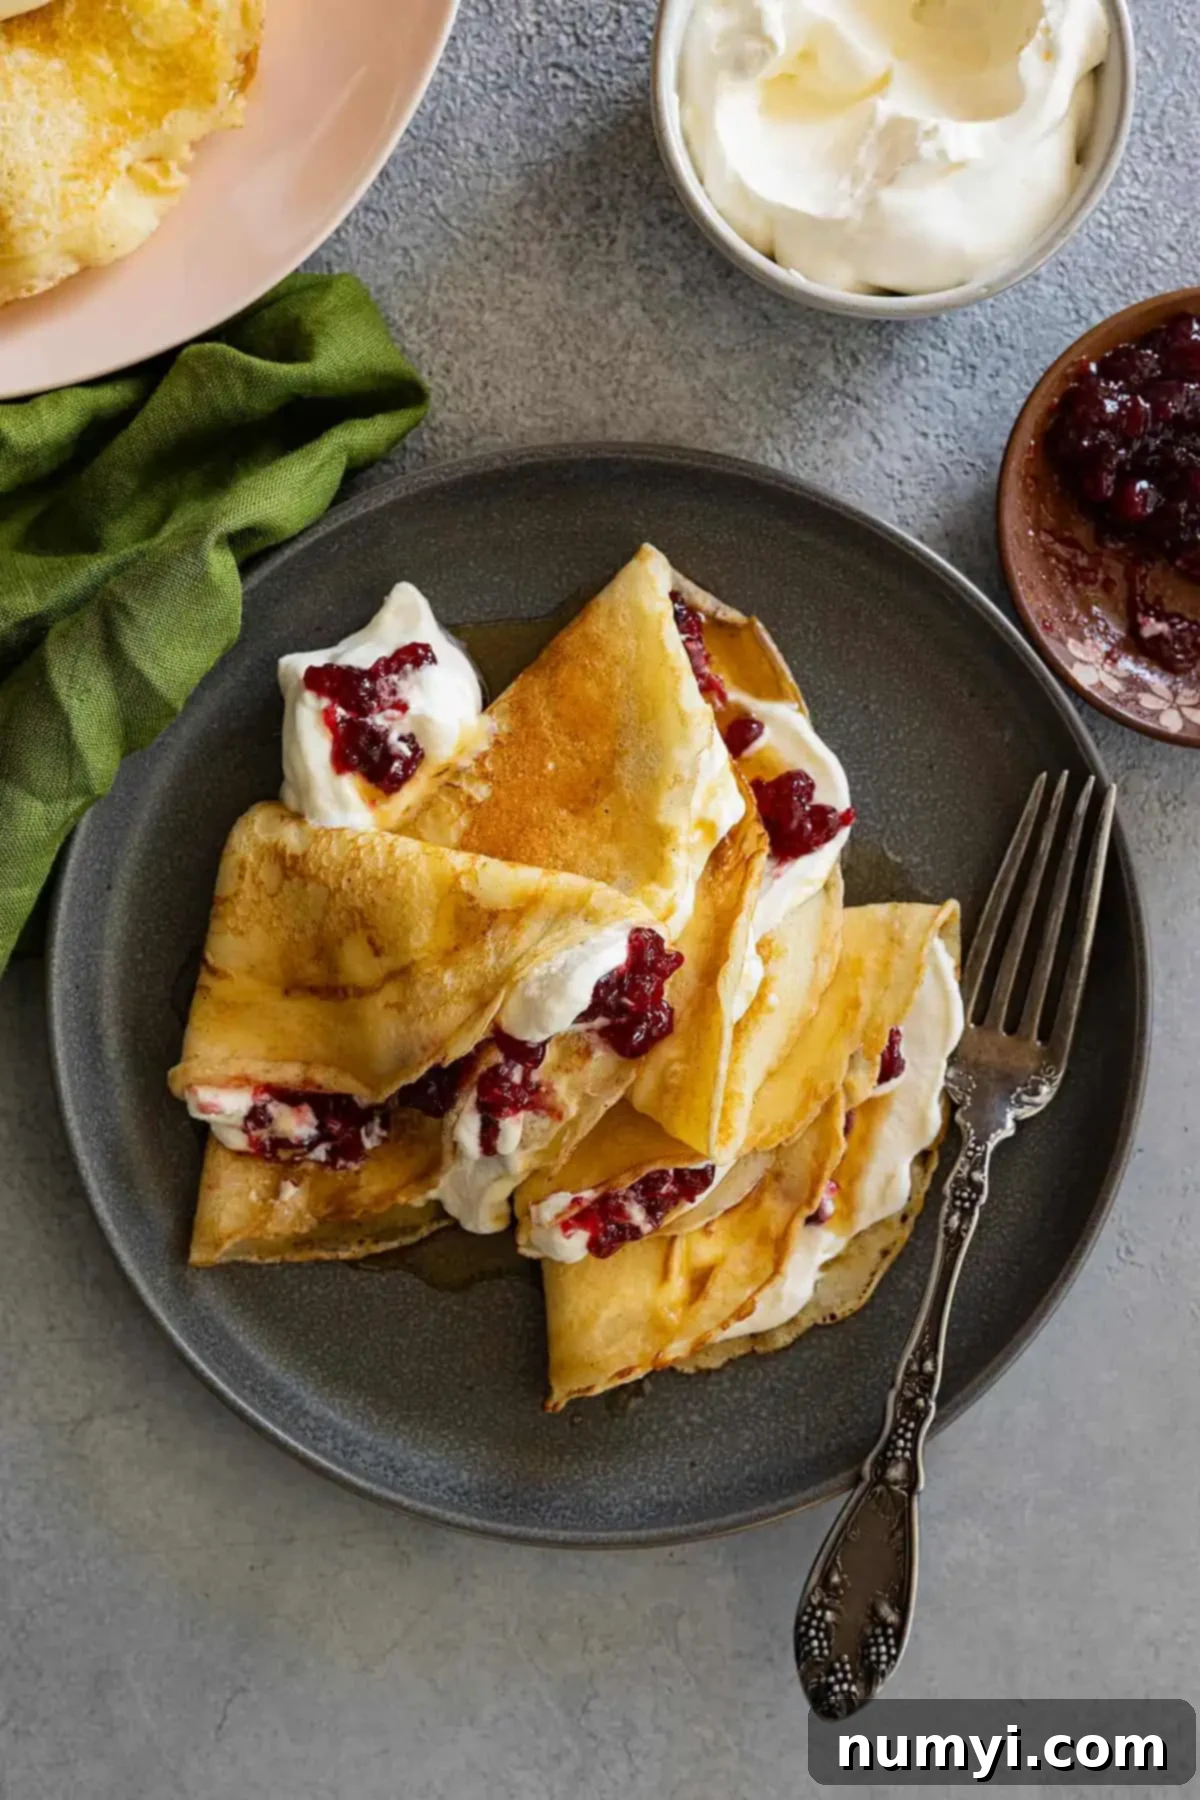
Swedish pancakes, or Pannkakor, are crafted from a remarkably simple batter consisting of flour, eggs, a touch of salt and sugar, and milk. This batter is then cooked to perfection, forming thin, lacy layers of golden-brown goodness. Unlike their thicker American counterparts, Swedish pancakes are much lighter and possess an almost crepe-like quality, yet with their own distinct, slightly richer flavor profile. Traditionally, when served sweet, they are often adorned with a generous dollop of whipped cream and tart lingonberries, creating a harmonious balance of flavors. However, their versatility shines when served savory, offering a fantastic base for fillings like thinly sliced ham, sharp cheese, or even luxurious smoked salmon. They truly are a blank canvas for your culinary imagination!
In our home, adding new recipes from our heritage is a cherished tradition. With roots primarily in German and Swedish cultures, and a delightful dash of Danish influence, our kitchen is often filled with the aromas of timeless family favorites. Beyond these wonderful Swedish pancakes, other beloved recipes we prepare every year, especially for Christmas, include Creamy Rice Pudding, the festive Swedish Tea Ring, the unique Ostakaka, and hearty Potato Bologna. Each dish tells a story, connecting us to generations past and creating new memories with every bite.
Why You’ll Fall in Love with These Swedish Pancakes (Pannkakor)
Beyond their delightful taste, Swedish pancakes offer a multitude of reasons to adore them. They are more than just a breakfast item; they are a culinary experience that adapts to your needs and cravings.
- Uniquely Light and Delicate Texture: Forget heavy, dense pancakes. Swedish pancakes are beautifully thin and airy, providing the perfect tender vehicle for an endless array of toppings. Their delicate nature makes them feel gourmet, yet they are incredibly simple to prepare.
- Incredibly Versatile for Any Meal: While often associated with breakfast, these pancakes transcend mealtime boundaries. They are equally fantastic for a quick lunch, an elegant brunch, a light dinner, or even a sophisticated dessert. Their neutral, slightly sweet flavor pairs wonderfully with both sweet and savory ingredients.
- Effortless to Make with Pantry Staples: You won’t need any exotic ingredients for this recipe! These pancakes rely on common items you likely already have in your pantry and refrigerator – flour, eggs, milk, sugar, and salt. This makes them an accessible and budget-friendly option for any home cook.
- Perfectly Portable for Busy Lifestyles: Need a quick bite on the go? Simply roll up a few Swedish pancakes, perhaps with a dusting of powdered sugar or a smear of jam, and you have a delicious, handheld snack or light meal ready to head out the door with you. They pack easily for picnics or lunchboxes!
- A Taste of European Tradition: Experience a classic Scandinavian treat that brings a touch of old-world charm to your table. Making these pancakes is a delightful way to explore international flavors and traditions from the comfort of your own kitchen.
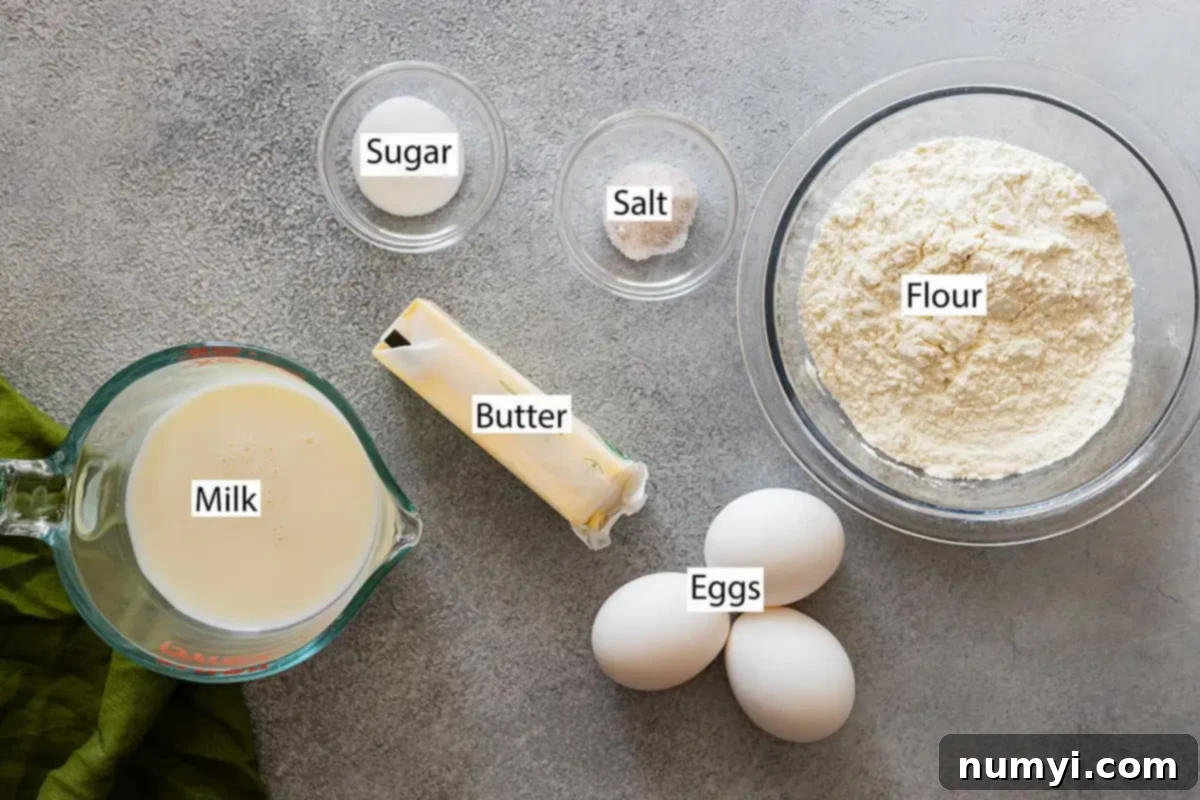
Essential Ingredients for Perfect Pannkakor
These pancakes may not demand a long list of ingredients, but don’t let their simplicity deceive you! Each component plays a crucial role in creating a truly mouthwatering and authentic Swedish pancake experience.
- ALL-PURPOSE FLOUR: The foundation of our batter, all-purpose flour provides the structure for these thin pancakes. For best results, measure your flour accurately, preferably by weight if possible, to avoid a too-thick batter.
- EGGS: Eggs are essential for richness, binding the ingredients, and contributing to the delicate texture and golden color of the pancakes. Using large eggs is standard for this recipe.
- MILK: Milk adds moisture and creaminess, resulting in a tender pancake. Whole milk will yield a slightly richer flavor, but 2% milk works beautifully too. Ensure your milk is at room temperature to help it combine smoothly with the other ingredients, preventing lumps and ensuring a consistently smooth batter.
- SUGAR: Just a small amount of sugar is included in the batter, providing a subtle sweetness that makes these pancakes versatile for both sweet and savory applications. It also aids in browning, giving them those attractive golden edges.
- SALT: Do not skip the salt! It is a flavor enhancer that balances the sweetness and brings out the full taste of the other ingredients, preventing the pancakes from tasting bland.
- BUTTER: Used for cooking the pancakes, butter imparts a wonderful, nutty flavor and helps achieve that desirable golden-brown crispness on the edges. Clarified butter or a light oil can also be used if preferred, but butter truly enhances the authentic taste.
Kitchen Tools You’ll Need:
To whip up these Swedish pancakes, you’ll need a few basic kitchen essentials:
- Large Mixing Bowl: For combining your ingredients.
- Whisk: To ensure a smooth, lump-free batter. A hand mixer or blender also works.
- Measuring Cups and Spoons: For accurate ingredient proportions.
- 10-inch Skillet or Crepe Pan: A non-stick skillet is highly recommended for easy flipping.
- Spatula: A thin, flexible spatula is ideal for lifting and flipping the delicate pancakes.
- Ladle or ¼-cup measuring cup: For pouring the batter evenly into the pan.
Step-by-Step Guide: Crafting Your Swedish Pancakes
Making Swedish pancakes is a straightforward process, but a few key techniques will ensure perfect results every time. This section provides a detailed overview; for precise measurements and step-by-step instructions, please refer to the printable recipe card at the bottom of this post.
Preparing the Batter:
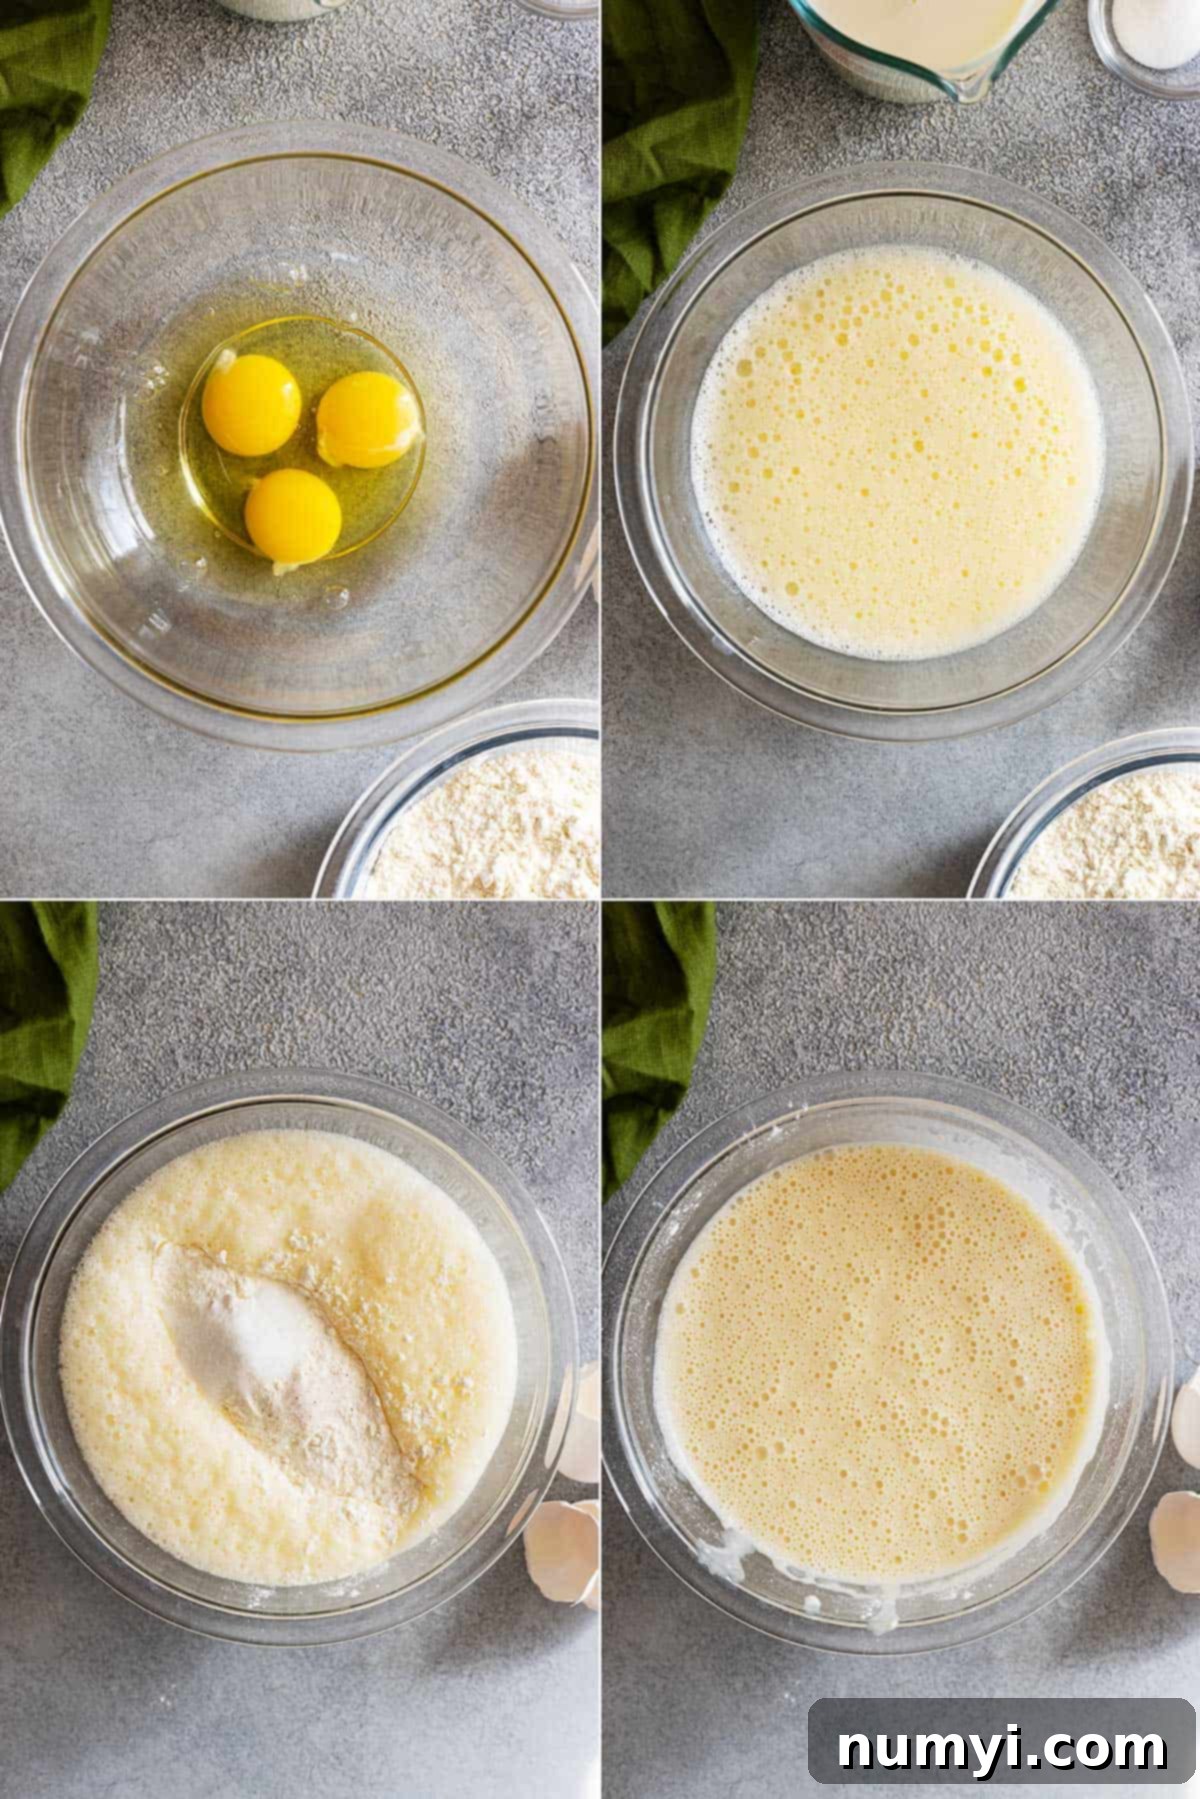
STEP 1: Combine Wet Ingredients First. In a large mixing bowl, crack your eggs and add the milk. Whisk these two ingredients vigorously until they are thoroughly combined and slightly frothy. This helps to break down the eggs and integrate them smoothly. Next, add the all-purpose flour, sugar, and salt to the wet mixture. Continue to whisk until the batter is completely smooth and free of any lumps. It’s important to whisk well, but avoid overmixing, which can develop the gluten too much and lead to tougher pancakes. If you prefer a hands-off approach, you can also combine all ingredients in a blender and blend until perfectly smooth – this is a great trick for a silky batter!
Batter Consistency: The batter for Swedish pancakes will be noticeably thinner than traditional American pancake batter, but it will be slightly thicker than a typical French crepe batter. It should be easily pourable and spread smoothly across the pan. If your batter seems too thick, you can add an extra tablespoon or two of milk until you achieve the desired consistency. A thin batter is key to those delicate, lacy pancakes.
Mastering the Cooking Technique:
STEP 2: Preheat and Swirl. Place a 10-inch skillet (a non-stick pan is highly recommended) over medium-low heat. Melt a small amount of butter in the pan, swirling it around to lightly coat the entire surface. Once the butter is melted and the pan is heated, pour approximately ¼ cup of the prepared batter into the center of the pan. Immediately tilt and swirl the pan in a circular motion to allow the batter to spread thinly and evenly across the bottom. This swift action is crucial for creating that characteristic thin, delicate pancake.
Cook and Flip: Allow the pancake to cook for 1-2 minutes. You’ll know it’s ready to flip when the edges begin to brown and slightly crisp, and the surface appears set, with tiny bubbles forming. Gently slide a thin spatula underneath the pancake and quickly flip it over. Cook for another 1-2 minutes on the second side, or until it is also golden brown and cooked through. The cooking time per pancake is quite short, so this process moves quickly!
Serve Immediately: As each pancake finishes cooking, you can serve it immediately or transfer it to a plate. If making a large batch, you can keep finished pancakes warm in a low oven (see FAQs below). Repeat the process with the remaining batter, adding a tiny bit more butter to the pan between each pancake if needed.
Tips for the Best Results:
- Rest the Batter: For an even smoother texture and to allow the flour to fully hydrate, consider letting the batter rest for 15-30 minutes at room temperature before cooking.
- Proper Pan Temperature: Medium-low heat is ideal. If the pan is too hot, the pancakes will brown too quickly on the outside and not cook through. Too low, and they won’t get that nice golden color.
- Even Coating of Butter: A light, even coating of butter in the pan before each pancake helps with browning and prevents sticking.
Troubleshooting Common Issues:
- Pancakes Sticking: Your pan might not be hot enough, or you might not be using enough butter. Ensure your non-stick pan is seasoned well.
- Pancakes Tearing: If they are too delicate to flip, your batter might be too thin (add a tiny bit more flour) or your pan might not be hot enough for the edges to set properly.
- Pancakes Too Thick: Add a tablespoon or two of milk to your batter to thin it out to the correct consistency. Remember, a swirl of the pan is key!
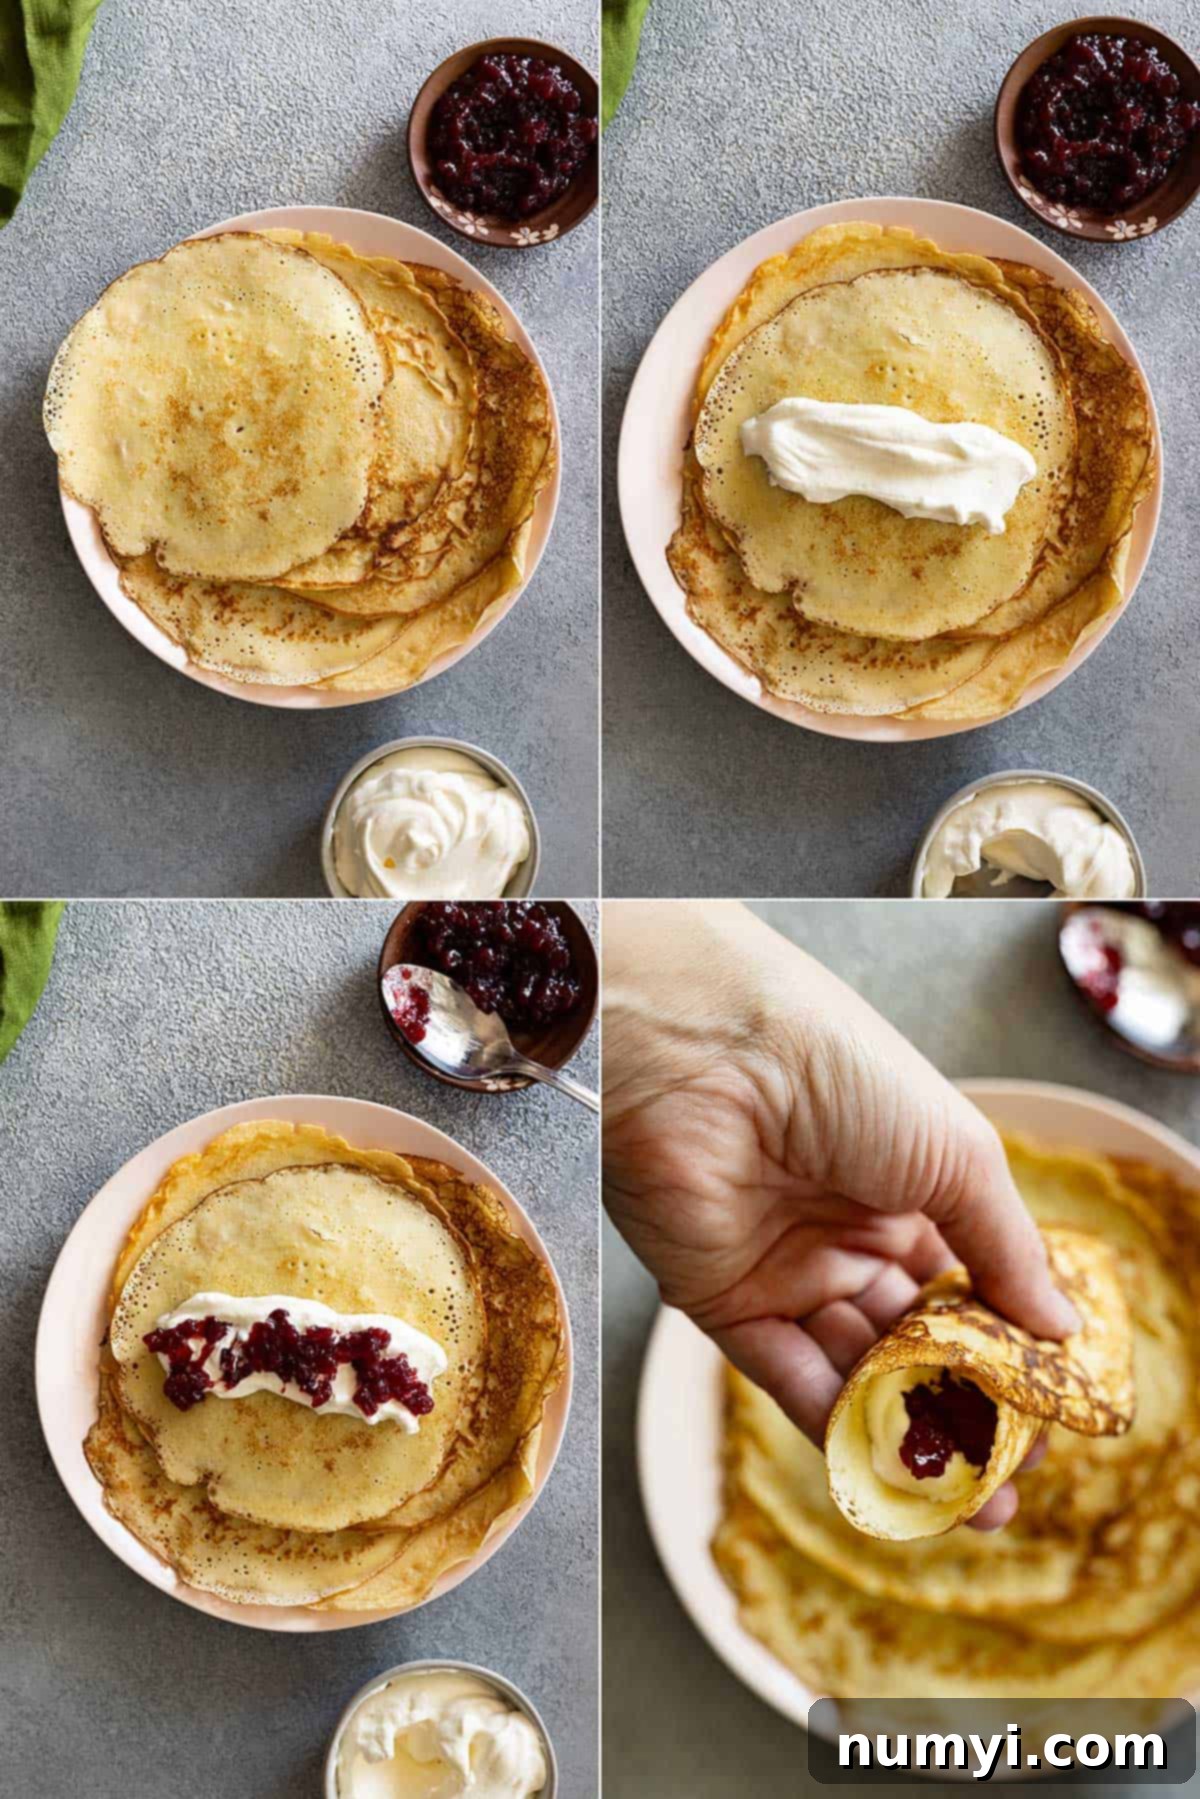
Frequently Asked Questions (FAQs) About Swedish Pancakes
Here are some common questions to help you master and enjoy your Swedish pancakes!
If you are preparing a large batch and not serving them all immediately, you can easily keep the pancakes warm in the oven. As each pancake is cooked, roll it up gently and place it on a baking sheet. Once you have a stack, place the baking sheet in a preheated 175-degree F (around 80-degree C) oven. This low temperature will keep them warm without drying them out.
To store leftover Swedish pancakes, allow them to cool completely to room temperature. Then, place them in an airtight covered container. They will stay fresh in the refrigerator for up to 3 days. To reheat, you can warm them quickly in a microwave or transfer the entire stack to a baking sheet, cover it loosely with foil, and place it in a 300-degree F (150-degree C) oven until they are thoroughly warm.
Absolutely! Swedish pancakes are wonderfully freezer-friendly. To prevent them from sticking together, stack cooled pancakes with a sheet of parchment paper in between each one. Once stacked, wrap the entire stack tightly with plastic wrap, then an additional layer of heavy-duty foil, or place them into a freezer-safe bag. They can be frozen for up to 3 months. When ready to enjoy, simply thaw them overnight in the refrigerator before reheating.
While Swedish pancakes and French crepes are both thin and delicate, there are subtle differences. Swedish pancake batter often includes a bit more sugar and sometimes a touch more egg, giving them a slightly richer flavor and a bit more chew than a traditional crepe. The cooking method is very similar, involving swirling the batter to coat the pan. Crepes are generally thinner and more pliable, while Swedish pancakes often have a slightly softer texture.
Yes, you can! Preparing the batter in advance is a great way to save time, especially for a busy morning breakfast or brunch. Simply whisk all the ingredients together, cover the bowl tightly with plastic wrap, and store it in the refrigerator for up to 24 hours. Give it a quick whisk before cooking, and you might need to add a splash more milk if it has thickened slightly overnight.
For gluten-free Swedish pancakes, you can experiment with a high-quality gluten-free all-purpose flour blend (one that includes xanthan gum works best). For dairy-free, substitute regular milk with an unsweetened non-dairy milk like almond, soy, or oat milk, and use a dairy-free butter substitute for cooking. Results may vary slightly in texture and flavor, but it’s definitely possible to enjoy these with dietary modifications.
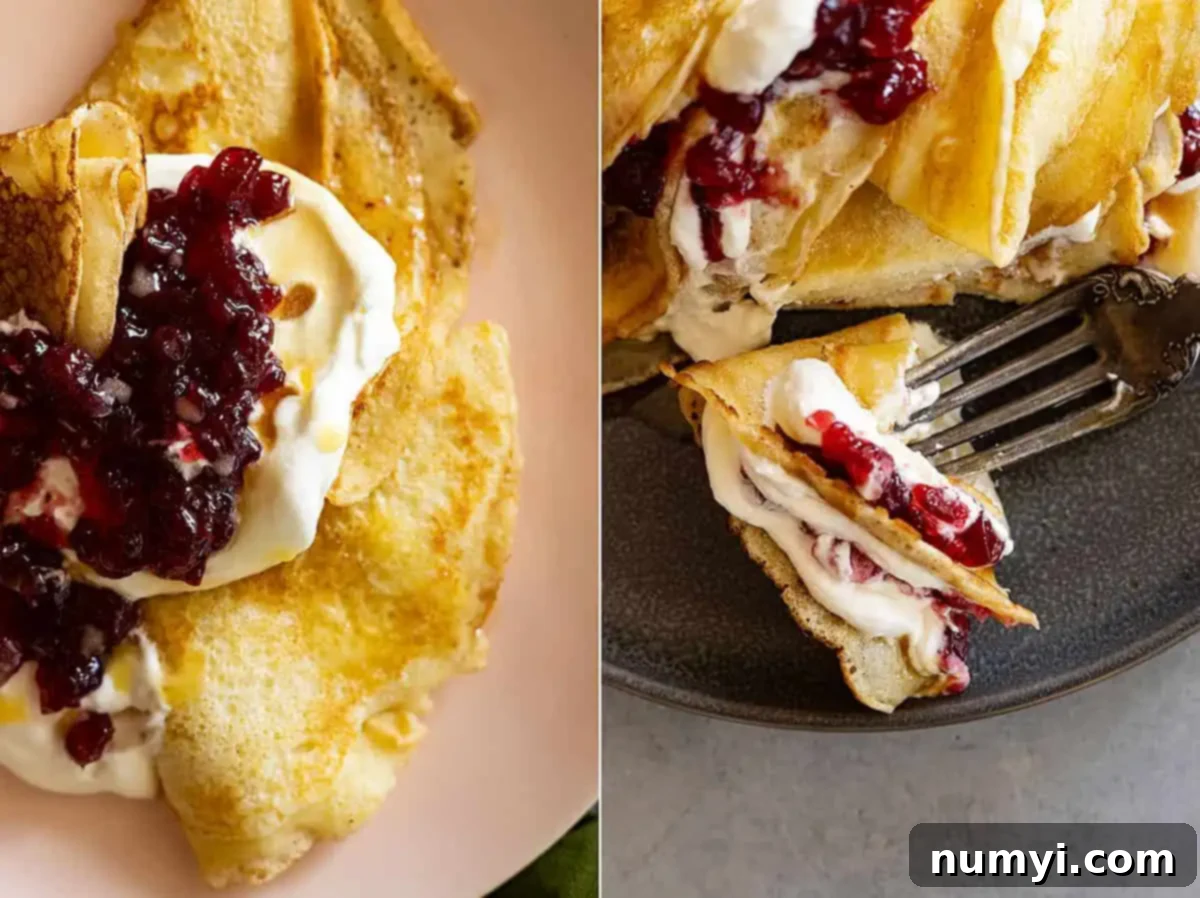
Irresistible Serving Suggestions for Your Pannkakor:
The beauty of Swedish pancakes lies in their incredible versatility. They can be transformed from a simple breakfast to a gourmet dessert or a savory meal with just a change of toppings. Here are some ideas to inspire you:
Sweet Toppings:
- Classic Whipped Cream & Lingonberries: The traditional and most beloved pairing. The tartness of lingonberries perfectly complements the rich cream and delicate pancake.
- Maple Syrup or Honey: A timeless choice for natural sweetness.
- Fresh Berries: Strawberries, blueberries, raspberries, or a mixed berry compote add freshness and vibrant flavor.
- Sauteed Apples or Peaches: Warm, caramelized fruit with a sprinkle of cinnamon makes for a comforting treat.
- A Sprinkle of Powdered Sugar: A simple, elegant finish that adds just the right amount of sweetness.
- Cream Cheese Frosting or Fruit Preserves: For a richer, dessert-like experience.
- Nutella or Chocolate Sauce: Indulgent options for chocolate lovers.
Savory Fillings:
- Smoked Salmon & Dill Cream Cheese: A sophisticated and delicious combination, perhaps with a sprinkle of fresh chives and a squeeze of lemon.
- Ham & Cheese: Classic comfort. Thinly sliced ham and a melting cheese like Swiss or Havarti, rolled up and warmed.
- Sauteed Mushrooms & Onions: Earthy and satisfying, especially with a hint of garlic and herbs.
- Herbed Cream Cheese: Mix cream cheese with fresh chives, red onion, and capers for a tangy, savory spread.
- Eggs & Bacon/Sausage: Turn your pancakes into a full breakfast wrap!
- Roasted Vegetables: Leftover roasted asparagus, bell peppers, or spinach can be delightful fillings.
No matter how you choose to enjoy them, these Swedish pancakes are sure to bring smiles to your table and warmth to your home.
HUNGRY FOR MORE? Don’t miss out on our latest delicious creations! Subscribe to my newsletter and follow along on Pinterest, Facebook, and Instagram for all my latest updates and culinary adventures!
Swedish Pancakes
Ingredients
- 3 large eggs
- 1½ cups (355ml) milk
- 1¼ cups (175g) all-purpose flour
- 2 teaspoons sugar
- ½ teaspoon salt
- butter for cooking
Instructions
-
In a large bowl, beat eggs and milk until well combined. Add flour, sugar, and salt. Whisk until smooth. You can also add everything to a blender and blend until smooth if you prefer.
-
Heat a little butter in a 10″ skillet over medium to medium-low heat. Pour ¼ cup of batter and tilt the pan in a circular motion until the batter is spread in an even, thin layer. Cook for 1-2 minutes or until edges are golden. Flip and cook for 1-2 minutes or until golden. Repeat for remaining batter. Serve immediately.
Notes
- STORAGE: Store cooled pancakes in a covered container for up to 3 days. Reheat in a microwave or transfer the whole stack to a baking sheet and cover with foil. Place in a 300-degree F oven until warm.
- FREEZER-FRIENDLY: Stack cooled pancakes between parchment paper. Wrap the stack with plastic wrap then heavy-duty foil or place into a freezer bag. Freeze for up to 3 months. Thaw overnight in the refrigerator.
Nutrition
