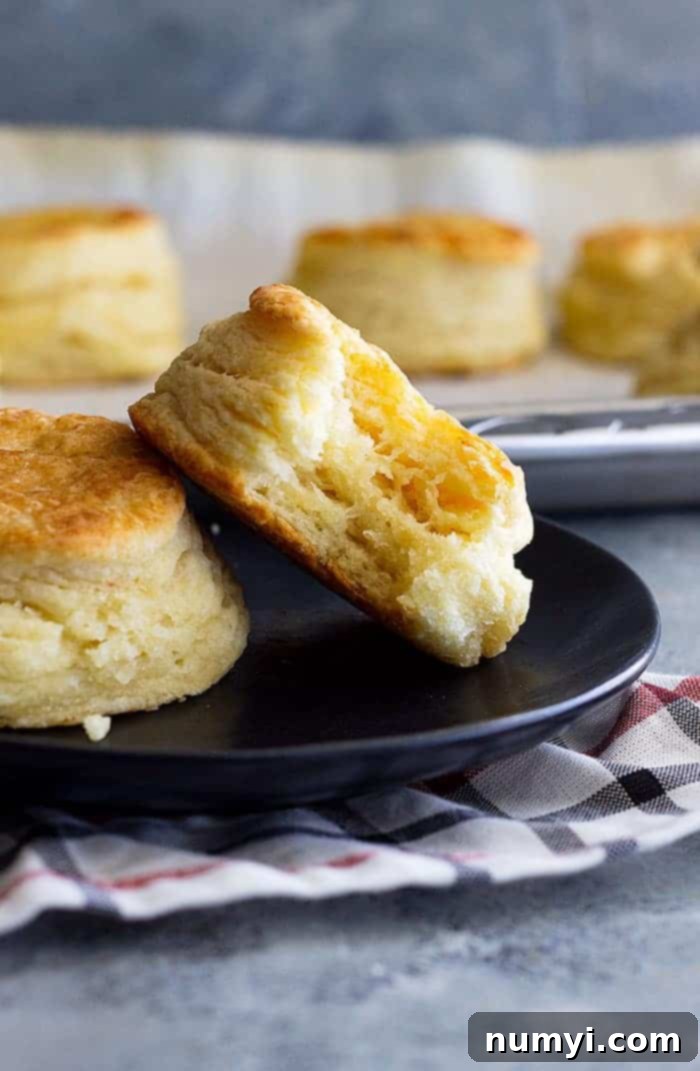
The Ultimate Guide to Making Perfectly Flaky Buttermilk Biscuits From Scratch
Unlock the secrets to baking incredible Flaky Buttermilk Biscuits with this comprehensive guide, requiring only 15 minutes of active preparation. Armed with simple tips and proven techniques, anyone can achieve golden, towering biscuits that boast a crispy exterior, a wonderfully soft interior, and countless buttery layers. Homemade biscuits are not just easy; they are the epitome of comforting food, promising a delightful experience with every bite.
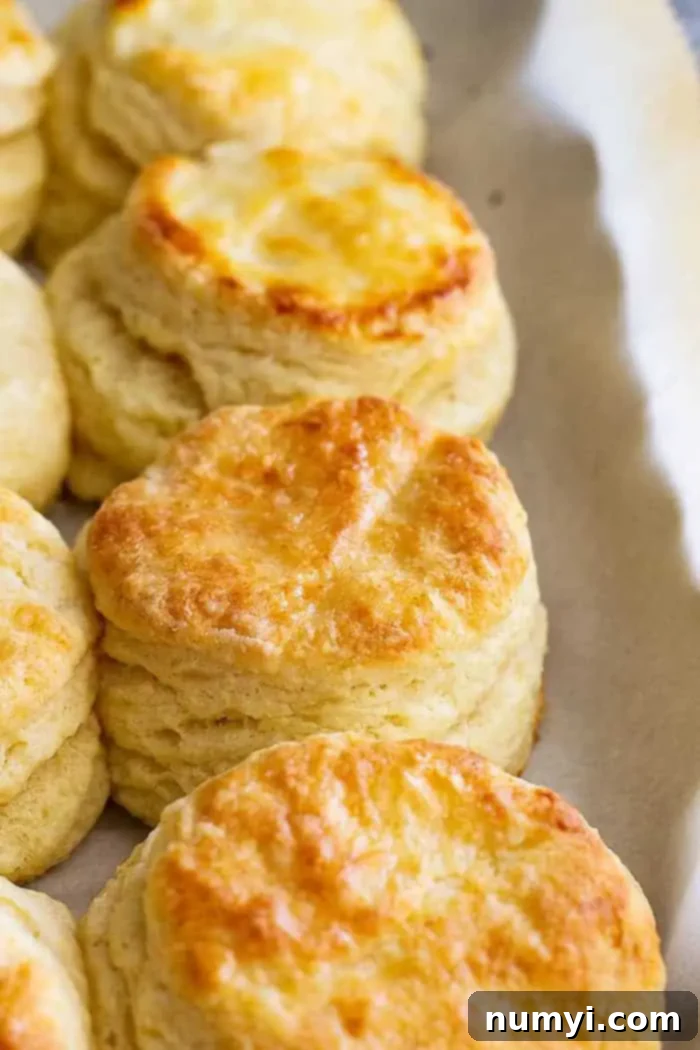
My Tried-and-True Simple Biscuit Recipe
My journey with homemade biscuits began in my youth, a cherished tradition passed down through generations. Over the years, I’ve experimented with countless recipes, yet I always find myself returning to a slightly adapted version from the classic Betty Crocker Cookbook. This particular recipe consistently yields perfectly flaky, fluffy buttermilk biscuits with an unmatched depth of flavor and texture that truly stands out.
I completely understand the convenience of store-bought refrigerated biscuits – life gets busy, and sometimes, time for homemade just isn’t there. However, if you find yourself with a little extra time and a craving for something truly special, I passionately encourage you to try your hand at this simple, from-scratch biscuit recipe. You’ll be amazed at the difference!
These buttermilk biscuits are genuinely easy to make, even if you’re a novice baker. The tall, buttery layers and tender crumb of these fluffy, flaky biscuits are simply unparalleled by anything you can buy in a can. They transform a simple meal into an occasion and are guaranteed to become a family favorite.
If you’re a fan of freshly baked goods, don’t stop at biscuits! Be sure to explore some of our other fantastic homemade bread recipes: Buttermilk Cornbread, Easy Banana Bread, and Beer Bread.
Why You’ll Fall in Love with This Biscuit Recipe:
- These flaky layered biscuits are the stuff of culinary dreams: exceptionally tall and fluffy, showcasing delicate, buttery layers on the inside, while boasting a perfectly golden, delightfully crispy exterior.
- They are surprisingly simple to prepare, requiring only about 15 minutes of hands-on prep time. Most of the magic happens in the oven!
- Enjoy the ultimate convenience: you can easily make the biscuit dough ahead of time and freeze it, ensuring that warm, freshly baked flaky buttermilk biscuits are always just an oven away, ready whenever a craving strikes.
- This recipe calls for only 7 essential ingredients, most of which are likely already staples in your pantry and refrigerator, making it accessible for any home cook.
Essential Ingredients for Perfect Flaky Biscuits:
Crafting the perfect biscuit starts with understanding the role of each ingredient. Here’s a closer look at what you’ll need and why:
Flour: I primarily use high-quality all-purpose flour for consistent results. However, for a slightly healthier twist, I’ve successfully used a 50/50 blend of white whole wheat flour and all-purpose flour; just note that you might need a touch more buttermilk to achieve the right dough consistency. The most critical aspect of measuring flour is to avoid compacting it. Always “spoon and level” – spoon the flour into your measuring cup until it overflows, then level it off with the straight edge of a butterknife. This prevents over-measuring, which can lead to dense, dry biscuits.
Sugar: A small amount of sugar isn’t just for sweetness; it plays a vital role in balancing the tangy buttermilk and the savory salt. It also contributes to that beautiful golden-brown crust, adding a subtle depth of flavor without making the biscuits overtly sweet.
Baking Powder: This is your primary leavening agent, crucial for creating those coveted tall and fluffy biscuits. It works by releasing carbon dioxide gas when heated, causing the dough to rise. It’s important to remember that baking powder cannot be fully substituted with extra baking soda, as they react differently.
Baking Soda: Another key leavening agent, baking soda works in tandem with the acid in the buttermilk. When combined, they produce additional carbon dioxide, further contributing to the biscuit’s rise and tender texture. For optimal results, always check the expiration date on both your baking powder and baking soda; stale leavening agents are a common culprit for flat biscuits.
Salt: Salt is essential for enhancing all the other flavors in the biscuit. If you opt to use salted butter, remember to omit or significantly reduce the amount of added salt in this recipe to prevent your biscuits from becoming overly salty.
Butter: This is arguably the most crucial ingredient for flaky biscuits, and the cardinal rule is that it must be exceptionally cold – ideally frozen. Cold butter is key to creating those magnificent layers. When tiny pieces of cold butter are encased in the dough and then exposed to high oven temperatures, the butter melts and releases steam. This steam creates air pockets, which separate the layers of dough, resulting in a tender, flaky interior and a wonderfully crispy exterior. I highly recommend placing your butter in the freezer for at least two hours before you plan to bake.
Buttermilk: Just like butter, buttermilk needs to be very cold. It imparts a distinctive tangy flavor that elevates the biscuits from bland to incredibly delicious. The acidity in buttermilk reacts with the baking soda, aiding in the leavening process and contributing to a tender crumb. Avoid substituting it with regular milk, as this will drastically change the flavor and texture. If you don’t have buttermilk on hand, don’t worry! You can easily make a homemade version: pour 1 tablespoon of white vinegar or lemon juice into a liquid measuring cup, then fill it the rest of the way to the 1-cup line with regular milk. Let it sit for 5-10 minutes until it slightly curdles before using.
How to Make Flaky Buttermilk Biscuits: A Step-by-Step Guide
Follow these steps carefully to ensure every biscuit is a masterpiece of flakiness and flavor:
1. PREHEAT THE OVEN: Begin by preheating your oven to a scorching 450°F (232°C). High heat is crucial for a rapid rise and golden crust. Line a baking sheet with parchment paper or lightly grease it, then set it aside. Alternatively, a lightly greased cast iron skillet works wonderfully, offering a beautiful crust.
2. COMBINE DRY INGREDIENTS: In a large mixing bowl, whisk together the all-purpose flour, sugar, baking powder, baking soda, and salt. Ensure these dry ingredients are thoroughly combined for even leavening throughout the dough.
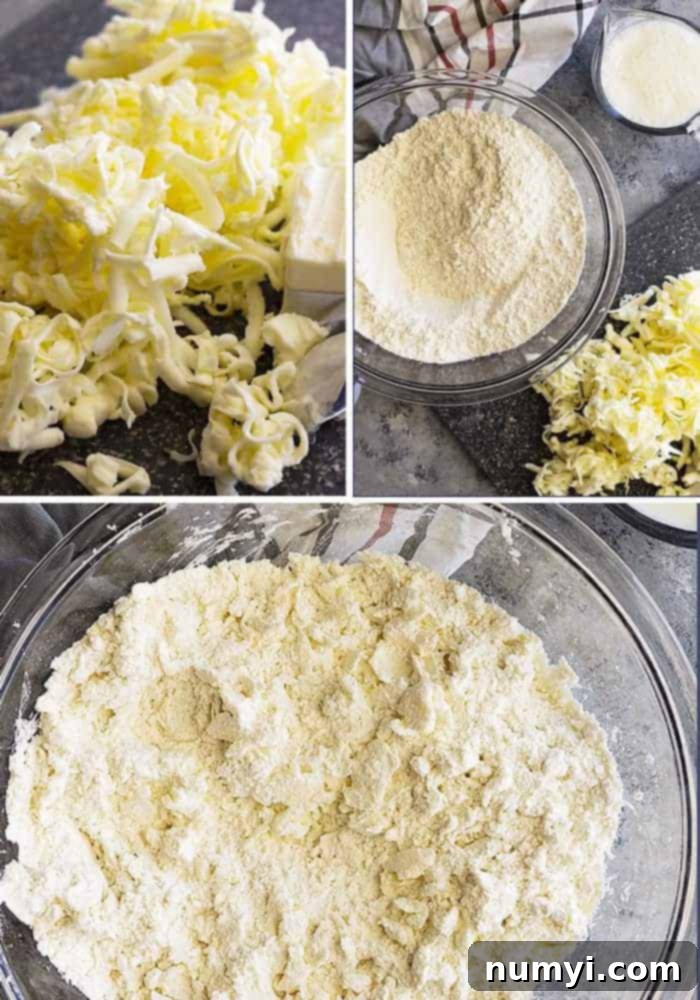
3. ADD COLD BUTTER: Now for one of the most vital steps! Using a cheese grater, grate your very cold (preferably frozen) butter directly into the bowl of dry ingredients. Once all the butter is grated, gently toss it with the flour mixture until each piece of butter is coated.
Let’s pause here because this step truly makes all the difference. Remember, COLD butter is non-negotiable! As previously mentioned, those tiny, icy fragments of butter within the dough are the secret to magnificent layers. When these biscuits hit the high heat of the oven, the butter melts rapidly, creating steam that pushes the layers of dough apart. This process results in an incredibly tender, layered interior and that irresistible crispy, golden exterior.
I find grating frozen butter with a cheese grater to be the most efficient method for achieving perfectly sized pieces that are evenly distributed throughout the dough. It saves time and effort compared to traditional cutting methods.
If you don’t have a grater, don’t worry. Simply cut the cold (refrigerated, not frozen for this method) butter into small, pea-sized pieces with a sharp knife. Then, using a pastry blender or two knives, “cut” the butter into the flour mixture until it resembles coarse crumbs, roughly the size of small peas. The goal is to incorporate the butter without melting it.
**The image above beautifully illustrates what the butter and flour mixture should look like at this stage – distinct specks of butter dispersed throughout the flour.**
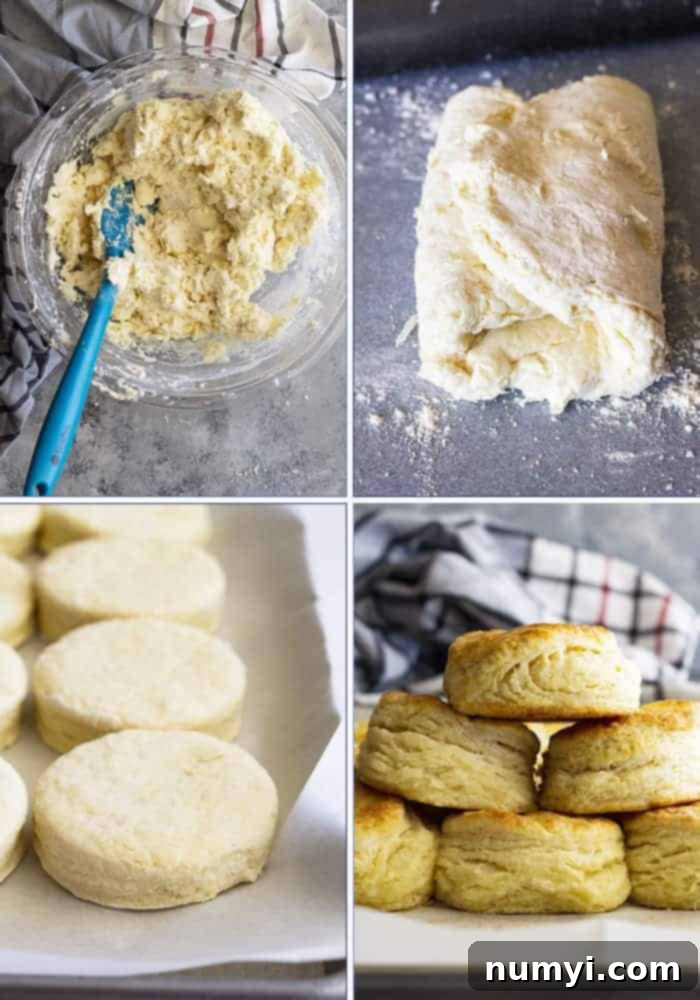
4. ADD BUTTERMILK AND GENTLY KNEAD: Pour in the cold buttermilk, stirring just until the dough begins to come together. At this point, it will appear quite rough and shaggy. Transfer the dough onto a lightly floured work surface and gently knead it just a few times (about 5-10 presses, with 10 being the absolute maximum) to finish bringing it into a cohesive mass.
The key here is minimal handling. As you can see in the first image above, the dough in the bowl looks somewhat disheveled after the buttermilk is stirred in. That’s perfectly normal! Once on the counter, a few gentle kneads are all that’s needed. This is another crucial pause: DO NOT OVERWORK THE DOUGH! Over-kneading develops the gluten in the flour too much, resulting in tough, dry biscuits instead of light and flaky ones. This might take a bit of practice, so don’t be discouraged if your first few batches aren’t perfect. Keep trying; I promise you’ll master it!
5. ROLL AND FOLD THE DOUGH: To create even more layers, you’ll perform a simple lamination technique. Roll the dough into a rectangle, then fold it into thirds, like a letter (as shown in the second image above). Rotate the dough, roll it into a rectangle again, and fold it into thirds once more. This process helps distribute the butter and create distinct layers. Finally, roll the dough one last time into a rectangle or square approximately 1/2 inch thick.
6. CUT THE BISCUITS: Use a biscuit cutter for traditional round biscuits, or a sharp knife for charming square ones. Dip your cutter or knife into flour before each cut to prevent sticking. Then, press straight down into the dough with a firm, decisive motion. It is absolutely vital not to twist the cutter or saw with the knife. Twisting or sawing seals the edges of the biscuit, which will prevent them from rising tall and forming those beautiful layers. Also, avoid using a drinking glass to cut biscuits, as its dull edge will also seal the dough. Clean cuts are essential for maximum rise and flakiness.
7. RE-ROLL AND CUT MORE BISCUITS: The practice of re-rolling biscuit scraps can be a point of debate among bakers. Some advise against it entirely to maintain optimal texture, but I personally can’t stand to waste good dough! I re-roll the scraps until all the dough is used. Just remember to do so with the lightest touch possible, understanding that each subsequent re-roll will make those biscuits slightly tougher. For the very last bits of dough, I often just roll them into one rustic, larger biscuit. *Refer to the video for a visual demonstration of this technique.*
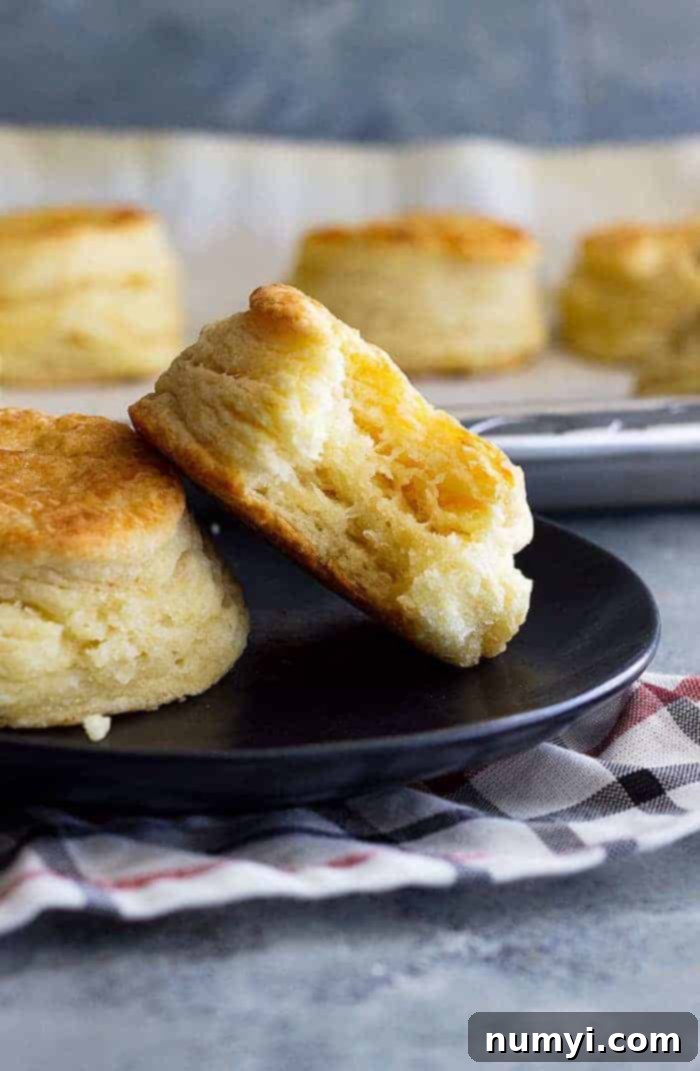
8. BAKE THE BISCUITS: Carefully place your cut biscuits onto the prepared baking pan. For biscuits with softer, taller sides, arrange them so their sides are just touching. If you prefer crispier sides, space the biscuits further apart on the sheet. Bake for 10-15 minutes, or until they are beautifully risen and boast a rich golden-brown hue on top.
Expert Tips for Baking the Fluffiest Buttermilk Biscuits:
Achieving biscuit perfection is within your reach with these critical tips:
- Use a Sharp Biscuit Cutter or Knife: To ensure a clean cut that doesn’t seal the delicate edges of your biscuits, always use a relatively sharp biscuit cutter or knife. A clean cut allows the biscuits to rise unhindered, promoting maximum flakiness.
- Invest in a Bench Scraper: This simple tool is an absolute game-changer for biscuit making. It makes cleaning your work surface and utensils incredibly easy, scraping up sticky dough bits far more efficiently than a wet cloth. In my opinion, it’s a must-have!
- Control Biscuit Sides with Placement: The way you arrange biscuits on the baking sheet affects their texture. For crispier, more individual biscuits, space them about 1-2 inches apart. For softer sides and a slightly taller rise (as they support each other), place the biscuits close enough to touch on the baking sheet.
- The Golden Rules: Cold Ingredients & Gentle Handling: As emphasized throughout this guide, the two most important factors for truly remarkable flaky buttermilk biscuits are using exceptionally cold butter and buttermilk, and being incredibly gentle with your dough – never overworking it. Master these two principles, and your biscuits will consistently turn out golden, flaky, and delicious!
- Check Your Oven Temperature: Oven temperatures can vary significantly. Consider using an oven thermometer to ensure your oven is truly at 450°F. An accurate temperature is vital for the rapid rise and even baking that biscuits require.
Frequently Asked Questions (FAQs):
Absolutely! You have two fantastic options for freezing these delicious flaky layered biscuits.
• To freeze baked biscuits: Allow them to cool completely, then store them in an airtight container or freezer bag for up to 3 months. To reheat, simply warm them in a toaster oven or conventional oven until heated through.
• To freeze raw biscuits (even better for fresh-baked goodness anytime!): Follow the simple biscuit recipe through the dough preparation and cutting steps. Place the raw, cut biscuits on a parchment-lined baking sheet and freeze until they are completely solid (this usually takes about 2-4 hours). Once frozen, transfer them to a heavy-duty zipper-lock bag or airtight container and freeze for up to 3 months.
• To bake from frozen: No need to thaw! Place the frozen biscuits on a parchment-lined baking sheet or a lightly greased cast iron skillet. Bake them in your preheated oven at 450°F for approximately 18-20 minutes, or until they are beautifully golden brown and risen. This is perfect for impromptu breakfasts or last-minute cravings!
Once baked and cooled, store your fluffy buttermilk biscuits in an airtight container at room temperature for up to 5 days. For longer storage, they freeze exceptionally well for up to 3 months, as detailed in the previous FAQ.
Several factors can contribute to biscuits that don’t rise properly. The most common reasons include:
1. Sealed Edges: If you twisted the biscuit cutter, sawed with a knife, or used a dull-edged glass to cut the dough, it likely sealed the edges. Sealed edges prevent the layers from separating and rising. Always press straight down!
2. Expired Leavening Agents: Old baking powder or baking soda lose their potency over time. Always ensure both are fresh and within their expiration dates for optimal lift.
3. Overworked Dough: Kneading the dough too much develops gluten, which makes biscuits tough and dense, hindering their ability to rise. Gentle handling is key.
4. Warm Butter: If your butter wasn’t cold enough, it melted into the dough instead of creating steam pockets for lift. Cold butter is paramount!
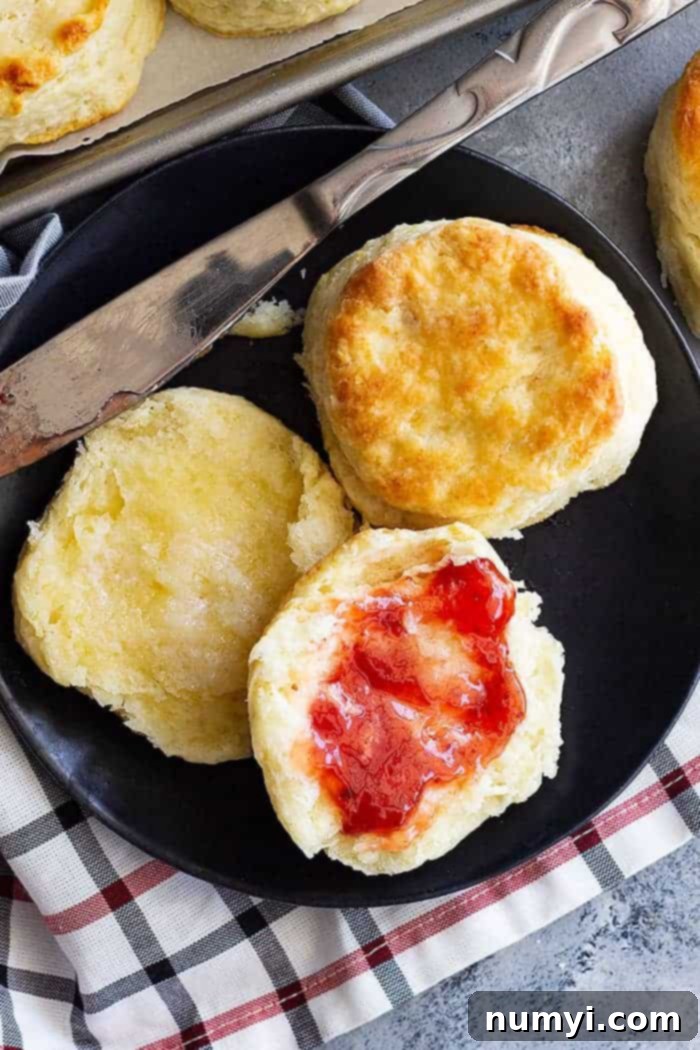
Flaky buttermilk biscuits are incredibly versatile! For breakfast or brunch, they’re perfect with butter, jam, honey, gravy (like sausage gravy), or alongside scrambled eggs and bacon. For dinner, they make an excellent accompaniment to stews, chili, fried chicken, or any meal that benefits from a soft, absorbent bread. You can even split them and use them as a base for shortcake with fresh fruit and whipped cream for a simple dessert!
Looking for More Great Recipes?
Expand your culinary repertoire with these other delicious recipes:
- Garlic Cheddar Biscuits
- Easy Buttermilk Cornbread
- Chicken Pot Pie with Biscuit Topping
- Slow Cooker Mashed Potatoes
- Easy Slow Cooker Pot Roast
HUNGRY FOR MORE? Subscribe to my newsletter and follow along on Pinterest, Facebook, and Instagram for all my latest updates!
How To Make Flaky Buttermilk Biscuits
Ingredients
- 3 cups (345g) all purpose flour
- 1½ tablespoons sugar
- 3 teaspoons baking powder
- ½ teaspoon baking soda
- 1 teaspoon salt
- ¾ cup (169g) COLD butter
- 1 cup (240ml) COLD buttermilk
Instructions
-
Preheat oven to 450°F (232 degrees C). Line a baking sheet with parchment paper or lightly grease, then set aside. OR use a cast iron skillet lightly greased.
-
In a large bowl combine the flour, sugar, baking powder, baking soda, and salt. Using a cheese grater grate the very cold butter (I like to keep mine in the freezer) into the bowl of flour. Gently mix in the butter. Stir in the buttermilk just until the dough starts to come together. It will look very rough and shaggy.
-
Place dough onto work surface and gently knead dough 5-10 times to finish bringing the dough together. Roll into a rectangle then fold dough into thirds. Repeat then roll into a rectangle or square that is 1/2″ thick.
-
Cut with a 2 1/2″ or 2 3/4″ biscuit cutter by dipping it into flour and pushing straight down. Do not twist the cutter. Cut the biscuits as close together as possible. Place biscuits on prepared pan with sides touching for softer sides or space apart for crisper sides. Re-roll any scraps until you have 12 biscuits.
-
Bake for 10-15 minutes or until golden brown.
Video
Notes
- Be sure to refer to the post and video for helpful tips on making biscuits.
- Store baked biscuits in an airtight container for up to 5 days. Or freeze them for up to 3 months.
- To freeze biscuit dough: prepare biscuits and cut with biscuit cutter as directed. Place raw biscuits on a parchment lined baking sheet and freeze until solid (about 2-4 hours). Transfer to a ziploc bag and freeze for up to 3 months. To use: Place frozen biscuits on a parchment lined baking sheet or greased cast iron skillet and bake in preheated oven for 18-20 minutes or until golden brown.
- Nutrition Facts: Since different brands of ingredients have different nutritional information, the information shown is just an estimate.
Nutrition
