The Ultimate Homemade Chicken Pot Pie with Flaky Biscuit Topping
Indulge in the heartwarming embrace of this homemade Chicken Pot Pie with Biscuit Topping. Brimming with succulent, tender chicken, bathed in a luxuriously creamy sauce, and crowned with golden, flaky biscuits, it’s the epitome of comfort food. This versatile chicken pot pie casserole is also a brilliant way to transform your leftover chicken, turkey, fragrant herbs, and an assortment of vegetables into a brand new, irresistible meal. Say goodbye to food waste and hello to a family favorite!

*Originally published November 2017. Text updated in 2024 for enhanced clarity and SEO.*
Easy & Irresistible Chicken Pot Pie with Homemade Biscuits
Prepare to delight your taste buds with an incredibly comforting and satisfying dish! This homemade Chicken Pot Pie with Biscuit Topping is not just a meal; it’s a celebration of flavor and an ingenious solution for using up those valuable leftovers. Whether you have cooked chicken, roasted turkey (perfect for post-Thanksgiving indulgence!), fresh herbs, or a medley of vegetables lingering in your refrigerator, this recipe ensures they find a delicious new purpose. What truly sets this recipe apart is that it’s made entirely from scratch, allowing you to control every ingredient and avoid any processed “cream of whatever” soups. The result is a richer, more authentic flavor profile that truly shines.
Our creamy chicken pot pie casserole features a magnificent topping of beautiful golden brown, utterly flaky biscuits. These aren’t just any biscuits; they’re tender, buttery clouds that perfectly complement the savory filling beneath. Your entire family, from the pickiest eaters to the most discerning palates, is sure to fall in love with this hearty and wholesome creation. It’s the kind of meal that brings everyone together around the table, creating cherished memories with every delicious bite.
If you find yourself with even more leftover turkey or chicken after enjoying this incredible pot pie, don’t let it go to waste! Explore other fantastic recipes like this creamy Turkey Tetrazzini or this soul-warming Creamy Turkey and Dumpling Soup for more comforting meal ideas.
Why You’ll Adore This Homemade Chicken Pot Pie Recipe:
- Effortless From-Scratch Goodness: While this creamy chicken pot pie recipe is made entirely from scratch, don’t let that intimidate you! It’s designed to be incredibly easy and achievable for cooks of all skill levels. I promise, the extra effort for homemade goodness is minimal, and the flavor reward is immense. To make your cooking experience even smoother, I’ve included several simple substitutions and expert tips below, ensuring your pot pie turns out absolutely perfect every single time. You’ll be amazed at how simple it is to create such a spectacular dish without relying on canned ingredients.
- The Epitome of Comfort Food: This chicken pot pie casserole truly is the ultimate comfort food experience. It’s wonderfully warm, incredibly creamy, and unbelievably rich – making it the perfect antidote to any chilly evening or a long, demanding day. More than just a meal, it’s a culinary hug, ideal for bringing to a new mom, a friend in need, or anyone who could use a little extra warmth and care. There’s something undeniably special about sharing a comforting, homemade dish during those significant life moments.
- Perfect for Meal Prep and Freezing: Simplify your weeknight dinners by preparing this chicken pot pie with biscuit topping ahead of time or freezing it for later. It’s an excellent make-ahead meal, allowing you to enjoy a delicious, homemade dinner with minimal effort on busy days. Imagine the convenience of pulling a ready-to-bake or ready-to-reheat pot pie from your freezer! Detailed instructions for both making ahead and freezing are provided below, making dinner planning much more manageable and stress-free.

Essential Ingredients for Your Creamy Chicken Pot Pie with Biscuits:
The heart of this incredible dish lies in its rich and savory filling, beginning with a simple yet incredibly flavorful homemade cream sauce. This luscious base is crafted from essential pantry staples: rich butter, aromatic chopped onion, pungent minced garlic, all-purpose flour for thickening, robust chicken broth, and creamy milk (whole milk is highly recommended for an extra decadent touch). The careful combination of these ingredients creates a velvety sauce that perfectly coats every component of the pie.
To infuse the pot pie with wholesome goodness and delightful texture, we then incorporate a vibrant mix of fresh vegetables. You’ll need hearty potatoes (Yukon Gold are excellent for their creamy texture), sweet carrots, and crisp celery. These vegetables simmer gently in the sauce, absorbing all the delicious flavors and becoming wonderfully tender. The final additions to the filling include your choice of pre-cooked turkey or chicken, bright frozen peas, and a fragrant blend of fresh herbs: aromatic parsley, earthy sage, and subtle thyme. These herbs are key to giving the pot pie its signature depth and warmth.
For the crowning glory – those irresistible flaky biscuits – you’ll need all-purpose flour, a touch of sugar to balance the flavors, baking powder and baking soda for perfect lift and tenderness, cold butter for flakiness, and crucially, cold buttermilk. The buttermilk is particularly important here; its acidity reacts with the baking soda to create incredibly moist, tender, and high-rising biscuits. I strongly advise against substituting buttermilk for this recipe, as it’s truly the secret to achieving that perfect biscuit texture.
Step-by-Step Guide to Making Chicken Pot Pie with Biscuit Topping:
STEP 1: PREHEAT OVEN: Begin by preheating your oven to 400 degrees F (204 degrees C). This ensures your oven is at the optimal temperature for baking, leading to perfectly cooked filling and golden, flaky biscuits.
STEP 2: PREPARE CREAM SAUCE: In a large Dutch oven or heavy-bottomed pot, melt the butter over medium heat. Once shimmering, add the finely chopped onion and cook, stirring occasionally, until the onions become translucent and soft, about 5-7 minutes. Next, stir in the minced garlic and cook for just 1 minute more until fragrant – be careful not to burn it! Sprinkle in the all-purpose flour and cook for another minute, stirring constantly to create a roux. Gradually whisk in the chicken broth and milk until the mixture is smooth and lump-free. Continue to cook, stirring frequently, until the sauce begins to thicken to your desired consistency, which typically takes about 5-8 minutes. It should be thick enough to coat the back of a spoon.
STEP 3: COOK VEGETABLES: Once your creamy sauce has thickened, add the diced potatoes, carrots, and celery to the pot. Reduce the heat to a gentle simmer, cover the Dutch oven, and allow the vegetables to cook for 10-15 minutes. The goal is for the vegetables to be tender-crisp, not mushy, as they will continue to cook slightly in the oven.
STEP 4: PREPARE BISCUITS: While your vegetables are simmering, turn your attention to the biscuit topping. In a large mixing bowl, combine the dry ingredients: flour, sugar, baking powder, baking soda, and salt. Whisk them together thoroughly. Now, for the butter: using a pastry blender, cut the cold butter into the dry ingredients until the mixture resembles coarse crumbs. Alternatively, you can use a box grater to grate the cold butter directly into the flour mixture, then gently mix it in. Finally, pour in the cold buttermilk and stir until just combined. Be careful not to overmix; a slightly shaggy dough is what you’re looking for. If your buttermilk is exceptionally thick, you might need to add a tiny bit more to bring the dough together.
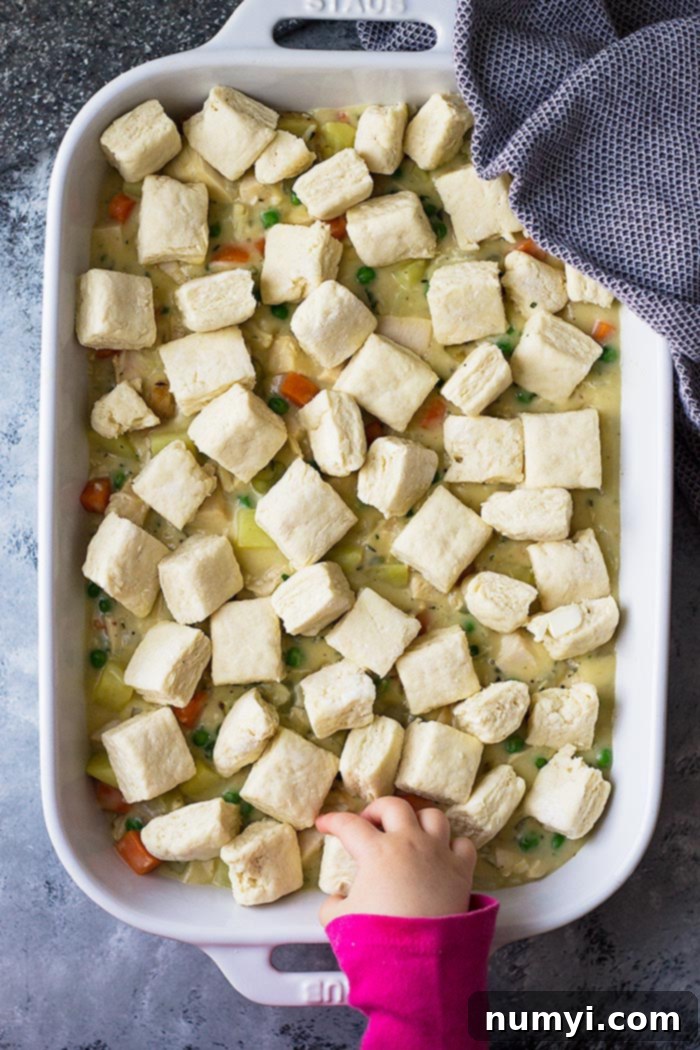
STEP 5: ADD DOUGH ON TOP: Lightly flour a clean work surface. Turn the biscuit dough out onto the floured surface and gently knead it about 10 times. This brief kneading helps to fully combine the ingredients without overworking the dough, which would make the biscuits tough. Roll or pat the dough into a rectangle, approximately 10 inches by 6 inches, and then cut the dough into charming 1-inch cubes. These small pieces will create a beautiful, rustic, and perfectly portioned biscuit topping.
STEP 6: PLACE IN BAKING DISH: Once the vegetables in the sauce are tender, remove the pot from the heat. Stir in the cooked chicken or turkey, frozen peas, the chopped fresh herbs (parsley, sage, and thyme), and season generously with salt and freshly ground black pepper to taste. Pour this savory, creamy filling into a 13×9-inch baking dish, spreading it evenly. Arrange the biscuit pieces over the top of the filling, leaving a small space between each piece to allow them to expand and brown beautifully.
STEP 7: BAKE: Carefully place the baking dish into your preheated oven. Bake for 20-25 minutes, or until the filling is bubbling hot around the edges and the biscuit topping has turned a magnificent golden brown and appears deliciously flaky. The aroma alone will have everyone rushing to the kitchen!

Smart & Simple Substitutions for Your Chicken Pot Pie with Biscuits:
- Frozen Veggie Shortcut: If you find yourself short on fresh vegetables or simply want to save some prep time, a bag of mixed frozen vegetables makes an excellent substitute. You can add frozen mixed veggies to the pot at the same time you add the frozen peas. However, remember that the initial simmering step for the sauce on the stove for 10-15 minutes is still crucial. This step isn’t just for cooking fresh potatoes, carrots, and celery; it also helps the sauce thicken properly before baking, ensuring your pot pie isn’t too runny.
- Easy Drop Biscuits: If the idea of rolling and cutting biscuit dough feels a little daunting, don’t worry! You can easily adapt this recipe to make delicious drop biscuits instead. Simply increase the amount of buttermilk to 1 cup (or slightly more if your buttermilk is particularly thick) to create a looser, spoonable dough. Then, instead of cutting cubes, use a spoon to drop dollops of the dough directly onto the hot filling in your baking dish. They’ll bake up beautifully, offering a rustic charm and all the same flaky goodness.
- Canned Biscuits for a Quick Fix: For those days when you’re truly in a time crunch and crave ultimate convenience, feel free to use store-bought canned biscuits. This is a perfectly acceptable shortcut that won’t compromise the comforting essence of your chicken pot pie casserole. Just cut each canned biscuit into fourths and arrange the pieces evenly over the top of the filling before baking. They’ll puff up into a lovely, golden crust, saving you precious minutes in the kitchen.
Expert Tips for the Perfect Homemade Chicken Pot Pie with Biscuit Topping:
- The Secret to Flaky Biscuits: For truly exceptional, flaky, and tender homemade biscuits, always use really cold butter and cold buttermilk. This is the golden rule of biscuit making! Cold butter creates pockets of steam as it melts in the oven, which results in those coveted layers. Cold buttermilk keeps the butter from melting prematurely and contributes to a tender crumb. Don’t skip this crucial step!
- Utilize Leftovers for Simplicity: This creamy chicken pot pie recipe is designed to be incredibly easy and efficient, especially when it comes to the protein. Make your life simple by using leftover turkey from holiday feasts, a convenient rotisserie chicken picked up from the grocery store, or even pre-cooked chicken from a previous dinner. Having your protein ready to go significantly cuts down on prep time and makes this hearty meal a breeze to assemble.
- Thicken the Filling on the Stove: If, after adding all the ingredients to your pot pie filling, it appears a bit too thin or runny, don’t hesitate to simmer it on the stove for a few extra minutes before transferring it to the baking dish. While the filling will thicken slightly more as it bakes in the oven, ensuring it has a good consistency beforehand guarantees a perfectly rich and creamy texture, preventing a watery pot pie.
Frequently Asked Questions (FAQs) About Chicken Pot Pie
Absolutely, this chicken pot pie recipe is wonderfully freezer-friendly and perfect for making ahead! To freeze a baked pot pie, simply allow it to cool completely after baking, then wrap it tightly with a double layer of plastic wrap and a layer of aluminum foil. It can be stored in the freezer for up to 2 months. When ready to enjoy, thaw it completely in the refrigerator overnight, then reheat in the oven until warmed through. Another fantastic option is to assemble the entire dish as directed but skip the baking step. Wrap it securely and freeze for up to 2 months. To bake from frozen (after thawing), transfer it to the refrigerator overnight to thaw, then let it sit at room temperature for about 30 minutes before baking as directed. For even more flexibility, you can freeze just the filling without the biscuits. Thaw the filling completely, then prepare and top with fresh biscuits just before baking, following the recipe instructions.
This hearty and complete meal truly shines on its own, making it easy to pair with simple, fresh sides. To complement the rich and creamy flavors, consider serving it with your favorite steamed green vegetable, such as broccoli, green beans, or asparagus, for a refreshing contrast. A simple, crisp green salad with a light vinaigrette dressing is another excellent choice, adding a bright and fresh element to the meal. While it already contains potatoes, some people enjoy pairing it with extra creamy mashed potatoes for an ultimate comfort food experience. The key is to keep the side dishes light and unfussy, allowing the delicious homemade chicken pot pie with biscuit topping to be the undeniable star of your dinner table.
Storing and reheating your leftover chicken pot pie with biscuit topping is straightforward. Any leftovers should be transferred to an airtight container and refrigerated promptly. It will stay fresh and delicious in the fridge for 3-5 days. For reheating, individual portions can be quickly warmed in the microwave until heated through. If you have a larger portion or want to restore some of the biscuit’s crispness, reheating in the oven is ideal. Place the leftovers in an oven-safe dish, cover loosely with foil to prevent the biscuits from over-browning, and bake at 300-325°F (150-160°C) for about 15-25 minutes, or until thoroughly heated. Remove the foil for the last few minutes if you desire crispier biscuits.
Yes, absolutely! While this recipe focuses on chicken or turkey, it can be easily adapted to be vegetarian. Simply omit the chicken/turkey and increase the amount of vegetables, or add other hearty vegetarian proteins like sautéed mushrooms, chickpeas, or cooked lentils to the filling. You would also substitute the chicken broth with a good quality vegetable broth to keep it completely meat-free. The creamy sauce and flaky biscuit topping will remain just as delicious with a robust vegetable-based filling, making it a versatile meal for everyone to enjoy.

More Comfort Food Recipes to Warm Your Soul:
- Hearty Biscuits and Gravy Casserole
- Delicious Creamy Chicken Orzo
- Velvety Creamy Potato Soup
- Tender Slow Cooker Pot Roast
- Classic Traditional Pumpkin Pie
- Sweet Apple Crumb Cake
HUNGRY FOR MORE? Don’t miss out on any delicious updates! Subscribe to my newsletter and follow along on Pinterest, Facebook, and Instagram for all my latest recipes, tips, and culinary adventures!
Chicken Pot Pie with Biscuit Topping

Ingredients
- 4 tablespoons butter
- 1 small onion chopped
- 3-4 cloves garlic minced
- ⅓ cup (44g) all purpose flour
- 3 cups (710ml) chicken broth or stock
- 1 cup (235ml) milk (I like to use whole)
- 1½ cups (240g) yukon gold potatoes washed and diced
- 2 large carrots diced
- 2 ribs celery diced
- 3 cups (440g) cooked chicken or turkey chopped
- 1 cup (140g) frozen peas
- 1 tablespoon finely chopped fresh parsley
- 1 tablespoon finely chopped fresh sage
- 1 tablespoon finely chopped fresh thyme
- salt and pepper to taste
Biscuits
- 2 cups (270g) all purpose flour
- 1 tablespoon sugar
- 1 tablespoon baking powder
- ¼ teaspoon baking soda
- ½ cup (113g) cold butter
- ¾ cup (177ml) cold buttermilk
Instructions
-
Preheat your oven to 400 degrees F (204 degrees C). This initial step is important for achieving an even bake and a perfectly golden biscuit topping.
-
In a large Dutch oven or a heavy-bottomed pot, melt the butter over medium heat. Add the chopped onion and cook, stirring occasionally, until the onions begin to soften and become translucent, which typically takes 5-7 minutes. Stir in the minced garlic and cook for an additional minute until fragrant. Next, add the all-purpose flour, stirring constantly for 1 minute to create a roux. Gradually whisk in the chicken broth and milk until the mixture is completely smooth. Continue to cook, stirring frequently, until the sauce thickens to a rich, creamy consistency (about 5-8 minutes). Finally, add the diced potatoes, carrots, and celery to the sauce. Reduce the heat to a gentle simmer, cover the pot, and cook for 10-15 minutes, or until the vegetables are tender-crisp.
-
While the vegetables are simmering in the creamy sauce, begin preparing your homemade biscuits. In a large bowl, combine the dry ingredients: flour, sugar, baking powder, baking soda, and salt. Whisk them thoroughly to ensure even distribution. Using a pastry blender, cut the cold butter into the dry mixture until it resembles coarse crumbs. Alternatively, grate the cold butter with a box grater and then gently mix it into the flour. Stir in the cold buttermilk until just combined, being careful not to overmix; a slightly shaggy dough is ideal for tender biscuits. You might need a little extra buttermilk if your batch is particularly thick.
-
Lightly flour a clean work surface. Transfer the biscuit dough onto this surface and gently knead it about 10 times. This minimal kneading helps to bring all the ingredients together without making the biscuits tough. Roll or pat the dough into a rectangle approximately 10 inches by 6 inches. Then, using a knife or pizza cutter, cut the dough into charming 1-inch cubes. These small pieces will create a delightful, rustic topping that bakes beautifully.
-
Once your vegetables are tender, remove the Dutch oven from the heat. Stir in the cooked chicken or turkey, frozen peas, the finely chopped fresh herbs (parsley, sage, and thyme), and season generously with salt and freshly ground black pepper to taste. Spoon this rich and creamy filling evenly into a 13×9-inch baking dish. Carefully arrange the prepared biscuit pieces over the entire surface of the filling, leaving a small amount of space between each piece to allow for expansion during baking.
-
Place the baking dish into your preheated oven. Bake for 20-25 minutes, or until the filling is bubbling hot around the edges and the biscuit topping has turned a beautiful golden brown and appears wonderfully flaky. Allow it to cool for a few minutes before serving to prevent burns and let the sauce set slightly.
Notes
- If you’re out of fresh veggies, use a bag of frozen mixed vegetables instead. Frozen veggies can be added at the same time as the frozen peas, but ensure to simmer the sauce on the stove for 10-15 minutes first to help it thicken, as you would with fresh vegetables.
- If homemade biscuits intimidate you, try making them as drop biscuits. Just increase the amount of cold buttermilk to 1 cup (or slightly more if your buttermilk is very thick) to create a more pliable dough. Then, simply use a spoon to drop spoonfuls of the dough on top of the filling before baking.
- For a quick and convenient option, if you’re in a pinch, you can use store-bought canned biscuits instead of homemade. Just cut them into fourths and arrange them over the filling.
Tips for making:
- Always use very cold butter and cold buttermilk when making the biscuits. This crucial step is the secret to achieving perfectly flaky, tender, and buttery homemade biscuits.
- Maximize efficiency by using pre-cooked protein. Leftover turkey from holiday meals, a convenient rotisserie chicken from the store, or even previously cooked chicken from another dinner will work perfectly. This makes the entire recipe much simpler and faster to prepare.
- If the pot pie filling appears thin or runny before baking, allow it to simmer on the stove for a few additional minutes to thicken. The filling will continue to thicken slightly in the oven, but a good starting consistency ensures a rich and creamy final product.
Freezing and make ahead instructions:
This dish is excellent for making ahead or freezing! To freeze a baked pot pie, allow it to cool completely, then wrap it tightly in plastic wrap and aluminum foil. Freeze for up to 2 months. Thaw completely in the refrigerator before reheating in the oven. Alternatively, assemble the dish as directed but skip the baking step. Wrap it tightly and freeze for up to 2 months. When ready to bake, thaw overnight in the fridge, let it sit at room temperature for about 30 minutes, then bake as directed. You can also freeze just the filling without the biscuit topping. Thaw the filling, then top with fresh biscuits and bake as instructed.
Nutrition
