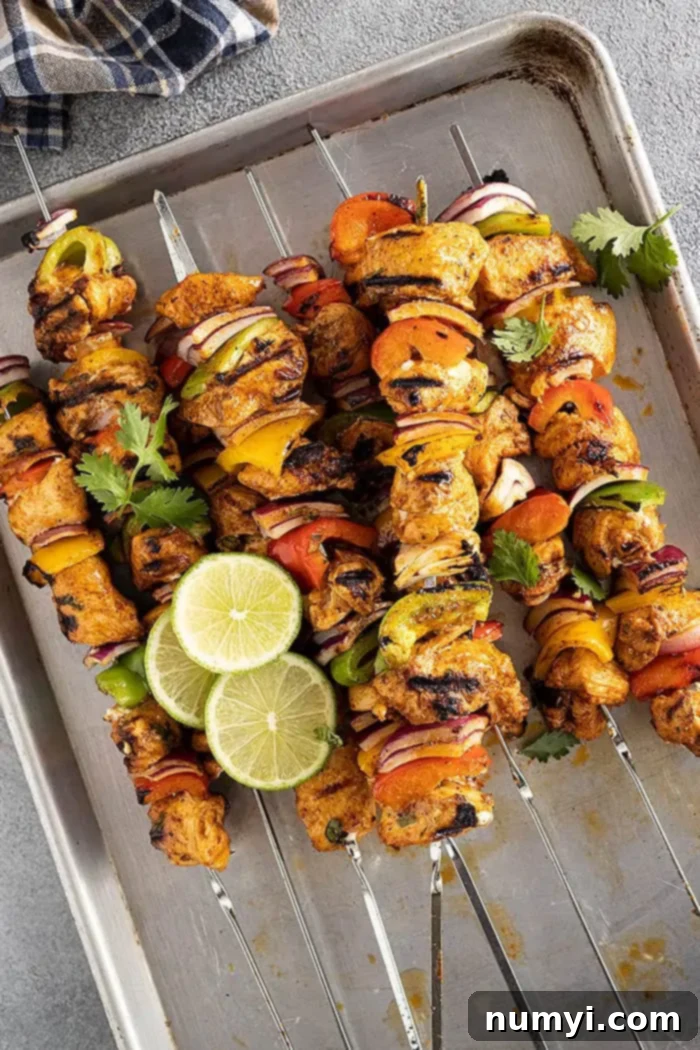
Flavorful & Easy Grilled Chicken Fajita Kebabs: Your Ultimate Weeknight Meal
Imagine all the vibrant, zesty flavors of your favorite chicken fajitas, but conveniently packed onto skewers and grilled to perfection. These Chicken Fajita Kebabs are exactly that – a super flavorful, effortlessly made chicken dish that’s ideal for any night of the week. Perfect for a quick family dinner or a delightful weekend barbecue, these kebabs bring a taste of Mexico right to your backyard grill.
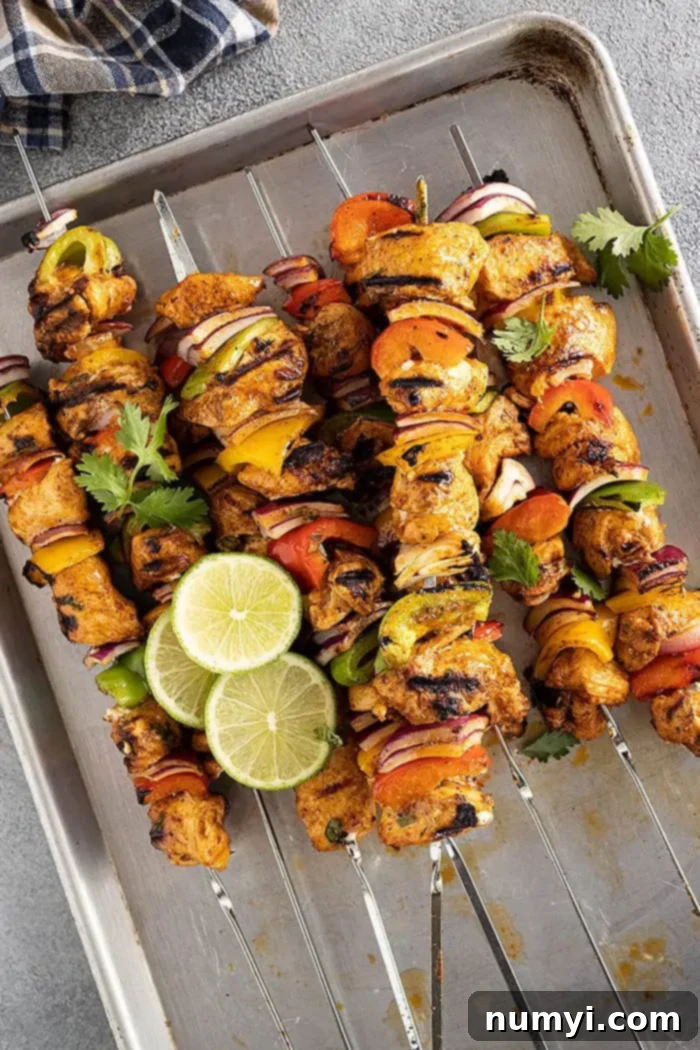
If you’re on the hunt for a fantastic meal that bursts with flavor and doesn’t demand hours in the kitchen, these grilled chicken fajita kebabs are an absolute must-try. They capture the essence of classic chicken fajitas, but instead of a sizzling skillet, they come off a hot grill, making them incredibly simple, healthier, and infused with that irresistible smoky char. Whether you’re an experienced griller or just starting out, this recipe promises delicious results with minimal fuss and maximum enjoyment.
Why You’ll Adore These Easy Grilled Chicken Fajita Kebabs
Beyond their mouth-watering taste, these chicken fajita kebabs offer a multitude of benefits that make them a standout dish for busy individuals and families alike. Here’s why this recipe will quickly become a cherished part of your meal rotation:
- Budget-Friendly Dining: Enjoy restaurant-quality fajitas without the hefty price tag. Making them at home means you control the ingredients and significantly cut down on costs, offering incredible value and deliciousness for your dollar. It’s a smart way to enjoy your favorite Mexican flavors more often.
- Unbeatable Flavor, Made Your Way: These kebabs deliver all the savory, spicy, and tangy notes you love in your favorite chicken fajitas. The homemade marinade ensures every piece of chicken and vegetable is infused with deep, authentic flavor that’s just as satisfying, if not more so, than dining out. Plus, you can customize the spice level to suit your palate, adding more cayenne for a kick or keeping it mild for the whole family.
- Grilling Made Simple: Perfect for grill masters and novice cooks alike! The straightforward grilling process makes this an excellent recipe for those new to outdoor cooking. With minimal cleanup and quick cooking times (often just 15 minutes on the grill!), it’s a stress-free way to enjoy a gourmet-tasting meal with that desirable char.
- Effortless Meal Prep: The chicken can be marinated several hours in advance, allowing the flavors to truly penetrate and tenderize the meat. This advance prep means less work right before dinner, making weeknights smoother and more enjoyable. Imagine coming home after a long day and simply needing to thread and grill! This also makes it a fantastic option for entertaining.
- Healthy and Wholesome: Loaded with lean protein from the chicken and a rainbow of fresh vegetables, these kebabs are a nutritious choice. They are naturally lower in carbs, packed with vitamins, and can easily be adapted for various dietary preferences, offering a guilt-free indulgence that doesn’t compromise on taste.
- Versatile and Customizable: While chicken is the star, the concept is highly adaptable. Feel free to experiment with different proteins like shrimp or beef, or add other vegetables such as zucchini, cherry tomatoes, or mushrooms to your skewers for added variety and nutrition.
- Fun for the Whole Family: Assembling the skewers can be a fun activity for kids and adults alike, making dinner preparation an interactive and engaging experience. It’s a great way to get everyone involved in the kitchen (or backyard!).
Simple Ingredients for Maximum Flavor
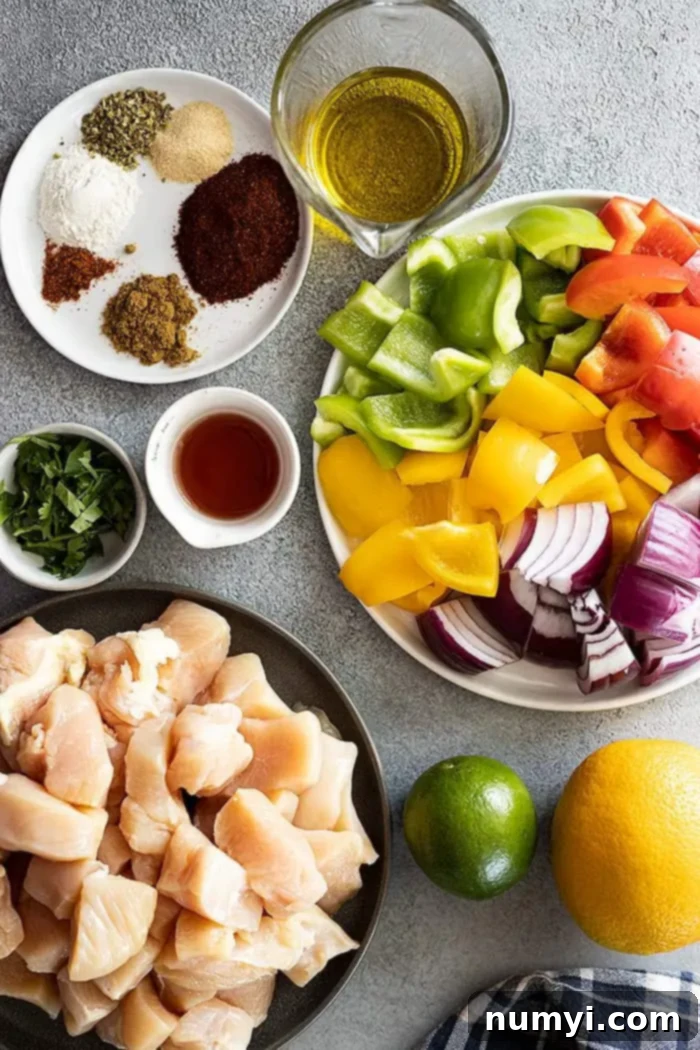
One of the best aspects of these chicken fajita kebabs is that they rely on readily available, fresh ingredients. You likely have many of these staples in your pantry and fridge already, making dinnertime preparation a breeze. Here’s a detailed look at what you’ll need to create these irresistible and healthy grilled chicken fajita kebabs:
For the Kebabs:
- Chicken Breast: We recommend boneless, skinless chicken breast for its lean protein content and quick cooking time. Cut it into uniform 1½-inch pieces to ensure even cooking and easy threading onto skewers. If you prefer, boneless, skinless chicken thighs can also be used for an even juicier and richer result, though cooking times may vary slightly.
- Bell Peppers: To add both visual appeal and a delightful mix of flavors, use different colored bell peppers – red, yellow, and orange work beautifully. Each color offers a slightly different sweetness and nutrient profile. Cut them into pieces roughly the same size as your chicken for balanced cooking. Green bell peppers are also an excellent option for a more traditional, slightly bitter fajita taste.
- Onion: Red onion is often preferred for its milder flavor and beautiful color that stands out on the skewer after grilling. However, any onion you have on hand, such as white or yellow, will work well to add that essential aromatic and sweet-savory element once cooked. Cut the onion into similarly sized wedges or thick slices that can be easily threaded.
For the Zesty Fajita Marinade:
- Olive Oil: This forms the base of our vibrant marinade, helping to carry the flavors of the spices and herbs deep into the chicken. It also contributes to keeping the chicken moist during grilling and prevents sticking on the hot grates. Extra virgin olive oil will add a richer, fruitier taste.
- Red Wine Vinegar: A touch of acidity is crucial for tenderizing the chicken and brightening the overall flavor profile of the fajitas. It acts as a perfect counterpoint to the richness of the oil and the warmth of the spices, adding a delightful tang.
- Cilantro: Freshly chopped cilantro is key for an authentic Mexican-inspired flavor. Its bright, herbaceous, and slightly citrusy notes complement the spices perfectly, making every bite burst with freshness.
- Lime: The fresh juice of one whole lime provides a tangy, zesty kick that is quintessential to fajita flavor. Like the vinegar, it also assists in tenderizing the chicken and adds an irresistible brightness.
- Orange: The juice of half an orange adds a subtle sweetness and another layer of citrus complexity to the marinade, balancing the savory and spicy elements. Don’t skip this for that extra depth and unique aroma!
- Spices: This carefully selected blend creates the signature fajita seasoning that makes these kebabs so irresistible.
- Chili Powder: Provides a mild, earthy, and slightly smoky base to the marinade.
- Cumin: Adds a warm, earthy, and nutty flavor, which is a hallmark of authentic Mexican cuisine.
- Onion Powder & Garlic Powder: These essential aromatics offer concentrated flavor without the raw bite of fresh onion and garlic, distributing evenly throughout the marinade.
- Oregano: Mexican oregano is ideal for its earthy, slightly citrusy, and peppery notes. Regular dried oregano can be used if Mexican oregano is not available.
- Cayenne Pepper: For a touch of heat! Adjust the amount to your preference – omit it entirely for a mild version, or add more for a fiery kick that truly awakens the palate.
- Salt: Essential for seasoning the chicken and vegetables, enhancing all the other flavors and ensuring the dish is well-balanced.
Crafting Your Perfect Chicken Fajita Kebabs: A Step-by-Step Guide
Making these delicious chicken fajita kebabs is a straightforward process that yields incredibly satisfying results. Follow these simple steps to bring this vibrant and flavorful dish to life in your own kitchen or backyard:
Step 1: Prepare the Flavorful Marinade
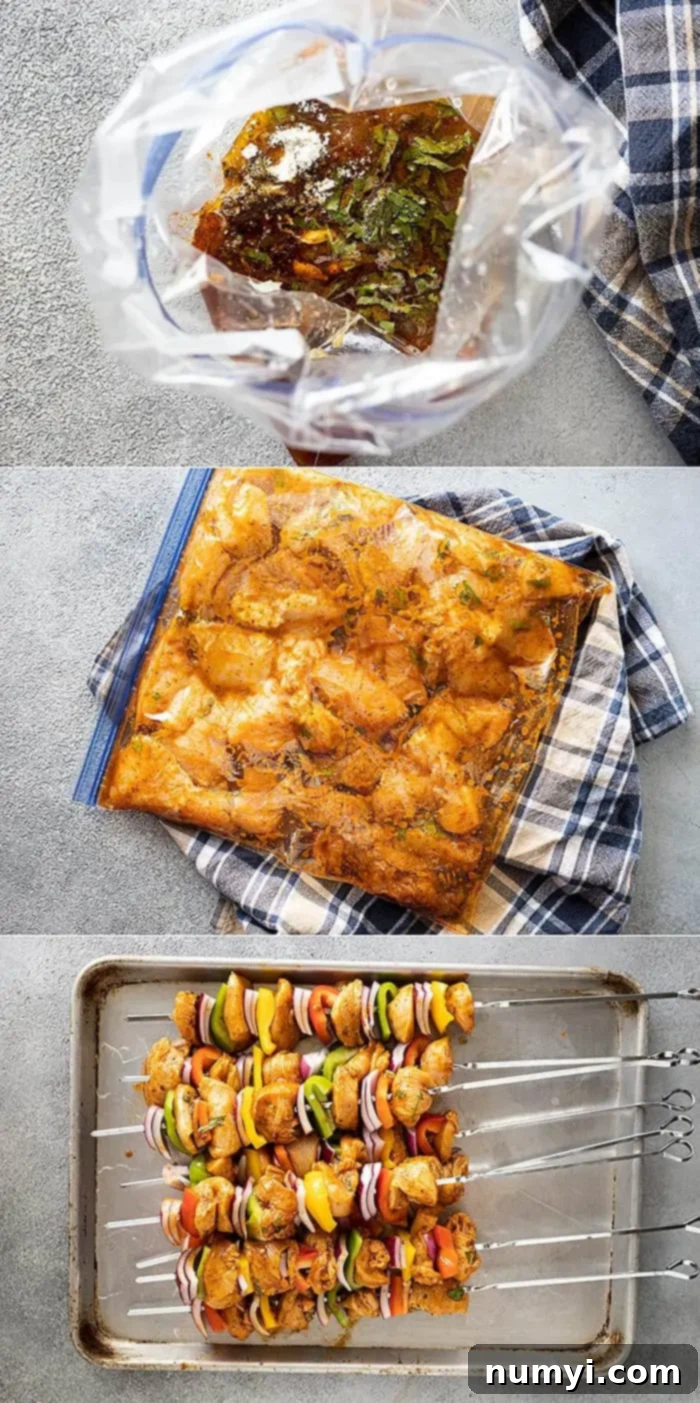
The marinade is where all the magic begins, infusing your chicken with that signature fajita taste and helping to tenderize it. In a large, sturdy resealable bag (like a Ziploc bag) or a non-reactive bowl, combine all the marinade ingredients: olive oil, red wine vinegar, freshly chopped cilantro, the fresh juice of one lime, the juice of half an orange, chili powder, cumin, onion powder, garlic powder, oregano, and a pinch of salt and cayenne pepper. Mix everything thoroughly until all the spices and liquids are well combined, forming a cohesive and aromatic marinade.
Next, dice your boneless, skinless chicken breast into uniform 1½-inch pieces. This size is ideal for both marinating effectively and cooking evenly on the grill, ensuring consistent tenderness. Place the chicken into the bag with the prepared marinade. Seal the bag, pressing out as much air as possible, and gently massage the bag to ensure every piece of chicken is thoroughly coated in the flavorful marinade.
Marinating Time is Key: For optimal flavor development and tenderness, refrigerate the marinating chicken for a minimum of 1 hour. If you’re planning ahead, you can marinate the chicken for up to 8 hours. This extended time allows the ingredients to penetrate deeper into the meat, resulting in a more flavorful and tender kebab. However, avoid marinating for longer than 8 hours, especially with citrus, as the acid can start to break down the chicken’s texture too much, leading to a mushy consistency.
Step 2: Prepare and Assemble Your Skewers
While your chicken is soaking up all those incredible fajita flavors, it’s time to get your skewers ready and prepare your vegetables.
- Soak Wooden Skewers (If Applicable): If you are using wooden skewers, this step is absolutely crucial to prevent them from burning and charring excessively on the hot grill. Submerge them completely in water for at least 30 minutes before you start assembling your kebabs. Metal skewers do not require soaking.
- Chop the Vegetables: Cut your bell peppers (use a mix of colors like red, yellow, and orange for visual appeal and varied sweetness) and red onion into pieces that are roughly the same size as your marinated chicken chunks. This ensures that all components cook at a similar rate and fit neatly on the skewers, creating a balanced bite.
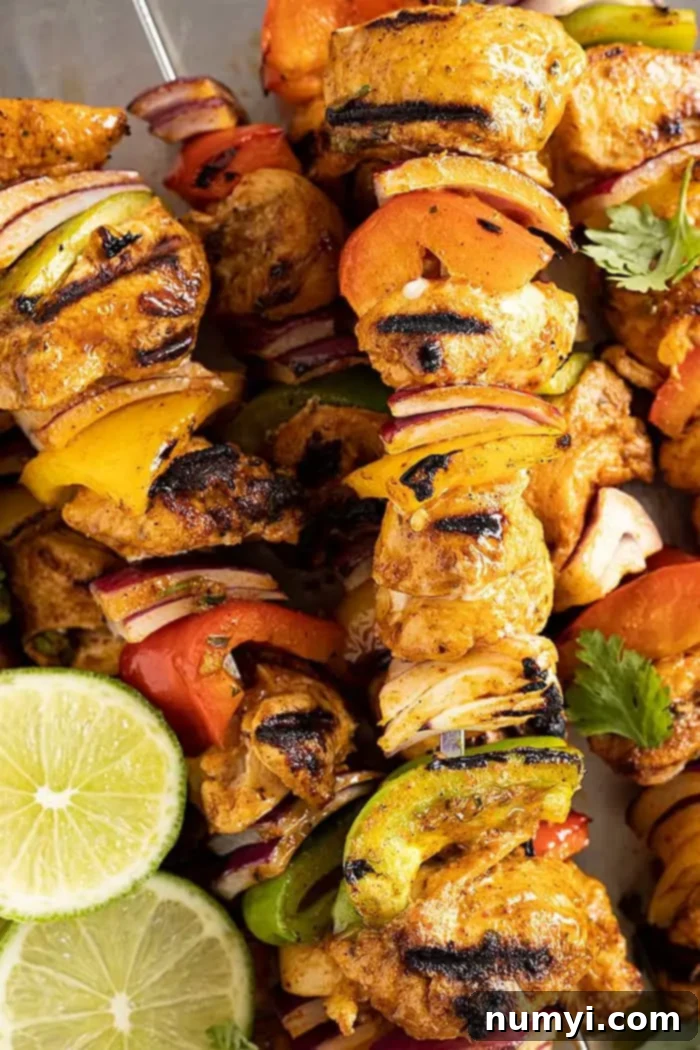
- Thread the Kebabs: Once the chicken has marinated for the desired time, it’s time for assembly! Carefully thread the chicken pieces, bell peppers, and onion onto your soaked skewers. To ensure a good mix of flavors and textures in every bite and to promote even cooking, alternate between chicken and vegetables. Aim for an even distribution along the skewer, but don’t pack them too tightly, as this can hinder proper heat circulation and even cooking. (Refer to the images provided in this post for a visual guide on optimal threading technique.)
Step 3: Grill to Perfection
The final step is to bring these beautiful, flavorful skewers to life on the grill!
- Preheat Your Grill: Set your grill to medium-high heat, aiming for a consistent temperature of about 400°F (200°C). Allowing the grill to fully preheat is essential for achieving a good sear on the chicken and vegetables, preventing the food from sticking, and ensuring thorough cooking.
- Clean and Oil the Grates: Before placing your kebabs, ensure your grill grates are meticulously clean. Use a sturdy grill brush to remove any residue from previous cooks. Then, lightly oil the grates by dipping a paper towel in a small amount of high-smoke-point cooking oil (like vegetable or canola oil) and carefully wiping it over the hot grates with long-handled tongs. This step is vital to further prevent sticking and promote those desirable, restaurant-quality grill marks. For more detailed instructions on grill maintenance, you can refer to resources like How To Clean Your Grill.
- Grill the Kebabs: Carefully place the assembled skewers directly onto the preheated, oiled grill grates. Grill them for approximately 5 minutes on each side. The exact cooking time may vary based on your specific grill’s heat output and the thickness of your chicken pieces, so keep a close eye on them. You’ll want to rotate them regularly to ensure all sides get a nice char and cook evenly.
- Check for Doneness: The chicken should be completely opaque throughout, with no pink remaining in the center. For food safety, the internal temperature of the thickest part of the chicken should reach 165°F (74°C) as measured with a reliable meat thermometer. The vegetables should be tender-crisp, with some beautiful charring around the edges, indicating they’ve cooked perfectly and developed a smoky sweetness. Remove the kebabs from the grill once cooked through.
- Resting Time: Just like any grilled meat, it’s a good idea to let the chicken kebabs rest for 5 minutes after removing them from the grill. Simply transfer them to a clean platter and tent loosely with foil. This allows the juices to redistribute throughout the chicken, ensuring it remains incredibly tender, moist, and flavorful.
Delicious Ways to Serve Your Chicken Fajita Kebabs
These chicken fajita kebabs are incredibly versatile and pair well with a variety of sides, allowing you to customize your meal to your liking. Whether you’re aiming for a traditional feast or a lighter, healthier option, there’s a perfect pairing for everyone. Here are some fantastic serving suggestions to complete your fajita feast:
- Classic Mexican Sides: For a traditional and hearty meal, serve your kebabs alongside your favorite Quick and Easy Refried Beans and a comforting dish of Easy Spanish Rice. These staples perfectly complement the bold, zesty flavors of the fajitas and create a truly satisfying plate.
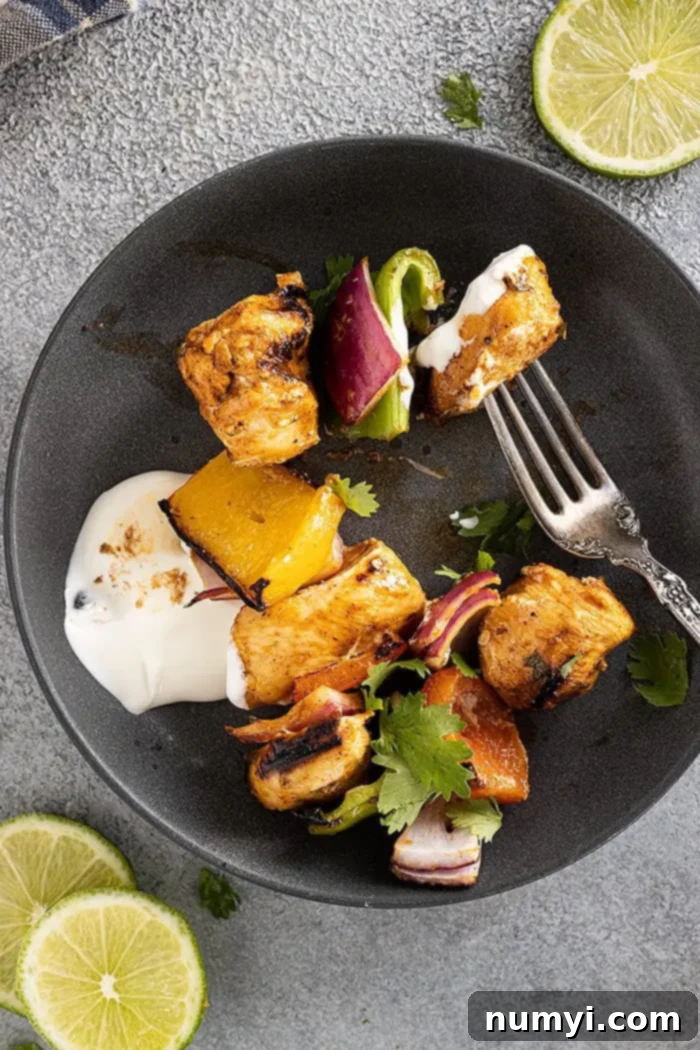
- Warm Tortillas and Abundant Toppings: A must-have for any authentic fajita experience! Serve the grilled chicken and vegetables (either on the skewers or slid off) with a stack of warm flour or corn tortillas. Then, offer a generous spread of classic fajita toppings like fresh salsa (pico de gallo), creamy guacamole, cool sour cream or plain Greek yogurt, shredded cheese, extra chopped cilantro, and plenty of lime wedges for squeezing. Let everyone build their own fajitas for a fun, interactive, and fully customizable dinner experience.
- Healthy and Low-Carb Option: If you’re looking to keep your meal light and low-carb, simply slide the chicken and vegetables off the skewers and serve them over a large, crisp bed of fresh lettuce or a vibrant green salad. Add some avocado slices, a sprinkle of queso fresco, and a light vinaigrette (like a lime-cilantro dressing) for a refreshing and incredibly satisfying meal that’s packed with nutrients without the extra carbs.
- Grilled Corn on the Cob: For an extra smoky touch that pairs beautifully with the grilled kebabs, grill some corn on the cob alongside your chicken and veggies. A sprinkle of chili powder, a dash of smoked paprika, and a squeeze of fresh lime juice make it an irresistible side dish.
- Quinoa or Brown Rice: For a healthier whole grain option, serve the kebabs with a side of fluffy quinoa or brown rice. These grains provide a wholesome base that will soak up any delicious juices and marinade left over from the chicken and vegetables, adding another layer of flavor and texture.
- Fresh Avocado Salad: A simple, vibrant salad featuring diced avocado, juicy tomatoes, thinly sliced red onion, and a light lime-cilantro dressing can provide a wonderful fresh and creamy contrast to the warm, smoky kebabs.
Explore More Delicious Recipes
If you loved these Chicken Fajita Kebabs, be sure to check out some of our other fantastic recipes that bring bold flavors to your table:
- Hearty Mexican Casserole: A comforting and easy-to-make dish perfect for feeding a crowd.
- Comforting Chicken Tamale Pie: All the flavors of tamales in a convenient and delicious pie form.
- Decadent Tres Leches Cake: A classic Latin American dessert that is rich, moist, and utterly delightful.
- Classic Margarita: The perfect refreshing cocktail to complement any Mexican-inspired meal.
- Quick & Easy Taco Pasta: A family-friendly dinner that combines two favorites into one delicious meal.
HUNGRY FOR MORE? Don’t miss out on our latest recipes, cooking tips, and culinary inspiration! Subscribe to my newsletter and follow along on Pinterest, Facebook, and Instagram for all my latest updates and delicious creations!
Chicken Fajita Kebabs: The Recipe
Here’s a condensed, easy-to-follow recipe for these incredible Grilled Chicken Fajita Kebabs, ensuring you have all the key details for a perfect cook:

Recipe Details
- Servings: 4
- Author: Malinda Linnebur
- Prep Time: 20 minutes
- Cook Time: 15 minutes
- Marinade Time: 1-8 hours
- Total Time: Approximately 35 minutes of active time, plus marinating.
Ingredients
For the Marinade:
- ¼ cup (60ml) olive oil
- Juice of 1 lime
- Juice of ½ an orange
- 2 tablespoons chopped fresh cilantro
- 1 tablespoon red wine vinegar
- 1 tablespoon chili powder
- 1 teaspoon cumin
- 1 teaspoon onion powder
- ½ teaspoon garlic powder
- ½ teaspoon oregano
- Salt and cayenne pepper to taste (adjust cayenne for desired heat)
For the Kebabs:
- 2 pounds (1kg) boneless, skinless chicken breast, cut into uniform 1½” pieces
- 3 bell peppers (e.g., red, yellow, orange), cut into 1½” pieces
- 1 red onion (or onion of choice), cut into 1½” wedges or thick slices
Instructions
- Marinade the Chicken: In a large resealable bag or a non-reactive bowl, combine all the marinade ingredients (olive oil, lime juice, orange juice, cilantro, red wine vinegar, chili powder, cumin, onion powder, garlic powder, oregano, salt, and cayenne pepper). Mix thoroughly until well combined. Add the diced chicken pieces to the bag, seal, and massage to ensure all chicken is evenly coated. Refrigerate for a minimum of 1 hour and up to 8 hours.
- Prepare Skewers: If you are using wooden skewers, immerse them in water for at least 30 minutes before assembly. This prevents them from burning on the grill.
- Assemble Kebabs: Preheat your grill to medium-high heat, targeting a temperature of about 400°F (200°C). Clean the grill grates with a brush and lightly oil them to prevent sticking. Thread the marinated chicken pieces, bell pepper pieces, and onion wedges onto the skewers, alternating between them for an attractive presentation and even cooking.
- Grill to Perfection: Place the assembled skewers on the hot, oiled grill grates. Cook for approximately 5 minutes per side, rotating the kebabs periodically, until the chicken is completely opaque throughout and shows no pink. For food safety, ensure the internal temperature of the chicken reaches 165°F (74°C). The vegetables should be tender-crisp with some delicious charring.
- Rest and Serve: Once cooked, remove the kebabs from the grill and let them rest for 5 minutes on a clean platter, loosely tented with foil. This allows the juices to redistribute, ensuring tender and moist chicken. Garnish with fresh cilantro and additional lime wedges before serving.
Nutrition Information (per serving)
- Calories: 440 kcal
- Carbohydrates: 10g
- Protein: 50g
- Fat: 21g
- Saturated Fat: 3g
- Polyunsaturated Fat: 3g
- Monounsaturated Fat: 13g
- Trans Fat: 1g
- Cholesterol: 145mg
- Sodium: 303mg
- Potassium: 1131mg
- Fiber: 3g
- Sugar: 5g
- Vitamin A: 3480 IU
- Vitamin C: 119mg
- Calcium: 42mg
- Iron: 2mg
Did you make this? We’d love to see your creations and hear about your experience! Share a picture and tag @countryside_cravings on Instagram to let us know how your Chicken Fajita Kebabs turned out!
