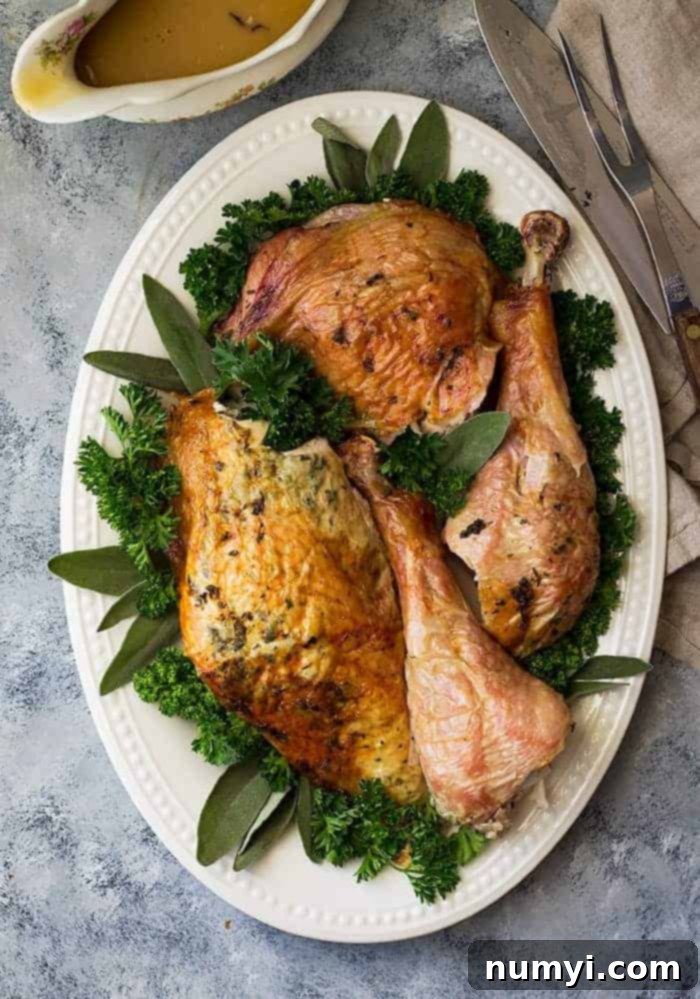
The Ultimate Guide to Herb Roasted Spatchcock Turkey: Faster, Juicier, Crispier!
Say goodbye to dry turkey and endless cooking times! This Herb Roasted Spatchcock Turkey cooks significantly faster than the traditional method, guaranteeing unbelievably juicy meat and perfectly crispy skin every single time. Master the art of butterflying and roasting a turkey with our easy-to-follow guide, ensuring your next feast is both stress-free and delicious!
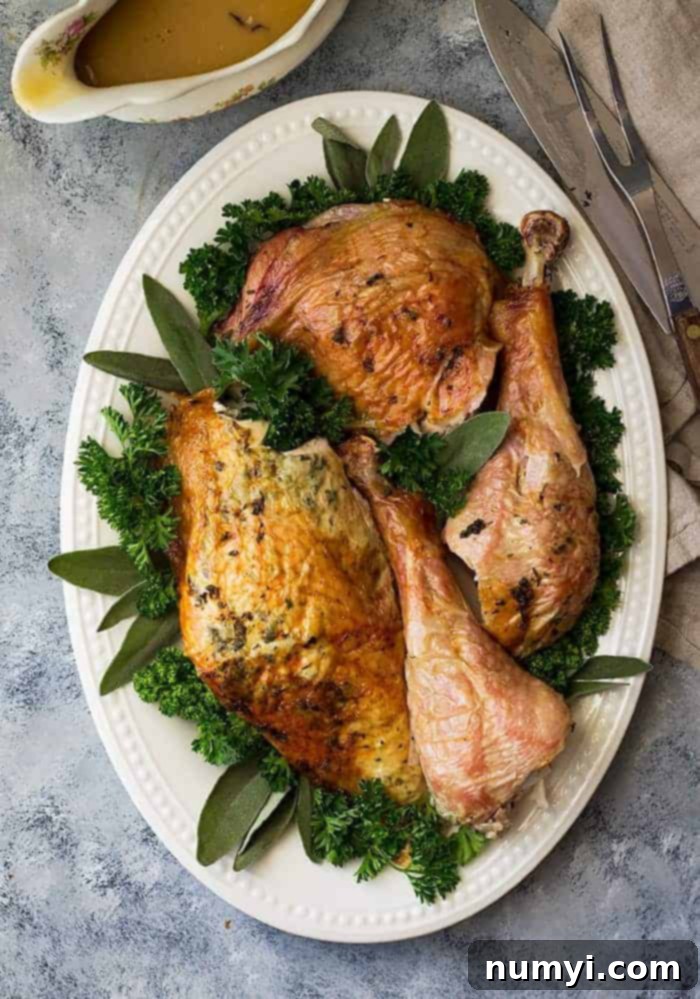
Unlock the Secret to a Perfect Holiday Turkey: Spatchcocking!
If the thought of spending countless hours roasting a turkey on Thanksgiving or any holiday fills you with dread, then this butterflied herb-roasted turkey recipe is your ultimate game-changer. “Spatchcocking,” also known as butterflying, is a revolutionary technique that involves removing the turkey’s backbone and flattening it. This simple alteration dramatically increases the surface area exposed to heat, resulting in a multitude of benefits:
- Significantly Reduced Cooking Time: No more waking up at the crack of dawn! A spatchcocked turkey can cook in less than half the time of a traditional whole bird.
- Unrivaled Juiciness: By cooking flat, all parts of the turkey are exposed to even heat, preventing the breast from drying out while the dark meat struggles to cook. This ensures every bite is incredibly moist and flavorful.
- Crispier, Golden Skin: More skin surface means more delicious, golden-brown crispiness. Every inch of that savory herb butter can work its magic!
Embrace the spatchcock method this holiday season for a less stressful, more enjoyable, and undeniably delicious turkey experience. You’ll wonder why you ever did it the traditional way!
While spatchcocking offers superior results, if you prefer the classic method, don’t forget to check out our Beer and Butter Turkey recipe. And no holiday meal is complete without a full spread of delightful sides. Pair your perfectly roasted turkey with classics like Sweet Potato Casserole with Streusel Topping, our comforting Homemade Green Bean Casserole, tangy Cranberry Pomegranate Sauce, savory Homemade Herb Stuffing, and, of course, a rich Homemade Turkey Gravy made from your pan drippings.
Why You’ll Fall in Love with This Spatchcock Turkey Recipe
This Herb Roasted Spatchcock Turkey isn’t just another turkey recipe; it’s a revelation. Here’s why it’s destined to become your go-to for special occasions and weeknight feasts alike:
- Explosively Flavorful: Infused with a rich herb butter rub both under and over the skin, every bite is bursting with aromatic flavors.
- Surprisingly Simple: Despite its impressive results, this method is significantly easier and less daunting than roasting a traditional whole turkey.
- Crispy Perfection, Juicy Core: Achieve that coveted golden-brown, crackling skin while ensuring the breast and dark meat remain incredibly tender and moist.
- Ideal for Any Gathering: Whether it’s a grand holiday feast or a smaller family get-together, this turkey is always a showstopper and perfectly portioned for sharing.
- Lightning-Fast Cooking: Prepare to be amazed! A typical 14-15 pound turkey can be ready in just under 2 hours, freeing up your oven and your time.
- Even Cooking, Every Time: The flattened structure allows for more uniform heat distribution, eliminating unevenly cooked spots.
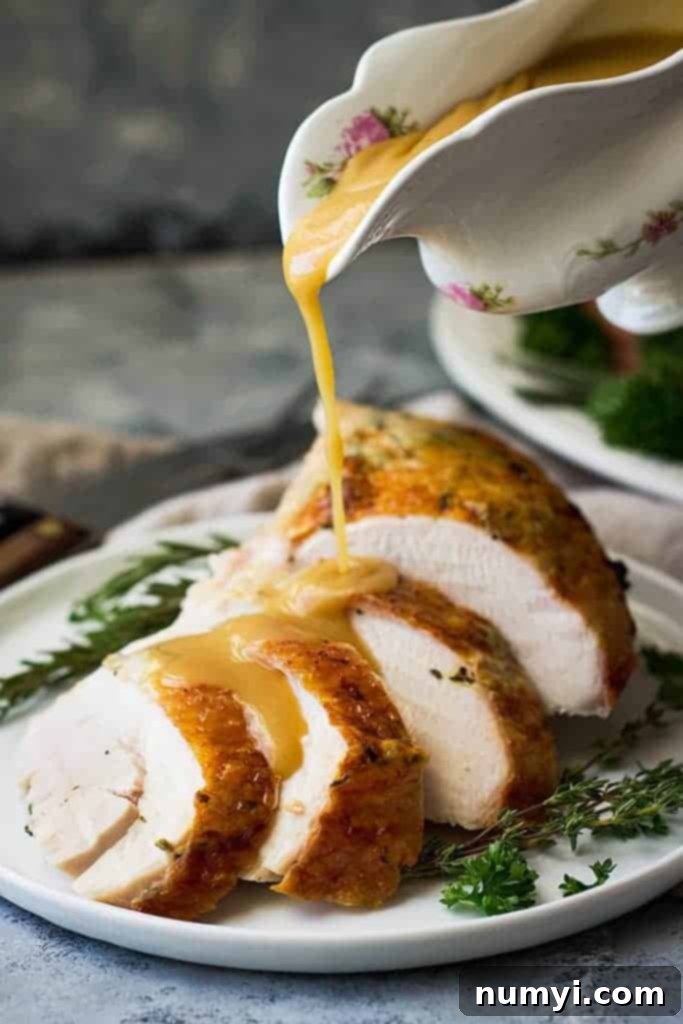
Essential Ingredients for Your Spatchcocked Turkey Masterpiece
Crafting the perfect herb roasted spatchcock turkey begins with selecting quality ingredients. Here’s a breakdown of what you’ll need and why each component is crucial:
- TURKEY: For this specific recipe, we recommend a 14-15 pound turkey. When planning for your guests, a good rule of thumb is 1.5 pounds of turkey per person. If you’re like us and love ample leftovers for sandwiches, soups, and more, aim for 2 pounds per person! Ensure your turkey is fully thawed before beginning.
- CHICKEN STOCK: This liquid gold goes into the baking pan beneath the turkey. It serves multiple purposes: it prevents drippings from burning, keeps the oven moist, and creates a flavorful base for the most incredible gravy. You can easily substitute chicken broth or even vegetable stock if preferred.
- BUTTER: Softened unsalted butter forms the luscious base for our herb rub. It acts as a flavor carrier, helps crisp the skin, and keeps the meat moist. Ensure it’s at room temperature for easy mixing and spreading.
- FRESH HERBS: The heart of our “herb roasted” flavor! You’ll need a vibrant blend of fresh parsley, sage, rosemary, and thyme. While dried herbs can be used in a pinch, fresh herbs truly elevate the aroma and taste profile, making a noticeable difference in the final dish. Don’t skimp on quality here!
- SEASONED SALT & BLACK PEPPER: These essential seasonings enhance all the other flavors. Seasoned salt adds an extra layer of savory goodness, while freshly ground black pepper provides a subtle warmth. Adjust to your taste preferences.
With these simple yet powerful ingredients, you’re well on your way to a holiday turkey that will impress even the most discerning palates!
Step-by-Step Instructions: Crafting Your Herb Roasted Spatchcock Turkey
Follow these detailed steps to ensure your turkey is perfectly prepared, cooked, and absolutely delicious:
Step 1: RECIPE PREP (The Foundation)
- **Thaw Your Turkey:** If frozen, ensure your turkey is completely thawed. This typically takes several days in the refrigerator (about 24 hours per 4-5 pounds).
- **Bring to Room Temperature:** Remove the turkey from the refrigerator at least 1 hour before you plan to roast it. This allows for more even cooking.
- **Preheat Your Oven:** Set your oven to a blazing 425 degrees F (218 degrees C). High heat initially helps to crisp the skin.
- **Prepare Your Baking Sheet:** Line a large, sturdy baking sheet (preferably oversized for a 14-15lb bird) with foil for easier cleanup. Place a wire rack inside the pan. This allows air to circulate around the turkey, contributing to crispy skin.
Step 2: MAKE THE HERB BUTTER RUB (Flavor Powerhouse)
- In a small bowl, combine the softened butter with all your fresh, chopped herbs (parsley, sage, rosemary, thyme), seasoned salt, and black pepper. Mix thoroughly until all ingredients are well incorporated, forming a fragrant paste.
Step 3: SPATCHCOCK THE TURKEY (The Game Changer)
- **Backbone Removal:** Place the turkey breast-side down on a large cutting board, with the tail facing you. Using heavy-duty kitchen shears (or a very sharp, sturdy knife), carefully cut along one side of the backbone, from tail to neck. Repeat on the other side. The backbone should now be completely removed.
- **Flattening:** Flip the turkey over so it’s breast-side up. With the heel of your hands, firmly press down on both sides of the breastbone until you hear a crack. This flattens the bird, allowing it to cook evenly. Discard any fat pockets found in the cavity and thoroughly pat the entire turkey, inside and out, with paper towels to ensure it is completely dry. This is crucial for crispy skin.
- For a visual guide on spatchcocking, refer to the video linked at the end of this post! You can save the removed backbone to make delicious turkey stock for gravy later.
Step 4: ADD THE HERB BUTTER (Flavor Infusion)
- **Under the Skin:** Gently separate the skin from the breast meat using your fingers, being careful not to tear it. Work your way down towards the thighs and legs. Take about half of your herb butter mixture and carefully rub it directly onto the meat under the skin. This ensures deep flavor and moisture.
- **Over the Skin:** Spread the remaining herb butter mixture evenly over the entire exterior of the turkey skin. This will create that gorgeous golden-brown, crispy finish.
Step 5: ROAST TO PERFECTION (The Cook)
- Place your butterflied, seasoned turkey breast-side up on the prepared wire rack within the baking sheet.
- Pour the 2 cups of chicken stock into the bottom of the baking sheet, around and under the wire rack. This liquid will prevent drippings from burning and contribute to a moist oven environment, perfect for your gravy base.
- Roast in the preheated 425 degrees F (218 degrees C) oven for 40 minutes.
- After 40 minutes, reduce the oven temperature to 375 degrees F (190 degrees C) and continue to bake for another 40-45 minutes.
- The turkey is done when the internal temperature, measured with a meat thermometer in the thickest part of the thigh (without touching the bone), reaches 165 degrees F (74 degrees C).
Step 6: CARVE AND ENJOY (The Reward)
- **Resting is Key:** Once the turkey reaches 165 degrees F, remove it from the oven and let it rest, uncovered, for at least 20-30 minutes before carving. This crucial step allows the juices to redistribute throughout the meat, ensuring every slice is incredibly moist. The internal temperature will continue to rise slightly during this resting period (carry-over cooking).
- **Make Gravy:** While the turkey rests, carefully pour the flavorful pan juices from the baking sheet into a measuring cup or gravy separator. Use these drippings to make an amazing homemade gravy! Our Homemade Turkey Gravy recipe is perfect for this.
- **Carve and Serve:** Carve your perfectly roasted turkey and serve immediately with your favorite holiday sides. Enjoy!
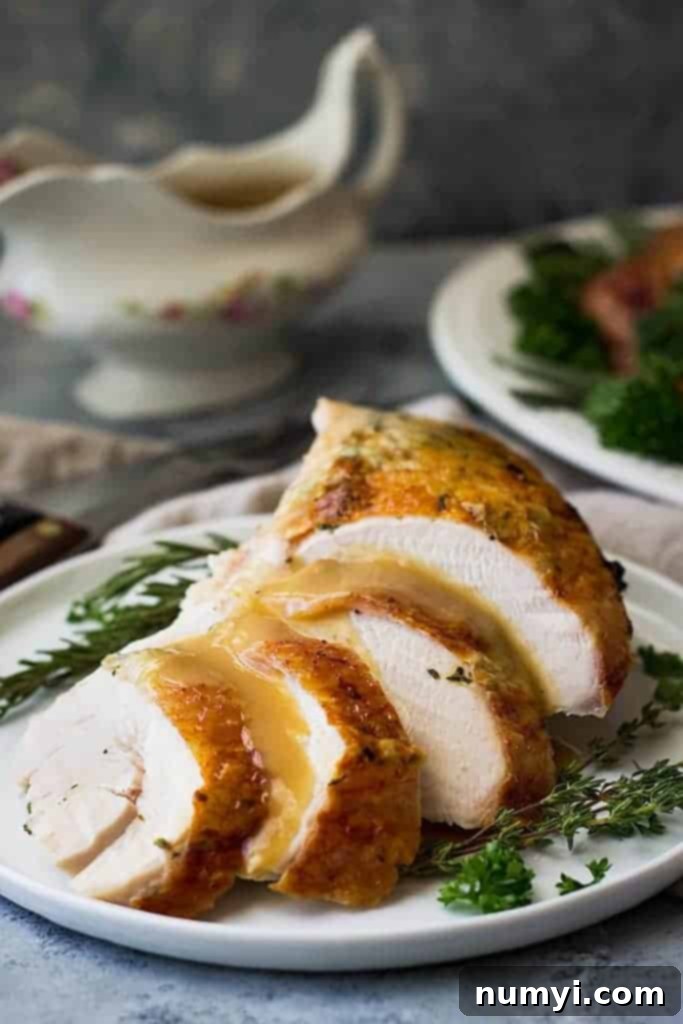
Expert Tips for Mastering Your Butterflied Turkey
Achieving a truly exceptional herb roasted spatchcock turkey involves a few professional insights. Keep these tips in mind for the best results:
- Understand Your Turkey’s Brining Status: This recipe is optimized for a turkey that has already been brined. Most commercially sold turkeys are “pre-brined” or “self-basting,” meaning they’ve been injected with a saltwater solution. You can tell by checking the ingredient label – if it lists anything beyond just “turkey,” it’s likely been brined. If you’ve purchased a natural, organic, or “heritage” turkey that hasn’t been pre-brined, we highly recommend brining it yourself. A good brine, especially a dry brine, will significantly enhance moisture and flavor. This guide from The Kitchn on how to dry brine a turkey is an excellent resource!
- Allow Ample Time for Thawing: A properly thawed turkey is essential for even cooking and food safety. The safest method is to thaw it in the refrigerator, allowing approximately 24 hours for every 4-5 pounds. For a 14-15 pound turkey, this means 3-4 days. If you’re short on time, you can thaw the turkey in a sink filled with cold water, changing the water every 30 minutes. This method takes roughly 30 minutes per pound, so plan accordingly.
- Utilize Visual Spatchcocking Guides: If you’re new to spatchcocking, a visual aid can be incredibly helpful. This post from Allrecipes on how to butterfly a turkey offers a fantastic pictorial guide. Remember, the backbone you remove can be saved and used to make a rich, flavorful broth or stock for your gravy or future recipes.
- The Importance of a Meat Thermometer: This is your most valuable tool for perfectly cooked turkey. Always use a reliable meat thermometer to check doneness. Insert the thermometer into the thickest part of the thigh, ensuring it doesn’t touch any bone. Your turkey is perfectly cooked when it reaches an internal temperature of 165-170 degrees F (74-77 degrees C). We recommend pulling it from the oven at 165 degrees F, as the temperature will continue to rise by another 5-10 degrees during the resting period (carry-over cooking), ensuring maximum juiciness.
- Mastering the Carve: Once rested, carving a spatchcocked turkey is surprisingly easy. Separate the legs and thighs, then remove the breast meat in large sections before slicing. The flattened bird makes it much more accessible than a traditional round turkey.
- Don’t Forget the Gravy: The pan drippings are liquid gold! Skim any excess fat, then use the remaining flavorful juices to create the most incredible homemade gravy. It’s the perfect accompaniment to your tender turkey.
- Smart Leftovers Management: Allow any leftover turkey to cool completely before carving into smaller portions and storing in airtight containers in the refrigerator for up to 3-4 days. Cooked turkey also freezes beautifully for up to 3 months.
Frequently Asked Questions About Spatchcock Turkey
The primary reason is increased surface area. By removing the backbone and flattening the turkey, more of the meat and skin are directly exposed to the oven’s heat. This allows for more efficient and rapid heat transfer compared to a compact, traditional whole bird, significantly reducing overall cooking time. Additionally, this increased exposure contributes to much crispier skin, as more of it is open to the heat and not tucked underneath the bird.
Spatchcocking promotes incredibly even cooking, which is the secret to a juicier turkey. In a traditional whole turkey, the breast meat (white meat) cooks much faster than the dense dark meat of the thighs and legs. This often creates a dilemma: by the time the dark meat is perfectly cooked (around 170-175 degrees F), the breast meat, which starts to dry out above 150-160 degrees F, is often overcooked and dry. Flattening the bird ensures that both the breast and dark meat are exposed to heat more uniformly, allowing them to reach their ideal internal temperatures closer to the same time. This prevents the white meat from drying out while waiting for the dark meat to finish, resulting in a turkey that is perfectly cooked and juicy throughout.
The size of your baking sheet depends directly on the size of your butterflied turkey. For turkeys under 12 pounds, a standard half-sheet pan (approximately 18×13 inches) should suffice. However, for larger turkeys, like the 14-15 pound bird in this recipe, you will likely need an oversized or full-sheet pan (around 26×18 inches) to accommodate its flattened form. Always measure your turkey’s width after spatchcocking and compare it to your baking sheet before you begin roasting to ensure a proper fit and optimal air circulation.
While you can technically place some aromatic vegetables and herbs inside the cavity of a spatchcocked turkey, it is generally not recommended to stuff it with traditional bread-based stuffing. The flattened shape of the bird doesn’t offer a suitable cavity for stuffing, and placing stuffing under the meat would hinder even cooking and crispy skin. It’s best to cook your stuffing separately to ensure both the turkey and the stuffing are perfectly cooked and safe to eat.
The general rule for spatchcocked turkeys is approximately 7-9 minutes per pound at 425°F for the initial blast, then reducing to 375°F until the internal temperature reaches 165°F. For a smaller bird (10-12 lbs), the total cooking time might be closer to 1 hour 15 minutes to 1 hour 30 minutes. For a larger bird (16-18 lbs), it could extend to 2 hours 15 minutes. Always rely on an accurate meat thermometer inserted into the thickest part of the thigh, not touching the bone, to confirm doneness.
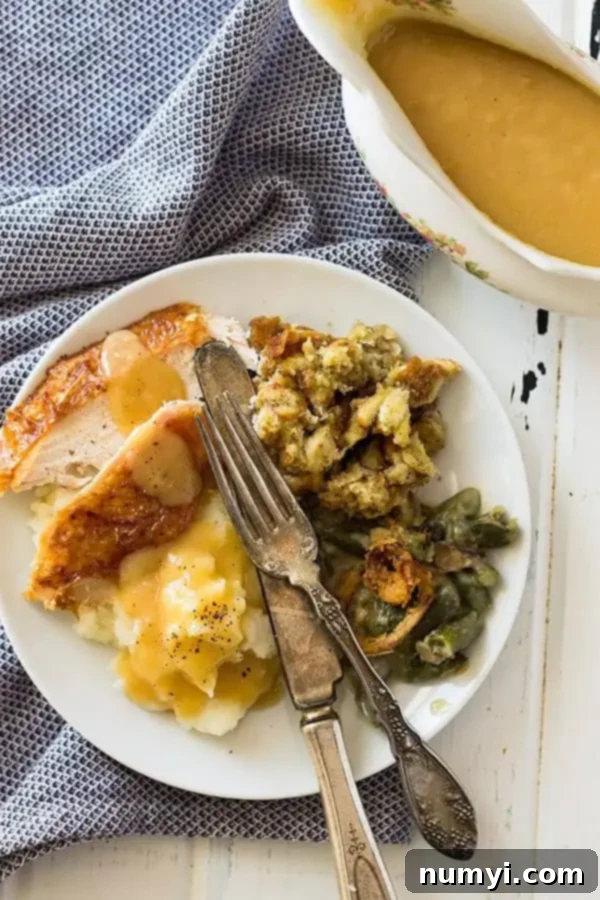
Delicious Accompaniments: What to Serve with Your Spatchcock Turkey
A magnificent turkey deserves an equally impressive array of side dishes. Here are some classic and creative pairings that perfectly complement the rich flavors of your Herb Roasted Spatchcock Turkey:
- Creamy Mashed Potatoes: The ultimate comfort food, perfect for soaking up that delicious gravy.
- Homemade Turkey Gravy: Made from the pan drippings of your spatchcocked turkey – don’t let those flavorful juices go to waste!
- Sweet Potato Casserole with Streusel Topping: A delightful balance of sweet and savory.
- Green Bean Casserole: A holiday staple that brings a touch of creamy, crispy goodness.
- Cranberry Sauce: Whether homemade or store-bought, its tartness provides a wonderful contrast to the rich turkey.
- Herb Stuffing or Dressing: A savory, aromatic complement that truly makes it a holiday meal.
- Roasted Brussels Sprouts or Asparagus: For a touch of green and earthy flavor.
- Fresh Dinner Rolls: Perfect for wiping your plate clean.
More Turkey Recipes To Explore
If you’re a turkey enthusiast or simply looking for new ways to prepare this versatile bird, here are a few more delicious recipes to inspire your culinary adventures:
- Cranberry Glazed Turkey: A festive and tangy option.
- Herb Roasted Turkey: A classic preparation for a traditional bird.
- Sweet Potato and Stuffing Turkey Roulade: An elegant and flavorful presentation.
- Apple Cranberry Stuffed Turkey Breast: A delicious option for smaller gatherings or a weeknight meal.
Visual Guide: How to Spatchcock Turkey
Sometimes, seeing is believing! Watch this helpful video for a clear demonstration of how to properly spatchcock a turkey:
We hope this comprehensive guide inspires you to try the incredible Herb Roasted Spatchcock Turkey for your next special meal. We are confident you’ll be delighted by the juicy meat, crispy skin, and significantly reduced cooking time!
HUNGRY FOR MORE? Don’t miss out on our latest delicious recipes and cooking tips! Subscribe to our newsletter and follow along on Pinterest, Facebook, and Instagram for all our updates!
Herb Roasted Spatchcock Turkey Recipe
This Herb Roasted Spatchcock Turkey cooks much quicker than the traditional way! Plus, the meat is juicier and the skin is crispier. Learn how to butterfly and roast a turkey before your next gathering!
Author: Malinda Linnebur
Print Recipe
Prep Time: 25 mins
Cook Time: 1 hr 25 mins
Total Time: 1 hr 50 mins
Ingredients
- 8 tablespoons butter, softened
- 2 tablespoons chopped fresh parsley
- 1 tablespoon chopped fresh sage
- 1 tablespoon chopped fresh rosemary
- 1/2 tablespoon chopped fresh thyme
- 2 teaspoons seasoned salt
- Pepper to taste
- 1 (14-15 pound) (5.8 kg) turkey
- 2 cups (475ml) chicken stock or broth
Instructions
- Remove turkey 1 hour before roasting.
- Preheat oven to 425 degrees F (218 degrees C). Line a large baking sheet with foil and place a cooling rack inside, set aside.
- In a small bowl combine the butter, herbs, salt and pepper, set aside.
- Place turkey breast side down on a cutting board with the tail facing you. Using a very sharp knife or heavy duty kitchen shears cut along one side of the backbone then down the other side. (Watch video in post to see how to do this) Discard any fat pockets found inside the cavity and pat the inside dry with paper towels. Turn the turkey right side up and with the heel of your hands press down on each side of the breastbone. (You should hear it snap) Pat dry with paper towels.
- Carefully separate the skin from the breast meat and rub with some of the herb butter mixture. Be sure to get under the skin on the thighs and legs as well. Spread any remaining butter mixture over the skin. Place turkey breast side up on prepared baking sheet. Pour chicken stock into baking sheet.
- Bake for 40 minutes then reduce heat to 375 degrees (190 degrees C) and bake for 40-45 minutes or until the internal temperature of the thickest part of the thigh reads 165 degrees F (74 degrees C).
- Remove from oven and let rest for 30 minutes before carving. Pour off juices from the baking sheet into a measuring cup to make gravy.
Notes
- This recipe is for a turkey that has already been brined. How do you know if your turkey has been brined? Look at the ingredient label on your turkey. If it says anything other than “turkey” it has been brined. If you are purchasing a natural or “heritage” turkey that hasn’t been brined I highly recommend brining it. This will also ensure you have really juicy meat. This post from The Kitchn on how to dry brine a turkey is great!
- Be sure you allow for plenty of time to defrost your turkey. You can do this by leaving it in the refrigerator 3 days before you plan to brine your turkey or roast it. If you are short on time you can thaw the turkey in your sink with cold water. Change the water every 30 minutes until the turkey is thawed.
- This post from Allrecipes on how to butterfly a turkey is a great pictorial guide. You can save the backbone you remove from the turkey to make broth/stock.
- How much turkey do you need? Plan for at least 1 pound per person. And if you want a lot of leftover turkey plan for 1 1/2 pounds per person.
- To make gravy use this recipe for Homemade Turkey Gravy.
Did you make this? Let me know by sharing a picture and tagging @countryside_cravings on Instagram!
