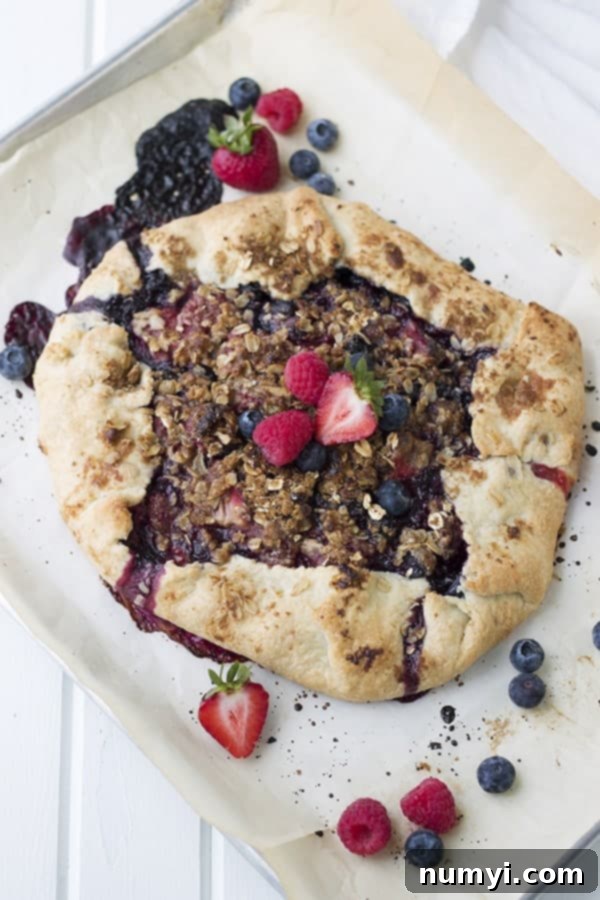
Easy Rustic Berry Galette Recipe: Your Perfect Homemade Fruit Tart
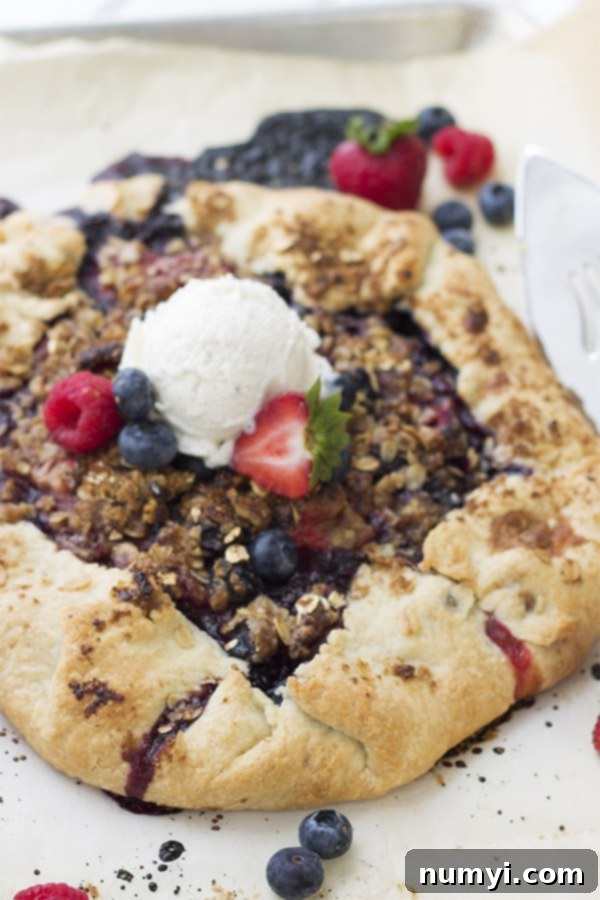
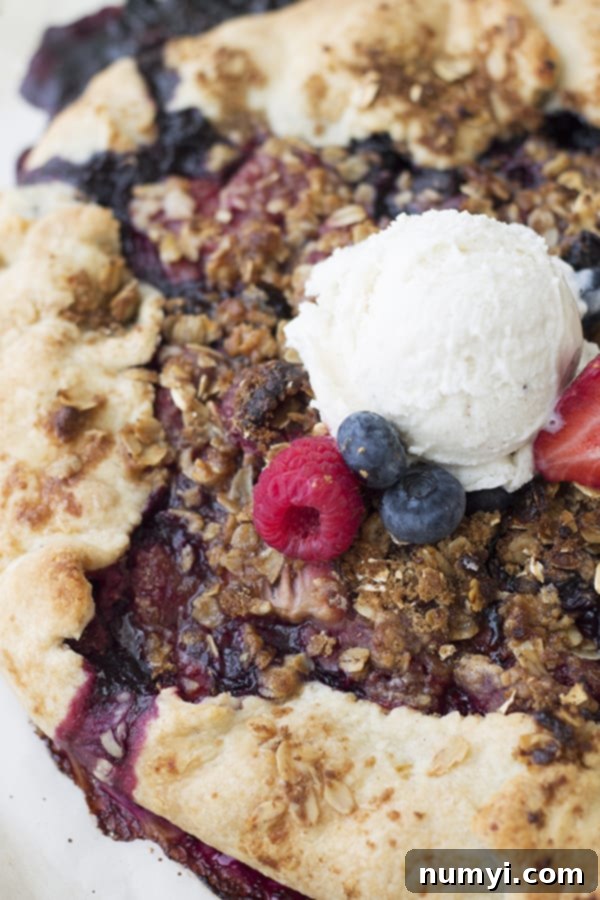
Imagine a dessert that’s bursting with the vibrant flavors of fresh berries, cradled in a golden, flaky crust, and topped with a sweet, crumbly oat streusel. This Rustic Berry Galette is precisely that – super easy to make and even more delightful to savor! Its charm lies in its “imperfection,” offering all the deliciousness of a traditional pie without the stress of intricate lattice work or perfect crimping. The harmonious blend of the buttery, crumbly crust, the warm spiced oat topping, and the bubbling, sweet-tart berry filling creates an unforgettable dessert experience. If you’ve ever shied away from baking pies, this galette recipe is your gateway to homemade fruit desserts. Once you embrace the beautiful, free-form nature of the galette, you’ll wonder why you ever bothered with anything more complicated!
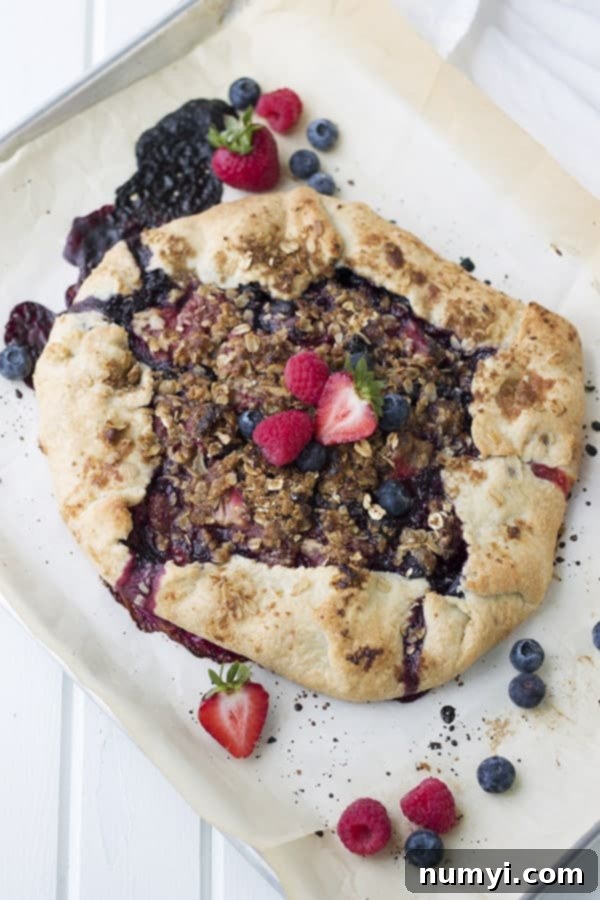
Why You’ll Fall in Love with This Easy Berry Galette
Many home bakers, myself included, have experienced the frustration of trying to achieve the perfect, picture-book pie. The quest for flawless crimping and a pristine top crust can sometimes overshadow the joy of baking. That’s where the beauty of a galette shines! A galette is essentially a free-form tart, offering all the delightful flavors and textures of a classic fruit pie but with a delightfully relaxed, rustic aesthetic. It celebrates imperfection, making it incredibly approachable for bakers of all skill levels, especially those who find traditional pie making daunting.
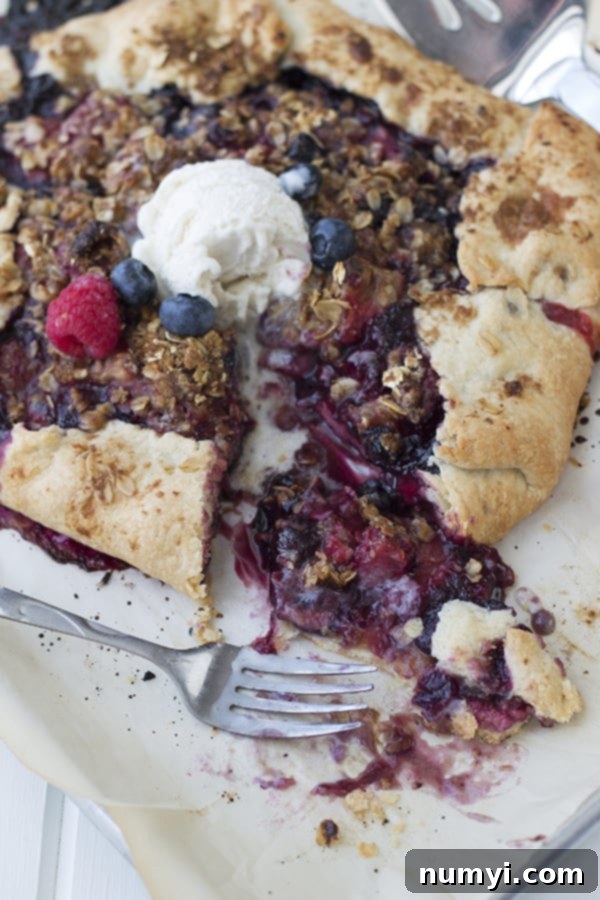
This Berry Galette recipe isn’t just about ease; it’s also remarkably faster to prepare than a traditional pie. You get to enjoy that irresistible buttery, flaky crust and a generous, bubbling, juicy fruit filling, but in a fraction of the time and with far less fuss. There’s no need for a pie plate, no intricate lattice work, just a simple fold of the dough around the vibrant berry filling. The end result is a stunning homemade dessert that looks like it took hours of effort, but actually comes together with surprising speed. The “rustic” presentation means less stress about perfection and more focus on the pure joy of baking and eating. Serve it warm with a dollop of freshly whipped cream or a scoop of creamy vanilla ice cream for an extra touch of indulgence that will make you an instant galette convert!
Essential Ingredients for Your Homemade Berry Galette
Crafting the perfect berry galette relies on a few key components working in harmony. Each ingredient plays a crucial role in achieving the balance of flavors and textures that makes this dessert truly special. I’ve thoughtfully organized the ingredients into three distinct categories: the flaky crust, the sweet and tangy berry filling, and the irresistible spiced oat topping. This breakdown will help you keep everything straight as you gather your supplies and embark on your baking adventure, ensuring you have all you need for a successful and delicious outcome.
For the Flaky Galette Crust
- All-purpose flour: This forms the primary structure of our galette crust. Using all-purpose flour ensures a tender yet sturdy base that can hold the juicy berry filling without becoming soggy.
- Salt: A small but mighty ingredient, salt is essential for enhancing the flavor of the butter and balancing the sweetness of the entire dessert, preventing it from tasting bland.
- Cold Butter: This is arguably the most critical ingredient for a flaky crust! When cold butter is cut into the flour, it creates pockets. As the galette bakes, these butter pockets release steam, separating the layers of dough and resulting in that wonderfully flaky, tender texture we all crave. Always use butter straight from the fridge and cut it into small cubes.
- Cold Water: Just like cold butter, cold water helps keep the dough from becoming tough by limiting gluten development. Adding it gradually ensures you reach the perfect consistency without over-hydrating the dough.
For the Sweet & Juicy Berry Filling
- Packed Brown Sugar: This provides a deep, rich sweetness with subtle caramel notes that beautifully complement the natural tartness of the mixed berries. Packing the brown sugar ensures you get the exact amount for optimal flavor and a perfectly viscous filling.
- All-purpose flour: In the filling, flour acts as a gentle thickener. It helps absorb some of the juices released by the berries during baking, preventing your galette from becoming watery and ensuring a luscious, spoonable filling.
- Lemon Zest: A true flavor enhancer! The finely grated zest from a fresh lemon adds a bright, fragrant, and tangy note that elevates the entire berry filling, making the fruit flavors pop and preventing the dessert from tasting too sweet or flat. Don’t skip this ingredient – it makes a noticeable difference!
- Mixed Fresh Berries: This recipe calls for a generous 5 cups of mixed berries. I personally love a combination of 1 cup raspberries, 2 cups blueberries, and 2 cups sliced strawberries for their varied textures, colors, and sweet-tart profiles. However, feel free to use your absolute favorites or whatever is freshest and most abundant in season! Blackberries, boysenberries, or even a mix of cherries would also be divine additions. For best results, use fresh berries when possible, but frozen can work too if prepared correctly (see FAQs for tips).
For the Spiced Oat Topping
- Old-fashioned oats: These oats contribute a lovely chewiness and a truly rustic texture to the topping, which contrasts beautifully with the soft fruit filling. While quick oats can be used in a pinch, old-fashioned oats offer a superior bite.
- Packed Brown Sugar: Sweetens the oat topping and helps it caramelize into a delightfully crisp and golden streusel during baking, adding another layer of flavor and texture.
- Cinnamon: A classic warm spice that adds comforting depth and aroma, perfectly harmonizing with the sweet berries and earthy oats.
- Cold Butter: Just like in the crust, cold butter is key here for creating a wonderfully crumbly, streusel-like topping that bakes up golden and crisp. It ensures the topping maintains its texture rather than melting away.
Step-by-Step Guide: How to Make This Irresistible Berry Tart
Baking this berry galette is a straightforward and enjoyable process that even novice bakers can master. Follow these simple steps carefully, and you’ll create a show-stopping homemade dessert that tastes as good as it looks.
Step 1: Prepare Your Oven
Before you begin assembling your ingredients, ensure your oven is ready. Preheat your oven to a precise 425 degrees F (218 degrees C). This high initial temperature is crucial because it ensures the galette crust bakes quickly, resulting in a golden, flaky texture, and allows the berries to cook down to a perfectly bubbly and thick consistency without making the crust soggy.
Step 2: Craft the Flaky Crust
- In a medium-sized mixing bowl, combine the all-purpose flour and salt. Whisk them together thoroughly to ensure the salt is evenly distributed throughout the dry ingredients.
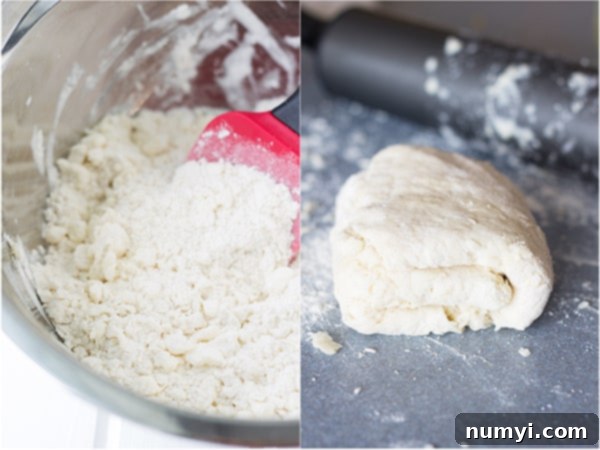
- Add the cold, cubed butter to the flour mixture. Using a pastry blender, two knives, or your fingertips, swiftly “cut in” the butter until the mixture resembles coarse crumbs, with some pea-sized pieces of butter still visible. Avoid overworking the butter into the flour; these distinct butter pieces are essential for creating the wonderfully flaky texture as they melt and create steam during baking.
- Gradually add 4 tablespoons of ice-cold water, mixing with a fork until large clumps of dough start to form. If the dough still seems too dry and isn’t coming together when pressed, add the final tablespoon of cold water, one teaspoon at a time. The goal is a shaggy dough that just holds together when gently squeezed.
- Gently bring the dough together with your hands, forming it into a flat disk. Wrap the disk tightly in plastic wrap to prevent it from drying out, and then place it in the freezer for about 10-15 minutes (or in the refrigerator for 30 minutes). Chilling the dough is crucial for firming up the butter, which prevents the crust from becoming tough and makes it significantly easier to roll out without sticking.
Step 3: Prepare the Luscious Berry Filling
In a large bowl, combine the all-purpose flour, packed brown sugar, and vibrant lemon zest. Whisk them well to ensure the flour and sugar are evenly distributed and the lemon zest’s fragrant oils are released into the mixture. Add your mixed fresh berries to this dry mixture and gently toss to coat them thoroughly. This coating not only helps thicken the berry juices during baking but also ensures a consistent sweetness throughout the filling. Set this colorful, fragrant filling aside while you work on the topping and crust assembly.
Step 4: Mix the Crumbly Oat Topping
In a separate, small bowl, combine the old-fashioned oats, packed brown sugar, and ground cinnamon. Stir them together to mix. Add the cold, cubed butter and use your pastry blender or fingertips to cut in the butter until you achieve fine, moist crumbs. This simple topping adds a delightful textural contrast – a sweet, spiced crunch – and an extra layer of flavor to your galette. Set it aside, ready to be sprinkled on just before baking.
Step 5: Assemble Your Rustic Berry Galette
- Retrieve your chilled pastry dough from the freezer and unwrap it. Place the dough on a generously floured work surface to prevent sticking. Using a rolling pin, roll the dough out evenly into a roughly 15-inch circle. Don’t worry if it’s not perfectly round; the rustic, free-form look is part of its charm and appeal!
- Lightly dust the top of the rolled dough with a little extra flour, then carefully fold the dough in half, and then in half again. This technique makes it significantly easier to transfer the delicate dough without tearing.
- Gently place the folded dough onto a well-greased baking sheet or one lined with parchment paper. This prevents the galette from sticking and makes cleanup a breeze, ensuring your beautiful creation comes off the pan effortlessly.
- Unfold the dough, then spoon the prepared berry filling evenly into the middle of the dough circle, leaving a clear 2-inch border around the edges. This border will form the crust.
- Carefully fold the edges of the dough up and over the filling, pleating the dough as you go to create a rustic, free-form border. There’s truly no need for perfection here – the more natural and artfully “imperfect” the folds, the better the galette will look!
- Finally, generously sprinkle your reserved spiced oat topping over the exposed berry filling and even slightly over the folded crust edges. This will create a delightful, crunchy streusel layer.
Step 6: Bake to Golden Perfection
Carefully place your assembled galette into the preheated 425 degrees F (218 degrees C) oven. Bake for approximately 30-35 minutes. You’ll know your galette is perfectly ready when the crust is beautifully golden brown, and the berry filling is visibly bubbling in the center, indicating that the fruit is tender and its delicious juices have thickened to perfection. Once baked, carefully remove the galette from the oven and allow it to cool on the baking sheet for 10-15 minutes before attempting to slice and serve. This crucial cooling time allows the hot fruit filling to set slightly, which results in cleaner slices and prevents a soupy center. Enjoy your warm, homemade rustic berry galette – a true taste of simple indulgence!
Tips for Success & Delicious Variations
Pro Tips for the Best Galette
- Keep everything cold: This cannot be stressed enough! For a truly flaky, tender crust and a distinct, crumbly topping, ensure your butter and water are as cold as possible. This prevents the butter from melting into the flour too quickly, preserving its ability to create steam and separation.
- Don’t overmix the dough: Overmixing any pastry dough develops gluten excessively, which leads to a tough, unappetizing crust. Mix just enough until the dough barely comes together in shaggy clumps.
- Flour your surface well: A generously floured work surface prevents the dough from sticking as you roll it out, making it easier to handle, shape, and transfer to the baking sheet.
- Embrace the rustic look: The inherent beauty of a galette lies in its imperfect, free-form shape. Don’t strive for machine-like perfection in your folds or crimping; let its natural, homemade charm shine through.
- Watch for bubbling: The vigorous bubbling of the filling in the center of the galette is a key visual indicator that the berries are cooked through, tender, and their juices have sufficiently thickened.
- Adjust sweetness to your berries: If your berries are exceptionally tart, you might add an extra tablespoon or two of brown sugar to the filling. Conversely, if they’re very sweet, you can slightly reduce the sugar.
Delicious Galette Variations
- Different Fruit Fillings: While mixed berries are a classic and delicious choice, feel free to experiment with other fruits! Sliced apples with a hint of cinnamon and nutmeg, ripe peaches with a touch of almond extract, or even a mixed stone fruit galette (peaches, plums, nectarines) would be fantastic.
- Nutty Topping: For an added layer of flavor and crunch, incorporate finely chopped nuts like almonds, pecans, or walnuts into the oat topping. They toast beautifully in the oven.
- Herbal Twist: A subtle hint of finely chopped fresh thyme or rosemary can add an unexpected and sophisticated aromatic touch to berry fillings, creating a wonderful sweet and savory complexity.
- Citrus Swap: If fresh lemons are unavailable, orange zest can also provide a lovely bright and aromatic note to the berry filling, pairing particularly well with blueberries.
- Chocolate Chips: For a decadent twist, sprinkle a handful of mini chocolate chips over the berry filling before folding the crust. Dark chocolate and berries are a match made in heaven.
- Spiced Crust: Add a pinch of cinnamon or cardamom to your crust flour for an extra layer of warm spice that complements the filling.
Serving Suggestions for Your Berry Galette
A warm berry galette is a delightful dessert on its own, its rustic charm making it inviting and comforting. However, a few simple additions can elevate it to an even more memorable treat, perfect for any occasion from a casual family dinner to a festive gathering. For classic indulgence, a generous scoop of creamy vanilla bean ice cream is always a winning choice, creating a beautiful contrast between the warm fruit and the cold, melting creaminess. Alternatively, a dollop of freshly homemade whipped cream provides a lighter, airier accompaniment. For a simple yet elegant touch, a light dusting of powdered sugar over the cooled galette can add visual appeal. You could also drizzle it with a homemade berry coulis for intensified fruit flavor, a delicate crème anglaise, or even a hint of balsamic glaze for a sophisticated edge. Pair it with a cup of freshly brewed coffee or a soothing herbal tea for a cozy afternoon treat, or serve it as the star dessert at your next dinner party. Its versatility and straightforward preparation make it a go-to dessert that impresses without the fuss.
Storage Instructions for Freshness
If you happen to have any leftovers of this delicious berry galette (which, let’s be honest, is a rare occurrence!), proper storage will help maintain its freshness and delightful flavor for a few days. You can store your baked galette, covered loosely with foil or plastic wrap, at room temperature for up to 2 days. This is ideal for short-term enjoyment. For longer storage, transfer the cooled galette to an airtight container and refrigerate for up to 4 days. While it’s absolutely delicious eaten chilled, gently warming individual slices in a toaster oven, microwave, or a low oven for a few minutes will bring back some of that fresh-baked warmth and revive the crispness of the crust, making it feel like it’s fresh out of the oven again.
Frequently Asked Questions (FAQs) About Galettes
Yes, absolutely! If you’re using frozen berries, it’s important to thaw them completely first. Once thawed, thoroughly drain off any excess liquid before adding them to your filling mixture. This crucial step prevents the galette from becoming soggy and ensures a perfectly set, delicious filling that isn’t too watery.
The primary difference lies in their structure and baking method. Pies are traditionally baked in a pie dish or shaped pan and are often completely enclosed by their crust (e.g., a double-crust pie with a top and bottom crust). Galettes, on the other hand, are baked freeform directly on a flat baking sheet. Their crust is simply folded up and over the edges of the filling, leaving the center exposed, giving them their characteristic rustic and open-faced appearance. They are generally considered less fussy to make.
A galette is indeed a type of tart! The terms are often used interchangeably, particularly in French cuisine, where “galette” can refer to various flat, round cakes. Generally, a tart implies an open-faced pastry with a filling, often baked in a specific tart pan with fluted sides. A galette specifically refers to a free-form, rustic tart baked without a pan, directly on a sheet, but essentially, they fall under the same delicious family of fruit pastries.
A baked berry galette can be stored at room temperature, loosely covered with foil or plastic wrap, for up to 2 days. For extended freshness, especially in warmer climates, it’s best to place it in an airtight container and refrigerate for up to 4 days. While it can be eaten cold, gently warming it before serving will enhance its flavors and revive the crust’s texture.
Absolutely! The galette crust dough is perfect for making in advance. After forming it into a disk and wrapping it tightly in plastic wrap, you can store it in the refrigerator for up to 2-3 days, or even freeze it for up to a month. When you’re ready to bake, if refrigerated, let it sit at room temperature for about 10-15 minutes to soften slightly before rolling it out. If frozen, thaw it in the refrigerator overnight before bringing it to room temperature.
More Delicious Berry Recipes to Try
If you’ve enjoyed the simple elegance and burst of flavor from this delightful berry galette, you’re sure to love these other fantastic berry-centric recipes from Countryside Cravings. They’re perfect for enjoying the seasonal bounty of berries in various forms, from refreshing salads to decadent cheesecakes, ensuring you can celebrate these versatile fruits all year round.
- Triple Berry Pretzel Salad: A unique sweet and salty sensation, featuring layers of creamy goodness, crunchy pretzel crust, and a vibrant berry topping, perfect for potlucks and gatherings.
- Frozen Triple Berry Cheesecake: A refreshing, no-bake dessert that’s incredibly easy to make and ideal for warm weather entertaining, bursting with the flavors of three kinds of berries.
- Triple Berry Coconut Parfait: A light, layered dessert that combines the tropical notes of coconut with the sweet and tart goodness of triple berries, perfect for a fresh breakfast or elegant brunch.
- Healthier Berry Cheesecake Parfait: Enjoy the classic creamy flavors of cheesecake with fresh berries in a guilt-free and easy-to-assemble parfait, making it a great option for a lighter treat.
- Berry Icebox Cake: An effortless, make-ahead dessert that requires no baking! Layers of graham crackers, whipped cream, and fresh berries combine to create a delightful, chilled treat that’s always a crowd-pleaser.
DID YOU KNOW….
rating and sharing recipes is one of the best ways you can support your favorite food bloggers? If you make this recipe, I would love if you clicked the stars when commenting below to leave a rating and/or sharing a photo on Instagram, Facebook, or Pinterest! Your feedback and shares truly help our recipes reach more home bakers like you, allowing us to continue creating delicious content.
Rustic Berry Galette
This Rustic Berry Galette is super easy to make and is even more delicious to enjoy! The crumbly crust and spiced oat topping are delicious complements to the sweet and juicy berry filling. This recipe is so much easier to make than a pie, so once you lean into the rustic form of the galette you’ll never look back!

Servings: 8-10
Author: Countryside Cravings
Prep Time: 20 mins
Cook Time: 35 mins
Total Time: 55 mins
Ingredients
Crust
- 1 ½ cups all purpose flour
- ¾ teaspoon salt
- ½ cup + 2 tablespoons cold butter
- 4-5 tablespoons cold water
Filling
- ⅔ cups packed brown sugar
- ½ cup all purpose flour
- 1 teaspoon lemon zest
- 5 cups mixed fresh berries (e.g., 1 cup raspberries, 2 cups blueberries, 2 cups sliced strawberries)
Topping
- ¼ cup old fashioned oats
- ¼ cup packed brown sugar
- ¼ teaspoon cinnamon
- 2 tablespoons cold butter
Instructions
- Preheat oven to 425 degrees F (218°C).
- To make the crust: Combine flour and salt in a medium bowl. Cut in the cold butter until coarse crumbs form. Add 4 tablespoons of cold water, mixing with a fork until large clumps form. If too dry, add the remaining tablespoon of water. Form into a disk, wrap tightly in plastic wrap, and freeze for 10-15 minutes (or refrigerate for 30 minutes).
- For the filling: In a large bowl, combine flour, brown sugar, and lemon zest. Add berries and gently toss to coat. Set aside.
- For the topping: In a small bowl, combine oats, brown sugar, and cinnamon. Cut in the cold butter until fine crumbs form. Set aside.
- Assemble the galette: Remove dough from freezer and unwrap. Roll out on a well-floured surface to a 15-inch circle. Lightly dust with flour, fold in half, then half again, and transfer to a greased or parchment-lined baking sheet. Unfold the dough. Spoon berry filling onto the middle, leaving a 2-inch border. Fold the dough edges up over the filling, pleating as needed. Sprinkle with reserved oat topping.
- Bake for 30-35 minutes, or until the crust is golden brown and the filling is bubbling. Let cool for 10-15 minutes before serving.
Notes
- If using frozen berries, thaw them completely and drain any excess liquid before using.
- Store leftovers at room temperature, covered, for up to 2 days, or in the refrigerator in an airtight container for up to 4 days.
Nutrition Information (Approximate per Serving)
Calories: 396kcal | Carbohydrates: 62g | Protein: 4g | Fat: 15g | Saturated Fat: 9g | Cholesterol: 38mg | Sodium: 353mg | Potassium: 128mg | Fiber: 4g | Sugar: 33g | Vitamin A: 487IU | Vitamin C: 3mg | Calcium: 37mg | Iron: 2mg

