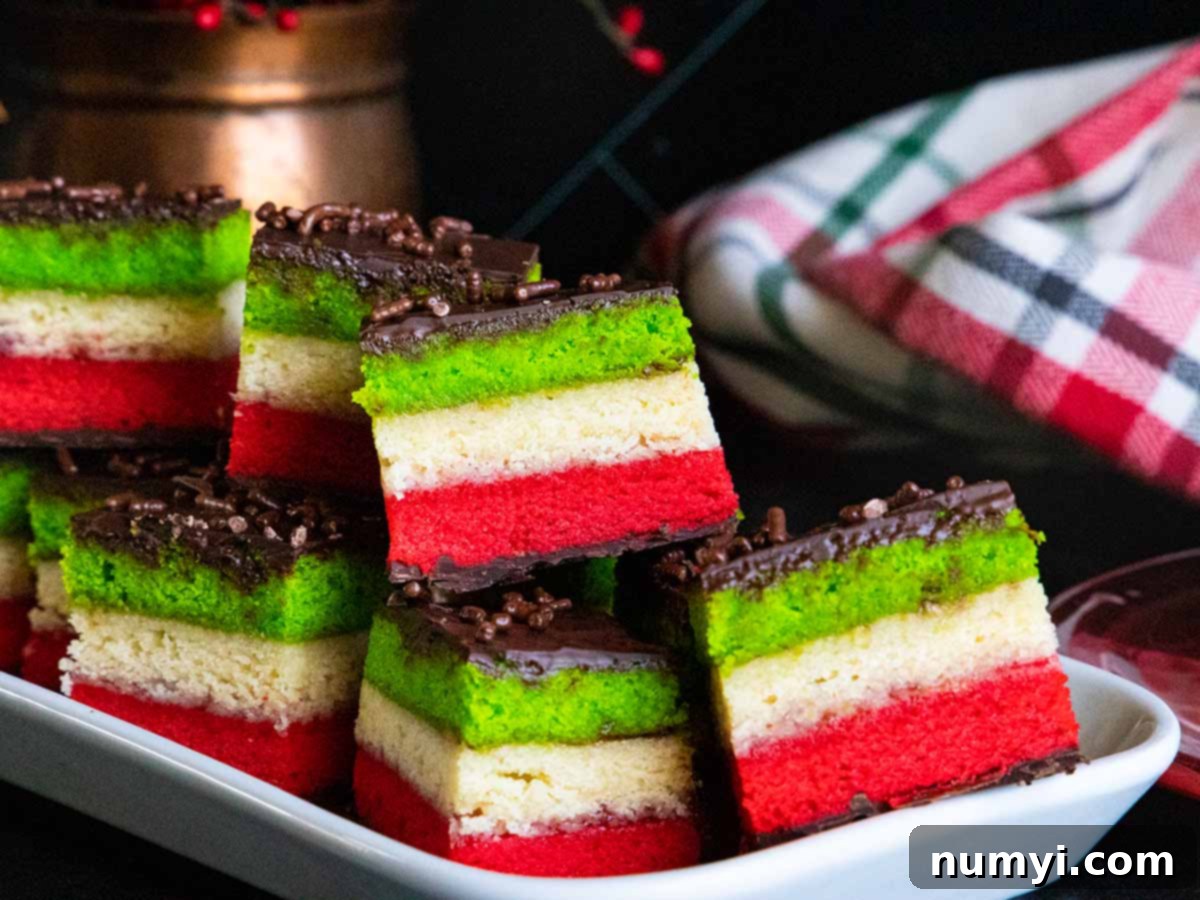
Authentic Italian Rainbow Cookies: A Step-by-Step Guide to Tri-Color Perfection
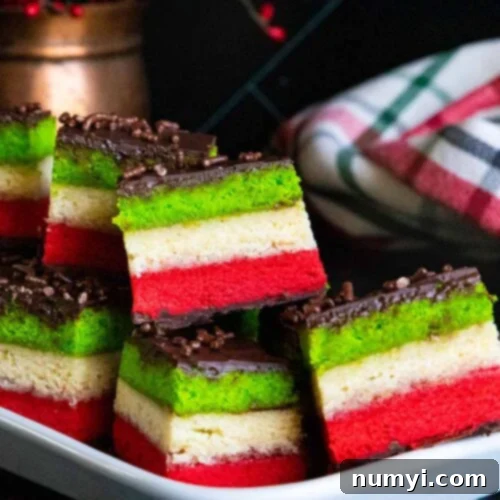
Italian Rainbow Cookies, often known as Tri-Color Cookies or Venetian Cookies, are a cherished classic in Italian-American baking, particularly popular during the festive holiday season. These delightful confections are a unique dessert that transcends the definition of a typical cookie, offering a soft, moist, cake-like texture rather than a crisp or chewy bite. Each piece is a miniature work of art, meticulously crafted from three distinct, thin layers of almond-flavored sponge cake. These layers are vibrantly colored red, white, and green, a deliberate homage to the Italian flag, symbolizing heritage and pride. Nestled between these colorful layers is a sweet, tangy fruit jam—traditionally apricot, but often raspberry for a brighter hue and flavor. The entire ensemble is then elegantly coated in a smooth, rich layer of dark chocolate, providing a luxurious finish. This intricate combination of flavors and textures makes Italian Rainbow Cookies an irresistible and visually stunning addition to any dessert spread, captivating all who taste them with their sweet, almond-infused charm.
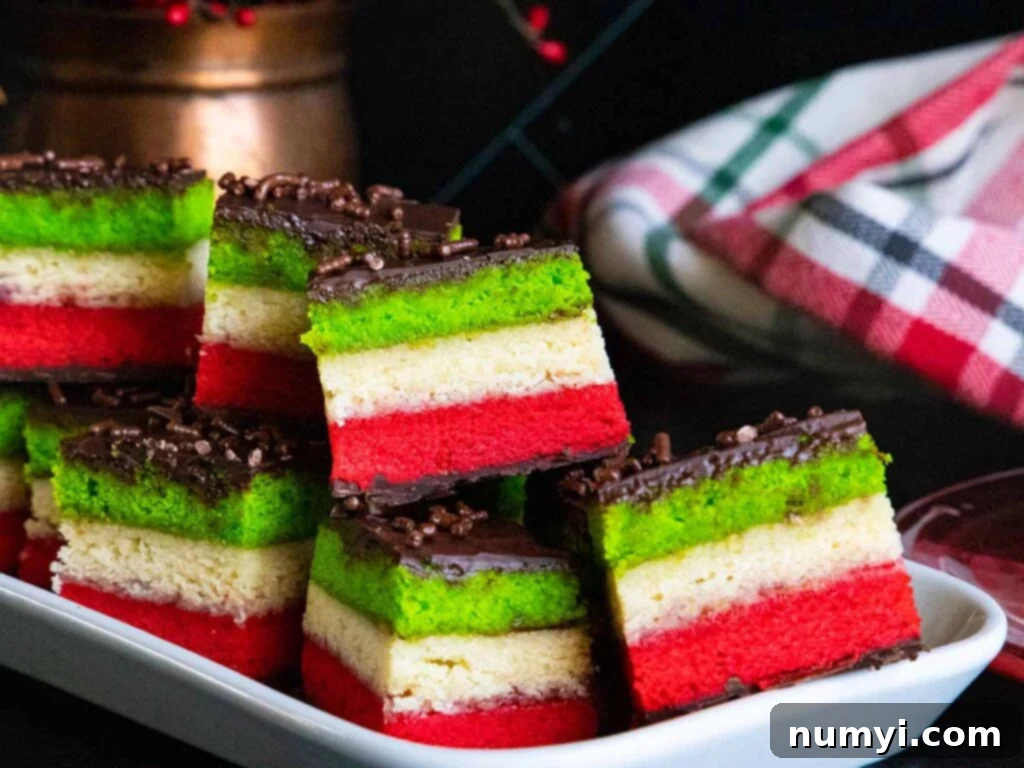
The Rich History and Cultural Significance of Italian Rainbow Cookies
Despite their name, the origins of Italian Rainbow Cookies (also affectionately known as Venetians, Tri-Color Cookies, Seven-Layer Cookies, Italian Flag Cookies, or Neapolitans) are firmly rooted in the vibrant Italian-American communities of the United States. These iconic sweets emerged in the early 1900s as a culinary tribute from Italian immigrants to their cherished homeland. The distinctive red, white, and green layers were a deliberate and heartfelt choice, intentionally mirroring the colors of the Italian flag. This edible symbolism served as a poignant expression of national pride and a constant connection to their heritage in a new country.
During the late 19th and early 20th centuries, as millions of Italians immigrated to the United States, food became a powerful tool for maintaining cultural identity and traditions. Immigrants often adapted familiar recipes to incorporate ingredients available in their new surroundings, giving birth to unique dishes that became staples in Italian-American homes and bakeries. The Rainbow Cookie is a perfect example of this culinary evolution, quickly gaining popularity and becoming a beloved fixture, especially during major holidays like Christmas and Easter, as well as family celebrations such as weddings and baptisms. Their labor-intensive preparation, which requires dedication and a touch of artistry, often imbued them with a special significance, making them a cherished gift or a highlight of any celebratory feast. These cookies are more than just a dessert; they are a sweet testament to the enduring spirit, resourcefulness, and cultural pride of the Italian-American community.
Are Rainbow Cookies Truly Italian?
It’s a common and understandable question, given their name! However, the answer is that these delightful treats are more accurately described as Italian-American. They were not born in the bakeries of Italy but rather emerged from the kitchens of Italian immigrant communities in the United States during the early 20th century. The creative choice to use red, white, and green layers was a deliberate way for these communities to honor their native country, symbolically representing the colors of the Italian flag. This makes them a unique and cherished part of the Italian-American culinary landscape, a beautiful fusion of tradition and new beginnings.
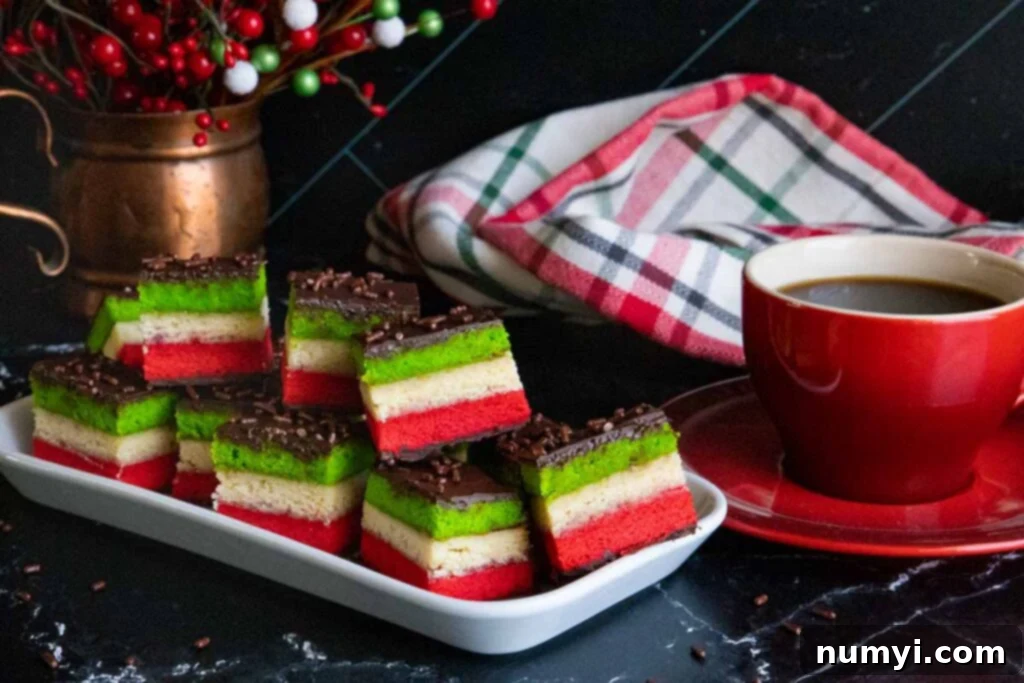
Why You’ll Fall in Love with These Tri-Color Delights
My journey to perfecting these Italian Rainbow Cookies has been one of dedicated experimentation and discovery. I delved deep into a myriad of recipes, exploring countless tips and tricks, and rigorously testing variations until I achieved a method that is not only straightforward but consistently yields spectacular results. Now, I’m thrilled to share my perfected approach with you, ensuring you can easily create these stunning cookies in your own kitchen.
The core appeal of these cookies lies in their exquisite almond flavor, which is wonderfully pronounced and utterly authentic, reminiscent of delicate Amaretti Cookies. What truly sets them apart is their unique texture: a soft, tender, and distinctly cake-like consistency that almost melts in your mouth, a pleasant surprise for those expecting a traditional cookie. Each of the three vibrant layers of almond cake is thinly spread with a bright, sweet, and slightly tart seedless raspberry jam, providing a delightful contrast to the rich almond notes (though apricot jam is also a popular and traditional choice). Finally, the entire stacked confection is enveloped in a smooth, sweet layer of dark chocolate, offering a satisfying snap and a perfect balance to the sweetness within. This harmonious blend of flavors and textures truly makes them “to-die-for”!
In my family, surprisingly, these particular cookies were never part of our Italian-American holiday traditions. My aunt, for instance, had never even heard of them, expressing genuine curiosity when I mentioned my ambitious baking project. This personal anecdote highlights the beautiful diversity within Italian-American culinary heritage, where some families might frequently bake Italian Ricotta Cookies or Italian Sesame Seed Cookies, while others might be entirely unfamiliar with rainbow cookies. Regardless of your family’s specific traditions, these Italian Rainbow Cookies are an exceptional choice to add to your holiday baking repertoire this year. Their vibrant appearance and irresistible taste make them a show-stopping treat that will impress your guests and become a cherished new tradition.
Essential Ingredients for Perfect Rainbow Cookies
Crafting these exquisite cookies begins with a careful selection of quality ingredients. Each component plays a crucial role in achieving the signature flavor, vibrant colors, and tender texture of authentic Italian Rainbow Cookies:
- Unsalted Butter – Ensure your butter is softened to room temperature. This is vital for achieving a smooth, well-emulsified batter when creamed with the almond paste and sugar. If using salted butter, you may want to reduce or completely omit the added kosher salt in the recipe to prevent the cookies from becoming too salty.
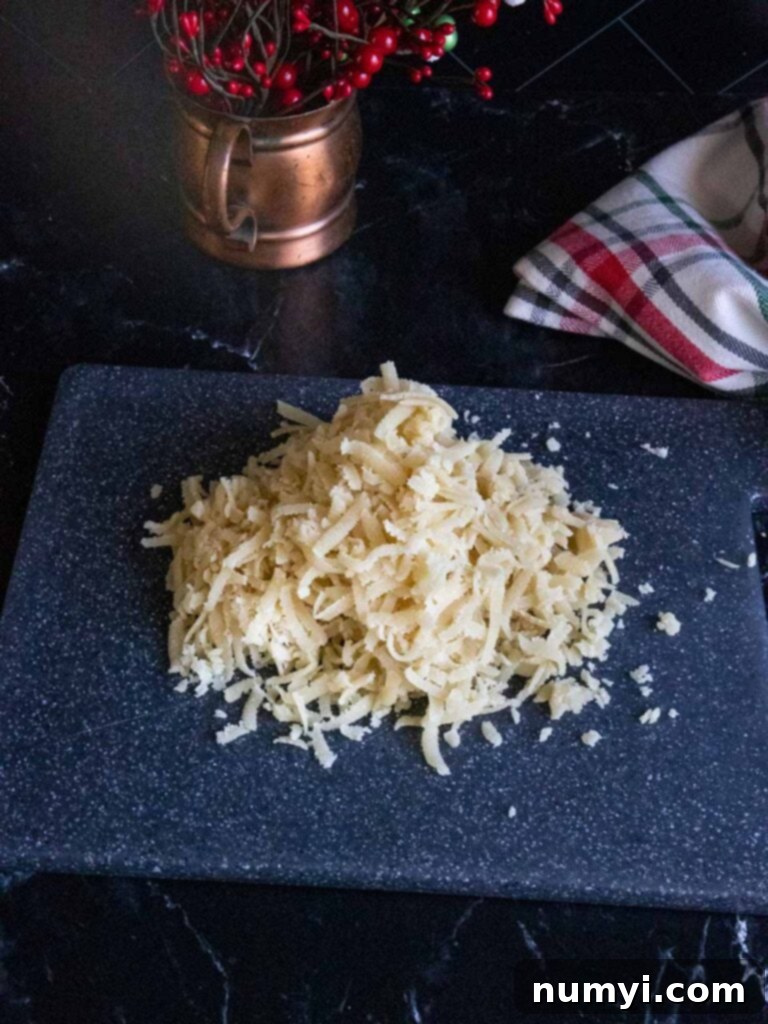
- Almond Paste – This is the key ingredient for the cookies’ characteristic, rich almond flavor. Almond paste provides a distinct marzipan-like depth and moisture that cannot be fully replicated by almond flour or extract alone. Shredding it before use helps it incorporate evenly into the batter.
- Granulated Sugar and Kosher Salt – Granulated sugar sweetens the cake and contributes to its tender crumb. A touch of kosher salt is essential for balancing the sweetness and enhancing all the other flavors, making them more pronounced and well-rounded.
- Eggs – Use large eggs, and ensure they are at room temperature. Room temperature eggs emulsify more effectively with the fats in the batter, leading to a smoother mixture and a lighter, more consistent cake texture.
- Pure Almond Extract – While almond paste lays the foundation, a dash of pure almond extract intensifies and brightens the overall almond flavor, ensuring it shines through in every bite without being overwhelming.
- All-purpose Flour – This provides the primary structure for the delicate cake layers. All-purpose flour yields a tender crumb and helps the layers maintain their shape while baking, ensuring they are light and airy.
- Seedless Raspberry Jam (or raspberry preserves) – Traditionally, apricot jam is often used, providing a classic sweet-tart complement. However, we enthusiastically recommend seedless raspberry jam for its vibrant color and delightful sweet-tart flavor profile, which pairs exceptionally well with the almond cake. Heating it slightly will make it easier to spread thinly.
- Dark Chocolate Chips – For the rich and glossy chocolate coating, I prefer Ghiradelli 72% Cacao chocolate chips for their deep, robust flavor and excellent melting properties. You can also use good quality semi-sweet or bittersweet chocolate chips, depending on your preference for sweetness and intensity. The chocolate provides a crucial textural contrast and a decadent finish.
- Red Gel Food Coloring and Green Gel Food Coloring – Gel food colorings are superior to liquid food colorings for this recipe because they provide intense, vivid colors without adding excess moisture to the batter, which could affect the cake’s delicate texture. I find Wilton Gel Food Coloring works exceptionally well for achieving those signature, deep hues.
How to Master the Italian Rainbow Cookies Recipe: A Detailed Guide
While this recipe might appear intricate due to its layered nature, it is truly more time-consuming than it is difficult. Most of the process involves inactive chilling time, which is essential for developing the flavors and ensuring the layers set beautifully. Embrace patience, and you will be rewarded with a spectacular dessert!
- **Prepare Your Oven and Baking Pans:** Start by positioning two racks in your oven to divide it into approximate thirds. This setup ensures optimal air circulation and even baking for all three cake layers. Preheat your oven to a precise 350 degrees F (175 degrees C). Next, prepare three standard 9×13 inch baking sheets (or quarter sheet pans) by lining each with parchment paper. Crucially, leave about a 2-inch overhang of parchment on the longer sides of the pans; these will act as convenient “handles” to easily lift the delicate baked cake layers without risking tears.
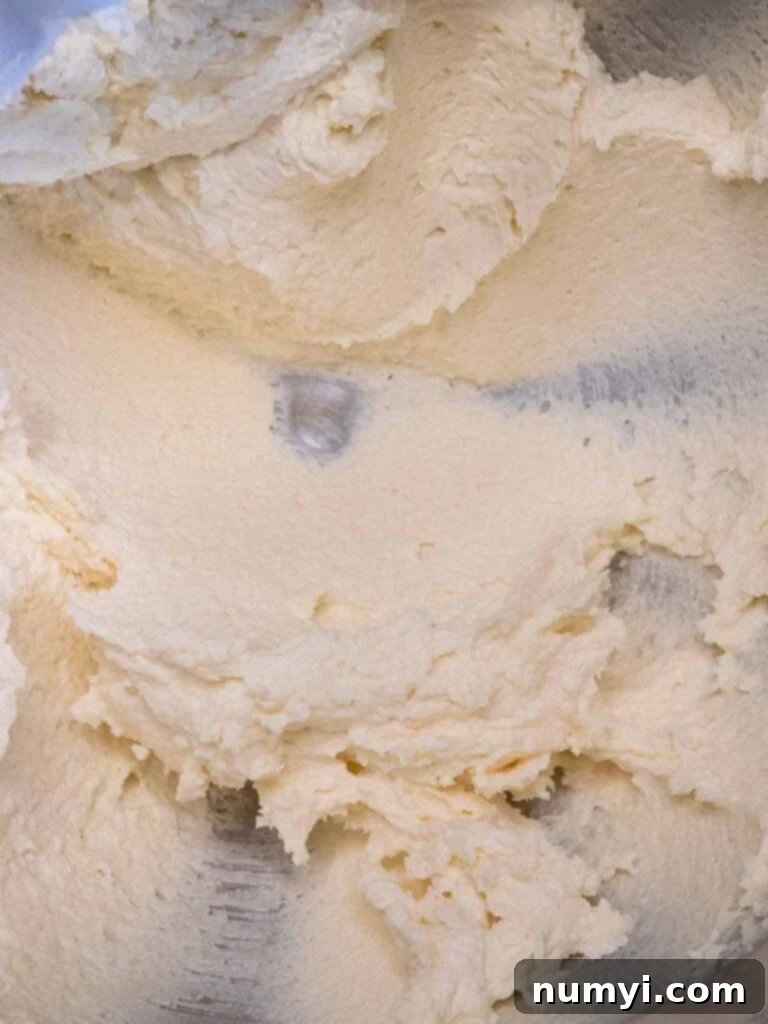
- **Cream the Butter, Almond Paste, Sugar, and Salt:** In the large bowl of a stand mixer fitted with the paddle attachment (or using a substantial bowl and a hand-held electric mixer), combine the softened unsalted butter, finely shredded almond paste, granulated sugar, and kosher salt. Cream these ingredients together on medium-high speed for approximately 5 minutes. Continue mixing until the mixture is visibly lightened in color, fluffy, and perfectly smooth. During this creaming process, pause occasionally to scrape down the sides and bottom of the bowl with a spatula, ensuring all ingredients are thoroughly incorporated.
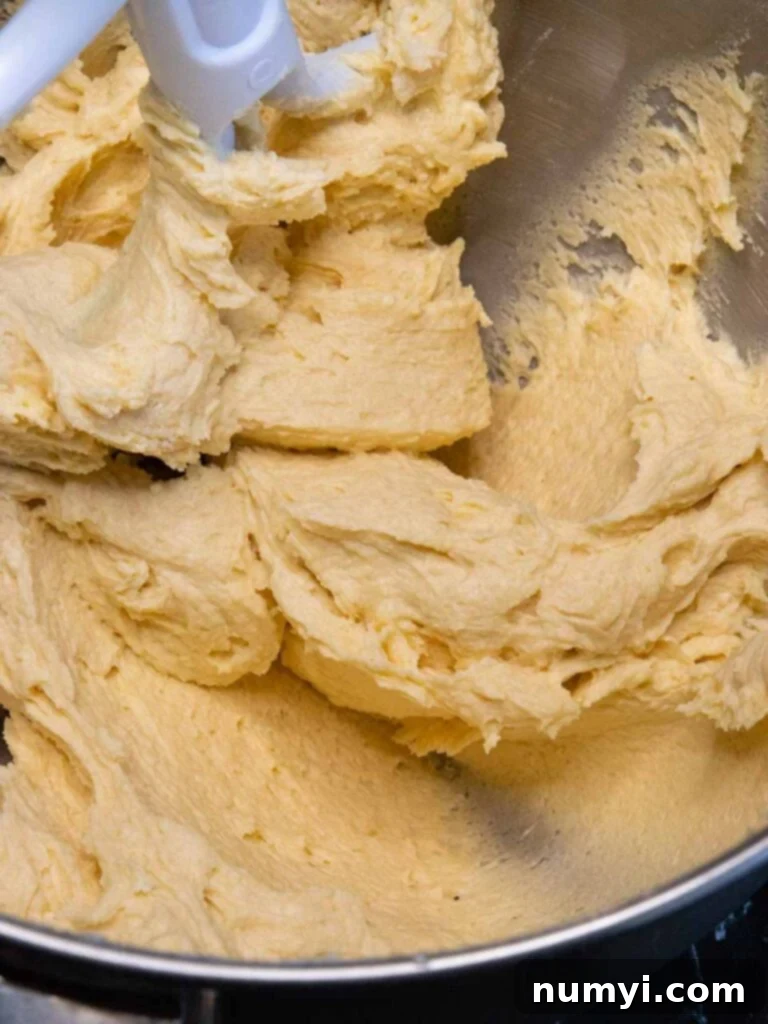
- **Incorporate Eggs and Almond Extract:** Reduce the mixer speed to medium. Add the room temperature eggs one at a time, ensuring each egg is fully incorporated before adding the next. Continue mixing for approximately 2 minutes until the batter appears smooth and homogenous. Stir in the pure almond extract, mixing just until its fragrant essence is evenly distributed throughout the batter.
- **Gently Mix in Flour:** With the mixer still on low speed, begin adding the all-purpose flour in three separate increments. Mix only until the flour is just combined and no dry streaks are visible. It’s crucial not to overmix at this stage, as excessive mixing can develop the gluten in the flour, resulting in tough, less tender cake layers. Scrape down the bowl as necessary to ensure all the flour is incorporated.
- **Divide and Color the Batter:** Evenly divide the prepared batter into three separate medium bowls. For the most consistent and visually striking layers, use a kitchen scale to weigh out the batter, aiming for approximately 14 ounces (which is roughly 1 ¾ cups) in each bowl. Now for the signature colors: using your gel food coloring, thoroughly tint one bowl of batter with red food coloring and another bowl with green food coloring, stirring until a deep, uniform color is achieved in each. Leave the third bowl of batter uncolored; this will form the white layer of your rainbow cookies.
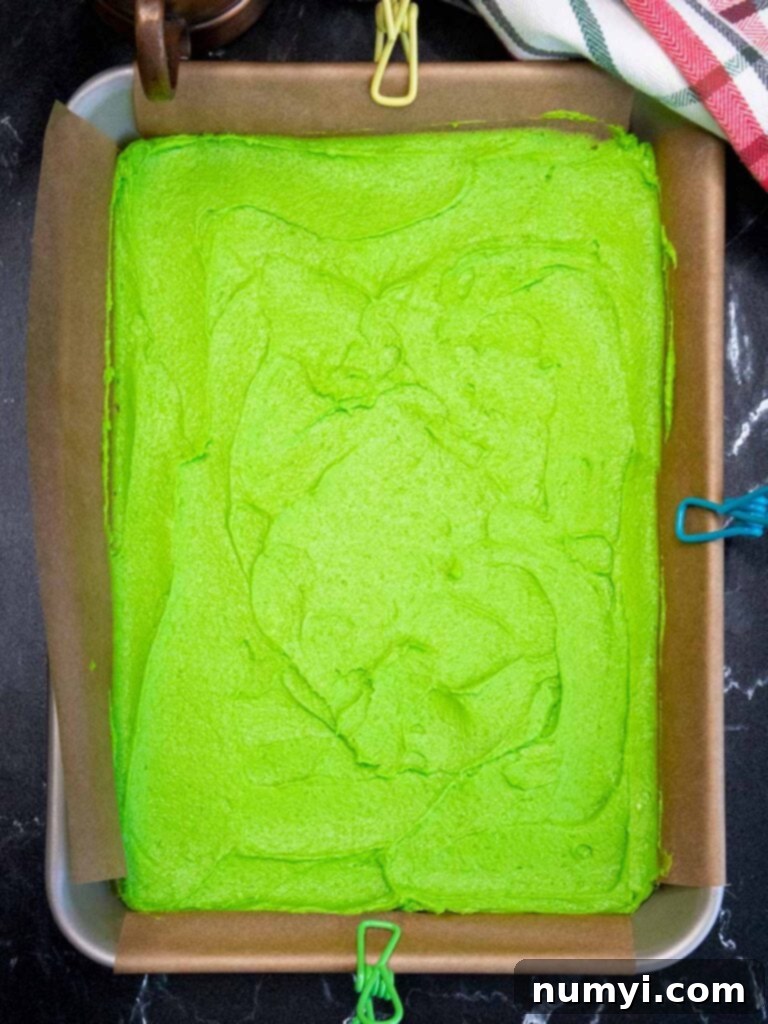
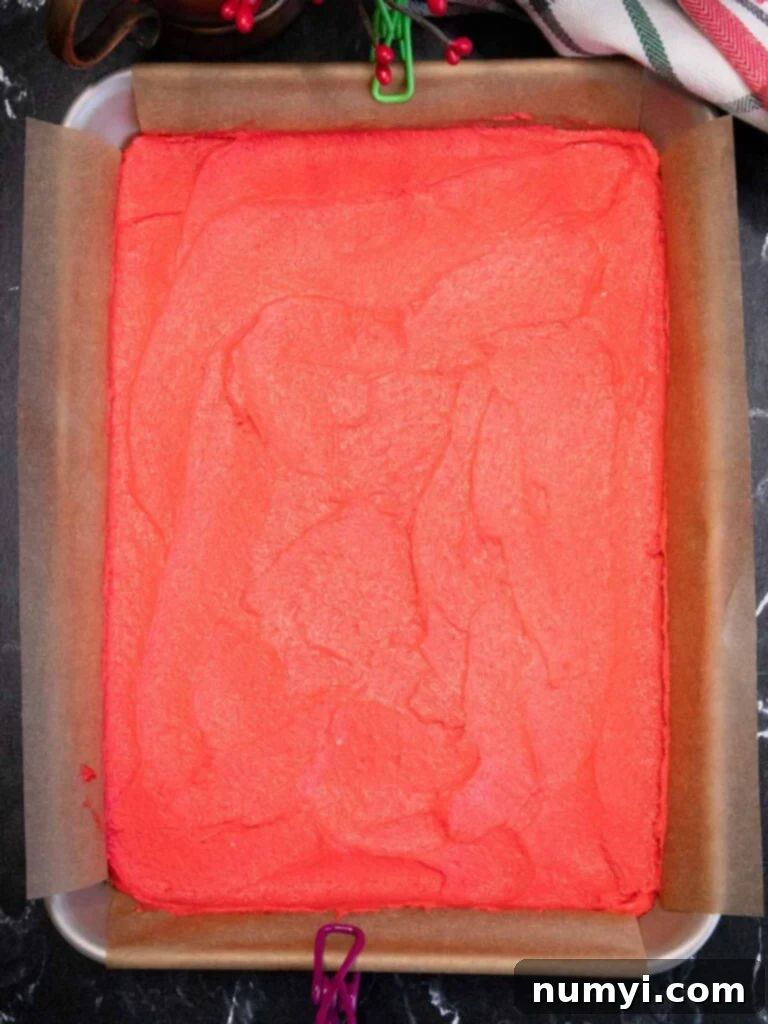
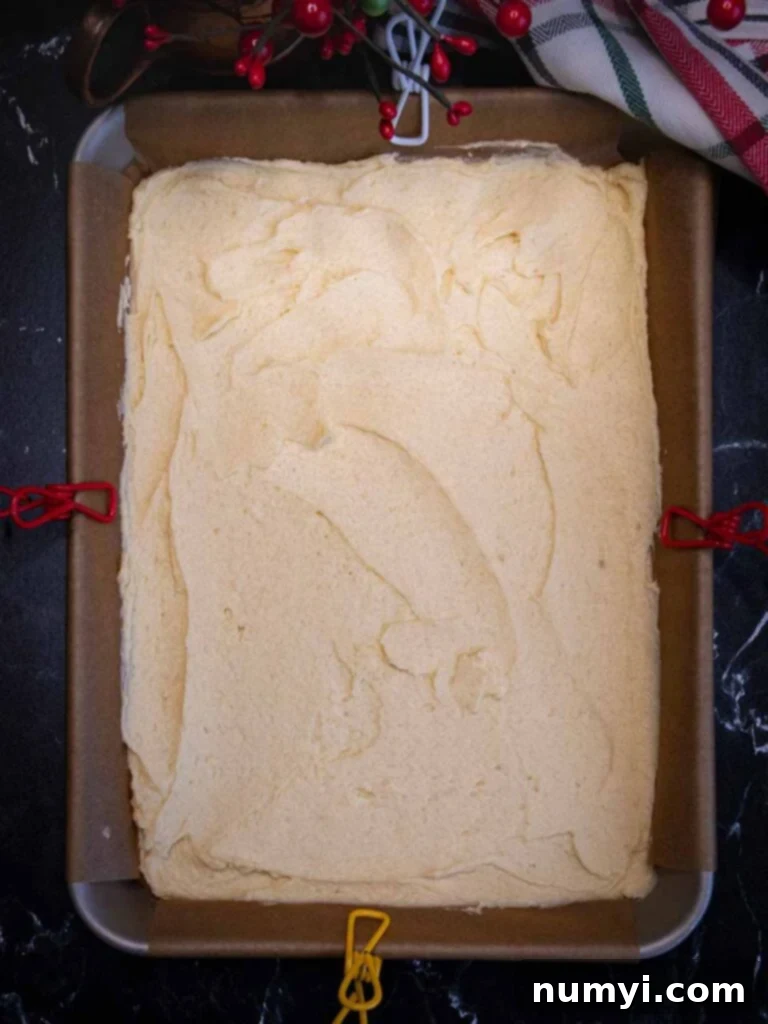
- **Bake the Cake Layers:** Transfer each bowl of colored batter into its respective prepared baking pan. Using an offset spatula, carefully spread each batter evenly across the bottom of the pan, extending to the edges. Don’t be concerned if the top surface isn’t perfectly smooth; these thin layers will self-level and bake evenly in the oven. Bake all three layers simultaneously (if your oven allows, otherwise bake in batches) for 12-14 minutes, rotating the pans halfway through for consistent baking. The layers are done when their tops appear dry to the touch but have not yet begun to brown. These are thin cakes, so watch them closely to avoid overbaking. Immediately remove the baked layers from the oven and carefully transfer them, still on their parchment paper, to a wire rack to cool completely.
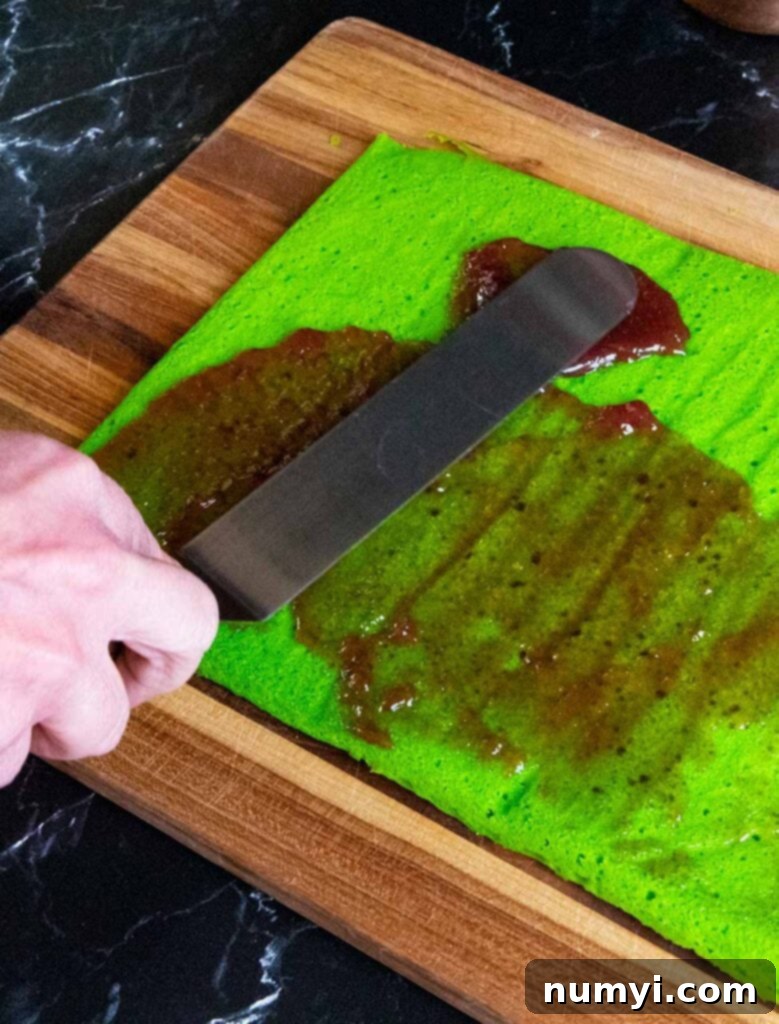
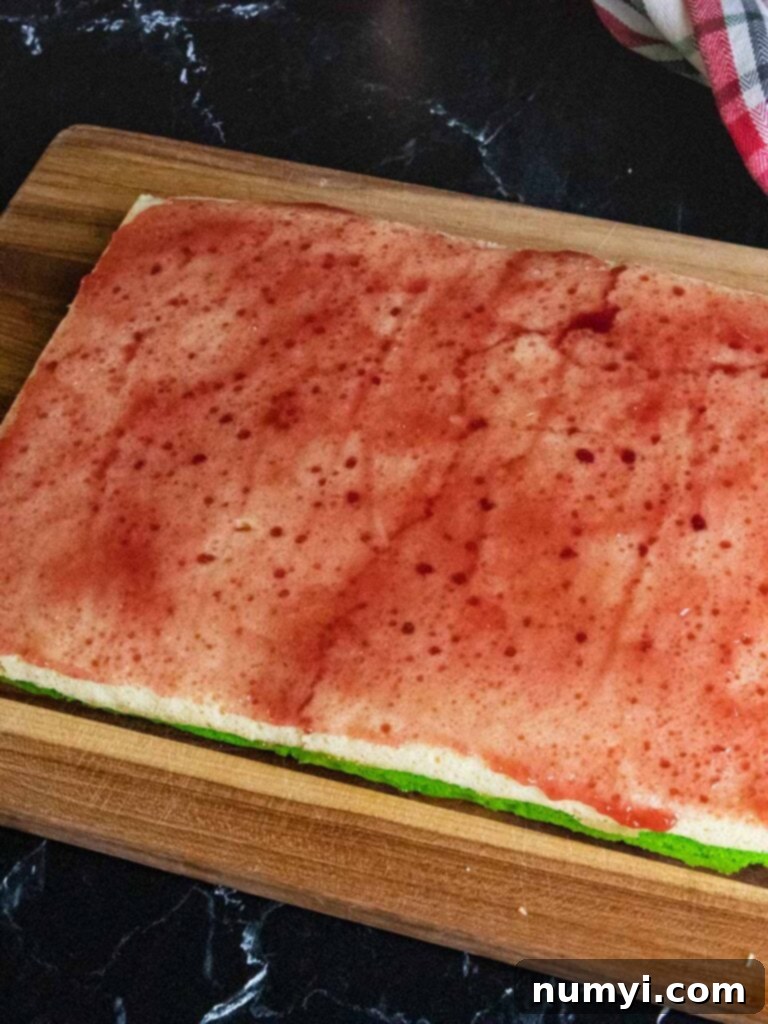
- **Assemble Layers with Jam:** Once the cake layers are completely cool, prepare for assembly. Place a fresh piece of parchment paper onto a large, flat cutting board. Carefully transfer the green cake layer onto this parchment-lined board. Warm 1/2 cup of the seedless raspberry jam in the microwave for just a few seconds until it’s slightly runny; this makes it significantly easier to spread thinly and evenly. Using an offset spatula, spread this warmed jam into a uniform, thin layer over the green cake. Next, carefully peel the parchment paper from the white (undyed) cake layer and gently place it directly on top of the jam-covered green layer. Spread the remaining 1/2 cup of warmed jam evenly over the white layer. Finally, remove the parchment from the red cake layer and carefully place it on top of the jam-covered white layer, completing your tri-color stack.
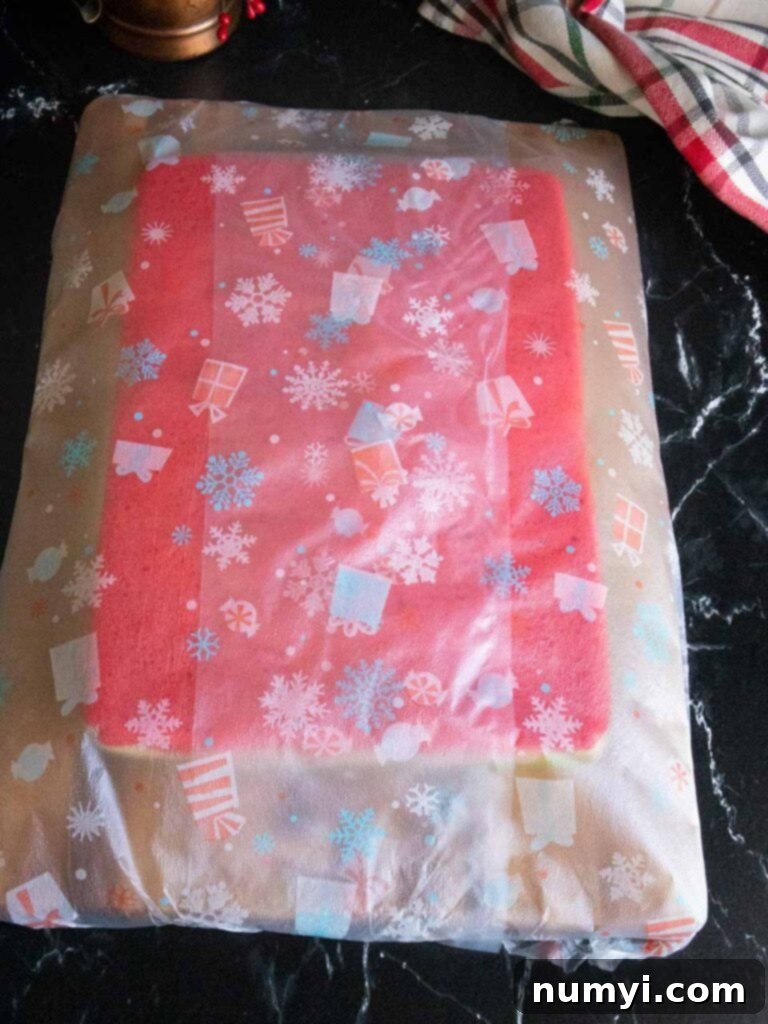
- **Press and Chill the Stacked Cake:** Once all layers are stacked with jam, place a new sheet of parchment paper or wax paper over the top (red) layer. Now, wrap the entire stacked cake tightly and securely in several layers of plastic wrap. To help the layers meld together and create a dense, compact texture, place a flat baking sheet on top of the wrapped cake and weigh it down with heavy objects. Large cookbooks, cutting boards, or several cans of food work perfectly. Refrigerate the weighted cake overnight, or for a full 24 hours. This extended chilling period is crucial for firming up the cake and allowing the flavors to fully develop and integrate.
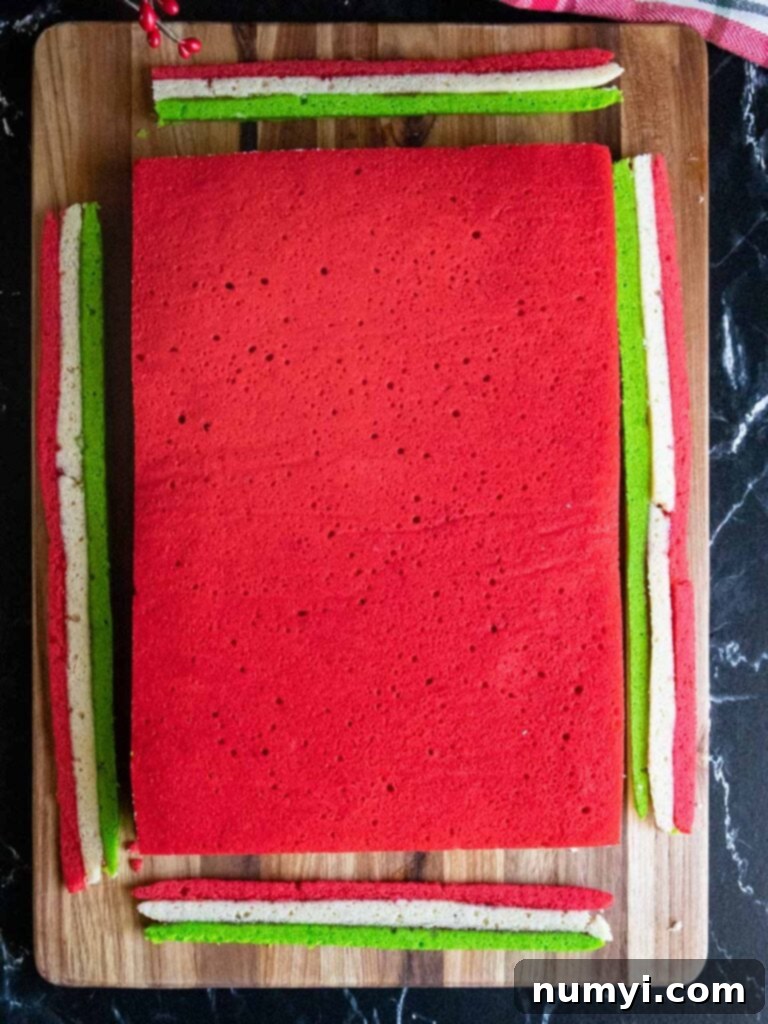
- **Trim Edges and Apply First Chocolate Layer:** After the essential chilling period, remove the heavy weights, baking sheet, and plastic wrap from the now-firm cake block. Using a very sharp, long knife (a serrated knife is often ideal for clean cuts), meticulously trim off all four outer edges of the cake. This step is key to revealing the stunning, perfectly defined red, white, and green layers, giving your rainbow cookies a professional and polished appearance.
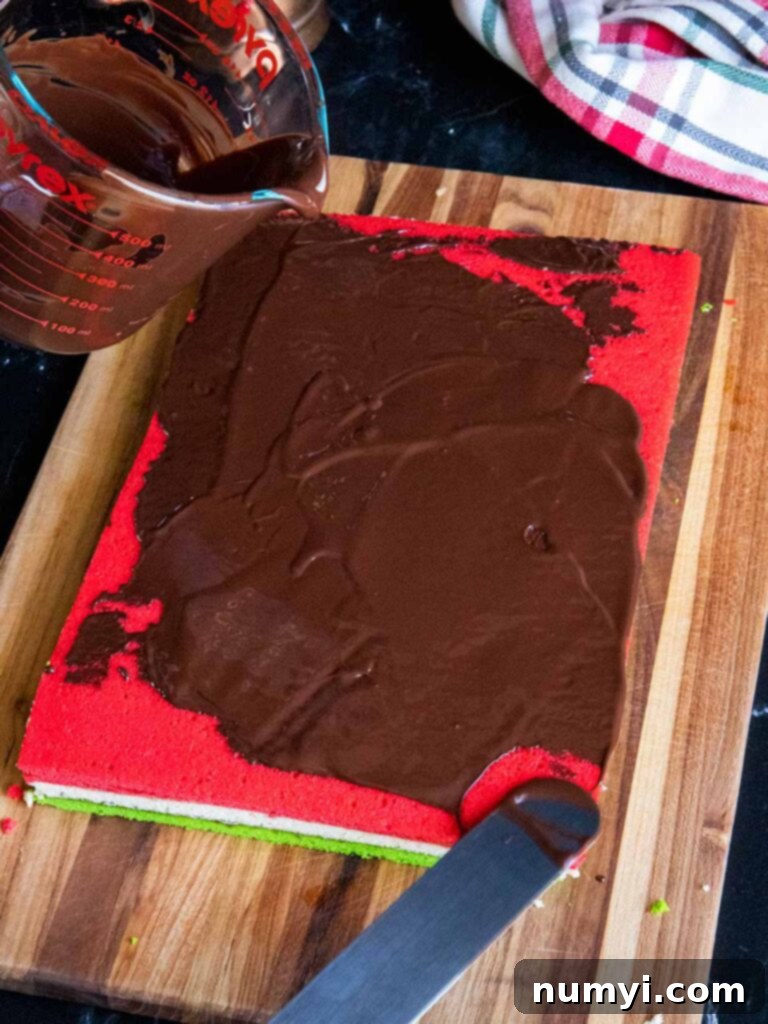
- **Melt and Spread Chocolate (Top Layer):** Place 4 ounces of your chosen dark chocolate chips along with 1/4 teaspoon of vegetable oil into a microwave-safe measuring cup. Microwave for 30 seconds, then remove and stir thoroughly. Continue microwaving in 15-second intervals, stirring vigorously after each, until the chocolate is almost entirely melted and smooth. Remove from the microwave and stir continuously until the chocolate is completely smooth and glossy. Using an offset spatula, spread this melted chocolate evenly over the top (red) layer of the trimmed cake. Refrigerate the cake for approximately 30 minutes, or until the chocolate coating is completely set and firm to the touch.
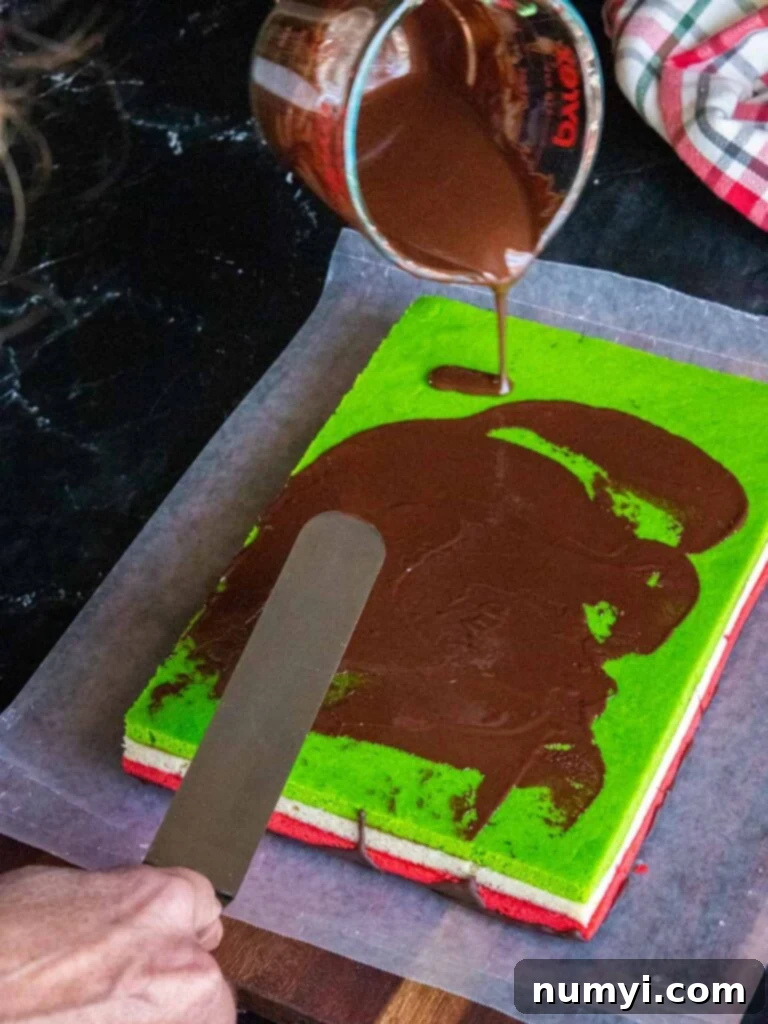
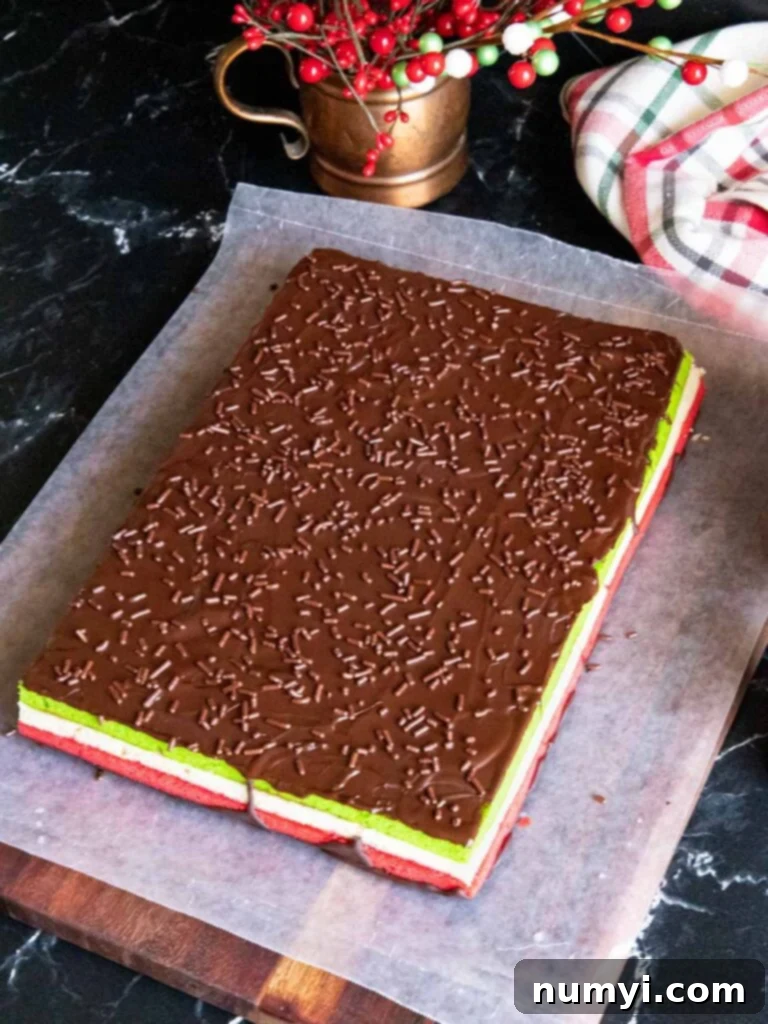
- **Melt and Spread Chocolate (Bottom Layer) & Finish:** Once the top chocolate layer is fully set, gently cover it with a fresh piece of parchment paper. Place another baking pan or a cutting board firmly over this parchment, and carefully but decisively flip the entire cake block over. This will expose the green bottom layer. Melt the remaining 4 ounces of chocolate with the other 1/4 teaspoon of vegetable oil, following the same microwave and stirring method as before until it is smooth. Spread this melted chocolate evenly over the exposed green layer. Return the cake to the refrigerator for another 30 minutes, or until this second chocolate layer is also completely set. For an extra touch of elegance and protection, you can also coat the sides of the cake with melted chocolate at this stage, using an offset spatula to create a neat finish.
Expert Tips for Perfectly Cutting Rainbow Cookies
Cutting your Italian Rainbow Cookies into neat, uniform pieces is the final, crucial step to showcasing their beautiful tri-color layers. To achieve the best results and prevent the chocolate coating from cracking or smearing, follow these expert tips diligently:
- **Essential Sharpness:** A very sharp, thin-bladed knife is absolutely essential. A good quality chef’s knife or a long, thin serrated knife will cut through the firm chocolate and dense cake most effectively.
- **Warm the Blade:** Fill a tall glass with very hot tap water. Dip your knife into the hot water for about 10-15 seconds. The warmth transferred to the blade will allow it to glide through the chocolate and cake layers smoothly, minimizing resistance and potential cracking.
- **Thoroughly Wipe Dry:** Immediately after warming the knife, wipe it completely dry with a clean paper towel. Any residual moisture on the blade can cause the chocolate to bloom (develop a whitish film) or seize, creating an uneven cut.
- **Make Decisive Cuts:** With your warmed and dried knife, make one single, decisive cut straight down through the entire block of cookies. You can aim for 1-inch squares or 2-inch rectangles, depending on your preferred serving size.
- **Repeat for Every Slice:** This is the most critical tip for a flawless finish: for every single cut you make, repeat the entire warming and wiping process. This seemingly tedious step is precisely what ensures clean, crisp lines, minimizes chocolate cracking, and prevents smearing across your vibrant cake layers. This consistent effort will result in uniformly beautiful cookies, each a perfect masterpiece.
Additional Baking Tips for Ultimate Success
- **Simplified Egg Preparation for Tender Cakes:** Many traditional recipes for Italian Rainbow Cookies call for separating eggs and beating egg whites to stiff peaks to incorporate air for a lighter cake. However, I’ve consistently achieved a wonderfully tender and moist cake texture by simply using whole eggs, eliminating an extra step and simplifying the process without compromising the delicious results.
- **Effortless Almond Paste Incorporation:** Almond paste can be quite dense and sticky, making it challenging to blend smoothly into the batter. The most effective method I’ve discovered is to shred it using the large holes of a box grater. This creates fine, manageable pieces that cream beautifully and evenly with the butter and sugar, far more efficiently than trying to crumble it by hand or with a fork.
- **No-Stick Pan Prep (Optional Spray):** While many recipes suggest spraying your baking pans with a non-stick spray before lining with parchment paper to help the paper adhere, I’ve found this step to be unnecessary. The batter, once spread, has enough consistency to hold the parchment in place, making the cooking spray an optional step you can confidently skip.
- **Warm Jam for Smooth Spreading:** For the jam layers, warming the seedless raspberry (or apricot) jam slightly in the microwave for 10-15 seconds makes a remarkable difference. This gentle warming thins the jam just enough to be spread into a perfectly even, thin layer over the delicate cake without causing it to tear or stick.
- **Strategic Chocolate Coating:** In my last batch, I applied chocolate to both the top (red layer) and the bottom (green layer) of the cake. While delicious, I’ve found a slightly simpler approach is equally effective and aesthetically pleasing. Next time, I plan to spread the chocolate only over the top (the green layer, once flipped) and coat the sides. This still provides a beautiful presentation and a rich chocolate flavor without the extra step for the bottom.
- **Achieving Consistent Cake Layers:** For the most uniform and visually stunning tri-color layers, precision in dividing the batter is paramount. I highly recommend using a kitchen scale to weigh the batter out equally into three separate bowls. Each bowl should contain approximately 1 ¾ cups or about 14 ounces of batter. This ensures each cake layer bakes to a consistent thickness, resulting in perfectly even stripes.
- **Vibrant Color Intensity:** To achieve the deep, rich red and green hues characteristic of these cookies, I typically use about 35 drops of gel food coloring for each colored batter. While this might seem like a generous amount, gel food colorings are highly concentrated and deliver intense pigment without adding excess liquid, which could alter the batter’s consistency. Feel free to adjust the amount to your preferred color intensity; even a lighter tint will still be beautiful.
Frequently Asked Questions About Italian Rainbow Cookies
Absolutely! Italian Rainbow Cookies are an excellent candidate for make-ahead preparation, making them perfect for busy holiday seasons or entertaining. To prepare them in advance, follow the recipe all the way through the pressing and chilling step (before you apply the chocolate coating). Once the stacked cake is fully chilled, wrap it very tightly in several layers of plastic wrap, then either wrap it again in freezer paper or place it into a large 2-gallon freezer bag. Store the tightly wrapped cake block in the freezer. When you’re ready to complete the cookies, simply thaw the cake overnight in the refrigerator, then proceed with melting and spreading the chocolate layers as directed. This method ensures maximum freshness and allows for stress-free holiday baking.
To keep your Italian Rainbow Cookies fresh, moist, and delicious, store them in an airtight container. The refrigerator is the ideal place for storage, where they will remain fresh for up to 1 week. While they are delightful when chilled, for the very best taste and to fully appreciate their tender, cake-like texture, I recommend allowing them to come to room temperature for about 15-30 minutes before serving. This softens the cake layers and the chocolate coating, enhancing their overall flavor and mouthfeel.
Yes, Italian Rainbow Cookies freeze beautifully! For optimal results when freezing already cut cookies, I recommend using a large, flat airtight container. Arrange the cookies in a single layer, placing sheets of wax paper between each layer to prevent the chocolate from sticking together. Wrap the container securely or place it into a large freezer bag, ensuring it’s sealed tightly to prevent freezer burn. They can be frozen for up to 3 months. While you can freeze them with the chocolate already applied and cut into pieces, be aware that freezing can sometimes cause the chocolate to develop a slight discoloration, known as “chocolate bloom.” If a pristine appearance is paramount, consider following the “make-ahead” notes mentioned above and adding the chocolate coating after the cookies have thawed in the refrigerator.
Explore More Delicious Cookie Recipes
Eggnog Cookies (Cut Out)
Amaretti Cookies Recipe
Italian Fig Cookies (Cucidati)
Are you on Pinterest? Click the button below to add this recipe to one of your boards!
Italian Rainbow Cookies Recipe
Print
Pin
Rate
Cookies, Dessert
American, Italian
20 minutes
12 minutes
1 day
48
159
kcal
Leigh Harris
Ingredients
- 8 oz Almond paste shredded for easier mixing
- 1 1/2 cups Unsalted butter softened (3 sticks)
- 1 cup Granulated sugar
- 1/2 tsp Kosher salt
- 4 large Eggs at room temperature
- 1 1/2 tsp Almond extract
- 2 cups All-purpose flour
- 35 drops Red gel food coloring or less, to desired intensity
- 35 drops Green gel food coloring or less, to desired intensity
- 1 cup Seedless Raspberry jam warmed slightly
- 8 oz Dark chocolate chips (72% Cacao, semi-sweet, or bittersweet)
- 1/2 tsp Vegetable oil divided
Instructions
-
**Prepare Oven & Pans:** Arrange two racks in your oven to divide it into thirds for even heat distribution. Preheat the oven to 350 degrees F (175 degrees C). Line three 9×13 inch baking sheets or quarter sheet pans with parchment paper, leaving about a 2-inch overhang on the longer sides. This overhang will act as convenient handles for removing the delicate baked cake layers later.
-
**Cream Butter & Almond Paste:** In the bowl of a stand mixer fitted with the paddle attachment (or using a large bowl and a hand-held electric mixer), combine the softened unsalted butter, finely shredded almond paste, granulated sugar, and kosher salt. Cream these ingredients together at medium-high speed for approximately 5 minutes until the mixture is light, fluffy, and smooth. Remember to scrape down the sides of the bowl as needed to ensure all ingredients are fully incorporated.8 oz Almond paste, 1 1/2 cups Unsalted butter, 1 cup Granulated sugar, 1/2 tsp Kosher salt
-
**Add Eggs & Almond Extract:** Beat in the large eggs, one at a time, mixing at medium speed for about 2 minutes until the batter is smooth and well-combined. Stir in the pure almond extract, ensuring the distinctive almond flavor is evenly distributed throughout the mixture.4 large Eggs, 1 1/2 tsp Almond extract
-
**Incorporate Flour:** Reduce the mixer speed to low and gradually add the all-purpose flour in three separate additions. Mix only until the flour is just combined and no dry streaks remain. Be careful not to overmix, as this can develop the gluten too much, leading to a tough cake. Scrape down the sides of the bowl as needed after each addition.2 cups All-purpose flour
-
**Divide & Color Batter:** Divide the batter equally into three medium bowls. For precision and consistent cake layers, use a kitchen scale to ensure each bowl contains approximately 14 ounces (about 1 ¾ cups) of batter. Using your gel food coloring, thoroughly tint one bowl of batter red, another bowl green, and leave the third bowl uncolored to represent the white layer.35 drops Red gel food coloring, 35 drops Green gel food coloring
-
**Spread & Bake Cake Layers:** Transfer each colored batter into a separate prepared baking sheet. Using an offset spatula, spread each batter evenly across the bottom of its pan, ensuring an even layer from edge to edge. The surface doesn’t need to be perfectly smooth, as it will naturally even out during baking. Bake all three layers simultaneously (or in batches if your oven isn’t large enough), rotating the pans halfway through, for 12-14 minutes. Bake until the tops look dry and set but are not browned. These are thin layers, so watch them closely to prevent overbaking. Immediately remove the baked layers from the oven and transfer them, still on their parchment paper, to a wire rack to cool completely.
-
**Assemble with Jam:** Once the cake layers are completely cool, place a fresh piece of parchment paper on a large cutting board. Carefully transfer the green cake layer onto this parchment-lined board. Slightly warm 1/2 cup of the seedless raspberry jam in the microwave for a few seconds; this will make it much easier to spread. Spread this warmed jam into an even, thin layer over the green cake. Carefully remove the parchment paper from the white (undyed) layer and gently place it on top of the jam-covered green layer. Spread the remaining 1/2 cup of warmed jam evenly over the white layer. Finally, remove the parchment from the red layer and carefully place it on top of the jam-covered white layer.1 cup Seedless Raspberry jam
-
**Press & Chill Overnight:** Place a new sheet of parchment or wax paper over the red top layer of the stacked cake. Wrap the entire assembly tightly in several layers of plastic wrap. For best results, place a baking sheet on top of the wrapped cake and weigh it down with heavy objects, such as large cookbooks or cans. This step helps to compress the layers, making them adhere better and creating a denser, more uniform texture. Refrigerate the weighted cake overnight, or for a full 24 hours, to allow the flavors to meld and the cake to firm up.
-
**Trim Edges:** After the chilling period, remove the weights, baking sheet, and plastic wrap from the chilled cookie block. Using a very sharp, long knife (a serrated knife often works best for clean cuts), carefully trim off the ragged edges from all four sides of the cake. This step reveals the stunning, perfectly defined red, white, and green layers, giving your rainbow cookies a professional and polished appearance.
-
**Apply First Chocolate Layer:** Place 4 ounces of your chosen dark chocolate chips and 1/4 teaspoon of vegetable oil into a microwave-safe measuring cup. Microwave for 30 seconds, then stir thoroughly. Continue microwaving in 15-second intervals, stirring well after each, until the chocolate is almost entirely melted. Remove from the microwave and stir until it is completely smooth and glossy. Using an offset spatula, spread this melted chocolate evenly over the top (red) layer of the trimmed cake. Refrigerate the cake for about 30 minutes, or until the chocolate coating is fully set and firm to the touch.8 oz Dark chocolate chips, 1/2 tsp Vegetable oil
-
**Apply Second Chocolate Layer:** Once the top chocolate layer is set, gently cover it with a fresh piece of parchment paper. Place another baking pan or cutting board firmly over the parchment, and carefully but decisively flip the entire cake block over. This will expose the green bottom layer. Melt the remaining 4 ounces of chocolate with the other 1/4 teaspoon of vegetable oil, using the same microwave and stirring method as before until it is smooth. Spread this melted chocolate evenly over the exposed green layer. Return the cake to the refrigerator for another 30 minutes, or until this second chocolate layer is also fully set. For a truly professional finish, you can also coat the sides of the cake with melted chocolate at this stage, using an offset spatula.
-
**Cut into Cookies:** To cut the cookies cleanly, fill a tall glass with very hot water. Dip a sharp knife into the hot water, then immediately wipe it completely dry with paper towels. Cut the large cake block into 1-inch or 2-inch squares or rectangles, depending on your desired size. It is crucial to warm and clean the knife thoroughly before *each* cut to minimize the chocolate from cracking or smearing onto the vibrant cake layers, ensuring every cookie is pristine.
Notes
—The easiest and most efficient way to break down almond paste for seamless integration into the batter is by shredding it on the large holes of a box grater. This ensures it creams smoothly and evenly.
—For consistent and visually appealing layers, accurately weigh your batter. Aim for approximately 1 ¾ cups (or about 14 ounces) of batter in each of the three bowls after dividing. This precision will result in uniform cake layers.
—To achieve deep, vibrant red and green colors, I typically use around 35 drops of gel food coloring for each portion of batter. While this might seem generous, gel colorings are highly concentrated and produce rich hues without thinning the batter. Adjust the amount to reach your preferred color intensity.
**Make-Ahead Instructions:** These cookies are ideal for preparing in advance, especially for busy holiday seasons. You can make them up to the point of pressing and chilling the stacked cake (before applying the chocolate). Wrap the entire block tightly in multiple layers of plastic wrap, then either in freezer paper or a large 2-gallon freezer bag. Store in the freezer. When you’re ready to serve, thaw the cake overnight in the refrigerator, then proceed with the chocolate coating and cutting steps.
**Storage Guidelines:** Store your finished Italian Rainbow Cookies in an airtight container in the refrigerator for up to 1 week to maintain their freshness and texture. For optimal flavor and a softer cake, allow them to sit at room temperature for 15-30 minutes before serving.
**Freezing Instructions:** Yes, you can freeze individual rainbow cookies! To prevent them from sticking, arrange them in a single layer in a large, flat airtight container with wax paper between layers. Wrap the container securely or place it into a large freezer bag. They can be frozen for up to 3 months. While you can freeze them with the chocolate already applied and cut, be aware that freezing can sometimes cause the chocolate to develop a slight discoloration (known as “chocolate bloom”). For the best appearance, consider following the “make-ahead” notes and adding the chocolate after thawing.
