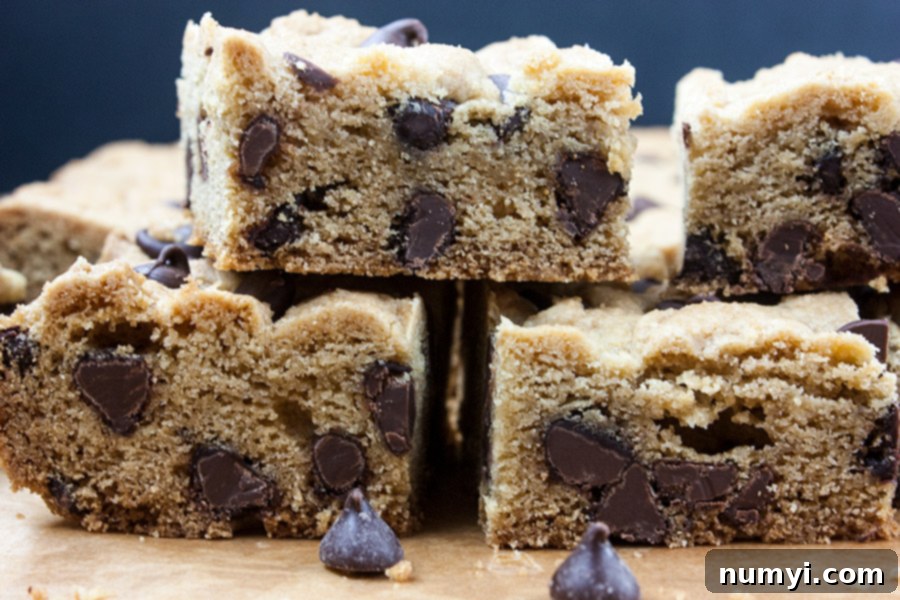
The Ultimate Chewy Chocolate Chip Cookie Bars: An Easy, Crowd-Pleasing Recipe
Get ready to discover the secret to baking the most incredible chocolate chip cookie bars! Imagine a perfectly soft, wonderfully chewy middle, framed by crisp, buttery edges, all generously studded with rich semi-sweet chocolate chips. These aren’t just any cookie bars; they’re the easiest and most efficient way to whip up a large batch of homemade cookies without the fuss of individual scooping and chilling. Whether you’re feeding a hungry crowd, preparing for a potluck, or simply craving a comforting dessert, these irresistible bars are guaranteed to be a hit every single time.
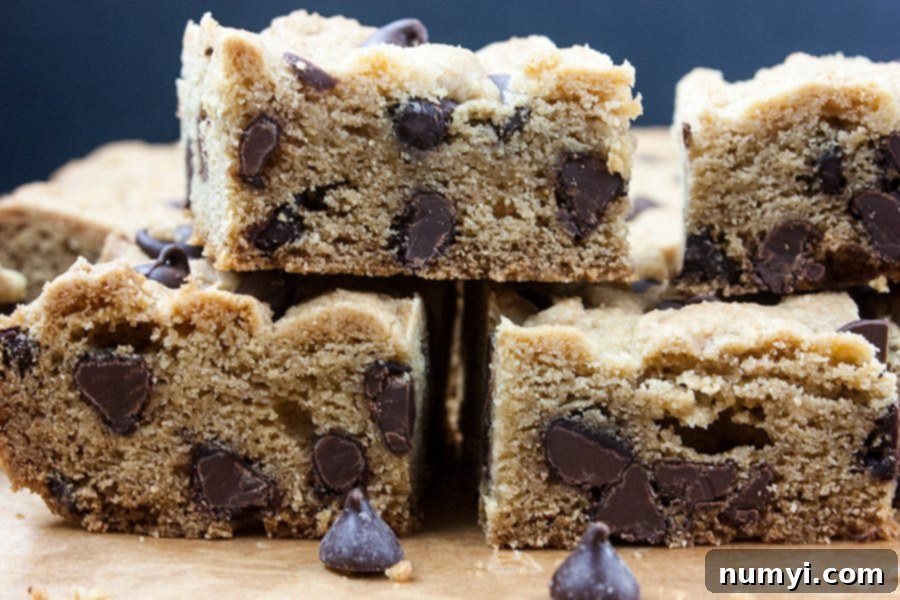
In this comprehensive guide, we’ll walk you through everything you need to know to create bakery-quality chocolate chip cookie bars right in your own kitchen. From essential tips for perfect texture to creative variations and smart storage solutions, you’ll find all the details to master this beloved dessert. Say goodbye to endless cookie sheets and hello to a single pan of pure, blissful cookie magic!
Why These Chocolate Chip Cookie Bars Are a Must-Bake
These chewy chocolate chip cookie bars are not just incredibly delicious; they are also a joy to make, especially when you need a quick and easy dessert. Here’s why they’re destined to become your new go-to recipe:
- Effortless Baking: Forget the tedious process of chilling dough, rolling out individual cookies, and baking multiple batches. With this recipe, you simply press the dough into a single pan, bake, and slice. It’s a true time-saver, perfect for busy schedules.
- Perfect Texture Every Time: Achieved through a careful balance of ingredients, these bars boast a delightful contrast. You’ll find a soft, gooey, and chewy center, complemented by irresistibly crisp and buttery edges. Every bite is pure bliss.
- Feeds a Crowd: A 9×13-inch pan yields a generous amount of bars, typically around 24 servings, making them ideal for parties, potlucks, family gatherings, school events, or even just stocking your freezer for future cravings.
- No-Fail Recipe: Designed for simplicity and success, this recipe minimizes common cookie pitfalls. There’s no worrying about dough spreading too much or cookies losing their shape. It’s a consistently reliable recipe.
- Classic Flavor, Enhanced Convenience: All the beloved taste of a classic chocolate chip cookie is packed into a convenient bar form, making it easier than ever to enjoy this timeless treat without the individual handling.
- Customizable: With a few simple tweaks, you can easily adapt these bars to suit different tastes or occasions, adding various mix-ins or changing chocolate types, as we’ll explore in the variations section.
These advantages make chocolate chip cookie bars a superior choice for anyone looking for a stress-free yet incredibly rewarding baking experience. They deliver maximum flavor and satisfaction with minimal fuss.
Expert Tips for Perfect Chocolate Chip Cookie Bars
Achieving the perfect chocolate chip cookie bars is easier than you think, especially with these tried-and-true tips. Follow these guidelines to ensure your bars come out soft, chewy, and absolutely delicious every single time:
- Measure the Flour Correctly: This is arguably the most crucial step for texture. Do not scoop flour directly from the bag with your measuring cup, as this compacts it and leads to too much flour, resulting in dense, dry bars. Instead, aerate the flour by fluffing it with a fork or spoon, then gently spoon it into your measuring cup until overflowing. Finally, swoop the excess off the top with a straight edge (like a knife or the back of a spoon). This method ensures you have the exact amount of flour needed for a perfectly moist and chewy bar.
- Use Room Temperature Eggs: Cold eggs don’t emulsify as well with butter and sugar, which can lead to a less uniform batter and a less tender crumb. For optimal results, take your eggs out of the refrigerator at least 30 minutes to an hour before you start baking. If you’re short on time, place them in a bowl of warm water for 5-10 minutes. This allows them to incorporate more evenly into the mixture, contributing to a better rise and a more consistent, velvety texture in your ultimate chocolate chip cookie bars.
- Line the Baking Pan Properly: While greasing and flouring is an option, lining your 9×13 baking pan with parchment paper is highly recommended. Leave an overhang of parchment on all sides – this creates convenient “handles” to easily lift the cooled bars out of the pan, making slicing and serving a breeze. It also ensures absolutely no sticking and simplifies cleanup significantly. If you don’t have parchment, aluminum foil works too; just make sure to grease it well, especially if using a non-stick spray on top.
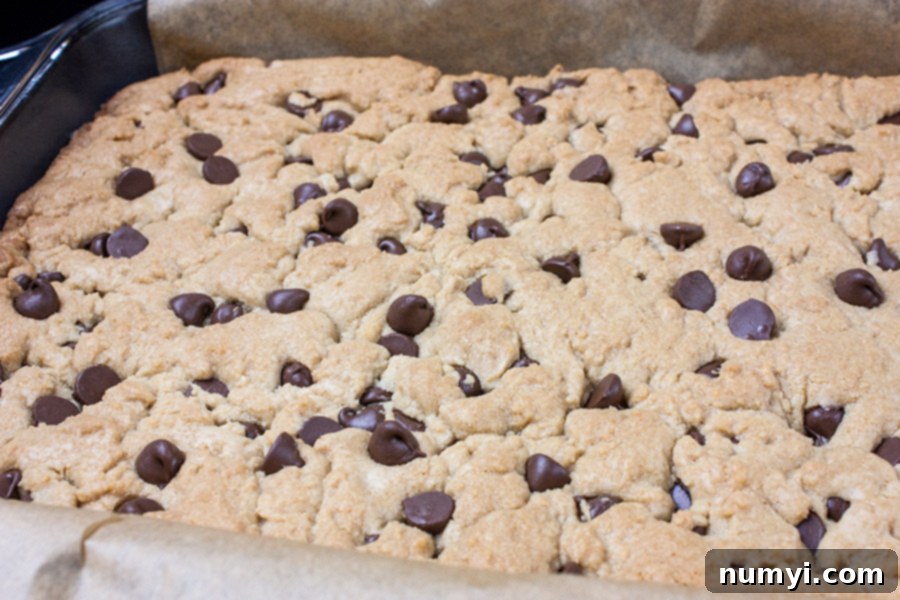
- Do Not Overbake: This is the golden rule for moist, chewy chocolate chip cookie bars! Overbaking is the quickest way to turn a potentially perfect bar into a dry, crumbly disappointment. Look for edges that are set and lightly golden brown, while the center still looks slightly soft and possibly a little underdone. Remember, the bars will continue to bake slightly from residual heat once removed from the oven. Aim for that perfect gooey center by erring on the side of slightly underbaking.
- Know Your Oven: Every oven is different. Some run hotter, some cooler, and many have hot spots. Investing in an inexpensive oven thermometer can help you verify your oven’s actual temperature, ensuring it matches your recipe’s requirements. Adjust baking times accordingly based on your oven’s performance. It’s always better to start checking for doneness a few minutes before the recipe’s minimum bake time.
- Let the Bars Cool Completely (or mostly): Patience is key here! It can be tempting to dive right into these delicious cookie bars, but letting them cool significantly (preferably completely) in the pan on a wire rack allows them to set properly. Cutting into warm bars will result in a messy, crumbly experience, whereas cooled bars will slice cleanly and hold their shape beautifully.
Following these tips will elevate your homemade chocolate chip cookie bars from good to absolutely phenomenal!
Delicious Variations for Your Chocolate Chip Cookie Bars
One of the best things about these easy chocolate chip cookie bars is how versatile they are! While the classic semi-sweet chocolate chip version is always a winner, don’t hesitate to get creative and customize them to your liking. Here are some fantastic ideas to spark your imagination:
- Change Up the Chocolate:
- Dark Chocolate: For a richer, more intense chocolate flavor, swap out the semi-sweet for high-quality dark chocolate chips or finely chopped dark chocolate. Brands like Guittard or Ghirardelli offer excellent options that provide a sophisticated twist on the classic.
- White Chocolate: A delightful alternative, white chocolate chips add a creamy, sweet contrast. They pair wonderfully with a sprinkle of dried cranberries, macadamia nuts, or even lemon zest for an even more gourmet bar.
- Milk Chocolate: If you prefer a sweeter, milder chocolate experience, milk chocolate chips are a fantastic choice, especially popular with kids and those who enjoy a less bitter chocolate profile.
- Chocolate Chunks: For larger, more indulgent pockets of melted chocolate throughout the bar, use chopped chocolate bars instead of standard chips. A mix of different chocolate types (dark and milk, or semi-sweet and white) can also create an interesting and complex flavor profile.
- Add Candies & Sweet Mix-ins:
- M&M’s: Toss in some colorful M&M’s for a fun, festive addition. This is particularly great for birthday parties, holidays (think red and green for Christmas, pastels for Easter), or just to add a vibrant pop of color and extra sweetness.
- Toffee Bits: Introduce a delightful chewiness and rich caramel-like flavor by folding in a handful of toffee bits. The slight crunch and buttery notes add another fantastic layer of texture and taste.
- Chopped Candy Bars: Get truly indulgent by chopping up your favorite candy bars (such as Snickers, Reese’s Peanut Butter Cups, Twix, or Butterfinger) and mixing them into the dough. This creates a unique and personalized treat.
- Caramel Bits: Swirl in some soft caramel bits for a gooey, melt-in-your-mouth experience that complements the chocolate beautifully.
- Introduce Nuts & Seeds:
- Chopped Nuts: Walnuts, pecans, almonds, or even macadamia nuts add a wonderful crunch and nutty flavor. Toasting them lightly in a dry pan for a few minutes before adding can enhance their aroma and taste significantly.
- Sunflower or Pumpkin Seeds: For a nut-free crunch, these seeds are a great option, offering a slightly savory balance that can be quite appealing.
- Spice It Up:
- Cinnamon: A pinch of ground cinnamon (about 1/2 teaspoon) can add warmth and depth to the chocolate chip flavor, making the bars feel even more comforting.
- Espresso Powder: A teaspoon of instant espresso powder (not coffee grounds) won’t make your bars taste like coffee but will subtly deepen and intensify the chocolate flavor, making it richer and more profound.
- Festive & Finishing Touches:
- Colorful Sprinkles: Use colorful sprinkles over the top before baking to make them more festive and suitable for celebrations. Different colors can match any party theme!
- Flaky Sea Salt: A sprinkle of flaky sea salt on top just after baking (while the chocolate is still melty) enhances the chocolate’s sweetness and adds a sophisticated, irresistible salty-sweet balance.
Feel free to mix and match these variations to create your signature chocolate chip cookie bar recipe! The possibilities are endless, ensuring there’s a perfect bar for every craving and occasion.
Step-by-Step: How to Make Irresistible Chocolate Chip Cookie Bars
Making these decadent chocolate chip cookie bars is straightforward and incredibly rewarding. Follow these simple steps for a perfect batch:
- Prepare Your Pan: Preheat your oven to 350°F (175°C). This ensures the oven is at the correct temperature when your dough is ready. Line a 9×13 baking pan with parchment paper. It’s crucial to ensure the parchment paper hangs over the sides by a few inches – this creates convenient “sling” handles that will make it incredibly easy to lift the cooled bars out of the pan later. Lightly spray the parchment paper (and any exposed pan sides, if applicable) with non-stick baking spray to guarantee no sticking whatsoever. Set your prepared pan aside.
- Combine Dry Ingredients: In a medium-sized bowl, whisk together the all-purpose flour, baking soda, cornstarch, and salt. The cornstarch is a secret ingredient here, contributing significantly to that desirable soft and chewy texture. Whisking these dry ingredients thoroughly ensures they are evenly distributed, so you don’t end up with pockets of salt or baking soda in your finished bars. Set this dry mixture aside.
- Mix Wet Ingredients: In a large mixing bowl, combine the melted unsalted butter (which should be slightly cooled, not hot, to prevent cooking the eggs), packed brown sugar, and granulated sugar. Mix these thoroughly using an electric mixer or a sturdy whisk until no lumps of sugar remain and the mixture is smooth, light, and well combined. This can take a couple of minutes. Next, beat in the room temperature eggs one at a time, ensuring each is fully incorporated before adding the next. Finally, stir in the pure vanilla extract. The mixture should be light and creamy.
- Combine Wet and Dry: Gradually add the dry ingredients to the wet ingredients. Mix on low speed or by hand with a spatula until just combined. Be careful not to overmix the dough once the flour is added, as this can overdevelop the gluten, resulting in tough rather than tender cookie bars. Stop mixing as soon as you see no more streaks of dry flour.
- Fold in Chocolate Chips: Gently fold in the majority of your semi-sweet chocolate chips (about 1 3/4 cups). If you desire a visually appealing top with extra chocolate, reserve about 1/4 cup of chocolate chips to sprinkle over the dough just before baking. This step is entirely optional but makes for a beautiful presentation.
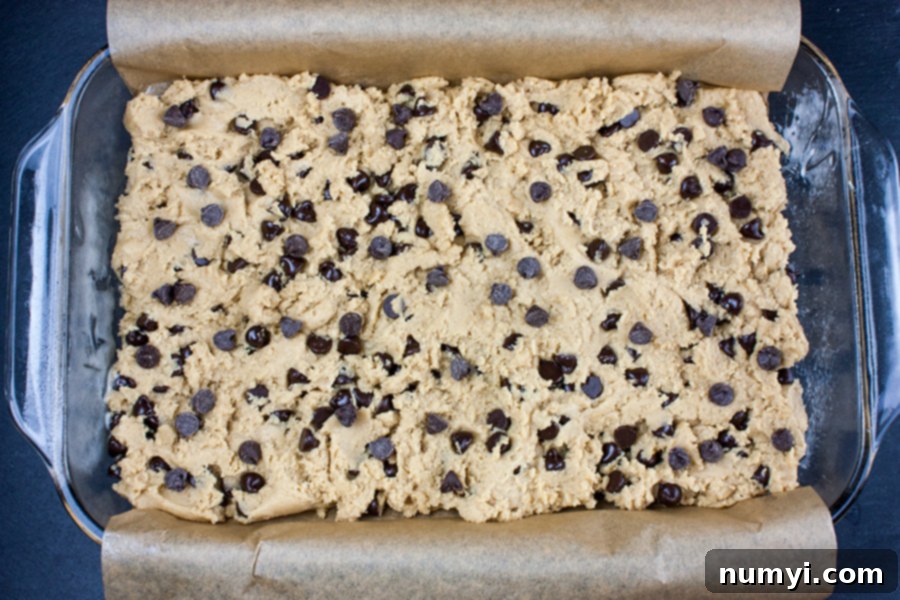
- Press into Pan: Transfer the cookie dough to your prepared 9×13 baking pan. Using a rubber spatula or your lightly floured hands (to prevent sticking), evenly spread and press the dough into the pan. Make sure it reaches all corners and is level across the top for even baking. If you reserved chocolate chips, sprinkle them generously over the top of the pressed dough now.
- Bake to Perfection: Place the pan in your preheated oven and bake for approximately 35-40 minutes. Baking time can vary depending on your oven, so start checking at 35 minutes. The bars are done when the edges are lightly golden brown and set, but the center still looks slightly soft or even a little underbaked. A toothpick inserted into the center should come out with moist crumbs attached, but not wet batter. If it comes out completely clean, they are likely overbaked. Do not overbake to ensure moist, chewy bars.
- Cool Completely: Once baked, remove the pan from the oven and place it on a wire rack to cool completely. This is a critical step for perfect bars! Allowing the chocolate chip cookie bars to cool fully (which can take an hour or more, depending on room temperature) ensures they set up properly and are easy to slice cleanly. Trying to cut them while warm will result in a messy, crumbly experience.
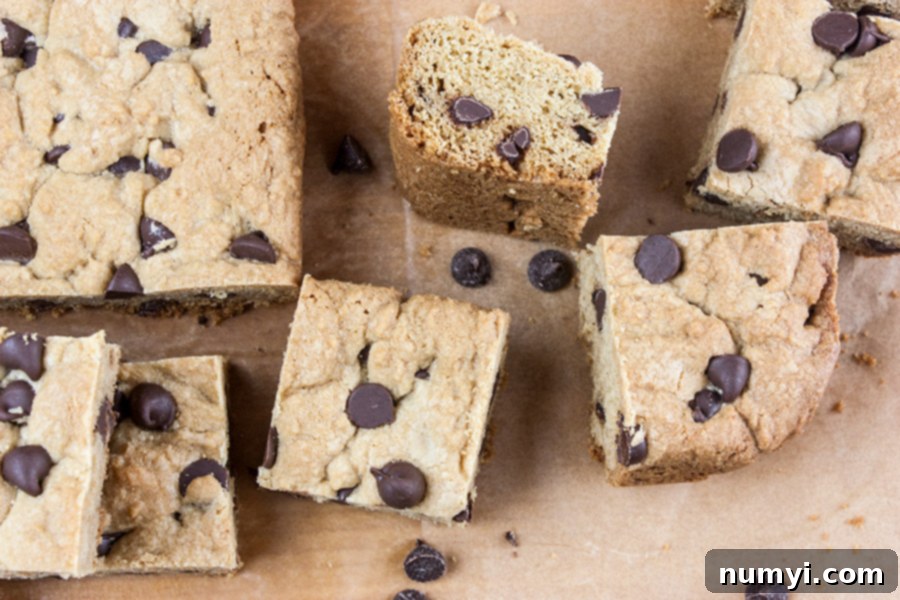
- Slice and Serve: Once the bars are cool enough to handle, use the parchment paper overhang to gently lift the entire slab of cookie bars out of the pan and onto a cutting board. Use a sharp knife to cut them into your desired pieces – squares, rectangles, or even triangles. Enjoy these ultimate homemade chocolate chip cookie bars!
Don’t Sweat The Recipe is supported by its readers. We may earn a commission if you purchase through a link on our site. Learn more.
Serving Suggestions for Your Delicious Cookie Bars
These versatile chocolate chip cookie bars are fantastic on their own, but they can also be elevated with a few simple additions. Here are some ideas to make them even more special:
- Warm with Ice Cream: Serve a slightly warmed square with a scoop of vanilla bean ice cream. The contrast between the warm, gooey bar and cold, melting ice cream is absolutely heavenly. A sprinkle of sea salt on top can enhance this even further.
- Whipped Cream or Cool Whip: A dollop of freshly whipped cream or a swirl of Cool Whip adds a light, creamy texture that perfectly complements the rich cookie bar.
- Caramel or Chocolate Drizzle: For an extra touch of decadence, drizzle warm caramel sauce, hot fudge, or a simple chocolate syrup over the top of the bars before serving.
- A Sprinkle of Sea Salt: A tiny pinch of flaky sea salt sprinkled on top just after baking (while the chocolate is still melty) or before serving can greatly enhance the chocolate’s sweetness and adds a sophisticated, gourmet touch.
- Coffee or Milk Pairing: These bars are the perfect companion to a hot cup of coffee, a robust espresso, a comforting tea, or simply a refreshing glass of cold milk.
- For Special Occasions: Arrange them artfully on a platter for parties, bake sales, potlucks, or family gatherings. They’re always a crowd-pleaser and much easier to transport and serve than individual cookies.
- Lunchbox Treat: Pack a square in lunchboxes for a delightful surprise. They hold up well and provide a sweet energy boost during the day.
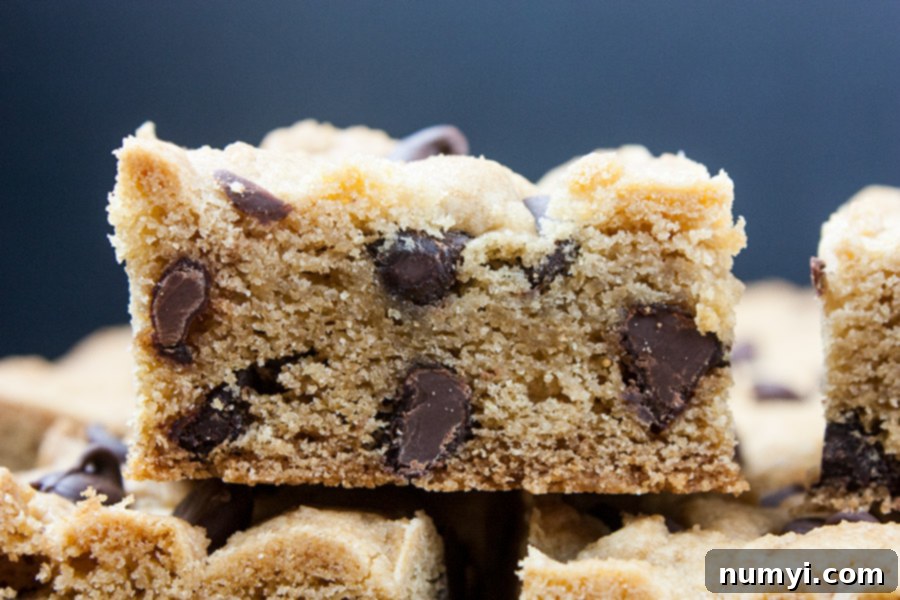
No matter how you choose to serve them, these homemade cookie bars are guaranteed to bring smiles and satisfy any sweet tooth.
Make Ahead, Storing, and Freezing Your Chocolate Chip Cookie Bars
These chewy chocolate chip cookie bars are excellent for making ahead, and they store beautifully, making them a fantastic option for meal prep or future enjoyment. Here’s how to best store and freeze them to maintain their deliciousness:
Storing Baked Chocolate Chip Cookie Bars
Once your chocolate chip cookie bars have completely cooled (this is absolutely key for preventing condensation and sogginess), store them in an airtight container at room temperature. They will remain wonderfully fresh, soft, and chewy for up to 4-5 days. For optimal freshness, you can place a slice of plain white bread (such as sandwich bread) in the container with the bars; the bread will absorb excess moisture, helping to keep the bars soft and moist for longer. Alternatively, if your climate is particularly humid, or if you plan to keep them longer than a few days, refrigerating them can extend their life, though it may alter the texture slightly, making them a bit firmer.
Freezing Baked Chocolate Chip Cookie Bars
These bars freeze exceptionally well, which is perfect for having a quick dessert on hand or preparing for future events. To freeze them effectively:
- Cool Completely: Ensure the bars are entirely cool before freezing. Any residual warmth can lead to ice crystals and freezer burn.
- Pre-cut: For convenience, it’s best to cut the bars into individual squares or your desired serving sizes before freezing. This allows you to grab just one or two at a time.
- Wrap Individually (Optional but Recommended): For the best protection against freezer burn and to make thawing easier, wrap each bar tightly in plastic wrap, then again in aluminum foil. This double layer creates an excellent barrier.
- Container: Place the wrapped bars in a single layer in a freezer-safe airtight container or a heavy-duty freezer bag. If using a bag, squeeze out as much air as possible before sealing.
- Freeze: Store in the freezer for up to 2-3 months for the best quality. While they may still be safe to eat after this time, the texture might start to degrade.
- Thawing: When you’re ready to enjoy them, simply take out the desired number of bars and let them thaw at room temperature for about 30 minutes to an hour. You can also briefly warm them in the microwave for 15-30 seconds for a delicious, fresh-from-the-oven feel with gooey chocolate.
Freezing Cookie Dough (Unbaked)
You can also prepare the cookie dough ahead of time and freeze it for later baking. This is a fantastic time-saver for fresh-baked treats on demand!
- Prepare Dough: Follow the recipe instructions up to the point of pressing the dough into the pan.
- Wrap & Freeze: Press the dough into your parchment-lined 9×13 pan as usual. Then, wrap the entire pan (with the dough inside) tightly with plastic wrap, followed by aluminum foil to prevent freezer burn. Alternatively, you can press the dough into a parchment-lined pan, then lift the parchment with the dough block out of the pan, wrap the dough block tightly, and store it.
- Storage: Freeze for up to 1-2 months.
- Baking from Frozen: When ready to bake, you can either thaw the dough in the refrigerator overnight or bake directly from frozen. If baking from frozen, you will need to add an extra 10-15 minutes to the baking time. Keep a close eye on the edges for golden brown cues to prevent overbaking.
These strategies ensure you can enjoy fresh, homemade chocolate chip cookie bars whenever the craving strikes, with minimal effort and maximum convenience.
Troubleshooting Common Chocolate Chip Cookie Bar Problems
Even with the best recipes, sometimes things don’t go exactly as planned. Here are some common issues you might encounter when making chocolate chip cookie bars and how to identify, fix, or prevent them next time:
Why Are My Cookie Bars Dry and Crumbly?
This is usually due to one of two main reasons:
- Overbaking: The most common culprit. As soon as the edges are golden and the center looks just set (it might still look a little soft), remove them from the oven. They will continue to cook slightly as they cool from residual heat. Always err on the side of underbaking for chewiness.
- Too Much Flour: Incorrectly measuring flour (scooping directly from the bag without aerating and leveling) can add significantly more flour than intended, leading to a dry, dense dough. Always spoon and level your flour as described in our tips!
Why Are My Cookie Bars Too Flat or Greasy?
If your bars are spreading too much, seem greasy, or lack the desired thickness:
- Butter Too Warm: Ensure your melted butter is slightly cooled, not hot, before mixing with the sugars and eggs. Hot butter can melt the sugar too quickly and affect the dough’s structure, causing excessive spreading.
- Not Enough Flour (Rare): While too much flour is more common, too little can lead to a very loose batter and excessive spreading. Double-check your measurements carefully.
- Old Leavening Agents: Baking soda loses its potency over time. If your baking soda is old or expired, it won’t react properly to help the bars rise, leading to a flatter result. Test your baking soda by mixing a teaspoon with a tablespoon of vinegar; if it fizzes, it’s still good.
Why Do My Chocolate Chips Sink to the Bottom?
This can happen with looser batters, especially with heavier chips. To prevent it:
- Lightly Coat Chips: Before folding into the dough, toss your chocolate chips with a tablespoon of the measured flour from the recipe. This thin coating helps them adhere to the dough and prevents them from sinking to the bottom of the pan during baking.
- Slightly Thicker Batter: If your batter seems unusually thin, ensure your butter was not too hot when added and that your flour was measured correctly (spooned and leveled). A slightly firmer dough helps suspend the chips.
My Bars Are Unevenly Baked – Some Parts are Done, Others Aren’t.
Uneven baking usually points to oven issues:
- Oven Hot Spots: Most ovens have hot spots. To combat this, consider rotating your pan halfway through the baking time (e.g., at the 20-minute mark) to ensure even exposure to heat across all areas of the pan.
- Oven Temperature: As mentioned in our tips, an oven thermometer can confirm your oven is heating accurately. If it’s off, you may need to calibrate your oven or simply adjust your baking temperature and time accordingly.
- Pan Material: Darker metal pans conduct heat more intensely and can lead to crispier edges and faster baking. Lighter, reflective pans bake more gently and evenly. Adjust your baking time and temperature based on the type of baking pan you’re using.
Don’t be discouraged by a less-than-perfect batch; baking is a learning process! With these insights, you’ll be baking perfect chocolate chip cookie bars in no time, mastering this delightful dessert.
Bar cookies, also known as cookie bars or tray bakes, are essentially cookies baked in a rectangular pan (like a 9×13 inch baking dish) rather than being individually scooped and placed on a cookie sheet. They are then cut into squares, rectangles, or other shapes after baking and cooling. This method is incredibly efficient for making large batches of cookies, as it eliminates the need for chilling dough, rolling, cutting, or multiple baking rounds. They often have a softer, chewier texture in the center compared to individual cookies, making them a popular choice for gatherings and easy desserts.
The key to perfectly chewy chocolate chip cookie bars is not to overbake them. Look for the following signs: The edges should be set and lightly golden brown. The center might still appear slightly soft or even a little gooey – this is perfect, as they will continue to set as they cool. A toothpick inserted into the center should come out with moist crumbs attached, but not wet batter. If it comes out completely clean, they are likely overbaked and will be dry. For extra gooey bars, you can even pull them out when the center still has a slight wobble, knowing the residual heat will finish the job.
To keep your chocolate chip cookie bars fresh and delicious, ensure they are completely cooled before storing. Once cooled, place them in an airtight container at room temperature. They will stay soft and chewy for up to 4 to 5 days. For best results, you can place a piece of white bread in the container with the bars; it helps to absorb excess moisture and keeps the bars from drying out.
Yes, these chocolate chip cookie bars freeze beautifully! Once completely cooled, cut the bars into individual servings. Wrap each bar tightly in plastic wrap, then place them in a freezer-safe airtight container or heavy-duty freezer bag. They can be frozen for up to 2-3 months for optimal quality. To enjoy, simply remove the desired number of bars from the freezer and let them thaw at room temperature for about 30-60 minutes, or warm them slightly in the microwave for a gooey treat.
More Irresistible Dessert Recipes
- Cranberry Bliss Bars (Starbucks Copycat)
- Red Velvet Brownies
- Ultimate Turtle Brownies
- Salted Butterscotch Pretzel Brookies
- Oatmeal Chocolate Chip Cookie Bars
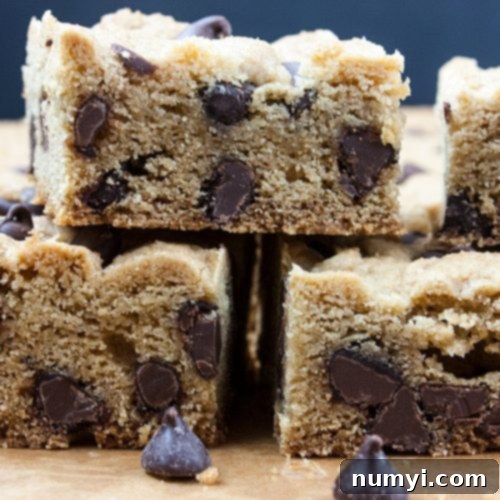
The Ultimate Chewy Chocolate Chip Cookie Bars Recipe
Print
Pin
Rate
Ingredients
- 4 1/2 cups all-purpose flour
- 2 teaspoons baking soda
- 2 teaspoons cornstarch
- 1 teaspoon salt
- 1 1/2 cups unsalted butter, melted and slightly cooled
- 2 cups brown sugar, packed
- 1/2 cup granulated sugar
- 2 large eggs at room temperature
- 2 teaspoons pure vanilla extract
- 2 cups semi-sweet chocolate chips
Instructions
-
Preheat the oven to 350° F (175°C). Line the bottom of a 9×13 baking pan with parchment paper, leaving an overhang on all sides to easily lift the bars out of the pan when cool. Spray the parchment (and any exposed pan) with non-stick baking spray. Set aside.
-
In a medium-size bowl, whisk the all-purpose flour, baking soda, cornstarch, and salt together until well combined. Set aside.
-
In a large bowl, mix the melted and slightly cooled unsalted butter, packed brown sugar, and granulated sugar together until no lumps remain and the mixture is smooth. Beat in the room temperature eggs one at a time, followed by the pure vanilla extract.
-
Gradually add the dry ingredients to the wet ingredients, mixing until just combined. Be careful not to overmix. Fold in the semi-sweet chocolate chips, reserving about 1/4 cup for sprinkling on top if desired for appearance.
-
Transfer the dough to the prepared baking pan and use a spatula or lightly floured hands to spread it into an even layer, reaching all corners. Sprinkle the top with the reserved chocolate chips (if using).
-
Bake for 35-40 minutes, or until the edges are lightly browned and set, and the center looks just set (still slightly soft). A toothpick inserted into the center should come out with moist crumbs. Do not overbake to ensure moist, chewy bars.
-
Place the pan on a wire rack and let the bars cool completely for at least an hour before slicing. This allows them to set properly and prevents crumbling.
-
Once cool, use the parchment paper overhang to lift the entire slab of cookie bars out of the pan. Place on a cutting board and cut into your desired serving squares or rectangles using a sharp knife.
