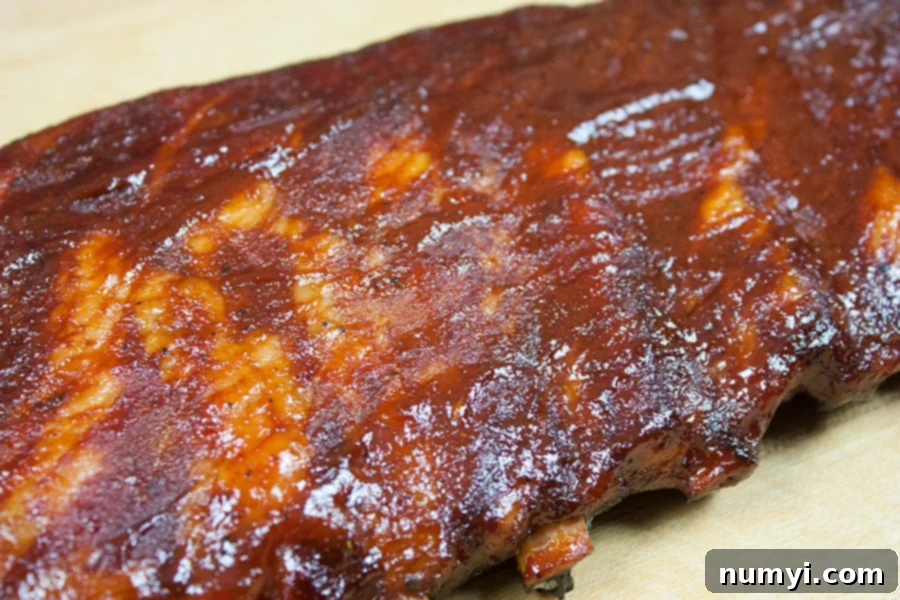
Unforgettable Fall-Off-The-Bone St. Louis Ribs: Your Ultimate Guide to Smoked Perfection
Achieving truly fall-off-the-bone St. Louis style spare ribs can seem like a daunting task, especially if you’re new to the world of barbecue. However, by following a few straightforward steps and embracing the art of low-and-slow cooking, you can consistently deliver the most **tender, succulent, and utterly mouth-watering ribs** that will impress everyone at your table. This comprehensive guide will walk you through everything you need to know to become a backyard barbecue hero.
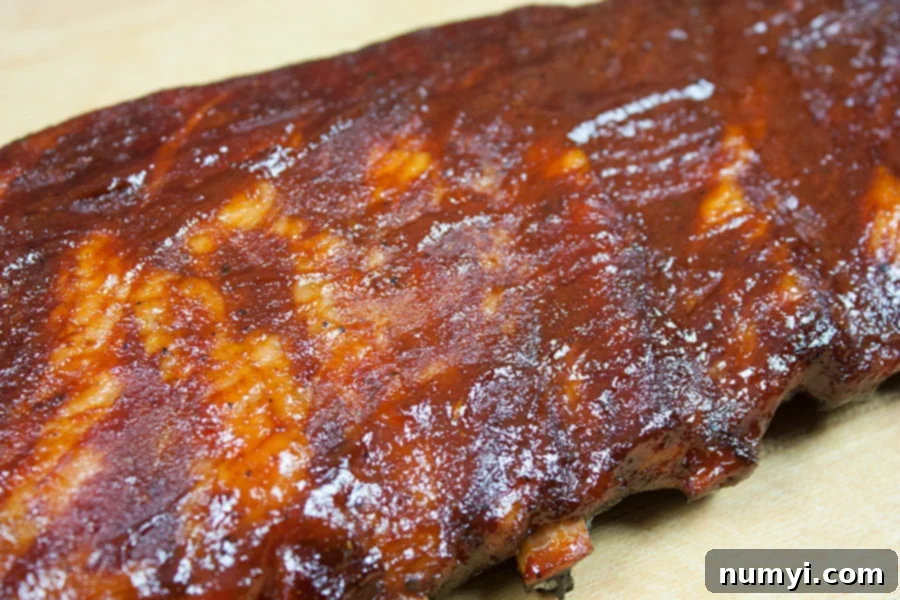
Why You’ll Fall in Love with This Rib Recipe
There’s a reason these ribs are legendary. Imagine biting into a rib where the meat practically melts in your mouth, gently pulling away from the bone with minimal effort. That’s precisely what this recipe delivers. Our specially crafted rub offers a delightful balance of sweetness and a subtle hint of spice, creating a complex flavor profile that tantalizes your taste buds. While some prefer a rib with a bit more “tug”—a clean bite that leaves a distinct impression—our method focuses on maximizing tenderness without sacrificing flavor or texture. This recipe aims for that exquisite ‘fall-off-the-bone’ experience that many barbecue enthusiasts crave, making it a crowd-pleaser every single time.
We understand that the world of barbecue is vast, with countless techniques and personal preferences. From slow-smoking to oven-baking, and from wet rubs to dry brines, each method offers a unique pathway to delicious ribs. This particular recipe, however, has become our absolute favorite due to its consistent results and incredible flavor. Think of this as your foundational guide; feel free to experiment and adapt it to create your own signature rack of ribs.
If you prefer a rib that offers a bit more resistance—a clean, satisfying bite with just a slight tug—we also have a fantastic recipe for St. Louis style ribs that don’t require wrapping. These still boast exceptional tenderness but cater to a different texture preference. You can find that recipe for St. Louis style ribs with a clean bite here.
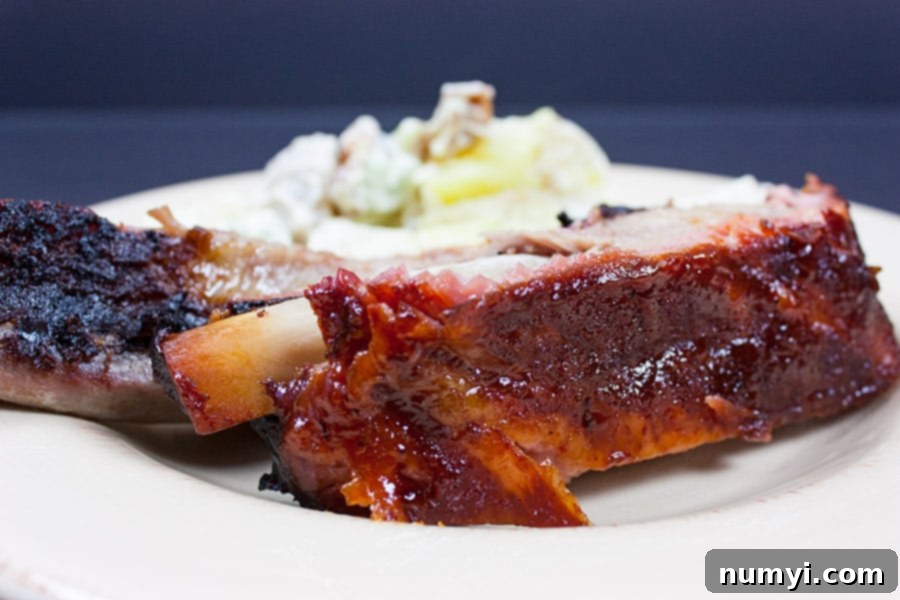
To complement these succulent ribs, consider serving some of our favorite side dishes. Classic pairings like grilled corn on the cob, creamy macaroni salad, or savory BBQ baked beans are always a hit. These sides enhance the meal, making it a truly unforgettable barbecue feast.
Rave Reviews: What People Are Saying About These Ribs
Don’t just take our word for it! The countless glowing testimonials we’ve received speak volumes about the exceptional quality and flavor of these ribs. Here’s a glimpse of what satisfied home cooks and barbecue enthusiasts have shared:
“My wife said these were better than Chili’s, better than even her own ribs, and it was my first time making St. Louis style ribs! Thank you for sharing such an incredible recipe!”
“Hands down, these are the best ribs we’ve ever eaten. The instructions were absolutely spot on! A huge thank you for sharing; we’re enjoying them all the way up in Saskatchewan, Canada!”
“I am 60 years old and have NEVER in my entire life tasted more juicy, tender, fall-off-the-bone ribs in ANY restaurant or barbecue joint. This recipe is a game-changer!”
“Thanks for this amazing recipe. I grew up barbecuing weekly over an open pit. I’ve always struggled with pork ribs, but this process absolutely delivered. Truly delicious!”
Watch the full video tutorial for making these fall-off-the-bone St. Louis Style Ribs.
How To Make Fall Off The Bone St. Louis Style Ribs
The journey to perfect ribs begins with careful preparation and a strategic cooking plan. Follow these steps to ensure your ribs are incredibly tender, flavorful, and truly fall off the bone.
Step 1: Removing The Membrane – A Crucial First Step
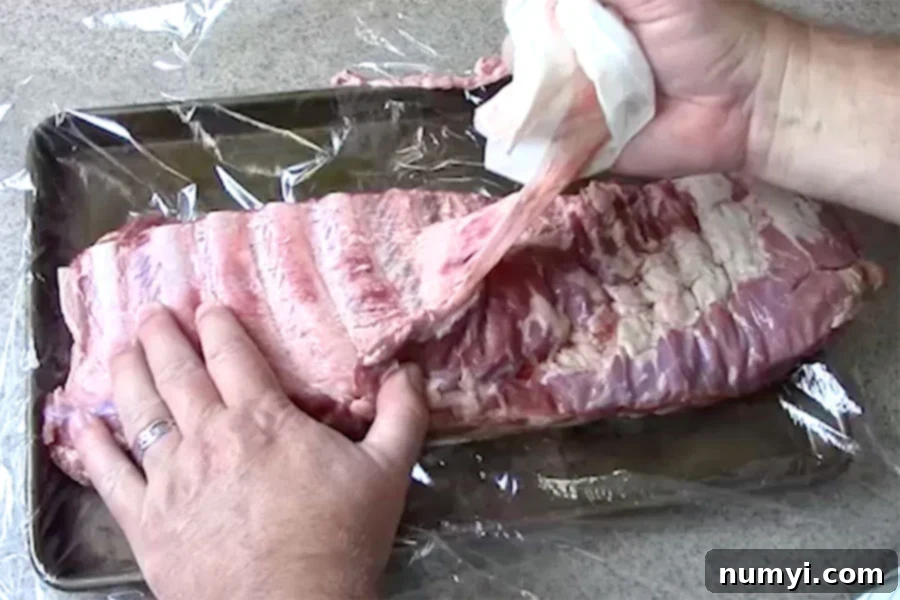
The very first, and arguably most critical, step in preparing St. Louis style ribs is to remove the tough membrane, also known as the peritoneum, from the underside of the rib rack. This often-overlooked layer of connective tissue, unlike other fats and collagens in the meat, will not break down during the cooking process. If left intact, it results in a chewy, unpleasant texture that can detract significantly from your rib experience. It also prevents your delicious rub and smoke flavors from properly penetrating the meat, creating a barrier that you definitely want to eliminate.
St. Louis style ribs are essentially pork spare ribs that have been trimmed to a more uniform, rectangular shape. With spare ribs, you’ll almost always find the membrane still attached. Baby back ribs, on the other hand, often come with the membrane already removed. While some pitmasters might occasionally skip this step, we strongly advocate for its removal. It truly makes a noticeable difference in both tenderness and flavor absorption.
To remove it, simply locate one corner of the membrane, usually at the smaller end of the rack. Use a spoon handle or a butter knife to gently pry it up, working your way underneath until you can get a good grip. Once you have a corner lifted, grab it firmly with a paper towel (this provides better traction) and slowly but steadily pull it across the rack. It should come off in one satisfying sheet. If it tears, simply repeat the process for any remaining sections.
Step 2: Applying The Rub – Building a Flavor Foundation
Once the membrane is off, it’s time to apply your flavor-packed rub. The world of barbecue rubs is incredibly diverse, offering an endless array of flavor profiles. You can choose from countless commercial rubs, or, for a truly personalized touch, create your own. We’ve developed a “secret” rub that consistently delivers exceptional results, and we’re happy to share it with you. This versatile rub is perfect not just for St. Louis style ribs, but also for baby back ribs, pork shoulders, and virtually any cut of pork you want to infuse with fantastic flavor. Keep this recipe handy, as it’s sure to become a staple in your barbecue arsenal.
Step 3: The Secret Rub Ingredients
Our signature rub features a harmonious blend of sweet, savory, and spicy elements:
- White Sugar: Provides an initial touch of sweetness that balances the savory notes and aids in the caramelization process, contributing to a beautiful bark.
- Dark Brown Sugar: Adds a deeper, richer sweetness and molasses notes, further enhancing caramelization and creating a sticky, flavorful crust.
- Smoked Paprika: A cornerstone ingredient that provides a deep, earthy, and smoky foundation, essential for a classic barbecue flavor reminiscent of Memphis-style rubs.
- Garlic Powder: Offers a pungent, savory aroma and flavor that is universally loved and pairs perfectly with pork.
- Kosher Salt: Crucial for seasoning and, more importantly, for the dry brining process that tenderizes the meat.
- Oregano: Infuses the rub with an herbaceous, earthy note, adding complexity to the overall flavor profile.
- Cayenne Pepper: Provides a customizable touch of heat. Feel free to adjust the amount to your preference – add more for extra spice, or omit it entirely for a milder rub.
- Cumin: Lends a warm, earthy, and slightly smoky aroma that complements the pork and other spices beautifully.
- Black Pepper: A classic seasoning that adds a sharp, piquant flavor, enhancing all the other ingredients.
- Dry Mustard: A traditional barbecue rub ingredient known for its ability to cut through richness and subtly tenderize the meat.
Simply combine all the rub ingredients thoroughly in a small bowl until well mixed. It’s now ready to transform your ribs. Apply the rub generously to both sides of the ribs, ensuring every inch is coated for maximum flavor penetration.
After applying the rub, allow the ribs to rest. This resting period, ideally between 2 to 24 hours, is crucial. If resting for more than an hour or two, ensure the ribs are refrigerated and covered tightly with plastic wrap.
The longer you allow your ribs to rest with the rub, the deeper and more complex the flavor will become. My personal preference is to rub them down the night before and let them marinate in the refrigerator overnight. This extended rest period guarantees an incredible depth of flavor and maximizes tenderness.
Step 4: Planning The Cook – Setting the Stage for Success
When you’re ready to embark on your barbecue adventure, it’s time to prepare your grill or smoker. This recipe calls for an approximate 5-hour cooking time, maintaining a consistent temperature range of 225 to 250 degrees Fahrenheit. The cooking process is broken down into three key stages: 2 to 2.5 hours for smoking, 1.5 to 2 hours wrapped in foil, and then a final 30 minutes over direct heat to crisp them up and set the sauce. Accounting for time spent pulling the ribs on and off the grill, the entire process typically spans around 5 hours, so plan your day accordingly.
For my smoke source, I prefer charcoal for heat combined with hickory or pecan wood for that distinctive smoky flavor. Both woods impart a robust, traditional barbecue aroma that perfectly complements pork. Before placing them on the grill, if your ribs have been refrigerated, take them out about an hour beforehand to allow them to come closer to room temperature. This promotes more even cooking.
After their rest, you’ll notice some moisture on the ribs, a sign that the dry brine is actively working its magic. Donning a pair of gloves can be helpful here, though the rub washes off easily. Apply another generous layer of rub to both sides of the ribs, ensuring they are thoroughly coated before carefully placing them in your smoker or grill.
Step 5: Smoking The Ribs – The First Stage
This initial phase is all about infusing that incredible smoky flavor. Maintain a consistent grill/smoker temperature of 225-250 degrees Fahrenheit. Place your St. Louis style ribs using indirect heat—meaning they should not be directly over the heat source. This ensures gentle, even cooking and prevents the exterior from burning before the interior is tender.
For the next 2 to 2.5 hours, keep a watchful eye on your ribs. To prevent them from drying out and to build a beautiful bark, spritz them approximately every 30-45 minutes. A simple 50/50 mix of water and apple cider vinegar (or apple juice) works wonders. The apple cider vinegar adds a subtle tang and helps break down connective tissues, while the water keeps the surface moist for better smoke adhesion.
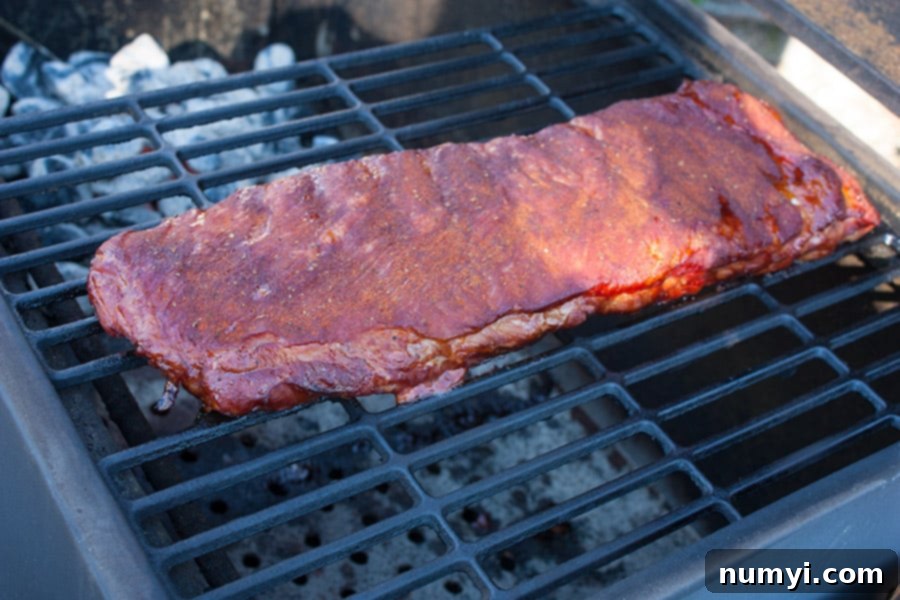
After this initial smoking period, your ribs should have developed a nice reddish-brown color, a smoky aroma, and a slight crust. They’ll look fantastic, but this is just stage one of the tenderizing process!
Carefully remove the ribs from the grill or smoker. Tear off two large sheets of heavy-duty aluminum foil, overlapping them slightly on your counter to create a sturdy wrapping surface. Place your ribs onto the foil. Now, the magic happens: generously apply honey and three to four pats of butter evenly across one side of the rib rack. Flip the ribs and repeat, adding more honey and butter to the other side. This sweet and rich concoction will create a steamy, flavorful environment inside the foil. Seal the ribs up nice and tight, ensuring no moisture or steam can escape, as they’re about to go back on the grill for the next crucial stage.
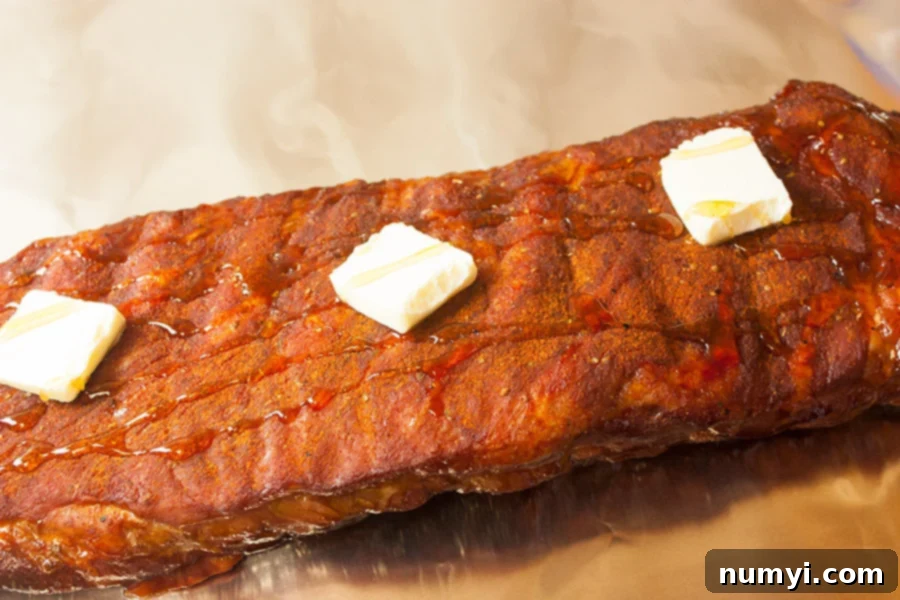
Return the wrapped ribs to the grill for approximately another 1.5 to 2 hours. Continue to maintain your temperature between 225-250 degrees Fahrenheit. This “Texas Crutch” method is critical for tenderizing the ribs significantly, as the trapped moisture and fat essentially braise the meat. It also effectively stops the primary smoking process, allowing the ribs to focus on becoming incredibly succulent.
After this wrapped cooking stage, carefully remove the ribs from the grill. Be prepared for a fair amount of delicious juice when you unwrap them. You should observe that the rib meat has noticeably pulled away from the ends of the bones, indicating a good degree of tenderness. At this point, the internal temperature of the ribs should be around 195 degrees Fahrenheit.
Step 6: The Grand Finale – Charring and Sauciness
For the final stage, we want to add some enticing char and caramelize that delicious barbecue sauce. It might be necessary to add more charcoal to increase the heat, or adjust your grill for more direct heat if possible. I typically add more charcoal at this step to get a good char. Place the unwrapped ribs back on the grill, directly over the heat, for about 5 minutes per side. This direct heat creates a beautiful crust and deepens the smoky flavor.
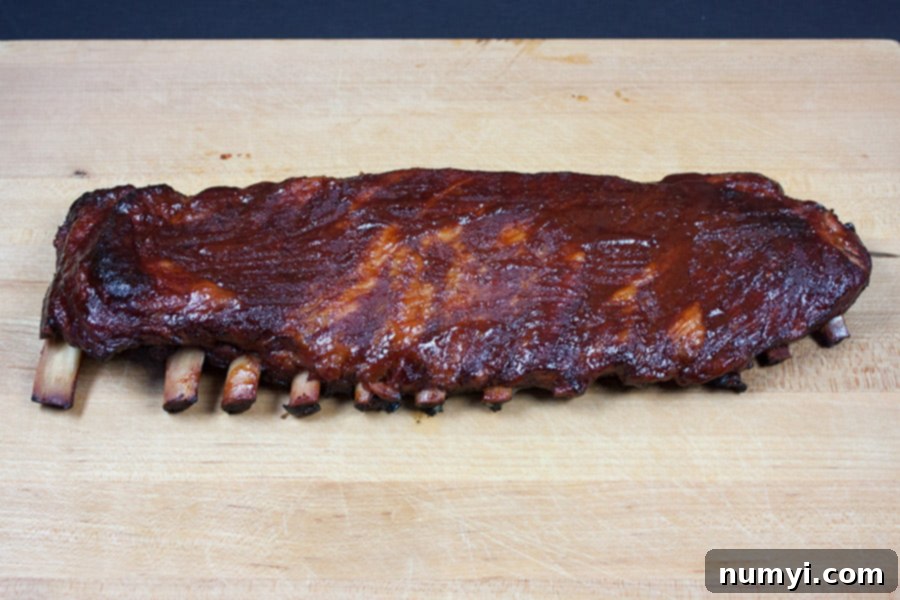
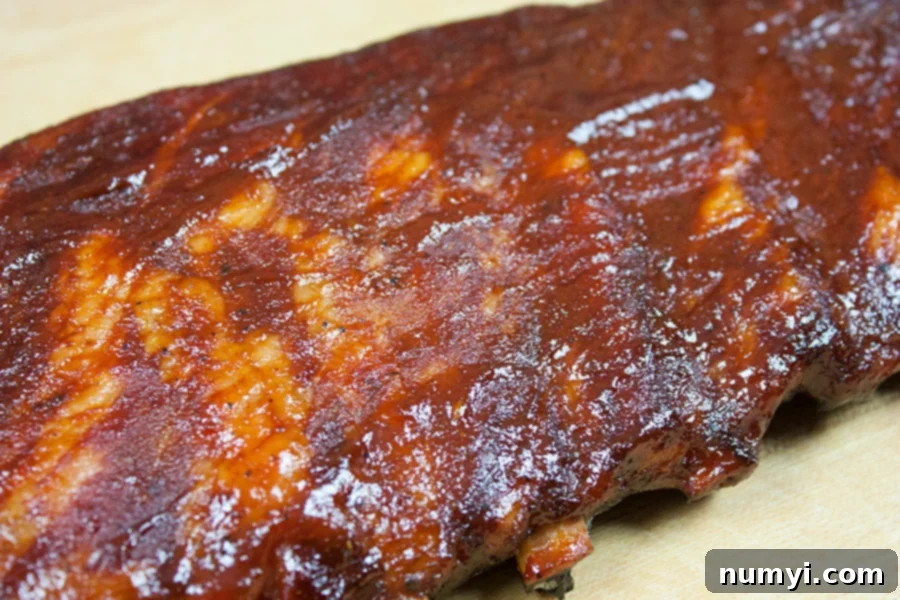
Next, apply a generous layer of your favorite barbecue sauce to each side of the ribs. Our bourbon chipotle barbecue sauce recipe is an excellent choice if you’re looking for a homemade option. Allow the ribs to cook for another 10 minutes on each side, letting the heat caramelize the sugars in the sauce. This creates a wonderfully sticky, glistening glaze that locks in flavor and adds another layer of deliciousness.
The combination of the initial rub, the honey and butter from the wrap, and the caramelized barbecue sauce will result in incredibly sticky, sweet, and savory ribs that are truly irresistible.
Step 7: Rest, Slice, and Serve Your Masterpiece
Once your ribs have reached perfection, remove them from the grill and let them rest for 5 to 10 minutes before slicing. This resting period is vital, as it allows the juices within the meat to redistribute, ensuring every bite is moist and flavorful. Skipping this step can result in dry ribs, even after all your hard work.
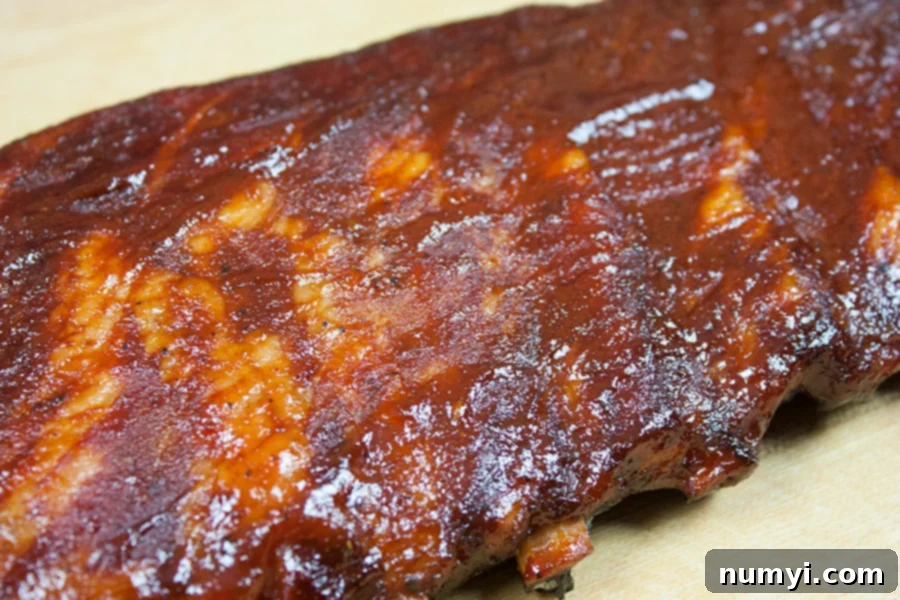
Cut the ribs into individual portions and serve them with your favorite side dishes. We often pair ours with our refreshing Herb Potato Salad (No Mayo) and classic Deviled Eggs. Prepare for an outpouring of compliments – you will undoubtedly be the hero of the day!
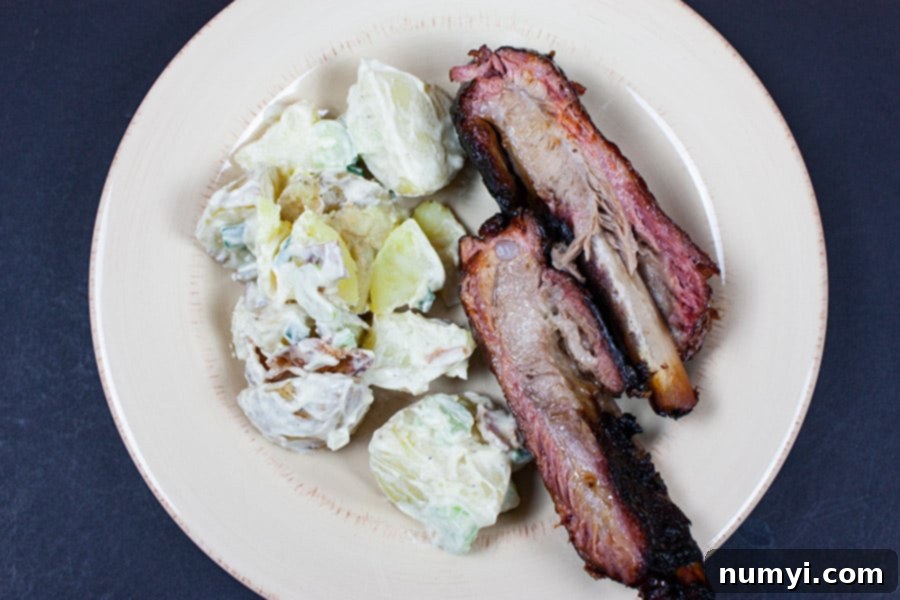
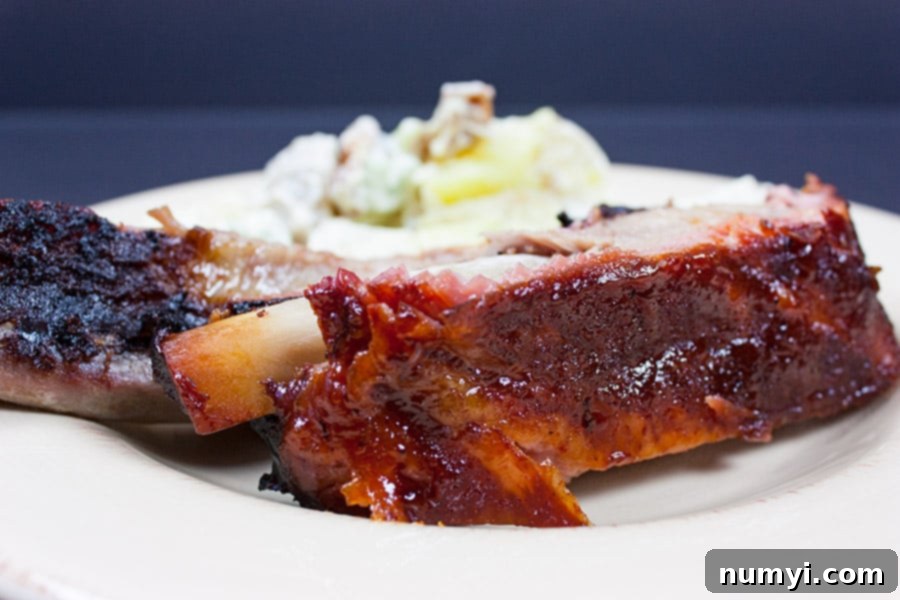
For a visual demonstration of the entire process, including the incredibly easy cutting of these tender ribs, refer to our video tutorial. You’ll clearly see how the meat willingly separates from the bone with the slightest pressure of the knife. My wife even joked that they “might be too tender”—a testament to their perfect doneness!
So, give this recipe a try and share your experience with us. We love hearing about your barbecue successes! After mastering this technique, these St. Louis style ribs will undoubtedly become your go-to recipe for impressing family and friends.
(Please note: This video is one of my earlier creations, so I appreciate your understanding. I’m always working to improve!)
A Note On The 3-2-1 Method for Ribs
If you’ve delved into the world of rib preparation, you’ve likely come across the popular “3-2-1 method.” For those unfamiliar, this technique involves smoking ribs at a low and slow temperature (typically 225-250 degrees Fahrenheit) for three hours, then wrapping them tightly in foil and cooking for an additional two hours, and finally unwrapping them for a final hour of cooking. The idea is to achieve ultimate tenderness.
However, after countless racks of ribs and extensive experimentation, I’ve personally moved away from strictly adhering to the 3-2-1 method. Many experienced pitmasters and backyard barbecue enthusiasts who share a similar passion for quality ribs often agree. The primary issue with the 3-2-1 method is that it can lead to ribs that are *too* tender, resulting in a texture that is less like traditional barbecue ribs and more akin to braised pork. The meat can become mushy, losing that characteristic “rib meat” consistency that we all appreciate.
This recipe, with its maximum 5-hour cook time, is carefully designed to achieve that coveted fall-off-the-bone tenderness without overcooking the meat to the point of becoming stringy or overly soft. We find that a slightly shorter wrapped period prevents the ribs from turning into “pork stew.”
It’s important to remember that personal preference plays a huge role. For instance, my wife prefers her ribs with a bit more “tug,” which means I’ll pull her portion off the grill when the internal temperature reaches around 190°F. I, on the other hand, love the extreme tenderness this method offers, pulling them off around 198-200°F. Even these small fluctuations in temperature can lead to a noticeable difference in the final texture.
Ultimately, the “best” rib is the one *you* enjoy the most. This information on the 3-2-1 method is simply provided to give you additional context and help you fine-tune your technique, ensuring you consistently knock *your* winning ribs out of the park, exactly to your liking.
Expert Tips and Variations for Perfect Ribs
- Cook to Temperature, Not Time: While the times provided in this guide are excellent benchmarks, always rely on internal temperature for the most accurate results. Factors like humidity, ambient temperature, and the thickness of your rib rack can all affect cooking times. When unwrapping your ribs, check their internal temperature with a reliable meat thermometer. Once they reach 195°F, they are ready for that final 30 minutes to an hour of cooking to achieve truly fall-off-the-bone perfection.
- Personalize Your Flavors: Don’t hesitate to use your favorite rubs and barbecue sauces. If you choose to use our recommended rub, a Memphis-style barbecue sauce would pair beautifully, offering a sweet and tangy complement. For an extra special touch, definitely try our Bourbon Chipotle Barbecue Sauce!
- Versatility for All Ribs: This method isn’t just for St. Louis style ribs! It works exceptionally well with both pork baby back ribs and full pork spare ribs. Adjust cooking times slightly based on the size and thickness of the rack. Baby back ribs typically cook faster due to their smaller size.
- Maintain Moisture with a Drip Pan: For sustained moisture and easier cleanup, consider placing a drip pan filled with water or apple juice directly under your ribs (if cooking on an offset or kettle grill setup for indirect heat). This helps regulate temperature and adds humidity to the cooking chamber.
- Monitor Your Smoke: Aim for a “thin blue smoke” rather than thick white smoke. Thin blue smoke indicates a clean burn and will impart the best flavor. Thick white smoke can make your ribs taste bitter.
- Probe Placement is Key: When checking internal temperature, insert your thermometer into the thickest part of the meat, avoiding the bones. The bones heat faster and will give you an inaccurate reading.
- Storing Leftovers: Cooked ribs can be stored in an airtight container in the refrigerator for 3-4 days. To reheat, wrap them in foil and warm gently in an oven at 250-300°F until heated through, or briefly on a grill.
Frequently Asked Questions About Fall-Off-The-Bone Ribs
Rib meat becomes fall-off-the-bone tender through a process called “low-and-slow” cooking. This extended cooking time at lower temperatures (typically 225-250°F) allows the tough connective tissues and collagen within the meat to slowly break down and convert into gelatin. This gelatin melts and disperses throughout the muscle fibers, resulting in that incredibly tender, succulent texture. Achieving an internal temperature of around 195°F or higher is generally when this magical transformation occurs, leading to ribs that practically detach from the bone.
While ribs are technically safe to eat at 145°F, they will be very tough and chewy at this temperature. For a pleasant eating experience, you’ll want to cook them longer. At around 180°F, the collagen and connective tissues begin to break down, resulting in a more tender rib with a good “bite” or “tug.” For the ultimate juicy, tender, fall-off-the-bone experience, aim for an internal temperature between 195°F and 205°F. Within this range, the meat is incredibly soft and easily separates from the bone.
The time it takes for ribs to become fall-off-the-bone tender is less about a fixed duration and more about reaching the correct internal temperature and using the right cooking method. Typically, achieving an internal temperature of 195°F is the key to fall-off-the-bone ribs. Depending on your specific smoker or grill, the consistency of your temperature, and the size of your rib rack, this can be achieved anywhere from 2.5 hours (for smaller racks at slightly higher temperatures) to 6 hours (for larger racks cooked strictly low and slow). Our method aims for approximately 5 hours for St. Louis style ribs at 225-250°F.
Yes, you can adapt this recipe for oven use, though you will miss out on the distinct smoke flavor. To cook in the oven, follow all preparation steps (membrane removal, rub application). Preheat your oven to 250°F (120°C). Place the rubbed ribs on a wire rack set over a baking sheet (to catch drips). Bake for the initial 2-2.5 hours, then proceed with the wrapping step (honey, butter, foil) and continue baking for 1.5-2 hours. Finally, unwrap and finish with BBQ sauce under the broiler or at a higher oven temperature (around 400°F) for 10-15 minutes per side, watching carefully to prevent burning.
This recipe is specifically designed for St. Louis style ribs, which are pork spare ribs that have been trimmed of their breast bone and cartilage. This cut is flatter and more rectangular, making it cook more evenly and easier to slice. However, the method works beautifully for full spare ribs (which will just be larger and might require a slightly longer cook time) and pork baby back ribs, which are smaller, leaner, and will generally cook faster. Look for ribs with good marbling and a consistent thickness.
More Delicious Barbecue Recipes to Explore
If you loved these St. Louis style ribs, be sure to check out some of our other fantastic barbecue creations:
Smoked Baby Back Ribs Recipe
Smoked Pork Shoulder (Pork Butt)
Smoked Shotgun Shells Recipe
Fall Off The Bone St. Louis Style Ribs Recipe
Pin
Rate
Ingredients
- 1 Rack St Louis Style ribs
- 6-8 Tablespoons butter
- 4 Tablespoons Honey
- 8 Oz BBQ Sauce
Rub Ingredients
- ⅔ C White Sugar
- ⅓ C Dark Brown Sugar
- ½ C Smoked Paprika
- ¼ C Garlic Powder
- ⅓ C Kosher Salt
- 1 tsp Oregano
- 1 tsp Cayenne Pepper
- 1 tsp Cumin
- 1 tsp Black Pepper
- 1 tsp Dry Mustard
Instructions
-
Remove membrane from back of ribs.1 Rack St Louis Style ribs
-
Apply a liberal amount of rub to ribs.
-
Wrap in plastic wrap, let rest for 2 to 24 hours.
-
After rest, remove plastic wrap and add more rub liberally.
-
Start the smoker/grill.
-
Get grill/smoker to stable temperature (225 to 250 degrees Fahrenheit).
-
Add smoking wood chips.
-
Put ribs on, meat side up.
-
Cook for 2 to 2.5 hours, spritzing every 30-45 minutes with a 50/50 mix of water and apple cider vinegar (or apple juice).
-
Remove ribs from grill.
-
Lay ribs onto heavy-duty tin foil, add honey and butter equally to each side.6-8 Tablespoons butter, 4 Tablespoons Honey
-
Seal ribs in tin foil, place back on the grill for 1.5 to 2 hours (meat side down).
-
Remove ribs from grill, remove ribs from tin foil.
-
Add more heat to grill, if needed, aiming for a bit more direct heat.
-
Place ribs back on the grill over heat for approximately 5 minutes each side to char.
-
Cover in BBQ sauce.8 Oz BBQ Sauce
-
Cook each side for approximately 10 minutes, allowing the sauce to caramelize and set.
-
Remove from grill, set aside for 5 to 10 minutes.
-
Cut into individual portions.
Notes
Nutrition
Carbohydrates: 111g |
Protein: 10g |
Fat: 26g |
Saturated Fat: 13g |
Polyunsaturated Fat: 3g |
Monounsaturated Fat: 7g |
Trans Fat: 1g |
Cholesterol: 68mg |
Sodium: 10199mg |
Potassium: 763mg |
Fiber: 7g |
Sugar: 89g |
Vitamin A: 7527IU |
Vitamin C: 1mg |
Calcium: 110mg |
Iron: 5mg
