Classic Homemade Iced Oatmeal Cookies: A Nostalgic Recipe for Comfort and Joy
There’s something uniquely comforting about a classic iced oatmeal cookie. Each bite transports you back to simpler times, evoking cherished childhood memories of warm kitchens and sweet treats. These aren’t just any cookies; they’re a delicious blend of chewy oats, warm spices, and a delightful crackled icing that looks as impressive as it tastes. Forget about store-bought versions – with this recipe, you’ll be baking up a batch of homemade perfection that truly stands out. You’ll fool everyone into thinking you spent an entire day perfecting them, but we’ll keep that little secret between us!
Why These Iced Oatmeal Cookies Are Simply Irresistible
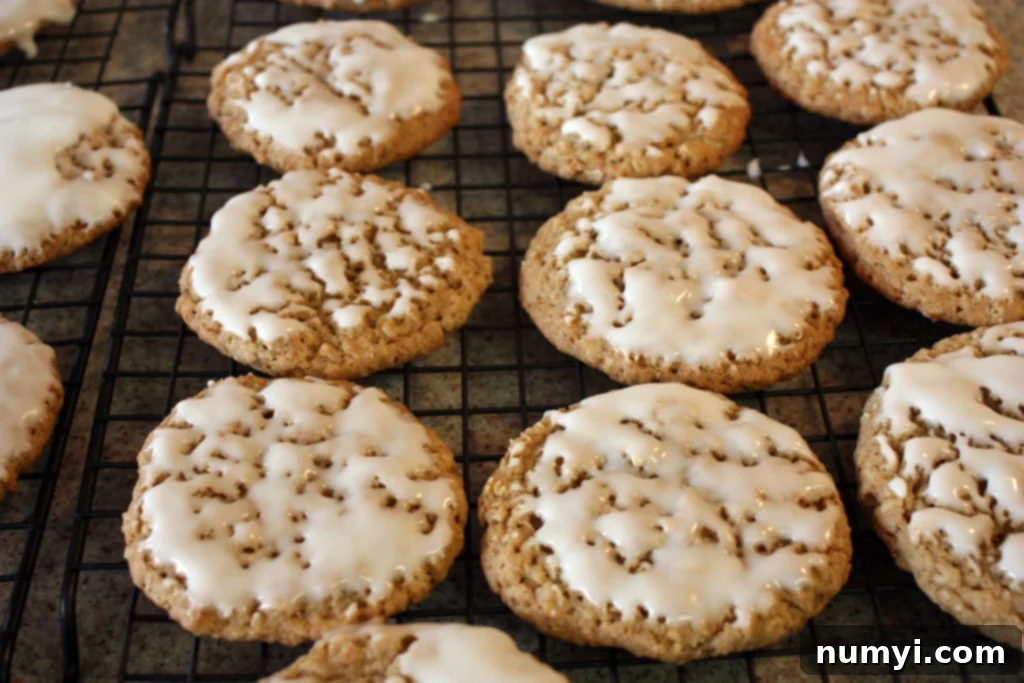
What makes these old-fashioned iced oatmeal cookies so special? It’s the perfect harmony of textures and flavors. The cookies boast slightly crispy edges with a wonderfully soft and chewy center, packed with the wholesome goodness of oats. The magic truly happens with the signature icing: a thick, creamy glaze that dries to a beautifully crackled finish, adding both sweetness and an appealing visual element that’s hard to resist. The comforting aroma of cinnamon and nutmeg fills your kitchen as they bake, setting the stage for a truly delightful experience. This recipe delivers that perfect balance, making it a timeless favorite for all ages.
Essential Ingredients for Your Perfect Batch
Crafting the best iced oatmeal cookies starts with understanding each ingredient’s role. Here’s a detailed look at what you’ll need and why it’s important to use the specified types and states:
- Old-fashioned Rolled Oats: This is crucial for the desired texture. Unlike quick oats, which are heavily processed and will result in a mushier cookie, old-fashioned oats retain more of their structure. We’ll be giving them a quick pulse in a food processor to break them down slightly, ensuring a smoother texture while still maintaining that distinctive oat-y chewiness. This step is key to achieving that authentic old-fashioned feel without the cookies being too rustic. It provides a delightful chewiness that quick oats simply cannot replicate.
- Light Brown Sugar and Granulated Sugar: The combination of these two sugars is not accidental. Light brown sugar contributes a deep, caramel-like flavor and, more importantly, a moist, chewy texture to the cookies. Its molasses content helps keep the cookies soft and enhances the overall richness. Granulated sugar, on the other hand, provides sweetness and helps with the spread and crispiness of the edges, giving the cookies a lovely structural integrity. Using both ensures a balanced flavor profile and a superior texture that is both tender and slightly crisp. Remember to pack the brown sugar tightly when measuring for accuracy.
- Ground Cinnamon and Nutmeg: These warming spices are the heart and soul of traditional oatmeal cookies. Cinnamon provides a sweet, woody warmth, while nutmeg adds a slightly earthy, pungent sweetness that complements the oats perfectly. Together, they create that irresistible, comforting aroma and taste that defines a classic iced oatmeal cookie. Don’t skimp on fresh, quality spices for the best flavor; they make a significant difference in the final product’s depth and complexity.
- Unsalted Butter (Room Temperature): Using unsalted butter gives you complete control over the salt content in your recipe. Butter’s salt content varies significantly between brands, so opting for unsalted ensures consistent results. More importantly, room temperature butter is essential for proper creaming with the sugars, allowing it to incorporate more air. This creates a light and fluffy base, which translates into tender, airy cookies with a delicate crumb. Cold butter won’t cream properly, leading to dense and heavy cookies.
- Large Eggs (Room Temperature): Similar to butter, room temperature eggs emulsify better with the other ingredients, leading to a more uniform and consistent dough. They act as a binder, adding richness, moisture, and helping the cookies hold their shape during baking. If your eggs are cold, you can quickly warm them by placing them in a bowl of warm (not hot) water for 5-10 minutes.
- All-Purpose Flour: This forms the structural foundation of our dry ingredients. Proper measurement is vital to avoid dense or dry cookies. We’ll discuss the correct method for measuring flour in the tips section to ensure your cookies have the perfect tender crumb.
- Baking Powder and Baking Soda: These are the crucial leavening agents that give the cookies their lift and tender crumb. Baking soda reacts with the acidic brown sugar to create carbon dioxide, which helps the cookies spread and rise. Baking powder provides additional leavening, ensuring a perfectly risen and light cookie texture. Using both ensures an optimal chemical reaction for cookie perfection.
- Salt: A small amount of salt is a flavor enhancer that balances all the other flavors, particularly the sweetness. It also makes the cinnamon and nutmeg pop, creating a more complex and satisfying taste experience.
- Pure Vanilla Extract: A ubiquitous flavor enhancer in baking, vanilla extract ties all the ingredients together, adding a subtle depth and warmth that complements the spices and oats beautifully. Always opt for pure vanilla for the best flavor.
Expert Tips for Baking Flawless Iced Oatmeal Cookies
Achieving bakery-quality iced oatmeal cookies at home is easier than you think, especially when you pay attention to these crucial baking tips:
- Mastering the Icing Consistency for that Signature Crackle: The icing is indeed thick, and that’s precisely what we’re aiming for. This robust consistency is what allows it to form that beautiful, characteristic crackle as it dries. If your icing is too thin, it will simply run off the cookie and won’t create the desired effect. If it’s too thick, it won’t spread evenly. When mixing, start with the recommended amount of liquid and add more confectioners’ sugar or cream/milk in tiny increments until it reaches a spreadable yet sturdy consistency that clings to the spoon. It should drip slowly rather than run quickly.
- The Absolute Importance of Room Temperature Unsalted Butter: We can’t stress this enough! Always use unsalted butter at room temperature. Butter’s salt content varies significantly between brands, so unsalted gives you control over the final flavor profile. More importantly, room temperature butter creams together with sugar much more effectively, incorporating vital air that yields light and fluffy cookies. Cold butter won’t cream properly, leading to dense, harder cookies, and melted butter will make your cookies greasy and flat.
- Accurate Flour Measurement is Key to Perfect Texture: Do not scoop your flour directly from the bag with your measuring cup. This action compacts the flour, leading to too much flour in your recipe, which will result in dry, tough, and crumbly cookies. Instead, always aerate your all-purpose flour by fluffing it with a fork or whisking it in its container. Then, spoon it lightly into your dry measuring cup until it overflows. Finally, level it off with a straight edge (like the back of a knife or an offset spatula). This method ensures you have the correct amount for a perfectly tender and moist cookie.
- Preventing Overbaking for Chewy Goodness: Iced oatmeal cookies are best when they are delightfully chewy on the inside with a slight crispness on the edges. Overbaking will result in dry, hard, and less flavorful cookies. To avoid this, keep a close eye on your cookies during the last few minutes of baking. Look for bottoms that are just starting to turn a light golden brown and edges that are set, while the centers still look slightly soft and puffy. They will continue to set and firm up as they cool on the baking sheet after being removed from the oven.
- Pulsing the Oats Just Right for Ideal Texture: When processing the old-fashioned oats in the food processor, aim for a coarse meal, not a fine flour. The goal is to break down the larger oat flakes slightly, creating a smoother texture in the cookie dough without losing the characteristic “oat” texture. A few quick pulses (around 10-12 times) should be enough. Over-processing will make your cookies more cakey and less chewy, losing that desirable rustic element.
- Complete Cooling Before Icing: The Golden Rule: Patience is a virtue, especially when it comes to icing cookies! Ensure your cookies are completely cool to the touch – ideally, at room temperature for at least an hour, or even longer if your kitchen is warm – before attempting to apply the icing. Warm cookies will immediately melt the icing, creating a messy, runny glaze that won’t achieve the crisp, crackled finish you desire. A wire rack is ideal for promoting even cooling.
- Don’t Crowd the Baking Sheet: Always leave at least 2 inches between each cookie dough ball on your prepared baking sheets. Cookies need space to spread evenly without merging into one giant cookie. Crowding can also lead to uneven baking and softer, less crispy edges.
Step-by-Step Guide: How to Make Old-Fashioned Iced Oatmeal Cookies
Follow these detailed instructions to create a batch of homemade iced oatmeal cookies that are sure to impress and satisfy:
Preparation is Key:
First, ensure your oven is accurately preheated to 350 degrees Fahrenheit (175°C). An oven at the correct temperature from the start is vital for even baking and proper cookie spread. As the oven preheats, prepare two baking sheets by lining them with parchment paper or silicone baking mats. This crucial step prevents the cookies from sticking, promotes even browning, and makes cleanup incredibly easy.
Preparing the Oats for Optimal Texture:
Measure out your old-fashioned rolled oats. Transfer them to a food processor and pulse about 10-12 times. The objective here is to break down the oats slightly to give the cookies a smoother, less rustic texture, but it’s critical not to turn them into a fine oat flour. You should still see some distinct, smaller oat pieces. This controlled pulsing contributes significantly to the characteristic chewy and tender crumb of the finished cookies.
Combining the Dry Ingredients:
In a large mixing bowl, meticulously whisk together the pulsed oats, all-purpose flour (measured correctly using the spoon-and-level method), baking powder, baking soda, salt, ground cinnamon, and ground nutmeg. Whisking ensures all these dry ingredients are thoroughly combined and evenly distributed throughout the mixture. This step is essential for uniform flavor and consistent leavening, preventing pockets of unmixed ingredients in your final cookies. Set this mixture aside for later incorporation.
Creaming the Wet Ingredients to Perfection:
In the bowl of a stand mixer fitted with the paddle attachment (or using a reliable hand mixer), beat the softened room temperature unsalted butter on medium-high speed until it becomes visibly light and fluffy. This process typically takes about 2-3 minutes. This step is vital as it incorporates air into the butter, which is crucial for creating a tender crumb and a light texture in your finished cookies.
Next, add both the light brown sugar (packed) and granulated sugar to the creamed butter. Continue to beat on medium-high speed for another 2-3 minutes, until the mixture is light, fluffy, and well combined. The mixture should appear pale and aerated. Remember to stop and scrape down the sides of the bowl as needed to ensure all ingredients are thoroughly incorporated and no sugar or butter is clinging to the edges.
Add the large eggs, one at a time, beating after each addition just until the yolk disappears and is fully integrated into the batter. This ensures proper emulsification and prevents the batter from separating, which can happen if you add them all at once or beat too vigorously. Finally, lightly beat in the pure vanilla extract until just combined. Avoid overmixing once the vanilla is added.
Gradually Incorporating Dry into Wet:
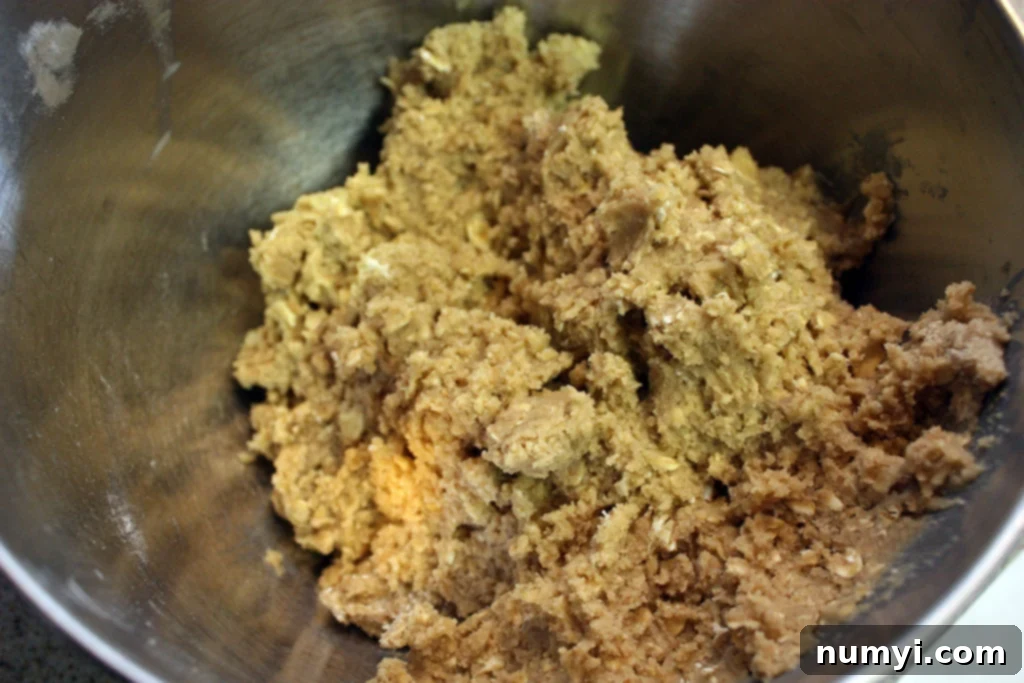
With the mixer set to low speed, gradually add about half of your reserved dry ingredients mixture to the butter and egg mixture. Mix only until just blended, being extremely careful not to overmix. Overmixing develops the gluten in the flour, which can lead to tough, dense cookies. Once the first half is just incorporated, add the remaining dry mixture and continue to mix on low speed. Mix only until it is fully incorporated and a cohesive dough forms, with no visible streaks of flour remaining. Stop the mixer as soon as the last of the flour disappears into the dough.
Shaping and Baking for Uniformity:
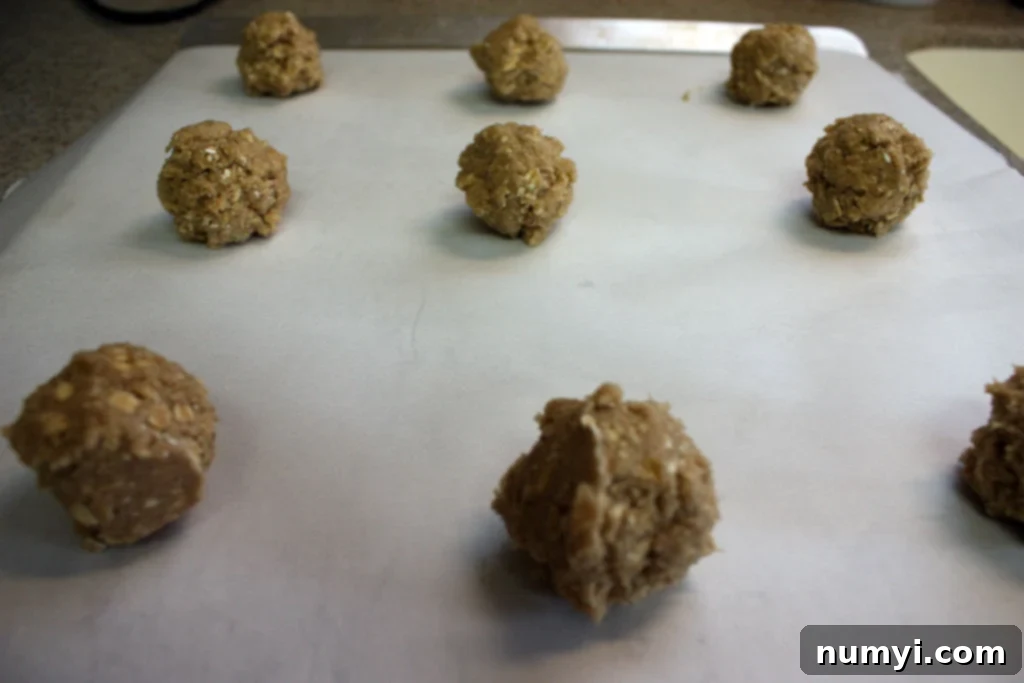
Using a 2-tablespoon size cookie scoop (ensure it’s not heaping, but leveled straight across the top), roll the dough into uniform balls. Consistency in size helps ensure all cookies bake evenly. Place these dough balls onto your prepared baking sheets, ensuring they are at least 2 inches apart. This spacing is crucial to allow for proper spreading during baking without the cookies merging into one another. If you crowd the pan, your cookies might not brown evenly or achieve the desired texture.
Bake in the preheated oven for 10-12 minutes. The baking time can vary slightly depending on your specific oven and the size of your cookies, so it’s important to keep a close eye on them. The cookies are ready when the bottoms just begin to turn a light golden brown, and the edges are set, but the centers still look slightly soft and puffy. Crucially, do not overbake them, as this will lead to dry and crumbly cookies rather than the desired chewy texture.
Cooling the Baked Cookies:
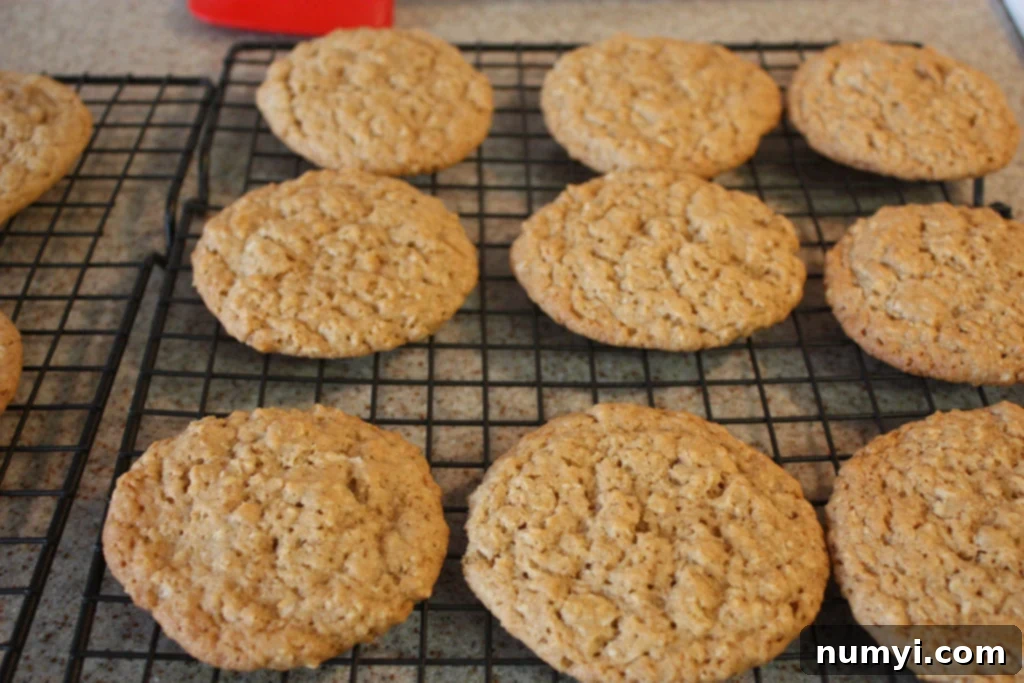
Once baked, promptly remove the baking sheets from the oven. Let the cookies rest on the hot pan for about 5 minutes. This brief resting period allows them to set up further and become firm enough to handle without breaking when transferred. After 5 minutes, carefully transfer the cookies to a wire rack to cool completely. This complete cooling is an absolutely vital step before you even think about applying the icing; warm cookies will cause the icing to melt and run, creating a messy, runny glaze instead of the crisp, crackled finish you desire. Ensure they are fully cooled, which can take an hour or more.
Preparing the Signature Icing:
While the cookies cool patiently, prepare your delicious, crackled icing. In a medium bowl, combine the confectioners’ sugar (also widely known as powdered sugar) with the heavy cream or milk. Begin with the smaller amount of liquid specified in the recipe and add more slowly if needed, as the ideal consistency is paramount for these cookies.
Whisk the mixture thoroughly until the confectioners’ sugar is completely dissolved and the icing is smooth and somewhat thick. The desired consistency should be like a thick pancake batter – it should be able to drip slowly from the whisk but still hold its shape slightly. If your icing appears too thin and runny, gradually whisk in a little more powdered sugar, a tablespoon at a time. Conversely, if it’s too thick and won’t spread easily, add very small amounts (half a teaspoon at a time) of heavy cream or milk until it’s just right. Remember, it’s always easier to add more liquid than to fix overly thin icing, so proceed cautiously!
Icing and Setting the Cookies:
Once the cookies are completely cooled to room temperature, place the prepared icing in a shallow dish or container that is wide enough to easily accommodate the top of a single cookie. Quickly dip the tops of the cooled cookies into the icing, ensuring an even, thin coat. Allow any excess icing to drip off back into the dish before transferring the cookie.
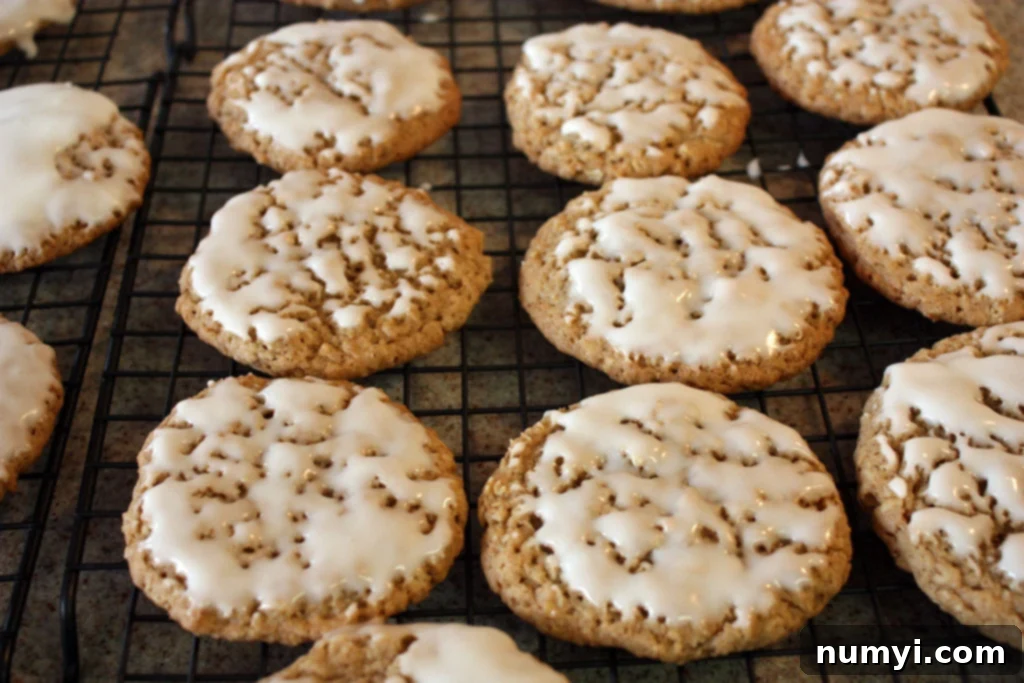
Immediately place the dipped cookies back on the wire cooling rack to dry and set. The thick icing will naturally start to form its characteristic crackle as it dries, giving these cookies their iconic appearance. This drying process can take anywhere from 30 minutes to a few hours, depending on the humidity in your environment. You want the icing to be firm and dry to the touch before attempting to stack or store the cookies to prevent smudging and sticking.

Once the icing has hardened and set completely, these beautifully iced oatmeal cookies are ready to be devoured! They make a perfect snack, dessert, or a thoughtful homemade gift. You’re going to absolutely love this recipe, I promise! The combination of a chewy, spiced cookie and that sweet, crackled glaze is truly irresistible.
Frequently Asked Questions About Iced Oatmeal Cookies
No, for the best results, it’s highly recommended to stick to old-fashioned rolled oats. Oat flour is too powdery and lacks the coarse texture needed to give these cookies their signature chewiness. Using oat flour will result in a more cake-like or crumbly cookie, missing that delightful hearty bite. Similarly, quick oats are too finely cut and processed; they will absorb liquid too quickly and yield a mushy, less textured cookie. Pulsing old-fashioned oats briefly in a food processor is the perfect compromise, providing a smoother, less rustic texture while retaining the essential oat character that defines these classic cookies.
To maintain their freshness and prevent the icing from sticking, store your iced oatmeal cookies in an airtight container at room temperature. Ensure the icing is completely set before storing. If you need to stack them, place a piece of parchment paper or wax paper between each layer to protect the delicate icing and prevent them from adhering to each other. They will stay fresh and delicious for up to 3-5 days. For optimal flavor and texture, consuming them within the first couple of days is recommended, but honestly, they rarely last that long!
Yes, you absolutely can! If you want to freeze the cookie dough for later, shape the dough into balls as instructed, then place them in a single layer on a parchment paper-lined baking sheet. Freeze until solid, which usually takes an hour or two. Once frozen, transfer the dough balls to a freezer-safe container or a heavy-duty freezer bag, removing as much air as possible. They can be stored for up to 2 months. When ready to bake, you can bake them directly from frozen, adding a couple of extra minutes (usually 2-4 minutes) to the baking time. Freezing the baked and iced cookies is also possible, but it’s best to freeze them first on a sheet until the icing is completely solid, then wrap them individually or layer with parchment paper in an airtight container to prevent sticking and freezer burn. Thaw them at room temperature before serving for the best texture.
The consistency of the icing is absolutely key to achieving that classic crackle. If your icing is too thin and runny, which can happen if you add too much liquid or didn’t measure your confectioners’ sugar accurately, gradually whisk in more confectioners’ sugar, a tablespoon at a time, until it reaches a thick, pourable, yet sturdy consistency that clings to the whisk. If, on the other hand, your icing is too thick and won’t spread easily, add very small amounts (half a teaspoon at a time) of heavy cream or milk until it’s just right. Remember, it’s much easier to add more liquid than it is to fix overly thin icing, so always go slowly and add tiny increments.
While this recipe focuses on classic iced oatmeal cookies to honor their traditional appeal, feel free to experiment with additions in future batches! You could add a handful of plump raisins or dried cranberries for an extra layer of chewiness and fruitiness, which pairs wonderfully with the spices. A sprinkle of finely chopped walnuts or pecans would introduce a lovely nutty crunch and added flavor. If you’re feeling adventurous, a touch of white chocolate chips could add a sweet creaminess. Just be mindful not to add too many wet ingredients that might alter the dough’s consistency too much. For your first attempt, we recommend sticking to the recipe to master the foundational flavor and texture, then customize future batches to your heart’s content!
Discover More Delicious Cookie Recipes
If you loved baking and enjoying these classic iced oatmeal cookies, you’re in for a treat! Explore our other delightful cookie recipes perfect for any occasion, from simple everyday snacks to impressive holiday treats:
- Old Fashioned Peanut Butter Cookies
- Almond Joy Cookies
- Italian Butterball Cookies
- Monster Cookies
- Cut-Out Sugar Cookies

Old Fashioned Iced Oatmeal Cookies Recipe
Print
Pin
Rate
Ingredients
- 2 cups old-fashioned rolled oats
- 2 cups all-purpose flour
- 1 tablespoon baking powder
- ½ teaspoon baking soda
- ½ teaspoon salt
- 2 teaspoons cinnamon
- ½ teaspoon ground nutmeg
- 1 cup unsalted butter room temperature (2 sticks)
- 1 cup light brown sugar packed
- ½ cup granulated sugar
- 2 large eggs room temperature
- 1 teaspoon pure vanilla extract
FOR THE ICING:
- 2 tablespoons heavy cream or milk
- 2 cups confectioners’ sugar
Instructions
-
Preheat oven to 350 degrees.
-
Prepare 2 baking sheets lined with parchment paper.
-
Add the rolled oats to a food processor and pulse about 10 times. Don’t over process, leave some texture.
-
In a large mixing bowl whisk the oats, flour, baking powder, soda, salt, cinnamon, and nutmeg. Set aside.
-
In the bowl of a stand mixer cream the butter on medium-high until fluffy.
-
Add the brown and granulated sugars and mix on medium-high until it becomes fluffy.
-
Add the eggs, one at a time, beating just until the yolk disappears into the batter.
-
Lightly beat in the vanilla. Add about half of the dry mixture to the butter and egg mixture, mixing on low speed just until blended.
-
Continue adding the flour mixture until it is fully incorporated.
-
Using a 2 tablespoon size cookie scoop (not heaping – leveled straight across the top of the scoop), roll the dough into balls and place on the prepared baking sheet at least 2 inches apart.
-
Bake for 10-12 minutes or until the bottoms just start to brown. Do not over bake.
-
Remove the pan from the oven and let the cookies rest for 5 minutes before removing to a rack to cool completely.
-
To prepare the icing, combine the confectioners’ sugar with the cream.
-
Whisk until the sugar is dissolved and the icing is somewhat thick.
-
Place the icing in a shallow dish or container.
-
Quickly dip the tops of the cooled cookies into the icing and let the excess drip off.
-
Set the dipped cookie on the cooling rack until the icing has set.
-
Store the cookies in an airtight container.
Nutrition
Recipe from motherthyme
