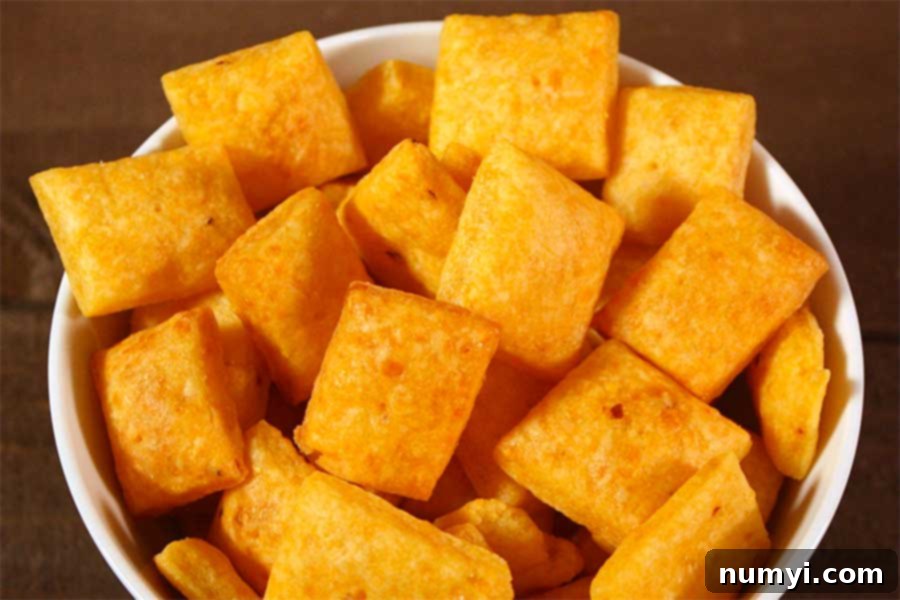
Homemade Spicy Cheese Crackers: Your Ultimate Cheesy, Crunchy Snack Recipe
Prepare to elevate your snacking experience with these incredible homemade spicy cheese crackers! Bursting with bold, savory cheese flavor, a satisfying kick of spice, and an irresistible crunch, these crackers are guaranteed to be a massive hit with everyone who tries them. If you’ve ever wished for a healthier, more flavorful alternative to store-bought varieties, or simply love the idea of creating something delicious from scratch, then this easy-to-follow recipe is an absolute must-try. Forget those bland, mass-produced crackers; once you taste the fresh, vibrant difference of homemade, you’ll never look back – these are truly a cut above the rest, offering unparalleled taste and texture.
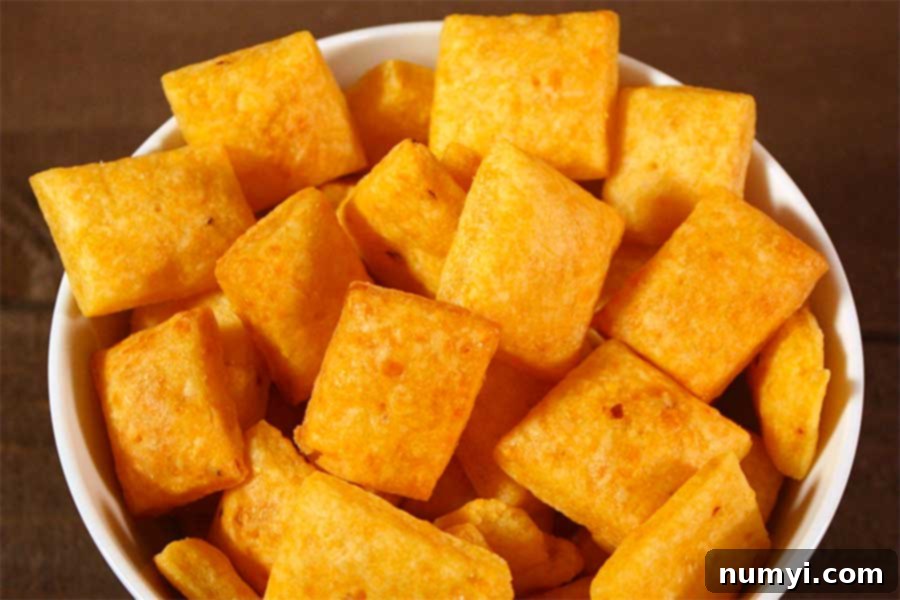
One of the best aspects of this recipe is its adaptability. While we adore the zesty punch of red pepper flakes, you can easily customize the spice level to suit any palate. If you’re planning to share these delightful bites with younger family members or those sensitive to heat, simply omit the red pepper flakes entirely for a classic, cheesy cracker that’s just as delicious. This makes them a perfect snack for school lunchboxes, after-school treats, or a crowd-pleasing appetizer for any gathering, ensuring everyone can enjoy their irresistible charm. They are fantastic on their own, but also serve as an excellent base for dips or a crunchy accompaniment to soups and salads.
For more exciting snack ideas, be sure to explore our Spicy Seasoned Oyster Crackers! They offer a different kind of spicy crunch, perfect for expanding your appetizer repertoire.
The Irresistible Appeal of Homemade Cheese Crackers
There’s a unique satisfaction that comes with baking your own snacks, and homemade cheese crackers are a prime example. Beyond the sheer joy of creating something delicious, crafting your own crackers offers a level of freshness, flavor control, and ingredient transparency that simply can’t be matched by store-bought options. You have complete command over the quality of the cheese, the richness of the butter, and the intensity of the seasonings, ensuring a superior taste profile and avoiding any unwanted preservatives, artificial colors, or strange additives.
Many commercially produced cheese crackers, while convenient, often contain a list of ingredients that are difficult to pronounce. What’s more, the “cheese” flavor in these products can sometimes taste artificial. This is particularly true for pre-packaged shredded cheeses, which are frequently coated with anti-caking agents to prevent clumping. While practical for some uses, this powdery substance can dull the true cheese flavor and even affect the texture of your baked goods. By shredding your own block of high-quality sharp cheddar, as this recipe recommends, you guarantee the purest, most authentic cheese taste and a perfectly smooth dough texture.
The texture of these homemade crackers is also unparalleled. Unlike the often dense or overly airy store-bought versions, these crackers boast a delicate, crisp, and flaky crunch that melts in your mouth. Each bite delivers a burst of real, savory cheese flavor, beautifully complemented by the subtle warmth of garlic powder and the vibrant kick of red pepper flakes. It’s an experience that elevates a simple snack into a gourmet treat. Plus, the enticing aroma that fills your kitchen as these golden squares bake is an added bonus, setting the stage for a truly delightful eating experience.
Making crackers at home is also surprisingly simple, especially with the efficiency of a food processor. It’s a quick and fun culinary project, suitable for bakers of all skill levels, and can be a wonderful activity to share with family. Beyond the sensory pleasures, there’s also the economic benefit. High-quality ingredients, when purchased wisely and prepared at home, can often be more cost-effective than repeatedly buying premium packaged snacks. This means you can enjoy more delicious, wholesome crackers for less.
Crafting Your Own Spicy Cheese Crackers: A Simple Guide
The journey to these delightful crackers begins with a few key steps, made effortlessly easy with modern kitchen tools. One crucial tip for success lies in your choice of cheese. I strongly advise against using pre-packaged shredded sharp cheddar cheese. As mentioned, these often come coated with anti-caking agents, which can give them a slightly grainy texture and affect the cracker’s overall consistency and melt. For the purest flavor and best results, invest in a block of high-quality sharp cheddar and shred it yourself just before you begin. This ensures maximum freshness and the authentic, robust cheese flavor that makes these crackers so addictive.
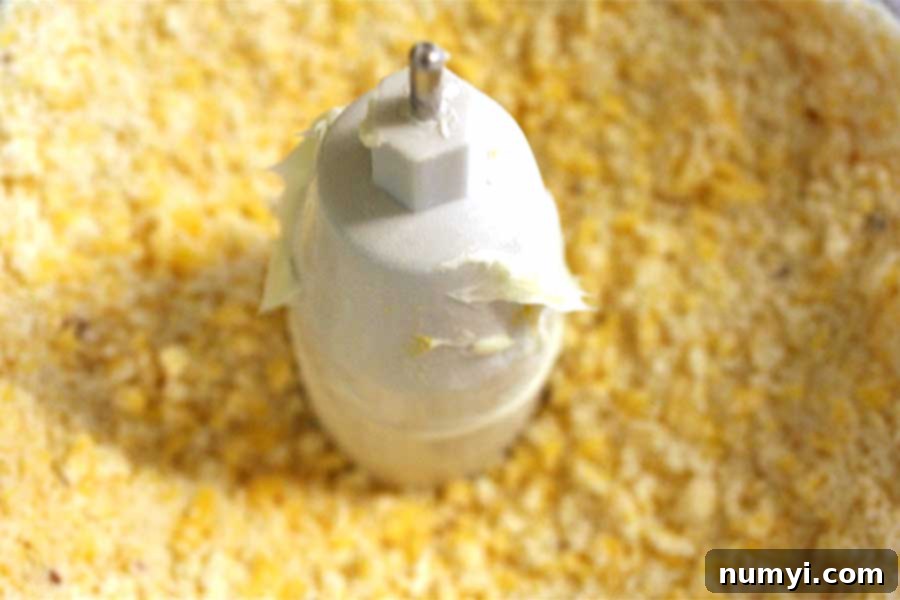
This recipe is designed for maximum efficiency and minimal fuss, largely thanks to the food processor. It brings the dough together in mere minutes, transforming simple ingredients into a cohesive dough with very little hands-on effort. This means you spend less time mixing and more time enjoying the process and the delicious outcome. The cleanup is also incredibly quick, making this a perfect weeknight project or a last-minute party snack solution when you need something impressive yet easy.
Prepping Your Workspace and Essential Ingredients
- First things first, preheat your oven to 350 degrees F (175 degrees C). A consistently hot oven is crucial for achieving evenly baked, crisp crackers from the moment they enter the heat.
- Next, prepare a large baking sheet by lining it with parchment paper. Parchment paper is an essential tool here, as it prevents the crackers from sticking to the pan and makes cleanup an absolute breeze. It also helps to ensure even heat distribution on the bottom of the crackers.
- Now, for the star ingredient: if you haven’t already, shred your block of sharp cheddar cheese directly into the bowl of your food processor. Using a block of cheese and shredding it yourself guarantees a superior, fresher flavor compared to pre-shredded options.
Mixing the Dough to Perfection in Minutes
With your freshly shredded cheese in the food processor, it’s time to combine the remaining dry and semi-solid ingredients. Add the cold unsalted butter (cut into small, manageable pieces), the all-purpose flour, kosher salt, red pepper flakes (if you’re embracing the spicy kick), and garlic powder. The cold butter is particularly important as it contributes significantly to the flaky, tender texture of the finished crackers. Avoid using softened butter, as this can result in a tougher, less desirable consistency.
Pulse these ingredients together in the food processor. You’re looking to achieve a coarse, crumbly mixture that resembles wet sand or fine gravel. The food processor will efficiently break down the cold butter and combine it thoroughly with the flour and seasonings, ensuring an even distribution of flavor throughout the dough. It’s important not to over-process at this initial stage; a coarse crumb is exactly the texture you want before introducing any liquid.
While these crackers are fantastic on their own, don’t miss out on our other savory treats. Our delightful Sausage Balls make another excellent party appetizer that complements these spicy crackers beautifully!
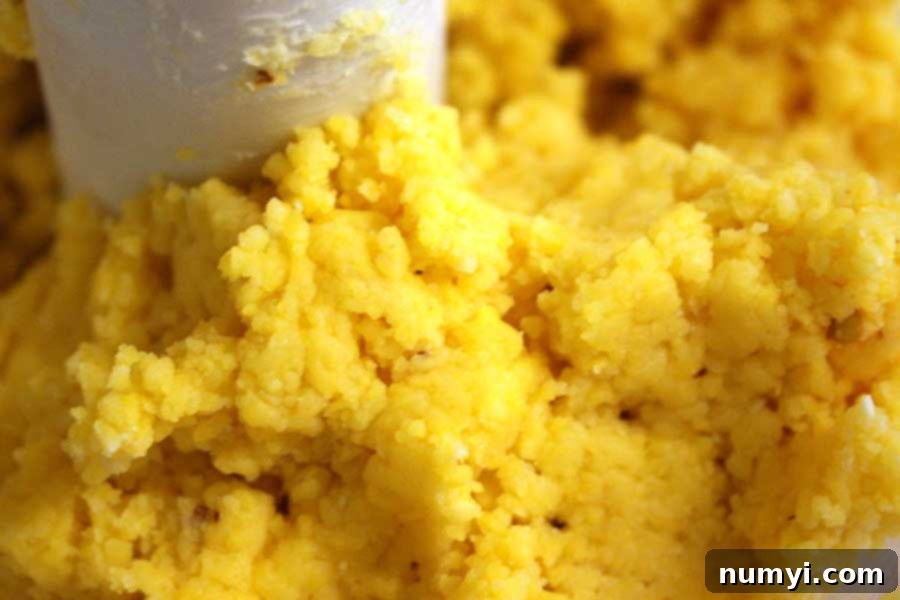
Once you have your perfectly coarse crumb mixture, it’s time to bring the dough together with the milk. Pour in the initial tablespoon of milk and pulse the food processor again. Observe the dough carefully: it should start to come together and form a cohesive ball. The exact amount of milk needed can vary slightly depending on factors like the humidity in your kitchen or the moisture content of your specific cheese. Therefore, if the dough still appears too dry or crumbly after the first tablespoon, add just a tiny drizzle more milk – perhaps a teaspoon or two at a time – and continue pulsing until the dough fully coalesces into a soft, pliable ball. It’s crucial to avoid adding too much milk, as an overly wet dough can result in tough, dense crackers. The goal is a dough that holds its shape well and is easy to roll out without being sticky.
Rolling and Cutting Your Crackers to Shape
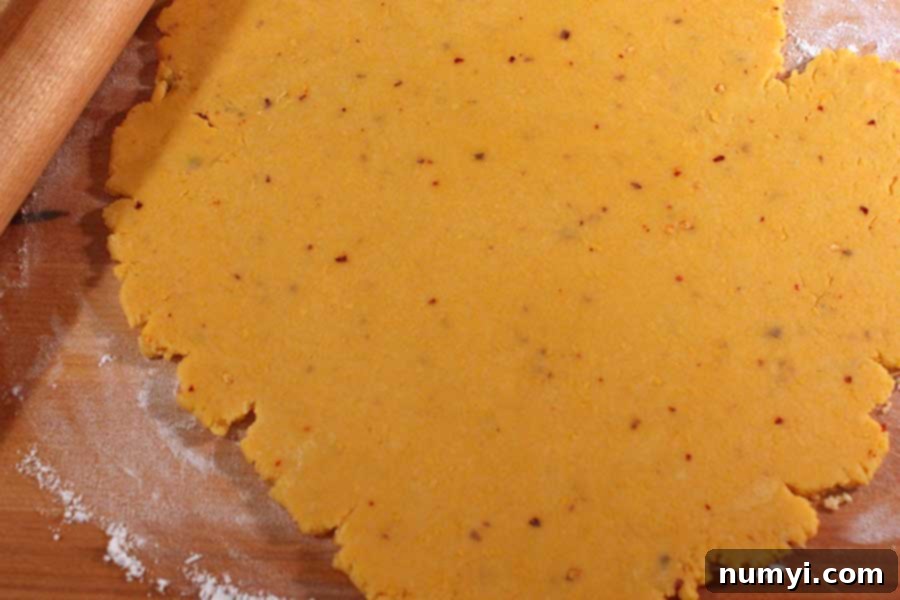
Lightly flour a clean work surface, such as a large cutting board or your countertop. Alternatively, you can roll the dough directly on a large piece of parchment paper, which can simplify the transfer process later. Transfer your dough ball to this prepared surface. Using a rolling pin, roll out the dough evenly until it’s approximately 1/8-inch thick. Aim for as consistent a thickness as possible across the entire sheet of dough. This uniformity is absolutely key to ensuring that all your crackers bake evenly, achieving that desired crispy texture without some burning and others remaining undercooked.
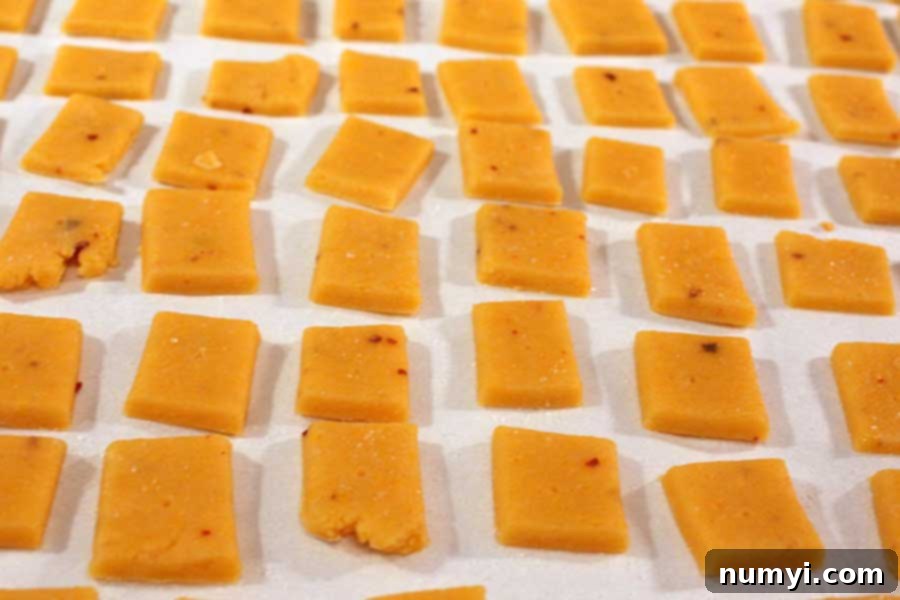
Now comes the creative and slightly less precise part: cutting your crackers! You can use a sharp knife, a pastry wheel, or, as I often find most efficient and enjoyable, a pizza cutter. This tool makes quick work of cutting the dough into approximately 1-inch squares. Don’t worry if your lines aren’t perfectly straight – mine rarely are! The charm of homemade lies in these little imperfections, which give each cracker character and tell a story of your culinary adventure. Whether perfectly square or delightfully rustic, they’ll taste undeniably amazing.
Carefully transfer the cut cracker squares to your parchment-lined baking sheet, ensuring you leave a little space (about half an inch) between each one for even air circulation. This prevents them from steaming rather than crisping. Before baking, use a toothpick or a small skewer to poke a hole in the center of each cracker. This small but important step serves a functional purpose: it helps to prevent the crackers from puffing up excessively during baking, ensuring they remain flat, thin, and wonderfully crispy.
Baking to Golden Perfection and Storage Tips
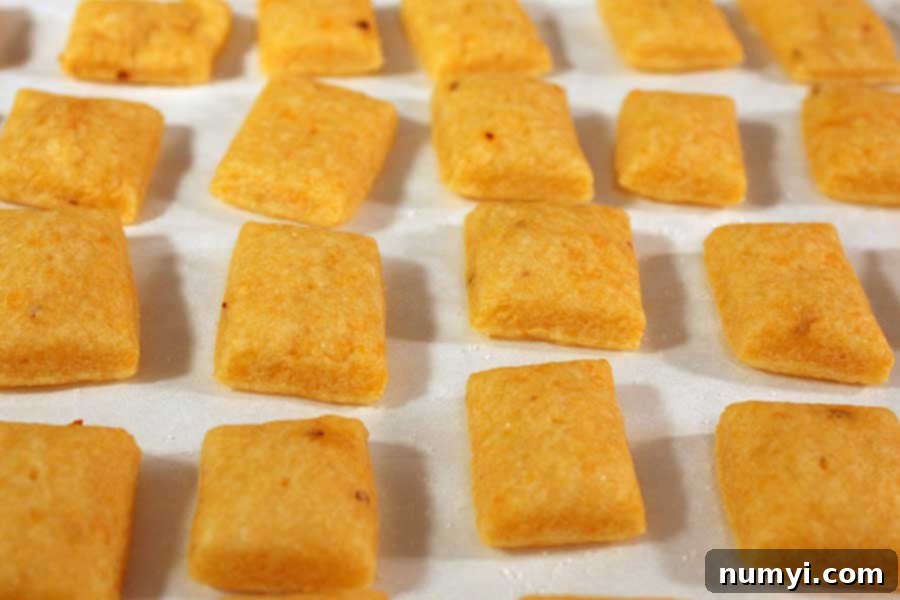
Slide your baking sheet into the preheated oven. Bake for approximately 12 to 15 minutes, or until the edges of the crackers just begin to turn a beautiful golden brown. It’s crucial to keep a close eye on them, as baking times can vary slightly depending on your oven’s calibration and the exact thickness of your crackers. You want them to be crisp and golden, but certainly not burnt. Once baked to perfection, remove them from the oven and allow them to cool completely on the baking sheet. As they cool, they will continue to firm up and become even crispier.
Enjoy these delightful homemade cheese crackers! They are undeniably at their absolute best when eaten the day they are made, offering maximum crispness and freshest flavor. The immediate gratification of warm, savory, spicy crackers straight from the oven is unmatched. If you happen to have any leftovers – a rare occurrence, I assure you, as they tend to disappear quickly – store them in an airtight container at room temperature. While they may soften slightly over time due to moisture in the air, a quick refresh in a warm oven (around 250°F or 120°C for 5-10 minutes) can often bring back some of their beloved crisp texture. They are perfect for spontaneous snacking, alongside a hearty soup, or as a crunchy companion to your favorite dips.
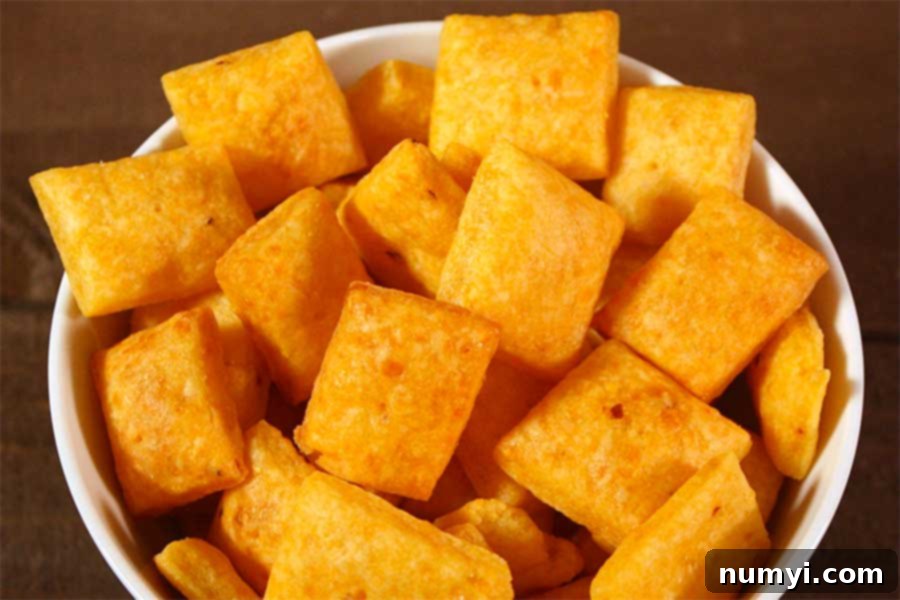
These spicy cheese crackers are an absolute game-changer for any occasion. Imagine them as the star of your next Game Day party, a sophisticated yet approachable addition to a cocktail hour, or a simple yet deeply satisfying snack to curb those afternoon cravings. Their vibrant flavor and satisfying texture make them truly versatile and universally appealing.
Looking for another fantastic, crowd-pleasing appetizer that pairs wonderfully with these crackers? Our Easy Spinach Dip is a perfect match, offering a cool and creamy contrast to the spicy crunch!
Customizing Your Homemade Spicy Cheese Crackers
One of the greatest joys of homemade recipes is the freedom to customize them to your exact preferences. While this recipe is fantastic as written, don’t hesitate to experiment with different flavors and ingredients to make these spicy cheese crackers uniquely yours. The base dough is quite forgiving, allowing for a variety of delicious modifications.
Adjusting the Spice Level
- For More Heat: If you’re a true spice enthusiast who loves a fiery kick, feel free to increase the amount of red pepper flakes to 1 teaspoon or even more. For an extra layer of heat and flavor, you could also add a pinch of cayenne pepper, a dash of smoked paprika, or a tiny amount of your favorite chili powder directly into the dough alongside the other dry ingredients.
- For Less Heat / Mild Version: As mentioned earlier, for a completely kid-friendly version or for those who prefer no spice at all, simply omit the red pepper flakes entirely. The crackers will still be wonderfully cheesy and flavorful, making them a hit with everyone.
Experimenting with Cheese Varieties
While sharp cheddar provides a classic, robust flavor that truly shines, don’t be afraid to venture out and try other cheeses or even a blend of cheeses to create unique flavor profiles:
- Pepper Jack: For an inherent spicy kick and a creamier melt, Pepper Jack cheese is an excellent choice.
- Smoked Gouda: Adds a wonderful smoky depth and a slightly sweet, nutty flavor to the crackers.
- Parmesan or Pecorino Romano: These hard, aged cheeses offer a strong, salty, and intensely umami flavor, perfect for an Italian-inspired cracker.
- Gruyere: Offers a complex, nutty, and slightly sweet flavor that would make for a more sophisticated cracker.
- Monterey Jack: A milder option that still delivers great cheese flavor and a lovely melt.
- Cheddar Blends: Combine sharp cheddar with a milder cheese like Colby or a tangy one like provolone for a more complex profile.
Adding Herbs and Other Seasonings
Infuse your crackers with aromatic herbs or additional spices to further enhance their savory appeal:
- Dried Herbs: Mix in a teaspoon of dried rosemary, thyme, oregano, or an Italian seasoning blend with the flour and other dry ingredients. These herbs pair beautifully with cheese.
- Onion Powder: A quarter to half teaspoon of onion powder can add another layer of savory depth alongside the garlic powder, creating a more “umami” experience.
- Smoked Paprika: Beyond a little heat, smoked paprika contributes a rich, smoky flavor and a beautiful reddish-orange hue to the crackers.
- Freshly Ground Black Pepper: A generous amount of freshly ground black pepper can significantly enhance the overall savory flavor of the crackers.
- Mustard Powder: A pinch of dry mustard powder can subtly amplify the cheese flavor without being overtly “mustardy.”
Fun Shapes and Sizes
Beyond the classic 1-inch square, get creative with your cracker shapes! Use small cookie cutters to make stars, hearts, circles, or other festive shapes, especially if you’re making these for a holiday party, a themed event, or simply to delight children. Just remember that smaller or more intricate shapes might require a slightly shorter baking time, so keep an even closer eye on them in the oven to prevent burning.
Perfect Pairings and Serving Suggestions
These spicy cheese crackers are incredibly versatile and can be enjoyed in a multitude of ways. Their robust flavor and satisfying crunch make them suitable for almost any occasion, from casual snacking to elegant entertaining.
- Party Appetizer Essential: They are an absolute stellar addition to any appetizer spread. Serve them piled high in a bowl, alongside a beautifully arranged charcuterie board featuring cured meats, gourmet cheeses, olives, fresh fruit, and nuts. They add a homemade touch that will impress your guests.
- Dip’s Best Friend: Their sturdy yet crisp texture makes them the perfect vehicle for your favorite dips. They are strong enough for thicker dips like creamy hummus, a hearty bean dip, a classic French onion dip, or a rich artichoke dip. And, of course, our Easy Spinach Dip is an absolutely fantastic choice for pairing!
- Soup and Salad Companion: Don’t limit these to just dipping. Crumble them roughly over a warm bowl of tomato soup, creamy pumpkin soup, or a hearty chili for an added layer of cheesy crunch instead of traditional croutons. They also make a wonderful, unexpected topping for a fresh green salad.
- Game Day MVP: For sports fans, these crackers are a must-have for game day festivities. Their spicy kick and addictive cheesy goodness are perfect for fueling game-time excitement and cheering on your favorite team.
- Simple Snack: Sometimes, the best way to enjoy these crackers is all on their own. Their complex flavor profile means they don’t need much accompaniment. Pair them with a tall glass of iced tea, a cold sparkling water, or your beverage of choice for a truly satisfying break.
- Kid-Friendly Treat: Remember the non-spicy version? It’s a fantastic and wholesome snack for children, a much better and more flavorful alternative to many processed options found in stores. Pack them in lunchboxes or offer them as an after-school snack.
- Cheese Board Enhancement: Elevate your cheese board by adding these homemade crackers. Their unique flavor and texture will complement various cheeses beautifully, adding another dimension to your tasting experience.
Expert Tips for Success and Optimal Storage
To ensure your homemade spicy cheese crackers turn out perfectly crisp, flavorful, and irresistible every single time, here are a few extra tips from the kitchen:
- Cold Butter is Crucial: Always ensure your butter is very cold and cut into small pieces before adding it to the food processor. Cold butter prevents the dough from becoming greasy and helps create pockets of steam during baking. These steam pockets are what contribute to the desired flaky, tender, and crisp texture of the cracker.
- Don’t Overwork the Dough: When pulsing the dough in the food processor, stop as soon as it forms a cohesive ball. Overworking the dough can develop the gluten too much, resulting in tough, chewy crackers rather than the light and crisp texture we’re aiming for. Less is more when it comes to mixing this dough.
- Achieve Even Thickness: When rolling out the dough, strive for as consistent a thickness as possible, ideally around 1/8-inch. This uniformity is vital for ensuring that all your crackers bake evenly. If some parts of the dough are thicker than others, you’ll end up with some crackers burning while others remain soft or undercooked.
- Parchment Paper is Your Best Friend: Lining your baking sheet with parchment paper is non-negotiable for this recipe. It not only prevents the crackers from sticking (saving you from frustration and broken crackers) but also makes cleanup incredibly easy, allowing you more time to enjoy your delicious creations.
- Monitor Baking Closely: Ovens can vary significantly, so the 12-15 minute baking time provided is a guideline. Start checking your crackers around the 10-minute mark. You want them to be beautifully golden brown around the edges and crisp. They will continue to crisp up slightly as they cool, so don’t wait for them to be rock hard in the oven.
- Cool Completely: Allow the crackers to cool completely on the baking sheet after removing them from the oven. This cooling process is essential for them to achieve their full crispness and helps prevent them from becoming soft when stored.
Storage Best Practices
These crackers are truly best enjoyed fresh, ideally on the day they are baked, when their crispness and flavor are at their peak. However, if you find yourself with a miraculous quantity of leftovers:
- Airtight Container: Store them in an airtight container at room temperature. This will help protect them from moisture and keep them fresh for up to 3-5 days. Avoid refrigerating, as this can introduce moisture and make them soft.
- Reviving Crispness: If your crackers have softened slightly over time, don’t despair! You can often revive their crispness by spreading them in a single layer on a baking sheet and popping them into a preheated 250°F (120°C) oven for 5-10 minutes. Let them cool completely again after this brief reheat, and they should regain much of their initial crunch.
Spicy Cheese Cracker Recipe
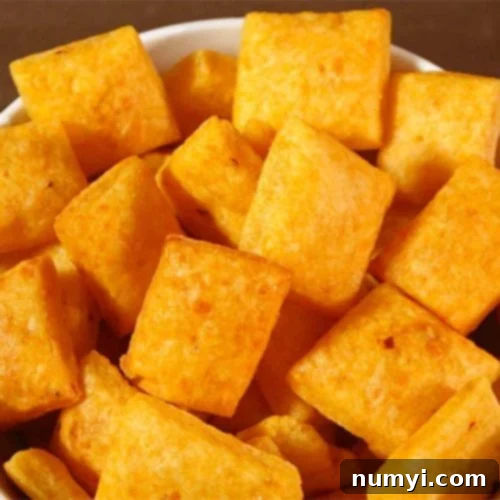
Spicy Cheese Crackers
Print
Pin
Rate
Ingredients
- 6 oz Sharp Cheddar Cheese shredded (from a block for best results)
- 1/4 Cup Unsalted Butter, cut into small pieces
- 3/4 Cup All-Purpose Flour
- 1/2 Teaspoon Kosher Salt
- 1/2 Teaspoon Red Pepper Flakes (adjust to taste, or omit for mild)
- 1/4 Teaspoon Garlic Powder
- 1 Tablespoon Milk (plus more as needed)
Instructions
-
Preheat your oven to 350 degrees F (175 C). Line a large baking sheet with parchment paper.
-
Shred the sharp cheddar cheese from a block (do not use pre-shredded) directly into the bowl of a food processor.
-
Add the cold butter (cut into pieces), all-purpose flour, kosher salt, red pepper flakes (if using), and garlic powder to the food processor. Pulse until the mixture resembles coarse crumbs, like wet sand.
-
With the food processor running, gradually add the milk, one tablespoon at a time, until the dough forms a cohesive ball. You might need to add a small additional drizzle of milk (a teaspoon or two) if the dough is too dry. Be careful not to add too much, as this can make the crackers tough.
-
Transfer the dough to a lightly floured surface or a large sheet of parchment paper. Using a rolling pin, roll out the dough evenly to about 1/8-inch thick. Cut the dough into approximately 1-inch squares using a pizza cutter or sharp knife.
-
Carefully place the cut crackers on the prepared baking sheet, leaving a small space (about 1/2 inch) between each. Use a toothpick or small skewer to poke a hole in the center of each cracker; this helps prevent them from puffing up.
-
Bake for 12-15 minutes, or until the crackers are beautifully golden brown and crisp around the edges. Keep a close eye on them during the last few minutes, as they can quickly go from golden to burnt.
-
Remove from the oven and let cool completely on the baking sheet. These homemade cheese crackers are best eaten the day you bake them for optimal crispness. Store any leftovers in an airtight container at room temperature for up to 3-5 days; revive crispness by reheating briefly in a warm oven if needed.
