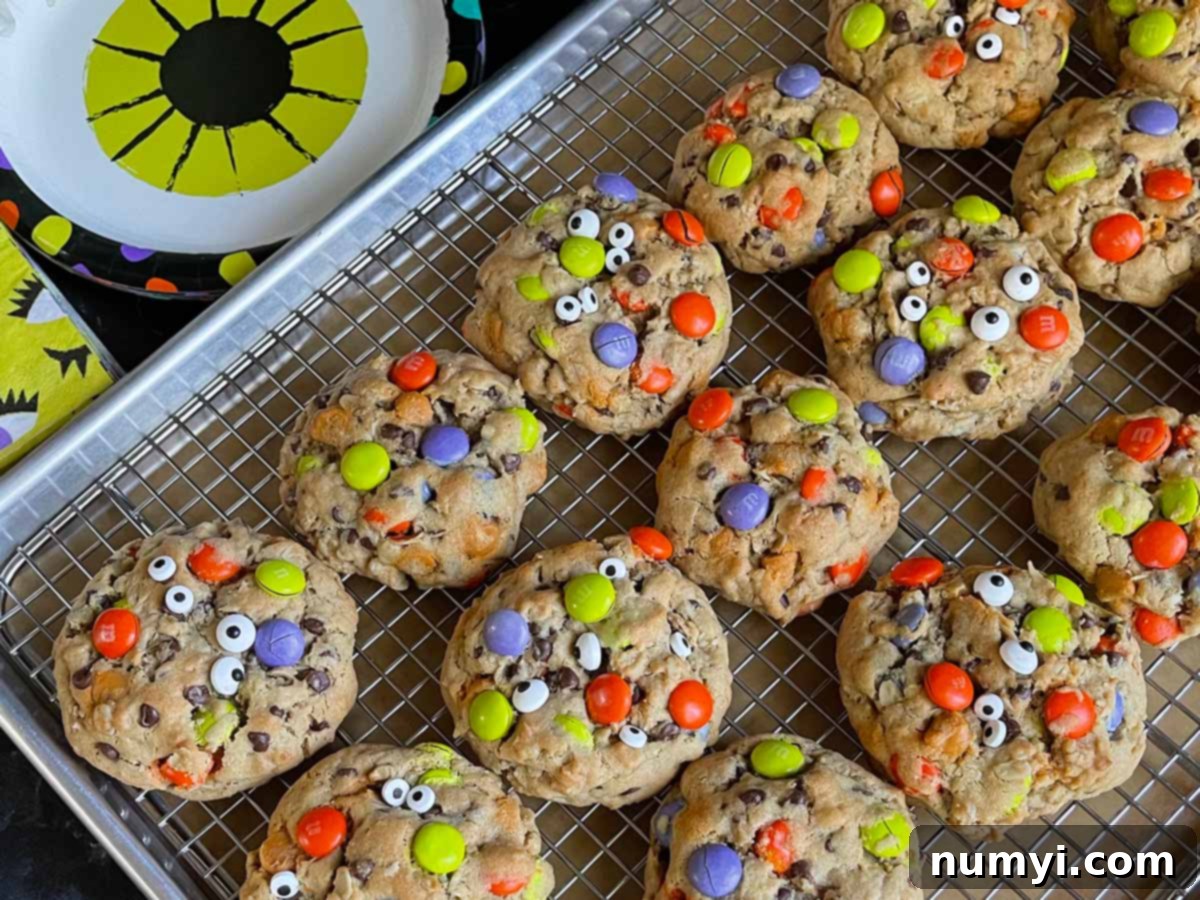
Spooktacularly Delicious: The Ultimate Halloween Monster Eye Cookies Recipe
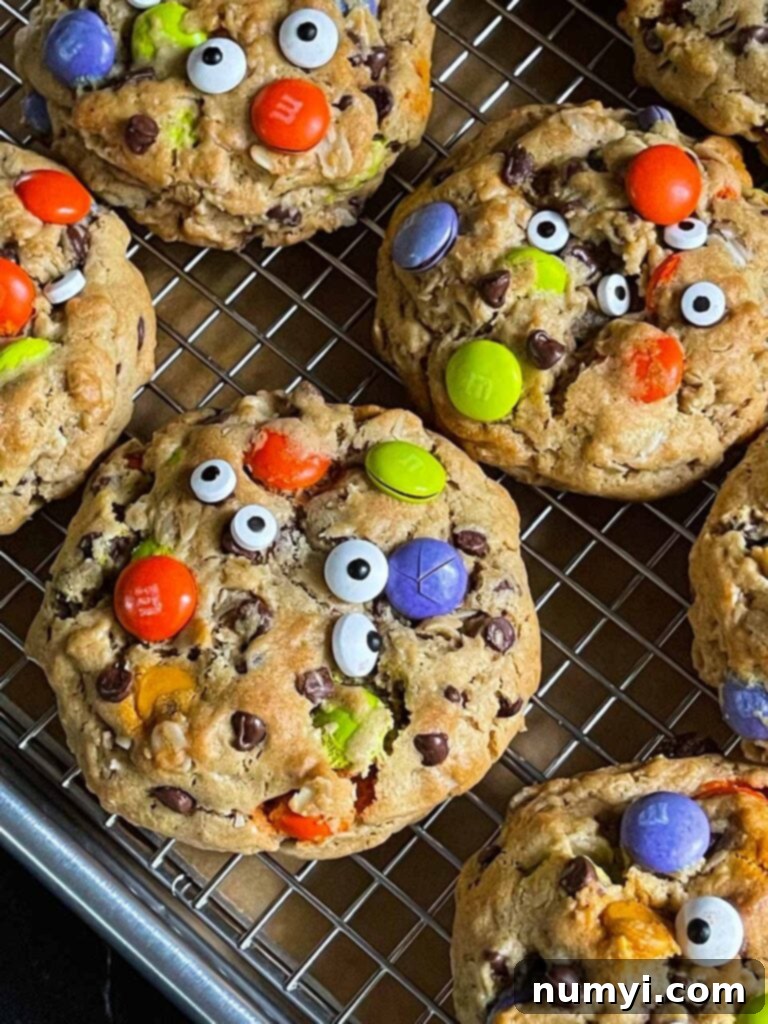
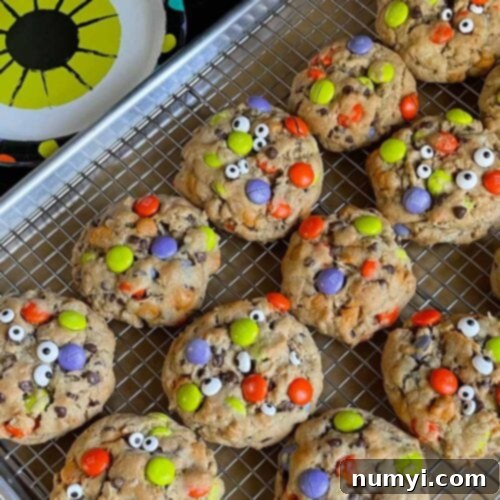
Get ready to unleash some monstrously delicious fun in your kitchen this Halloween with these incredible Monster Eye Cookies! These aren’t just any cookies; they’re soft, delightfully chewy, and wonderfully thick, bursting with a harmonious blend of creamy peanut butter, wholesome oats, vibrant M&M’s, rich chocolate chips, and sweet butterscotch chips. Each bite offers a symphony of textures and flavors, making them an absolute treat for both the eyes and the taste buds. Perfectly adorned with playful candy eyeballs, these cookies are guaranteed to be the star of any Halloween gathering or a cozy, spooky movie night at home.
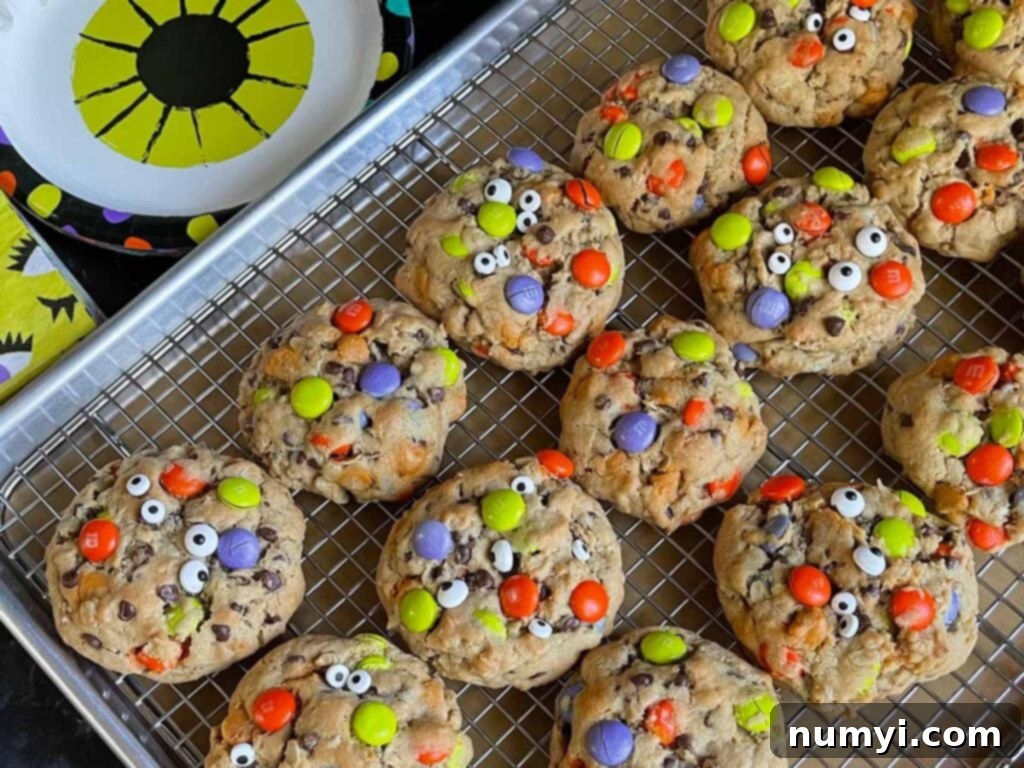
Why These Halloween Monster Eye Cookies Will Be Your New Favorite Treat
There’s something truly magical about classic monster cookies, and we’ve taken that beloved recipe and given it a festive, spooky-cute Halloween makeover. If you’re searching for an easy yet impressive Halloween dessert, look no further! These homemade Halloween cookies are not only adorable with their quirky candy monster eyeballs but also boast an irresistible flavor that will have everyone reaching for more. They’re chock-full of delightful candies, savory peanut butter, and hearty oats, creating a unique texture that’s both satisfying and comforting.
These monster-sized treats are absolutely perfect for Halloween parties, school events, or simply enjoying with your family. Imagine the delight on your guests’ faces as they encounter these fun, ghoulishly grinning cookies – your baking prowess will undoubtedly be admired! They capture the essence of the Halloween spirit with their vibrant colors and playful design, making them an ideal way to celebrate the season.
Beyond their festive appeal, these cookies stand out for their incredible taste and texture. The combination of ingredients creates a cookie that is chewy on the inside with slightly crispy edges, a truly delightful experience. The addition of candy eyeballs elevates them from a simple cookie to a memorable, themed dessert. Whether you’re a seasoned baker or just starting, this recipe is straightforward and yields fantastic results every time.
If you’re a fan of other delightful cookie recipes, you might also enjoy our Classic Hello Dolly Cookies, rich Italian Butterball Cookies, versatile Sugar Cookies with Heavy Cream, elegantly flavored Glazed Maple Shortbread Cookies, and the ever-popular Almond Joy Cookies. But for Halloween, these Monster Eye Cookies truly steal the show!
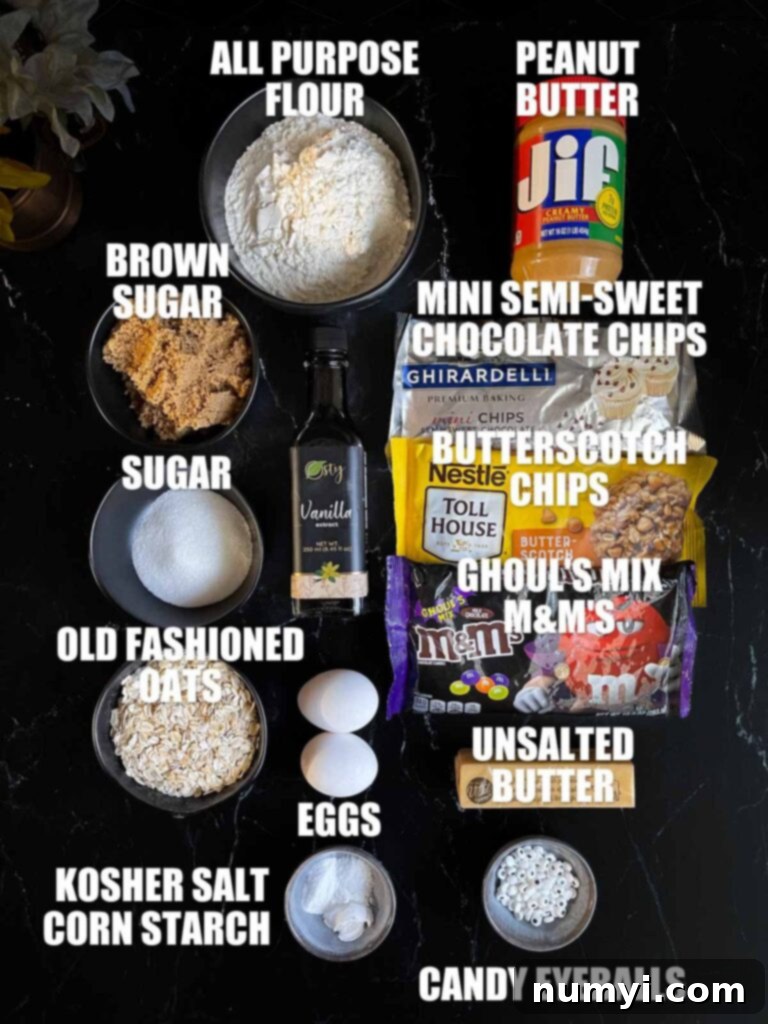
Key Ingredients for Your Monster Eye Cookies
Crafting the perfect Halloween Monster Eye Cookie requires a careful selection of both pantry staples and festive add-ins. Below is a detailed look at the ingredients that make these cookies so special. For a complete list of measurements and step-by-step instructions, please refer to the comprehensive recipe card at the bottom of this page.
- The Hearty Cookie Base – This foundational blend creates the signature soft and chewy texture. You’ll need high-quality all-purpose flour for structure, unsalted butter (at room temperature for optimal creaming), large eggs (also at room temperature for better emulsion), creamy peanut butter (essential for that classic monster cookie flavor and chew), cornstarch for extra tenderness, dark brown sugar and granulated sugar for sweetness and moisture, old-fashioned oats for texture and chewiness, pure vanilla extract to enhance all the flavors, and a pinch of kosher salt to balance the sweetness. The cornstarch is a secret weapon here, contributing to an incredibly soft, melt-in-your-mouth cookie that doesn’t dry out.
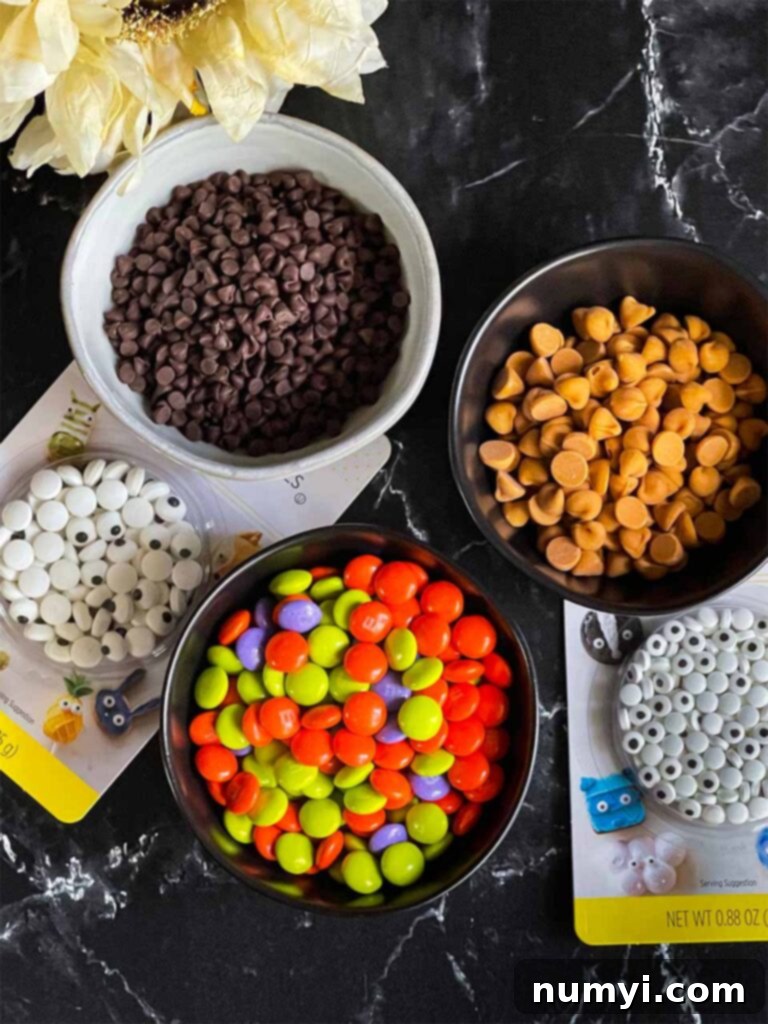
- Fun Candy Add-Ins – These are what truly make these cookies “monster” and “Halloween” themed! We recommend using Ghoul’s Mix M&M’s for their festive colors (purples, greens, oranges, and blacks), mini semi-sweet chocolate chips for pockets of rich chocolate, and butterscotch chips to add a unique, buttery caramel note that complements the peanut butter beautifully. And of course, the star of the show: candy eyeballs! These adorable yet slightly creepy edible decorations bring the monster theme to life. You can typically find candy eyeballs in the baking or cake decorating aisle of most major grocery stores, especially around Halloween.
How to Make Delicious Halloween Monster Eye Cookies
Making these spooky-cute cookies is a fun and rewarding process. Follow these detailed steps to ensure your Monster Eye Cookies come out perfectly soft, chewy, and full of festive charm.
-
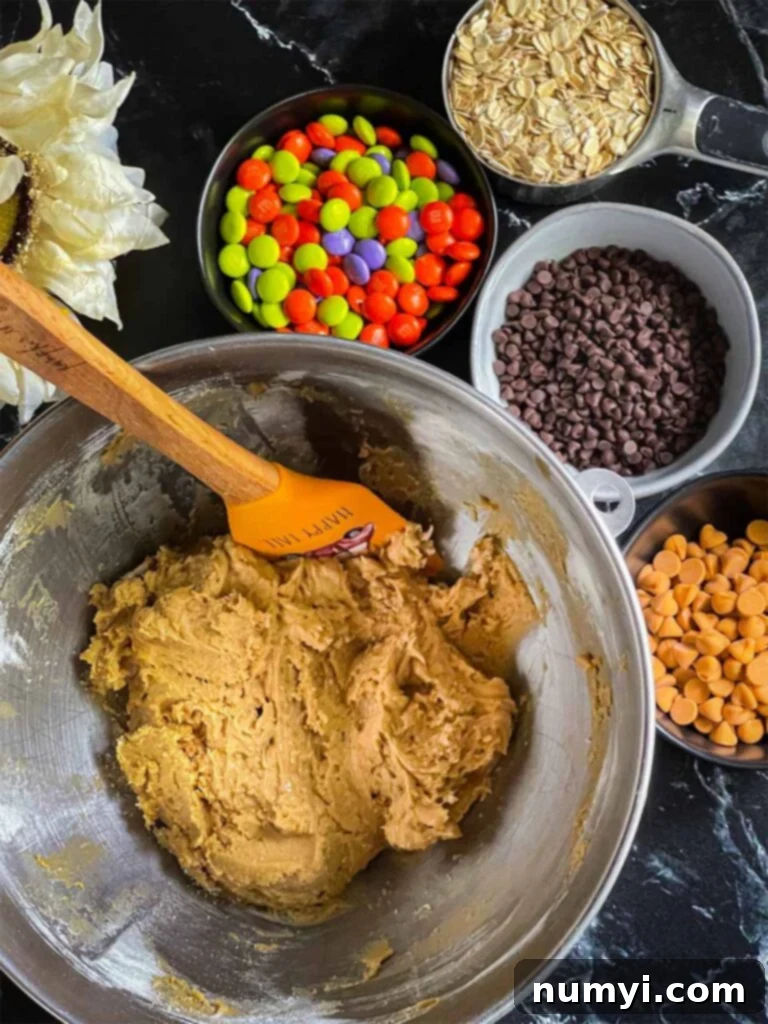
Begin by preparing your dry ingredients. In a large mixing bowl, thoroughly whisk together the all-purpose flour, baking soda, cornstarch, and kosher salt until they are well combined. This ensures an even distribution of leavening agents and seasoning throughout your cookies. Set this bowl aside. In a separate, larger bowl, using an electric mixer, cream together the softened unsalted butter and creamy peanut butter until the mixture is smooth and cohesive. Gradually add the dark brown sugar and granulated sugar, continuing to cream until the mixture becomes light, fluffy, and noticeably paler in color. This step is crucial for incorporating air, which contributes to the cookies’ final texture. Finally, beat in the eggs one at a time, ensuring each is fully incorporated before adding the next, then mix in the vanilla extract until just combined. Scrape down the sides of the bowl to ensure everything is evenly mixed.
-
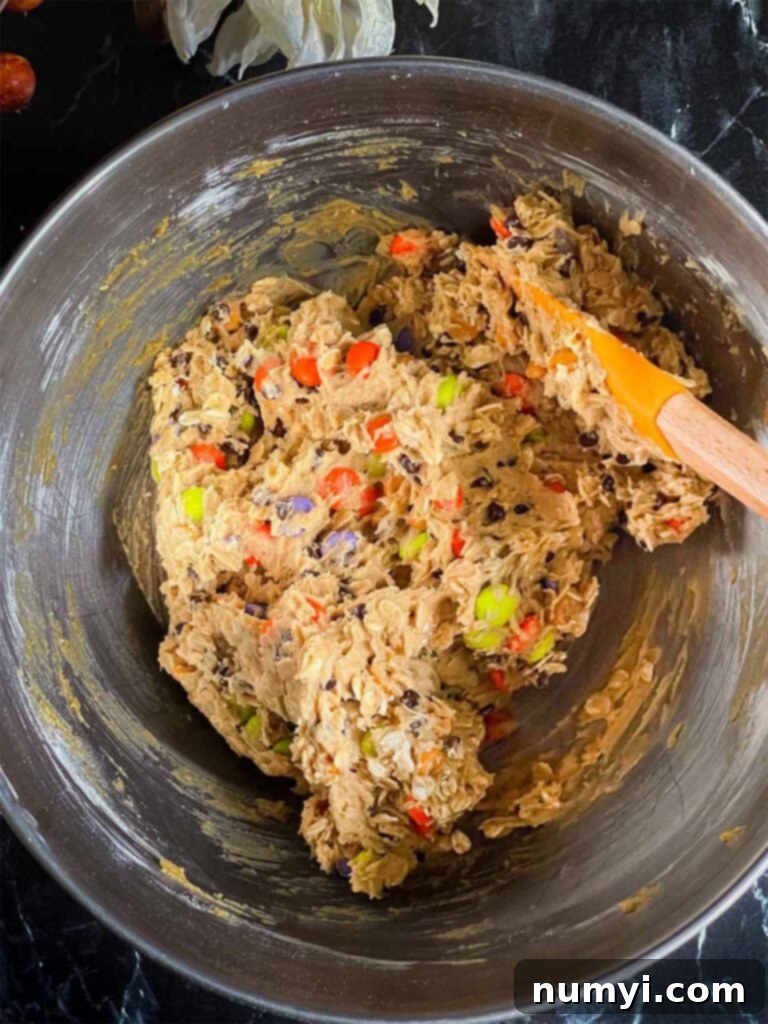
Now, gently stir the whisked dry ingredients into the wet ingredients. Mix until just combined, being careful not to overmix. Overmixing can lead to tougher cookies due to over-development of gluten. Once the base dough is formed, fold in the old-fashioned oats, Ghoul’s Mix M&M’s, mini semi-sweet chocolate chips, and butterscotch chips. Stir just enough to distribute these delightful add-ins evenly throughout the dough. Cover the bowl with plastic wrap and refrigerate the dough for a minimum of 2 hours. Chilling the dough is a crucial step that helps prevent the cookies from spreading too much in the oven, allows the flavors to meld, and results in a thicker, chewier cookie. You can even chill it overnight for an even richer flavor and firmer dough.
-
Once the dough is chilled, preheat your oven to 350 degrees Fahrenheit (175 degrees Celsius). Line two large baking sheets with parchment paper or silicone baking mats. This prevents sticking and ensures even baking. Using a standard 1/4 cup cookie scoop, drop generous balls of dough onto the prepared baking sheets, ensuring they are spaced about 2 to 3 inches apart. This generous size helps create those wonderfully thick and chewy “monster-sized” cookies you’re aiming for. For the best shape, you can gently roll the scooped dough into smooth balls before placing them on the sheet.
-
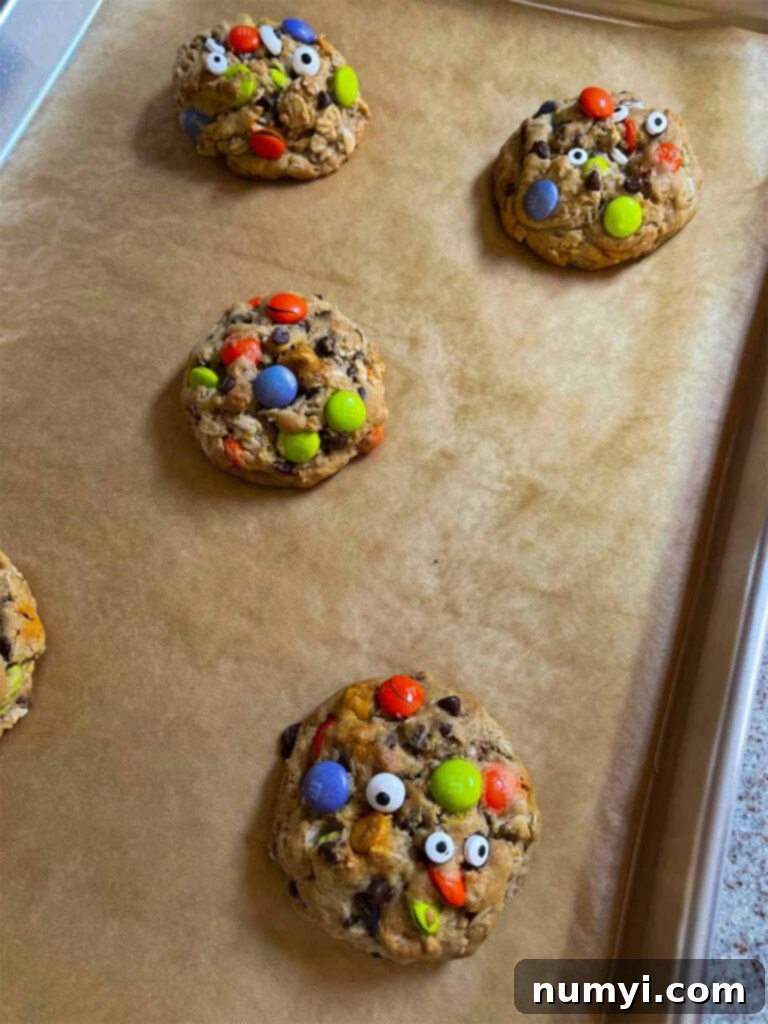
For an even more vibrant and appealing look, gently press a few extra M&M’s onto the tops of the cookie dough balls before baking. While not strictly necessary for flavor, this small detail adds a wonderful pop of color and makes the cookies look even more irresistible right out of the oven. Bake the cookies for approximately 12-14 minutes. Keep a close eye on them; the edges should be lightly golden brown, but the centers may still appear slightly underdone and soft. This is completely normal and desirable, as it ensures your cookies remain soft and chewy after cooling. They will continue to set and firm up as they cool on the baking sheet.
-
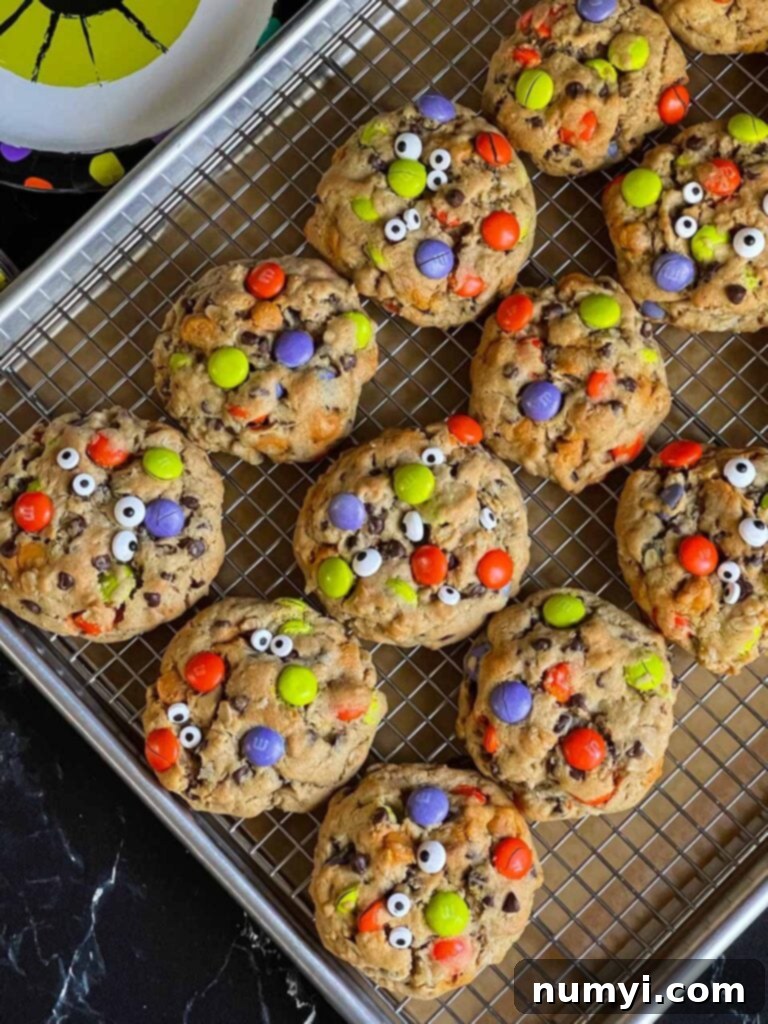
This is where the magic happens! Immediately after you remove the cookies from the oven, while they are still warm and soft, gently press the candy eyeballs into the tops of each cookie. The residual heat from the cookies will help the eyeballs adhere without melting or disfiguring them. This step is optional, but it’s what truly transforms them into adorable “eye cookies”! Allow the cookies to cool on the baking pan for about 5 minutes. This brief resting period helps them set and become firm enough to handle without breaking. After 5 minutes, carefully transfer them to a wire rack to cool completely. Cooling on a wire rack ensures air circulation, preventing soggy bottoms and allowing for a perfectly set cookie.
These sinfully scrumptious treats are a fantastic mash-up of flavors and textures that will leave you craving bite after monstrous bite. Their festive appearance makes them a standout, while their incredible taste ensures they disappear quickly!
Expert Tips for Perfect Monster Eye Cookies
Achieving bakery-quality Halloween Monster Eye Cookies is easy with a few simple tricks. Keep these tips in mind to ensure your cookies turn out perfectly every time:
- Measure Your Flour Accurately: Precision in baking is key, especially with flour. To measure correctly, aerate your flour by fluffing it with a fork or spoon. Then, gently spoon the flour into your measuring cup and level it off with a straight edge, such as the back of a knife. Avoid scooping directly from the bag, as this can compact the flour and lead to using too much, resulting in dry, dense cookies.
- Choose the Right Peanut Butter: For the best monster cookie experience, we highly recommend using regular, creamy peanut butter brands like Jif or Skippy. These brands contain added oils, sugar, and salt that contribute to the ideal texture and flavor profile of monster cookies. All-natural peanut butter, which typically separates and is less consistent, can significantly alter the texture and taste, potentially making your cookies too oily or crumbly.
- Do Not Overbake: This is perhaps the most crucial tip for achieving soft and chewy cookies. Monster cookies are best when slightly underdone in the center. The edges should be just set and lightly golden. Removing them from the oven at this stage will ensure they remain wonderfully soft and gooey, rather than turning dry and crumbly.
- For a Crispier Cookie: If you prefer a cookie with a bit more crunch, simply bake them for an additional 1-2 minutes. Keep a close watch, as ovens vary, and even a minute can make a big difference in crispiness.
- Remember Post-Baking Carryover Cooking: Even after you pull the cookies from the oven, they continue to cook from residual heat while resting on the hot baking pan. This “carryover cooking” is why we aim for a slightly underbaked center. Allow them to cool on the baking sheet for the recommended time before transferring to a wire rack.
- Add Candy Eyes Post-Baking: We strongly advise against adding the candy eyeballs before baking. The high oven heat can cause them to melt, disfigure, or turn an unappealing brown color, ruining their charming appearance. Always press them onto the warm cookies immediately after baking.
- Ensuring Eye Adhesion: To help the candy monster eyes stick perfectly, try placing a few extra chocolate chips on top of each dough ball before baking. When you remove the cookies from the oven, press the candy eyeballs onto these warm, slightly melted chocolate chips. The chocolate acts as a natural “glue” as it cools and sets.
- Room Temperature Ingredients: Always ensure your butter and eggs are at room temperature. This allows them to cream together more easily, creating a smoother, more emulsified batter that traps air better, leading to a lighter, more evenly textured cookie.
- Chilling the Dough is Essential: Don’t skip the refrigeration step! Chilling the dough not only prevents the cookies from spreading excessively but also deepens the flavors, resulting in a more delicious and well-textured cookie.
Creative Variations for Your Monster Cookies
Monster cookies are incredibly versatile, making them one of the best cookie bases for adapting to any holiday or special occasion. Feel free to get creative with these variations:
- Seasonal Color Swaps: Easily change the theme of your monster cookies for any holiday by simply swapping out the M&M’s for seasonal colors. Think red and green for Christmas, pastels for Easter, red, white, and blue for the 4th of July, or pink and red for Valentine’s Day. This makes them a year-round favorite!
- Add Colorful Sprinkles: Enhance the festive look by adding a generous amount of colored sprinkles to the tops of the cookies before baking, or even after, if you prefer a fresh pop of color. Nonpareils, jimmies, or sanding sugar in coordinating colors can add extra visual appeal and a slight crunch.
- Utilize Leftover Halloween Candy: This recipe is fantastic for using up that mountain of leftover Halloween candy! Chop up candy bars like Snickers, Reese’s Peanut Butter Cups (beyond just the pieces!), Twix, or Kit Kats. You could also add Whoppers, toffee bits, or even crushed pretzels for a salty-sweet crunch. Just be sure to chop them into small, manageable pieces to distribute evenly throughout the dough.
- Mini M&M’s for Texture: While Ghoul’s Mix M&M’s are perfect for the Halloween theme, our personal favorite for these cookies are mini M&M’s. They provide a more even distribution of chocolate and candy shell in every bite. While difficult to find in specific Ghoul’s Mix colors, they are readily available in standard colors and still add a fantastic touch.
- Other Mix-Ins: Don’t limit yourself to just the specified candies! Consider adding white chocolate chips, dark chocolate chunks, chopped nuts like pecans or walnuts, or even dried cranberries or raisins for an extra layer of flavor and texture.
- Flavor Boosters: A tiny pinch of cinnamon or a spoonful of instant espresso powder can subtly enhance the chocolate and peanut butter flavors, adding an unexpected depth.
These chocolate chip crazy-eyed Halloween Monster cookies are more than just a great Halloween treat for parties; they’re also a fun, festive activity and a delicious snack for the family during a scary movie night! Their combination of familiar flavors and a whimsical presentation makes them an instant hit.
So, for your next Halloween party, embrace the spirit of the season with this incredibly fun Halloween cookie recipe. It’s the perfect spooky treat that embodies both charm and deliciousness. The entire family, from the littlest ghouls to the biggest monsters, will absolutely adore these cute monster cookies with all their wonderful Halloween colors and delightfully cute candy eyes. Get ready for smiles and satisfied sweet cravings!
Frequently Asked Questions (FAQs) About Monster Eye Cookies
Have questions about these delightfully spooky Monster Eye Cookies? We’ve got answers to help you master this festive recipe.
Monster cookies are a beloved American classic known for their rich and varied ingredient list. Typically, they are a fantastic combination of creamy peanut butter, wholesome old-fashioned oats, colorful M&M’s, and decadent chocolate chips. Many recipes, like ours, also include other delightful add-ins such as butterscotch chips, shredded coconut, or chopped nuts, which further enhance their flavor and texture. The result is always a remarkably thick, generously sized, and wonderfully chewy cookie!
For monster cookies, old-fashioned rolled oats are your best bet. They retain their structure well during baking, which provides a fantastic, hearty texture and a satisfying chewiness to the cookies. Quick oats or instant oats, being smaller and thinner, tend to absorb more moisture and can result in a softer cookie with less distinct texture. Steel-cut oats are not suitable for cookies, as they are too coarse and will not cook thoroughly within the baking time, leading to an unpleasantly hard texture.
The key to moist, chewy cookies is careful baking. Every oven can vary, so it’s essential to watch your cookies closely. Remove the cookies from the oven when the very center still looks slightly underdone and soft, and the edges are just set and lightly golden. The cookies will continue to cook and set as they cool on the baking sheet. If your cookies consistently come out dry, try reducing the baking time by 1-2 minutes. An oven thermometer can also help ensure your oven is heating accurately.
Absolutely! This recipe is perfect for making ahead, which is a great convenience for busy schedules or party preparation. You can prepare the cookie dough as instructed, then cover the bowl tightly with plastic wrap and store it in the refrigerator for up to 4 days. When you’re ready to bake, simply scoop and bake as directed.
Once your cookies have cooled completely on a wire rack, transfer them to an airtight container or a resealable bag. Stored at room temperature, they will maintain their freshness and delicious texture for up to 4 days. For best results, you can place a piece of parchment paper between layers of cookies to prevent them from sticking together.
Yes, you can easily freeze monster cookies! For baked cookies, ensure they are completely cool, then place them in an airtight, freezer-safe container or bag for up to 3 months. For cookie dough, which is often preferred for freshness, form the dough into balls as if you were going to bake them. Place these dough balls on a parchment-lined baking sheet and freeze them until they are solid (about 1 hour). Once frozen solid, transfer the dough balls to a freezer-safe bag or container and freeze for up to 3 months. This method allows you to bake fresh cookies whenever a craving strikes!
If baking from frozen dough balls, you have a couple of options. You can thaw them in the refrigerator overnight, then bake as directed in the recipe. You might find they need an additional 1-2 minutes of baking time to achieve the desired doneness. Alternatively, you can thaw the dough balls in the refrigerator for about 2 hours before baking as instructed. Baking from frozen often yields a slightly thicker cookie, which many people love.
More Delicious Cookie Recipes to Explore
If you loved these Halloween Monster Eye Cookies, you’re in for a treat! We have a wide array of other delightful cookie recipes perfect for any occasion, from simple everyday snacks to festive holiday desserts. Expand your baking repertoire with these crowd-pleasing favorites:
Peanut Butter Cup Cookies
Best Chewy Snickerdoodle Cookies
Eggnog Cookies (cut out)
Are you on Pinterest? Click the button below to add this recipe to one of your boards!
Halloween Monster Eye Cookies Recipe
Print
Pin
Rate
Cookie, Dessert
American
2 hours
10 minutes
14 minutes
2 hours
24 minutes
18
284
kcal
Leigh Harris
Ingredients
- 1/2 cup Unsalted butter room temperature
- 1/2 cup Creamy peanut butter
- 3/4 cup Dark brown sugar
- 1/4 cup Granulated sugar
- 2 large Eggs room temperature
- 2 teaspoons Vanilla extract
- 1 teaspoon Baking soda
- 1/2 teaspoon Kosher salt
- 2 teaspoons Cornstarch
- 1 1/2 cups All-purpose flour
- 1 cup Old-fashioned oats
- 1/2 cup Ghoul’s Mix M&M’s candies plus extra for the tops
- 1/2 cup Mini semi-sweet chocolate chips
- 1/2 cup Butterscotch chips
- 1/4 cup Candy eyeballs or more as desired
Instructions
-
In a large bowl, cream together the softened unsalted butter and creamy peanut butter until smooth and well combined.1/2 cup Unsalted butter, 1/2 cup Creamy peanut butter
-
Add the dark brown sugar and granulated sugar to the butter mixture, creaming them together until the mixture is light, fluffy, and noticeably pale in color.3/4 cup Dark brown sugar, 1/4 cup Granulated sugar
-
Beat in the two large eggs one at a time until fully incorporated, then mix in the vanilla extract until just combined. Scrape down the sides of the bowl as needed.2 large Eggs, 2 teaspoons Vanilla extract
-
In a separate, medium-sized bowl, whisk together the baking soda, kosher salt, cornstarch, and all-purpose flour until all dry ingredients are thoroughly combined.1 teaspoon Baking soda, 1/2 teaspoon Kosher salt, 1 1/2 cups All-purpose flour, 2 teaspoons Cornstarch
-
Gradually add the dry ingredients to the wet ingredients, mixing on low speed until just combined. Be careful not to overmix the dough.
-
Gently stir in the old-fashioned oats, Ghoul’s Mix M&M’s, mini semi-sweet chocolate chips, and butterscotch chips until they are evenly distributed throughout the dough. Again, avoid overmixing.1 cup Old-fashioned oats, 1/2 cup Ghoul’s Mix M&M’s candies, 1/2 cup Mini semi-sweet chocolate chips, 1/2 cup Butterscotch chips
-
Cover the bowl containing the cookie dough with plastic wrap and refrigerate for at least 2 hours, or preferably overnight. This chilling step is essential for flavor development and to prevent the cookies from spreading too much during baking.
-
Preheat your oven to 350 degrees F (175 degrees C). Line two large baking sheets with parchment paper or silicone baking mats to prevent sticking and ensure even baking.
-
Drop heaping 1/4 cup-sized balls of dough onto the prepared baking sheets, ensuring they are about 2-3 inches apart to allow for spreading. For the best results and a uniform shape, gently roll the scooped dough into smooth balls before placing them on the sheet.
-
For an extra pop of color and visual appeal, gently press a few extra M&M’s on the top of each cookie dough ball before baking. (This step is optional but highly recommended!)
-
Bake for approximately 12-14 minutes. The cookies may appear slightly undone in the center; this is perfectly normal and desired for a chewy texture. They will continue to set as they cool. Immediately upon removing them from the oven, gently press the candy eyeballs onto each hot cookie.1/4 cup Candy eyeballs
-
Allow the cookies to cool on the baking sheet for at least 5 minutes before carefully transferring them to a wire rack to cool completely. This helps them firm up and prevents them from breaking.
Notes
Freezing Cookie Dough: To freeze the dough for future use, form the cookie dough into balls as instructed. Place them on a parchment-lined baking sheet and freeze for at least 1 hour, or until they are completely solid. Once frozen, transfer the dough balls to a freezer-safe bag or airtight container and store in the freezer for up to 3 months. This way, you can bake fresh cookies whenever you desire!
To Bake From Frozen: When you’re ready to bake the frozen cookie dough, you have a couple of options. You can thaw them in the refrigerator overnight, then bake as directed in the recipe, potentially adding an additional 1-2 minutes to the baking time. Alternatively, you can thaw the dough balls in the fridge for about 2 hours before proceeding with the baking instructions. This flexibility makes them a perfect make-ahead treat!
Originally Published 10/02/2022
