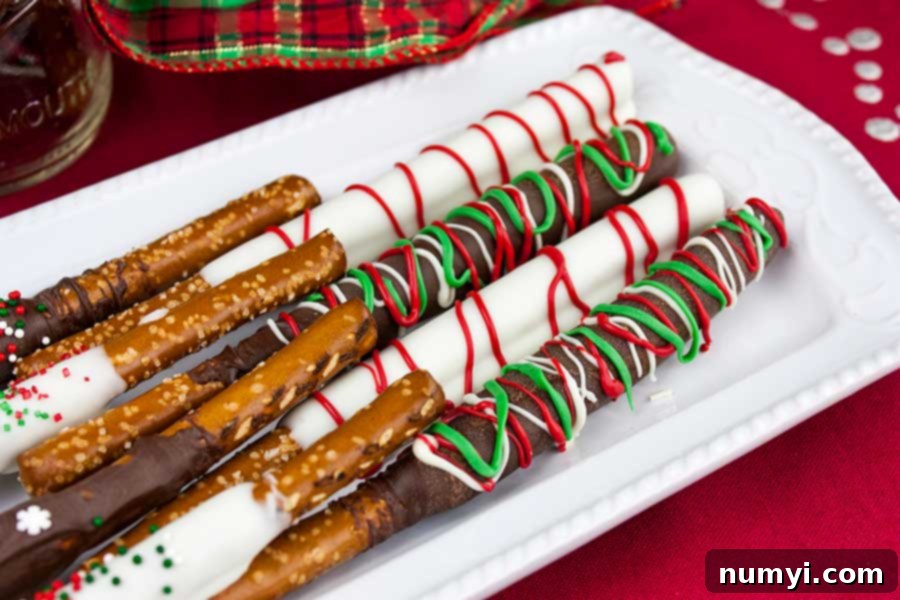
Easy Homemade Chocolate Covered Pretzel Rods: The Ultimate Salty-Sweet Treat Recipe
There’s something undeniably magical about the combination of salty and sweet, and few treats capture this balance as perfectly as chocolate-covered pretzel rods. These delightful confections are incredibly easy and fun to make, making them the ideal project for a cozy afternoon, a festive holiday gathering, or a thoughtful homemade gift. Imagine biting into the crisp, salty crunch of a pretzel rod, followed by a smooth, rich layer of chocolate, all possibly enhanced with colorful sprinkles or delightful drizzles. It’s a symphony of textures and flavors that truly everyone loves!
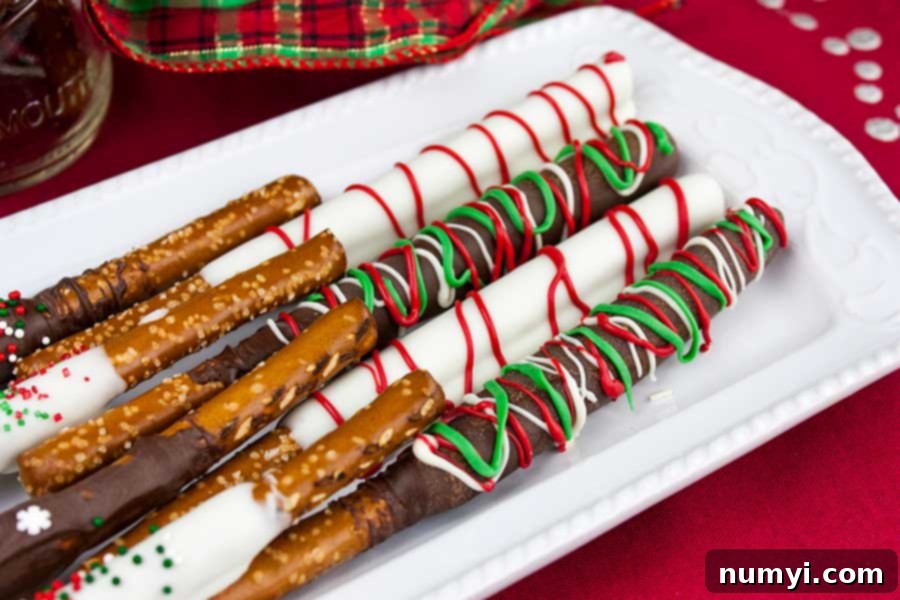
Why You’ll Adore These Chocolate Covered Pretzel Rods
These homemade chocolate-covered pretzel rods offer a delightful blend of simplicity, versatility, and irresistible taste that makes them a favorite for any occasion. Here’s why you’ll absolutely love making and sharing them:
- **Irresistible Flavor Combination:** The classic salty-sweet dynamic is on full display here. The savory crunch of the pretzel perfectly complements the creamy sweetness of the chocolate, creating an addictively delicious treat that appeals to all palates.
- **Budget-Friendly Indulgence:** Why spend a fortune on gourmet store-bought pretzels when you can create a batch of equally impressive (if not better!) treats right in your own kitchen for a fraction of the cost? This recipe is incredibly economical, especially when making larger quantities for parties or gifts.
- **Effortless & Fun for All Ages:** This recipe is famously simple, requiring minimal culinary skills. It’s a fantastic activity for kids and adults alike. Little ones can take charge of the sprinkles and drizzles, fostering creativity and making cherished memories in the kitchen. The dipping process is straightforward and yields impressive results every time.
- **Perfect for Every Occasion:** Whether you’re planning a birthday party, a casual snack at home, a movie night, a baby shower, or looking for charming holiday gifts, these pretzel rods fit the bill. Their customizable nature means they can be adapted to any theme or celebration, adding a personalized touch to your spread.
- **Wonderful Homemade Gifts:** During the holidays, these pretzel rods transform into beautiful, thoughtful gifts for friends, neighbors, teachers, and colleagues. Package them in cellophane bags tied with festive ribbons, or arrange them in decorative tins for a truly special present. They’re a delicious way to spread joy!
If you enjoy making delightful homemade treats, you might also like some of our other favorites such as Peanut Butter Balls, Old Fashioned Peanut Brittle, Butter Pecan Fudge, Ultimate Turtle Brownies Recipe, Peanut Butter Pretzel Bites, and Hello Dolly Cookies.
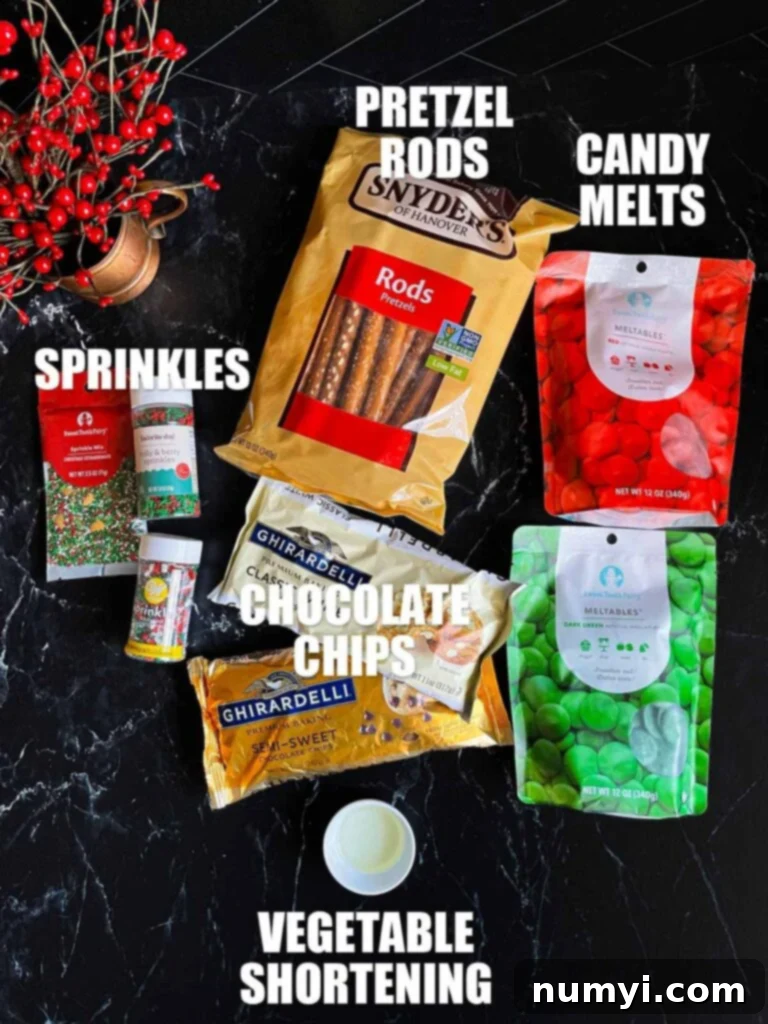
Essential Ingredients for Perfect Pretzel Rods
Crafting these delicious treats requires just a few key components, but choosing the right ones can make all the difference in taste and presentation. Here’s a closer look at what you’ll need:
- Pretzels: The star of the show! You’ll want to use long, round pretzel rods for this recipe. These are typically sold in packages ranging from 12 ounces to larger 25- to 27-ounce canisters, depending on how many you plan to make. Look for sturdy brands like Snyder’s or Clancy’s (Aldi brand), as they are less likely to break during the dipping process. The inherent saltiness of the pretzel rods is crucial, as it provides that perfect contrast to the sweet chocolate. While rods are ideal for their impressive length, you can also experiment with regular pretzel twists or mini pretzels for bite-sized variations.
- Chocolate: The beauty of this recipe is its flexibility when it comes to chocolate. You can use virtually any type you prefer!
- High-Quality Chocolate Bars: Brands like Ghirardelli or Guittard offer a rich, smooth melt and superior flavor. Simply chop them finely before melting.
- Chocolate Chips: Semi-sweet, dark chocolate, milk chocolate, or white chocolate chips all work wonderfully. For optimal smoothness and ease of dipping, especially with chocolate chips, it’s highly recommended to mix them with a small amount of vegetable shortening or a neutral vegetable oil (like canola or coconut oil). This helps achieve a fluid consistency, preventing the chocolate from seizing and making it much easier to coat the pretzels evenly.
- Candy Melts (Melting Wafers): These are specifically designed for melting and coating, offering a wide range of colors and requiring no shortening. They are perfect for achieving vibrant drizzles and coatings without tempering.
- Toppings: This is where you can let your creativity truly shine! The possibilities for toppings are virtually endless and can be customized for any season or occasion. Gather your favorites before you start dipping:
- Sprinkles: Classic rainbow sprinkles, seasonal colors (red and green for Christmas, pastels for Easter, orange and black for Halloween), nonpareils, or sanding sugars.
- Chopped Nuts: Pecans, walnuts, almonds, peanuts, or pistachios add a delightful crunch and nutty flavor.
- Crushed Candies: Mini M&M’s, crushed peppermint candies (especially festive for winter!), toffee bits, or even crushed Oreos.
- Other Fun Additions: Mini marshmallows, mini chocolate chips, shredded coconut, or a drizzle of contrasting colored candy melts for an extra pop.
Crafting Your Delicious Chocolate Covered Pretzel Rods
Making these delightful treats is a straightforward process, but a little preparation goes a long way. Follow these steps for perfect, beautifully coated pretzel rods:
- Prepare Your Workstation: Begin by lining two large baking sheets with parchment paper or wax paper. This prevents the pretzels from sticking and makes cleanup a breeze. Next, arrange all your desired toppings (sprinkles, chopped nuts, etc.) in small, easily accessible bowls. If you plan to use colored candy melts for drizzling, place about 1/2 cup of each color into separate heavy-duty zip-top bags and set them aside. Having everything ready before you start melting the chocolate will ensure a smooth, stress-free process.
- Melt the Chocolate: The easiest and most efficient way to melt chocolate for dipping pretzel rods is by using a tall, somewhat narrow glass or jar. Before you add chocolate, measure a pretzel rod against several of your glasses to find one that allows the rod to be submerged almost entirely. Place two cups of your chosen chocolate chips (semi-sweet, dark, or white) and one tablespoon of vegetable shortening into the glass. Microwave the mixture for 45 seconds. Carefully remove the glass and stir vigorously with a rubber spatula, ensuring you scrape down the sides to incorporate all the melted chocolate. If the chocolate isn’t completely smooth, microwave it in additional 10- to 15-second intervals, stirring thoroughly after each interval, until it reaches a perfectly smooth, dippable consistency. Be careful not to overheat, as chocolate can burn easily.
- Dip and Decorate: Hold a pretzel rod by its dry end and carefully dip it into the melted chocolate. Tilt the glass as needed to cover as much of the pretzel as desired, leaving a small portion at the top for easy handling. Lift the rod out, allowing any excess chocolate to drip back into the glass. Gently scrape the bottom end of the rod against the rim of the glass to remove any remaining drips. Immediately place the dipped pretzel rod on your prepared baking sheet. While the chocolate is still wet, liberally sprinkle your chosen toppings over the coated section. Speed is key here, especially with sprinkles, as the chocolate will start to set quickly.
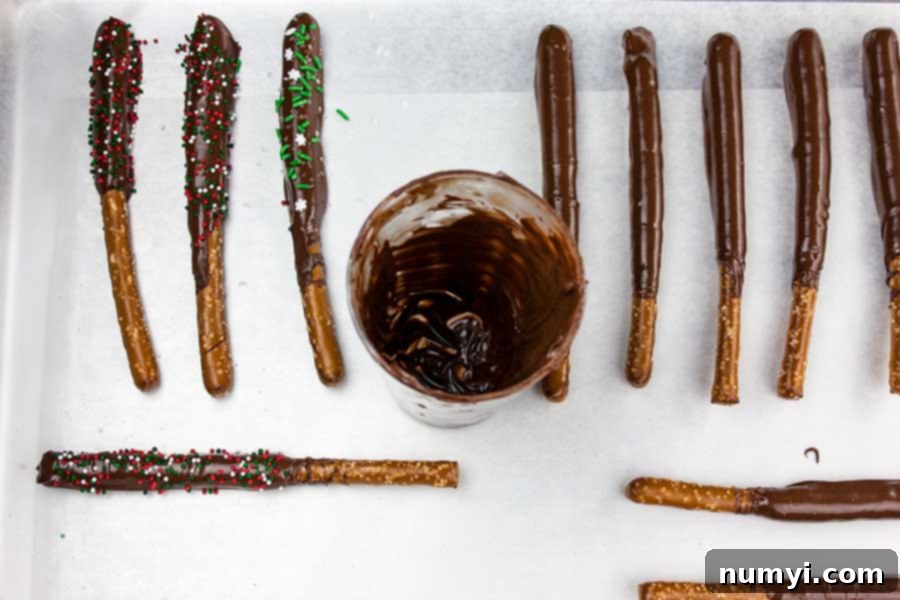
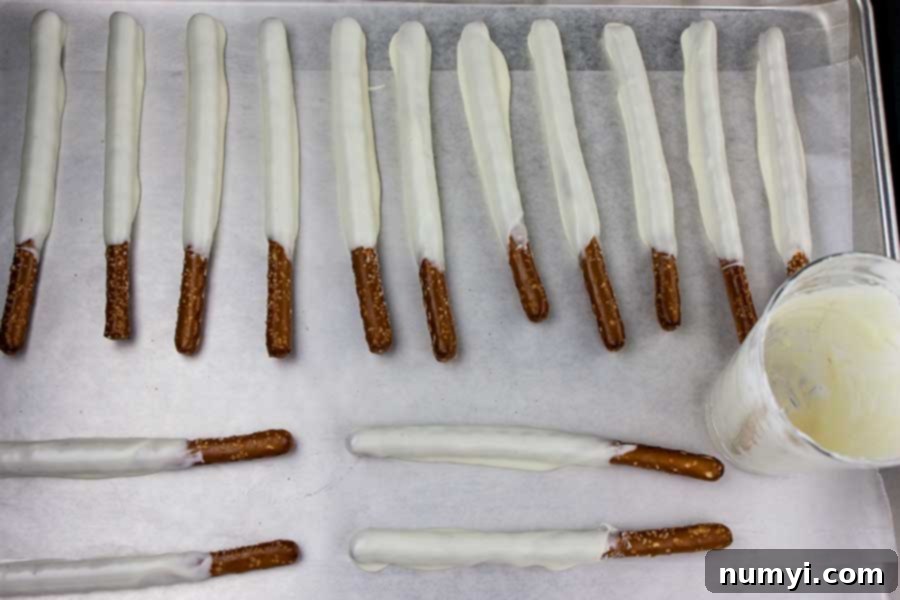
- Timing with Toppings: Remember, if you’re using sprinkles, chopped nuts, or other small toppings, they must be applied immediately after dipping and before the chocolate begins to set. Once the chocolate hardens, your toppings won’t adhere properly. Get creative with your choices – the possibilities for beautiful and delicious combinations are truly endless!
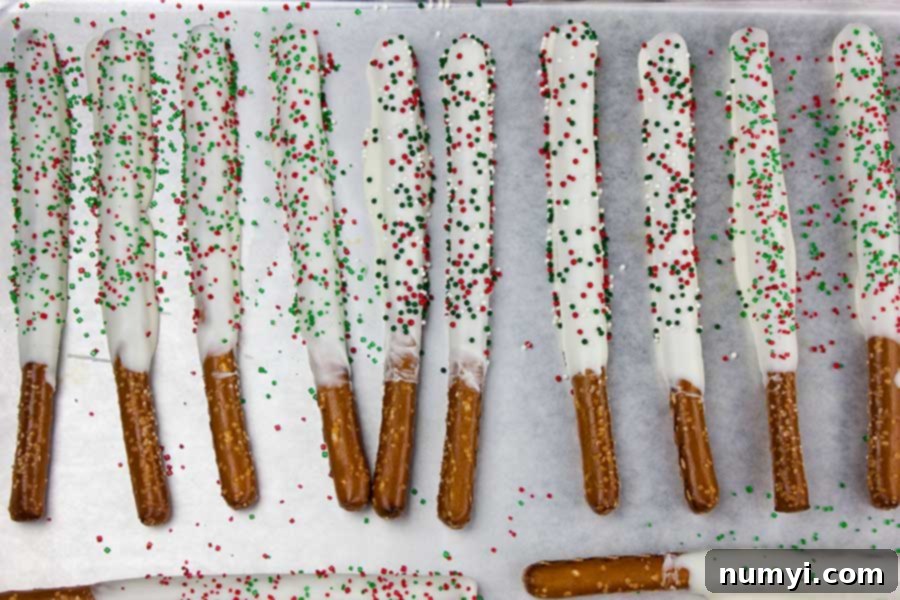
- Adding Drizzles: If you plan to add colorful chocolate drizzles, it’s best to dip all your pretzel rods first and let the main chocolate coating set slightly. Once ready for drizzling, retrieve your zip-top bags with the colored candy melts. Microwave each bag for about 20-25 seconds (start with less time if your microwave is powerful). Squish the candy melts around in the bag until they are thoroughly melted and smooth. Snip a tiny cut in one corner of each bag – start with a very small cut, you can always make it bigger! Then, artfully drizzle the melted candy over your chocolate-covered pretzels, creating beautiful patterns.
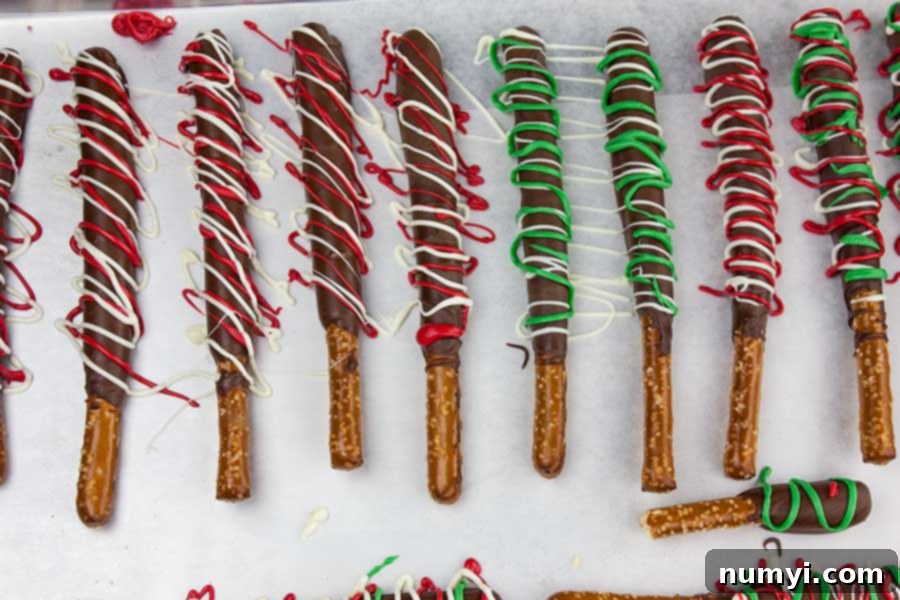
- Allow to Set and Store: Once decorated, let the chocolate-covered pretzel rods sit at room temperature or in the refrigerator (for faster setting) until the chocolate is completely firm. Once set, they are ready to be enjoyed, packaged for gifts, or stored for later. For gifting, clear cellophane bags tied with a pretty ribbon are always a simple and elegant choice. For personal enjoyment, store them in an airtight container to maintain freshness.
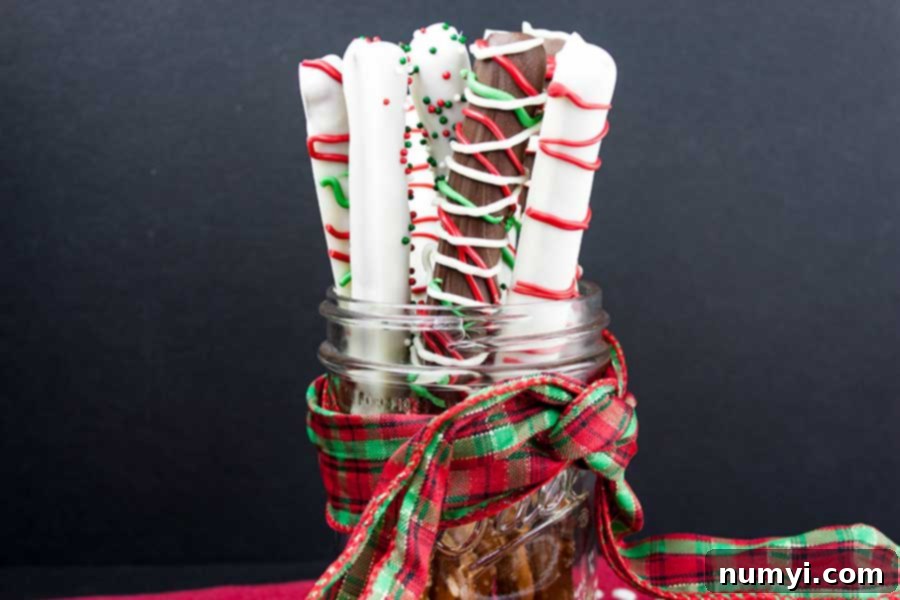
These easy, fun treats are perfect for getting the whole family involved. Kids especially love going crazy with the sprinkles or carefully drizzling colorful candy melts over the tops. It’s a wonderful way to bond and create something delicious together!
Alternative Melting Method: How to Melt Chocolate in a Crock Pot
If you’re making a large batch of chocolate-covered pretzels or prefer a more hands-off approach to melting and keeping your chocolate warm and dippable, a crock pot can be an excellent tool. Here’s how to do it:
Start by filling tall, heat-safe glasses or jars (such as mason jars) with your chocolate chips or candy melts. Place these jars directly into the crock pot. Carefully pour hot water into the crock pot, ensuring the water level comes about halfway up the sides of your jars. Be extremely cautious not to splash any water into the chocolate, as even a tiny drop can cause the chocolate to seize and become unusable. Set your crock pot to the “High” setting. Once the chocolate begins to melt and becomes smooth, stir it with a long-handled spoon to ensure an even consistency. Then, reduce the crock pot temperature to “Low” to keep the chocolate perfectly melted and warm for continuous dipping.
Clever Ways to Dry Chocolate Covered Pretzels without a Flat Side
Achieving a perfectly rounded, flat-side-free finish on your chocolate-covered pretzel rods can be a bit tricky if you’re just laying them flat. Here are a few ingenious methods to help them dry beautifully, ensuring an even coating all around:
- Wire Cooling Rack Method: After dipping, gently stand each pretzel rod upright by inserting its undipped end into the holes of a wire cooling rack. This allows air to circulate around the entire chocolate-covered surface, promoting even drying and preventing flat spots.
- Cereal Box Stand: Repurpose an empty cereal box or similar cardboard box. Using a sharp knife (adult supervision for kids!), carefully cut small “X” shapes into the top of the box. Then, use your finger to gently push through the “X” to create a small hole. These holes will securely hold your pretzel rods upright as the chocolate sets.
- Styrofoam Egg Carton Hack: Turn an empty styrofoam egg carton upside down. Poke holes into the top of each egg slot using a skewer or a sturdy toothpick. These improvised slots are perfect for standing the pretzel rods upright to dry.
- Tall Glass or Mug Method: If you only have a few rods, simply stand them upright in a tall glass or mug that is deep enough to support them without tipping. This is a quick and easy solution for smaller batches.
Expert Tips for Perfect Pretzel Rods Every Time
Making chocolate-covered pretzel rods is easy, but a few simple tips can elevate your treats from good to spectacular:
- Preparation is Paramount: As mentioned, setting up your workstation before you begin melting chocolate is crucial. Have your parchment-lined baking sheets ready, all your sprinkles and toppings in accessible bowls, and any candy melts for drizzling prepped in zip-top bags. This organized approach will keep the process smooth and prevent rushed, messy results.
- Mastering Chocolate Melting: Whether you use a microwave or a double boiler, gentle heating is key.
- **Microwave:** Always use short intervals (15-30 seconds), stirring thoroughly between each one. Chocolate chips may retain their shape even when fully melted, so stir to check consistency. Overheating can cause chocolate to seize or burn, making it thick, clumpy, and unusable.
- **Double Boiler:** If you prefer a double boiler, ensure the bowl with chocolate does not touch the simmering water below. The steam should be sufficient to melt the chocolate evenly. Stir frequently.
- Consider Melting Wafers for Ease: While chocolate chips work well with a bit of shortening, almond bark or chocolate melting wafers are specifically designed for easy melting and smooth coating without needing extra fat. They are a great option for beginners or when you need vibrant colors.
- Experiment with Chocolate Types: Don’t limit yourself to just one kind of chocolate! Dark chocolate provides a sophisticated bitterness, semi-sweet offers a balanced flavor, milk chocolate is rich and creamy, and white chocolate provides a sweet, vanilla-like base. You can even use different chocolates on one pretzel rod for a striped effect.
- Seasonal & Themed Customization: Tailor your pretzel rods to any holiday or event. Use pastel sprinkles for Easter, red, white, and blue for the 4th of July, spooky-themed candies for Halloween, or festive red and green for Christmas. The possibilities are endless for making them fit any party theme.
- Flavor Enhancements: Add a drop or two of food-grade extract to your melted chocolate for an extra flavor dimension. Peppermint, almond, or orange extracts can create unique and delicious variations.
- Cooling & Setting: Allow ample time for the chocolate to set completely before handling or packaging. If your kitchen is warm, a short stint in the refrigerator (about 10-15 minutes) can speed up the setting process. Just don’t leave them in too long, as condensation can form.
- Gifting Presentation: For gifting, place 2-3 pretzel rods in clear cellophane bags and tie with a festive ribbon. You can also arrange an assortment of different flavors and colors in a decorative box or tin.
Frequently Asked Questions (FAQs)
Store your chocolate-covered pretzel rods in an airtight container at room temperature for up to one week. Keeping them in a cool, dry place away from direct sunlight will prevent the chocolate from melting or blooming. Layer them between sheets of parchment paper if stacking to prevent sticking.
While technically possible, freezing chocolate-covered pretzel rods is generally not recommended. The texture of the pretzels can become soft and stale after thawing, losing their desirable crispness. Additionally, chocolate tends to “bloom” (develop a white, powdery coating) when frozen and thawed due to changes in fat crystals, which, while harmless, can affect their appearance.
When stored properly in an airtight container at room temperature, homemade chocolate-covered pretzel rods typically stay fresh for about 5 to 7 days. The pretzel can start to lose its crispness over a longer period, but the chocolate will remain good.
Absolutely! Many brands offer excellent gluten-free pretzel rods that can be used interchangeably in this recipe. Just ensure they are sturdy enough to withstand dipping. The chocolate and toppings are naturally gluten-free, making this a great treat for those with dietary restrictions.
Chocolate bloom is caused by either fat crystals rising to the surface (fat bloom) or sugar crystals crystallizing (sugar bloom). Fat bloom often happens due to temperature fluctuations, causing the cocoa butter to separate and form a white film. Sugar bloom occurs when moisture comes into contact with chocolate, dissolving sugar, which then recrystallizes on the surface. To prevent bloom, store chocolate-covered pretzels in a consistent, cool, dry environment, and avoid drastic temperature changes. Freezing often leads to bloom.
More Delicious Pretzel Treat Recipes to Try
If you love the salty crunch of pretzels, then you’re in for a treat with these other fantastic recipes that incorporate pretzels in creative and delicious ways:
Butter Toffee Pretzels
Honey Mustard Pretzels
Salted Butterscotch Pretzel Cookies
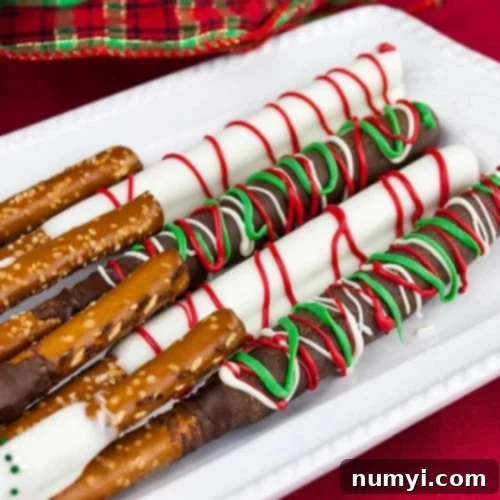
Chocolate Covered Pretzel Rods Recipe
Print
Pin
Rate
Ingredients
- 16 oz pretzel rods
- 12 ounces chocolate chips semisweet, dark or white chocolate or candy melts
- 1-2 tablespoons vegetable shortening
- Sprinkles
Instructions
-
Line two large baking sheets with wax or parchment paper.
-
Set up your workstation with all the sprinkles you are going to use. Place about 1/2 cup of colored melting candy (for the drizzle) in heavy-duty zip-top bags.
-
Microwave 2 cups of chocolate chips and vegetable shortening in a tall glass for 45 seconds. Stir.
The morsels may retain some of their original shapes. If necessary, microwave for additional 10- to 15-second intervals, stirring just until morsels are melted.
12 ounces chocolate chips, 1-2 tablespoons vegetable shortening -
Dip the pretzel rods into melted chocolate, tilting the glass to easily cover as much of the pretzel as you want.
Use the side and rim of the glass to remove excess. Place on prepared baking sheet. Sprinkle with sprinkles.
16 oz pretzel rods, Sprinkles -
Or microwave the candy melts in the zip-top bags for about 20-25 seconds, squish the candy around until melted and smooth.
Cut a tiny cut corner from each of the bags and drizzle.
-
Let set up. Store in an air-tight container.
Notes
Storing – Place them in an air-tight container or bag and store them at room temperature for about 1 week.
