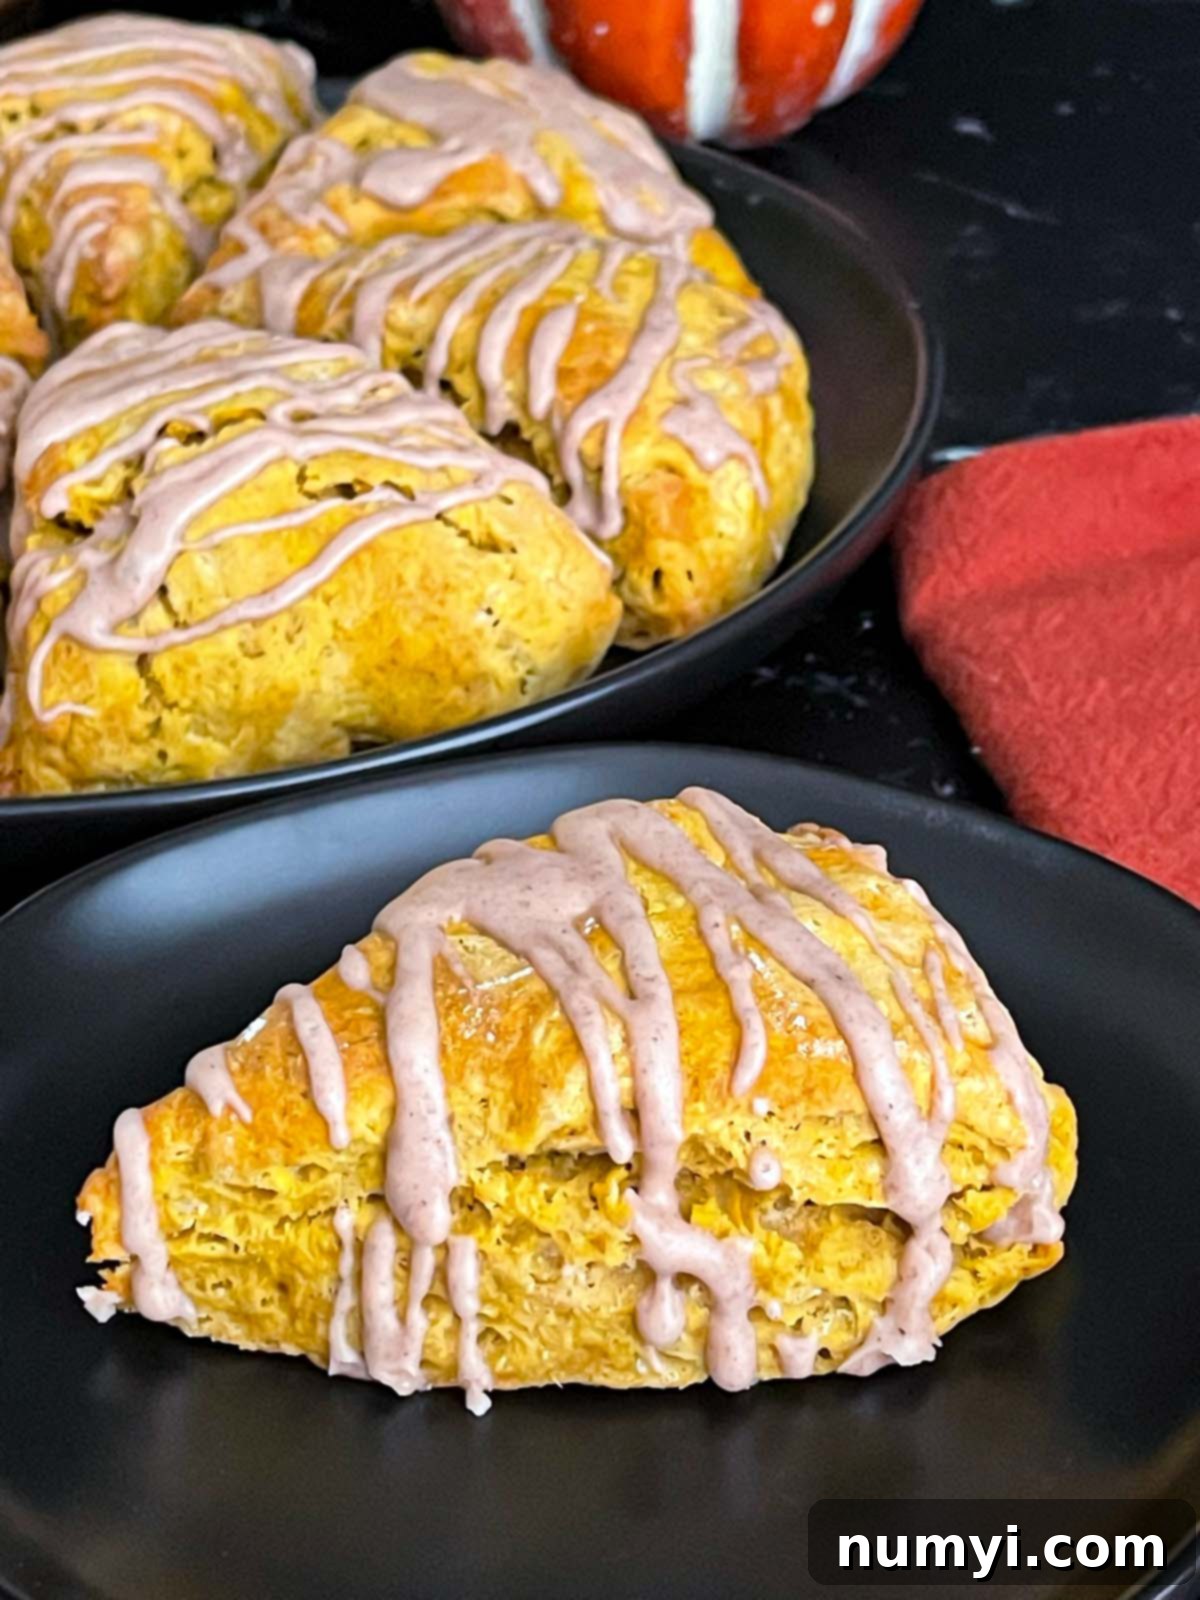
Deliciously Flaky Pumpkin Scones: Your Ultimate Guide to Warm, Spiced Perfection
There’s nothing quite like the comforting aroma of freshly baked goods filling your home, and these tender, flaky pumpkin scones deliver that cozy feeling in every single bite. Crafted with real pumpkin puree and a generous blend of classic pumpkin pie spices, they offer a perfect balance of warmth and sweetness. Imagine a scone that’s wonderfully moist on the inside, with a delicate, slightly crisp exterior, bursting with all the nostalgic flavors of autumn. These homemade pumpkin scones are an absolute delight, whether enjoyed on their own or paired with your favorite hot cup of coffee or a soothing mug of tea. They are an ideal treat for breakfast, brunch, or a delightful afternoon snack, especially as the cooler weather sets in.
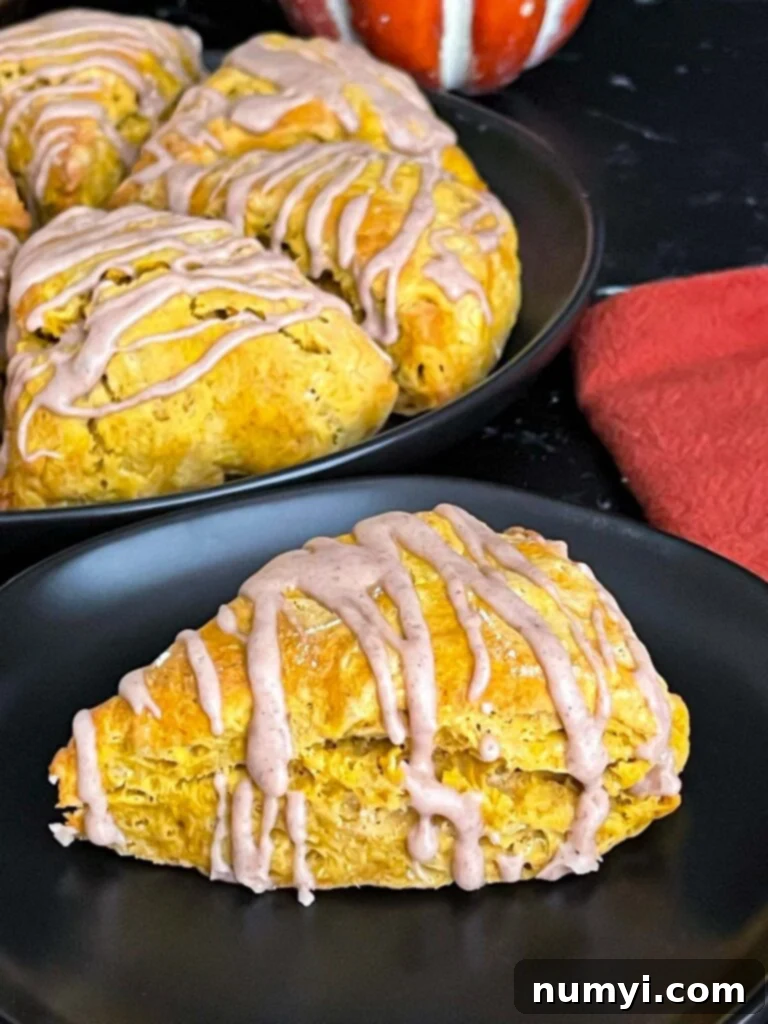
Why You’ll Fall in Love with This Pumpkin Scone Recipe
This isn’t just another scone recipe; it’s a culinary journey into the heart of fall baking. We’ve perfected a method that makes creating these pumpkin delights surprisingly easy, even for novice bakers. Here’s why these truly are the best pumpkin scones:
- Effortlessly Simple: Despite their gourmet appeal, these scones come together with straightforward steps and readily available ingredients. You don’t need to be a pastry chef to achieve professional-looking and tasting results.
- Unrivaled Texture: Each scone boasts an incredible texture profile. They are exquisitely tender and moist on the inside, a result of the rich pumpkin puree and heavy cream, while the carefully prepared dough ensures a distinctly flaky crumb. The exterior bakes to a beautiful golden-brown, offering a satisfyingly subtle crispness that contrasts beautifully with the soft interior.
- Cozy Autumn Flavors: Every bite is a celebration of fall. Infused with pure pumpkin and a harmonious blend of warming spices like cinnamon, nutmeg, ginger, and cloves, these scones encapsulate the very essence of the season. It’s like a warm hug in food form!
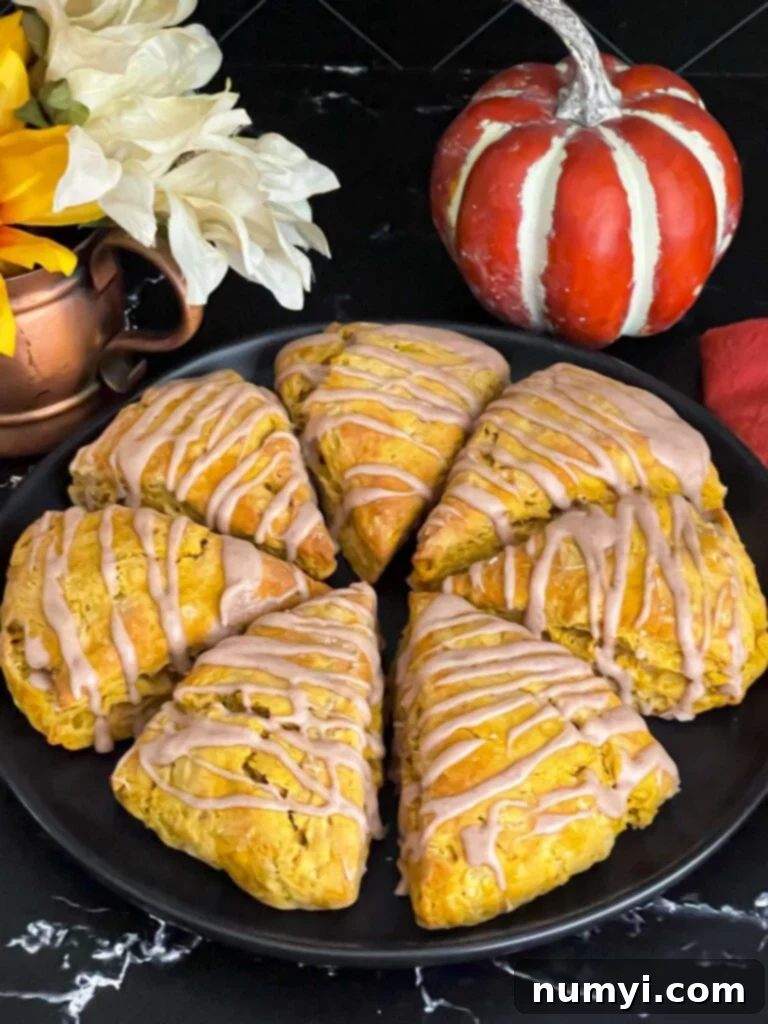
- Versatile Indulgence: These scones are absolutely delicious whether enjoyed plain, showcasing their inherent pumpkin goodness, or elevated with a drizzle of our simple, homemade pumpkin spice glaze. The glaze adds an extra layer of sweetness and spice, making them even more irresistible.
- Perfect for Any Occasion: From a special weekend brunch to a cozy weekday breakfast, or as a delightful treat for guests, these pumpkin scones are always a crowd-pleaser. They also make wonderful edible gifts during the holiday season.
If you’re a pumpkin enthusiast, be sure to explore some of our other delectable pumpkin creations: Baked Pumpkin Donuts, Pumpkin Spice Latte Biscotti, Pumpkin Cheesecake, Gingersnap Crust Pumpkin Pie, and Bakery Style Pumpkin Muffins.
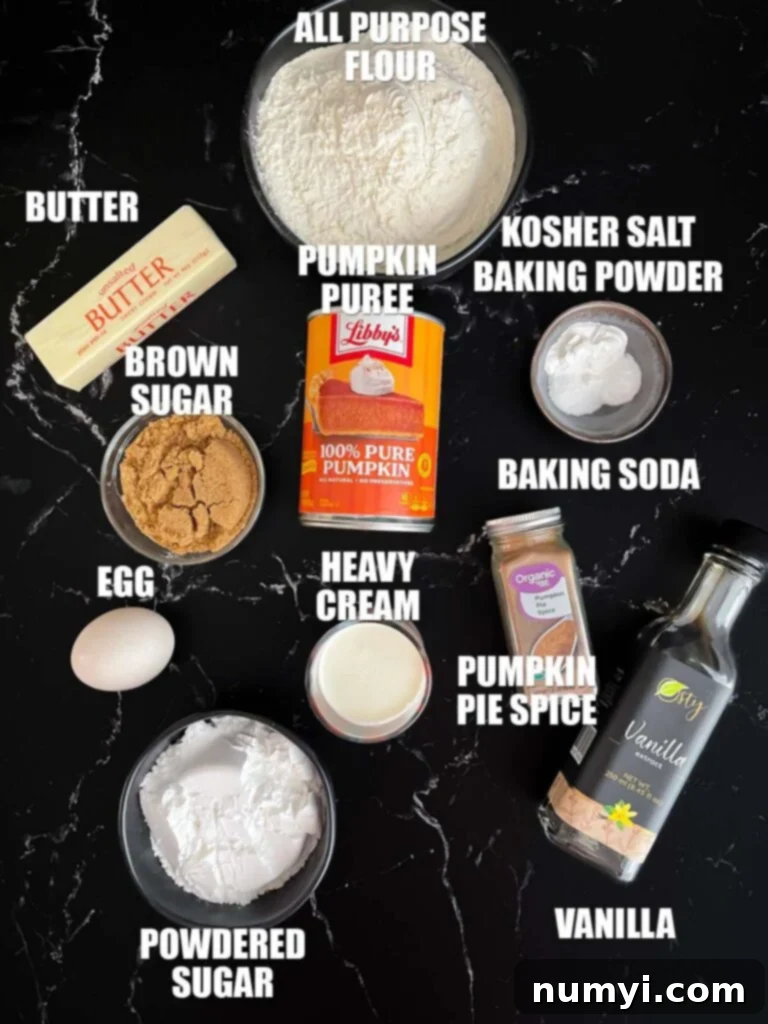
For a complete list of ingredients, precise measurements, and step-by-step instructions, please refer to the detailed recipe card at the bottom of this post.
How to Make Flaky Homemade Pumpkin Scones
-
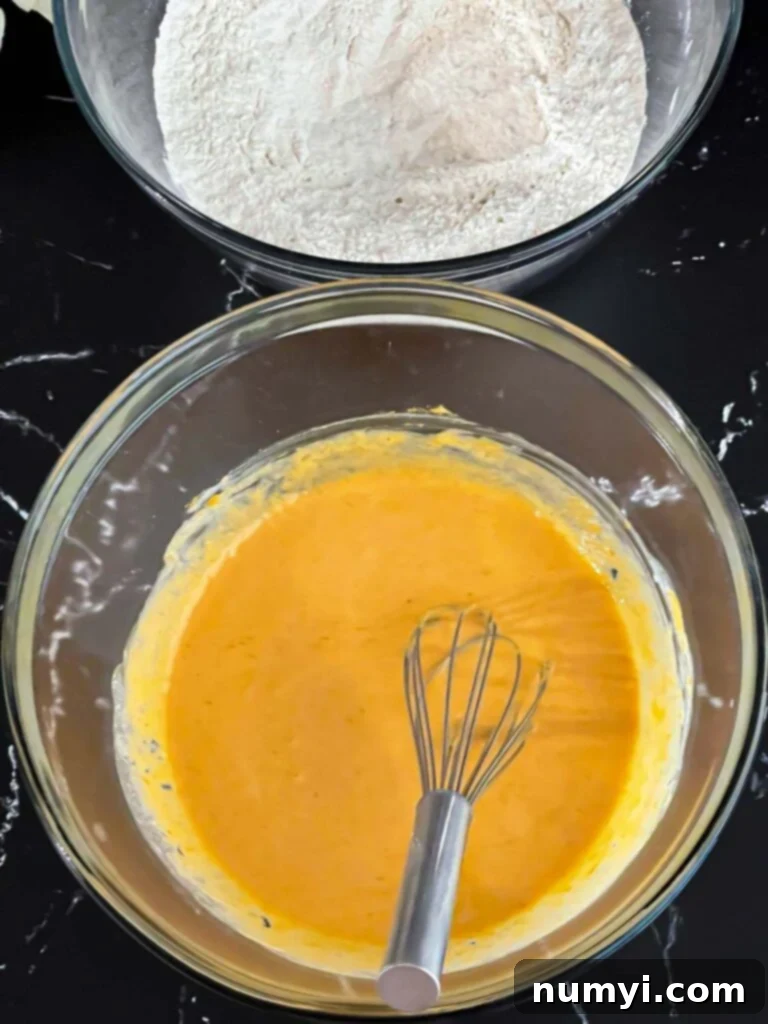
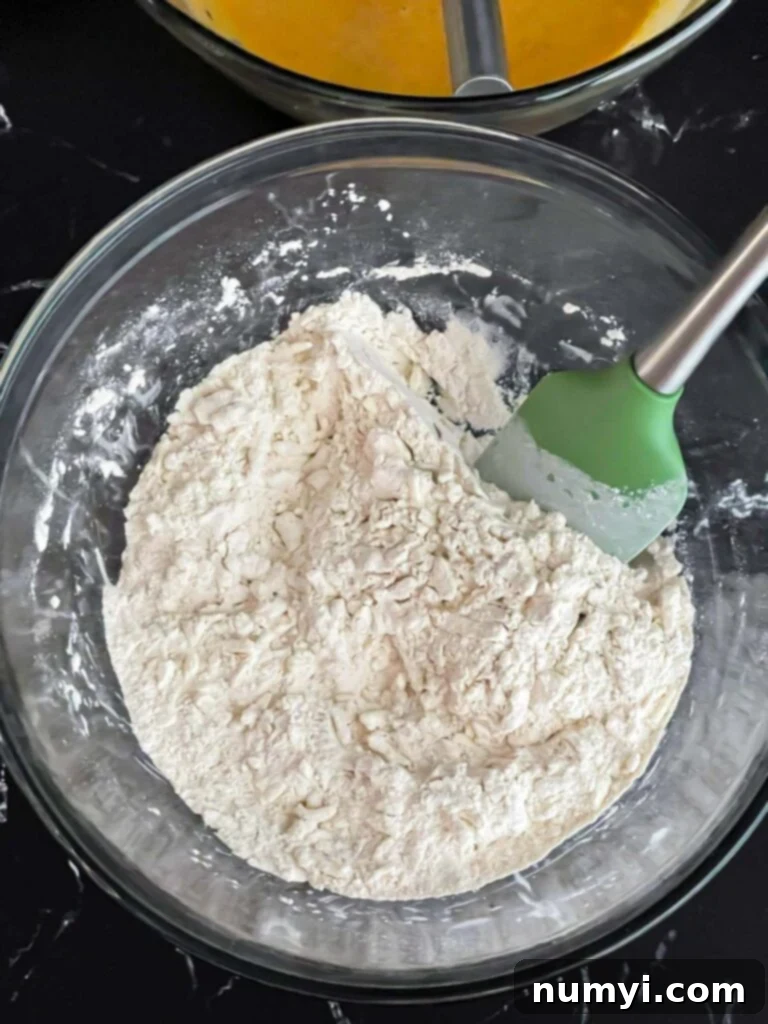
Prepare Your Wet & Dry Ingredients: Begin by shredding your cold butter and placing it back into the freezer to keep it firm while you prepare the other components. In a large mixing bowl, combine the all-purpose flour, baking powder, baking soda, pumpkin pie spice, and kosher salt. Whisk these dry ingredients thoroughly to ensure they are evenly distributed. In a separate medium bowl, whisk together the pure pumpkin puree, large egg, heavy cream, dark brown sugar, and vanilla extract until a smooth and uniform wet mixture is achieved. This ensures all the flavors are well blended before combining with the dry.
-
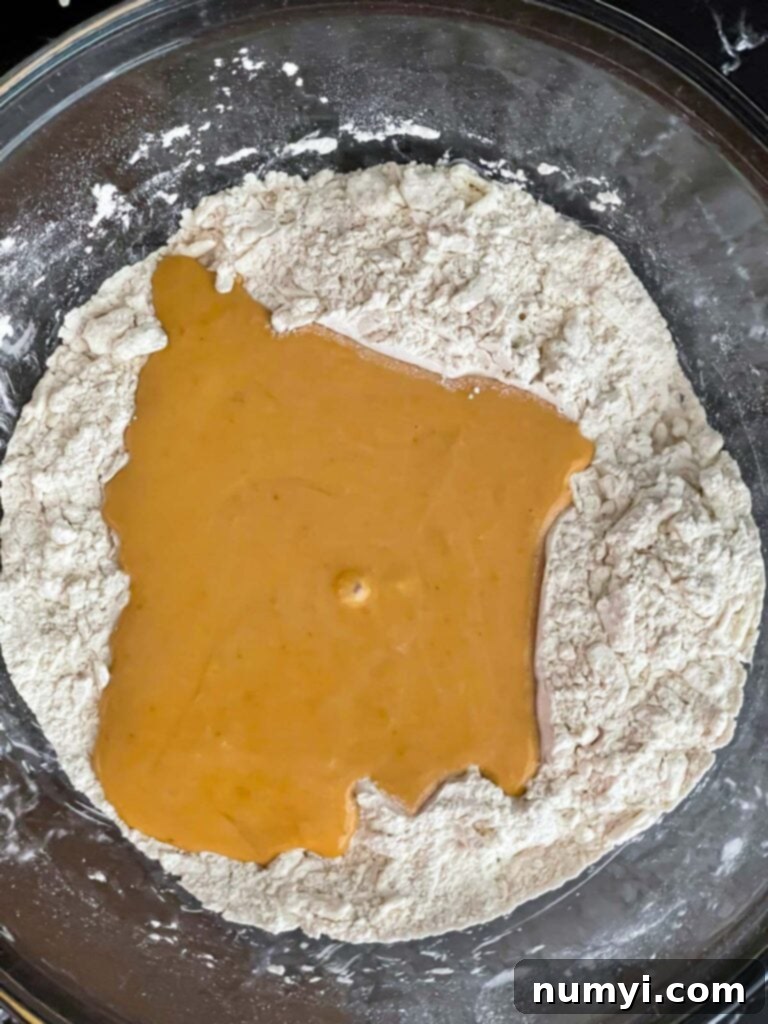
Combine Butter with Dry, Then Add Wet: Retrieve your frozen shredded butter and gently toss it into the bowl with the dry ingredients. The shredded butter method is excellent for creating pockets of butter that will melt during baking, resulting in incredibly flaky scones. Use your hands to lightly coat the butter in the flour mixture. Next, create a shallow well in the center of the flour and butter mixture. Pour all the wet pumpkin ingredients into this well. Using a spatula or your hands, gently stir the mixture just until the dough begins to come together. Avoid overmixing; a few streaks of flour are perfectly acceptable and will prevent tough scones.
-
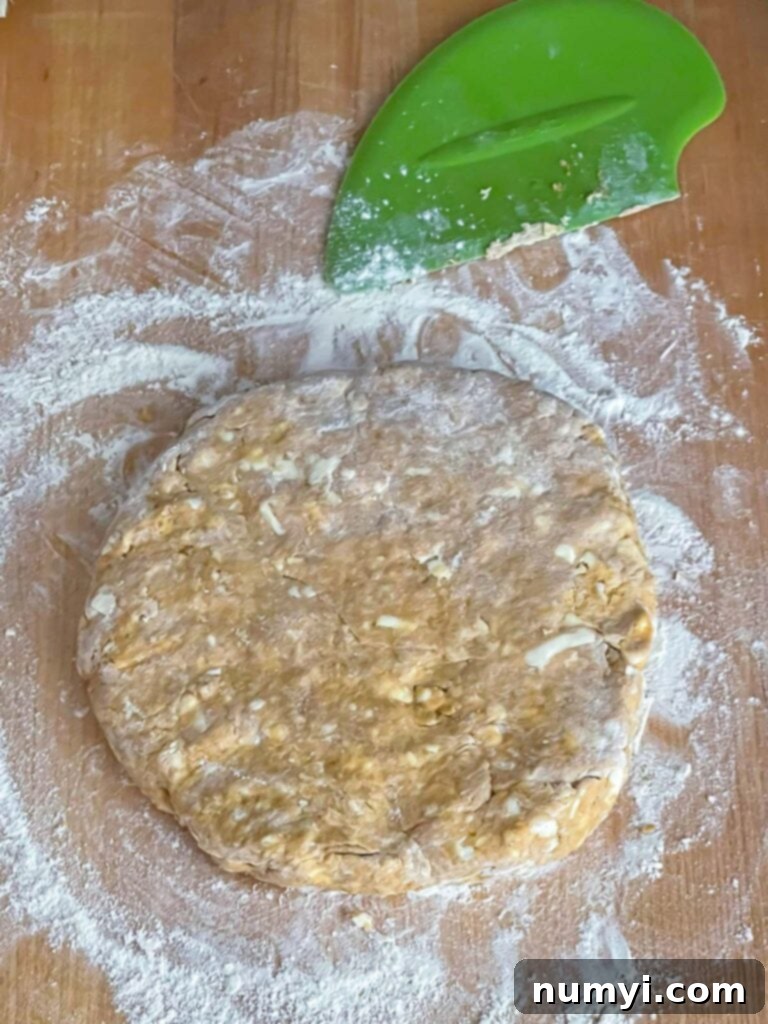
Gentle Folding for Layers (Lamination): Lightly dust a clean, flat surface with a bit of flour. Turn the scone dough out onto this surface. Gently bring the dough together into a loose ball. To create those beautiful flaky layers, we’ll perform a simple folding technique. Lightly pat the dough into a rough rectangle, then gently fold it in half. Turn the dough 90 degrees and fold it in half again. Repeat this process approximately 2 to 3 times. The key here is gentle handling and avoiding any aggressive kneading, as overworking the dough will develop gluten and result in tough, rather than tender, scones.
-
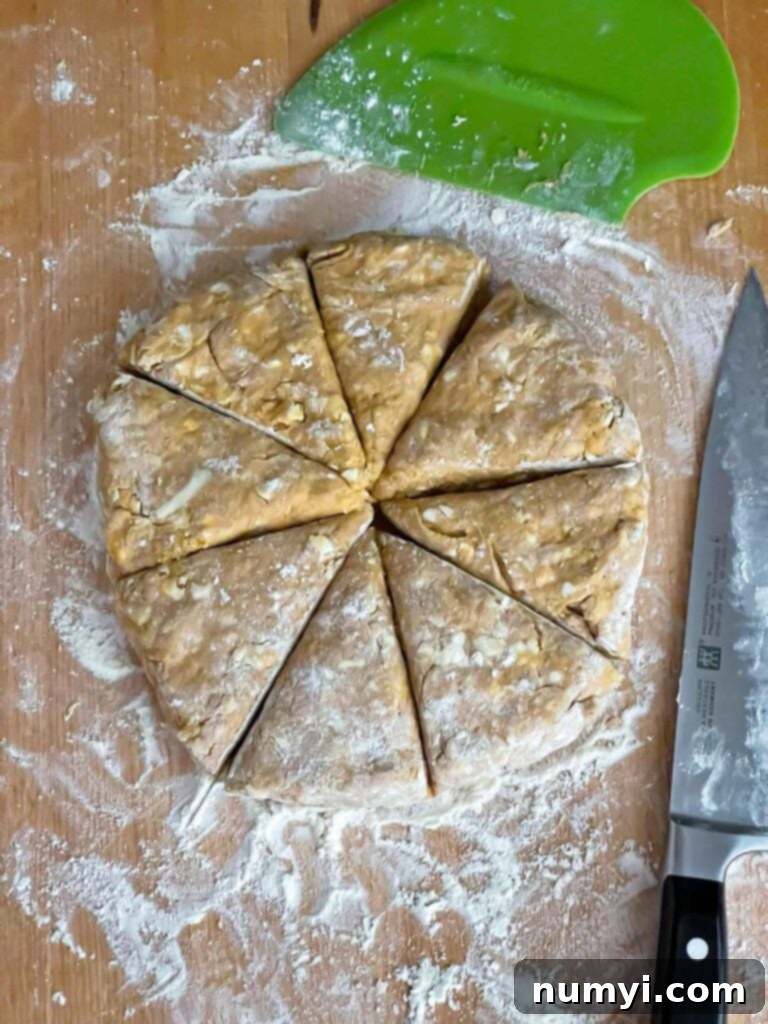
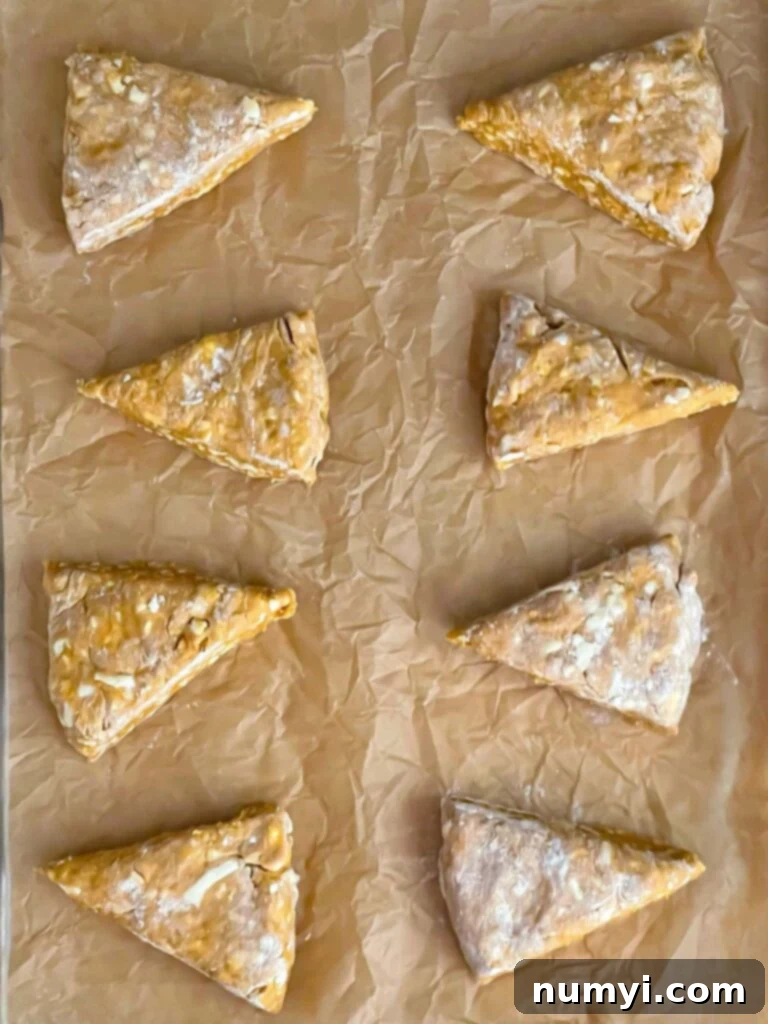
Shape, Cut, and Chill: Once folded, gently pat the dough into a uniform round, about 1 inch thick. Be mindful not to press too firmly. Using a sharp knife or a bench scraper, cut the dough into 8 equal wedges, just like slicing a pie. Line a baking sheet with parchment paper and carefully arrange each scone wedge on it, ensuring they are spaced about 2 inches apart to allow for proper air circulation during baking. Place the entire baking sheet into the freezer for at least 20 minutes. This crucial chilling step helps the butter remain solid, contributing significantly to the scones’ flaky texture when baked.
-
Bake to Golden Perfection & Glaze: While the scones are chilling, preheat your oven to 400ºF (200ºC). Once the oven is hot and the scones are thoroughly chilled, transfer the baking sheet directly from the freezer to the oven. Bake for approximately 15-20 minutes, or until the tops are beautifully golden brown and the bottoms are also lightly browned and firm. Once baked, transfer the scones to a wire rack to cool completely if you plan to add the pumpkin spice glaze. To make the glaze, simply whisk together powdered sugar, a touch of pumpkin pie spice, and 3-4 tablespoons of heavy cream (or more for a thinner, drizzly consistency) until smooth. Drizzle generously over the cooled scones and enjoy!
Essential Tips for the Best Pumpkin Scones
Achieving the perfect scone is all about a few key techniques. Follow these tips to ensure your pumpkin scones are consistently tender, flaky, and absolutely delicious:
- Choose Pure Pumpkin Puree Wisely: Always use pure pumpkin puree, not pumpkin pie filling. Pumpkin pie filling contains added sugars and spices, which will alter the flavor and texture of your scones. If you’re considering homemade pumpkin puree, be cautious; it often contains more moisture than canned versions, which can lead to a sticky dough and dense scones. Stick to canned pure pumpkin for consistent results.
- Embrace the Cold: The secret to truly flaky scones lies in keeping all your ingredients, especially the butter and heavy cream, as cold as possible. Cold butter creates steam when it bakes, separating the dough into distinct layers. Freezing the butter and chilling the shaped scones before baking are critical steps. This ensures the butter doesn’t melt into the dough prematurely, preserving those precious pockets for flakiness.
- Alternative Butter Incorporation: While grating frozen butter is our preferred method for ease and even distribution, you can also use a pastry blender or your fingertips to cut cubed cold butter into the dry ingredients. Work quickly to prevent the butter from warming up too much. The goal is pea-sized pieces of butter throughout the flour.
- Avoid Overworking the Dough: This is perhaps the most important rule for scones, just as it is for biscuits. Overmixing or kneading the dough excessively will develop the gluten in the flour, resulting in a tough, chewy scone rather than a light, tender one. Mix and fold just enough until the ingredients are combined.
- Handle with Care When Shaping: When forming the dough into a round, use a gentle touch. Lightly pat it down rather than compressing it firmly. Excessive pressure can hinder the formation of those delicate, airy layers.
- Know Your Oven: Ovens can vary significantly in temperature. If you know your oven tends to run hot, start checking for doneness a few minutes early, around the 15-minute mark. Scones are done when they are golden brown on top and bottom and feel firm to the touch.
- DIY Pumpkin Pie Spice: No pumpkin pie spice on hand? No problem! You can easily create your own blend. For this recipe, combine 1 ½ teaspoons of ground cinnamon, ½ teaspoon of ground ginger, ½ teaspoon of ground nutmeg, and ¼ teaspoon of ground cloves. Store any leftover blend in an airtight container for future fall baking.
- The Power of Parchment Paper: Always line your baking sheet with parchment paper. This prevents sticking, ensures even browning on the bottom of the scones, and makes cleanup a breeze.
- Don’t Skimp on Cooling (If Glazing): If you plan to drizzle your scones with the pumpkin spice glaze, allow them to cool completely on a wire rack first. Applying glaze to warm scones will cause it to melt and run off, rather than setting into a beautiful, appealing finish.
Delicious Variations to Try
While these pumpkin scones are perfect as is, they also serve as an excellent canvas for creative additions and modifications. Feel free to experiment and customize them to your liking:
- Alternate Toppings: Instead of the pumpkin spice glaze, you can brush the tops of the unbaked scones with a little extra heavy cream before baking. Then, sprinkle them generously with sparkling pearl sugar or turbinado sugar for a beautiful crunch and a slightly less sweet topping. A simple dusting of powdered sugar after baking also works wonderfully.
- Add a Nutty Crunch: Introduce a delightful textural contrast by folding in some chopped nuts. Toasted pecans or walnuts are excellent choices that complement the warm pumpkin spice flavors. Toasting the nuts beforehand enhances their flavor significantly.
- Indulge with Chocolate: For a more decadent treat, stir in some semi-sweet chocolate chips, milk chocolate chips, or white chocolate chips into the dough before shaping. Pumpkin and chocolate is a surprisingly delicious combination, especially with white chocolate which highlights the spice.
- Infuse with Citrus: A little citrus zest can brighten the entire flavor profile. Add 1-2 teaspoons of finely grated orange or lemon zest to the dry ingredients for a subtle, zesty lift.
- Dried Fruit Delights: Consider folding in about 1/2 cup of dried cranberries, chopped dried apricots, or even golden raisins for extra sweetness and chewiness. These fruits pair beautifully with pumpkin and spice.
Frequently Asked Questions (FAQs)
Absolutely! Scones are fantastic for make-ahead preparation. The best way to prepare them in advance is to flash freeze the unbaked dough wedges. Arrange the cut scones on a parchment-lined baking sheet and freeze them for at least 1 hour, or until completely solid. Once frozen, you can transfer them to an airtight freezer container or a resealable freezer bag, layering them with parchment paper to prevent sticking. They can be stored this way for up to 3 months. When you’re ready to bake, simply place the frozen scones directly onto a prepared baking sheet and bake as directed, adding a few extra minutes (usually 3-5) to the baking time since they are starting from frozen. Alternatively, for an overnight version, prepare the scones up to the point of cutting them into wedges. Cover the baking sheet tightly with plastic wrap and refrigerate overnight. The next morning, simply proceed with the baking instructions.
Yes, you can! Baked pumpkin scones freeze well, but it’s best to freeze them without the glaze. Allow the baked scones to cool completely, then place them in an airtight freezer bag or container. They can be frozen for up to 3 months. To enjoy, thaw them overnight in the refrigerator or at room temperature. Once thawed, you can warm them in a low 300ºF (150ºC) oven for 5-10 minutes to refresh them, then prepare and apply the glaze just before serving.
Scones are undeniably at their best on the day they are baked, offering the freshest flavor and flakiest texture. However, you can store any leftover scones in an airtight container at room temperature for up to 2 days. To refresh them, place them in a low 300ºF (150ºC) oven for 5 to 10 minutes. Be aware that if your scones are already glazed, the glaze will melt when reheated. If you prefer to store them longer, freezing as described above is the best option.
The ideal consistency for the glaze is a balance between being thick enough to coat the spoon but thin enough to drizzle attractively. Start with the recommended amount of heavy cream (3-4 tablespoons), and add more a tiny bit at a time (half a teaspoon) if you desire a thinner, more flowing glaze. For a thicker, more opaque glaze, stick to the lesser amount of cream. Whisk until completely smooth and lump-free.
Absolutely! If you don’t have pumpkin pie spice on hand, or simply prefer to mix your own, you can substitute it with individual ground spices. For this recipe, a good homemade blend would be 1 ½ teaspoons of ground cinnamon, ½ teaspoon of ground ginger, ½ teaspoon of ground nutmeg, and ¼ teaspoon of ground cloves. This combination will yield a similar warm and inviting spice profile.
More Delicious Breakfast Bread Recipes
Strawberry Scones
Blueberry Scones
Cheddar Chive Biscuits

Pumpkin Scones Recipe
Print
Pin
Rate
Ingredients
Scones
- 2 1/4 cups All-purpose flour
- 1 1/2 tsp Baking powder
- 1/4 tsp Baking soda
- 2 tsp Pumpkin pie spice
- 1/2 tsp Kosher salt
- 1/2 cup Unsalted butter shredded and frozen
- 1/2 cup Pure pumpkin puree not pumpkin pie filling
- 1 large Egg
- 1/2 cup Heavy cream
- 1/3 cup Dark brown sugar or light brown
- 1 tsp Vanilla extract
Pumpkin Glaze
- 3/4 cup Powdered sugar
- 1 tsp Pumpkin pie spice
- 3-4 tbsp Heavy cream or more for drizzle consistency
Instructions
-
Shred and freeze the butter. Line a baking sheet with parchment paper.1/2 cup Unsalted butter
-
In a large bowl, whisk together the flour, baking powder, baking soda, pumpkin pie spice, and kosher salt. In a separate bowl, whisk the pumpkin puree, egg, heavy cream, brown sugar, and vanilla extract until well combined.2 1/4 cups All-purpose flour, 1 1/2 tsp Baking powder, 1/4 tsp Baking soda, 2 tsp Pumpkin pie spice, 1/2 tsp Kosher salt, 1/2 cup Pure pumpkin puree, 1 large Egg, 1/2 cup Heavy cream, 1/3 cup Dark brown sugar, 1 tsp Vanilla extract
-
Toss the shredded frozen butter in the flour mixture to coat evenly.
-
Make a well in the center of the flour and butter mixture. Pour the pumpkin wet mixture into the well, and stir gently just until the dough starts to come together and no large pockets of flour remain. Avoid overmixing.
-
Dust a flat surface with flour. Turn the dough out, bring it together, and lightly fold the dough in half. Gently turn the dough 90 degrees and fold again. Repeat this folding process about 2 to 3 times without overworking the dough to create flaky layers.
-
Gently shape the dough into a 1-inch thick round. Cut into 8 equal wedges. Place each wedge on the parchment-lined baking sheet, spacing them about 2 inches apart. Freeze the shaped scones for 20 minutes.
-
Preheat your oven to 400ºF (200ºC).
-
Bake the frozen scones for 15-20 minutes, or until they are lightly golden on both the top and bottom. Transfer them to a wire rack to cool completely if you plan to glaze them.
-
For the glaze, whisk together the powdered sugar, pumpkin pie spice, and heavy cream until it reaches your desired drizzly consistency. Drizzle the glaze generously over the cooled scones before serving.3/4 cup Powdered sugar, 1 tsp Pumpkin pie spice, 3-4 tbsp Heavy cream
Notes
- If your oven tends to run hot, be sure to start checking them for doneness at 15 minutes to prevent over-browning.
- If you don’t have pumpkin pie spice, you can create your own blend: use 1 1/2 tsp ground cinnamon, 1/2 tsp ground ginger, 1/2 tsp ground nutmeg, and 1/4 tsp ground cloves.
- For more in-depth guidance, troubleshooting, and creative ideas, please refer to the detailed tips, variations, and the FAQ section provided in the article above.
