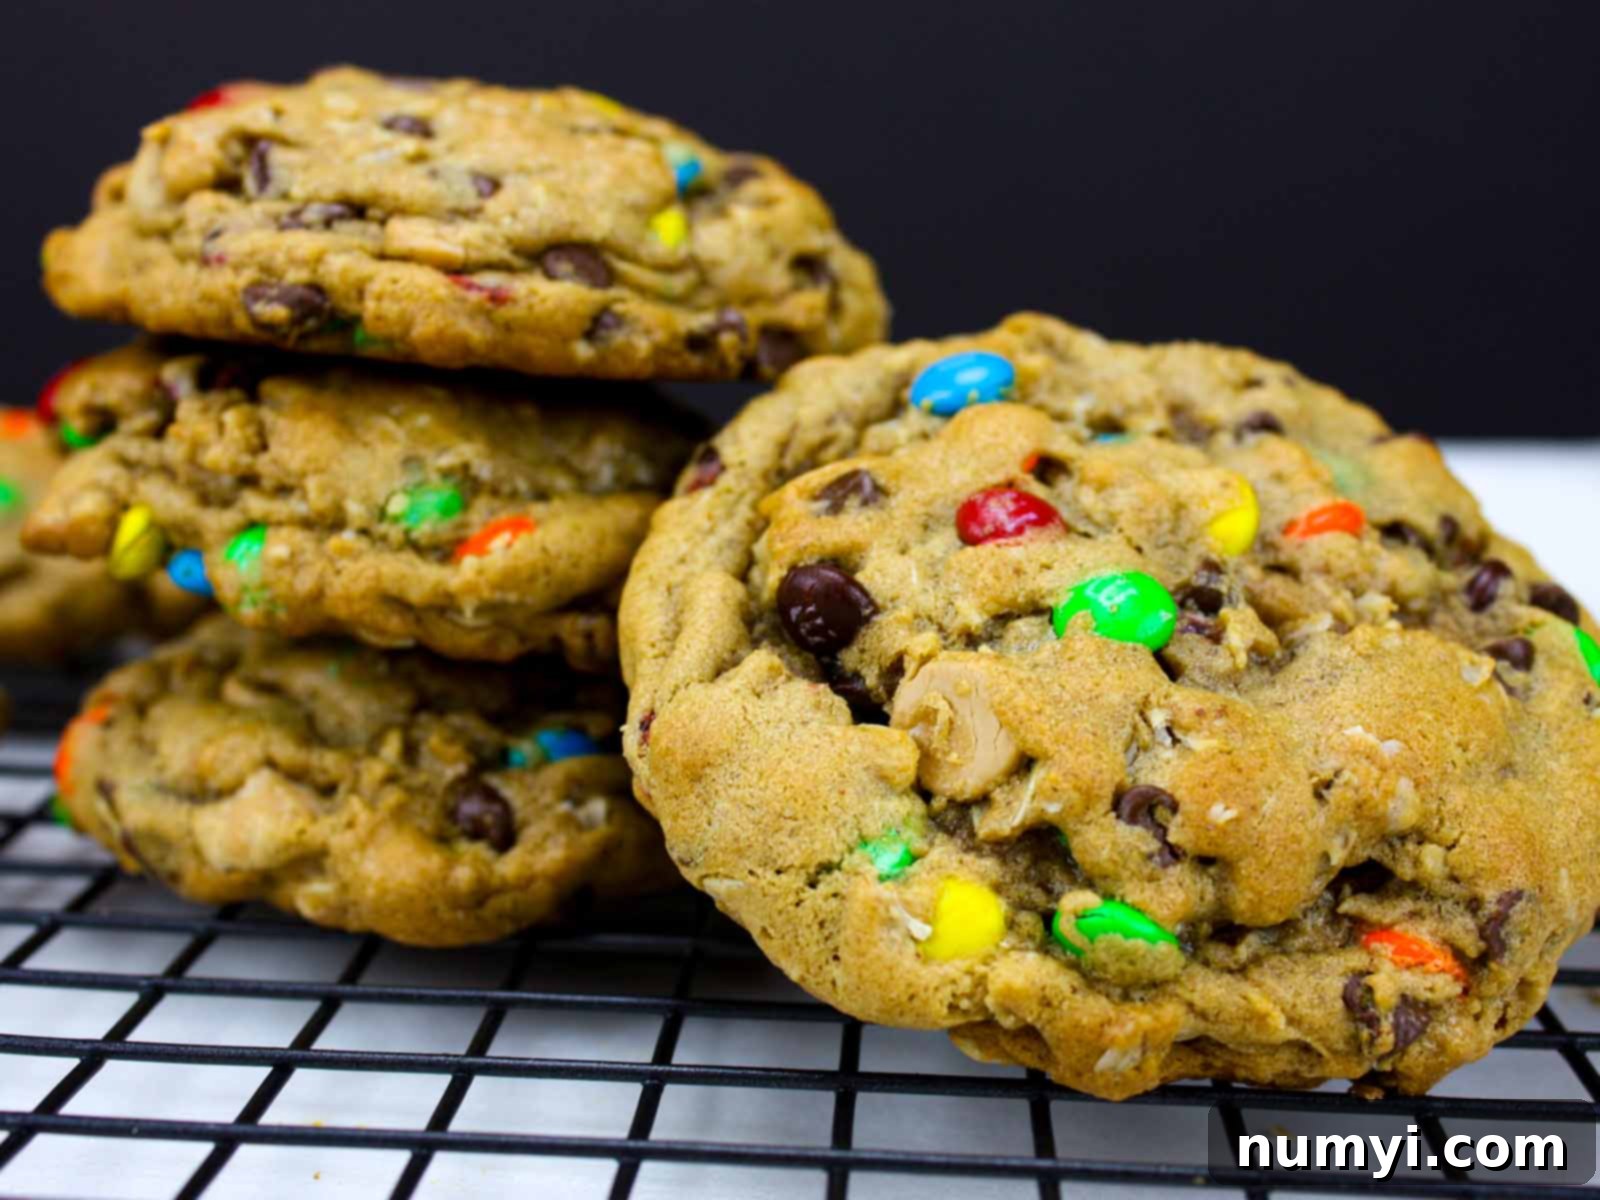
The Best Chewy & Thick Monster Cookies Recipe: An Ultimate Guide to Irresistible Homemade Treats
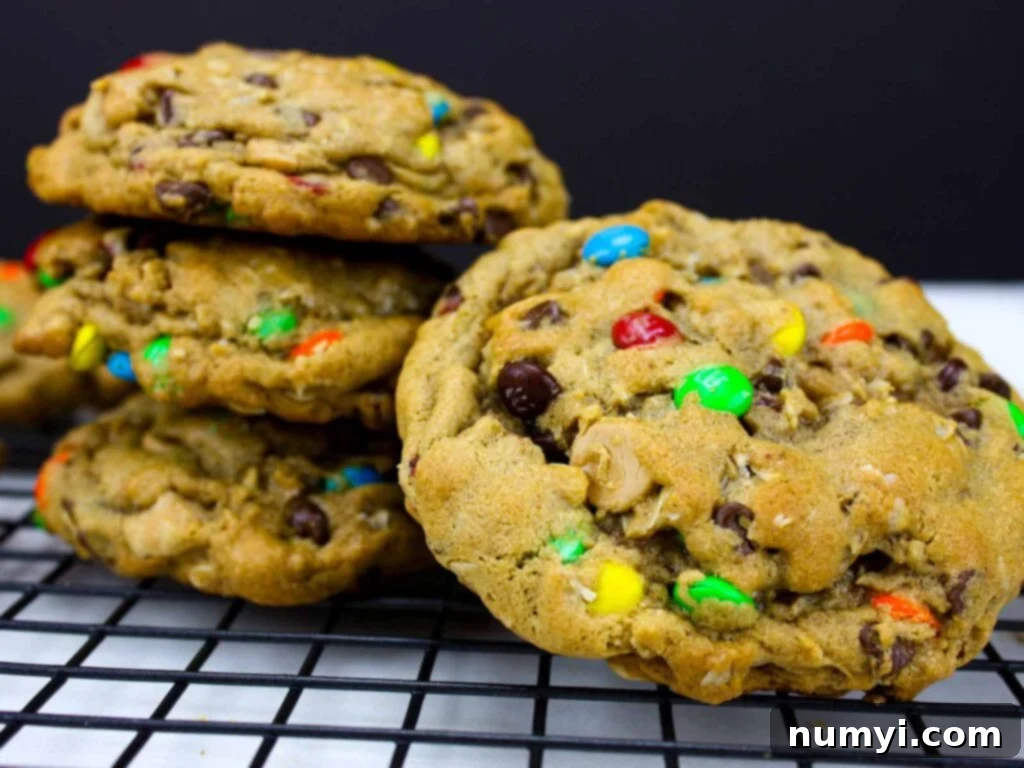
These Monster cookies are an absolute delight, a perfect fusion of beloved flavors and textures. Each bite delivers a harmonious blend of creamy peanut butter, rich chocolate chips, colorful M&M’s, sweet butterscotch, and hearty oats. They boast perfectly crispy edges that give way to a wonderfully soft, moist, and delightfully chewy center, making them an unparalleled homemade treat.
Why You’ll Love These Monster Cookies
This easy Monster cookie recipe has quickly become a beloved staple in our home, and we’re sure it will in yours too. There’s so much to love about these magnificent treats:
- **Irresistibly Thick and Chewy:** Forget thin, flat cookies! Our Monster cookies are generously sized and boast a satisfying thickness that ensures a perfectly soft and chewy bite every time. The combination of ingredients and proper chilling prevents them from spreading too much, maintaining their desirable hefty shape.
- **Loaded with Flavor & Texture:** Each cookie is packed with an incredible assortment of mix-ins. You’ll find a delightful explosion of creamy peanut butter, melty chocolate chips, crunchy M&M’s, and sweet butterscotch chips, all balanced by the wholesome texture of old-fashioned oats. It’s a symphony of flavors and textures in every mouthful.
- **Simple to Make:** Despite their impressive appearance and complex flavor profile, these Monster cookies are surprisingly easy to prepare. The instructions are straightforward, making them accessible for bakers of all skill levels.
- **Perfect for Any Occasion (or Craving!):** Whether you need a treat for a party, a homemade gift, or just a little something to satisfy your sweet tooth, these cookies are ideal. They’re also perfect for making ahead; you can freeze the dough or baked cookies to enjoy whenever a craving strikes.
- **The Magic of Chilled Dough:** This recipe emphasizes chilling the dough overnight, and for good reason! This crucial step is the secret to achieving their signature thick, chewy texture and preventing excessive spreading during baking. It also allows the flavors to meld beautifully, resulting in a richer, more complex taste.
If you’re a fan of our other delightful creations like Italian Butterball Cookies (buttery and delicate), Hello Dolly Cookies Recipe (a layered classic), Chewy Snickerdoodle Bars (cinnamon-sugar perfection in bar form), Lemon Sandwich Cookies (bright and tangy), or Old Fashioned Peanut Butter Cookies (a timeless favorite), then these Monster Cookies are definitely for you!
Monster cookies are a delightfully indulgent confection, essentially robust peanut butter oatmeal cookies generously loaded with a variety of sweet mix-ins. Typically, these include classic M&M’s candies, semi-sweet chocolate chips, and often other additions like butterscotch chips, transforming a simple cookie into a truly ‘monster-sized’ treat in both flavor and texture. Their rich, chewy character and abundance of ingredients make them a universally loved dessert.
Essential Ingredients for Perfect Monster Cookies
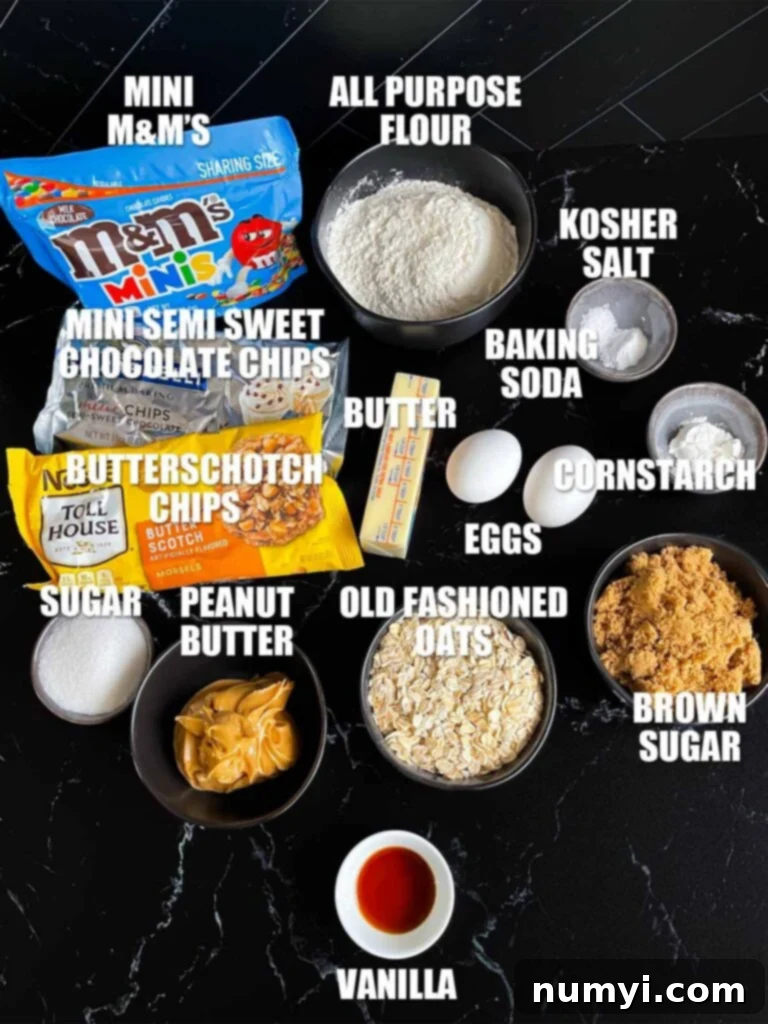
Crafting the best Monster cookies starts with the right ingredients and understanding their role. Below is a detailed list of what you’ll need, with insights into why each component is important. For precise measurements, please refer to the recipe card located further down the page.
- Unsalted Butter: Using unsalted butter is crucial as it gives you complete control over the salt content in your cookies. If you only have salted butter, you’ll need to slightly reduce the amount of added salt in the recipe. Keep in mind that different brands of salted butter contain varying amounts of sodium, so adjusting can be tricky. Always ensure your butter is at room temperature for optimal creaming.
- Creamy Peanut Butter: The creamy texture of peanut butter is key here. It contributes to the soft, chewy interior and distinct flavor. Crunchy peanut butter, with its drier consistency and added nuts, can result in a tougher, denser cookie that doesn’t spread as beautifully. We recommend using processed, regular creamy peanut butter like Jiff or Skippy for the best results, as natural peanut butter (which often separates oil) can affect the dough’s consistency.
- Dark Brown Sugar and Granulated Sugar: This combination is essential for both flavor and texture. Dark brown sugar provides moisture and a deep, rich molasses flavor, contributing to the cookies’ chewiness. Granulated sugar, on the other hand, helps create those desirable crispy edges and also aids in spread.
- Large Eggs: Always use room-temperature eggs. Eggs act as a binder, adding structure and moisture to the cookies. Room temperature eggs emulsify better with the butter and sugar, creating a smoother, more uniform dough.
- All-Purpose Flour, Baking Soda, and Salt: These are the foundational dry ingredients. All-purpose flour provides the main structure for the cookie. Baking soda is a leavening agent that helps the cookies rise slightly and contributes to their soft texture. Salt balances the sweetness and enhances all the other flavors, making them pop.
- Cornstarch: A secret weapon for tender cookies! Adding cornstarch helps to create a softer, more delicate crumb, ensuring your Monster cookies are melt-in-your-mouth delicious and prevent them from becoming too cakey or tough.
- Old-Fashioned Oats: These are non-negotiable for the perfect Monster cookie texture. Old-fashioned oats are thicker and heartier, providing a wonderfully chewy and substantial bite that stands up well to baking. Quick-cooking oats are much finer and can result in a more delicate, less chewy cookie that spreads more. Steel-cut oats are too coarse and won’t work in this recipe.
- Mini M&M’s Candies, Mini Semi-Sweet Chocolate Chips, and Butterscotch Chips: These are the “monster” in Monster cookies! The mini versions of M&M’s and chocolate chips ensure an even distribution of flavor and color throughout the cookie, guaranteeing a delightful surprise in every bite. Butterscotch chips add an extra layer of sweet, caramel-like flavor that complements the peanut butter beautifully. Feel free to adjust these to your preference, but the combination is truly magical!
How to Make the Best Monster Cookies: Step-by-Step Guide
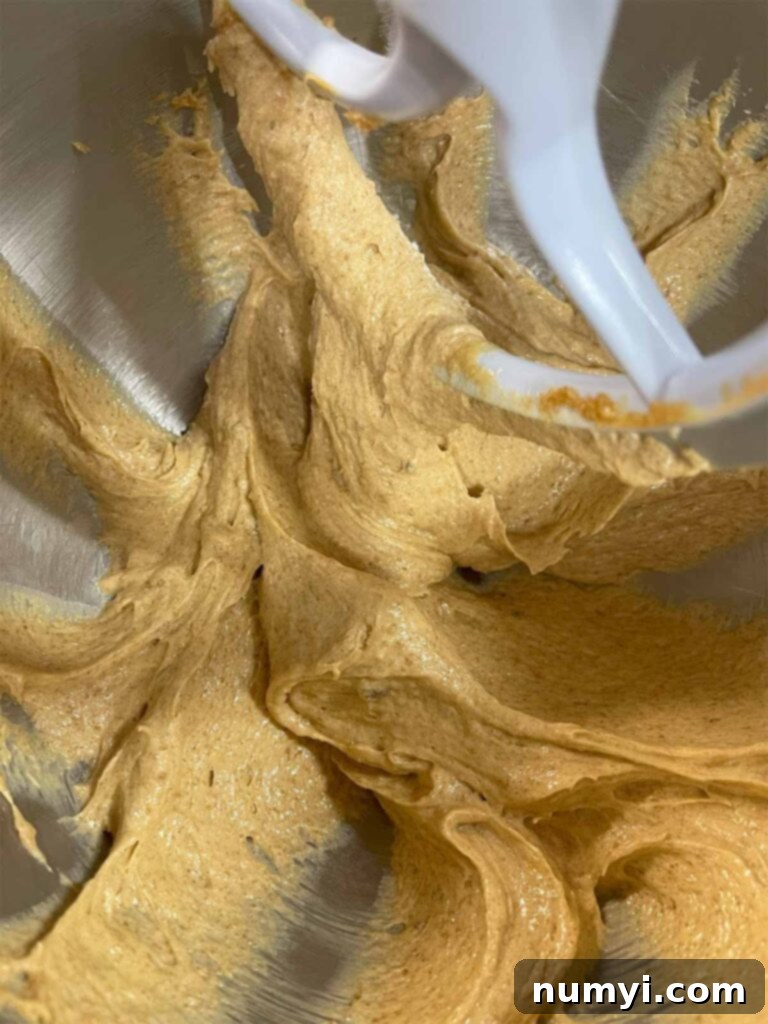
- Cream the Wet Ingredients: In the bowl of a stand mixer fitted with the paddle attachment (or a large mixing bowl with a hand mixer), cream together the room-temperature unsalted butter and creamy peanut butter on medium speed for about 2-3 minutes. Continue to add the dark brown sugar and granulated sugar, creaming the mixture until it becomes light, fluffy, and visibly pale. This process incorporates air, which is vital for soft cookies. Finally, add the room-temperature eggs one at a time, followed by the vanilla extract, beating thoroughly after each addition until everything is well combined and smooth.
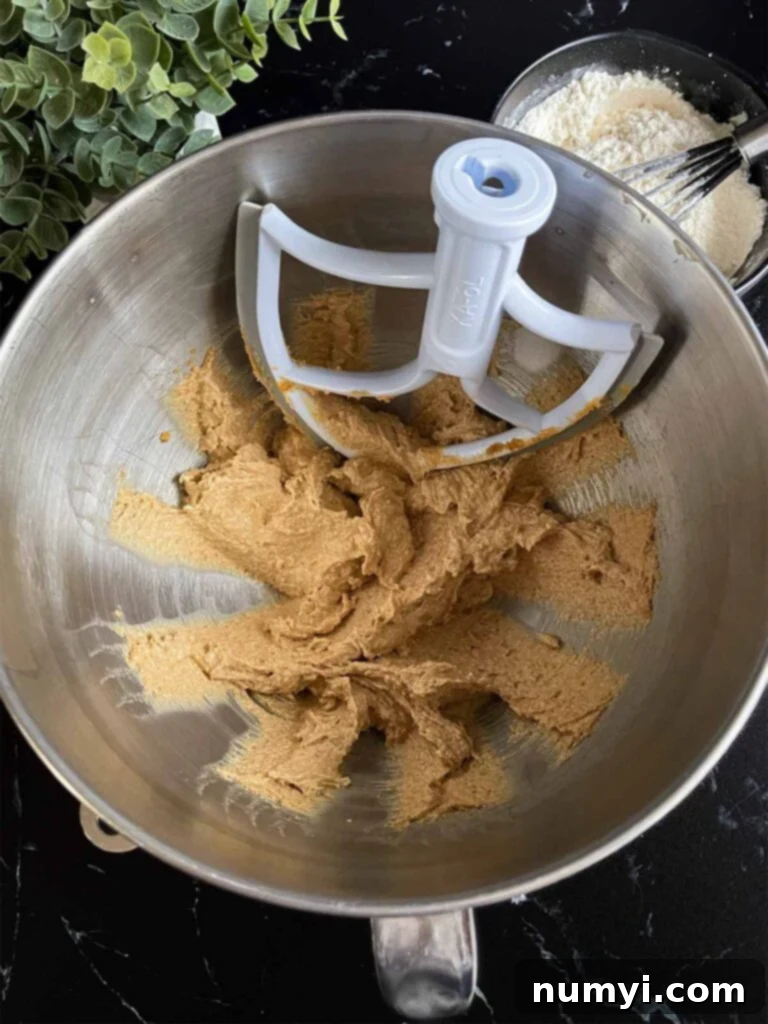
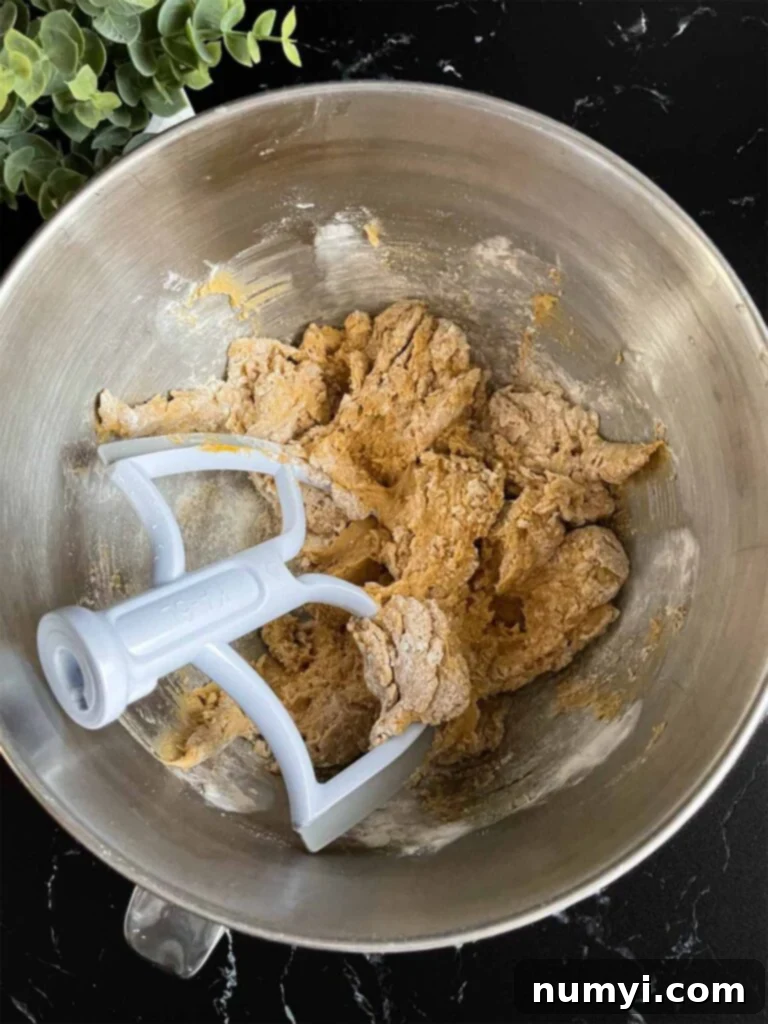
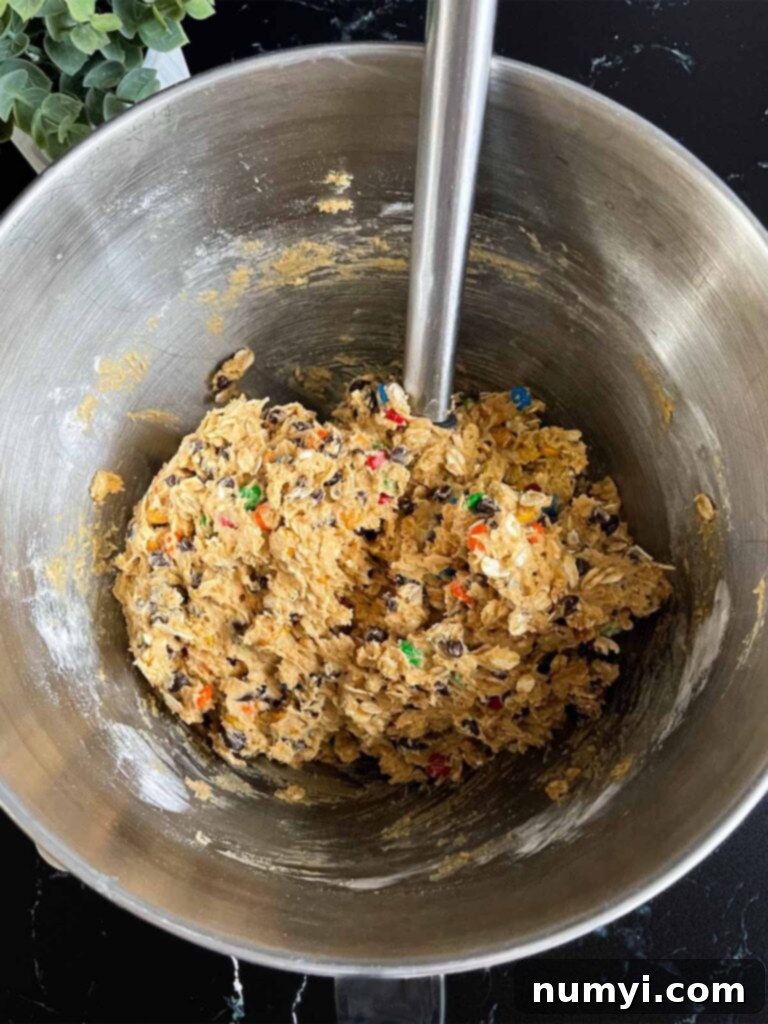
- Combine Dry and Wet Ingredients: In a separate, medium-sized bowl, whisk together the all-purpose flour, baking soda, salt, and cornstarch until thoroughly combined. This ensures even distribution of leavening and seasoning. Gradually add this dry ingredient mixture to the wet ingredients in the stand mixer, mixing on low speed until just combined. Be careful not to overmix, as this can develop the gluten in the flour and result in tough cookies. Once most of the flour is incorporated but some dry streaks may still remain, gently fold in the old-fashioned oats, mini M&M’s, mini semi-sweet chocolate chips, and butterscotch chips by hand. Mix just until everything is evenly distributed.
- Chill the Dough and Prepare for Baking: Cover the cookie dough tightly with plastic wrap and refrigerate for at least 2 hours, or ideally, overnight. This chilling period is crucial for preventing the cookies from spreading too much and helps to develop a deeper flavor and chewier texture. Once ready to bake, preheat your oven to 350 degrees F (175 degrees C). Line two large baking sheets with parchment paper or silicone baking mats; this prevents sticking and ensures even baking. Using a heaping 1/4 cup measure, scoop out portions of dough and roll them into neat, uniform balls. Place these dough balls onto the prepared baking sheets, ensuring they are about 2-3 inches apart to allow for spreading. For an extra pop of color and visual appeal, gently press a few additional M&M’s candies onto the tops of the dough balls before baking.
- Bake and Cool: Bake the cookies for approximately 12-14 minutes. The exact baking time may vary slightly depending on your oven. Look for cookies that are golden brown around the edges but may still appear slightly soft or undone in the center. This is perfectly normal and actually desirable, as they will continue to set and firm up as they cool on the baking sheet. Transfer them to a wire rack after about 5 minutes on the baking sheet to cool completely. This cooling process helps them achieve that perfect chewy texture.
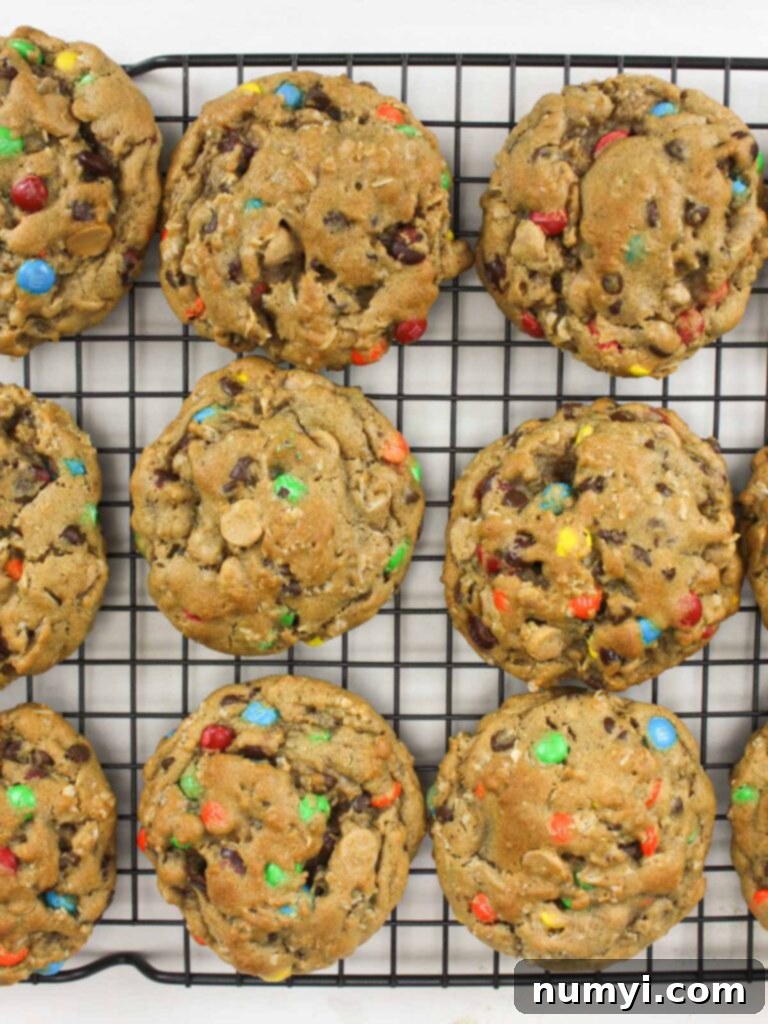
Just look at these magnificent, giant Monster Cookies! Their vibrant colors and inviting texture are simply amazing, promising a delicious experience with every single cookie.
Expert Tips for the Best Monster Cookies
Achieving cookie perfection is all about the details. Follow these expert tips to ensure your Monster cookies turn out absolutely flawless every time:
- Measure Flour Correctly: This is arguably one of the most important tips for baking. Do not scoop flour directly from the bag with your measuring cup, as this can compact it and lead to using too much flour. Instead, gently aerate the flour in its container, then spoon it lightly into your measuring cup. Level off the top with a straight edge (like the back of a knife) without packing the flour down. Too much flour can result in dry, crumbly cookies.
- Always Use Room Temperature Eggs and Dairy: Room temperature ingredients, especially butter and eggs, are crucial for proper emulsification. When butter and eggs are at the same temperature, they combine more easily and uniformly with the sugar, creating a smooth, airy batter. This leads to a more consistent texture in your baked cookies. Cold ingredients can cause the batter to curdle and result in a denser, less appealing cookie.
- Opt for Mini M&M’s and Mini Chocolate Chips: While regular-sized candies and chips can certainly be used, mini versions make a significant difference in Monster cookies. The smaller size ensures a more even distribution throughout the dough, meaning every single bite gets a delightful scattering of chocolate and candy. This prevents clumping and enhances the overall eating experience.
- Add Extra M&M Candies on Top Before Baking: For a visually stunning cookie, press a few extra M&M’s onto the top of each cookie dough ball right before they go into the oven. As the cookies bake and spread, these candies will remain visible on the surface, making them incredibly appealing and truly “monster-like” in appearance.
- Use Processed Creamy Peanut Butter: For this particular Monster cookie recipe, processed, regular creamy peanut butter (such as Jif or Skippy) works best. These types of peanut butter have a more consistent texture and less oil separation compared to all-natural varieties. Natural peanut butter, with its varying oil content, can sometimes cause the cookies to spread excessively or have an undesirable texture.
- Get Festive with Seasonal M&M’s: Monster cookies are incredibly versatile for holidays! Swap out the standard M&M’s for seasonal colored ones to match any celebration. Think red and green for Christmas, pastels for Easter, or orange and purple for Halloween. For a fun Halloween twist, check out our Halloween Monster Eye Cookies for inspiration!
Exciting Variations for Your Monster Cookies
While the classic Monster cookie is undeniably delicious, don’t hesitate to get creative! Here are some variations to customize your batch:
- Skip the Chilling Time (with caution!): If you’re in a rush and can’t wait for the dough to chill, you can bake these cookies immediately. Increase the baking time slightly to 14-16 minutes. However, be aware that skipping the chilling will result in cookies that spread more and will be thinner. They will also have a slightly less developed flavor and a chewier texture. For the best results, chilling is always recommended.
- Butterscotch Chip Alternatives: If butterscotch isn’t your favorite, feel free to substitute it with other chips. White chocolate chips are a fantastic alternative, adding a creamy sweetness that pairs beautifully with the peanut butter and chocolate. You could also try milk chocolate chips for an even richer chocolate flavor, or even dark chocolate chips for a less sweet, more intense cookie.
- Peanut Butter M&M’s for Extra Peanut Flavor: To double down on the peanut butter goodness, swap out some or all of the regular mini M&M’s for peanut butter M&M’s. This will intensify the nutty flavor throughout the cookie and provide a different textural element.
- Add Reese’s Pieces: For the ultimate peanut butter lover, incorporating Reese’s Pieces into your Monster cookies is a must. These vibrant, peanut-butter-filled candies will add another layer of intense peanut flavor and a satisfying crunch. You can use them in addition to or instead of some of the other mix-ins.
- Smaller Cookie Size: Our recipe makes deliciously giant cookies, but you can easily adjust the size to your preference. Use a 1-inch cookie scoop for smaller, more portion-controlled cookies. If you choose this option, be sure to reduce the baking time to approximately 10-12 minutes, keeping an eye on them to prevent over-baking. Adjust baking time based on visual cues.
- Nutty Additions: For even more texture and flavor, consider adding a handful of chopped nuts like pecans or walnuts. These add a delightful crunch and a complementary earthy note to the sweet cookies.
- Dried Fruit: A small amount of dried cranberries or raisins can add a pleasant chewiness and a hint of tartness, creating a more complex flavor profile.
Frequently Asked Questions About Monster Cookies
Old-fashioned rolled oats are absolutely the best choice for this recipe. Their thicker, coarser texture provides a wonderful chewiness and structure that holds up exceptionally well during baking, contributing to the signature thick and satisfying bite of Monster cookies. Quick oats, being much finer and more processed, will absorb liquids too quickly and can cause your cookies to spread more and result in a less chewy, almost cakey texture. Steel-cut oats are far too coarse and will remain hard even after baking, making them unsuitable for cookies.
There are a few common culprits if your Monster cookies turn out flat, but rest assured, this recipe is designed to prevent that! Firstly, ensure you are using old-fashioned oats, as discussed above. Secondly, check the freshness of your baking soda; if it’s old, it won’t provide adequate lift. Thirdly, using room-temperature butter is essential, but if your butter is *too* soft or melted, it will cause excessive spreading. Most importantly, refrigerating the dough is absolutely crucial for these cookies. Chilling solidifies the butter in the dough, which means it takes longer to melt in the oven. This slower melting process allows the cookie’s structure to set before the butter fully spreads, resulting in those perfectly thick and chewy cookies. Without proper chilling, the butter melts too quickly, and the cookies spread out thin. Following the chilling instructions in this recipe rigorously will help you avoid flat cookies.
To maintain their freshness and delightful texture, place your completely cooled Monster cookies in an airtight container or a resealable freezer bag. Store them at room temperature, and they will remain wonderfully soft and chewy for up to one week. If you plan to keep them longer, freezing is an excellent option.
Yes, absolutely! Monster cookies are excellent for freezing, both baked and as raw dough. For baked cookies, ensure they are completely cooled, then place them in a freezer-safe airtight container or a heavy-duty resealable bag. They can be frozen for up to 3 months. For dough balls, scoop and roll them as directed, then arrange them on a parchment-lined baking sheet and freeze until solid (about 1-2 hours). Once hard, transfer the frozen dough balls to a freezer-safe container or bag and freeze for up to 3 months. To bake from frozen dough, simply place the frozen balls on a baking sheet and add an extra 1-3 minutes to the baking time. Alternatively, you can thaw the dough balls in the refrigerator overnight before baking as usual.
Explore More Delicious Cookie Recipes
Whipped Shortbread Cookies
Old Fashioned Oatmeal Raisin Cookies (Thick and Chewy)
Salted Butterscotch Pretzel Cookies
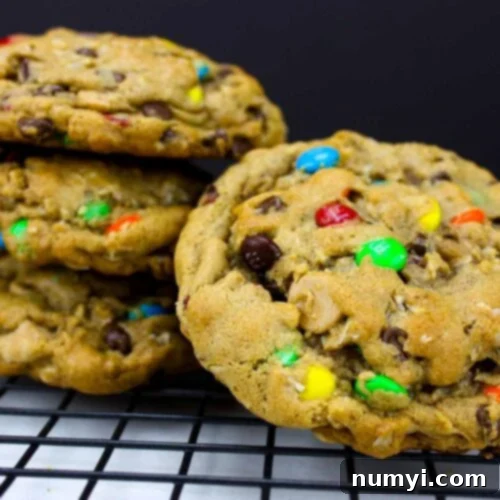
The Best Monster Cookies Recipe
Print
Pin
Rate
Ingredients
- 1/2 cup Unsalted butter room temperature
- 1/2 cup Creamy peanut butter
- 3/4 cup Dark brown sugar
- 1/4 cup Granulated sugar
- 2 large Eggs room temperature
- 2 teaspoons Vanilla extract
- 1 teaspoon Baking soda
- 1/2 teaspoon Salt
- 2 teaspoons Cornstarch
- 1 1/2 cups All-purpose flour
- 1 cup Old-fashioned oats
- 1 cup Mini M&M’s candies
- 1/2 cup Mini semi-sweet chocolate chips
- 1/2 cup Butterscotch chips
Instructions
-
In a large mixing bowl (or the bowl of a stand mixer), cream together the room temperature unsalted butter and creamy peanut butter on medium speed for about 2 minutes until the mixture is smooth and well combined.1/2 cup Unsalted butter, 1/2 cup Creamy peanut butter
-
Add the dark brown sugar and granulated sugar to the mixture. Continue creaming on medium-high speed for about 3 minutes until the mixture is visibly light, fluffy, and pale, incorporating plenty of air.3/4 cup Dark brown sugar, 1/4 cup Granulated sugar
-
Crack in the large eggs one at a time, beating well after each addition. Then, mix in the vanilla extract, ensuring all ingredients are thoroughly combined and the mixture is smooth.2 large Eggs, 2 teaspoons Vanilla extract
-
In a separate medium bowl, whisk together the baking soda, salt, cornstarch, and all-purpose flour until all dry ingredients are uniformly combined.1 teaspoon Baking soda, 2 teaspoons Cornstarch, 1 1/2 cups All-purpose flour, 1/2 teaspoon Salt
-
Gradually add the whisked dry ingredients to the wet ingredients, mixing on low speed just until some dry flour streaks still remain. Do not overmix.
-
By hand, gently stir in the old-fashioned oats, mini M&M’s candies, mini semi-sweet chocolate chips, and butterscotch chips until they are just combined and evenly distributed throughout the dough.1 cup Old-fashioned oats, 1 cup Mini M&M’s candies, 1/2 cup Mini semi-sweet chocolate chips, 1/2 cup Butterscotch chips
-
Cover the cookie dough tightly with plastic wrap and refrigerate for a minimum of 2 hours, or for best results, overnight. This chilling step is vital for the cookies’ texture and to prevent excessive spreading.
-
Once ready to bake, preheat your oven to 350 degrees F (175°C). Line two large baking sheets with parchment paper or silicone baking liners.
-
Drop heaping 1/4 cup-sized balls of dough onto the prepared baking sheets, ensuring they are about 2-3 inches apart. For the best shape, roll each portion into a smooth ball before placing it on the sheet.
-
(Optional) For a more appealing look, gently press a few extra M&M’s candies onto the top of each cookie dough ball before baking.
-
Bake for approximately 12-14 minutes, or until the edges are golden brown. It is normal for the centers to appear slightly underbaked; they will continue to set and firm up as they cool.
-
Allow the cookies to cool on the baking sheet for at least 5 minutes before carefully transferring them to a wire rack to cool completely. This helps them maintain their shape and develop their ultimate chewy texture.
Notes
Freezing Cookie Dough Balls: To freeze the dough, scoop and form cookie dough balls as directed. Place them in a single layer on a parchment-lined baking sheet and freeze for at least 1 hour, or until completely hard. Once frozen solid, transfer the dough balls to a freezer-safe, airtight bag or container. They can be stored in the freezer for up to 3 months.
To Bake From Frozen Dough: When ready to bake, you can either place the frozen dough balls directly on a baking sheet and add an additional 1-2 minutes to the suggested baking time, or you can thaw them in the refrigerator overnight and then bake according to the original recipe instructions.
Freezing Baked Cookies: Fully baked and completely cooled cookies can also be frozen. Place them in a single layer in a freezer-safe container or resealable bag, separating layers with parchment paper if stacking. Freeze for up to 3 months. Thaw at room temperature before serving.
Nutrition
This recipe was inspired by the fantastic creations at TheGirlWhoAteEverything. We hope you enjoy making and devouring these perfect Monster cookies as much as we do. Happy baking!
