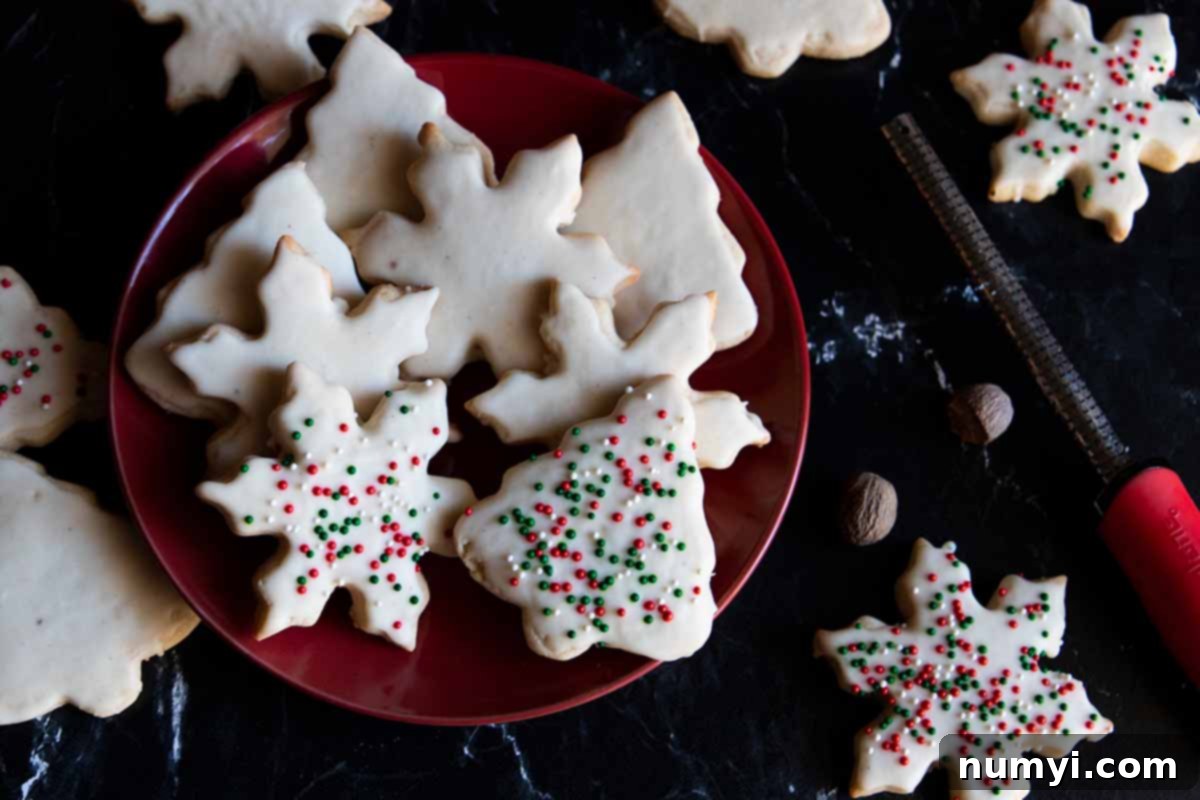
Delicious Eggnog Cookies with Sweet Glaze: Your Essential Holiday Baking Recipe
Embrace the festive spirit with these incredibly delicious Eggnog Cookies! Perfectly spiced, wonderfully tender, and topped with a luscious eggnog glaze, these cut-out cookies are a must-have for your holiday season. They offer a delightful balance of crisp edges and a soft interior, making them an instant favorite for both avid eggnog enthusiasts and those simply looking for a unique, flavorful holiday treat. Prepare to impress your friends and family with this classic festive dessert that captures the very essence of holiday cheer.

Why These Eggnog Cookies Will Become Your New Holiday Favorite
Forget those dry, cake-like eggnog cookies you might have encountered before. This recipe is a game-changer, designed for true cookie lovers. Unlike many traditional recipes that yield a soft, almost muffin-like texture or come with an overly thick, heavy frosting, our eggnog cookies boast a delightful sugar cookie consistency. We’ve perfected the balance to create a cookie that is truly special.
Imagine a tender interior complemented by slightly crisp edges, perfectly spiced with warm cinnamon, freshly grated nutmeg, and a hint of vanilla and rum extract. The crowning glory is a light, dreamy eggnog glaze that enhances the flavor without overwhelming it. This balance creates a cookie that is sophisticated yet comforting, making it an ideal addition to your holiday dessert spread. Each bite transports you to a cozy winter wonderland, filled with the nostalgic aromas of the season.
Even if you’re someone who typically shies away from drinking eggnog, you’ll find yourself reaching for seconds (and thirds!) of these cookies. The spices are perfectly balanced, offering that classic holiday warmth without being overpowering. I, for one, rarely drink eggnog but adore its distinctive flavor in baked goods, much like my fondness for an eggnog latte during the festive season. This recipe introduces the subtle, creamy, spiced notes of eggnog in a way that is universally appealing.
Beyond their incredible taste, these cookies are a joy to bake and decorate. The dough is specifically formulated to hold its shape beautifully during baking, ensuring your meticulously cut festive shapes remain crisp and defined. Furthermore, they bake with a smooth, even surface, providing the perfect canvas for a simple glaze, festive sprinkles, or even intricate royal icing designs. They truly are the perfect cut-out cookies for Christmas and beyond, offering both deliciousness and visual appeal for your holiday table or cookie swap!
Don’t Sweat The Recipe is supported by its readers. We may earn a commission if you purchase through a link on our site. Learn more.
Essential Ingredients for Perfect Eggnog Cookies
Crafting the perfect eggnog cookie relies on a few key ingredients, each playing a crucial role in developing that signature holiday flavor and desirable texture. While many ingredients are standard baking staples, the quality and type of certain components can make all the difference. Let’s delve into what you’ll need to create these unforgettable treats:
The Spice Powerhouse: Fresh Ground Nutmeg
Among the medley of classic holiday spices like cinnamon and vanilla, this recipe truly elevates with fresh ground nutmeg. There is an undeniable and significant difference between pre-ground nutmeg bought off the spice rack and nutmeg freshly grated from a whole seed. Fresh nutmeg offers a more potent, aromatic, and complex flavor profile that simply can’t be matched by its pre-ground counterpart. The difference is akin to fresh coffee versus instant; one provides a rich, vibrant depth, while the other falls flat.
If you’re an avid baker or simply appreciate superior flavor, doing yourself the favor of investing in a nutmeg grinder (or a simple microplane) is highly recommended. It genuinely is a game-changer, infusing your baked goods with a warmth and depth that will impress everyone. You’ll instantly notice the enhanced aroma and richer taste in every bite of these eggnog cookies, transforming them from good to extraordinary.
Beyond Nutmeg: Rum Extract and Creamy Eggnog
To capture the authentic and rich eggnog flavor, you’ll need a good quality rum extract. This provides that distinct, boozy undertone without adding actual alcohol, making these cookies suitable for all ages and perfect for family gatherings. If you prefer to use actual rum, you can substitute a small amount of dark rum (e.g., 1-2 teaspoons) for part of the rum extract or vanilla extract, though be mindful of the liquid balance in the dough. Of course, the star liquid ingredient is eggnog itself, which is incorporated into both the cookie dough for its signature creamy taste and the delicate glaze for a cohesive flavor profile.
Don’t forget the festive flair! While entirely optional, colorful sprinkles are highly encouraged to transform these delicious treats into true holiday showstoppers. Whether you opt for classic red and green, sparkling gold, or a mix of white and silver, sprinkles add a joyful touch that makes these eggnog cookies even more irresistible for a Christmas cookie platter or thoughtful gift-giving.
Baking Perfect Eggnog Cut-Out Cookies: A Step-by-Step Guide
Creating these delightful eggnog cut-out cookies is a straightforward process, but paying attention to a few details will ensure your cookies are perfectly tender, flavorful, and hold their festive shapes. Follow these steps for baking success and enjoy the aroma of holiday spices filling your kitchen:
Preparing the Dough for Optimal Flavor and Texture
1. Combine Dry Ingredients: In a medium-sized bowl, meticulously whisk together the all-purpose flour, baking powder, ground cinnamon, freshly ground nutmeg, and kosher salt. This initial step is vital as it ensures that all the leavening agents and aromatic spices are evenly distributed throughout the dry mixture. This uniformity guarantees consistent flavor and a perfect rise in every single cookie you bake. Once combined, set this fragrant mixture aside.
2. Cream Butter and Sugar: In a large bowl of a stand mixer fitted with the paddle attachment, or using a robust hand mixer, begin by beating the softened unsalted butter and powdered sugar together. Start on a low speed to gently incorporate the ingredients and prevent a powdered sugar cloud, then gradually increase to medium-high speed. Continue beating for a good 2-3 minutes, or until the mixture transforms into a noticeably pale, light, and wonderfully fluffy consistency. This creaming process is crucial as it incorporates air, which is essential for achieving the cookies’ signature tender texture. Remember to stop and scrape down the sides and bottom of the bowl periodically to ensure every bit is thoroughly combined and no pockets of unmixed ingredients remain.
3. Add Wet Ingredients: Next, introduce the room temperature large egg, a teaspoon of vanilla extract, and a teaspoon of rum extract to the creamed butter and sugar mixture. Beat on medium speed until all these wet ingredients are fully combined and seamlessly incorporated into the mixture. Utilizing room temperature egg and butter is vital here, as it helps them emulsify properly, creating a smooth, cohesive dough without any undesirable curdling that can occur with cold ingredients.
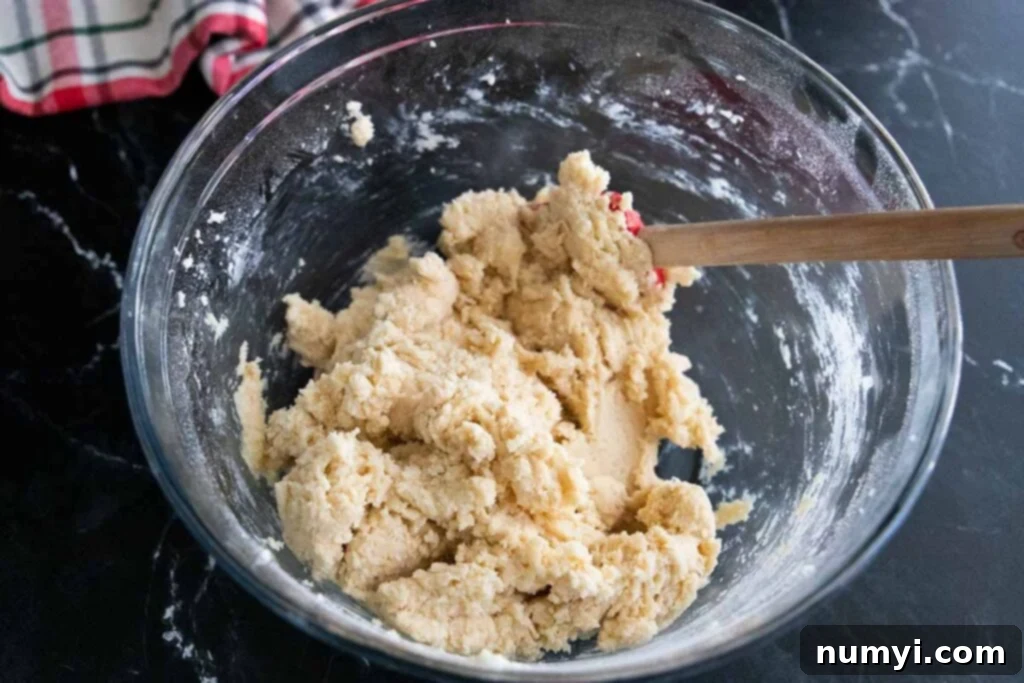
4. Incorporate Dry into Wet: Reduce the mixer speed to its lowest setting. Gradually add the reserved dry ingredient mixture to the wet butter mixture. Mix just until combined and a soft, cohesive dough begins to form. It’s important to be careful not to overmix at this stage, as excessive mixing can develop the gluten in the flour too much, which can result in tough, less desirable cookies. Stop mixing as soon as no visible streaks of dry flour remain in the bowl.
Chilling the Dough: The Secret to Perfect Cut-Outs
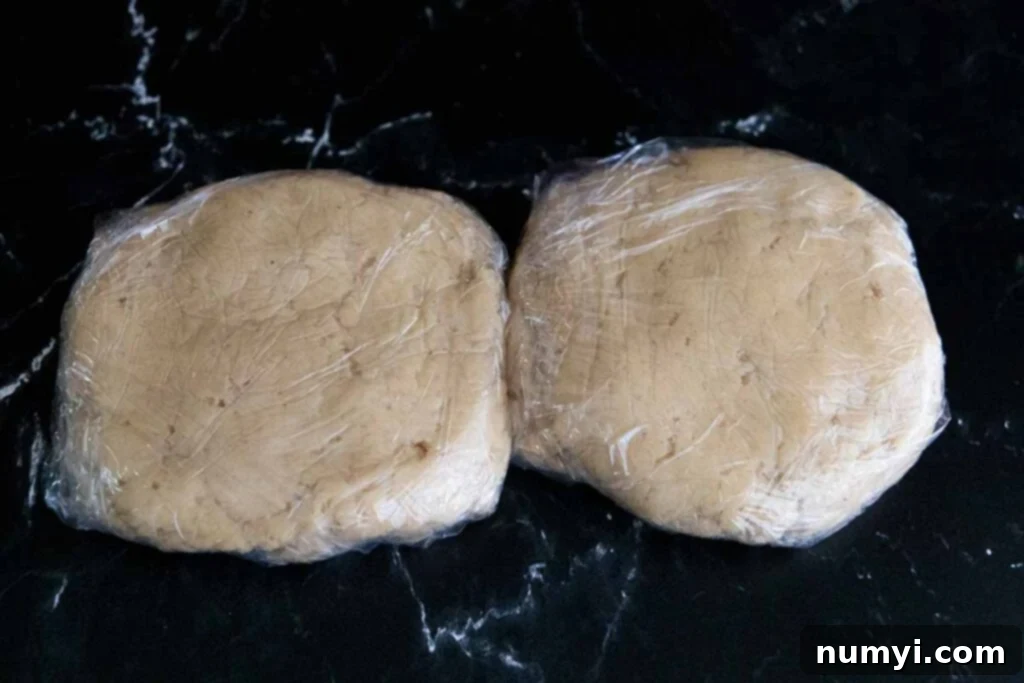
5. Chill the Dough: This is a critically important step for all cut-out cookies, especially our delicate eggnog cookies. Divide the freshly made cookie dough in half. Take each half, place it onto a piece of plastic wrap, and gently flatten it into a disk shape, about 1 inch thick. Wrap each disk tightly in plastic wrap, ensuring it’s sealed completely. Transfer these wrapped dough disks to the refrigerator to chill for a minimum of 2 hours. However, for optimal results – including better shape retention and a deeper, more developed flavor – chilling the dough overnight is highly recommended. Chilling solidifies the butter within the dough, which is essential for preventing the cookies from spreading excessively during baking, thus helping them maintain their intricate and beautiful festive shapes.
Rolling, Cutting, and Baking Your Festive Creations
6. Prepare for Rolling: Approximately 20-30 minutes before you plan to roll and cut your cookies, remove the dough from the refrigerator. This brief period allows the dough to soften just enough, making it easier to roll without cracking or tearing, yet it remains firm enough to handle without becoming overly sticky. This temperature balance is key for perfectly formed cookies.
7. Preheat Oven and Prepare Baking Sheets: Preheat your oven to a precise 375 degrees Fahrenheit (190 degrees Celsius). While the oven heats, prepare two large baking sheets by lining them with either parchment paper or reusable silicone baking mats. These liners are indispensable as they prevent sticking, make cleanup incredibly easy, and contribute to more even baking by providing a non-stick, insulated surface.
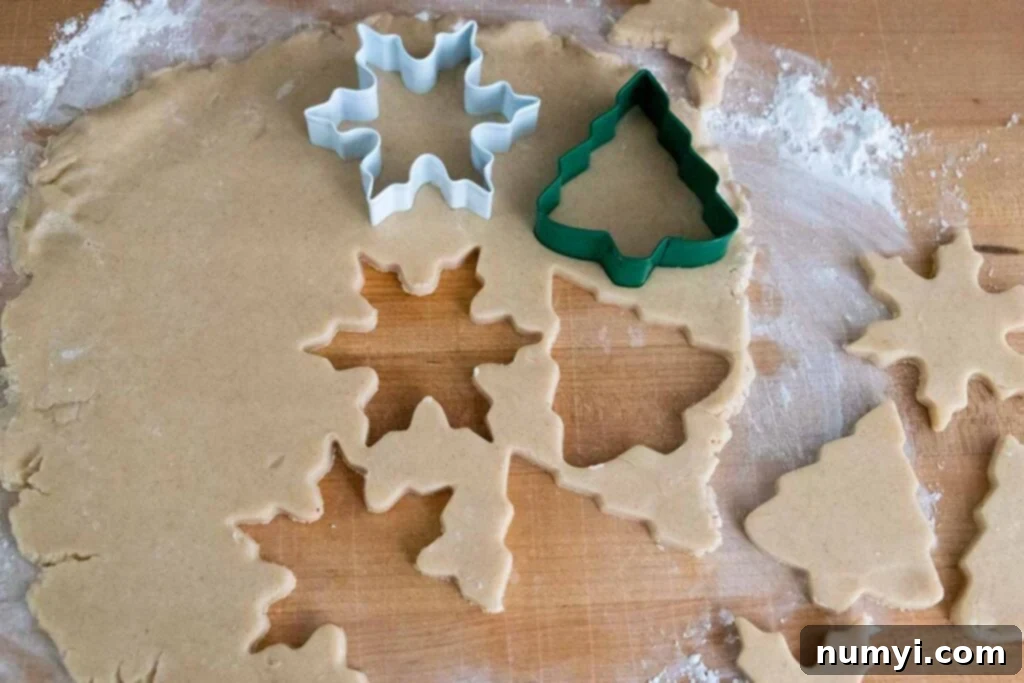
8. Roll and Cut: Lightly dust your clean work surface with powdered sugar (a trick that helps prevent sticking without adding extra flour that can toughen the cookies). Place one disk of dough onto the sugared surface and roll it out evenly to a thickness of about 1/8 inch to 1/4 inch. I personally find that 1/8 inch thickness yields a delightfully crispier cookie with well-defined edges. Use your favorite holiday-themed cookie cutters to cut out shapes, pressing firmly but gently. Carefully transfer the cut-out cookies to the prepared baking sheets, ensuring they are spaced at least 1 inch apart. You’ll notice these particular eggnog cookies are renowned for holding their shape exceptionally well and do not spread significantly during baking. Gather any dough scraps, gently re-form them into a disk, and return them to the refrigerator for 15-20 minutes to re-chill before re-rolling. This prevents the dough from becoming too warm and sticky, maintaining its workability.
The exact number of delicious eggnog cookies this recipe yields will depend on the size and intricacy of your chosen cookie cutters. On average, you can expect to produce around 3 dozen standard-sized festive cookies.
9. Bake to Perfection: Place your prepared baking sheets into the preheated oven. Bake for 7 to 10 minutes, or until the edges of the cookies just begin to turn a very light golden brown. It’s crucial to keep a close eye on them, as baking times can vary slightly depending on your specific oven and the thickness of your cookies. Over-baking can lead to dry, hard, and less flavorful cookies. The centers may still appear slightly soft when you remove them, but they will continue to firm up as they cool on the baking sheet. Once baked, let the cookies cool on the hot baking pans for about 1 minute. This brief cooling period allows them to firm up slightly before you attempt to move them. Then, carefully transfer them to a wire rack to cool completely. Ensure they are fully cooled to room temperature before applying any glaze to prevent it from melting or running.
Crafting the Irresistible Eggnog Glaze
A light, sweet, and aromatic eggnog glaze is the perfect finishing touch for these holiday cookies. It adds another subtle layer of eggnog flavor, a beautiful sheen, and a touch of elegance, making them even more festive and appealing to the eye and the palate.
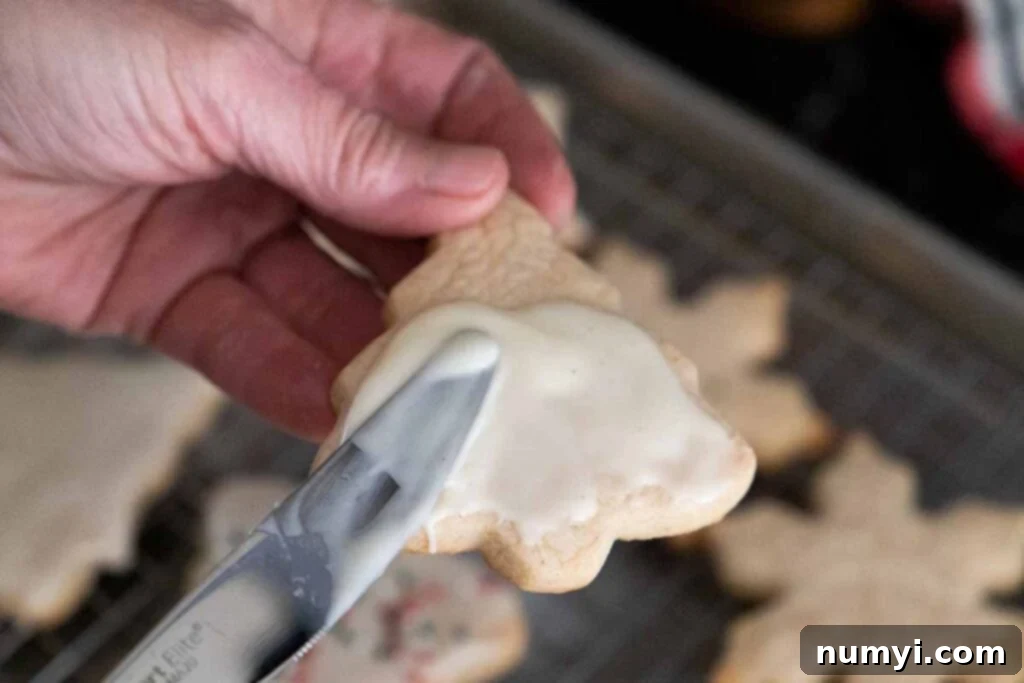
Simple Steps for a Smooth and Flavorful Glaze
1. Mix Ingredients: In a medium bowl, whisk together 2 cups of powdered sugar and 1/4 teaspoon of freshly grated nutmeg. The fresh nutmeg here is just as important as in the dough for maximum aroma. Gradually add 4 to 5 tablespoons of eggnog, whisking continuously until you achieve a smooth, pourable, yet thick enough consistency to cling to the cookies. The exact amount of eggnog needed may vary slightly depending on the fineness of your powdered sugar and your desired glaze consistency. It’s always best to start with 4 tablespoons and add more a tiny bit at a time (half a teaspoon increments) until you reach your preferred texture. For a thicker, more opaque glaze, use less eggnog; for a thinner, more translucent and delicate glaze, add a bit more.
2. Apply the Glaze: Once your eggnog cookies are completely cool to the touch, it’s time for the exciting part – glazing them! You have a couple of wonderful options for application:
- Spreading Method: For a controlled and elegant finish, use a small offset spatula or a butter knife to carefully spread a thin, even layer of glaze over the top surface of each cookie. This method works well for detailed designs or simply a clean, even coat.
- Dipping Method: For a quick, classic, and uniform coat, gently dip the entire top surface of each cooled cookie into the glaze. Allow any excess glaze to drip back into the bowl for a neat finish before carefully placing the cookie back on the wire rack. This method is often preferred for speed and ease, especially when making a large batch.
3. Decorate and Dry: While the glaze is still wet and tacky, generously sprinkle your favorite festive sprinkles over the cookies if desired. This adds a wonderful pop of color, texture, and holiday cheer, transforming your cookies into true visual delights. Allow the glazed cookies to dry completely on the wire rack before stacking them or storing them. This drying process typically takes at least 1-2 hours, or potentially longer in more humid environments. Once the glaze is fully set and hard to the touch, you can confidently stack and store your beautiful eggnog cookies in an airtight container.
These crispy, tender, and perfectly spiced eggnog cookies are perfect for any holiday occasion – whether it’s a friendly cookie swap, a stunning Christmas cookie tray for guests, a delicious addition to a potluck, or simply a cozy evening of holiday baking with loved ones. Be warned, they have a magical way of disappearing quickly, so you might want to bake a double batch!

Expert Tips for the Best Eggnog Cookies
Achieving bakery-quality eggnog cookies is simple with these helpful tips, designed to ensure your baking experience is smooth and your results are spectacular:
- Accurate Flour Measurement is Crucial: Flour is often the silent culprit behind dry or tough cookies. Always aerate your flour by fluffing it gently with a fork or spoon, then lightly spoon it into your measuring cup, and level it off with a straight edge (like the back of a knife). Avoid scooping directly from the bag with your measuring cup, as this can compact the flour significantly, leading to inadvertently adding too much and altering the dough’s texture.
- Room Temperature Ingredients are Key: Ensure both your butter and egg are at true room temperature before you begin mixing. This means the butter should be soft enough to easily indent with your finger but not melted or greasy. Eggs should not feel cold to the touch. Room temperature ingredients emulsify much better, creating a smooth, homogenous dough that bakes evenly and results in a superior cookie texture without any lumps or curdling. This step significantly impacts the final tenderness of your eggnog cookies.
- Choose Your Eggnog Wisely: You can use either homemade eggnog for a truly bespoke flavor and richness or a good quality store-bought eggnog. The richer and creamier the eggnog, the more pronounced its signature flavor will be in your finished cookies, adding a delightful depth that enhances the holiday spices.
- Do Not Skip Chilling the Dough: This is an absolutely non-negotiable step for any cut-out cookie recipe, including these eggnog cookies. Chilling the dough thoroughly (for at least 2 hours, but preferably overnight) helps the butter firm up within the dough. This solidification is vital because it prevents the cookies from spreading too much in the oven, ensuring your meticulously cut festive shapes remain sharp, defined, and picture-perfect. Additionally, overnight chilling allows all the lovely holiday flavors to fully develop and meld, yielding a more aromatic and truly delicious cookie.
- Cool Baking Sheets Between Batches: Never, ever place fresh cookie dough on a hot baking sheet. A hot sheet will cause the butter in the dough to melt too quickly before the cookie structure sets, leading to excessive spreading and misshapen cookies. Always allow your baking sheets to cool completely between batches, or ideally, use multiple sheets to rotate through, ensuring each batch starts on a cool surface.
- Roll Evenly for Consistent Results: For consistent baking and uniform texture, it’s paramount to roll your dough to an even thickness across the entire sheet. Using rolling pin guides or rulers can be incredibly helpful in achieving that perfect 1/8 to 1/4 inch thickness for all your cookies, ensuring they bake simultaneously and to the same level of crispness and tenderness.
- Don’t Overbake: These eggnog cookies are meant to be deliciously tender. Bake them until the edges are just barely golden, or if using lighter-colored cutters, just firm. The centers may still look slightly soft when you pull them from the oven, but they will continue to firm up beautifully as they cool on the baking sheet. Overbaking is the quickest way to end up with dry, crumbly, and less enjoyable cookies.
- Parchment Paper is Your Friend: Always use parchment paper or silicone baking mats when baking cookies. They not only prevent sticking, making it easier to transfer your delicate cookies, but also make cleanup a breeze. Furthermore, they contribute to more even baking by insulating the bottom of the cookies from direct heat, preventing burnt bottoms.
Frequently Asked Questions About Eggnog Cookies
Once the eggnog glaze has completely set and dried – which can take anywhere from 1-2 hours or even longer depending on the humidity in your kitchen – carefully place your cookies in an airtight container. Store them at room temperature, away from direct sunlight, where they will stay fresh and delicious for up to 1 week. For optimal softness and to prevent them from drying out, you can place a slice of plain white bread in the container; simply replace it every couple of days as it dries out.
Absolutely, freezing the cookie dough is an excellent way to prepare ahead for holiday baking or to have fresh cookies on demand! After forming the dough into disks, wrap each disk tightly in several layers of plastic wrap, then place them in an airtight freezer bag or container. The dough can be frozen for up to 2-3 months. When you’re ready to bake, transfer the frozen dough to the refrigerator and let it thaw overnight. Remember, the dough still needs to be cold for rolling and cutting to prevent excessive spreading, so remove it from the fridge only about 20-30 minutes before you plan to roll it out to allow it to become just pliable enough to work with.
If you plan on freezing baked eggnog cookies, it is highly recommended to do so before glazing or frosting them. Once your cookies are completely baked and cooled, arrange the unglazed cookies in a single layer on a parchment paper-lined baking sheet and freeze them until they are solid (this usually takes about 1-2 hours). Once hard, transfer the frozen cookies to an airtight freezer container or heavy-duty freezer bag, separating layers with parchment paper to prevent them from sticking together. They can be frozen for up to 2 months for the best quality and flavor. To enjoy, thaw them overnight in the refrigerator or at room temperature, then prepare and apply the eggnog glaze as instructed in the recipe.
If your dough feels excessively sticky after chilling, it could be a sign that you’ve added too much liquid or perhaps didn’t chill it for long enough. Try dusting your work surface and rolling pin with a bit more powdered sugar (avoiding regular flour, as it can toughen the cookies). If, on the other hand, the dough is too crumbly and difficult to roll, it might be too cold or you may have added too much flour. In this case, let it sit at room temperature for an additional 10-15 minutes to soften slightly. If it’s still very dry, try adding a tiny bit (1/2 teaspoon at a time) of additional eggnog or milk while gently kneading it until it comes together into a workable consistency. Always measure ingredients accurately to avoid these issues!
Yes, absolutely! Many brands offer delicious alcohol-free eggnog, which works perfectly fine and will deliver a wonderful flavor in this recipe. For the rum extract, if you prefer not to use it, have dietary restrictions, or simply don’t have it on hand, you can substitute it with an equal amount of additional vanilla extract. While the rum extract does contribute a distinct “eggnog” depth that mimics traditional eggnog, extra vanilla will still result in wonderfully flavored and aromatic cookies that everyone can enjoy.
More Delicious Eggnog Recipes to Explore
If you’ve fallen in love with the festive flavor of eggnog after trying these delightful cookies, you’ll be delighted to know there are many other incredible ways to incorporate this beloved holiday ingredient into your baking and beverages. Eggnog’s creamy, spiced profile lends itself beautifully to a variety of treats. Explore these other fantastic eggnog-inspired recipes to keep the holiday spirit going:
Eggnog Cheesecake with Gingersnap Crust
Eggnog Bundt Cake (Eggnog Glaze)
Better Than Starbucks Eggnog Latte
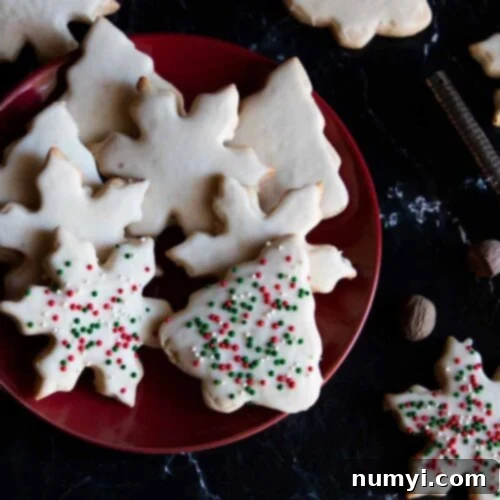
Classic Eggnog Cookies with Sweet Glaze Recipe
Print
Pin
Rate
Ingredients
Eggnog Cookies
- 3 1/4 cups All-purpose flour
- 2 tsp Baking powder
- 1 tsp Ground cinnamon
- 1 tsp Fresh ground nutmeg
- 1 tsp Kosher salt
- 1 cup Unsalted butter softened
- 2 cups Powdered sugar
- 1 large Egg room temperature
- 1 tsp Vanilla extract
- 1 tsp Rum extract
Eggnog Glaze
- 2 cups Powdered sugar
- 1/4 tsp Fresh grated nutmeg
- 4-5 tbsp Eggnog
Instructions
For the Cookie Dough
-
In a medium bowl, whisk together the flour, baking powder, cinnamon, nutmeg, and salt until well combined. Set this dry mixture aside.3 1/4 cups All-purpose flour, 2 tsp Baking powder, 1 tsp Ground cinnamon, 1 tsp Fresh ground nutmeg, 1 tsp Kosher salt
-
In a large bowl of a stand mixer, using the paddle attachment, beat the softened unsalted butter and powdered sugar together on medium speed until the mixture is pale and fluffy, typically 2-3 minutes. Stop and scrape down the bowl as needed to ensure even mixing.1 cup Unsalted butter, 2 cups Powdered sugar
-
Add the room temperature large egg, vanilla extract, and rum extract to the butter mixture. Beat until all ingredients are fully combined and the mixture is smooth.1 large Egg, 1 tsp Vanilla extract, 1 tsp Rum extract
-
Turn the mixer to low speed and gradually add the dry ingredients to the wet butter mixture. Beat just until a soft, cohesive dough forms and no dry streaks of flour are visible. Be careful not to overmix.
-
Divide the dough into two equal halves. Place each half onto a piece of plastic wrap and flatten it into a disk shape. Wrap tightly and refrigerate for at least 2 hours, or for best flavor development and easier handling, chill overnight.
-
Remove the chilled dough from the refrigerator about 20-30 minutes before you plan to roll and cut your cookies to allow it to soften slightly.
-
Preheat your oven to 375 degrees F (190 degrees C). Prepare two large baking sheets by lining them with parchment paper or silicone baking mats.
-
Lightly dust your work surface with powdered sugar. Roll out one disk of dough to an even thickness of 1/8″ to 1/4″. Use your favorite cookie cutters to cut out shapes. Carefully transfer the cut cookies to the prepared baking pans, placing them about 1 inch apart. These cookies don’t spread much. Collect dough scraps, gently re-form into a disk, and chill briefly before re-rolling.
-
Bake for 7 to 10 minutes, or until the edges are just beginning to turn a very light golden brown. Do not overbake. Let the cookies cool on the pans for about 1 minute to firm up, then transfer them to a wire cooling rack to cool completely before glazing.
For the Eggnog Glaze
-
In a medium bowl, whisk together 2 cups of powdered sugar, 1/4 tsp of freshly grated nutmeg, and gradually add 4 to 5 tablespoons of eggnog. Mix until a smooth, pourable, yet thick consistency is achieved. Adjust eggnog amount as needed to reach your desired glaze thickness.2 cups Powdered sugar, 1/4 tsp Fresh grated nutmeg, 4-5 tbsp Eggnog
-
Once the cookies are completely cooled, spread the eggnog glaze over them using a butter knife or small offset spatula, or dip the top of each cookie into the glaze, allowing any excess to drip off.
-
If desired, top with festive sprinkles while the glaze is still wet. Let the glazed cookies dry completely on a wire rack before stacking them in an airtight container for storage.
Notes
Always use room temperature butter and eggs. This allows them to cream together more effectively, creating a smoother, silkier dough that prevents lumps and curdling, ultimately leading to a better cookie texture.
Chilling the dough is an essential step! It prevents the cookies from spreading too much during baking, ensuring they hold their intricate cut-out shapes. Chilling overnight is particularly beneficial as it helps to develop a richer and deeper eggnog flavor.
Storing Glazed Cookies: Ensure the icing has completely hardened before storing. Place the cookies in an airtight container at room temperature, where they will stay fresh for up to 1 week.
Freezing Unbaked Cookie Dough: To prepare in advance, tightly wrap the dough in plastic wrap and then place it in an airtight container or a freezer-safe bag. When you’re ready to bake, thaw the dough in the refrigerator overnight. Remember, the dough should still be cold when you roll it out and cut the shapes, but let it sit at room temperature for about 20-30 minutes before handling for easier rolling.
Freezing Baked Cookies (Unglazed): If you plan to freeze baked cookies, do not glaze them beforehand. Arrange the fully cooled, unglazed cookies on a baking sheet lined with parchment paper and freeze until solid. Once hard, transfer the frozen cookies to an airtight freezer container, separating layers with parchment paper. They will maintain their best quality for up to 2 months. Thaw them in the refrigerator overnight, then proceed with making and applying the eggnog glaze as per the recipe instructions.
