Crispy Baked Chicken Chimichangas: A Healthier Homemade Mexican Delight
Craving the rich, savory flavors of Mexican food but looking for a lighter, healthier option? These baked chicken chimichangas are incredibly easy to make at home and deliver all the satisfying taste without the deep-fried guilt. Get ready to transform your kitchen into your favorite Mexican restaurant!

This recipe is more than just a meal; it’s an experience. The heart of these chimichangas lies in our slow cooker Mexican chicken, which is absolutely bursting with flavor. Its tender, juicy texture and aromatic spices elevate these baked chimichangas from simple burritos to an extraordinary culinary delight that will have everyone asking for seconds.
Why You’ll Fall in Love with These Baked Chimichangas
Forget the mess and extra calories of traditional fried chimichangas. By opting to bake these instead of deep-frying, you’re not only making a healthier choice but also simplifying the cooking process significantly. This method results in a beautifully crispy exterior while keeping the succulent filling perfectly moist. While classic chimichangas are fried, our oven-baked version offers a fantastic alternative that some might even call “oven-baked burritos” – a testament to their delightful texture and ease of preparation. This healthier approach makes them an ideal weeknight meal or a crowd-pleasing dish for entertaining, ensuring a delicious Mexican feast without the heavy feeling.
Essential Ingredients for Perfect Chimichangas
Crafting the best baked chicken chimichangas starts with selecting quality ingredients that build layers of flavor and texture. Here’s a closer look at what you’ll need to create this amazing dish:
- Chicken – The star of the show! This recipe truly shines when you use our shredded Mexican chicken recipe. Prepared in a slow cooker, it infuses the chicken with rich, authentic Mexican flavors that are unparalleled. Its tenderness and robust seasoning are what truly take these chimichangas over the top. If you’re short on time, a rotisserie chicken shredded and tossed with a good quality taco sauce can be a convenient substitute, though for the best results, we highly recommend making the slow cooker version.
- Cheese – Shredded sharp cheddar cheese provides a wonderfully tangy and melty addition to the filling. Its distinct flavor pairs beautifully with the Mexican chicken. For a milder taste or a different flavor profile, you could also consider Monterey Jack, a Mexican blend, or even a pepper jack for a little kick. Ensure it’s freshly shredded for the best melt.
- Tortillas – You will need large, burrito-sized flour tortillas, typically 10-inch in diameter. These provide ample space for the generous filling and are sturdy enough to withstand baking without tearing. Warming the tortillas slightly before filling them can also make them more pliable and easier to roll without cracking.
- Avocado Cilantro Sauce – This creamy, zesty sauce is the perfect cool counterpoint to the warm, savory chimichangas. It’s made with sour cream, mayonnaise, fresh avocado, fragrant cilantro, and a splash of fresh lime juice, seasoned with salt and pepper to taste. The blend creates a smooth, vibrant sauce that adds a burst of freshness and a luxurious finish to every bite.

Pro Tips for the Best Baked Chimichangas
Achieving perfectly crispy and flavorful baked chimichangas is easy with these helpful tips:
- Don’t Overfill the Tortillas: While it might be tempting to pack in as much delicious filling as possible, overfilling can make your chimichangas difficult to fold securely. This can lead to the filling spilling out during baking, and an unevenly cooked result. Aim for about ½ to ¾ cup of filling per 10-inch tortilla.
- Use a Baking Rack: This is a game-changer! Placing your chimichangas on a wire rack set inside a baking sheet allows air to circulate underneath them as they bake. This ensures that both the top and bottom of your chimichangas become wonderfully crispy and golden brown, not just the side facing up.
- Watch Them Closely: Oven temperatures can vary, and tortillas can go from perfectly golden to burnt in a matter of minutes. Keep a keen eye on your chimichangas, especially during the last few minutes of baking. You’re looking for a beautiful, even golden-brown color and a crispy texture.
- Warm Your Tortillas: Cold tortillas can be stiff and prone to cracking when folded. Gently warm your tortillas in the microwave for 15-20 seconds or in a dry skillet for a few seconds per side. This makes them more pliable and easier to roll, preventing tears and ensuring a tight seal.
- Brush with Melted Butter: A light brushing of melted butter on both sides of the chimichangas before baking is crucial for achieving that desirable crispy, golden-brown exterior. It helps create a beautiful crust and adds a subtle richness that enhances the flavor.
- Time-Saving Shortcut: If you’re pressed for time and can’t make the slow cooker Mexican chicken from scratch, don’t despair! You can easily shred a store-bought rotisserie chicken and toss it with a quality taco seasoning or taco sauce for a quick and flavorful filling. While the slow cooker version offers superior depth of flavor, this shortcut is perfect for busy weeknights.
Delicious Variations & Serving Ideas
While these baked chicken chimichangas are fantastic on their own, don’t hesitate to get creative with additional fillings and toppings to customize them to your liking. Mexican cuisine is all about vibrant flavors and personal touches!
- Add More Filling Components: Boost the heartiness and flavor of your chimichangas by incorporating other delicious elements. Consider adding a layer of creamy refried beans, hearty black beans, or a scoop of flavorful Mexican rice alongside the chicken and cheese. These additions add texture, substance, and a wonderful depth of flavor.
- Explore Different Toppings: The right toppings can elevate your chimichangas from great to unforgettable. Beyond the incredible avocado cilantro sauce, try a drizzle of warm queso dip, a dollop of fresh guacamole, or a spoonful of vibrant pico de gallo. Sour cream, extra fresh cilantro, diced red onions, or even pickled jalapeños can add contrasting flavors and textures that truly make the dish pop.
- Serve with Sides: Complete your Mexican feast with complementary side dishes. A simple green salad with a lime vinaigrette, a side of cilantro-lime rice, or even some grilled corn on the cob can balance the richness of the chimichangas beautifully.
How to Master Baked Chicken Chimichangas
Making these delicious baked chimichangas is a straightforward process, especially when you break it down into a few key steps. Let’s walk through how to create this mouthwatering dish in your own kitchen:
Step 1: Prepare the Flavorful Mexican Chicken
The foundation of this recipe is our slow cooker Mexican chicken. Prepare it according to the recipe instructions, allowing the rich flavors to develop beautifully. Once cooked, remove the chicken mixture from the slow cooker and ensure you drain any excess liquid thoroughly. This step is crucial; too much liquid in your filling will make your chimichangas soggy rather than crispy, compromising the texture we’re aiming for.
Step 2: Craft the Zesty Avocado Cilantro Sauce
While your chicken is ready, prepare the vibrant avocado cilantro sauce that will add a refreshing touch to your chimichangas. In the bowl of a food processor, combine sour cream, mayonnaise, ripe avocado (pitted and skinned), fresh cilantro, and the juice of one lime. Blend these ingredients until the sauce is completely smooth and creamy. Taste and season with salt and pepper as needed. Transfer the finished sauce to a separate bowl and refrigerate it while you assemble the chimichangas, allowing the flavors to meld and chill.
Step 3: Preheat and Prepare Your Baking Setup
Before assembly, preheat your oven to 400ºF (200ºC). Prepare a large baking sheet by lining it with aluminum foil for easy cleanup. Crucially, place a wire baking rack on top of the foil-lined baking sheet. As mentioned in our tips, this rack is essential for allowing air to circulate, ensuring that your chimichangas crisp up evenly on all sides.
Step 4: Assemble Your Chimichangas
Lay out a large flour tortilla on a clean surface. Place a heaping 1/2 cup (or slightly more, depending on tortilla size and preference) of the delicious shredded Mexican chicken in the middle. Top the chicken with your desired amount of shredded sharp cheddar cheese. Now, it’s time to fold it up burrito-style, ensuring a secure and compact package.
Mastering the Burrito Folding Technique
A well-folded chimichanga ensures the filling stays put and helps achieve an even crispness. Start by folding two opposite sides of the tortilla in towards the center, covering the filling. Next, take one of the remaining ends of the tortilla and fold it tightly over the filling and the previously folded sides. Gently tuck the edge underneath the filling and roll it tightly towards the other end. The goal is a snug, cylindrical shape that will hold together during baking.
Step 5: Butter and Bake to Golden Perfection
Carefully place your assembled chimichangas seam-side down on the prepared wire rack. Using a pastry brush, lightly brush both sides of each chimichanga with melted butter. This butter layer is what will help them achieve that irresistible golden, crispy crust. Bake for approximately 20 minutes, or until they are beautifully browned and crispy all over. Remember to keep an eye on them to prevent burning, as oven times can vary.
Step 6: Garnish, Serve, and Enjoy!
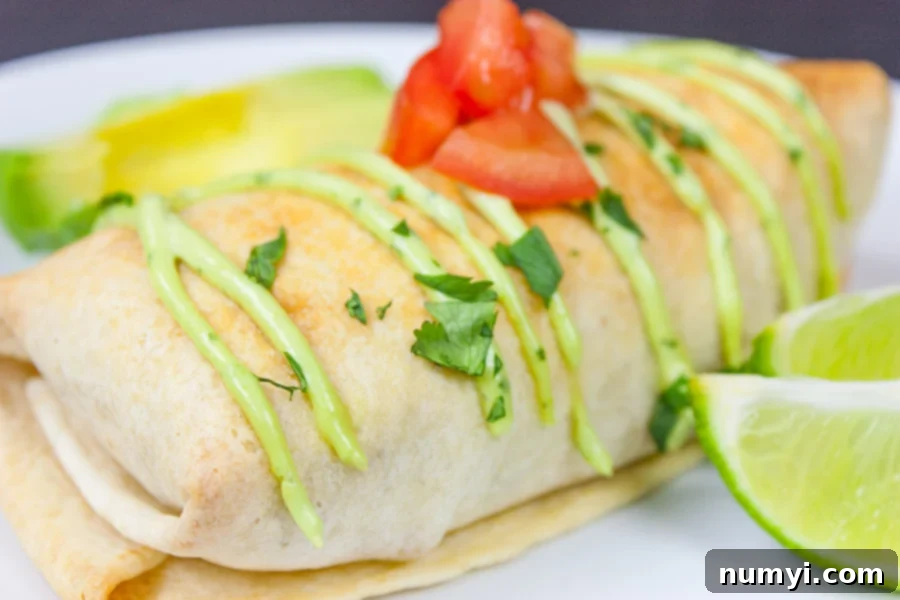
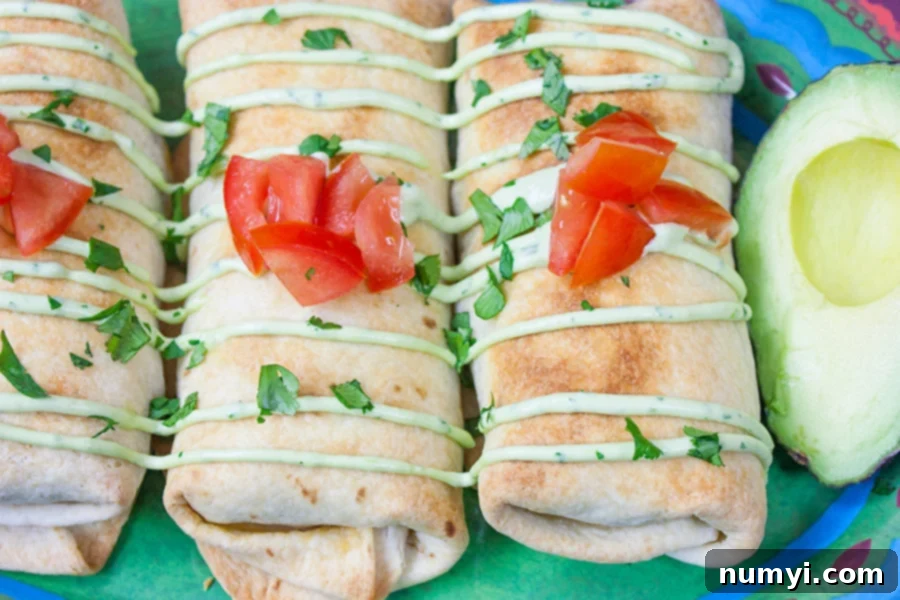
Once your baked chicken chimichangas emerge from the oven, golden and fragrant, transfer them to a serving platter. Drizzle generously with the chilled avocado cilantro sauce and add any other desired toppings such as diced tomatoes, extra cilantro, sour cream, or salsa. Serve immediately and relish in the crispy, crunchy exterior and the juicy, tender, flavorful Mexican shredded chicken inside. It’s a culinary experience that proves you don’t need deep-frying for incredible taste and texture!
Each bite offers a delightful contrast: a satisfyingly crispy, golden shell giving way to a rich, savory, and incredibly flavorful shredded Mexican chicken filling. Who needs deep-fried versions when you can achieve such perfection with a healthier, oven-baked method?
Frequently Asked Questions About Chimichangas
At their core, burritos and chimichangas are quite similar in terms of filling and wrapping. The key distinction lies in their preparation: a burrito is typically a soft, rolled tortilla filled with ingredients and served as is, while a chimichanga is a filled burrito that is then deep-fried until crispy. Our baked chimichanga recipe offers a healthier alternative to the traditional fried version, often resembling an oven-baked burrito in its cooking method, but retaining the crisp texture of a chimichanga.
While both are delicious Mexican dishes, chimichangas and enchiladas have distinct characteristics. Enchiladas typically feature tortillas filled with ingredients, rolled, and then baked covered in a savory sauce (like red chili sauce or green enchilada sauce) and often topped with cheese. Chimichangas, on the other hand, whether fried or baked like ours, are generally not submerged in sauce during cooking. They are usually served with sauces or toppings on the side or drizzled over them after they’re cooked, emphasizing their crispy exterior.
Absolutely! These chimichangas are perfect for meal prepping. You can assemble them without baking, wrap each unbaked chimichanga tightly in aluminum foil, and then place them in a freezer-safe bag. They can be frozen for up to 3 months. When you’re ready to cook, you can bake them directly from frozen: brush with melted butter and bake at 400°F (200°C) for about 40 minutes, or until thoroughly heated and golden brown. If thawed, they will only need about 25 minutes of baking time.
To store any leftovers, allow the cooked chimichangas to cool completely to room temperature. Then, place them in an airtight container and refrigerate for up to 4 days. For best results when reheating, you can warm them in an oven or air fryer to help maintain their crispy texture.
Baked chicken chimichangas pair wonderfully with a variety of side dishes. For a fresh contrast, consider serving them with a simple green salad dressed with a light vinaigrette, or a vibrant corn salad. Classic Mexican sides like cilantro-lime rice, black beans, or refried beans are always a hit. For a bit of extra indulgence, a side of warm queso dip or a bowl of fresh guacamole and tortilla chips would be perfect.
More Delicious Recipes to Explore
If you loved these baked chicken chimichangas, be sure to check out these other fantastic recipes that bring authentic and comforting flavors to your table:
- Frito Pie Casserole Recipe: A classic comfort food with a satisfying crunch.
- Crispy Pork Carnitas Recipe: Perfectly tender and crispy pork, ideal for tacos or burritos.

Baked Chicken Chimichangas Recipe
Print
Pin
Rate
Ingredients
- 1 recipe of Slow Cooker Mexican Chicken
- 6 burrito size tortillas
- 2 cups shredded sharp cheddar cheese
- 3 Tbsp. melted butter
For the Avocado-Cilantro Sauce:
- ¼ cup sour cream
- ½ cup mayo
- 1 ripe avocado, pitted and skinned
- ¼ cup cilantro, chopped
- Juice of 1 lime
- Salt to taste
Optional Toppings
- tomatoes
- sour cream
- cilantro
- salsa
Instructions
-
Prepare Mexican Chicken according to recipe directions. Drain excess liquid from chicken to prevent soggy chimichangas.
-
Prepare the avocado cilantro sauce by adding the sour cream, mayo, avocado, cilantro, lime juice, and salt to taste to the food processor and blend until smooth. Place in a separate bowl and set in the refrigerator to chill.
-
Preheat oven to 400 degrees F (200°C). Line a baking sheet with foil and add a baking rack on top to ensure all-around crispness.
-
Warm tortillas slightly if needed for pliability. Prepare the chimichangas by adding a heaping 1/2 cup of filling to each tortilla, top with the desired amount of cheese, and roll up burrito-style, tucking in the sides for a secure seal.
-
Place chimichangas on the baking rack, seam side down, and brush both sides lightly with the melted butter.
-
Bake for approximately 20 minutes or until golden brown and crispy. Watch closely, as baking times can vary and you don’t want them to burn.
Notes
Allow the filling to cool: Before storing, ensure any leftover chicken filling or assembled but unbaked chimichangas have cooled down to room temperature.
Use airtight containers: Transfer leftover cooked chimichangas or raw filling to an airtight container or sealable plastic bag.
Refrigeration: Cooked chimichangas or raw filling can be stored in the refrigerator for up to 3 to 4 days.
Freezing (optional): For longer storage, you can freeze assembled but unbaked chimichangas. Wrap each tightly in aluminum foil, then place them in a freezer-safe container or bag, removing as much air as possible. The chimichangas can be stored in the freezer for up to 2 to 3 months.
Thawing and reheating: To cook from frozen, brush with butter and bake at 400°F (200°C) for about 40 minutes, or until hot throughout. If thawed in the refrigerator overnight, bake for about 25 minutes. Leftover cooked chimichangas can be reheated in an oven or air fryer for best crispness.
Nutrition
This recipe was inspired by TheGirlWhoAteEverything. We’ve put our own healthy twist on it to make it perfect for your home kitchen!
