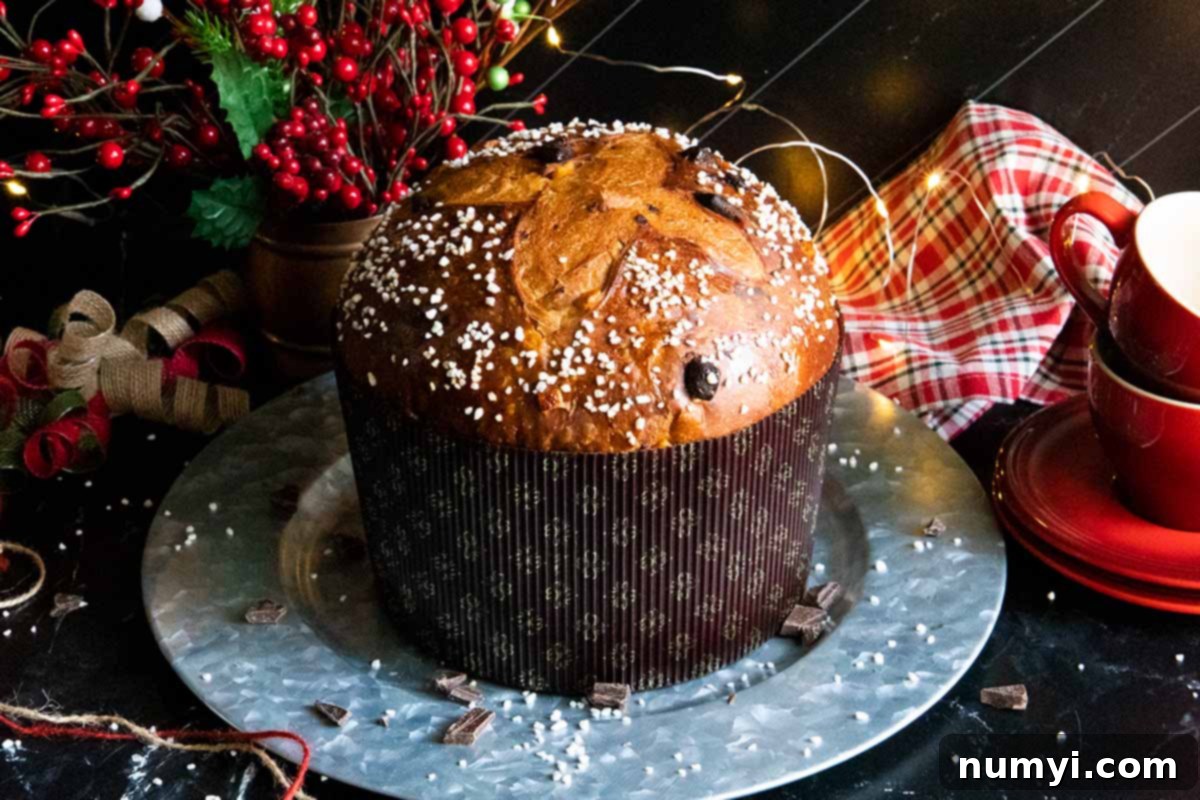
Homemade Chocolate Orange Panettone: The Ultimate Festive Italian Christmas Bread Recipe
There’s something truly magical about the aroma of freshly baked bread, especially when it’s infused with the warm, comforting scents of the holiday season. This homemade chocolate orange panettone recipe captures that magic perfectly. Imagine a sweet, wonderfully light, and incredibly moist Italian Christmas bread, generously studded with rich chocolate chunks and vibrant candied orange pieces that have been lovingly soaked in fragrant orange liqueur. It’s a culinary masterpiece that embodies the spirit of festive indulgence.
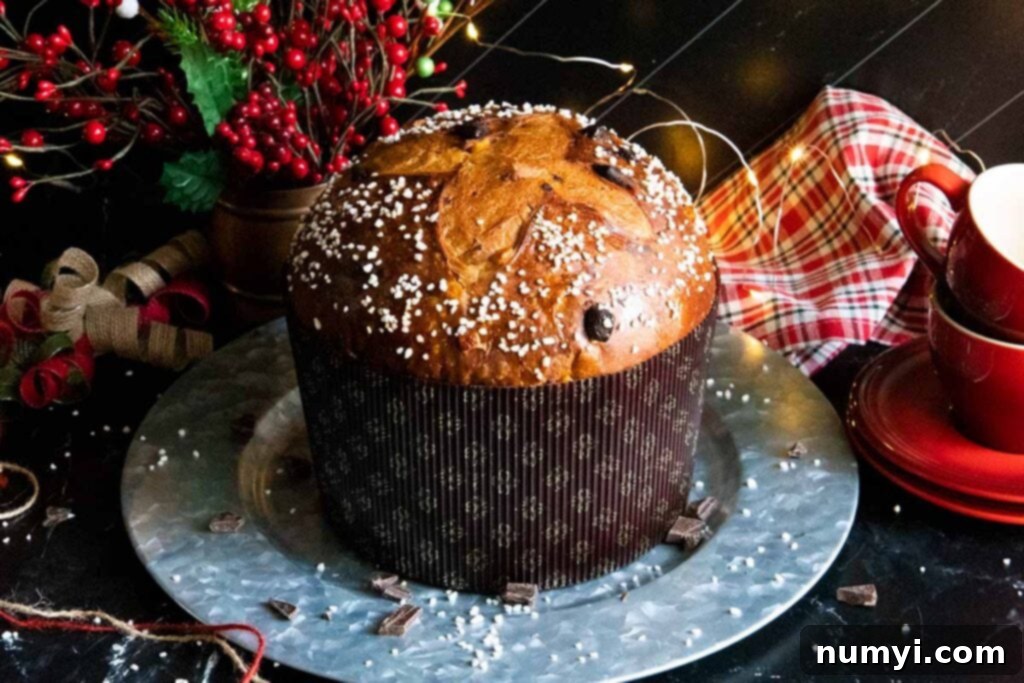
This exquisite bread is not just a treat for the senses; it’s also a perfect gift that speaks volumes of care and effort. Wrap a beautifully baked loaf for friends and family, or simply bake one for yourself and enjoy a slice with your favorite holiday coffee or a luxurious glass of dessert wine. The harmonious blend of deep chocolate and bright citrus in this classic Italian delight is sure to elevate any festive occasion.
Crafting Your Own Chocolate Orange Panettone
Embrace the joyful spirit of the holidays with the timeless flavors of chocolate and orange, expertly woven into a light, fluffy, and incredibly buttery-rich Christmas bread. Making panettone at home is a rewarding journey, a testament to patience and passion for baking. This recipe guides you through each step, ensuring a spectacular result that will impress everyone at your holiday table.
What Exactly is Panettone?
Panettone is a quintessential sweet Italian bread, traditionally enjoyed during the Christmas season. Originating from Milan, its history is rich with legend, often involving tales of love, passion, and culinary innovation. Historically, panettone was a simple, dome-shaped bread, usually enriched with dried fruits and raisins. Over centuries, it evolved into the beloved festive staple we know today, characterized by its tall, airy structure and buttery, fragrant crumb. While the classic version with candied fruit and raisins remains popular, modern variations, like this chocolate orange panettone, offer exciting twists on the tradition, appealing to a broader range of tastes.
Developing this particular chocolate orange panettone recipe has been a labor of love, building upon insights gained from perfecting our traditional panettone recipe. Through numerous tests and adjustments, we’ve uncovered several key techniques that ensure a truly exceptional loaf. The combination of rich chocolate and zesty orange is not just delicious, it’s a celebratory pairing that perfectly complements the rich, airy texture of panettone, making it an irresistible addition to your holiday baking repertoire.
Essential Tips for Baking Perfect Chocolate Orange Panettone
Achieving panettone perfection requires attention to detail and a few crucial techniques. Here are some invaluable tips derived from extensive testing that will guide you to a light, flavorful, and beautifully textured loaf:
- Incorporating Chocolate: The chocolate needs to be thoroughly kneaded into the dough, not just pressed or rolled in. This ensures even distribution and prevents large pockets of chocolate that can weigh down the dough or melt out during baking.
- Choosing the Right Chocolate: I experimented with chocolate chips but found they didn’t quite deliver the decadent mouthful of rich chocolate I desired. For the best results, opt for high-quality semi-sweet chocolate, roughly chopped into substantial chunks (about 1/4″ to 1/2″). These chunks will melt slightly, creating luscious pockets of chocolate that enhance every bite, unlike smaller chips which can sometimes get lost or dry out.
- The Magic of Refrigeration: Refrigerating the dough overnight is a game-changer. This slow, cold fermentation truly develops a more profound, complex flavor profile in the bread, making it incredibly aromatic and delicious. It also results in a more manageable dough, which is a significant benefit for such a rich and often sticky mixture.
- Handling Cold Dough for a Smooth Crumb: When removing the cold dough from the refrigerator, allow it to sit in a warm, draft-free place for at least one hour before gently punching it down. This allows the dough to relax and warm up slightly, making it more pliable. Then, gently press it out, roll, and form a ball. This careful handling helps to prevent large, undesirable holes in the finished bread, ensuring a consistently tender and airy crumb.
- Adjusting Baking Time: This version of panettone, with its added chocolate and fruit, may take a little longer to bake than a traditional one. This can also be influenced by individual oven variations. Therefore, always test for doneness with a wooden skewer (it should come out clean) or a thermometer (the internal temperature should reach 200°F / 93°C). Don’t rely solely on the clock.
- Preventing Over-Browning: Using double baking pans helps insulate the bottom of the panettone, preventing it from browning too quickly or excessively. If you notice the top browning too much during baking, gently tent it with aluminum foil to protect it.
Serving and Savoring Your Chocolate Panettone
Panettone is a versatile treat, and there are many delightful ways to enjoy it. It’s often best served warm, which enhances its buttery notes and allows the chocolate chunks to soften and become gooey. Simply place a few slices on a baking sheet and warm them gently in the oven for a few minutes. You can also toast slices for a delightful crunch.
For an extra special breakfast or brunch, transform leftover panettone into an indulgent French toast. The rich, airy bread soaks up the egg mixture beautifully, creating a truly luxurious dish. Serve it with a dusting of powdered sugar, fresh berries, or a drizzle of maple syrup. Panettone also pairs wonderfully with a cup of espresso, a glass of sweet dessert wine, or a dollop of mascarpone cream. Don’t limit it to just breakfast; it makes a fantastic dessert or a sophisticated afternoon tea accompaniment.
How Long Does Panettone Last?
Like any freshly baked bread, panettone will gradually lose moisture and dry out over time. To keep your homemade panettone as fresh as possible, store it in a plastic bag or an airtight container at room temperature for up to 5 days. For extended freshness, you can refrigerate it for up to 7 days. If you wish to store it for longer, panettone freezes remarkably well. Slice it, wrap individual slices tightly in plastic wrap, then place them in a freezer-safe bag for up to 3 months. Thaw slices at room temperature or gently warm them in the oven for a quick indulgence.
Ingredients You’ll Need for This Chocolate Orange Panettone Recipe
Crafting this panettone requires a few key ingredients, each playing a vital role in its exquisite texture and flavor. Using high-quality ingredients will undoubtedly elevate your final product.
For the Starter (Biga)
- All-purpose flour (or Bread flour): Provides the structure for the starter, initiating the fermentation process.
- Water: Activates the yeast and brings the starter together.
- Dry active yeast: The leavening agent that creates the airy texture and complex flavors.
For the Dough
- Water: Warm water (110-115°F / 43-46°C) is essential for proofing the yeast, ensuring it’s active and ready to work.
- Dry active yeast: More yeast for the main dough, contributing to its significant rise and fluffy texture.
- Eggs (Room temperature): Room temperature eggs incorporate more easily into the dough, leading to a smoother, more emulsified mixture and better rise. They add richness and help create a tender crumb.
- Granulated sugar: Sweetens the bread and provides food for the yeast, aiding in fermentation.
- Vanilla extract: Adds a classic, warm aromatic note that complements the other flavors.
- Orange zest: One packed tablespoon of finely grated orange zest is crucial for infusing the bread with a bright, intense, and natural orange flavor, far superior to artificial extracts.
- Bread flour (or all-purpose flour): While all-purpose flour works, bread flour, with its higher protein content, yields a lighter, chewier, and more open texture, which is ideal for panettone.
- Kosher salt: Balances the sweetness and enhances all the flavors in the bread, also regulating yeast activity.
- Unsalted butter: Good quality European butter is highly recommended. Its higher fat content and lower water content contribute to an incredibly rich, moist, and tender crumb, making a noticeable difference in the final product’s taste and texture. Ensure it’s softened to room temperature for smooth incorporation.
- Semi-sweet chocolate: As mentioned, roughly chopped chunks are preferred over chocolate chips. I tried bittersweet chocolate, but found it wasn’t sweet enough for our preference in panettone. Semi-sweet offers the perfect balance.
- Candied orange peel (diced): Provides concentrated bursts of sweet, tangy orange flavor and a delightful chewiness.
- Orange liqueur: A splash of orange liqueur (such as Grand Marnier or Cointreau) deepens and intensifies the orange flavor, adding a sophisticated aromatic complexity to the candied peel.
Don’t Sweat The Recipe is supported by its readers. We may earn a commission if you purchase through a link on our site. Learn more.
How to Make Chocolate Orange Panettone: A Detailed Guide
Making panettone is a multi-day process, but each step is straightforward and incredibly rewarding. The extended fermentation contributes significantly to its unique flavor and texture. Follow these instructions carefully, and embrace patience – it’s the secret ingredient to extraordinary panettone.
Day One: The Starter and Fruit Preparation (The Night Before)
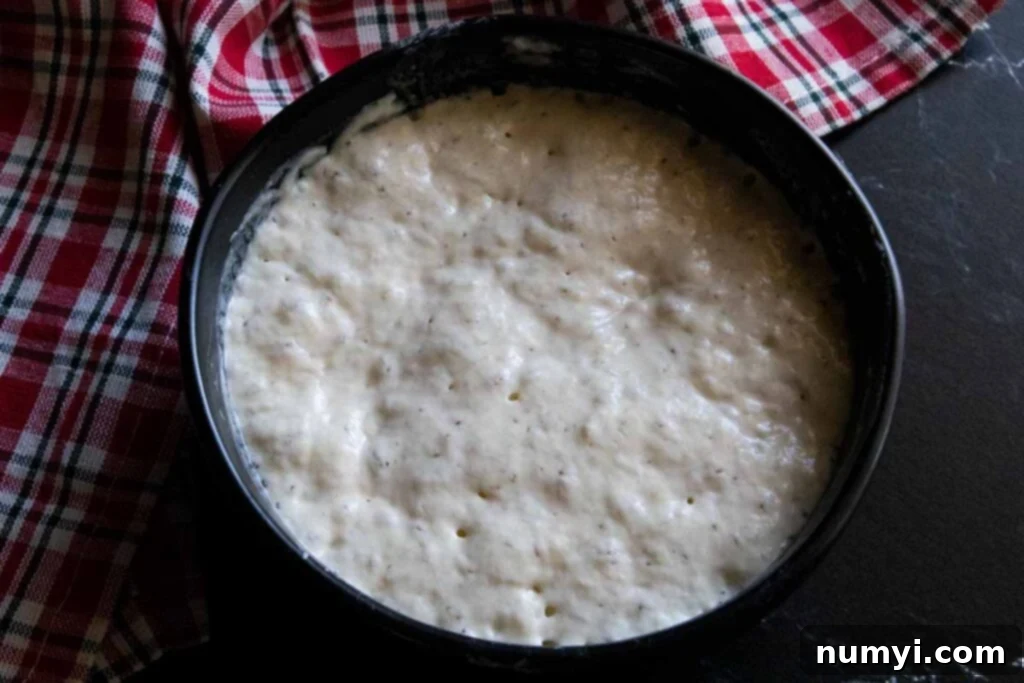
Create Your Starter (Biga): In a medium-sized bowl, combine 3/4 cup of all-purpose flour (or bread flour for a more robust starter), 1/3 cup water, and 1/8 teaspoon of dry active yeast. Mix these ingredients thoroughly until a shaggy, cohesive dough forms. Cover the bowl loosely with plastic wrap and let it rise at room temperature overnight. This slow, overnight fermentation, often referred to as a “biga” or pre-ferment, is crucial. It adds incredible depth of flavor to the final bread, improves its texture, and helps the panettone stay fresh for a little longer by promoting a more stable crumb structure. If you need to make it the same day, ensure it rises for at least 6 to 8 hours, so plan to start early in the morning.
Marinate the Candied Orange Peel: In a separate small bowl, combine your diced candied orange peel with the orange liqueur (Grand Marnier works beautifully here, imparting a rich, sweet citrus note). Stir gently to ensure all pieces are coated. Cover this bowl and let the candied orange soak overnight. This step not only infuses the peel with extra orange flavor but also softens it, ensuring tender, aromatic bursts of fruit throughout your panettone.
Day Two: Crafting the Main Dough
Today is about building the rich, buttery panettone dough. Precision in measurement and patience in kneading are key.
Prepare Dry Ingredients: Begin by measuring your flour properly using the “spoon and swoop” method: gently spoon flour into your measuring cup until it’s overflowing, then level it off with a straight edge. Place the measured flour into a medium-sized bowl. Whisk in the kosher salt, ensuring it’s evenly distributed, and set this aside.
Activate the Yeast: In the bowl of your stand mixer, combine 2 1/4 teaspoons of dry active yeast with 1/4 cup of warm water (aim for 110-115°F / 43-46°C – too hot will kill the yeast, too cold won’t activate it). Add about 1 tablespoon of the total 1/2 cup of granulated sugar. Stir lightly and let this mixture sit for 5-10 minutes. You’re looking for a frothy, foamy layer on top, which indicates your yeast is active and ready to work.
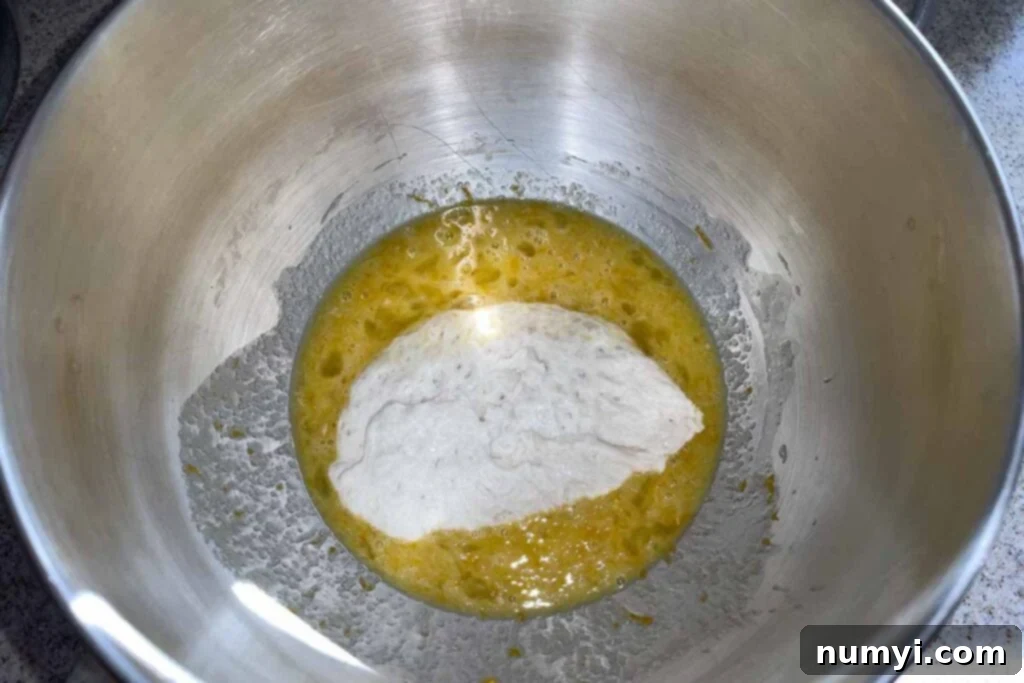
Combine Wet Ingredients: Once the yeast is frothy, add the room temperature large eggs, 1 1/2 teaspoons of vanilla extract, the remaining granulated sugar, and the packed tablespoon of orange zest to the yeast mixture. Whisk these together until well combined. The orange zest is essential here, providing a vibrant, fresh citrus aroma.
Initial Dough Mixing: Now, add your prepared starter and the flour-salt mixture to the stand mixer bowl. Attach the dough hook. Mix at a low speed until the ingredients come together and start pulling away from the sides of the bowl slightly. This initial mixing helps to hydrate the flour and begin gluten development.
Kneading for Gluten Development: Increase the mixer speed to medium and knead the dough for an impressive 10-15 minutes. During this time, the dough will transform, becoming smooth, elastic, and much more cohesive. You might need to stop the mixer periodically and scrape down the sides of the bowl to ensure all the dough is being worked evenly. Proper kneading is vital for developing the strong gluten network that gives panettone its characteristic light and airy texture.
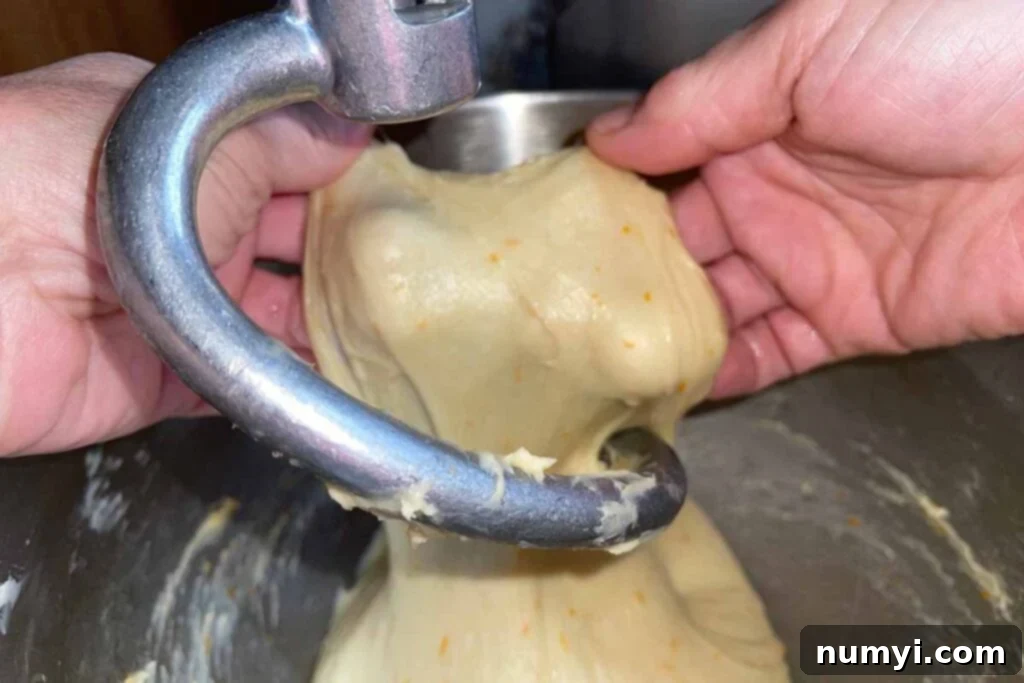
Incorporating Butter: Reduce the mixer speed to low. Gradually add the room temperature unsalted butter, a few tablespoons at a time, allowing each addition to be fully incorporated before adding the next. This process might take a while, but it’s crucial for achieving the rich, tender crumb. Once all the butter is in, increase the speed to medium and knead for another 10-15 minutes. The dough will be very soft and somewhat sticky, but it should pass the “windowpane test.” To check, gently stretch a small piece of dough with dampened fingers. If you can stretch it thin enough to see light through it without tearing, your gluten is sufficiently developed. Using good quality European butter, with its higher fat content, will make a significant difference in the final taste and texture of your panettone.
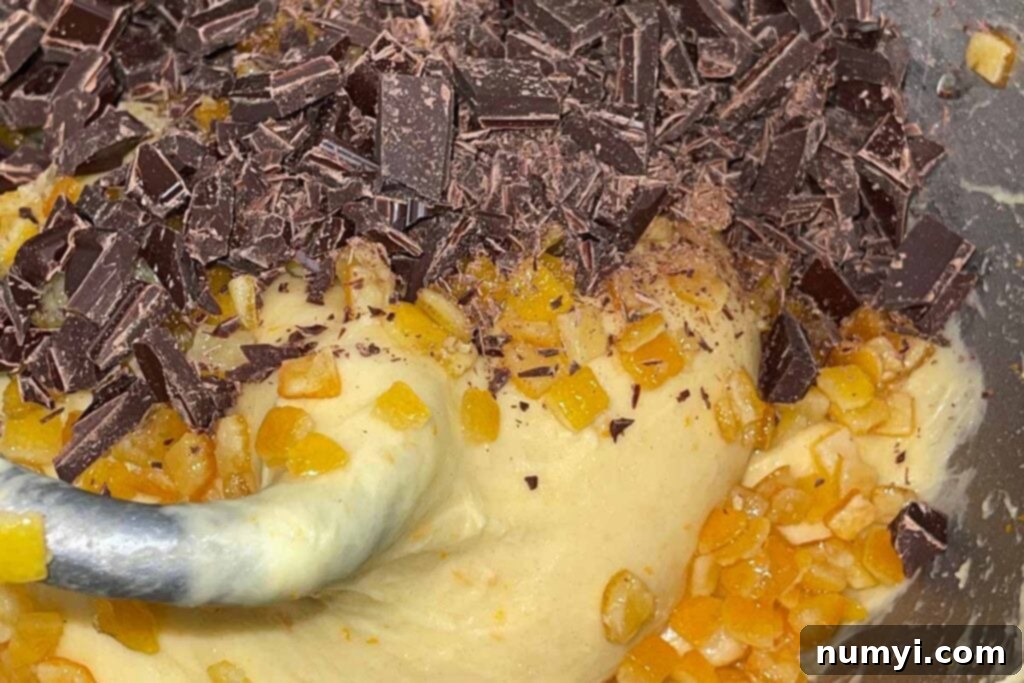
Adding Inclusions: Reduce the mixer speed to low. Add the roughly chopped semi-sweet chocolate chunks and the drained candied orange peel (ensure it’s well-drained of the liqueur). Knead on low speed for about 2 minutes, or just until the chocolate and fruit are evenly incorporated throughout the dough. Be careful not to overmix at this stage, as it can damage the gluten structure.
Light Flour Dusting (If Needed): Scrape the dough out onto a lightly floured surface. At this point, the dough will still be sticky. Knead in just enough flour to make it slightly easier to handle, avoiding excessive stickiness. The key here is minimal flour; the less flour you incorporate, the lighter and fluffier your baked panettone will be. A bench scraper will be an invaluable tool to help you manage the sticky dough without adding too much extra flour. Patience is truly a virtue here.
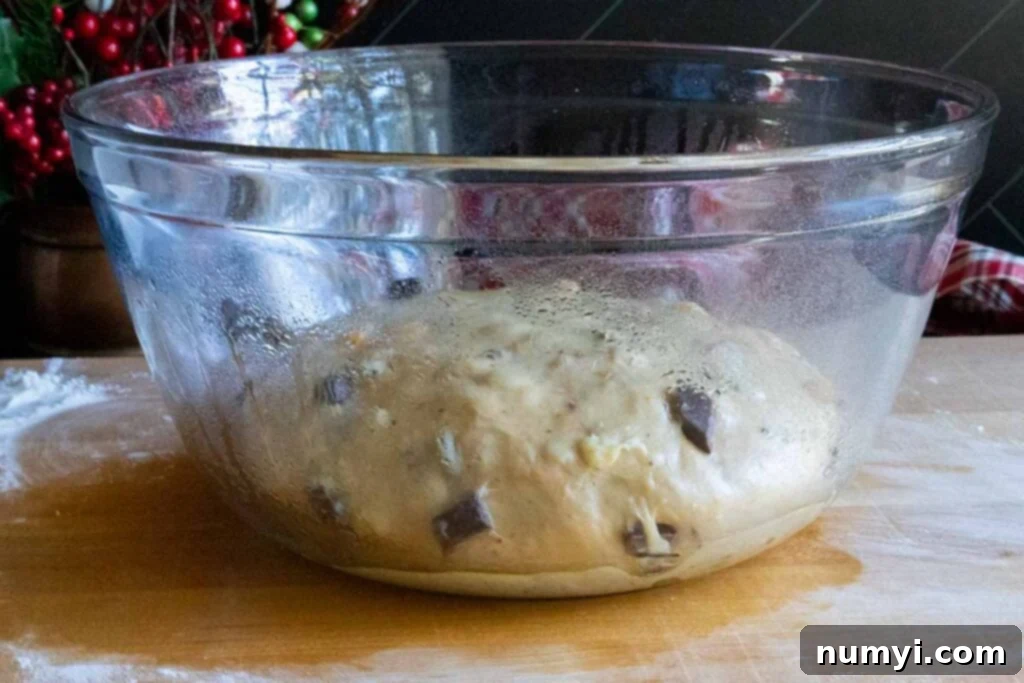
First Rise: Transfer the dough to a large, lightly oiled bowl, turning it once to coat the top with oil. Cover the bowl tightly with plastic wrap and let it rise in a warm, draft-free place for 3 to 4 hours, or until it has visibly tripled in size. The rising process for panettone dough is long, and patience is absolutely essential. Don’t rely solely on the clock; observe the dough closely and move to the next step once it has truly tripled.
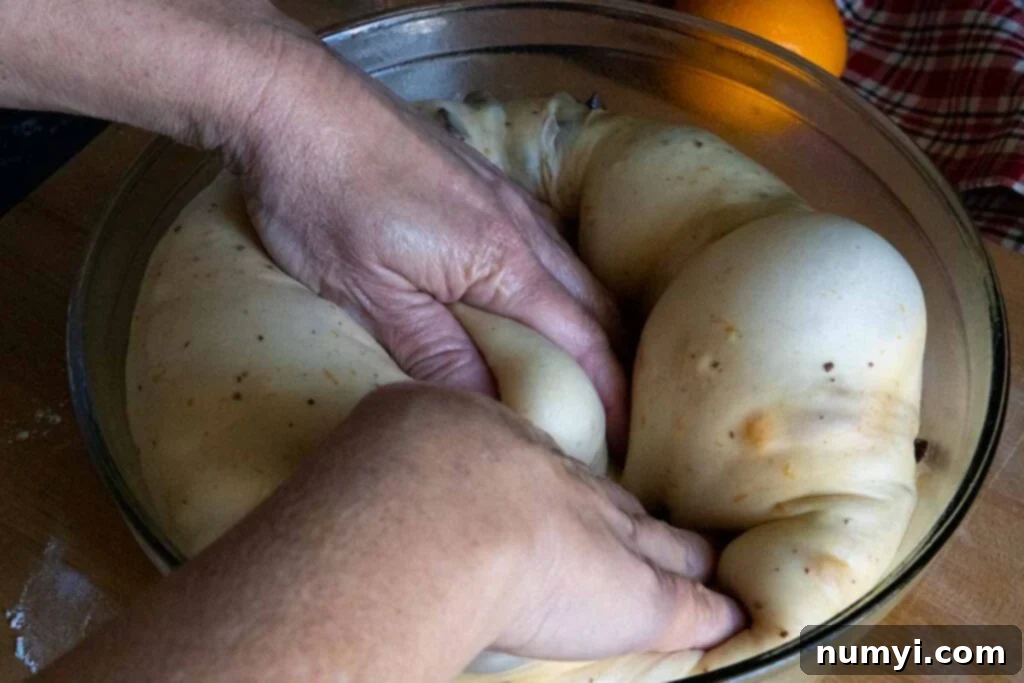
Prepare for Overnight Chill: Once the dough has tripled, gently punch it down to release the air. Remove the dough from the bowl and gently form it into a smooth ball by tucking and pulling the edges underneath towards you. This creates surface tension. Place it back into the large oiled bowl, cover it tightly with oiled plastic wrap, and refrigerate it overnight. This overnight cold proof is critical for deepening the flavor and improving the texture of the panettone, making it truly exceptional.
Day Three: Shaping, Final Rise, and Baking
Today is the day your magnificent panettone comes to life!
Bring Dough to Temperature: Your dough will continue to rise slowly in the refrigerator overnight, developing even more complex flavors and a superior texture. The next morning, remove the dough from the refrigerator and let it sit at room temperature for at least one hour to take the chill off. This makes it much easier to handle. Place the slightly warmed dough on a clean work surface. Because the dough is cold, it will be significantly easier to work with at this stage and should not require any additional flour. If you find it a bit sticky, you can lightly grease your hands with a tiny bit of butter instead of flour.
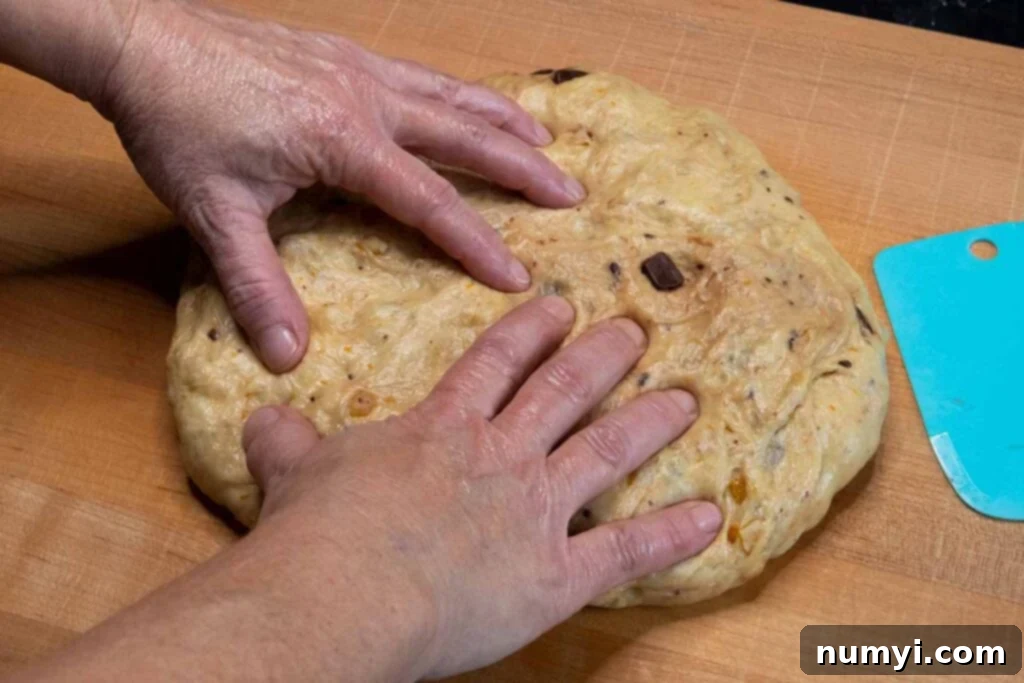
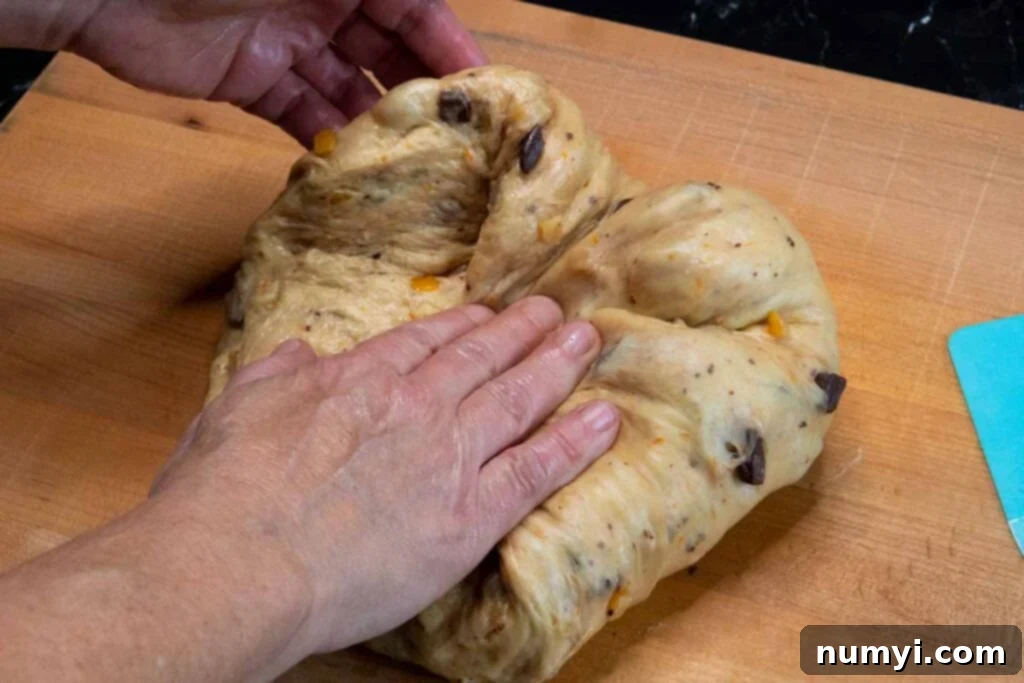
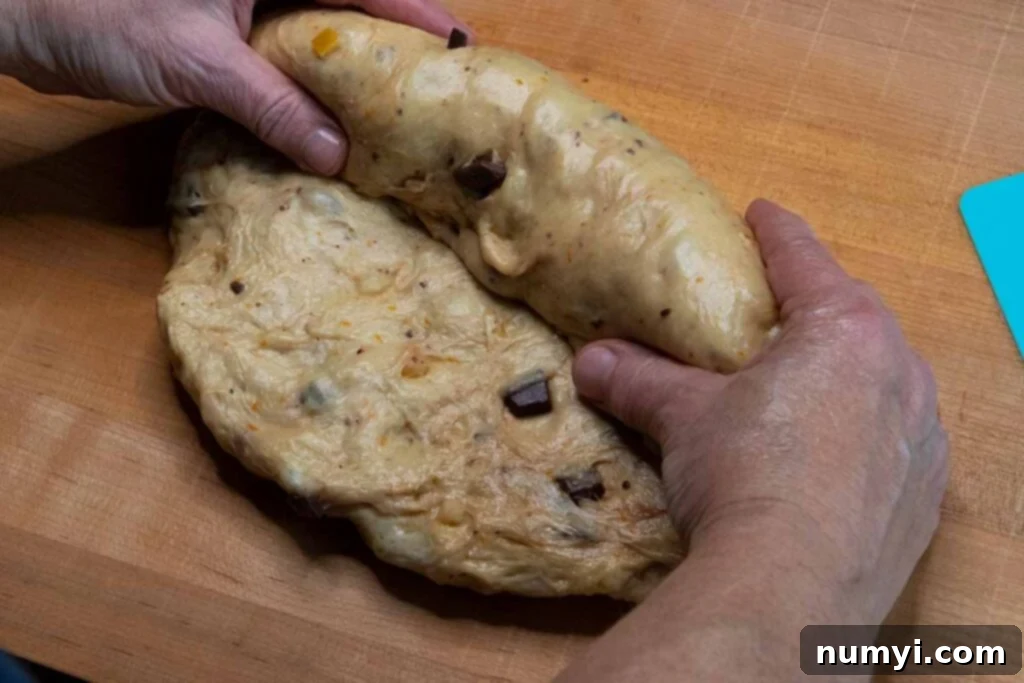
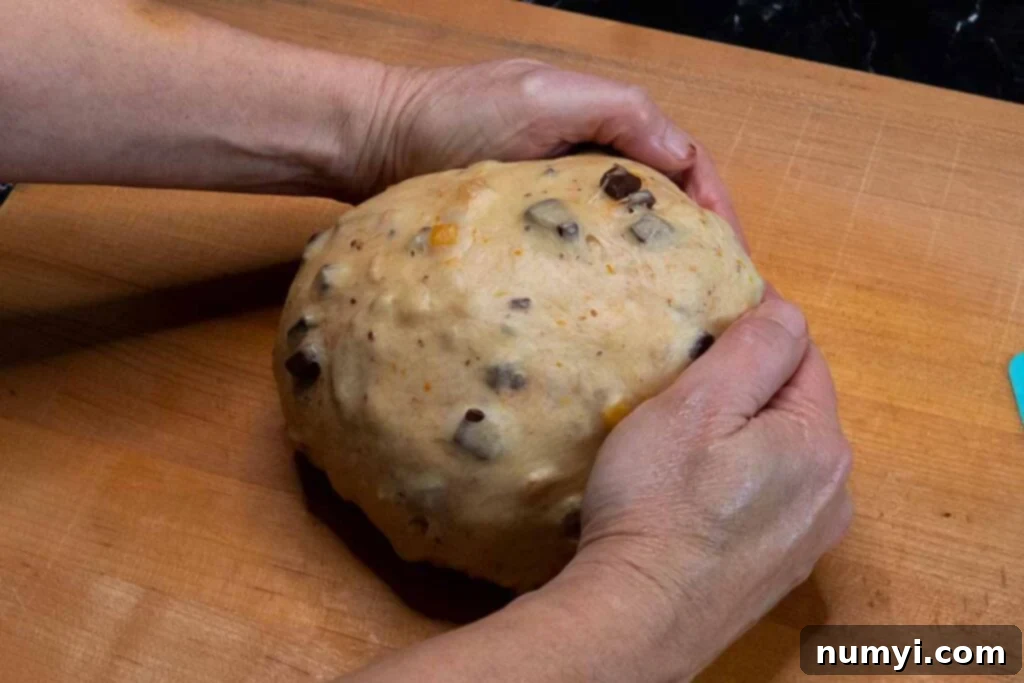
Shape the Dough: Gently press the dough out into a flat rectangle, then roll it up tightly into a log shape, gently folding the ends inwards as you roll. Once rolled, gather the ends and tuck them around to form a smooth, taut ball. This careful shaping ensures a beautiful, even rise and a classic panettone dome.
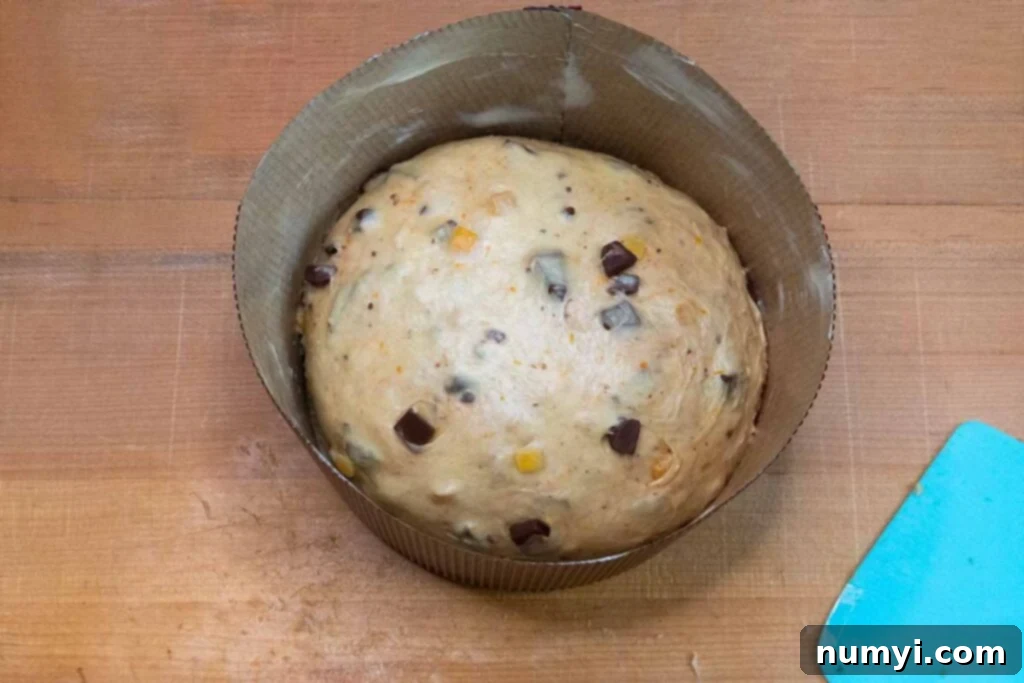
Final Proofing: Carefully transfer the shaped dough into a greased panettone mold (paper molds are readily available online, for instance, on Amazon). Place the mold on doubled baking sheets; this helps prevent the bottom from over-browning. Cover the mold loosely with oiled plastic wrap and let it rise in a warm, draft-free place until it almost reaches the top of the paper mold. This will take approximately 3 to 4 hours, or until it has almost tripled in size again. Remember, because the dough started cold, this final rise will take a considerable amount of time. I often find that my house, kept between 65º-68ºF, isn’t ideal for bread proofing. A trick I use is to turn on my oven light (without heat) while forming the dough, then place the covered panettone in the warm oven to rise. This creates a perfect, consistent environment.
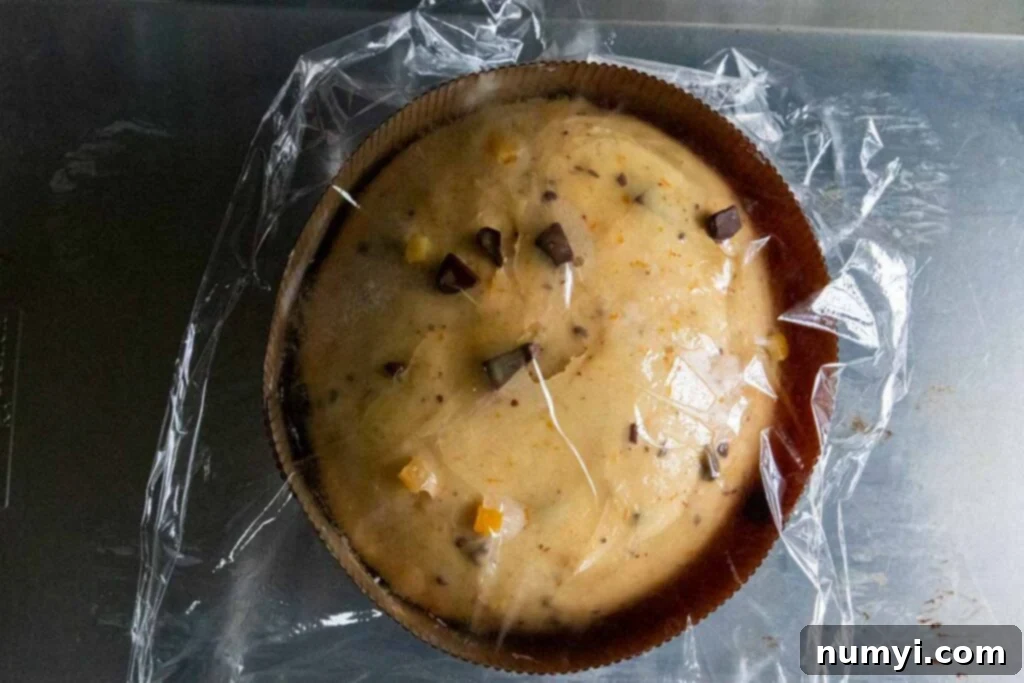
Preheat Oven & Prepare for Baking: Just before the panettone is fully risen (it should be domed and nearly at the top of the mold), carefully remove it from the oven (if you used it for proofing) and preheat your oven to 350ºF (175ºC).
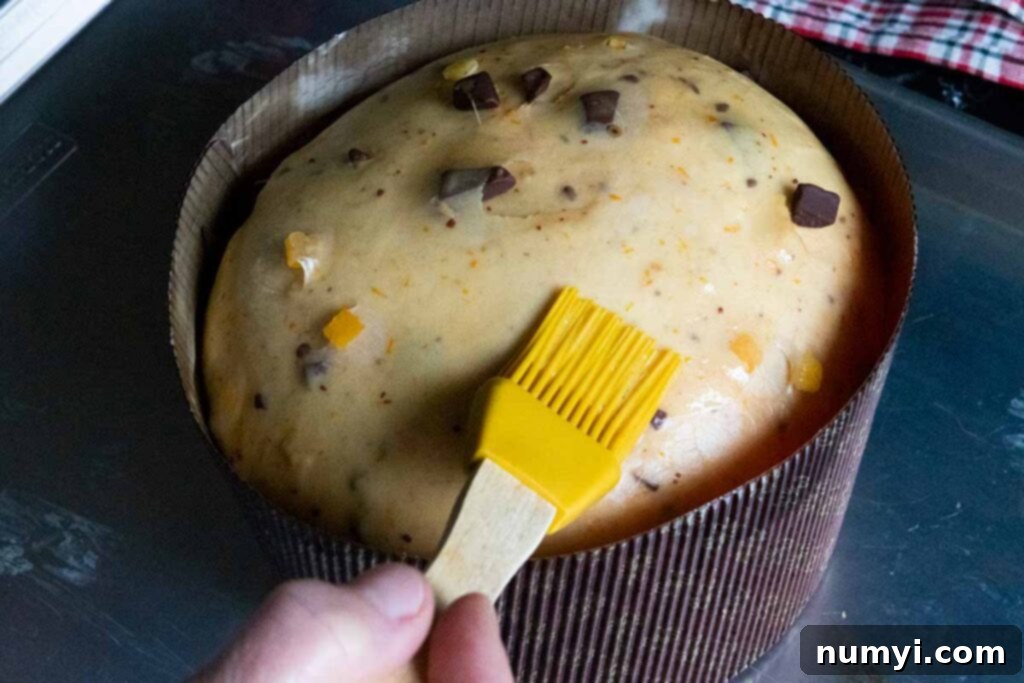
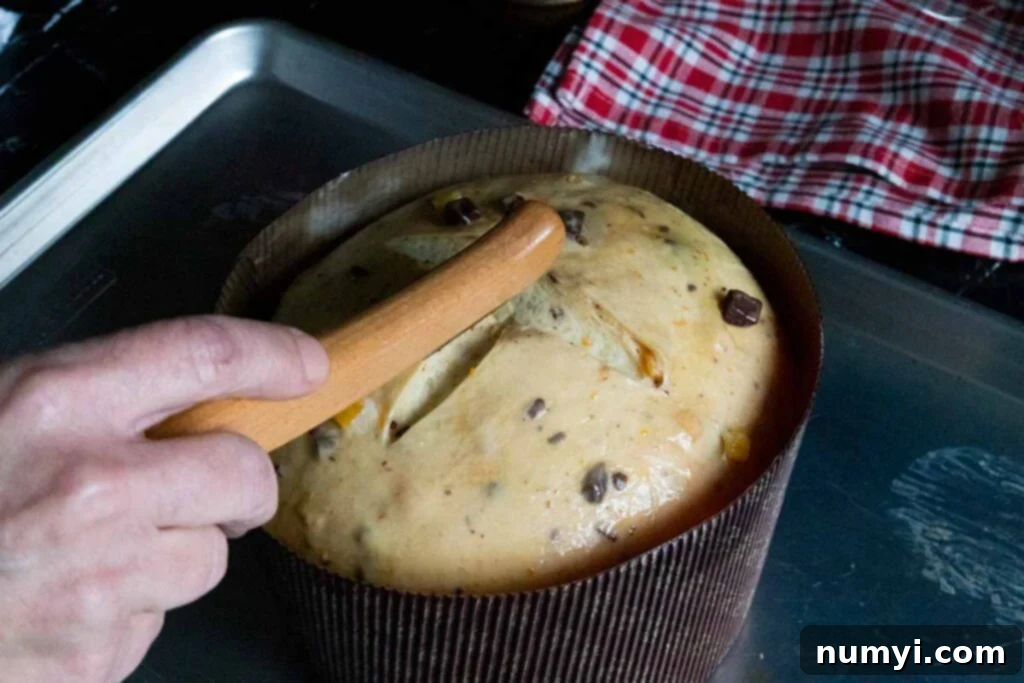
Egg Wash, Scoring, and Butter Dab: In a small bowl, whisk together one large egg with one tablespoon of water to create an egg wash. Before baking, gently brush the entire surface of the risen dough with this egg wash. This will give your panettone a beautiful, golden-brown crust. Next, using a very sharp knife (or a lame), carefully cut a “cross” into the top of the dough, about 1/4 to 1/2 inch deep. This scoring allows the bread to expand properly during baking, helping it achieve its signature domed shape and preventing uncontrolled tearing. Optionally, place a small dab of softened butter in the center of the cross for extra richness and a beautiful finish.
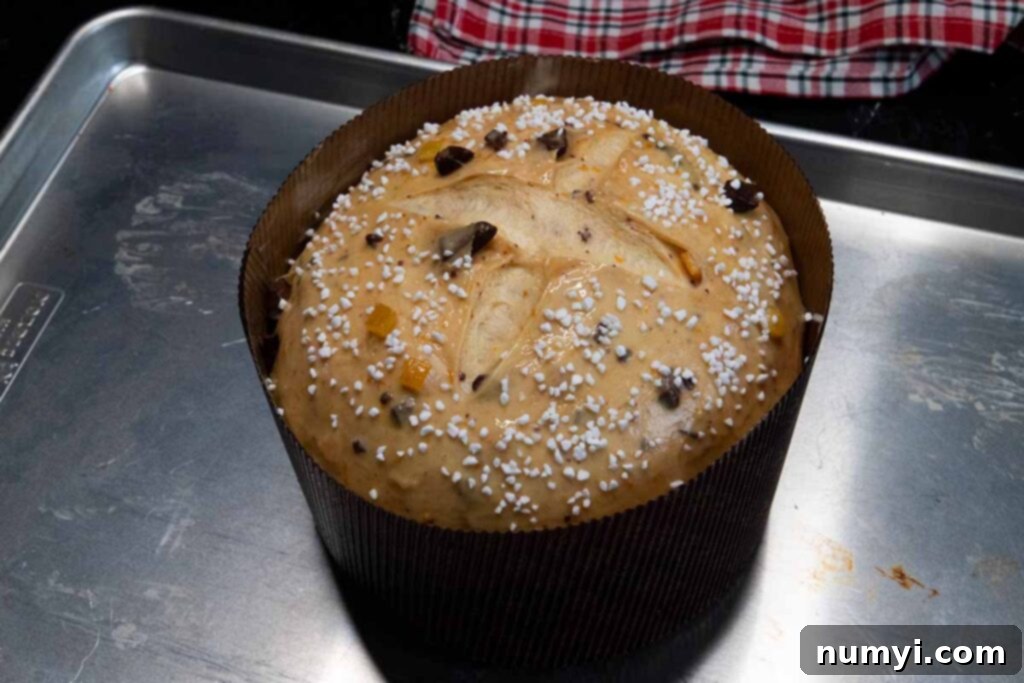
Add Pearl Sugar: For a delightful texture and visual appeal, sprinkle pearl sugar generously across the surface of the panettone. This sugar will caramelize slightly during baking, adding a subtle crunch.
Baking: Bake the panettone for 45 minutes to 1 hour. It’s done when a wooden skewer inserted into the center comes out clean and the internal temperature reaches 200°F (93°C). Keep an eye on the browning; if the top starts to get too dark (typically around 15 minutes into baking in my oven), lightly tent it with a piece of aluminum foil to prevent burning.
Prepare for Cooling: While the bread is baking, set up a system to hang it upside down to cool. This is a crucial step for panettone! Without it, the delicate, airy structure of the tall bread would collapse under its own weight as it cools, leading to a dense, compressed crumb. Hanging it upside down allows the gluten structure to set while cooling, maintaining its magnificent volume and light, fluffy texture.
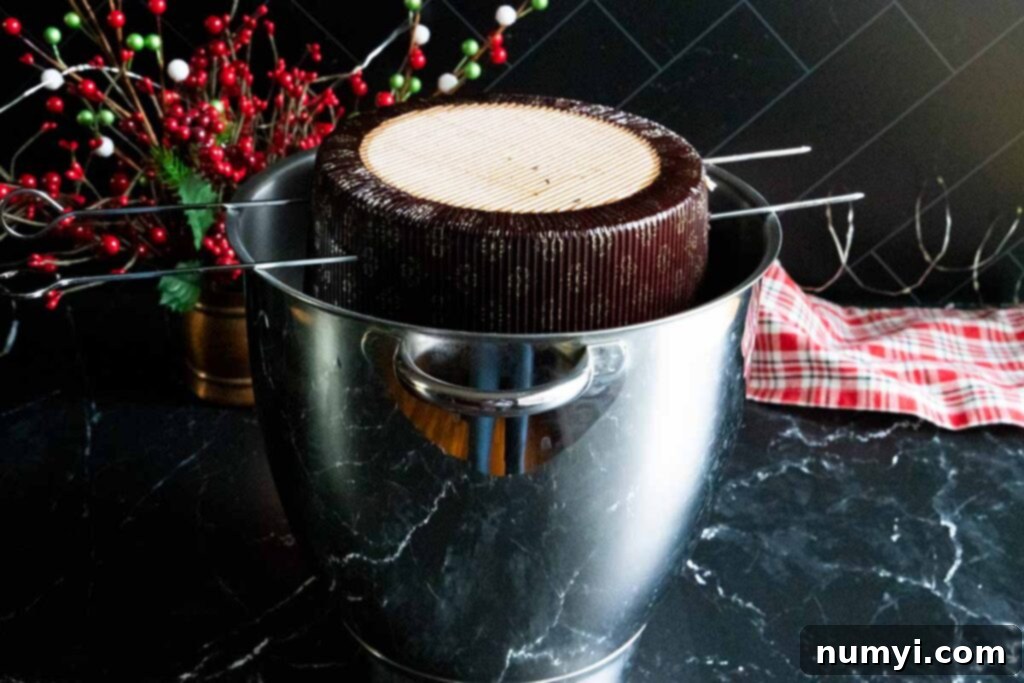
I find the bowl from my stand mixer works perfectly for this. If using a bowl, ensure it’s deep enough that the top of the panettone doesn’t touch the bottom of the bowl. Once baked, carefully slide two long metal skewers (I highly recommend metal; wooden ones snapped during my first attempt, causing a moment of panic!) through each side of the bottom of the bread, approximately 1-2 inches from the bottom edge. Then, invert the panettone and hang it upside down in your prepared cooling setup for at least 2 hours, or until completely cool.
When we first embarked on making our traditional panettone, we thought it might be a “one and done” kind of endeavor. How wrong we were! While our original recipe remains a beloved classic, we quickly discovered the immense fun and creativity that comes with experimenting with additional ingredients. This chocolate orange version is a testament to that joy of innovation.
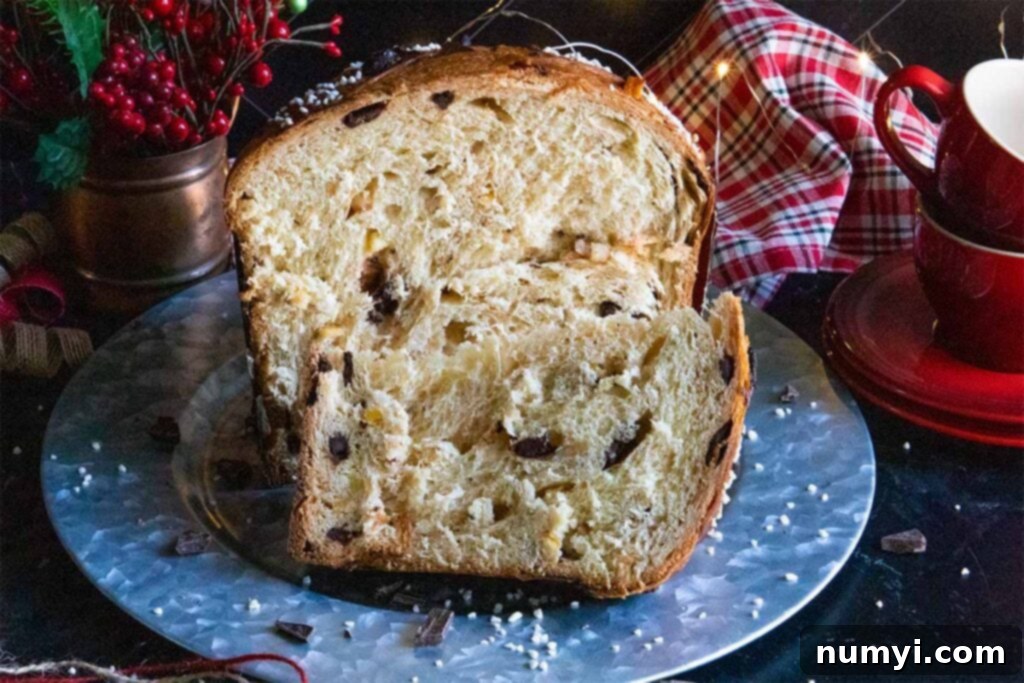
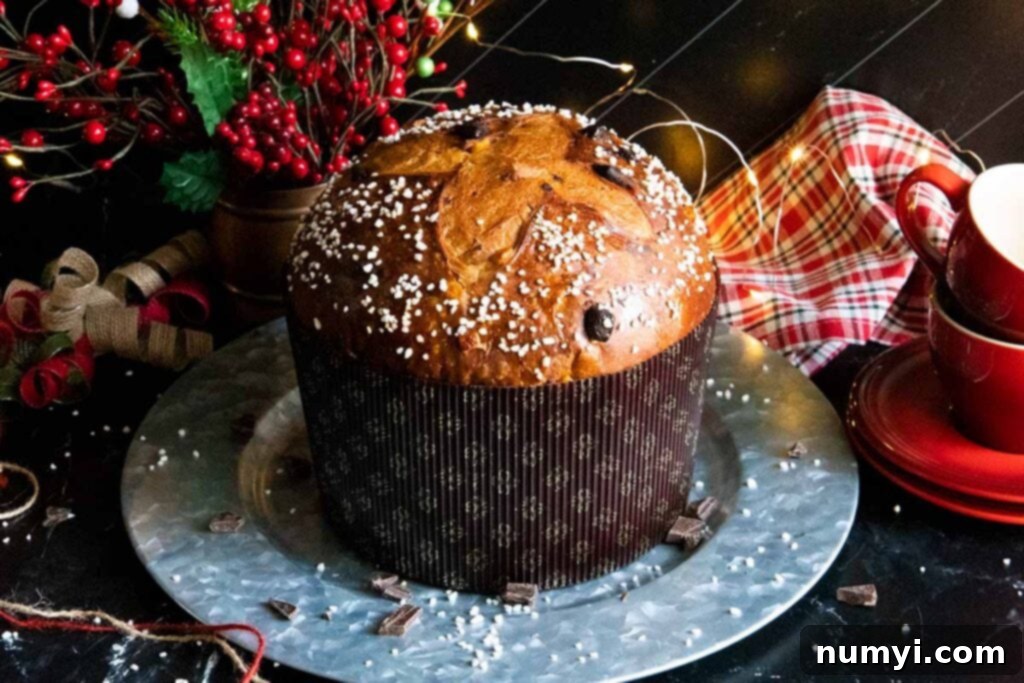
The crumb of this panettone is absolutely divine! It’s so incredibly light and airy, you’ll feel as if you’re eating a cloud, yet it boasts a wonderful, resilient structure that holds its shape beautifully. It’s a true masterpiece of texture and flavor.
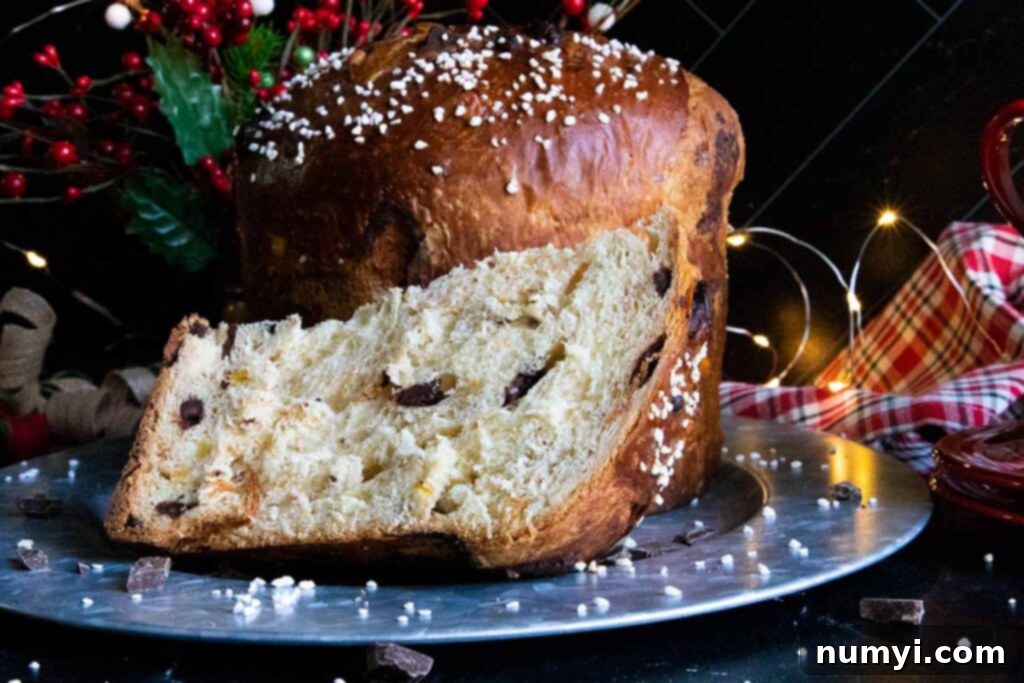
Yes, panettone is typically considered a holiday bread, deeply associated with Christmas festivities. But honestly, this stuff is *so good*! I could easily make a case for finding new and interesting ingredient combinations that would allow this magnificent loaf of bread to be enjoyed year-round, not just during the festive season. Its delicate sweetness and rich texture make it perfect for any time you desire a touch of luxury.
Give this chocolate orange panettone a whirl! You’ll not only amaze your family and friends with your baking prowess, but you’ll also create delicious memories that will last long after the last slice is devoured. Happy baking!
More Delicious Holiday Recipes to Explore
- Baklava Recipe
- Gramercy Tavern Gingerbread
- Fig Tart
- Italian Fig Cookies (Cucidati)
- Panettone Recipe
Chocolate Orange Panettone Recipe
Print
Pin
Rate
Ingredients
For the Starter
- 3/4 cup Bread flour
- 1/3 cup Water
- 1/8 teaspoon Dry active yeast
For the Dough
- 1/4 cup Water warm. 110-115 degrees F
- 2 1/4 teaspoons Dry active yeast
- 3 large Eggs
- 1/2 cup Granulated sugar divided
- 1 1/2 teaspoon Vanilla extract
- 1 tablespoon Orange zest packed
- All the starter from above
- 3 cups Bread flour (plus more for dusting)
- 1 tsp Kosher salt
- 6 tbsp Unsalted butter softened
For the Fruit and Chocolate
- 1/2 cup Candied orange peel diced small
- 3 tbsp Orange liqueur (such as Grand Marnier)
- 6 oz Semi-sweet chocolate roughly chopped into 1/4″ – 1/2″ pieces
For the Egg Wash
- 1 large Egg beaten
- 1 tablespoon Water
A dab of butter for the top just before baking
Instructions
The Starter (day one)
-
Mix 3/4 cup of bread flour, 1/3 cup water, and 1/8 teaspoon yeast in a medium-size bowl until a shaggy dough forms.
Cover loosely with plastic wrap and let rise at room temperature overnight (or for at least 6-8 hours if making the same day).
-
In a medium-size bowl, marinate the diced candied orange peel with the orange liqueur. Cover with plastic wrap and set aside to soak overnight, stirring occasionally to ensure even infusion.
The Dough (day two)
-
Drain the orange liqueur from the candied orange peel and set the peel aside.
-
Measure the flour properly (spoon and swoop method) into a medium-size bowl. Whisk the salt into the flour and set aside.
In the bowl of a stand mixer, proof the 2 1/4 teaspoons of yeast with the 1/4 cup of warm (110-115º degrees F) water and 1 tablespoon of the 1/2 cup of sugar for about 5-10 minutes until frothy on top.
Add the eggs, vanilla extract, remaining sugar, and orange zest to the yeast mixture and whisk together.
-
Add the prepared starter and the flour-salt mixture to the stand mixer. Attach the dough hook and mix on low speed until the dough comes together and starts pulling away from the bowl slightly. Turn the mixer to medium speed and knead for 10-15 minutes, or until the dough is smooth and elastic. You may need to stop the mixer and scrape down the sides a few times.
-
With the mixer on low speed, add the softened butter a few tablespoons at a time until fully incorporated. Once all butter is added, knead for another 10-15 minutes until the dough passes the windowpane test (it should be smooth and elastic, but still sticky). Again, scrape down the sides of the bowl as needed.
-
Add the chocolate chunks and the drained candied orange peel. Knead on low speed for about 2 minutes or until they are fully and evenly incorporated throughout the dough.
-
Scrape the dough out onto a lightly floured work surface. Knead in just enough flour (minimal amount!) until the dough is manageable and no longer extremely sticky. Remember, the less flour you use, the lighter and fluffier your panettone will be. A bench scraper helps tremendously here.
-
Place the dough in a large oiled bowl, turning it to coat the top with oil. Cover tightly with plastic wrap and let it rise in a warm, draft-free place for 3 to 4 hours, or until it has tripled in size. Once tripled, gently punch the dough down, remove it to your work surface, and form it into a smooth ball by tucking and pulling the edges underneath. Place it back in the oiled bowl, cover with oiled plastic wrap, and refrigerate overnight.
Day Three: Shaping, Final Proof, and Baking
-
Remove the dough from the refrigerator and let it sit at room temperature for at least one hour to take the chill off. Place the dough on a work surface (no flour needed, as the cold dough is easier to handle; you can grease your hands with butter if desired). Press and roll the dough out into a flat rectangle. Roll the dough up tightly into a log shape, then fold the ends into the center, and finally fold and tuck it around to form a smooth, taut ball.
-
Transfer the shaped dough into a greased panettone mold and place it onto doubled baking sheets.
-
Cover the mold loosely with oiled plastic wrap and let it rise in a warm place until it almost reaches the top of the paper mold (approximately 3 to 4 hours, or until almost tripled in size again). Remember, the dough is cold, so this final rise will take a while.
-
Just before it’s completely risen, preheat your oven to 350ºF degrees (175°C). Prepare an egg wash by beating 1 large egg with 1 tablespoon of water. Gently brush the dough with the egg wash over its entire surface. With a very sharp knife, carefully cut a “cross” on the top of the dough, about 1/4-1/2″ deep in both directions. Optionally, place a small dab of softened butter in the center of the cross.
-
Sprinkle pearled sugar generously across the surface of the panettone.
-
Bake for 45 minutes up to 1 hour, or until a wooden skewer comes out clean and the internal temperature is 200 degrees F (93°C). If the top starts to brown too much, lightly tent it with aluminum foil after about 15 minutes of baking.
-
While the bread is baking, prepare a method to hang it upside down to cool (e.g., using your stand mixer bowl). Once baked, carefully slide two sturdy metal skewers through each side of the bottom of the bread, approximately 1-2 inches from the bottom. Invert the panettone and hang it into the prepared place. Let it cool for at least 2 hours, or until completely cool, to prevent its delicate structure from collapsing.
Notes
Make the starter early in the morning on Day 1. Let it sit at room temperature for at least 6 hours until it’s bubbly and well-risen.
Then, proceed to make the main dough (all of Day Two’s steps). After the first rise (when the dough has tripled in size), gently punch it down, form it into a ball, and transfer it into a plastic zip-lock bag. Refrigerate it overnight.
On Day 2 (which would be your Day 3 from the original recipe), continue with the rest of the steps: bringing the dough to room temperature, shaping, final proofing, and baking. The results are still fantastic, offering a delicious panettone with a slightly condensed timeline!
