Soft & Chewy Homemade Italian Bread: Your Easy Go-To Recipe
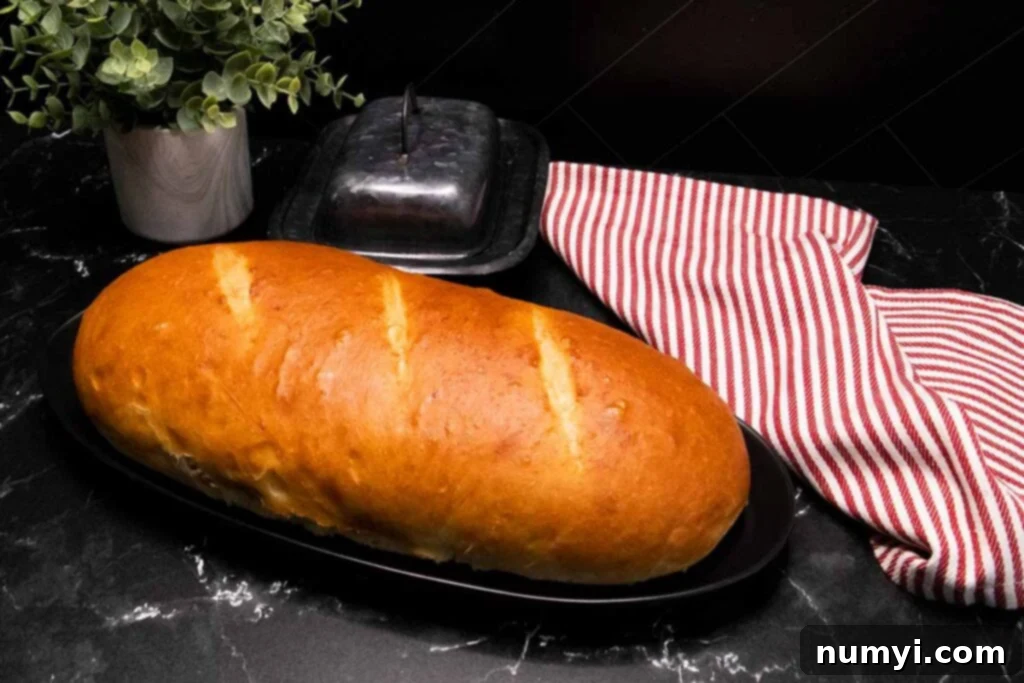
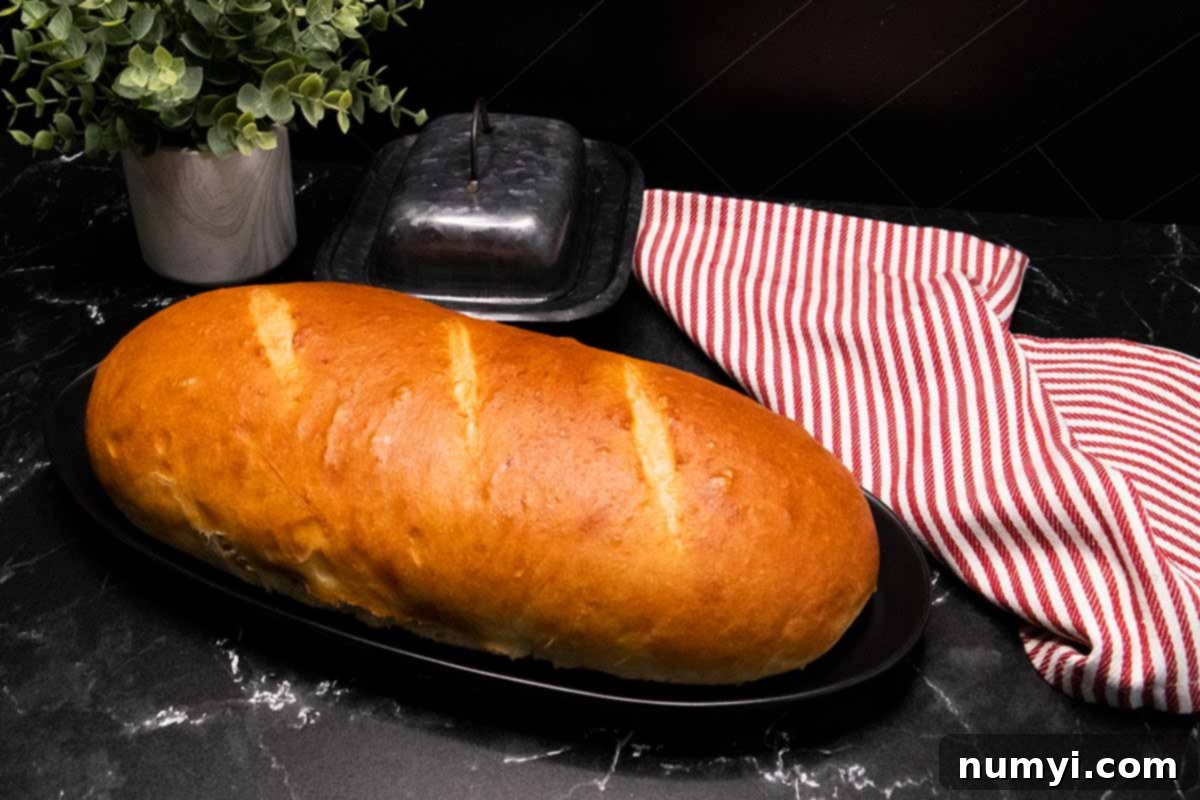
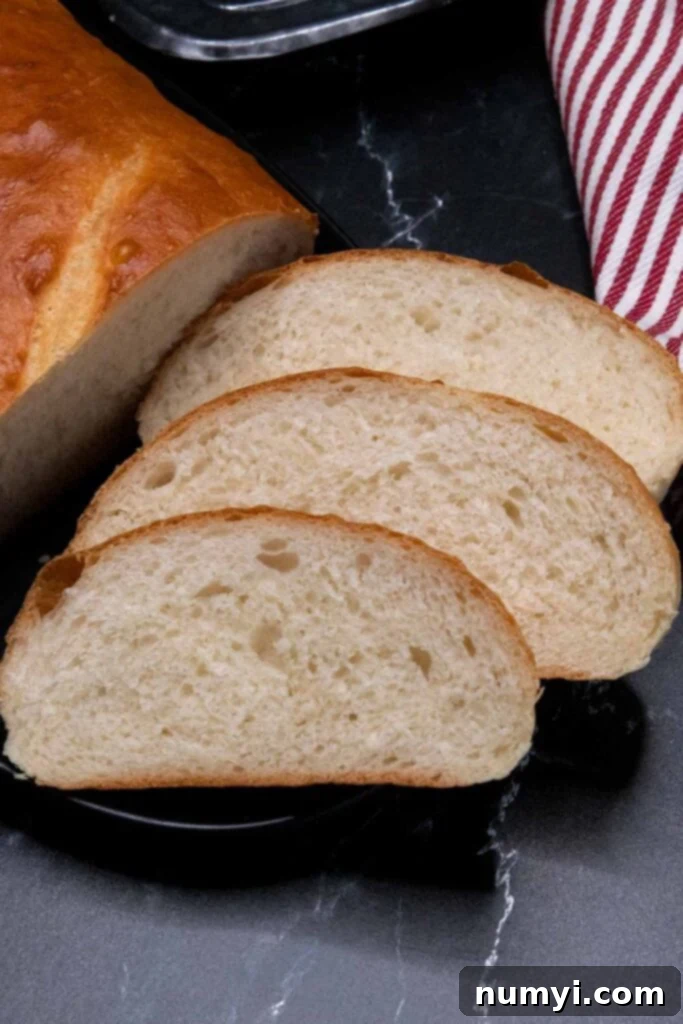
There’s nothing quite like the irresistible aroma of freshly baked bread filling your kitchen. This incredible Italian bread recipe promises a truly delightful experience, delivering a loaf with a remarkably fluffy, soft, and tender crumb on the inside, perfectly complemented by a satisfyingly chewy crust on the outside. Forget the often-disappointing store-bought versions; warm, fresh homemade Italian bread is simply unbeatable, transforming any meal into a special, comforting occasion.
While I don’t vividly remember my mother or aunts regularly baking homemade Italian bread in our home, the cherished memories of our Great Aunt Mary’s visits are etched in my mind. She would always show up with a warm, fresh-from-the-oven loaf of her legendary homemade bread, often accompanied by a thoughtful pair of crocheted socks! Yes, those charming crocheted booties were a signature, and we absolutely adored them. There’s an undeniable warmth and sense of tradition associated with bread baked with love, a comforting feeling that this easy Italian bread recipe aims to bring into your very own kitchen. It’s more than just food; it’s a connection to home and hearth.
Why You’ll Adore Baking This Homemade Italian Bread
This Italian bread recipe isn’t just about making a loaf of bread; it’s about creating a memorable culinary experience. Imagine yourself tearing off a piece of this perfectly baked Italian loaf, still warm and fragrant from the oven. You can slather it generously with rich European butter, dip it into a fragrant, seasoned olive oil with a sprinkle of herbs, or simply enjoy it plain – the simple pleasure of its texture and taste is unparalleled.
Beyond its incredible taste and texture, this homemade Italian bread is incredibly versatile, making it a perfect addition to almost any meal. It’s the ideal companion for your favorite Italian dishes, such as a hearty pasta with rich ragu, a vibrant minestrone soup, or a fresh Caprese salad. Its mild flavor and delightful texture also make it superb for crafting gourmet sandwiches, using as a base for bruschetta, or simply enjoying with a simple charcuterie board. Its ability to complement rather than overpower other flavors truly makes it a staple.
What makes this specific Italian bread recipe truly stand out is its surprising simplicity and efficiency. It’s super easy to make, even for novice bakers, and can be ready to enjoy in approximately two short hours. This means you don’t need to dedicate an entire day or weekend to bread-making; you can whip up this delightful loaf any day of the week, bringing the joy and comfort of fresh homemade bread to your family table whenever the craving strikes.
Envision the smiles and eager anticipation around your dinner table when you present a loaf of golden-brown bread that you baked yourself. The sense of accomplishment, combined with the superior taste, texture, and wholesome goodness of freshly made bread, makes this recipe a true winner. Plus, by making it yourself, you control all the ingredients, ensuring a delicious product free from the preservatives and artificial additives often found in store-bought alternatives. It’s a healthier, tastier choice for you and your loved ones.
Essential Ingredients for Your Perfect Italian Loaf
Crafting a perfect Italian bread at home begins with understanding the role of each ingredient. While the list is straightforward, each component plays a crucial part in achieving that desired fluffy interior and satisfyingly chewy exterior.
- Active Dry Yeast: This is the powerhouse ingredient responsible for making your bread rise, giving it that beautiful airy and light texture. When using active dry yeast, it’s typically “proofed” or activated in warm water first to ensure it’s alive and ready to work. If you choose to use instant yeast, you can usually skip this initial activation step and add it directly to your dry ingredients, which can save you a few minutes. Always double-check the expiration date on your yeast package for optimal results.
- Water: You’ll be using water at two different temperatures for this recipe. Warm water (ideally around 105-110 degrees F or 40-43 degrees C) is essential for activating the active dry yeast, waking it up and allowing it to begin its fermentation process. The second quantity of water will be hot tap water (crucially, *not* boiling water) for the main dough mixture. Don’t be concerned; when combined with the other cooler ingredients in the mixer bowl, its temperature will quickly drop to a level that is perfectly safe and beneficial for the yeast, helping to create a pliable and responsive dough.
- Granulated Sugar: A small amount of granulated sugar serves multiple purposes in bread making. Primarily, it acts as food for the yeast, encouraging it to activate, multiply, and produce carbon dioxide, which gives the bread its rise and a more tender crumb. Additionally, sugar aids in the Maillard reaction during baking, contributing to the beautiful golden-brown color of the crust.
- Olive Oil: Using a good quality olive oil adds a subtle yet distinct richness and authentic flavor that is characteristic of traditional Italian bread. More importantly, from a structural perspective, olive oil contributes significantly to the dough’s elasticity and softness. It helps to prevent the bread from drying out too quickly, ensuring a tender and moist texture throughout the crumb, even a day or two after baking.
- Kosher Salt: Salt is an indispensable ingredient for flavor, enhancing the overall taste of the bread and balancing the sweetness from the sugar. It also plays a vital role in regulating yeast activity, preventing it from rising too rapidly and allowing for better flavor development. Furthermore, salt helps to strengthen the gluten structure of the dough, which directly impacts the bread’s texture and overall structure.
- Bread Flour: We highly recommend using bread flour for this particular recipe. Bread flour typically has a higher protein content (usually ranging from 12-14%) compared to all-purpose flour. This higher protein level leads to stronger gluten development when kneaded, which is crucial for achieving the robust structure and that desirable chewy texture in your Italian bread. While all-purpose flour (with its lower protein content, around 10-12%) can be used as a substitute in a pinch, be aware that it may result in a slightly less chewy and potentially less airy crumb.
- Egg: A single large egg is used for the egg wash. Brushing the shaped loaf with a mixture of whisked egg and a tablespoon of water before baking creates a stunning golden-brown, shiny, and slightly crisp crust. This egg wash also helps in enhancing the visual appeal and adding a subtle depth of flavor to the exterior of the bread.
Expert Tips for Baking Your Perfect Italian Bread
Achieving bakery-quality Italian bread right in your own home is entirely within reach, especially when you keep a few key techniques and considerations in mind. These pro tips will help ensure your loaf turns out beautifully every time:
- Measure Flour Correctly (The Spoon & Level Method): This is perhaps one of the most crucial tips for any baking recipe. Do not scoop flour directly from the bag with your measuring cup, as this compacts the flour and can lead to using significantly too much, resulting in dense, dry bread. Instead, gently aerate your flour by fluffing it with a spoon or whisk in its container. Then, spoon the flour into your dry measuring cup until it overflows, and carefully level it off with a straight edge (like the back of a knife or a ruler). This method ensures you have the precise amount of flour needed for the perfect dough consistency.
- Monitor Water Temperature for Yeast Activation: When working with active dry yeast, the water temperature for activation is critical. It should be comfortably warm to the touch, ideally between 105 degrees F (40 degrees C) and 110 degrees F (43 degrees C). Water that is too hot will instantly kill the delicate yeast organisms, preventing your dough from rising at all. Conversely, water that is too cool will severely inhibit yeast activity, drastically slowing down or even preventing the rising process. A reliable kitchen thermometer is an invaluable tool for ensuring accuracy here.
- Choose the Right Mixer Attachment: For this particular Italian bread dough, especially during the initial mixing phase, we’ve discovered that the paddle attachment of your stand mixer works most effectively. The dough hook, while typically used for kneading, doesn’t always mix this softer, stickier dough efficiently enough, potentially leaving unmixed pockets of flour. The paddle ensures all ingredients are thoroughly combined and hydrated before the dough becomes too cohesive for it, after which you might switch to the dough hook for kneading, or simply continue with the paddle if the dough remains on the softer side.
- Resist Adding More Flour (Trust the Process): As you mix and even as you begin to handle the dough, it will likely be quite soft and sticky. It’s a very common temptation to add more flour to make it easier to work with, but please resist this urge! This recipe is specifically designed for a soft, slightly sticky dough, as this is the secret to its fluffy, tender interior. Adding extra flour will only make the bread dense, dry, and tough. A very lightly floured surface for the brief shaping process is usually all that’s needed, not an addition to the dough itself.
- Utilize Your Oven Light for Rising: A warm, draft-free environment is paramount for successful dough rising. An ingenious and simple trick is to turn on your oven light while you are mixing the dough. The gentle, consistent warmth emanating from the light bulb creates a perfectly cozy environment – warm enough to encourage vigorous yeast activity but not too hot to harm it. Just remember to turn the light off before you begin preheating the oven for baking!
- The Importance of Proper Kneading: Even though this dough is relatively soft, proper kneading is still vital to develop the gluten. Gluten is the protein network that provides the bread with its structure, elasticity, and that desirable chewy texture. Knead until the dough pulls away cleanly from the sides of the bowl and has a smooth, elastic, and somewhat cohesive feel. This can take several minutes in a stand mixer.
- Scoring for a Beautiful, Controlled Rise: Those diagonal cuts you make on the top of the loaf (known as scoring) aren’t just for aesthetics. They serve a functional purpose by allowing the bread to expand properly and predictably in the oven (the “oven spring”) without tearing haphazardly. This creates a more consistent rise and a beautiful, rustic appearance. Use a very sharp knife, a razor blade, or a dedicated bread lame for clean, confident cuts.
- Don’t Rush the Cooling Process: It can be incredibly difficult to wait, but allowing the bread to cool for at least 15-20 minutes after it comes out of the oven is absolutely crucial. This cooling period allows the internal structure of the bread to fully set and the residual heat to redistribute evenly throughout the loaf. Slicing into hot bread too early can lead to a gummy, steamy interior and can compromise the texture. Patience will be rewarded with the perfect crumb.
How to Craft Your Delicious Homemade Italian Bread
Follow these detailed, step-by-step instructions to create a beautiful, delicious loaf of homemade Italian bread that will impress everyone:
Step 1: Proof the Yeast
We’ll start by proofing the active dry yeast to ensure it’s lively and ready to work. In a small bowl, combine one packet of active dry yeast (which typically measures about 2 1/4 teaspoons) with 1/4 teaspoon of granulated sugar and 1/4 cup of warm water. The ideal temperature for this warm water is crucial – aim for between 105 degrees F (40 degrees C) and 110 degrees F (43 degrees C). Stir gently to dissolve the yeast and sugar, then let this mixture stand undisturbed for about 5 minutes. You’ll know your yeast is active and healthy when it develops a noticeable foamy or bubbly layer on the surface, indicating successful fermentation. If it doesn’t foam, your yeast may be expired or the water temperature was incorrect, and you should start over.
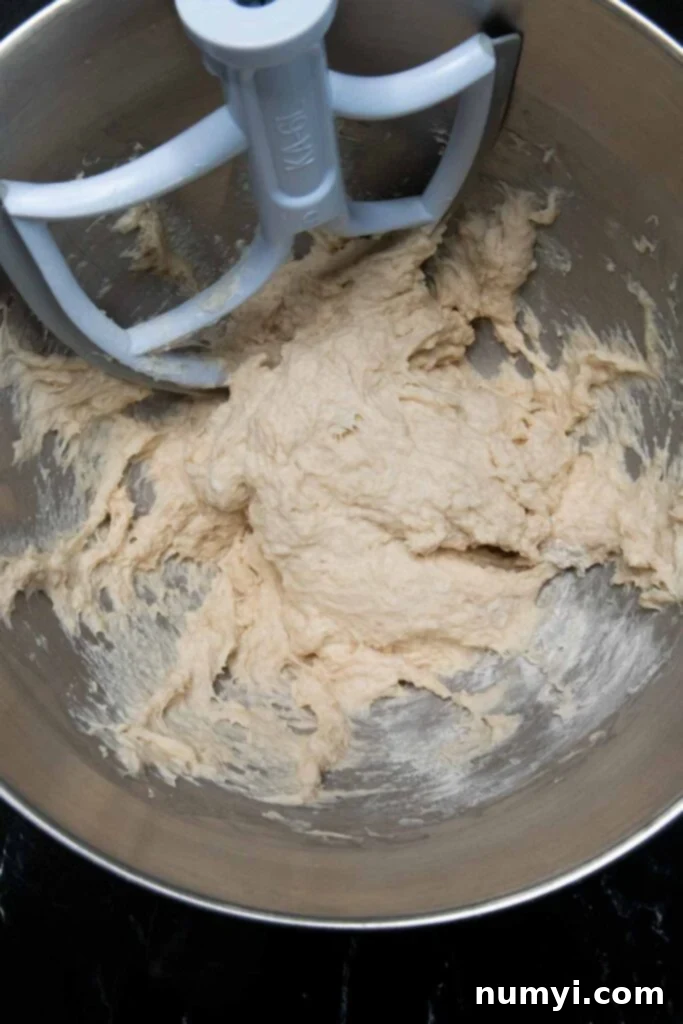
Step 2: Combine Wet Ingredients and Initial Flour
In the large bowl of your stand mixer (or a substantial mixing bowl if doing it by hand), combine 1 cup of hot tap water (again, ensuring it’s hot but not boiling), 1 tablespoon of granulated sugar, 1 1/2 teaspoons of kosher salt, and 1/4 cup of olive oil. Add 1 1/2 cups of bread flour to this liquid mixture. Attach the paddle attachment to your stand mixer and mix on low speed until the ingredients are just combined and a shaggy dough forms. The paddle attachment is particularly effective at this stage for thoroughly incorporating all ingredients, especially with this slightly wetter dough consistency. Next, carefully pour in the foamy, activated yeast mixture and continue to mix on low speed until it is fully incorporated into the dough. We’ve found that the dough hook can struggle to mix this initial stage properly, sometimes leaving dry pockets, which is why the paddle attachment is the preferred choice here. If you are mixing by hand, use a sturdy wooden spoon or your hands to combine until a shaggy dough forms.
note
You will be using hot tap water, not boiling water. This distinction is crucial because boiling water would instantly kill the active yeast, rendering it inactive and preventing your dough from rising. When added to the mixer bowl with the other, cooler ingredients, the temperature of the hot tap water quickly equilibrates to a level that is perfectly safe and beneficial for the yeast. This helps to create an ideal environment for gluten development and dough fermentation.
Step 3: Add Remaining Flour and First Rise
Now, add the remaining 1 3/4 cups of bread flour to the mixer bowl. Continue to mix on low speed until all the flour is fully incorporated and a cohesive, albeit sticky, dough forms. At this point, the dough will be quite soft and sticky to the touch, and this is exactly the desired consistency – resist the temptation to add more flour! As mentioned in our tips, excess flour will lead to a dense, dry, and less tender bread. Once thoroughly combined, use a rubber spatula to scrape down the sides of the bowl, ensuring all dough is gathered. Cover the bowl securely with plastic wrap or a clean, damp kitchen towel to prevent it from drying out, and let it rise in a warm, draft-free place for 1 hour. A good location for this first rise is inside an oven with just the light on, which provides a gently warm and stable environment.
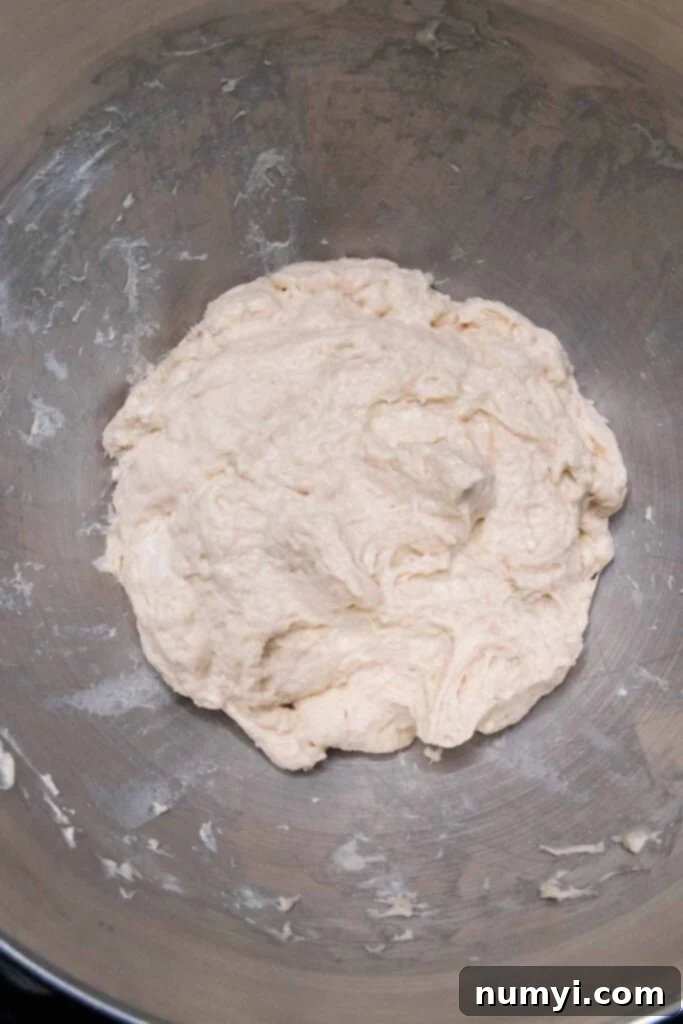
Step 4: Prepare Your Baking Surface
While your dough is undergoing its essential first rise, take a few moments to prepare your baking surface. This step is simple but important for ensuring a smooth baking process and preventing your beautiful loaf from sticking. Line a sturdy cookie sheet or a large baking sheet with a piece of parchment paper. Parchment paper not only prevents sticking but also helps in achieving an evenly browned bottom crust and makes cleanup significantly easier.
Step 5: Shape Your Loaf
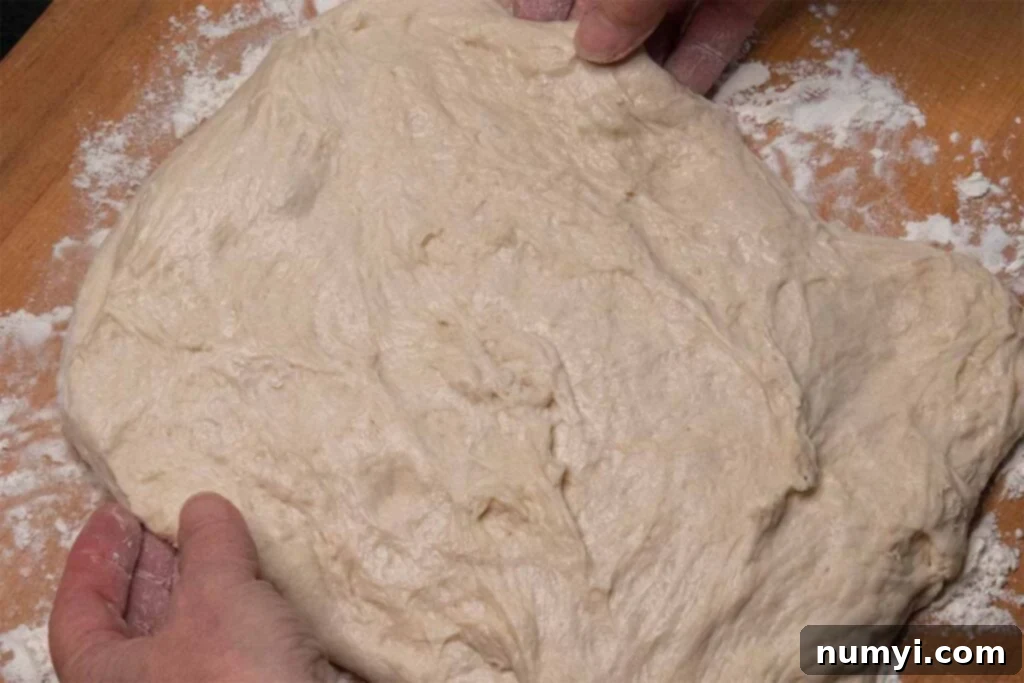
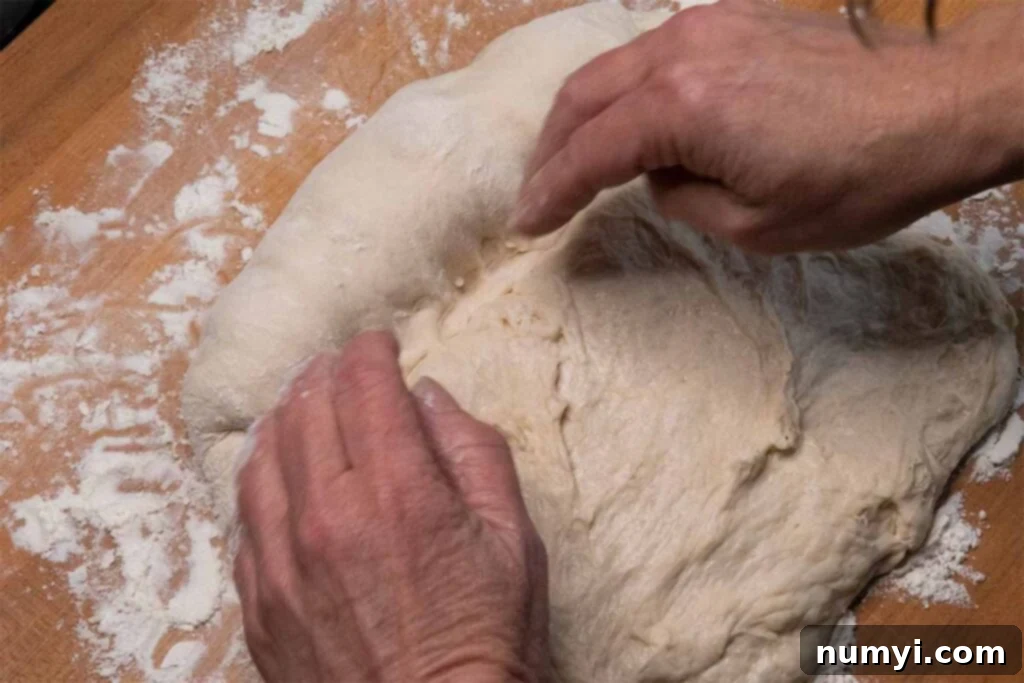
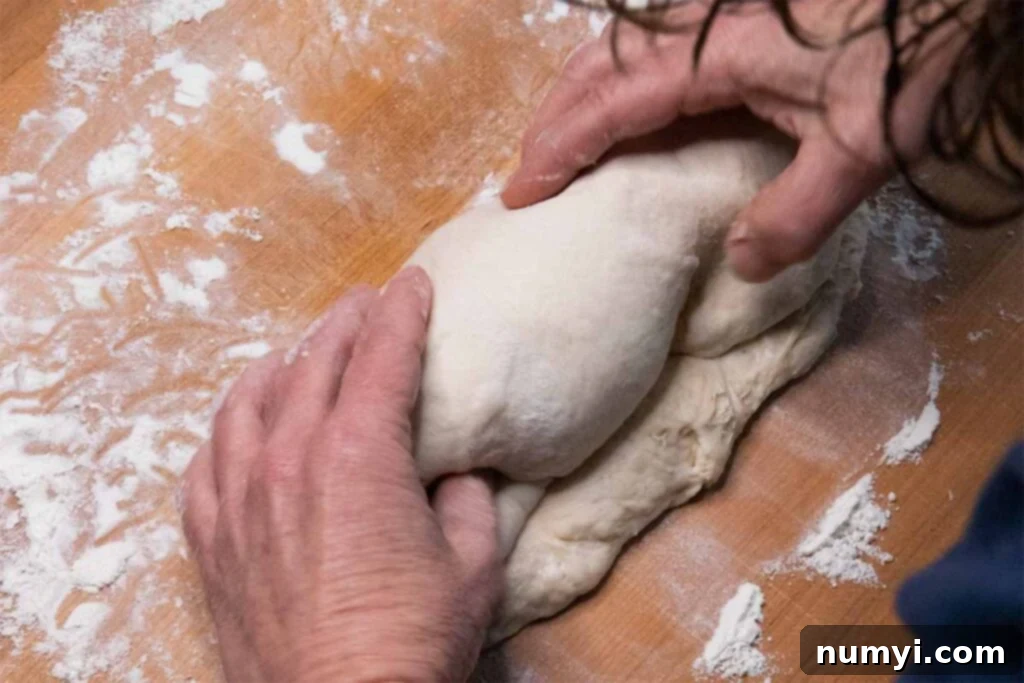
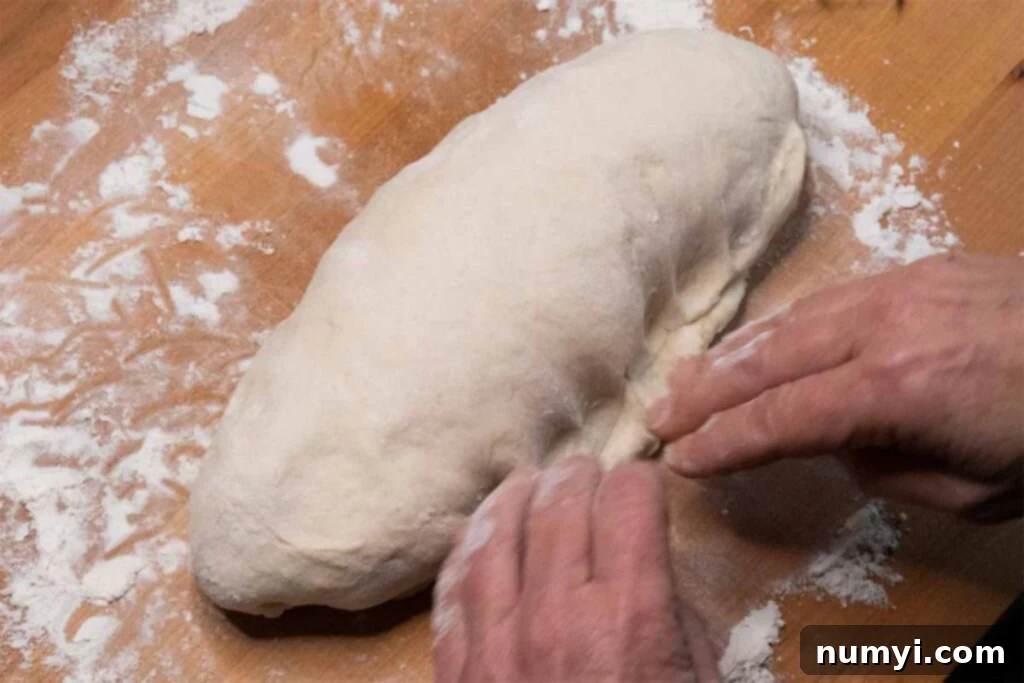
After the one-hour first rise, your dough should have visibly expanded and become plump. Gently scrape the risen dough out onto a lightly floured work surface or a large cutting board. Be careful not to aggressively punch it down or deflate it too much. Using your hands, gently flatten the dough into a rectangular shape. Now, beginning from the side closest to you, start rolling the dough away from you, in the style of a jellyroll or a tight log. As you roll, gently seal the dough at each turn and fold in the two corners to maintain a smooth, cylindrical shape. Continue this process until you have a compact, elongated loaf. Finally, firmly pinch and seal the seam along the entire bottom of the loaf and carefully tuck the ends neatly underneath to create a well-formed, aesthetically pleasing bread shape. This careful shaping ensures an even rise and an appealing final appearance once baked.
Step 6: Second Rise and Preheat Oven
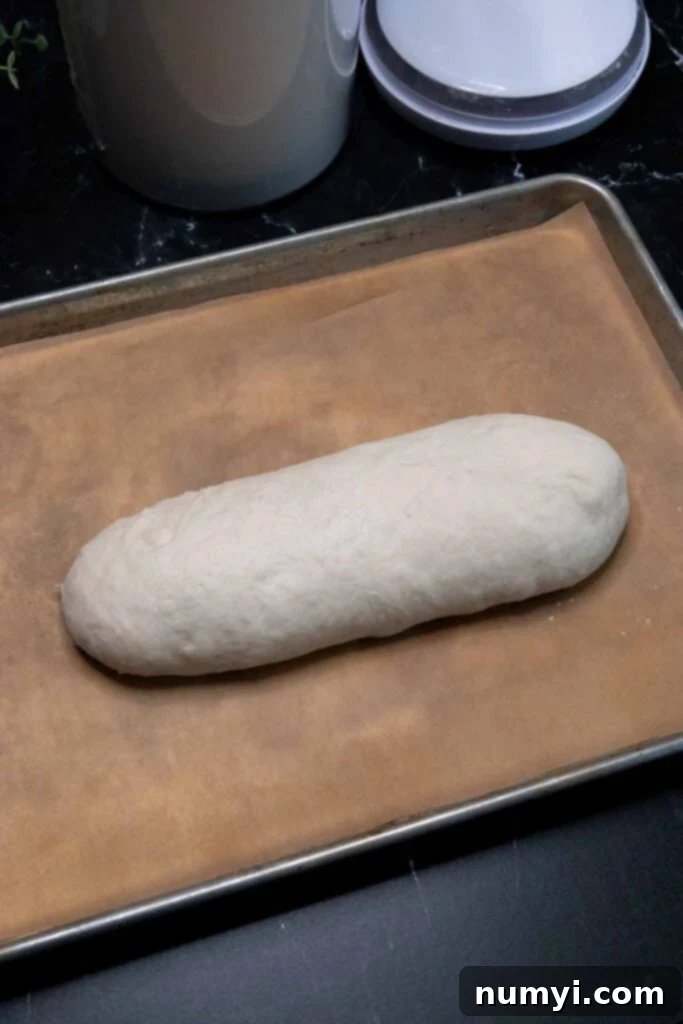
Carefully place your beautifully shaped dough, seam-side down, onto the parchment-lined baking sheet. Cover it loosely with plastic wrap or a clean kitchen towel to create a humid environment, and let it undergo its second rise (also known as proofing) for another 30 minutes. This crucial second rise allows the dough to relax further, develop additional air pockets, and expand once more, which contributes significantly to a lighter, airier texture in the final bread. During this waiting period, preheat your oven to 375 degrees F (190 degrees C) to ensure it’s at the correct temperature when the bread is ready to bake. Also, prepare your egg wash by whisking one large egg vigorously with 1 tablespoon of water in a small bowl. This simple mixture will be applied before baking to give your bread a gorgeous golden-brown, shiny, and slightly crisp crust.
Step 7: Egg Wash and Scoring
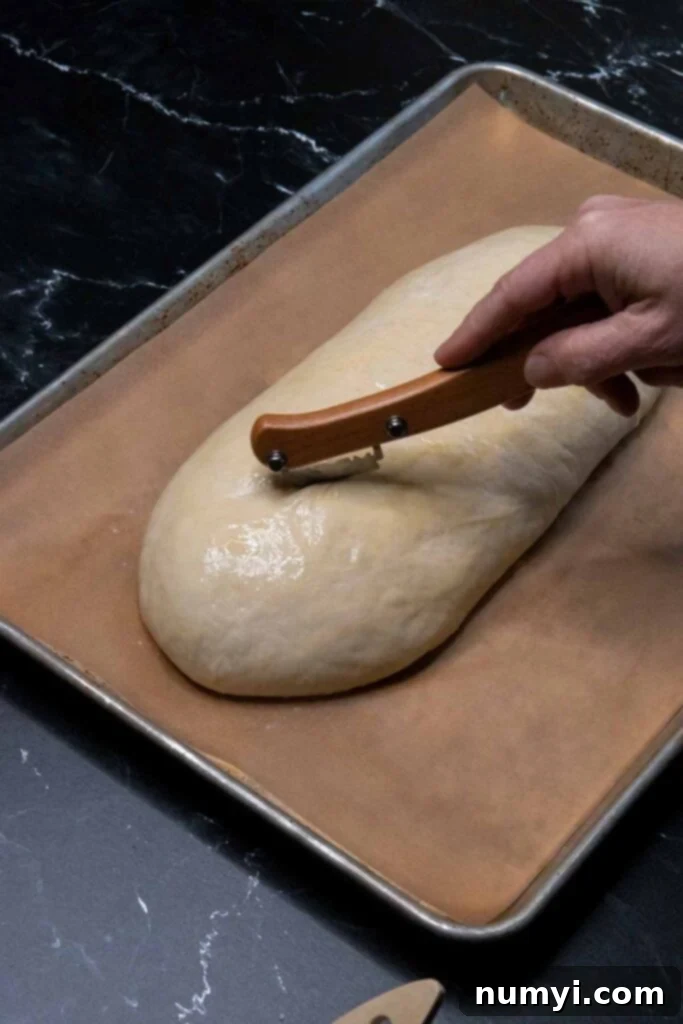
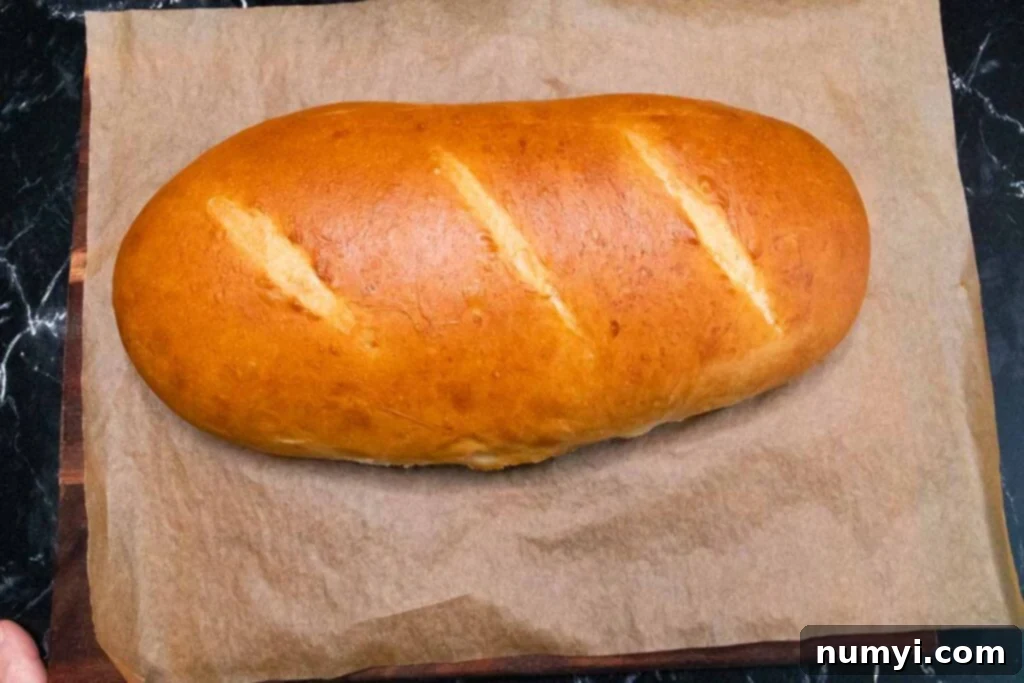
After the 30-minute second rise, your loaf should appear noticeably puffier and ready for its final touches. Gently brush the entire top and visible sides of the loaf with the prepared egg wash using a pastry brush. Be careful to apply it evenly without pressing down too hard, which could deflate the delicate dough. Next, using a bread lame, a very sharp knife (a serrated knife can also work well for this), or even a clean razor blade, make three or four confident, diagonal cuts across the top of the loaf. These strategic cuts are not merely for decoration; they serve a vital functional purpose by allowing the bread to expand predictably and beautifully in the hot oven (known as “oven spring”), preventing uncontrolled tearing and creating those classic, appealing ridges characteristic of artisanal bread.
Step 8: Bake and Cool to Perfection
Carefully transfer the baking sheet, with your prepared loaf, into the preheated 375 degrees F (190 degrees C) oven. Bake for approximately 20 to 25 minutes, or until the bread achieves a beautiful golden-brown color on the outside and sounds hollow when gently tapped on the bottom. For precision, an instant-read thermometer inserted into the center of the loaf should register an internal temperature of around 200-210 degrees F (93-99 degrees C) to indicate it’s fully cooked. Once baked, remove the bread from the oven and immediately transfer it to a wire rack to cool. It’s truly challenging to resist, but allowing the bread to cool for at least 15-20 minutes before slicing is paramount. This crucial cooling period allows the internal structure of the bread to set properly, the starches to firm up, and the residual heat to redistribute evenly, preventing a gummy texture when sliced and ensuring the best possible flavor and crumb. For this particular Italian bread recipe, we’ve found that using a pan of water in the oven or even spraying the oven with water during baking didn’t significantly alter the outcome, making this process even simpler and less fuss!
Storage and Make-Ahead Tips for Your Homemade Italian Bread
Enjoying your homemade Italian bread fresh from the oven is an unparalleled experience, but here’s how to store it properly or even prepare it in advance for future enjoyment:
Yes, you absolutely can prepare the dough in advance! If you wish to refrigerate the dough, after its first rise, gently punch it down to release air, shape it into a ball, then wrap it tightly in plastic wrap. Place it in the refrigerator for up to 24 hours. Keep in mind that even in the cold, the yeast will continue to rise slowly, so using a slightly larger bowl to accommodate any expansion is a good idea. For longer storage, you have the option to freeze the dough. After the first rise, punch down the dough, form it into a ball, wrap it tightly in plastic wrap, and then place it inside a freezer-safe bag or an airtight container. It can be stored in the freezer for up to 3 months. When you’re ready to bake, simply transfer the frozen dough to a bowl, cover it, and thaw at room temperature for about 4 hours, or until it becomes soft and pliable. Once thawed and at room temperature, proceed with shaping and baking as instructed in the recipe.
To maintain the freshness and quality of any leftover homemade Italian bread, it’s best to store it properly. Place the cooled bread in an air-tight container, a large sealed plastic bag, or wrap it tightly in aluminum foil. Store it at room temperature for approximately 3-4 days. While you can refrigerate the bread for up to 7 days for an even longer shelf life, be aware that refrigeration can sometimes cause bread to dry out and become firmer more quickly due to starch retrogradation. For optimal freshness, avoid slicing the entire loaf at once; instead, slice only what you intend to eat immediately, keeping the rest of the loaf intact.
Absolutely! Freezing is an excellent and highly recommended method for preserving your baked Italian bread for extended periods. Once the loaf has completely cooled to room temperature, wrap it tightly in plastic wrap, followed by an additional layer of heavy-duty aluminum foil, or place it securely in a freezer-safe bag or container. This double-layer protection helps prevent freezer burn. The bread will maintain its best quality for about 1 month, though it can remain edible for longer. When you’re ready to enjoy it, simply remove the bread from the freezer, thaw it at room temperature, or for that ‘just baked’ experience, warm it gently in a low oven (around 300°F or 150°C) for 10-15 minutes until warmed through.
If your dough isn’t rising as expected, the most common culprits are usually related to the yeast. First, double-check the expiration date on your yeast package to ensure it’s still active. For active dry yeast, always perform the initial proofing step as instructed to confirm the yeast is alive and bubbling. If the water used for proofing was too hot (above 110°F/43°C), it would kill the yeast. Conversely, if the water was too cold, the yeast would be sluggish and struggle to activate. Also, ensure your rising environment is genuinely warm and free from drafts; cold spots can significantly hinder fermentation. Lastly, sometimes dough just needs a little more time, especially in cooler kitchens – patience is a virtue in baking!
Yes, absolutely! This delicious Italian bread recipe can certainly be made entirely by hand, even without a stand mixer. The process will require a bit more manual effort and muscle for kneading, but the rewarding results will be just as fantastic, if not more so, due to the personal touch. Follow the same steps for combining ingredients in a large, sturdy mixing bowl, using a wooden spoon or your hands to thoroughly mix everything until a shaggy dough forms. Once the dough comes together, turn it out onto a lightly floured surface and knead vigorously for 8-10 minutes. Continue kneading until the dough transforms into a smooth, elastic, and springy ball. The feel of the dough will tell you when it’s ready; it should be less sticky and more manageable. Then, proceed with the rising, shaping, and baking instructions as written.
Serving Suggestions and Delicious Variations
This versatile homemade Italian bread is a fantastic base for countless culinary adventures, elevating both simple and elaborate meals:
- Classic Dipping: The simplest and often most satisfying way to enjoy this bread is by serving it alongside a small bowl of high-quality extra virgin olive oil. Enhance the experience by seasoning the oil with a pinch of red pepper flakes, dried oregano, freshly ground black pepper, and a touch of balsamic vinegar.
- Irresistible Garlic Bread: Transform your loaf into a crowd-pleasing side dish. Slice the bread horizontally, spread generously with a mixture of softened butter, minced garlic, and fresh parsley, then bake until golden and bubbly for an aromatic delight.
- Hearty Sandwiches and Paninis: Its sturdy yet remarkably soft texture makes this bread absolutely perfect for crafting robust and satisfying sandwiches. From classic Italian subs layered with cured meats and cheeses to warm, pressed paninis with your favorite fillings, it holds up beautifully.
- Elegant Bruschetta: For an appetizer that impresses, lightly toast slices of the bread, gently rub them with a cut garlic clove, drizzle with olive oil, and then top with a vibrant mixture of fresh diced tomatoes, fragrant basil, and a delicate finish of balsamic glaze.
- Accompaniment to Soups & Salads: This bread is the quintessential accompaniment to soak up the rich broths from comforting soups like minestrone, pasta fagioli, or lentil soup. It’s also wonderful enjoyed alongside a crisp, fresh garden salad, providing a delightful textural contrast.
- Croutons & Breadcrumbs: Don’t let any stale pieces go to waste! Cube leftover bread to make homemade croutons for salads or soups, or process them into fresh breadcrumbs for coating cutlets or topping casseroles.
Other Great Bread Recipes to Explore
If you enjoyed making this Italian bread, we encourage you to explore more of our delightful bread recipes to expand your baking repertoire:
- Easy White Bread Recipe: A simple, classic recipe perfect for beginners looking to master the basics of bread baking.
- Italian Easter Bread: A beautiful, slightly sweet braided bread often adorned with colored eggs, perfect for celebrations.
- Sourdough Bread Recipe: Dive into the world of sourdough with our comprehensive guide to achieving that tangy flavor and chewy texture.
- No Knead Large Dutch Oven Bread: Experience the simplicity of artisanal bread with minimal effort using a Dutch oven.
Easy Homemade Italian Bread Recipe
Print
Pin
Rate
Ingredients
To Proof the Yeast
- 1 packet Active dry yeast 2 1/4 tsp
- 1/4 cup Warm water
- 1/4 tsp Granulated sugar
For the Dough
- 1 cup Hot water Hot tap water, not boiling
- 1 tbsp Granulated sugar
- 1 1/2 tsp Kosher salt
- 1/4 cup Olive oil
- 3 1/4 cups Bread flour divided
Instructions
-
Dissolve the active dry yeast and 1/4 teaspoon granulated sugar in 1/4 cup of warm water (110 degrees F). Let it stand to proof for about 5 minutes. It should be foaming on the top.
-
In a large bowl of a stand mixer combine 1 cup of hot water, 1 tablespoon of granulated sugar, kosher salt, and olive oil. Add 1 1/2 cups of bread flour mix on low with the paddle attachment. Add the yeast mixture and mix on low to combine.
-
Add the remaining 1 3/4 cup of bread flour and mix on low until well combined. The dough will be very sticky at this point. Scrape down the sides of the bowl, cover, and let rise for 1 hour. (This bread dough is very soft but should be easy to handle. Resist adding more flour.)
-
Prepare a baking sheet with parchment paper.
-
After the one-hour rise time, scrape the dough out onto a well-floured work surface or large cutting board. Gently flatten the dough into a rectangle. Start rolling the dough toward you jellyroll style, gently seal, fold in the two corners after each roll. Seal the seam and tuck the ends under.
-
Place seam side down on the parchment-lined baking sheet. Cover and let rise another 30 minutes.
-
Preheat the oven to 375 degrees F. Whisk a large egg with 1 tablespoon of water.
-
After the 30 minute rise brush the loaf with the egg wash and using a bread lame or sharp knife make three or four cuts diagonally across the top of the loaf.
-
Bake for 20 to 25 minutes until golden brown. Allow the bread to cool for at least 15 minutes before slicing.
Nutrition
There you have it – a straightforward yet profoundly satisfying recipe for homemade Italian bread that will undoubtedly become a cherished favorite in your household. The unparalleled taste and texture of fresh bread, lovingly made with your own hands, truly elevate any meal and bring a sense of warmth and tradition to your table. So, go ahead, slice into this warm, pillowy soft, and delightfully chewy loaf, and savor every single, delicious bite. Happy baking!
