Mastering Homemade Sourdough Bread: Your Ultimate Guide to a Crispy Crust and Chewy Crumb
If you cannot see the video, try turning off your ad blocker.
This quick video offers a concise demonstration of the essential steps involved in crafting delicious sourdough bread. For those seeking a more in-depth visual guide, we highly recommend watching our comprehensive video available here on YouTube.
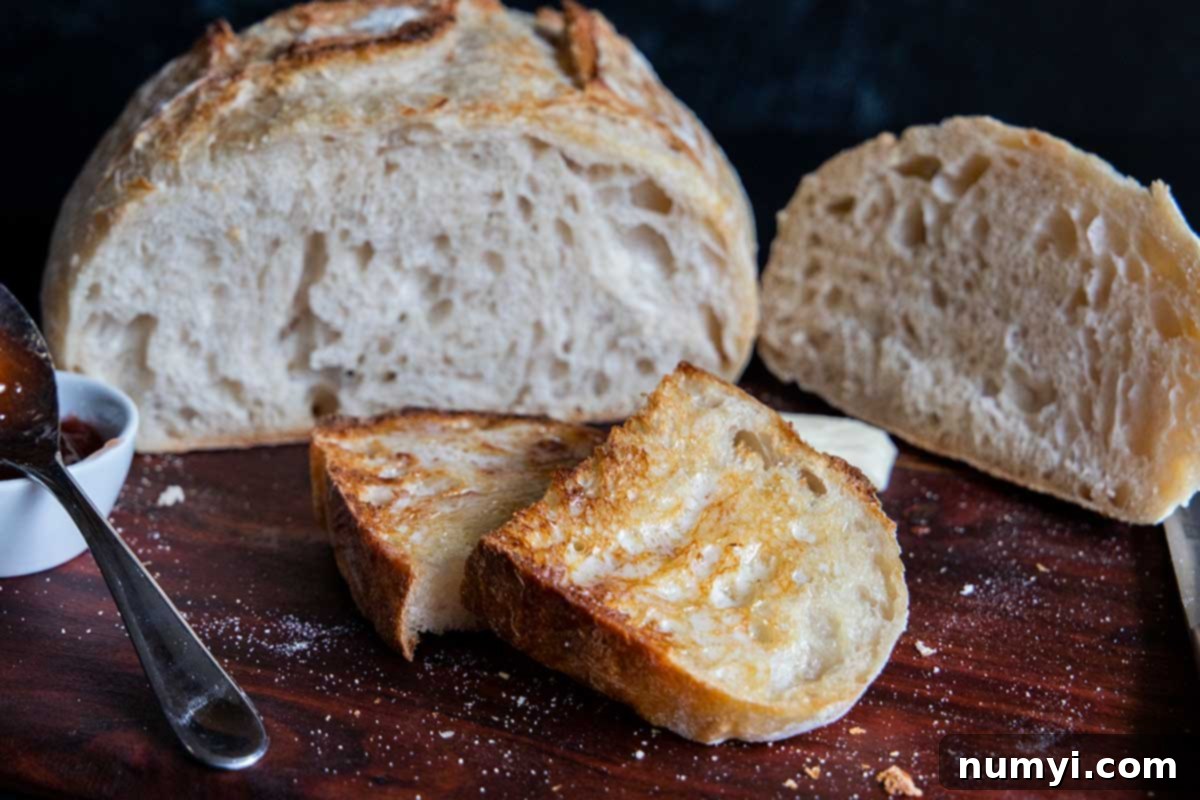
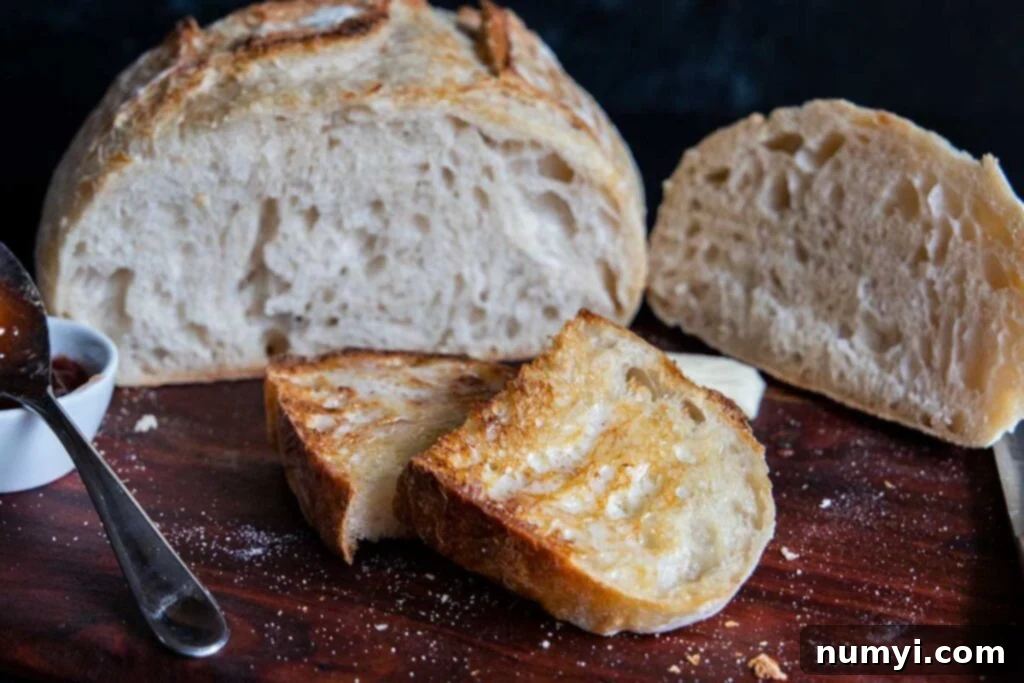
Embark on a culinary journey to bake sourdough bread that truly stands out. This recipe promises a deeply satisfying loaf with a wonderfully chewy, open-textured crumb, enveloped by an irresistible crispy, crunchy crust. Each bite delivers that distinctive, delightful tangy sourdough flavor that makes this bread so beloved.
Our dedication to perfecting this sourdough bread recipe spans nearly two years. It was a journey filled with countless trials, errors, and meticulous adjustments to every stage of the baking process. But through perseverance, we’ve developed a method that consistently delivers a flawless loaf every single time. We are confident that this proven approach will transform your home baking.
Contrary to popular belief, baking artisanal sourdough isn’t as daunting as it seems. We’ve meticulously crafted this step-by-step guide to demystify the process, breaking down each action into clear, manageable instructions. By diligently following these guidelines, you can significantly reduce your learning curve, achieving impressive results in a fraction of the time it took us.
It’s important to set realistic expectations; your very first loaf might not be absolutely perfect, and that’s completely normal. Sourdough baking is an art that requires patience, practice, and developing an intuitive “feel” for the dough. This journey of learning by doing allows you to understand how the dough should look and feel at each critical juncture, from the initial mix to the final proof. The wonderful upside? Your home will be continuously filled with the comforting, intoxicating aroma of freshly baked bread. There’s truly nothing quite like it!
The Art of Making Sourdough Bread: A Step-by-Step Guide
Sourdough bread is an ancient, slow-fermented bread that harnesses the power of natural wild yeast, eliminating the need for commercial yeast. This natural fermentation process is what imparts its characteristic chewy texture, remarkable crispy crust, and signature tangy flavor profile that sets it apart from conventional bread.
The foundation of any great sourdough loaf is an active, robust sourdough starter. We initiated our starter using Joshua Weissman’s detailed sourdough starter recipe. His video is incredibly informative, lasting approximately 9 minutes, and provides an exceptionally thorough explanation of the starter creation and maintenance process. We wholeheartedly recommend his method as an excellent starting point for cultivating your own vibrant sourdough starter.
Be prepared for a waiting period: your starter will typically require at least 7 days to fully mature, becoming ripe, active, and sufficiently potent for baking.
Essential Ingredients for Your Sourdough Starter
Creating a vibrant sourdough starter requires just a few basic ingredients:
- Rye flour
- Unbleached all-purpose flour
- Filtered water
Key Tools for Sourdough Starter Success
Having the right tools can make the starter process smoother:
- Large glass jar (for housing your starter)
- Food scale (for precise measurements, crucial for consistency)
- Spatula (for mixing)
- Thermometer (to monitor water temperature, aiding optimal starter activity)
When our starter isn’t in active use, we store it in the refrigerator to slow down its fermentation. To prepare it for baking, remove it from the fridge several days before you plan to make bread, allowing it to reach room temperature before its first feeding. To reactivate and strengthen your starter, discard all but approximately 1/4 cup (about 32 grams) to 1/3 cup (about 43 grams). Then, feed it with 50 grams of unbleached all-purpose flour and 50 grams of room temperature water. Repeat this feeding process twice daily, roughly every 8 hours, for three consecutive days.
On the morning of the day you intend to mix your bread dough, perform another feeding. Again, discard all but 1/4 cup to 1/3 cup of the starter, and feed it a larger portion: at least 100 grams of all-purpose flour and 100 grams of room temperature water.
How do you know when your sourdough starter is truly ready to bake with? A healthy, active starter should visibly double, if not triple, in size within a few hours of feeding. A reliable test is the “float test”: drop a small amount (a tad) of your starter into a glass of water. If it floats, your starter is buoyant with carbon dioxide and perfectly ripe and active, indicating it’s ready to lend its magic to your bread dough.
Once you’ve successfully cultivated a “ripe” or fully developed sourdough starter, you are well-prepared to proceed with making the bread dough.
We typically feed our starter the night before we plan to mix the dough. We then perform a second feeding approximately 2-3 hours before we’re ready to begin the dough-making process, as this is roughly how long it takes for our starter to double in size. This timing can vary based on the ambient temperature of your kitchen.
Since we maintain a cooler home environment, we often place our starter in the oven with only the light on. The gentle warmth from the oven light provides an ideal, cozy environment that encourages the starter’s activity and growth. However, a crucial word of caution: always place a sign OVER the oven controls as a prominent reminder to prevent anyone from accidentally turning the oven on! Trust us, we speak from experience.
Remember, the older and more consistently fed your sourdough starter is, the stronger and more complex its flavor contribution will be to your finished bread. So, keep baking! Practice not only makes perfect but also results in increasingly flavorful loaves.
Ingredients for Baking Your Sourdough Loaf
Crafting a superior sourdough loaf requires a simple yet specific set of ingredients:
- Ripe sourdough starter (active and ready)
- Bread Flour (or a high-quality unbleached all-purpose flour for good gluten development)
- Water – We consistently use filtered water for both our bread dough and all starter feedings to ensure purity and optimal fermentation.
- Kosher salt (or fine sea salt, for essential flavor and structure)
After much experimentation with varying measurements, we’ve settled on a precise set of quantities that consistently yield the best results. The amounts listed below are our tried-and-true formula, ensuring a perfect loaf every single time.
To begin, place a large mixing bowl or a round food storage container onto your digital food scale and zero it out.
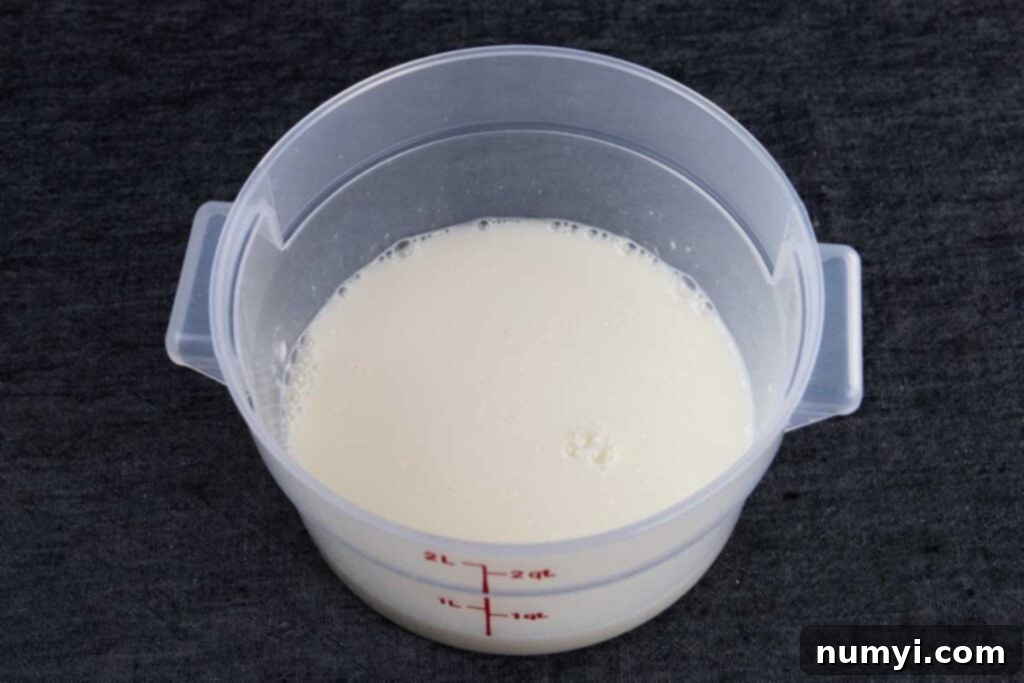
Carefully add 140 grams of your active sourdough starter. Zero the scale once more, then add 255 grams of room temperature filtered water. Stir these two ingredients thoroughly until the starter is fully dissolved and combined with the water, creating a milky mixture.
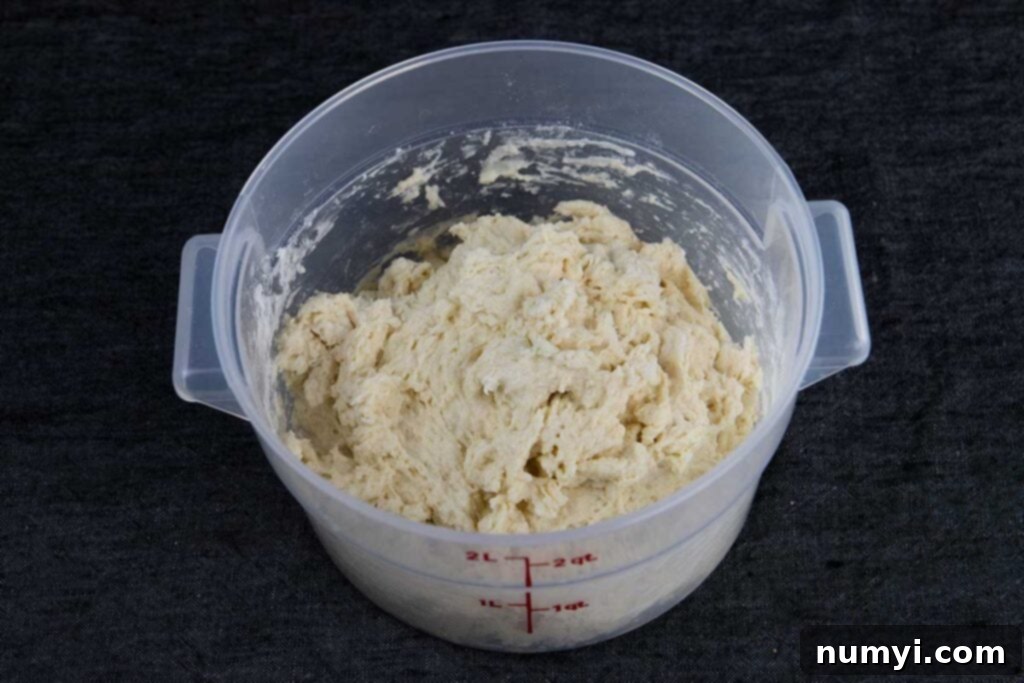
Return the container to the scale, zero it out again, and add 380 grams of unbleached bread flour. Using a dough whisk or your hands, mix the dough thoroughly until all dry flour is fully incorporated and no dry pockets remain. The dough should start to pull away from the sides of the bowl, indicating proper hydration. In a separate small container, measure out 11 grams of kosher salt and set it aside for later use.
Once mixed, cover the bowl tightly and allow the dough to autolyze (rest) undisturbed for a full two hours.
Understanding the Autolyse Process in Sourdough Baking
Autolyse is a fundamental technique in bread making, particularly beneficial for sourdough, where you simply mix the flour and water before introducing any other ingredients, especially salt or starter. This initial rest period is remarkably impactful. It allows the flour to thoroughly absorb the water, ensuring optimal hydration. During this time, the enzymes naturally present in the flour become active, initiating the early development of gluten, the protein network that gives bread its structure and elasticity. Furthermore, these enzymes begin to break down complex starches into simpler sugars, which will later serve as vital food for the yeast in your sourdough starter.
The autolyse phase transforms the dough significantly; it becomes noticeably smoother, more extensible, and begins to strengthen its overall structure. This not only makes the dough considerably easier to handle and shape in subsequent steps but also contributes to a superior final product: a loaf with a more refined texture, an impressive rise, and a richer, more complex flavor. Don’t skip this crucial resting period for an exceptional homemade sourdough experience.
After the two-hour autolyse period, it’s time to integrate the salt and begin developing the dough’s strength. Add half of the measured salt to the dough. Perform four gentle stretch and folds, rotating the bowl a quarter turn between each fold. Incorporate the remaining salt and repeat the stretch and fold process another four times. (You can refer to the accompanying video for a visual demonstration of this technique). Once completed, cover the container again and allow the dough to rest for another 30 minutes.
A helpful tip for less mess: slightly dampen your fingertips with water before handling and folding the dough. This prevents it from sticking excessively to your hands.
Over the next 1 1/2 hours (following the initial salt addition and folds), you will repeat the stretch, fold, cover, and rest cycle every 30 minutes. This series of gentle manipulations continues to build gluten and strength within the dough.
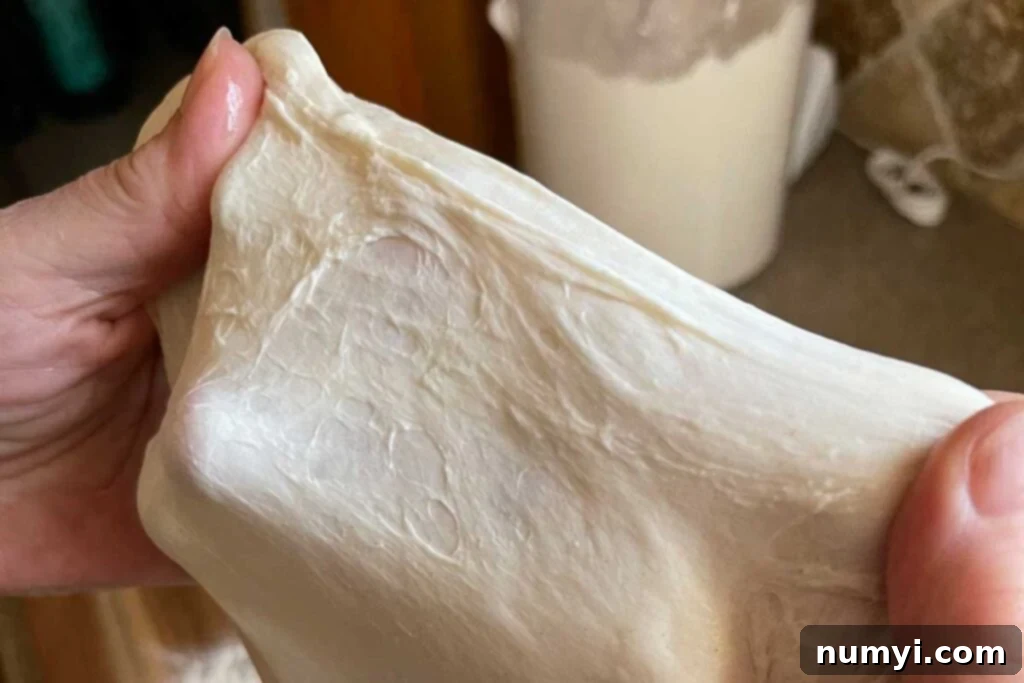
Upon completion of the final fold and rest period, your dough should be sufficiently developed to pass the “windowpane test.” This involves gently stretching a small piece of dough between your fingers until it becomes thin enough to see light through it without tearing. (See the video for a clear illustration of the windowpane technique).
Gently transfer the dough to a lightly floured surface. Perform a pre-shape, forming it into a loose round, and then allow it to bench rest for 20 minutes. It’s crucial not to use excessive flour at this stage. Learning to comfortably work with a slightly sticky dough is a key skill in sourdough baking. Once you master this, you’ll be able to create any type of bread you desire. This was a valuable lesson we learned through our own extensive trial and error.
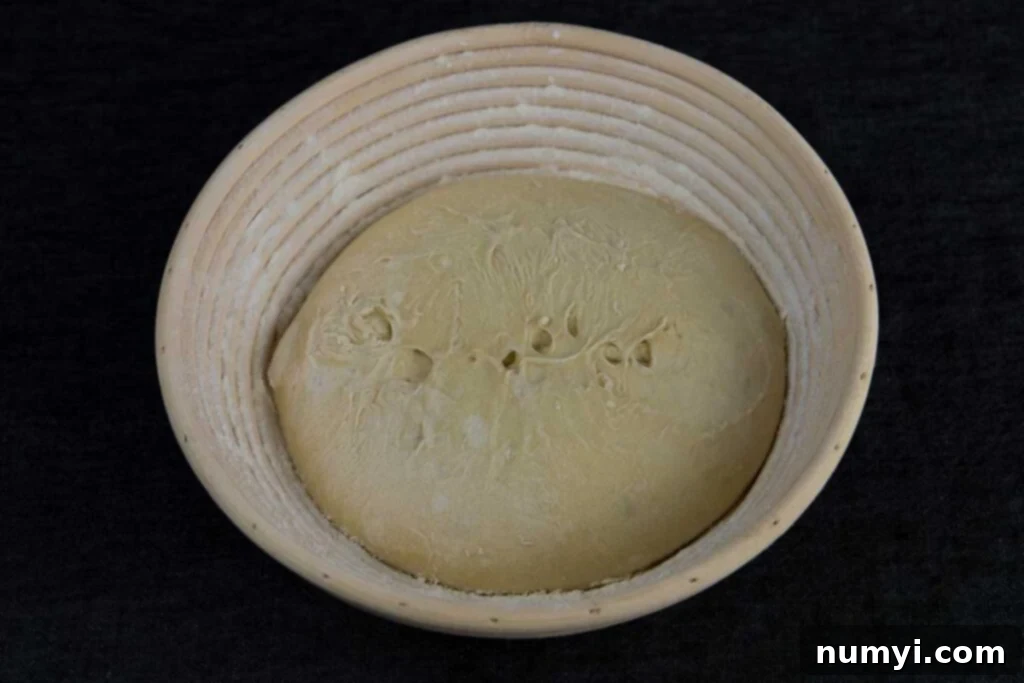
After the 20-minute bench rest, proceed to the final shaping of your dough into a tight boule (round loaf). Once shaped, carefully place it seam-side up into a well-floured banneton basket. For optimal results and to prevent sticking, we highly recommend using a special “dusting flour” mixture, consisting of equal parts all-purpose flour, rice flour, and semolina flour. Using plain flour alone will almost certainly cause the dough to adhere to the banneton, making it difficult to release. Trust us on this crucial tip.
If you don’t yet own a banneton, a medium-sized bowl lined with a floured cloth can serve as an alternative. However, if you’re serious about sourdough baking, investing in a banneton is highly recommended; they are readily available and affordable on Amazon, proving to be an invaluable tool. Lightly dust the top of the dough with your flour mixture, then place the banneton inside a large plastic bag or cover it tightly with plastic wrap to prevent the dough from drying out during proofing. We find a 2-gallon Ziploc bag works perfectly. Refrigerate the dough for a minimum of 12 hours, ideally overnight. This long, cold proof dramatically enhances the sourdough’s flavor development.
Baking Your Perfect Sourdough Loaf
The following morning (or whenever you are ready to bake), carefully retrieve the proofed dough from the refrigerator. Remove it from its bag or plastic wrap and allow it to warm up on the counter for approximately two hours. To assess if it’s perfectly warmed and ready, gently press the dough with your fingertip. It should retain the slight indentation and slowly, gradually bounce back. If it springs back too quickly, it needs more warming; if it collapses, it may be over-proofed.
While your dough is warming, preheat your oven to a scorching 500 degrees F (260 degrees C). Crucially, place your empty Dutch oven inside the cold oven before preheating. This allows the Dutch oven to reach the same high temperature as the oven, ensuring an even bake and a fantastic crust. If you used your oven light to warm the dough, remember to REMOVE the dough from the oven before beginning the preheating cycle.
Once the oven and Dutch oven are fully preheated, carefully place a piece of parchment paper over the top of the banneton (or bowl). Then, gingerly place a cutting board or baking sheet over the parchment-covered banneton and swiftly flip the entire assembly over, releasing the dough onto the parchment paper. Take a lame (a specialized dough scoring knife) or a very sharp knife and spray its blade with cooking oil spray to prevent sticking. Artfully score the top of your dough, creating a cross pattern or any desired design. This scoring allows the bread to expand predictably in the oven, creating a beautiful “ear” and preventing uncontrolled cracks.
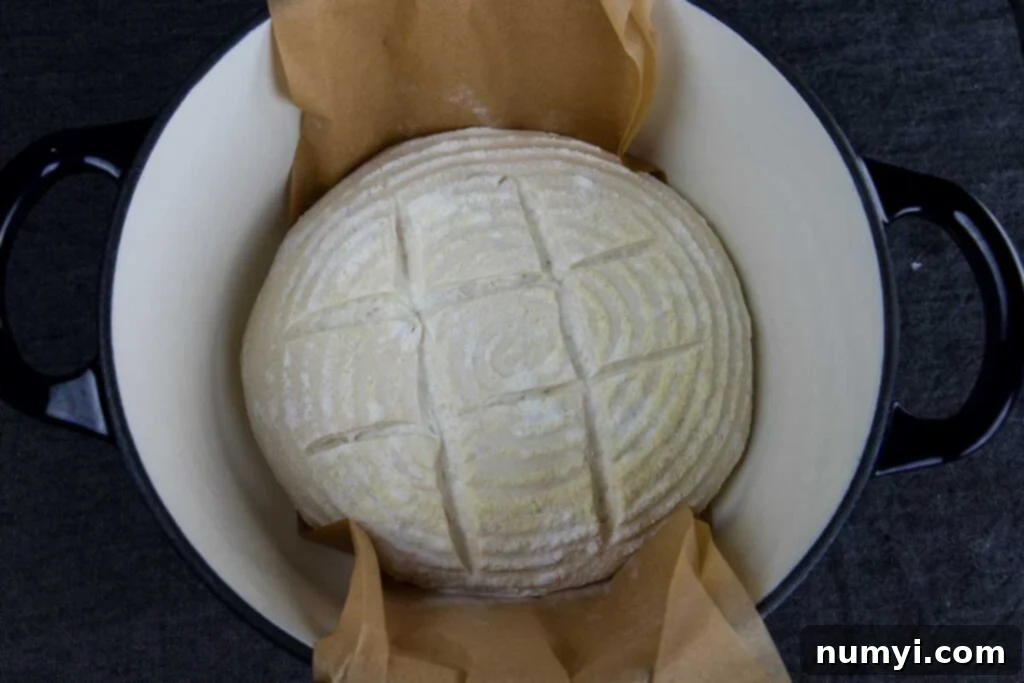
Using the parchment paper as convenient handles, carefully lower the scored dough into the intensely hot, preheated Dutch oven. Exercise extreme caution at this stage, as the Dutch oven will be incredibly hot. Once the dough is nestled inside, place the Dutch oven into the hot oven. For added steam, which is essential for a crispy crust and optimal oven spring, generously spray the inside of the oven with water at least 10 times. Swiftly place the Dutch oven lid on, trapping the steam, and immediately reduce the oven temperature to 435 degrees F (225 degrees C).
Bake the sourdough with the lid on for 20 minutes. Keep in mind that all ovens vary, and we’ve fine-tuned our baking times and temperatures through experimentation to achieve perfect results. This initial, covered baking period is critical for the bread to achieve its maximum rise, or “oven spring,” in a steamy environment.
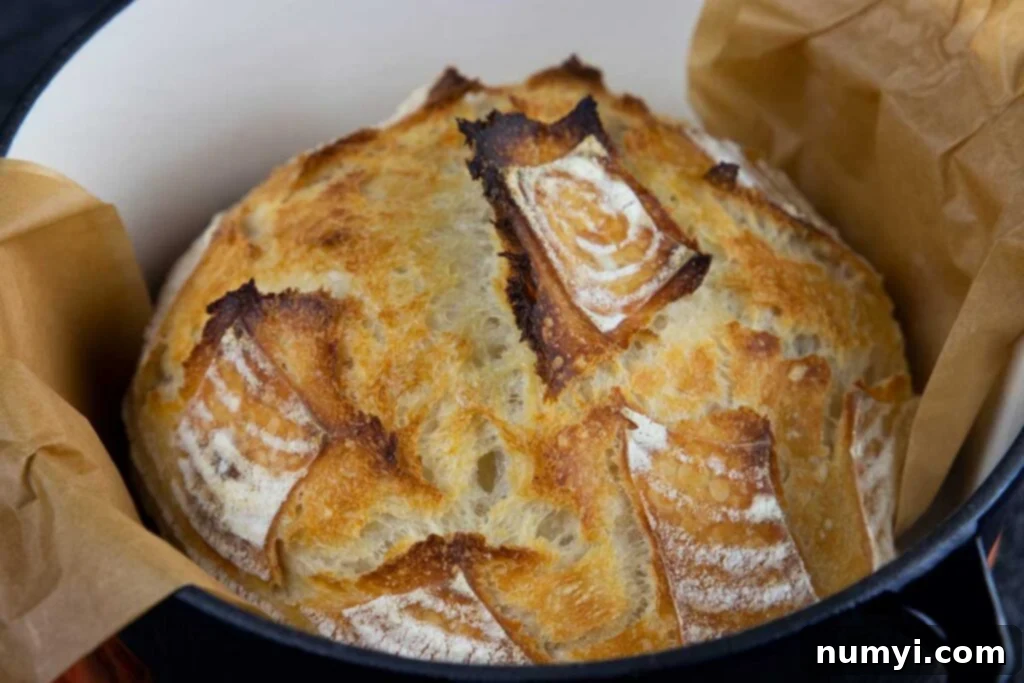
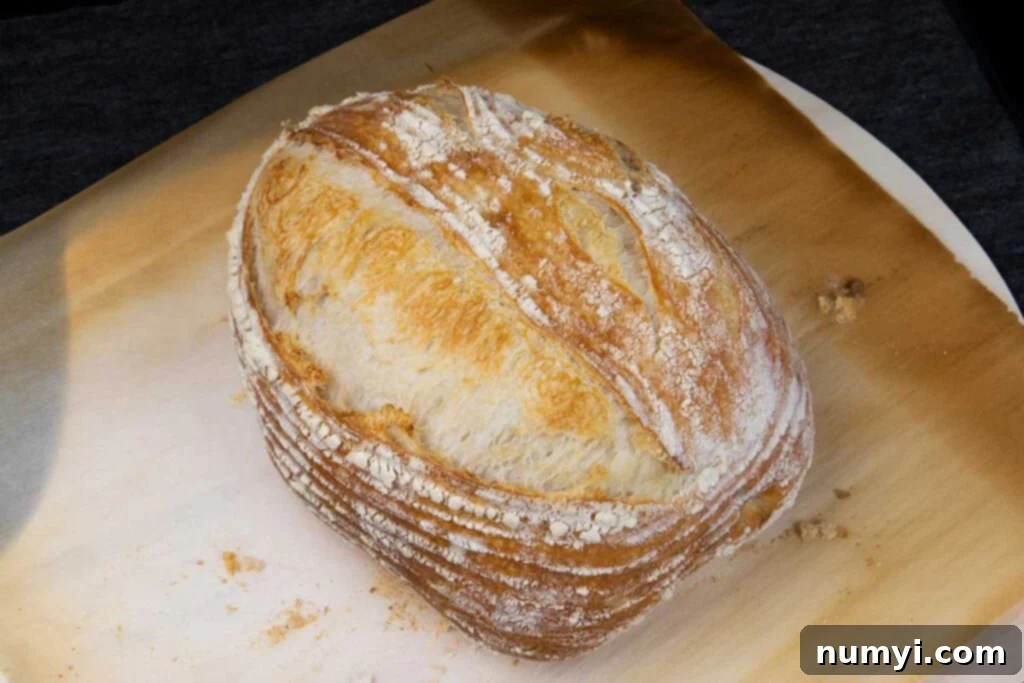
After the initial 20 minutes of covered baking, it’s time for the much-anticipated “BIG REVEAL!” Carefully remove the lid from the Dutch oven. You’ll be greeted by a beautifully risen, pale golden loaf. Rotate the pan 180 degrees to ensure even browning, then continue to bake the bread uncovered for an additional 15-20 minutes. This is genuinely our favorite part of the process, and the excitement never diminishes. We both eagerly rush to the kitchen to witness the magnificent rise and golden transformation of each loaf.
If you’re ever uncertain about the bread’s doneness, you can use an instant-read thermometer to check its internal temperature. A perfectly baked sourdough loaf should register around 208 degrees F (98 degrees C). Additionally, when gently thumped on the bottom, a fully baked loaf should sound hollow.
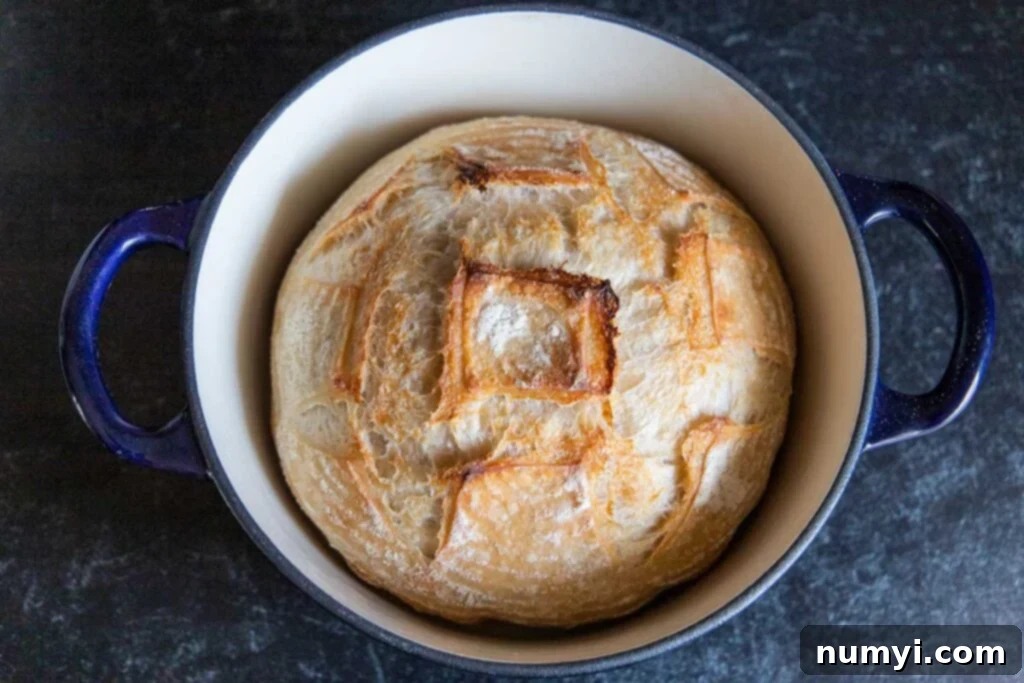
With great care, pull your freshly baked sourdough masterpiece from the oven and take a moment to admire your culinary creation!
There’s an unmatched satisfaction in presenting such a work of edible art. The enticing aroma that fills your home as your family gathers around in awe truly never gets old. For a while, it felt like we were baking this bread almost every day, and each time it emerged from the oven perfectly. And the flavor… oh, the flavor is absolutely exquisite. That distinctive tangy note, combined with the rich, yeasty undertones, is a testament to the natural fermentation.
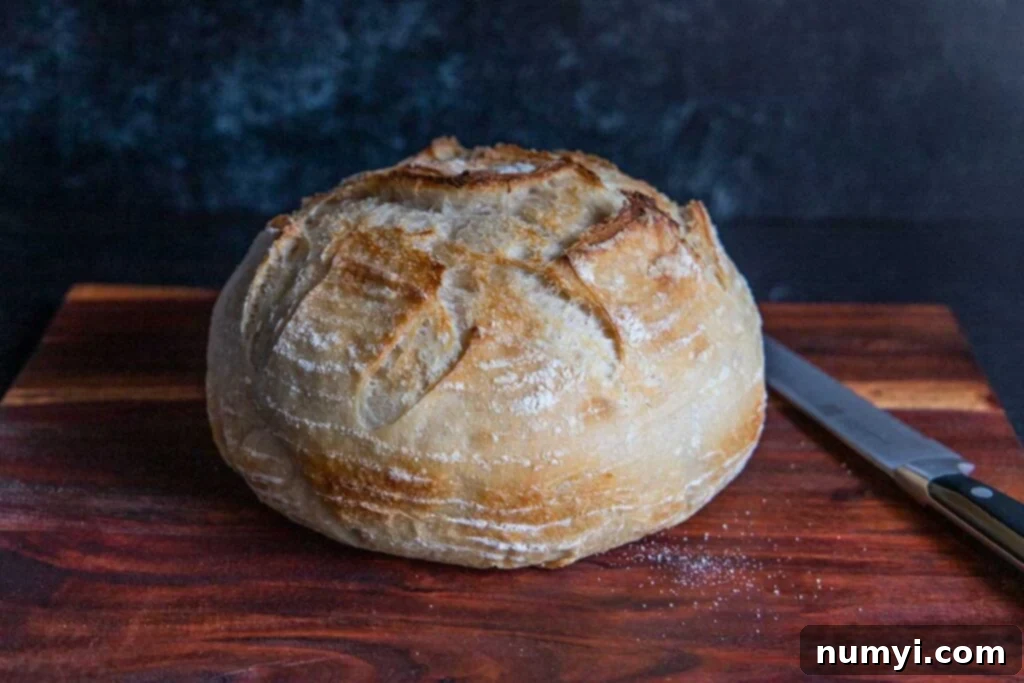
When we first embarked on our sourdough journey, we diligently followed countless recipes, one after another. Some yielded good results, while others fell short. Through this extensive process, we carefully selected the most effective techniques and elements from each, ultimately developing our unique, reliable method that consistently produces this exceptional bread. This recipe is a culmination of passion, patience, and persistent experimentation.
The versatility of this sourdough bread is truly remarkable; it pairs wonderfully with nearly any dish. Whether you’re serving hearty Italian pasta, crafting gourmet sandwiches, or simply need a perfect accompaniment for a meal, this loaf is an undeniable winner. Its robust flavor and satisfying texture elevate any culinary experience.
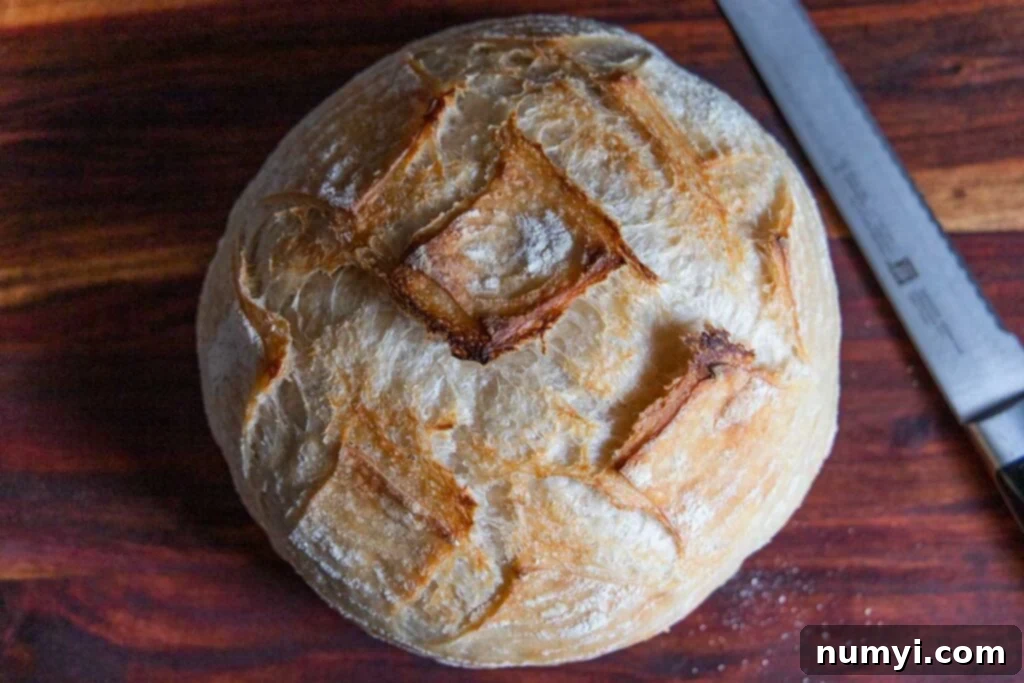
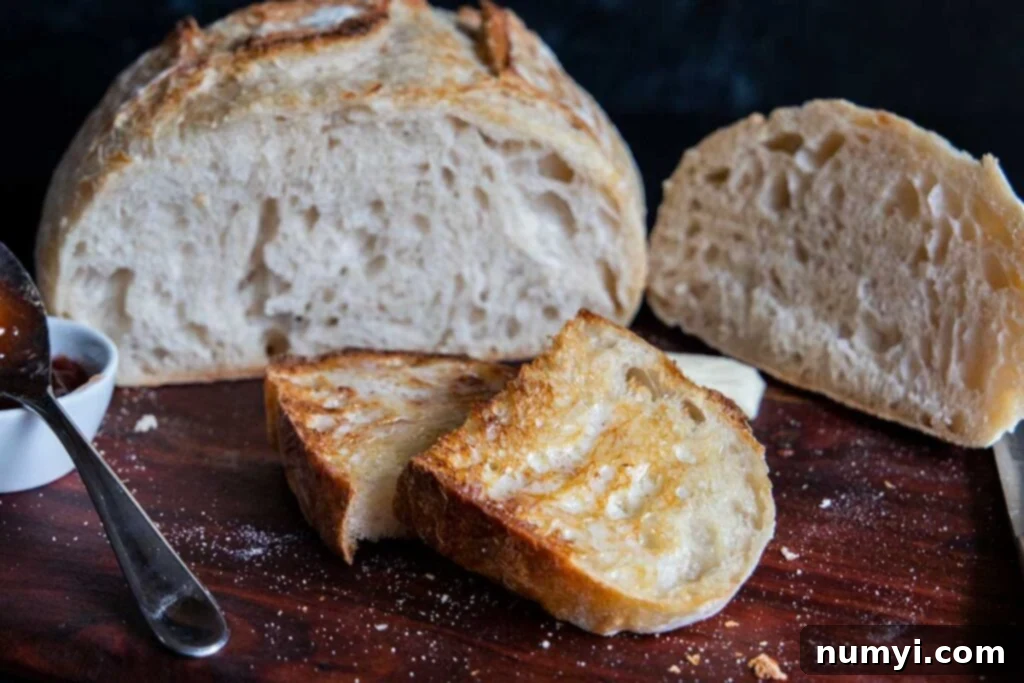
Prepare to be delighted by the characteristic open crumb, featuring those desirable, irregular holes that are a hallmark of expertly crafted sourdough. The interior crumb is delightfully soft and airy, contrasting beautifully with the perfectly crusty, golden-brown exterior. While there are thousands of recipes promising relatively easy sourdough, this one is our tried-and-true favorite. It not only looks stunning but tastes even better, and most importantly, it’s a recipe you can absolutely master. We genuinely hope you’ll give it a try – you certainly won’t regret it!
Conclusion: Endless Possibilities with Sourdough
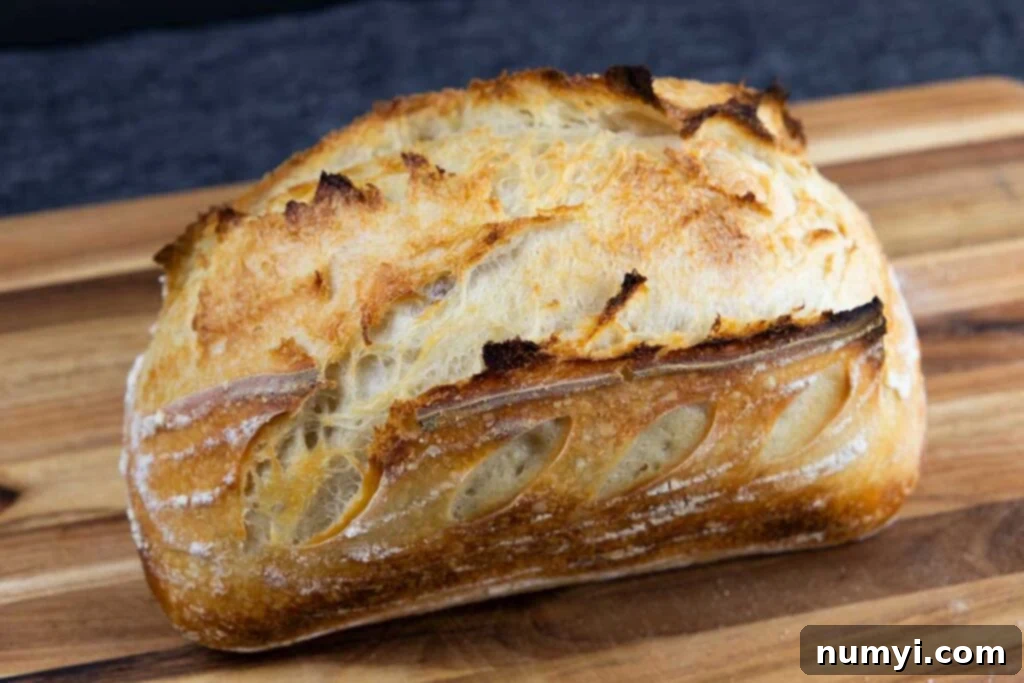
The beauty of this sourdough recipe lies in its adaptability. We consistently use this very same formula to create all our variations: classic boules, elongated batards, and even standard sandwich loaves. The core recipe remains unchanged; only the shaping and baking vessel need to be adjusted to suit your desired presentation.
Speaking of creative baking methods, did you know you can even bake this incredible sourdough bread on your smoker? The smoky flavor infusion is absolutely fabulous and adds a unique dimension to your loaf. You can explore that exciting technique here!
Below, you’ll find just a few examples from our collection of beautiful loaves, all made using this very same versatile sourdough recipe.
Recommended Sourdough Baking Tools
While none of these tools are strictly mandatory for sourdough baking, each one significantly streamlines the process and enhances your overall experience. Consider these investments for a more efficient and enjoyable baking journey.
Our Pick
Kook Sourdough Proofing Set: 2 Rattan Banneton Baskets, 2 Covers, Metal Scraper, Plastic Scraper, Scoring Lame, 5 Blades, and Case
This comprehensive set provides everything you need for professional-level sourdough proofing and scoring, including two proofing baskets, a lame for artful scoring, and versatile scrapers.
Our Pick
Jillmo Danish Dough Whisk, 12-inch Stainless Steel Whisk
While mixing by hand is always an option, we’ve found that a quality Danish dough whisk makes the initial mixing of sourdough dough significantly easier and cleaner. It’s a highly recommended upgrade.
Don’t Sweat The Recipe is supported by its readers. We may earn a commission if you purchase through a link on our site. Learn more.
Frequently Asked Questions About Sourdough Bread
Absolutely! Sourdough bread is often considered a healthier alternative to conventional breads. Scientific studies suggest that the slow fermentation process makes sourdough a prebiotic, which can significantly aid digestion. Furthermore, this fermentation helps break down phytates in the flour, allowing for better absorption of essential nutrients compared to many commercially produced breads. Its simple ingredient list—typically just flour, water, salt, and starter—means you’re consuming a wholesome product without unnecessary additives.
While the process might seem intricate at first, like any new skill, practice is key to mastering sourdough bread making. The ingredients themselves are remarkably simple and few. The primary learning curve involves becoming comfortable with the unique feel and behavior of sourdough dough throughout its various stages. With consistent effort and patience, you’ll find it becomes an intuitive and rewarding process.
A common reason for a sourdough loaf not achieving optimal height is over-proofing. If the dough proofs for too long, the yeast can exhaust its food supply before baking, leading to a weaker structure. To determine if your sourdough is perfectly proofed and ready for the oven, gently press your finger into the dough. It should leave a slight dimple that slowly, almost entirely, bounces back. If it springs back immediately, it needs more proofing; if the indentation remains, it’s likely over-proofed.
While not strictly mandatory, proofing your sourdough in the refrigerator for an extended period (cold proofing) is highly recommended. This longer, slower fermentation time significantly deepens and enhances the complex, tangy flavor of your sourdough bread. It also makes the dough easier to handle and score. However, if time is a constraint, you can certainly proof your dough at room temperature, though the flavor development might be less pronounced.
To adequately develop the gluten structure in your sourdough dough, a minimum of four stretch and fold sessions are typically recommended. This series of gentle manipulations builds strength and elasticity. You’ll know your dough has achieved sufficient gluten development if you can perform the “windowpane test” – stretching a small piece of dough between your fingertips until it’s thin enough to see light through without tearing. Once it passes this test, your dough is ready for the next stage.
Explore More Delicious Bread Recipes!
- Quick And Easy White Bread Recipe
- No-Knead Large Dutch Oven Bread
- Soft and Fluffy One-Hour Dinner Rolls
- Spicy Jalapeno Hushpuppies
Sourdough Bread Recipe
Print
Pin
Rate
Ingredients
- 140 g active sourdough starter
- 255 g water room temperature
- 380 g unbleached bread flour or all-purpose flour
- 11 g kosher salt or sea salt
Instructions
-
Place a large bowl or a round food storage container on the food scale and zero it out.
-
Add 140 grams of active sourdough starter, zero the scale out again and add 255 grams of room temperature filtered water. Stir to combine the starter and water.
-
Place the container back on the scale, zero it out again and add 380 grams of unbleached bread flour. Stir with a dough whisk or use your hands to mix the dough until no dry flour remains and it pulls away from the sides of the bowl.
-
Place a small container on the scale and measure 11 grams of kosher salt. Set aside.
-
Cover the bowl and autolyse (let rest) for two hours.
-
After the two-hour autolyse add half the salt. Stretch and fold four times. Add the remaining salt. Stretch and fold another four times (see video). Cover the container again and let rest for 30 minutes. It’s easier and less messy if you dampen your fingers before folding the dough.
-
Over the next 1 1/2 hours (after adding the salt and folding) you will stretch and fold, cover and let rest every 30 minutes.
-
After the last fold and rest time, you should be able to stretch a windowpane.
-
On a lightly floured surface pre-shape the dough and let it bench rest for 20 minutes. Don’t use too much flour.
-
After 20 minutes you are going to shape the dough into a boule and place it in a well-floured banneton seam side up. Dust lightly with flour and place in a large plastic bag or cover with plastic wrap so the dough doesn’t dry out.
-
The next morning (or when ready to bake) pull the dough out of the refrigerator, remove it from the bag or unwrap it, and let it warm up a bit.
-
While the dough is warming preheat the oven to 500 degrees F with the dutch oven in.
-
Once the oven is preheated, place a piece of parchment paper over the top of the banneton, carefully hold a cutting board or baking sheet over the banneton and flip it over onto the parchment paper.
-
Spray a lame (dough slicing knife) or sharp knife with cooking oil spray and make a cross pattern in the top of the dough.
-
Carefully place the dough using parchment paper as handles into the preheated dutch oven. Careful, the dutch oven will be hot. Place the dutch oven in the hot oven and spray with water at least 10 times. Carefully place the dutch oven lid on and turn the oven down to 435 degrees F.
-
Bake with the lid on for 20 minutes. Remove the lid, rotate the pan, and bake another 15-20 minutes.
