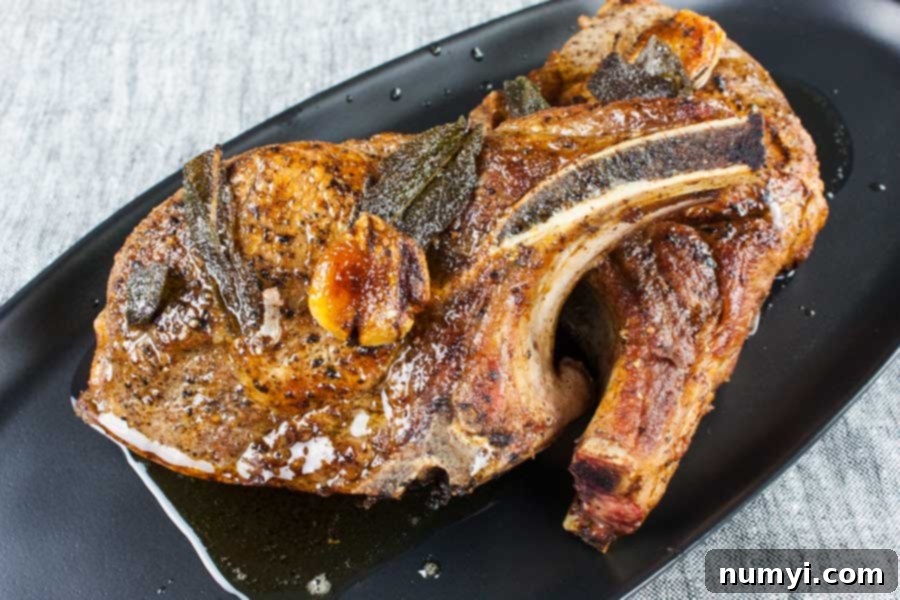
How to Cook Perfectly Juicy Pan-Seared Thick Cut Bone-In Pork Chops Every Time
There’s nothing quite like a perfectly cooked pork chop – seared to a beautiful golden crust on the outside, incredibly moist and tender on the inside, with juices flowing with every slice. This guide is dedicated to teaching you how to achieve just that, focusing on thick cut bone-in pork chops which offer exceptional flavor and texture. We’ll use simple, readily available ingredients and straightforward techniques to guarantee a succulent and flavorful meal, every single time you cook.
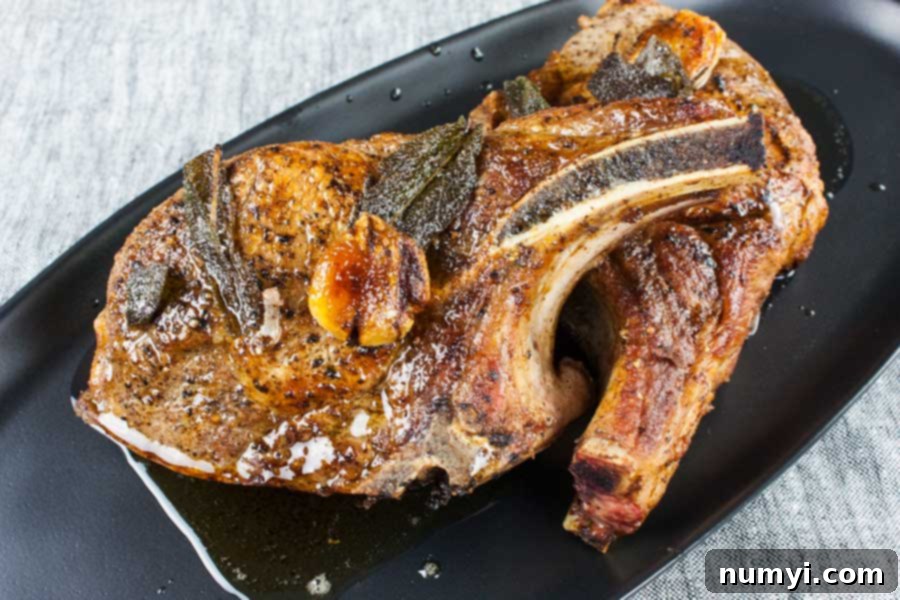
Why This Recipe Will Change Your Pork Chop Game
Have you ever found yourself wondering how to prepare those beautiful, thick bone-in pork chops without resorting to the oven, only to end up with a dry, uninspiring piece of meat? It’s a common challenge in many kitchens. The struggle is real when you anticipate a succulent bite, but instead, you get a pork chop that resembles jerky more than a tender cut. We’ve all been there, forcing ourselves to finish a meal that could have been so much better.
But what if I told you there are a few simple, yet powerful secrets to consistently delivering moist, juicy, and utterly delicious pan-fried pork chops? It’s not about complex techniques or exotic ingredients; it’s about understanding the fundamentals of cooking meat. Once you master these, you’ll be serving up pork chops that are celebrated, not just tolerated. These techniques ensure the Maillard reaction creates that desirable flavorful crust, while simultaneously locking in precious moisture.
Here are the fundamental secrets that will transform your thick cut bone-in pork chops:
Achieve a deep, golden crust with high heat searing. Continuously baste the pork chop while it cooks to lock in moisture. And finally, allow it to rest for almost as long as it was cooked to redistribute those flavorful juices. That’s truly it – simple steps for extraordinary results.
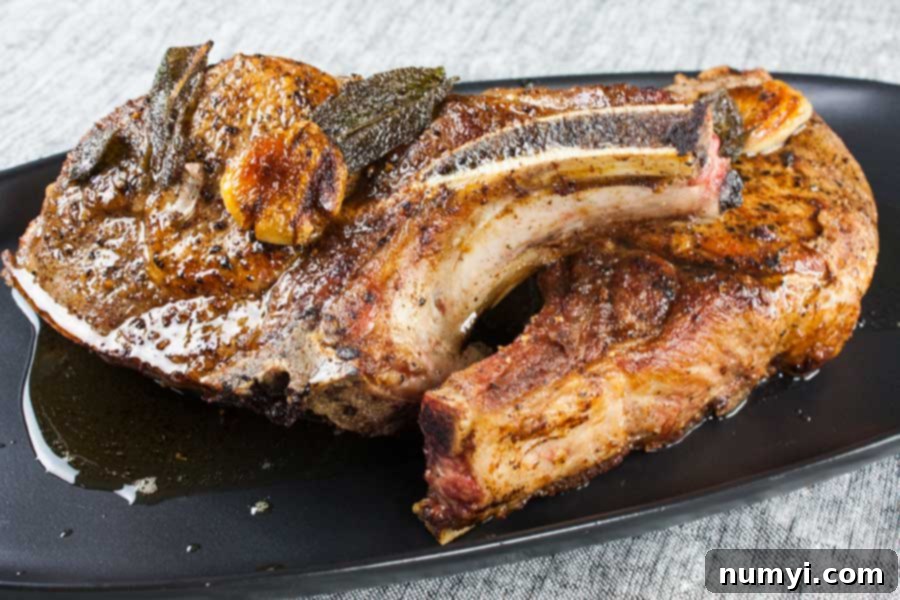
By diligently following these critical steps, you’ll consistently prepare the juiciest, most flavorful pan-seared thick cut bone-in pork chops you’ve ever tasted. These methods work together to ensure maximum flavor development and moisture retention, making every bite a culinary delight. The high heat develops a rich, savory crust, the basting keeps the meat hydrated, and the resting period ensures the internal juices remain in the meat rather than spilling out onto your cutting board.
Looking for the perfect accompaniment to these incredible pork chops? Consider our delectable Roasted Green Beans and Mushroom dish, which offers a wonderful earthy balance. Alternatively, if you’re following a Keto lifestyle, pair these chops with an irresistible Loaded Cauliflower Mash for a comforting and compliant meal!
Let’s break down the process into easy-to-follow steps, ensuring your journey to perfect pork chops is smooth and enjoyable.
Mastering the Pan-Fried Thick Cut Pork Chop Technique
Before we dive into the cooking, let’s address a common issue: pork chops curling up in the pan. This often leads to uneven cooking, with some parts overcooked and others undercooked. The fat cap along the edge of the chop shrinks faster than the meat, causing the chop to bow. There’s a simple, effective trick to prevent this from happening:
Place your thick cut bone-in pork chops on a cutting board. Using a sharp knife, make several small cuts (about 1/4 to 1/2 inch deep) through the fat and connective tissue along the edge of the pork chop, approximately every 2 inches. These shallow cuts will expand as the pork chop cooks, allowing the meat to lay flat in the pan. This ensures a consistent, even sear and cook across the entire surface of your prized pork chop.
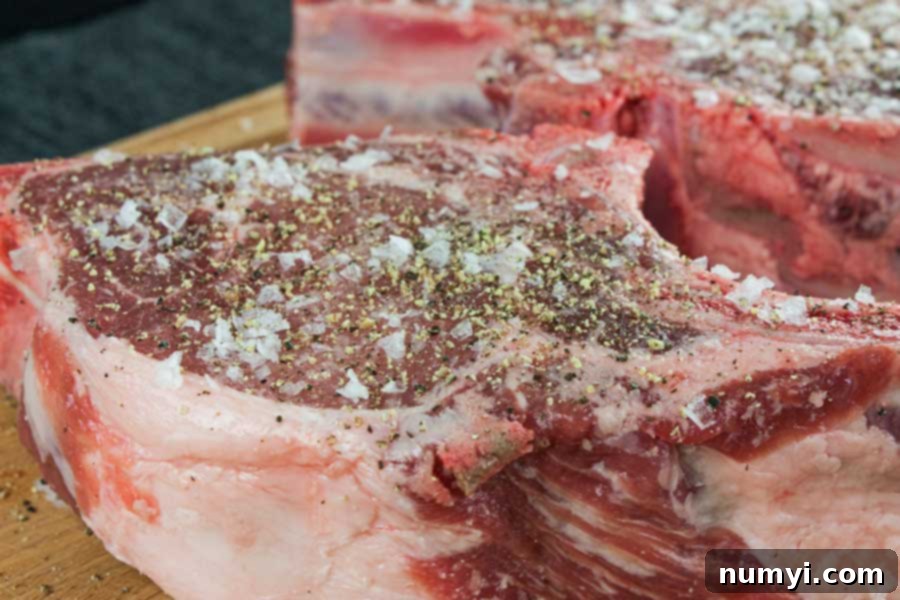
Once you’ve made these strategic cuts, it’s time to season your pork chops. Be generous! Liberally season both sides of the pork chops with high-quality salt and freshly cracked black pepper. Don’t be shy; a good amount of seasoning is crucial for flavor penetration. Gently press the salt and pepper into the meat with your hands to ensure it adheres well and forms part of that delicious crust when it hits the hot pan. This initial seasoning is key to building a fantastic flavor foundation.
Don’t Sweat The Recipe is supported by its readers. We may earn a commission if you purchase through a link on our site. Learn more.
Once seasoned, let your pork chops sit at room temperature for about 30 minutes. This allows the seasoning to penetrate the meat and removes the chill, promoting more even cooking when they hit the hot pan. This is an often-overlooked step that significantly impacts the final tenderness and juiciness of your thick cut pork chops.
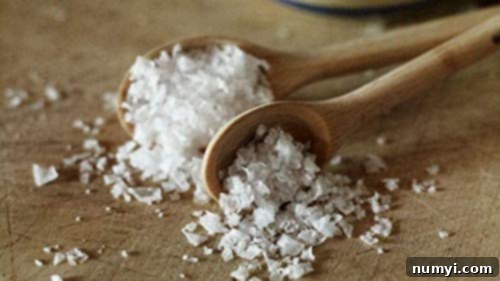
Don’t underestimate the power of good salt! For a superior crust and unparalleled flavor, we highly recommend using Maldon sea salt flakes for all your meat preparations. Its unique pyramid shape and delicate crunch create an incredible textural contrast and burst of flavor that conventional table salt simply can’t match. It has truly been a game-changer in elevating our meat dishes.
While the pork chops are resting, you can prepare the other aromatic ingredients. Grab about 4-5 cloves of fresh garlic. Instead of finely mincing them, give them a gentle smash with the flat side of a knife. We want them just bruised, not pulverized. This partial crushing allows the garlic to slowly release its aromatic oils into the cooking fat without burning, imparting a more subtle and complex flavor. Similarly, take a medium-sized onion and give it a rough chop into larger pieces. We’re looking for substantial chunks of onion, not a fine dice, as they will cook down and become tender, adding sweetness and depth to our sauce.
Now, it’s time to set the stage for searing. Place a heavy-bottomed skillet (cast iron works wonderfully for this) over medium-high heat. Add your olive oil and allow it to get nice and hot. You’ll know it’s ready when the oil begins to shimmer, and you might see a wisp of smoke, indicating it’s reached the perfect temperature for searing. A screaming hot pan is crucial for achieving that beautiful, crispy crust we’re after.
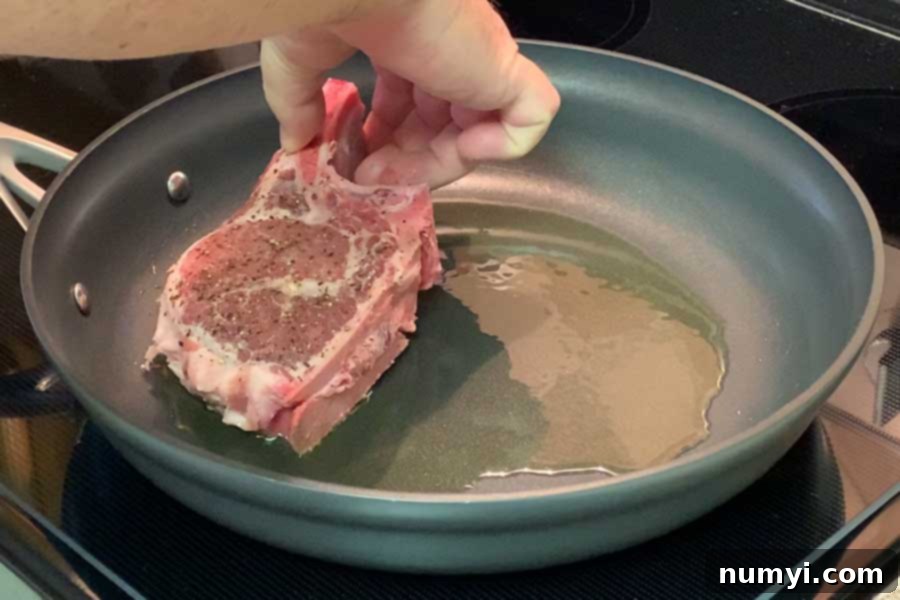
With the pan at optimal temperature, carefully add the pork chops. Always lay them into the pan by placing the edge closest to you down first, then gently laying the rest of the chop away from you. This technique helps prevent hot oil from splashing towards you, ensuring safety in the kitchen.
important note
For this recipe, we specifically used thick cut bone-in pork chops, each close to 1 inch thick and weighing approximately 12 ounces. These larger cuts require a bit more cooking time to reach perfection. Our pork chops were cooked for about 8 minutes on each side to achieve a beautiful sear and desired internal temperature. However, cooking times are highly dependent on the exact thickness of your pork chops. For chops ranging from 3/4 inch to 1.5 inches thick, you can expect cooking times to vary from 4 to 8 minutes per side. Always adjust accordingly and remember that an instant-read thermometer is your best friend for precision.
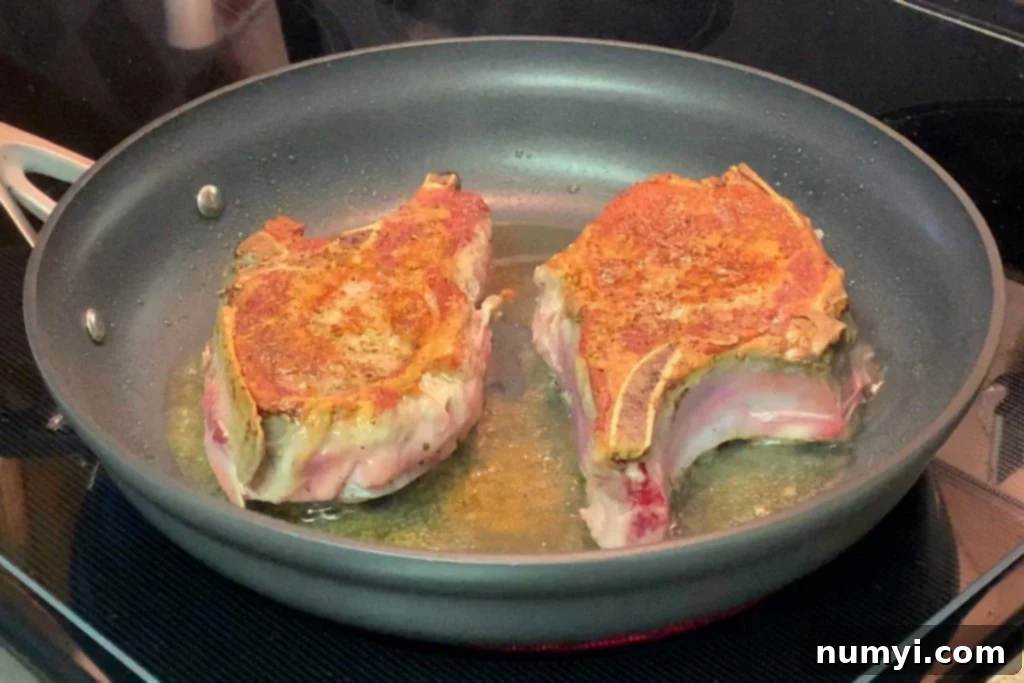
Before you flip the pork chops, take a moment to check the cooked side for doneness. You should see a wonderfully caramelized, deep golden-brown crust. This indicates that the Maillard reaction has occurred, creating rich, savory flavors. Resist the urge to peek or flip too early, as this prevents the crust from properly forming. Once you see that gorgeous crust, it’s time to flip them over to the other side.
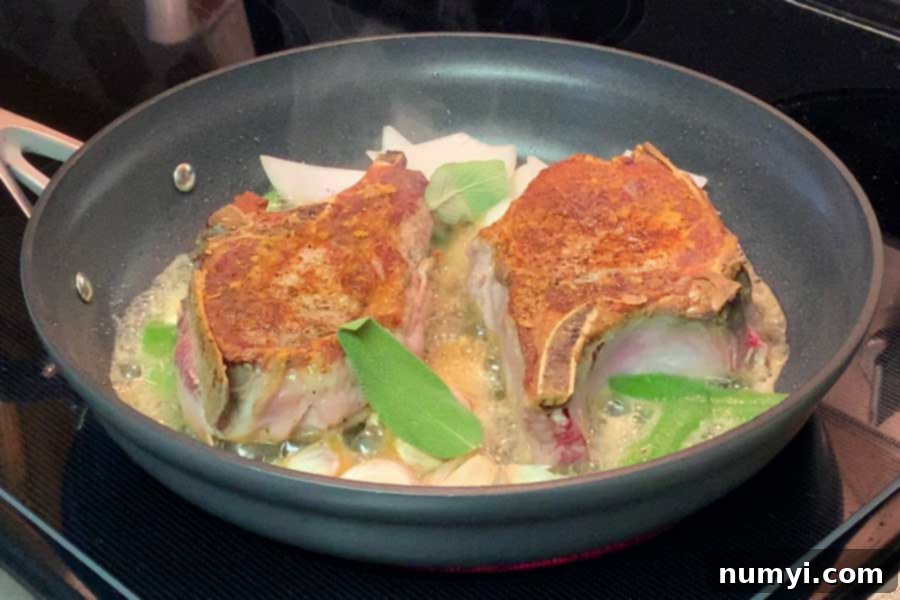
Once flipped, reduce the heat to medium. Now, it’s time to introduce the aromatics and the richness of butter. Add the butter, smashed garlic cloves, roughly chopped onion, and fresh sage leaves to the pan. The butter will melt and mingle with the olive oil, creating a luscious cooking liquid. Gently move the garlic, onion, and sage around in this butter-oil mixture, lightly pressing them against the pan to encourage them to release their incredible flavors. This step infuses the cooking fat with a deeply aromatic essence.
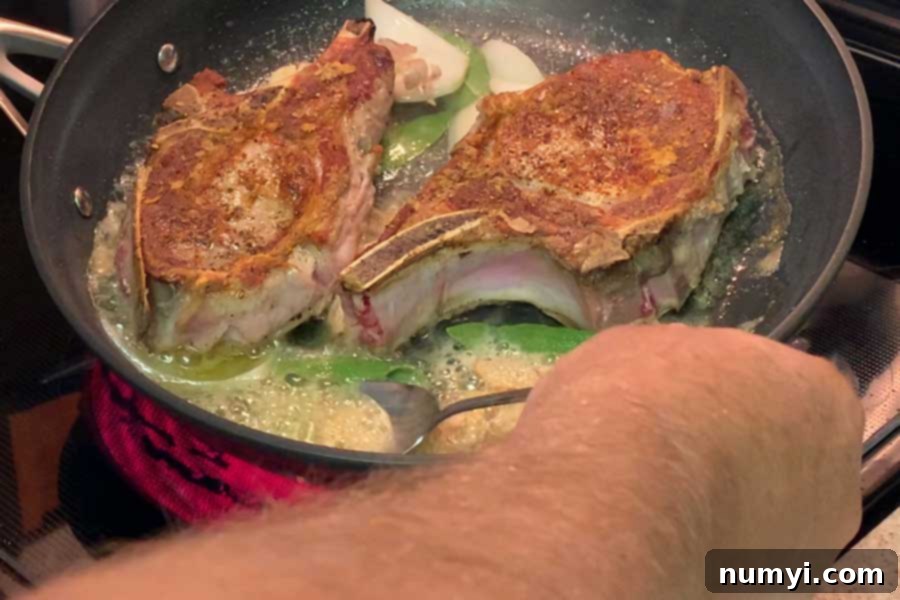
Now for a crucial step: basting. Tilt the pan slightly so that the butter and olive oil gather at one side. Using a large spoon, repeatedly scoop up this flavorful liquid and generously drizzle it over the cooked top of the pork chop. This continuous basting not only helps to infuse those wonderful garlic, onion, and sage flavors into the meat but also keeps the pork chop incredibly moist and tender. Baste frequently throughout the remainder of the cooking time, allowing the golden butter to permeate every fiber. As you baste, the butter and oil will gradually transform into a beautiful, nutty brown color, and your kitchen will fill with an absolutely amazing aroma, signaling the deliciousness to come!
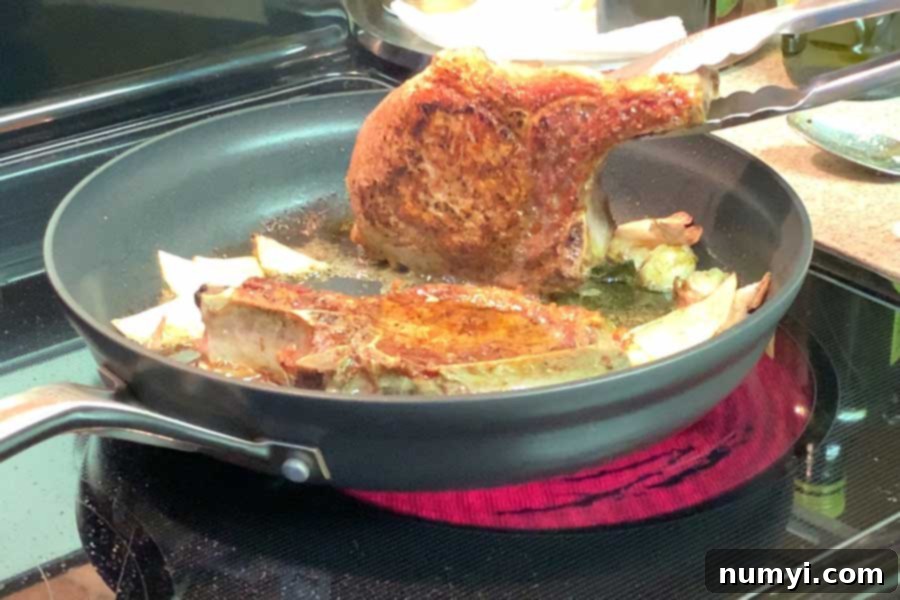
As the pork chops continue to cook, grab a pair of tongs and gently sear the edges. Hold each pork chop vertically in the pan, allowing the fat cap along the side to crisp up and render. This step is vital for both flavor and texture, transforming what could be chewy fat into a crispy, delectable morsel. Cook each side for about a minute or so, just until the fat has rendered sufficiently and achieved a golden hue.
As the second side cooks, continue to check for doneness. The most reliable way to ensure your pork chops are perfectly cooked is to use an instant-read thermometer. Insert the thermometer into the thickest part of the meat, being careful not to touch the bone. The bone conducts heat, which can give you an inaccurate reading. An instant-read thermometer is an indispensable tool in any kitchen, providing precision and peace of mind. If you don’t already own one, we highly recommend investing in one.
expert tip
For the ultimate juicy pork chop, I always aim to pull the pork chops off the heat when they reach an internal temperature of 140-145 degrees Fahrenheit. This might seem a bit low, but remember the principle of “carry-over cooking.” As the meat rests, its internal temperature will continue to rise by a few degrees, typically reaching the perfect 145-150 degrees Fahrenheit, ensuring a perfectly cooked and incredibly juicy pork chop that is safe to eat.
An instant-read thermometer is truly a kitchen game-changer. It eliminates guesswork, guaranteeing consistent results and preventing overcooked, dry meat. If you don’t already have one, consider it an essential investment for any home cook. It’s the secret to cooking meats to perfection every time.
To ensure food safety and optimal tenderness, cook the pork chops until they reach an internal temperature of 145 degrees Fahrenheit, as measured by your reliable instant-read thermometer.
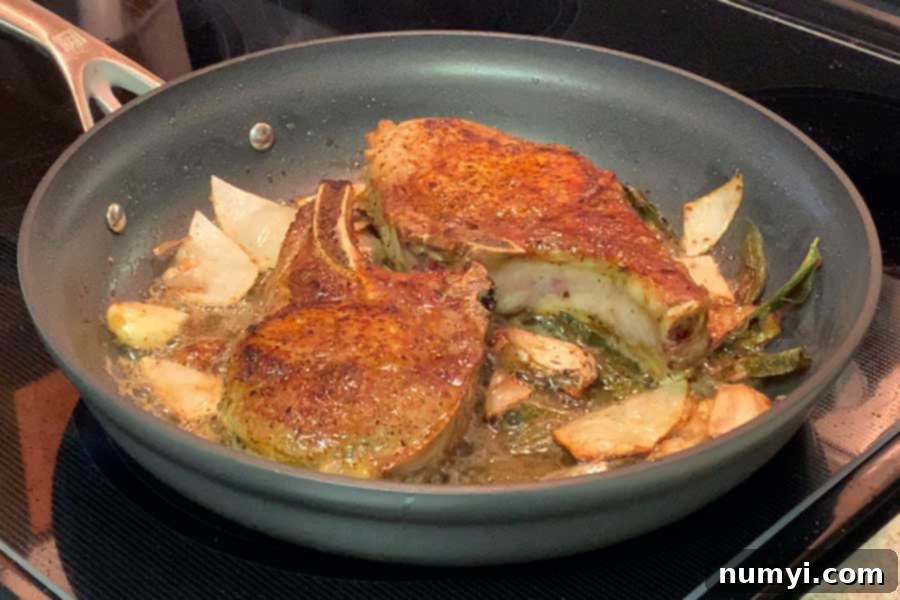
Once your thick cut bone-in pork chops have reached the target internal temperature, immediately remove the pan from the heat. Carefully transfer the cooked pork chops to a clean cutting board. This next step is perhaps the most crucial for ensuring juiciness: allow them to rest. The rule of thumb is to let them rest for approximately the same amount of time they took to cook, typically between 8 to 16 minutes for thick cuts. This resting period is not optional; it’s scientific. It allows all that super-heated moisture and flavorful juices within the meat to calm down and redistribute evenly throughout the chop. Skipping this step means all those precious juices will simply run out onto your plate when you cut into it, leaving you with a “Sahara Desert” pork chop. A properly rested pork chop, however, will be incredibly juicy, tender, and bursting with flavor.
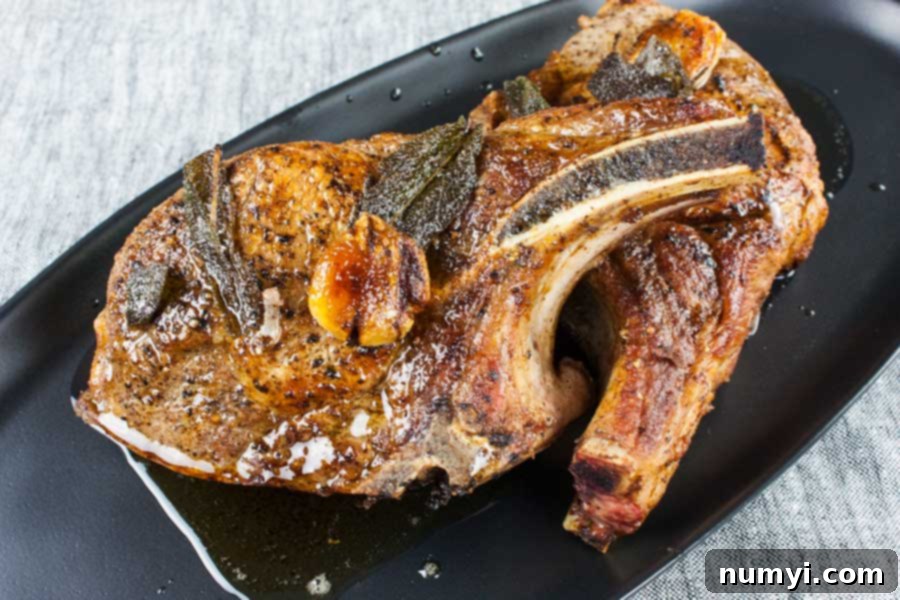
After their well-deserved rest, which typically lasts around 5-10 minutes for these thick chops, it’s time to plate your masterpiece. Drizzle any remaining garlic, onion, and sage-infused butter and olive oil sauce generously over the meat. This aromatic sauce is packed with flavor and will enhance the experience of every bite. Serve immediately and prepare for rave reviews.
We’ve prepared this particular recipe countless times, and it consistently yields amazing results. The beauty of this dish also lies in its versatility. Don’t hesitate to experiment with different herbs and aromatics to customize the flavor profile to your liking. For instance, instead of onion and sage, you might try fresh rosemary and thyme for a more earthy, herbaceous note. Almost any aromatic combined with a rich, brown butter sauce will make these bone-in pork chops sing with flavor!
While we encourage experimentation, there’s no denying our enduring love for that classic sage and brown butter sauce. It truly complements the pork beautifully, creating a comforting and sophisticated flavor experience!
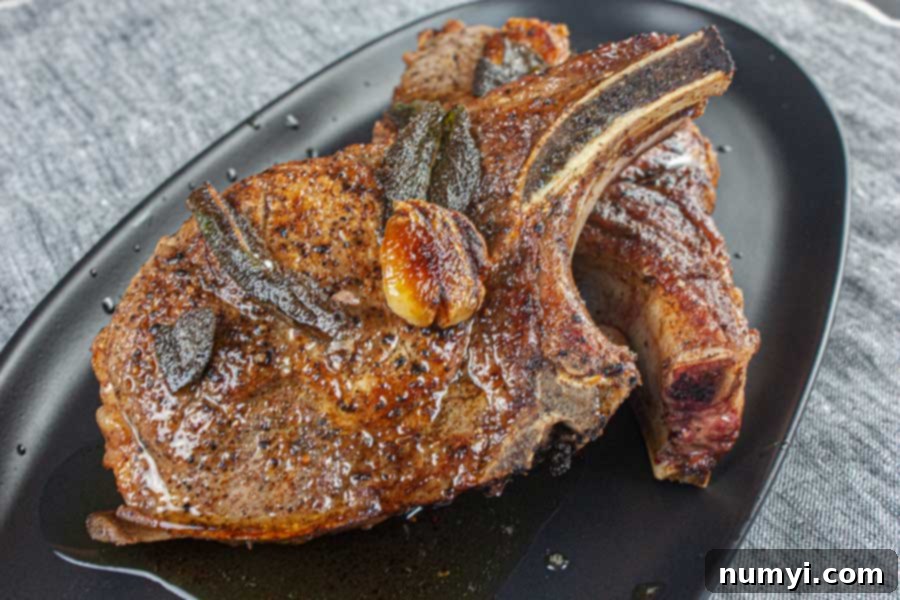
To recap, the big secrets to consistently achieving juicy, moist, and flavorful thick cut bone-in pork chops are fundamentally three-fold: master the high-heat sear for an incredible crust, consistently baste them during cooking to retain moisture, and most importantly, allow them ample time to rest after cooking to redistribute their precious juices. Beyond these core principles, the specific herbs and spices you choose are entirely up to your culinary creativity. Give this method a try, and prepare to impress yourself and your guests! We’d love to hear how your pan-seared pork chops turned out!
If you’re ready to elevate your pork chop game even further, make sure to check out our double bone-in smoked pork chops. These are truly exceptional, introducing a captivating smoky dimension to the flavor profile. The “wow” factor speaks for itself – see for yourself and discover a new favorite!
Essential Tips And Tricks for Perfect Pork Chops
- Bring Pork Chops to Room Temperature: Allowing your pork chops to sit out at room temperature for at least an hour before cooking is highly recommended. This crucial step not only speeds up the overall cooking process but also allows the salt to act as a dry brine, enhancing flavor and tenderness. It also prevents the thermal shock that can occur when cold meat hits a hot pan, leading to more even cooking.
- Utilize an Instant-Read Thermometer: To ensure your pork chop is cooked to absolute perfection and remains incredibly juicy, always use an instant-read thermometer. Aim to pull the pork chop off the heat when its internal temperature reaches between 140-145 degrees Fahrenheit. Remember, carry-over cooking will increase the temperature a few more degrees as it rests.
- Garlic Timing is Key: When cooking this dish, it’s best to use whole, smashed garlic cloves initially. If you prefer the flavor of diced garlic, wait until the last few minutes of cooking to add it. This strategic timing prevents the smaller pieces of garlic from burning and turning bitter, ensuring a sweet, aromatic infusion.
- Adjust for Boneless Pork Chops: If you opt for boneless pork chops, be aware that their cooking times will be significantly less than their bone-in counterparts. Keep a close eye on them and use your instant-read thermometer diligently to avoid overcooking.
- Handle Thin Pork Chops with Care: For thinner pork chops, you might need to slightly increase the heat to ensure you still achieve that desirable, crisp sear. The cooking times will be much shorter, but the goal remains the same: a beautiful crust. Always keep that instant-read thermometer handy, as thin cuts can go from perfectly cooked to dry in a matter of seconds.
Flavorful Variations to Explore
- Herbaceous Swaps: While sage is fantastic, don’t limit yourself! Experiment with different herbs to create unique flavor profiles. Fresh rosemary offers a robust, piney note that pairs wonderfully with pork, while thyme brings an earthy, slightly floral aroma. A combination of both can be particularly delightful.
- Spicy & Robust Twist: For those who love a bit of a kick and a more adventurous flavor, try a variation using cumin, chili powder, and paprika. By omitting the sage and incorporating these spices, you’ll achieve a more robust and spicier version of this dish. These warm, earthy spices lend themselves beautifully to pork, creating an entirely different and equally delicious culinary experience.
Frequently Asked Questions (FAQ)
The key to preventing dry pork chops lies in three critical steps: first, achieve a good sear on each side over high heat to lock in juices and develop flavor. Second, cook them just until the internal temperature reaches 140-145 degrees Fahrenheit using an instant-read thermometer. Immediately remove them from the heat at this point. Third, and most importantly, allow the pork chops to rest for about as long as they were cooked (8-15 minutes for thick cuts). This resting period is crucial as it allows the super-heated juices within the meat to redistribute, ensuring every bite is moist and tender.
Pork chops are incredibly versatile and pair well with a wide range of seasonings. Classic choices like fresh sage, aromatic rosemary, and earthy thyme create a beautiful, traditional flavor profile, especially when combined with garlic and butter. For a different, more vibrant experience, consider a blend of garlic, cumin, chili powder, and paprika; these spices offer a delicious, robust, and subtly spicier note that perfectly complements the rich flavor of pork, opening up a world of culinary possibilities.
To prevent pork chops from curling and ensuring even cooking, make shallow cuts (about 1/4 to 1/2 inch deep) every two inches or so along the fatty edge of the chop. As the pork chop cooks, the fat and connective tissue along the edge will contract. These small cuts relieve that tension, allowing the chop to expand gracefully and remain flat in the pan. This technique guarantees a consistent sear across the entire surface of the meat, leading to a perfectly cooked pork chop without any bowed centers or unevenly cooked sections.
Other Outstanding Pork Recipes to Savor
Double Bone-In Smoked Pork Chops
Crispy Pork Carnitas Recipe
Grilled Adobo Pork Tenderloin Recipe
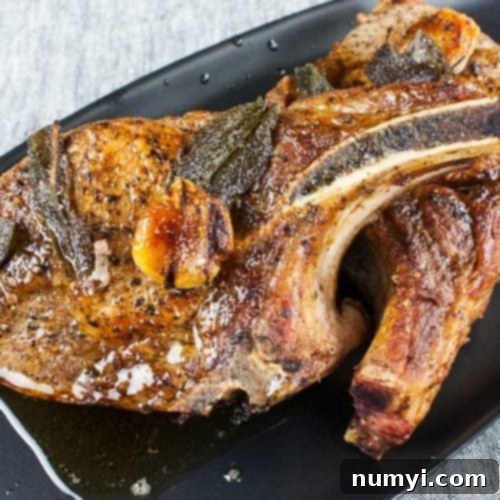
Thick Cut Bone-In Pork Chop Recipe
Print
Pin
Rate
Ingredients
- 2 Thick Cut Bone-In Pork Chops 8oz – 12oz each, approx. 1 inch thick
- 5 Cloves Garlic smashed
- 1/2 Medium Onion roughly chopped
- 5 Fresh Leaves Sage
- 4 tbsp Olive Oil
- 4 tbsp Unsalted Butter
- Kosher Salt or Maldon Sea Salt Flakes to taste
- Freshly Cracked Black Pepper to taste
Instructions
Prep Steps
-
To prevent curling, lay the thick cut bone-in pork chops on a cutting board. Using a sharp knife, make several shallow cuts (approx. 1/4 to 1/2 inch deep) through the fat cap along the edge, roughly every 2 inches. This allows the chop to cook evenly and remain flat. Let pork chops sit at room temperature for 30 minutes to 1 hour.
-
Season both sides of each pork chop liberally with salt (Maldon sea salt flakes recommended) and freshly cracked black pepper. Gently press the seasoning into the meat to ensure it adheres.Kosher Salt or Maldon Sea Salt Flakes, Black Pepper
-
Smash the garlic cloves with the flat side of a knife to bruise them and release their aromas. Remove the papery skin. Set aside.5 Cloves Garlic
-
Roughly chop half a medium onion into large chunks. Set aside.1/2 Medium Onion
Cooking Process
-
Place a medium-sized, heavy-bottomed skillet (cast iron recommended) over medium-high heat. Add the olive oil and allow it to get very hot, until it shimmers and just begins to smoke.4 tbsp Olive Oil
-
Carefully add the pork chops to the hot pan, laying them away from you to avoid hot oil splatter.2 Thick Cut Bone-In Pork Chops
-
Sear the first side for 4 to 8 minutes, depending on the thickness of your chops. You should see a deep, golden-brown crust. Flip to the other side.
-
Reduce the heat to medium. Add the butter, smashed garlic, roughly chopped onion, and fresh sage leaves to the pan.5 Cloves Garlic, 1/2 Medium Onion, 5 Fresh Leaves Sage, 4 tbsp Unsalted Butter
-
Move the garlic, onion, and sage around in the melted butter and olive oil, gently pressing them to release their aromatic oils and flavors into the sauce.
-
Tilt the pan and, using a spoon, baste the pork chops frequently with the aromatic butter and oil mixture. This helps infuse flavors and keep the chops moist.
-
Continue cooking the second side for another 4-8 minutes, depending on the thickness, while basting.
-
When the chops are almost done, use tongs to sear the edges. Hold each pork chop perpendicular to the pan and cook for about 1 minute per side, allowing the fat to render and crisp up.
-
Monitor the internal temperature with an instant-read thermometer. Remove the pork chops from the heat when they reach 140-145 degrees Fahrenheit (they will continue to cook as they rest). Transfer them to a cutting board.
-
Allow the pork chops to rest for approximately the same amount of time they took to cook, typically 8 to 16 minutes. This crucial step ensures the juices redistribute throughout the meat, resulting in a tender and juicy chop.
-
Plate the rested pork chops and generously drizzle the flavorful garlic, onion, sage, and brown butter sauce over the meat before serving. Enjoy your perfectly cooked, juicy pan-seared pork chops!
