Mastering the Art of Turkey Carving: A Step-by-Step Guide for a Perfect Holiday Feast
The centerpiece of any festive meal, especially during holidays like Thanksgiving or Christmas, is often a beautifully roasted turkey. However, for many home cooks, the thought of carving that magnificent bird can be quite daunting. Visions of a messy, unevenly cut turkey or struggling with stubborn joints might flash through your mind. But what if we told you that carving a turkey doesn’t have to be an intimidating ordeal? In fact, with the right tools, a few simple techniques, and a little confidence, you can carve your turkey like a seasoned professional, ensuring every guest enjoys a perfectly portioned, tender slice of meat.
This comprehensive guide will walk you through the entire process, from preparing your carving station to gracefully deconstructing your bird. We’ll provide clear, step-by-step instructions, essential tips, and common pitfalls to avoid, helping you present a stunning platter of turkey that’s as impressive to look at as it is delicious to eat. Get ready to banish your carving fears and embrace the satisfaction of mastering this essential culinary skill!
Essential Tools for a Seamless Turkey Carving Experience
Before you even think about touching that turkey, it’s crucial to gather the right equipment. Having everything at hand will make the process much smoother and more efficient. Here’s what you’ll need:
- A Sharp Carving Knife: This is arguably the most important tool. A sharp, long (8-10 inches) carving knife or a sharp chef’s knife is essential for clean cuts. A dull knife will not only make the job harder but can also be dangerous. Ensure it’s honed or sharpened before you begin.
- Carving Fork or Tongs: A sturdy carving fork or a pair of tongs will help you stabilize the turkey, hold pieces of meat while slicing, and transfer them to the platter. Tongs offer a good grip, especially for larger pieces.
- Large Cutting Board: Choose a cutting board with a juice groove to catch any drippings, preventing a messy countertop. A board that’s large enough to accommodate the entire turkey is ideal.
- Paper Towels or a Damp Cloth: These are not just for cleanup! They play a crucial role in stabilizing your turkey on the cutting board.
- Serving Platter: Have a warm, attractive serving platter ready to display your beautifully carved turkey slices.
- Small Bowls (Optional but Recommended): For separating white meat, dark meat, and any scraps you might want to save for stock or gravy.
The All-Important Resting Period: Don’t Skip This Step!
Once your turkey comes out of the oven, it’s tempting to start carving immediately. Resist the urge! Allowing the turkey to rest is perhaps the most critical step for a juicy, flavorful bird. As the turkey cooks, the muscle fibers contract, pushing the juices towards the center. If you cut into it too soon, these precious juices will run out, leaving you with dry meat.
Ideally, let your turkey rest for at least 20-30 minutes for smaller birds (under 12 pounds) and up to 45-60 minutes for larger ones (over 15 pounds). You can lightly tent it with aluminum foil to keep it warm. During this resting period, the muscle fibers relax, allowing the juices to redistribute throughout the meat, resulting in a much more tender and moist turkey. This is also the perfect time to make your gravy or finish any side dishes.
Getting Started: Setting Up Your Carving Station
With your rested turkey and tools ready, it’s time to set up your carving station. Place your large cutting board on a stable surface. To prevent the turkey from sliding around, fold three or four paper towels into a thick pad and place them in the center of your cutting board. This creates a non-slip surface and provides a little cushioning for the bird.
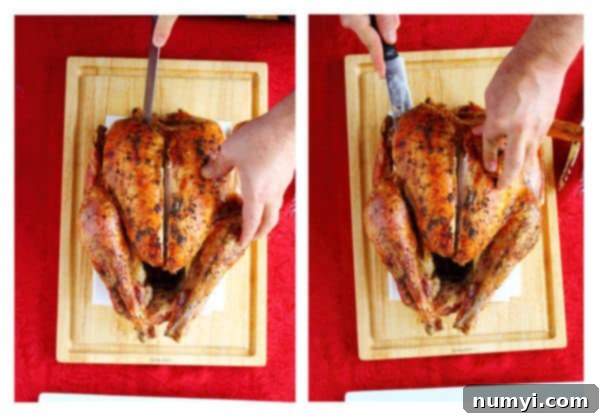
Carefully transfer your turkey onto the paper towel pad on the cutting board, breast-side up. Make sure it feels secure before proceeding.
Step 1: Detaching the Breast Meat – The Crown Jewel
The breast meat is often the most anticipated part of the turkey. Carving it correctly ensures tender, evenly sliced portions.
Locating the Breast Bone and Wishbone
Begin by identifying the breast bone, which runs down the center of the turkey’s chest. You’ll also want to find the wishbone, located at the neck cavity end of the breast. It’s often easier to make a small cut around the wishbone first to help remove it, or simply guide your knife around it.
Making the Initial Cuts
With your sharp carving knife, make a deep, vertical incision along one side of the breast bone, from the front to the back of the turkey. Keep your knife as close to the bone as possible, following its contour. You’ll feel the knife scraping against the bone.
Next, carefully cut horizontally along the bottom of the breast, where it meets the wing joint and the ribs, still keeping the knife close to the bone. Use a sawing motion if needed, but strive for smooth, continuous cuts. As you cut, gently pull the breast meat away from the carcass with your free hand or tongs. The goal is to separate the entire breast half in one clean piece.
Repeating on the Other Side
Once one breast half is removed, repeat the exact same process on the other side of the breast bone to remove the second breast half. Place both whole breast pieces on a clean section of your cutting board or a separate plate.
Step 2: Slicing the Breast Meat for Maximum Tenderness
Now that you have the breast meat separated, it’s time to slice it for serving. The key here is to cut against the grain. The “grain” refers to the direction of the muscle fibers. Cutting against it shortens these fibers, making each slice incredibly tender and easy to chew.
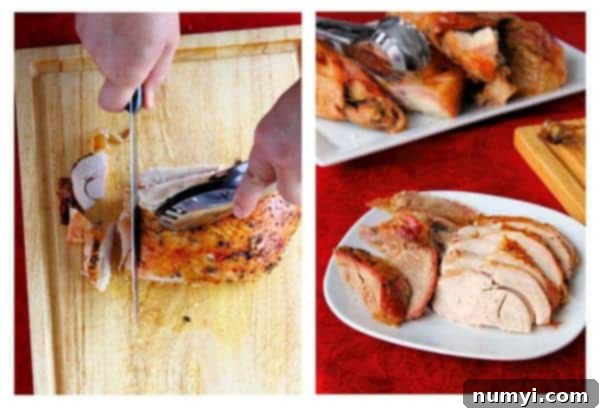
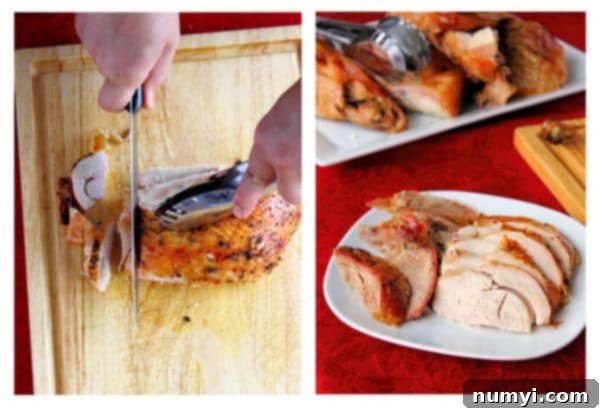
Lay one breast half flat on the cutting board. Angle your knife slightly and make slices about 1/4 to 1/2 inch thick, moving across the width of the breast. Aim for uniform slices for an appealing presentation. Arrange the slices neatly on your warmed serving platter.
Step 3: Detaching and Preparing the Legs and Thighs
Dark meat lovers rejoice! The legs and thighs offer rich, moist, and flavorful meat. They can be served whole or deboned and sliced.
Removing the Entire Leg-Thigh Quarter
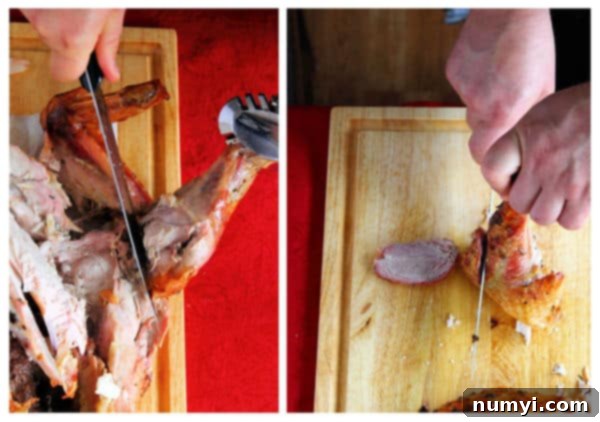
Turn the turkey on its side or back. Locate where the leg (drumstick and thigh) connects to the main body. Using your tongs, pull the leg away from the body. You’ll feel the hip joint pop out. Cut through the skin and the joint with your knife. This should be a relatively easy cut through cartilage, not bone. Once separated, place the entire leg-thigh quarter on your cutting board.
Separating the Drumstick from the Thigh
To separate the drumstick from the thigh, place the leg-thigh quarter skin-side down on the cutting board. Find the joint that connects the two. You can usually identify it by feeling for the indentation between the two bones. Cut directly through this joint. It should separate cleanly without much resistance.
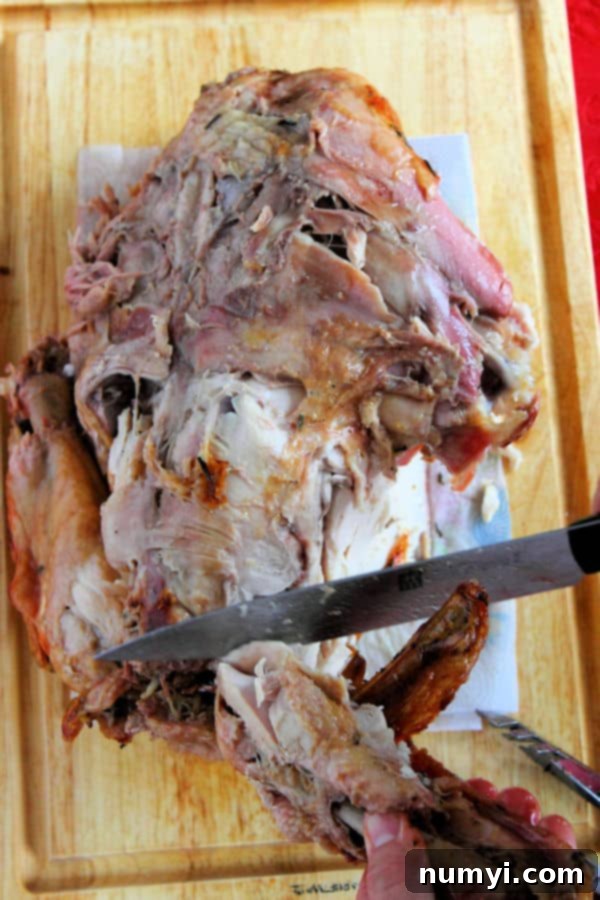
You can serve the drumsticks as is, offering a fun, handheld option for guests (sometimes referred to as “caveman style”). Alternatively, you can carefully run your knife along the bone to remove the meat, then slice it. For the thigh, you have a few options.
Deboning and Slicing the Thigh Meat
To debone the thigh, locate the thigh bone. Use your knife to cut along both sides of the bone, essentially opening up the thigh meat. The bone should then be quite easy to remove, either by pulling it out with your fingers or gently prying it with your knife. Once the bone is out, lay the thigh meat flat and slice it against the grain into uniform pieces, just like the breast meat. Add these dark meat slices to your serving platter, perhaps in a separate section from the white meat.
Step 4: Removing the Wings
The wings, though smaller, are packed with flavor and make a delicious snack or addition to the platter. They are best treated much like the legs.
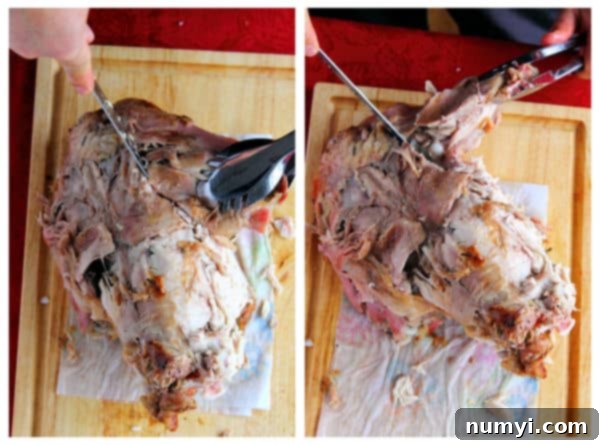
Flip the turkey over onto its breast side. This might reveal a less “pretty” side, but it provides better access to the wing joints. Grab a wing and pull it away from the body to expose the joint. You might need to cut through a bit of skin or connective tissue first. Once you locate the joint, cut through it cleanly. Repeat for the other wing. You can serve the wings whole, or if you prefer, separate the drumette and flat sections at their joint.
Step 5: Harvesting Any Remaining Meat and Preparing the Carcass
Don’t let any delicious meat go to waste! After removing the main sections, use your hands and knife to carefully scrape any remaining chunks of meat from the carcass. There’s often plenty of flavorful meat nestled around the bones, especially from the back and rib cage. These smaller pieces are perfect for sandwiches, turkey hash, or adding to soups.
Once you’ve retrieved all the edible meat, don’t discard the carcass! The turkey carcass is a goldmine for making incredibly flavorful turkey stock or broth. Simply break it down into smaller pieces (if necessary), place it in a large pot with some aromatics (onions, carrots, celery), cover with water, and simmer for several hours. This homemade stock will elevate your gravies, soups, and future dishes.
Tips for a Professional Carving Finish
- Keep Your Knife Sharp: This cannot be stressed enough. A sharp knife is safer and more effective.
- Work Methodically: Take your time and focus on one section at a time. There’s no rush!
- Wipe Down Your Board: Keep a damp cloth nearby to wipe away excess grease or juices to maintain a clean workspace.
- Warm Your Platter: A warm serving platter will help keep the carved meat warm while you finish carving.
- Present with Flair: Arrange white meat and dark meat separately on your platter for an appealing presentation. Garnish with fresh herbs like rosemary or parsley for an extra touch.
- Delegate if Possible: If you’re hosting, consider having someone help you transfer meat to the platter or clear away the carcass, especially for a very large bird.
Congratulations, You’ve Mastered the Turkey!
See? Carving a turkey isn’t so difficult after all! By following these simple steps, you’ve transformed a potentially intimidating task into an enjoyable part of your holiday meal preparation. You’ll not only impress your family and friends with your newfound skill but also ensure everyone gets to enjoy perfectly carved, moist, and delicious turkey.
Go ahead and pat yourself on the back – you’ve just carved that magnificent bird like a true pro! Now, sit back, relax, and savor the fruits of your labor. Happy feasting!
