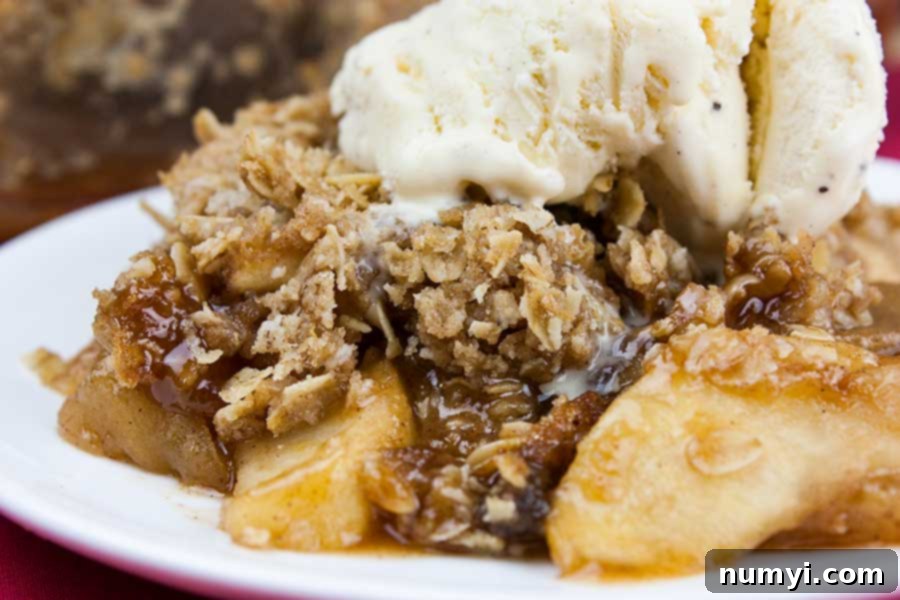
Classic Homemade Apple Crisp with Oat Crumble Topping: An Easy Fall Dessert Recipe
There’s truly nothing quite like the comforting aroma of cinnamon-spiced apples baking in the oven, especially as the crisp autumn air begins to settle in. This classic apple crisp recipe captures all the beloved flavors of a homemade apple pie, but with significantly less fuss and effort. Imagine thinly sliced, tender apples infused with warm spices, topped with a sweet, buttery, and irresistibly crunchy oat crumble. It’s a simple dessert that delivers maximum satisfaction, perfect for fall gatherings, holiday feasts, or simply a cozy night in.
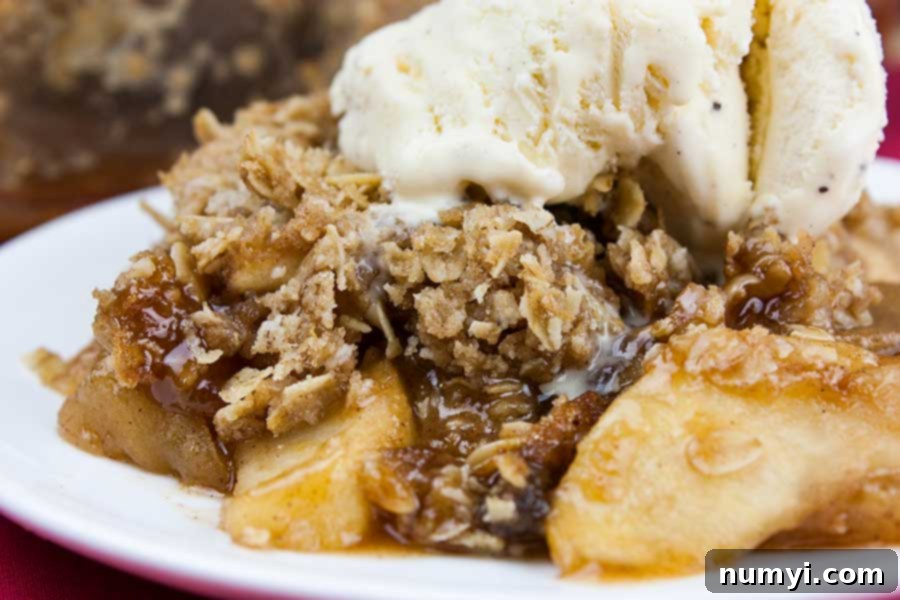
Why You’ll Adore This Easy Apple Crisp Recipe
This classic apple crisp isn’t just a dessert; it’s a sensory experience that brings warmth and joy to any occasion. As soon as you take that first bite, you’ll be transported back to cherished childhood memories of grandma’s homemade baking. It’s a quintessential treat, especially when the leaves start to change color and the holiday season approaches. Think of it alongside other fall favorites like slow cooker apple butter, warm apple cider, and fresh apple cider donuts.
Here are just a few reasons why this simple, old-fashioned apple crisp will quickly become a beloved staple in your home:
- Effortless Elegance: Forget the stress of rolling out pie crusts! This crisp offers all the delicious flavors of apple pie without any of the intricate steps. It’s incredibly easy to prepare, making it a perfect dessert for beginner bakers or busy weeknights.
- Irresistible Aroma: The moment this apple crisp starts baking, your entire home will be filled with the most delightful scent of cinnamon, nutmeg, and sweet apples. It’s an instant mood booster and sets a welcoming atmosphere.
- Crowd-Pleasing Comfort: Everyone loves a classic, and this apple crisp is guaranteed to be a hit with family and friends. Its comforting blend of tender fruit and crunchy topping appeals to all ages.
- Perfect Texture Contrast: The soft, juicy apple filling beautifully complements the crispy, golden-brown oat topping, creating a delightful textural experience in every spoonful.
- Versatile Serving: While incredible on its own, it’s absolutely heavenly served warm with a scoop of vanilla ice cream, a dollop of whipped cream, or a drizzle of caramel sauce.
Embrace the flavors of the season with this simple yet spectacular homemade apple crisp. It’s a dessert that truly embodies comfort and joy!
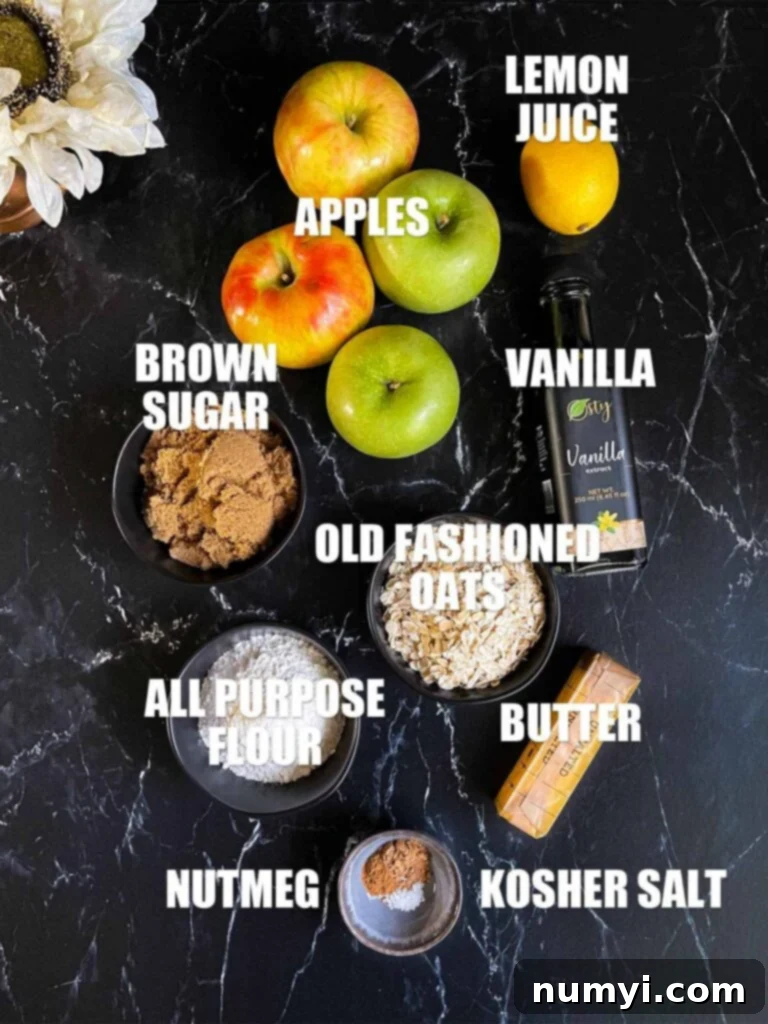
Crafting Your Delicious Classic Apple Crisp: Step-by-Step Guide
Creating this homemade apple crisp is a straightforward process, promising delightful results with minimal effort. Let’s walk through each step to ensure your crisp is perfect every time.
Selecting the Perfect Apples for Your Crisp
The key to a truly outstanding apple crisp lies in the apples themselves. For the best flavor and texture, I highly recommend using a mix of sweet and tart apples. Tart apples like Granny Smith hold their shape well during baking and provide a pleasant tang that balances the sweetness. Sweeter varieties, such as Honeycrisp, Fuji, or Gala, contribute lovely flavor and become wonderfully tender. Using a combination ensures a complex and satisfying taste profile.
When preparing your apples, peel them thoroughly to ensure a smooth texture in the cooked filling. Core them to remove the seeds and fibrous center, then slice them thinly and uniformly. Aim for slices about 1/4 inch thick. This ensures they cook evenly and become perfectly tender without turning to mush. A good apple slicer or peeler tool can make this task incredibly easy and quick!
Preparing the Flavorful Apple Filling
Once your apples are sliced, transfer them to a large mixing bowl. Now it’s time to infuse them with those classic fall flavors. Add the fresh lemon juice, which not only brightens the flavor but also helps prevent the apples from browning. Stir in the vanilla extract for a touch of warmth. Next, add the dark brown sugar, cinnamon, and freshly grated nutmeg. Freshly grated nutmeg makes a noticeable difference in flavor compared to pre-ground, so if you have whole nutmeg, I highly recommend grating it yourself.
The amount of brown sugar you use is flexible. I typically use 3/4 cup, especially when combining tart Granny Smith apples with sweeter Honeycrisp apples, to achieve a perfectly balanced sweetness. If your apples are naturally very sweet or you prefer a less sweet dessert, 1/2 cup might be sufficient. Taste a small piece of apple after tossing with spices and sugar to gauge the sweetness, though do not eat raw flour. Finally, sprinkle in two tablespoons of all-purpose flour. This acts as a thickener, ensuring your apple filling isn’t watery but instead creates a luscious, syrupy consistency.
Gently toss all these ingredients together until every apple slice is thoroughly coated. This ensures an even distribution of flavor and that the flour and spices are well integrated.
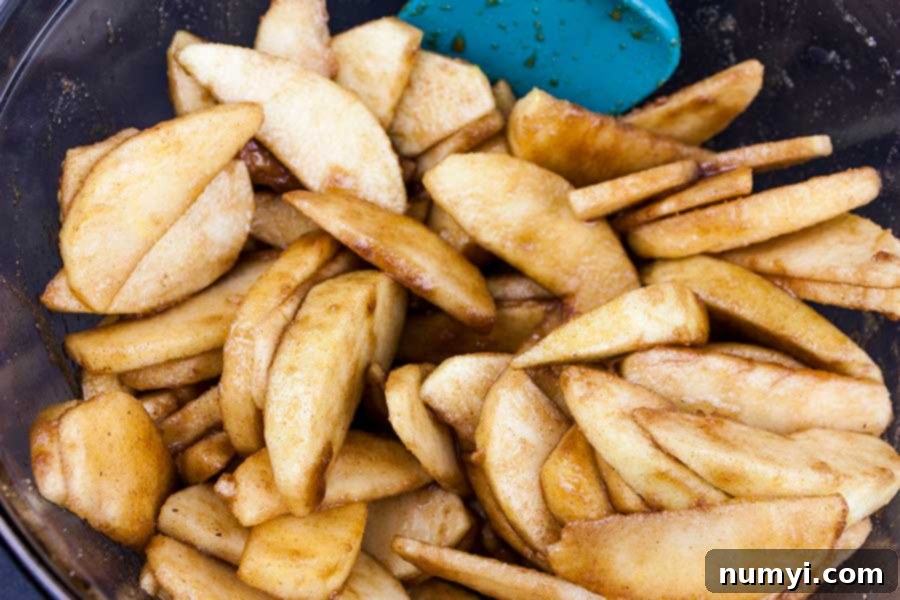
Before assembling, preheat your oven to 375ºF (190ºC). Prepare an 8×8 inch baking dish by lightly buttering the inside. This prevents sticking and contributes to a beautiful, slightly caramelized crust on the bottom. Once buttered, pour the prepared apple mixture evenly into the baking dish, spreading it out into an even layer.
Don’t Sweat The Recipe is supported by its readers. We may earn a commission if you purchase through a link on our site. Learn more.
Creating the Golden, Crunchy Oat Crumble Topping
The star of any apple crisp, besides the apples themselves, is undoubtedly the delightful crumble topping. This oat-filled topping provides that essential crunch and buttery sweetness that makes every bite so satisfying. The key to a perfect crumbly topping is using cold butter, which helps create distinct crumbs rather than a uniform dough.
In a medium bowl, combine the cold butter (cut into small cubes), old-fashioned oats, all-purpose flour, dark brown sugar, and a pinch of salt. The oats add a fantastic chewy texture and nutty flavor, while the brown sugar contributes deep, molasses-rich sweetness and helps achieve that beautiful golden-brown color when baked.
Now, it’s time to “cut in” the butter. You can use a pastry cutter, two knives, or even your fingertips (though be quick to prevent the butter from warming too much). Work the butter into the dry ingredients until the mixture resembles coarse crumbs, with some pea-sized pieces of butter remaining. Avoid overmixing; a slightly uneven texture is exactly what you want for a truly rustic and delicious crumble.
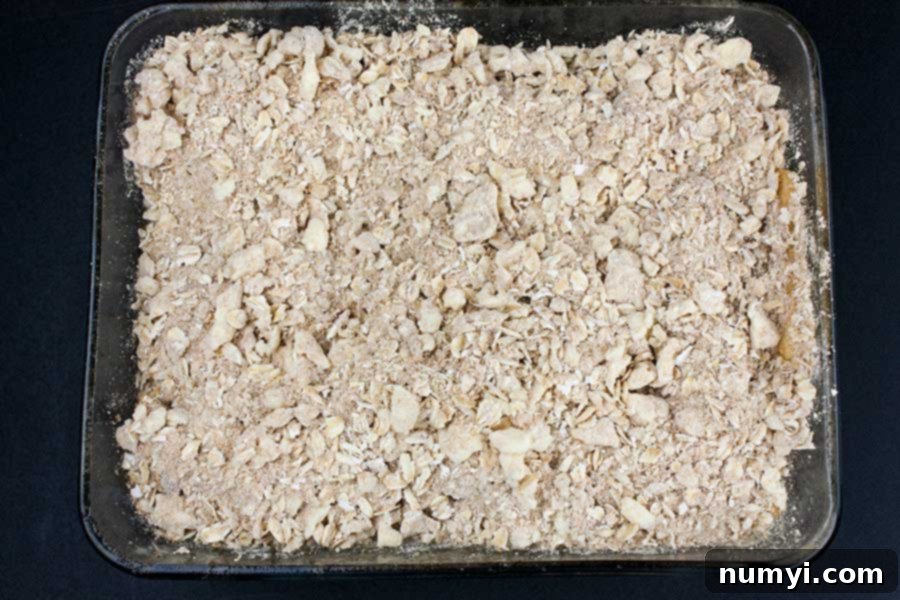
Once your crumb topping is ready, generously spread it evenly over the apple mixture in the baking dish. Ensure the apples are fully covered, as this will protect them while baking and create a continuous layer of crispiness.
Place the baking dish in your preheated 375ºF (190ºC) oven and bake for approximately 35-45 minutes. The baking time can vary slightly depending on your oven and the thickness of your apple slices. You’ll know it’s ready when the topping is a rich golden brown and the apples beneath are bubbling and tender. To check for doneness, carefully insert a knife into the apple mixture through the topping – it should slide in easily with minimal resistance.
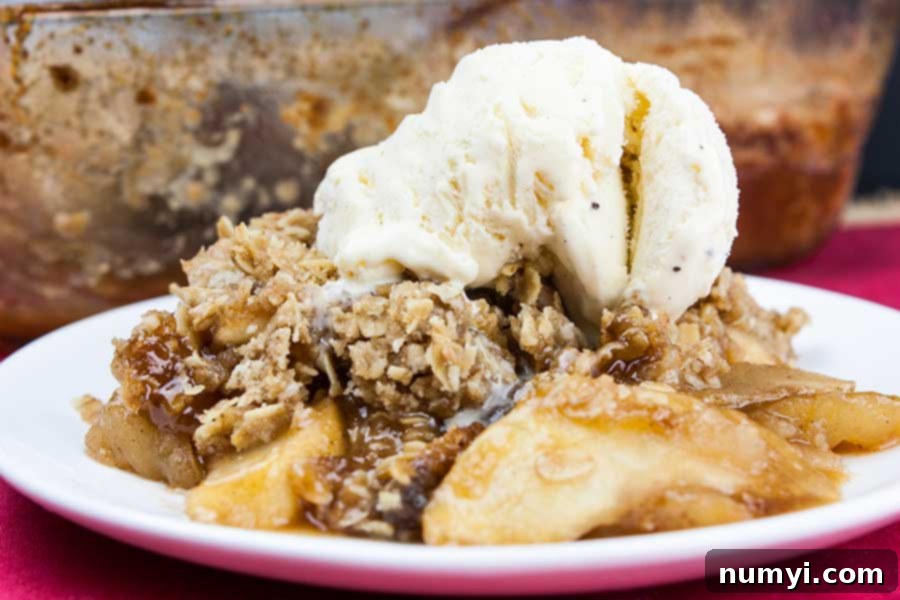
Once baked to perfection, remove the apple crisp from the oven and let it cool slightly for about 10-15 minutes. This allows the filling to set a bit and prevents it from being too runny when served. The wait is the hardest part!
Serve your warm, homemade apple crisp just like grandma used to make. It’s absolutely divine with a generous scoop of creamy vanilla ice cream, which slowly melts into the warm fruit, or a cloud of freshly whipped cream. The combination of sweet and tart apples, fragrant cinnamon and nutmeg, and the perfect crunch of the oat topping creates a simple yet incredibly delicious dessert experience.
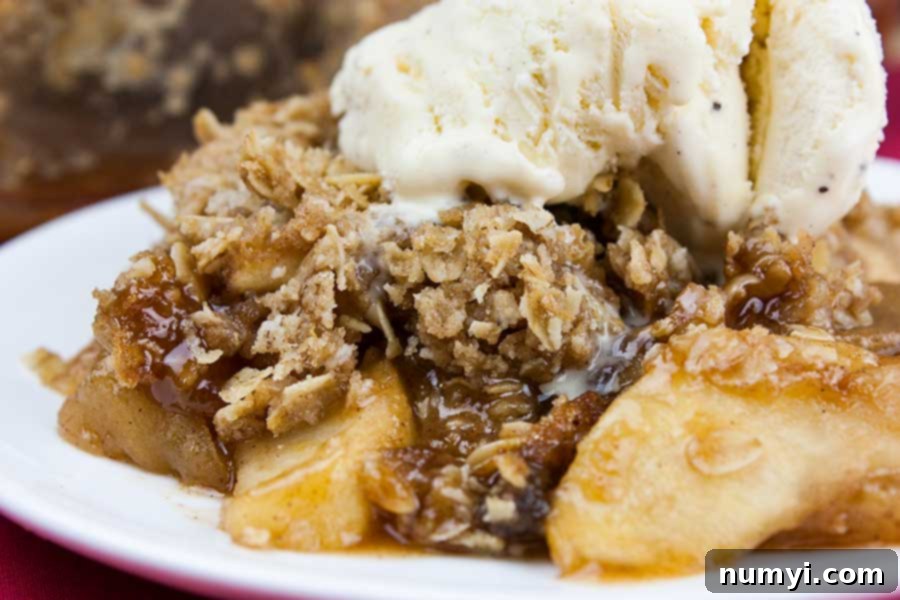
This simple classic dessert brings all the heartwarming flavors of Fall right to your table. It is sweet and tart, with rich hints of cinnamon and nutmeg, and a buttery crunch that truly can’t be beaten. Perfectly easy and utterly delicious!
Expert Tips for the Best Apple Crisp
- Apple Varieties Matter: For the ultimate apple crisp, I always recommend using a mix of apples. A combination of tart Granny Smith apples and sweeter Honeycrisp or Fuji apples provides a perfect balance of flavor and ensures the apples retain some texture after baking.
- Adjust Sweetness to Your Liking: The amount of sugar can be tailored to your preference and the natural sweetness of the apples you choose. Start with 1/2 cup for a less sweet crisp, and go up to 3/4 cup if you enjoy a richer, sweeter dessert, especially when using very tart apples.
- Dark Brown Sugar is Key: While granulated sugar can be used, dark brown sugar is truly superior for this recipe. It adds a deeper, more complex molasses flavor and contributes to a moister, chewier topping that simply can’t be matched by white sugar. It brings an extra layer of warm, cozy fall flavors to the best apple crisp you have ever eaten.
- Uniform Slicing: Slice your apples to a consistent thickness (around 1/4 inch). This ensures they cook evenly. If some are thick and some are thin, you might end up with some mushy pieces and some undercooked ones.
- The Butter Temperature for Topping: Always use very cold butter, cut into small cubes, for the crumb topping. This is crucial for achieving that signature crumbly texture. If the butter is too warm, it will melt too quickly and create a pasty topping instead of distinct crumbs.
- Checking for Doneness: To ensure the apples are perfectly tender, poke them with the tip of a knife through the topping. The knife should slide into the apple slices with very little resistance. The topping should also be a deep golden brown and appear crisp.
- Prevent a Soggy Bottom: If you’re worried about a soggy bottom, you can pre-bake the apple filling for about 10-15 minutes before adding the topping. This helps evaporate some moisture from the apples.
- Add a Touch of Crunch: For extra flavor and texture in the topping, consider adding a handful of chopped pecans or walnuts.
Frequently Asked Questions About Apple Crisp
The best apple crisps often use a blend of apple varieties. I highly recommend using a mix of tart apples like Granny Smith and sweeter, firmer apples such as Honeycrisp, Fuji, or Gala. This combination provides a delightful balance of flavor and ensures the apples maintain a pleasant texture after baking. Granny Smith offers a necessary tartness that cuts through the sweetness, while Honeycrisp offers a lovely sweetness and firmness.
The primary difference lies in the topping. An apple crisp topping traditionally contains oats, which give it a distinct texture and often a chewier, more rustic quality. An apple crumble topping, on the other hand, typically does not contain oats or nuts, consisting mainly of flour, sugar, and butter, resulting in a more uniform, cake-like crumb. Both are delicious, but the oats in a crisp are what give it that characteristic “crisp” texture.
Yes, you absolutely can! You can prepare the apple filling and the crumble topping separately and store them in the refrigerator for up to 24 hours. Assemble them right before baking. Alternatively, you can assemble the entire crisp (apples and topping) and refrigerate it, covered, for a few hours before baking. This makes it a great option for entertaining.
Yes, with a few simple substitutions! You can replace the all-purpose flour in both the apple filling and the crumble topping with a good quality 1:1 gluten-free baking flour blend. Ensure your oats are certified gluten-free if you have a severe intolerance, as some oats can be cross-contaminated during processing.
Yes, to make it dairy-free, simply replace the unsalted butter in the crumble topping with a good quality plant-based butter substitute. Make sure to use one that is suitable for baking and has a similar fat content to dairy butter for the best results.
Storing: Let the baked apple crisp cool completely to room temperature. Cover it tightly with plastic wrap or aluminum foil and refrigerate for up to 4 days. You can reheat individual servings in the microwave or oven for a few minutes until warm.
Freezing (Unbaked): You can freeze the prepared, unbaked apple crisp. Assemble the crisp in a freezer-safe baking dish, then wrap it tightly with plastic wrap and then with aluminum foil. Freeze for up to 3 months. When ready to bake, thaw overnight in the refrigerator and bake as directed, adding a few extra minutes to the baking time.
Freezing (Baked): You can also freeze baked apple crisp. Let it cool completely, then wrap it tightly with plastic wrap and aluminum foil. Freeze for up to 3 months. Thaw in the refrigerator overnight, and reheat in a 350-degree F (175ºC) oven for 20-25 minutes until warmed through and the topping is crisp again.
More Delightful Apple Dessert Recipes
Apple Strudel In Puff Pastry
Easy Puff Pastry Apple Turnovers
Lattice Crust Easy Apple Pie Recipe
Classic Apple Crisp with Oat Topping Recipe
Print
Pin
Rate
Ingredients
- 4 large apples (peeled, cored, and thinly sliced) (I used 2 large Granny Smith and 2 large Honeycrisp)
- 1 1/2 tablespoons fresh lemon juice
- 1/2 teaspoon vanilla extract
- 3/4 cup dark brown sugar (adjust to 1/2 – 3/4 cup depending on apple sweetness)
- 1/2 teaspoon ground cinnamon
- 1/2 teaspoon freshly grated nutmeg
- 2 tablespoons all-purpose flour
For the Crunchy Oat Topping
- 1/2 cup unsalted butter, very cold and cubed
- 1 cup old-fashioned rolled oats
- 2/3 cup all-purpose flour
- 1/2 cup dark brown sugar
- 1/8 teaspoon salt
Instructions
-
Preheat your oven to 375°F (190°C). Lightly butter an 8×8 inch (20×20 cm) baking dish and set it aside.
-
In a large mixing bowl, combine the thinly sliced apples, fresh lemon juice, vanilla extract, dark brown sugar, ground cinnamon, freshly grated nutmeg, and 2 tablespoons of all-purpose flour. Toss gently but thoroughly until all the apple slices are evenly coated with the spice and sugar mixture.
-
In a separate medium-sized bowl, prepare the oat topping. Combine the cold, cubed butter with old-fashioned oats, 2/3 cup all-purpose flour, dark brown sugar, and salt. Use a pastry cutter, two knives, or your fingertips to cut the butter into the dry ingredients until the mixture forms coarse, crumbly pieces.
-
Pour the prepared apple mixture into the buttered baking dish, spreading it out evenly. Then, sprinkle the oat crumble topping over the apples in an even layer.
-
Bake for 35-45 minutes, or until the apple filling is bubbly, the apples are soft and tender when pierced with a knife, and the oat topping is golden brown and crispy.
-
Remove from the oven and let cool slightly for about 10-15 minutes before serving. Serve warm with a scoop of vanilla ice cream, a dollop of whipped cream, or a drizzle of caramel sauce for an extra treat. Enjoy your perfect homemade apple crisp!
Notes
- The amount of sugar you choose to use will depend on the sweetness of the apples you use and how sweet you like your apple crisp.
Storing – Let the apple crisp cool to room temperature, cover tightly, and refrigerate for up to 4 days.
Freezing – You can freeze the prepared unbaked apple crisp. Assemble the crisp in a freezer-safe dish, wrap tightly and freeze for up to 3 months. When ready to bake, thaw overnight in the refrigerator and bake as directed, adding a few extra minutes to baking time.
You can also freeze baked apple crisp. Let it cool completely, wrap tightly with plastic wrap and aluminum foil, and freeze for up to 3 months.
Thaw in the refrigerator overnight, and reheat in a 350-degree F (175ºC) oven for 20-25 minutes until warmed through.
