Irresistible Carmelitas: The Ultimate Gooey Chocolate Caramel Oatmeal Bars Recipe
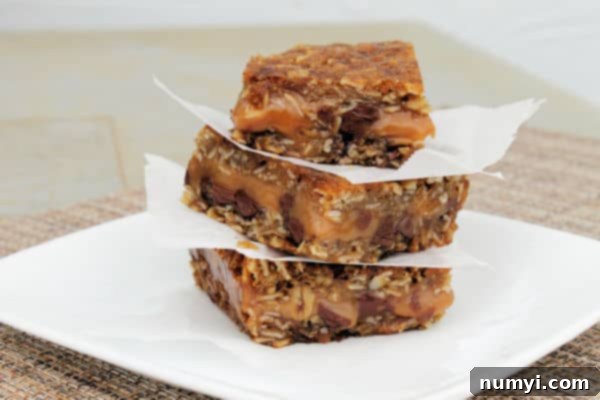
Prepare yourself for a truly decadent dessert experience with these incredible **Carmelitas**. If you’re a fan of rich caramel, luscious chocolate, and the comforting chewiness of oatmeal, then these bars are about to become your new obsession. These aren’t just any dessert bars; they’re the ultimate combination of gooey, sweet, and satisfying textures that melt in your mouth. Perfect for potlucks, family gatherings, or simply treating yourself, homemade Carmelitas are surprisingly easy to make and guaranteed to impress.
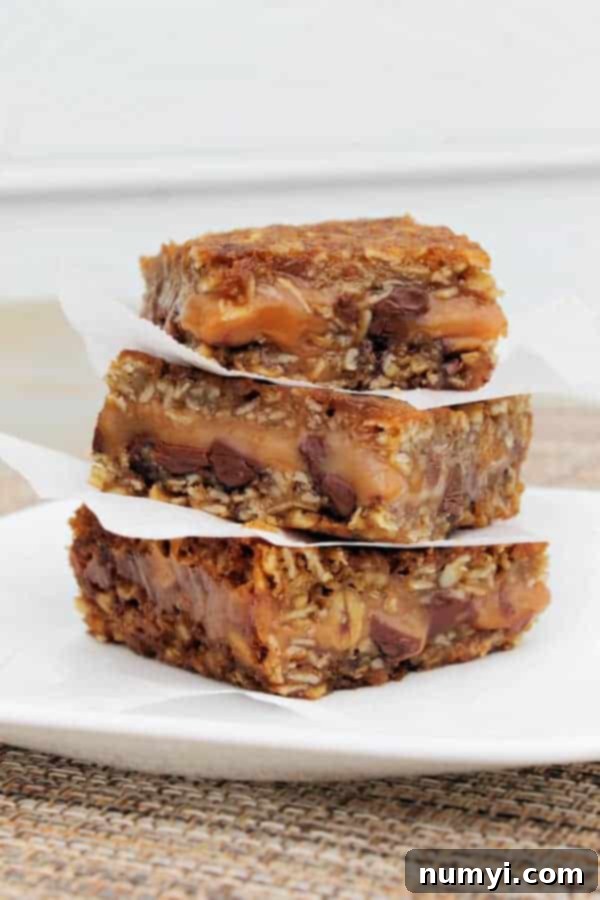
Imagine a buttery, crumbly oatmeal cookie base and topping, sandwiching a generous layer of warm, molten caramel and an abundance of melty chocolate chips. Each bite delivers a harmonious blend of sweet and salty notes, with a delightful texture that’s both soft and chewy. While they might be wonderfully messy to eat, that’s just part of their charm! Serve them warm with a scoop of vanilla ice cream, and you’ll understand why these chocolate caramel oatmeal bars are pure heaven on a plate.
Why You’ll Fall in Love with This Carmelitas Recipe
There are countless reasons why these **chocolate and caramel oatmeal bars**, affectionately known as Carmelitas, consistently rank high on dessert lovers’ lists. Their irresistible charm lies in a perfect symphony of textures and flavors that captivates from the very first bite. Here’s why this recipe stands out:
- Unmatched Gooeyness: The star of the show is undeniably the rich, melt-in-your-mouth caramel layer. It’s so soft and gooey that it creates an almost impossible-to-resist stickiness, making every bite a delightful indulgence. This texture is precisely what sets Carmelitas apart from other bar cookies.
- Perfect Chewy Texture: Encasing that luscious caramel and chocolate is a chewy oatmeal crust and topping. The old-fashioned oats provide a fantastic texture contrast, adding a rustic, satisfying chew that balances the sweetness. It’s a delightful combination of cookie and candy bar all in one.
- Chocolate Lover’s Dream: We generously layer these bars with chocolate chips, which melt beautifully into the warm caramel, creating pockets of intense chocolatey goodness throughout. You can use your favorite kind of chocolate – milk, semi-sweet, or even dark – to customize the flavor profile to your liking.
- Simple Yet Stunning: Despite their impressive appearance and complex flavor, Carmelitas are remarkably straightforward to prepare. The recipe uses common pantry ingredients and a simple layering technique, making them accessible even for novice bakers.
- Versatile Serving Options: While phenomenal on their own, these bars truly shine when served warm with a dollop of creamy vanilla ice cream. The cold ice cream provides a wonderful contrast to the warm, gooey bar, creating a dessert experience that is nothing short of heavenly. They’re also delicious chilled for a firmer, chewier treat.
Yes, they can be a bit messy to cut and eat, but that’s a small price to pay for such an extraordinary treat. The minor effort required for freezing them briefly before cutting ensures neat slices, and the flavor payoff is absolutely worth it.

Essential Ingredients for Perfect Carmelitas
Crafting the perfect Carmelitas starts with a few simple, high-quality ingredients. Each component plays a crucial role in achieving the signature taste and texture:
- Melted Butter: The foundation of our oatmeal crust, melted butter provides richness and helps bind the dry ingredients together, creating a tender and flavorful base.
- Packed Brown Sugar: This isn’t just for sweetness; brown sugar adds a deep, molasses-like flavor and contributes to the chewiness and moisture of the oat layers. Make sure it’s packed tightly for accurate measurement.
- Old Fashioned Oats: Rolled oats are key to the chewy texture. They hold their shape better than instant oats, giving the bars their characteristic chewiness and rustic appeal.
- All-Purpose Flour: A small amount of flour provides structure to the oat mixture, ensuring it forms a cohesive crust and topping that can contain the gooey filling.
- Baking Soda: This leavening agent helps the oat crust achieve a slight lift and tenderness without making it cake-like, maintaining its cookie-bar integrity.
- Vanilla Extract: Pure vanilla extract enhances all the other flavors, adding a warm, aromatic note that complements both the chocolate and caramel beautifully.
- Chocolate Chips: The chocolate layer is essential! Semi-sweet chocolate chips are a classic choice, but feel free to use milk chocolate for a sweeter bar or dark chocolate for a richer, more intense flavor.
- Pre-packaged Caramels: To make the process super easy, this recipe calls for pre-packaged, unwrapped caramels. These melt down quickly and consistently to create the perfect gooey caramel layer.
- Pinch of Salt: A tiny bit of salt in the caramel mixture helps to balance the sweetness and deepen the flavor, creating that irresistible sweet-and-salty dynamic.
- Whole Milk or Cream: Used to thin out the melted caramels, making them pourable and ensuring they remain soft and gooey once cooled. Cream will yield an even richer caramel.
Tips for Baking the Best Carmelitas
Achieving bakery-quality Carmelitas at home is easier than you think, especially with a few helpful tips:
- Proper Pan Preparation: Always line your baking pan with parchment paper or foil, leaving an overhang on the sides. This “sling” makes it incredibly easy to lift the entire batch of bars out of the pan once cooled, preventing sticking and ensuring clean removal. Grease the foil/parchment for extra non-stick insurance.
- Don’t Overmix the Oat Mixture: Once the wet and dry ingredients for the oat layers are combined, mix just until everything is incorporated. Overmixing can develop the gluten in the flour, leading to tougher bars.
- Even Crust Distribution: When pressing the first half of the oat mixture into the pan, ensure it’s an even layer. This provides a consistent base for the caramel and chocolate, leading to uniformly delicious bars.
- Melting the Caramel Gently: Patience is key when melting the caramels. Use medium-low heat and stir frequently to prevent scorching. If using a microwave, heat in short 30-second bursts, stirring well after each, until smooth. Adding milk or cream helps achieve the perfect pourable consistency.
- Layering with Care: After spreading the baked crust, sprinkle chocolate chips evenly, then carefully pour the melted caramel over them. Finally, crumble the remaining oat mixture over the caramel. Try to distribute it as evenly as possible to ensure every bite has a piece of the chewy topping.
- Cool Completely: This is perhaps the most crucial tip! Carmelitas are notoriously gooey. To get clean cuts, they *must* be cooled completely. Chilling them in the refrigerator or even freezing them for a short period will firm up the caramel significantly, making slicing much easier.
- Warm Before Serving: While delicious chilled, Carmelitas are heavenly when slightly warm. Pop a bar in the microwave for 10-15 seconds before serving to get that ultimate gooey texture back.
Delicious Variations to Try
While the classic Carmelita is perfect as is, there’s always room for creative twists to make these bars uniquely yours:
- Nutty Crunch: Add 1/2 to 1 cup of chopped pecans, walnuts, or almonds to the oat mixture for an extra layer of crunch and flavor. You can also sprinkle them on top of the caramel layer.
- Salty Sweet Perfection: A sprinkle of flaky sea salt over the caramel layer before adding the top crust will elevate the flavors and add a sophisticated touch, balancing the sweetness beautifully.
- Different Chocolates: Experiment with different types of chocolate chips! White chocolate chips offer a creamier, sweeter profile, while dark chocolate chips provide a lovely bitterness that cuts through the richness of the caramel. Chocolate chunks also work wonderfully for larger pockets of melted chocolate.
- Spice It Up: A pinch of cinnamon or nutmeg added to the oat mixture can give the bars a warm, spiced flavor, especially delightful during the fall months.
- Coconut Love: For coconut enthusiasts, a layer of shredded coconut sprinkled over the chocolate chips can add an exotic twist and extra texture.
- Peanut Butter Swirl: For a truly decadent twist, add a few dollops of creamy peanut butter over the melted caramel before topping with the remaining oat mixture. Swirl gently with a knife for a marbled effect.
Storage and Freezing Instructions
Proper storage ensures your Carmelitas remain fresh and delicious for as long as possible:
- Refrigerator Storage: Due to their gooey caramel center, Carmelitas are best stored in an airtight container in the refrigerator. They will keep well for about a week. Chilling them will also make them firmer and easier to handle.
- Freezer Storage (for Cutting): As mentioned in the tips, if you want perfectly clean-cut bars, pop the cooled pan into the freezer for 30-60 minutes before slicing. The caramel will firm up enough to allow for neat cuts but won’t freeze solid, making it easier to work with.
- Long-Term Freezing: For longer storage, once the bars are completely cooled and cut, place them in a single layer on a baking sheet and freeze until solid. Then, transfer them to a freezer-safe airtight container or bag, separating layers with parchment paper to prevent sticking. They can be frozen for up to 2-3 months. Thaw in the refrigerator or at room temperature, or reheat gently in the microwave.
FAQs about Carmelitas
The key to perfectly melted caramel is gentle heat and constant stirring. In a medium saucepan, combine the unwrapped caramels, a pinch of salt, and milk or cream over medium-low heat. Stir very frequently, almost continuously, until the caramels are completely melted and smooth. Avoid high heat, which can cause the caramel to burn or become grainy. Alternatively, you can use the microwave: place caramels, salt, and milk in a microwave-safe bowl and heat on high in 30-second increments, stirring well after each, until you reach your desired smooth consistency.
To maintain their freshness and prevent the caramel from becoming too soft, it’s best to store your Carmelitas in an airtight container in the refrigerator. They will stay delicious for up to a week. For longer storage, you can also freeze individual bars. Ensure they are completely cooled before storing, and separate layers with parchment paper if stacking.
Caramel is inherently very gooey and sticky, which can make cutting into neat bars a real challenge. Freezing the entire pan of cooled Carmelitas for a short period (around 30-60 minutes) firms up the caramel significantly. It won’t freeze solid, but it will become much more malleable and less sticky, allowing you to make clean, precise cuts. This step is essential for beautifully presented bars!
More Caramel Recipes To Try
If you’re like us and can’t get enough of that rich, buttery caramel flavor, you’ll love these other fantastic caramel-infused desserts:
- Caramel Apple Cheesecake Bars
- Peanut Butter Caramel Brownies
- Banana Pecan Scones with Caramel Icing
- Pumpkin Bread with Cream Cheese Caramel Icing
- Caramel Pretzel Sticks
- Salted Caramel Sauce
HUNGRY FOR MORE? Subscribe to my newsletter and follow along on Pinterest, Facebook, and Instagram for all my latest updates!
Carmelita Chocolate Caramel Bars

Ingredients
- 3/4 c butter melted
- 3/4 c packed brown sugar
- 1 1/2 c old fashioned oats
- 1/2 c flour
- 1/2 tsp baking soda
- 1 tsp vanilla
- 1 c chocolate chips
- 1 11 oz pkg caramels
- pinch of salt
- 1/3 c whole milk or cream
Instructions
-
Preheat oven to 350 degrees F.
-
Line an 8×8 inch baking pan with foil and coat with butter or cooking spray.
-
In a medium bowl combine melted butter, brown sugar, rolled oats, flour, baking soda and vanilla.
-
Spread 1/2 of the oat mixture in the bottom of the prepared pan.
-
Bake for 10 minutes.
-
While that is baking melt caramels with salt and milk in a medium saucepan over medium heat stirring very frequently.
-
Remove crust from oven and sprinkle with chocolate chips and top with caramel.
-
Carefully top the caramel with the remaining oat mixture.
-
Bake for 15 minutes.
-
Cool completely before cutting into bars. I froze the bars after they were cooled to help them cut and come out of the pan easier.
-
Store in the refrigerator.
