Irresistible Homemade Samoa Cookies: The Ultimate Girl Scout Copycat Recipe
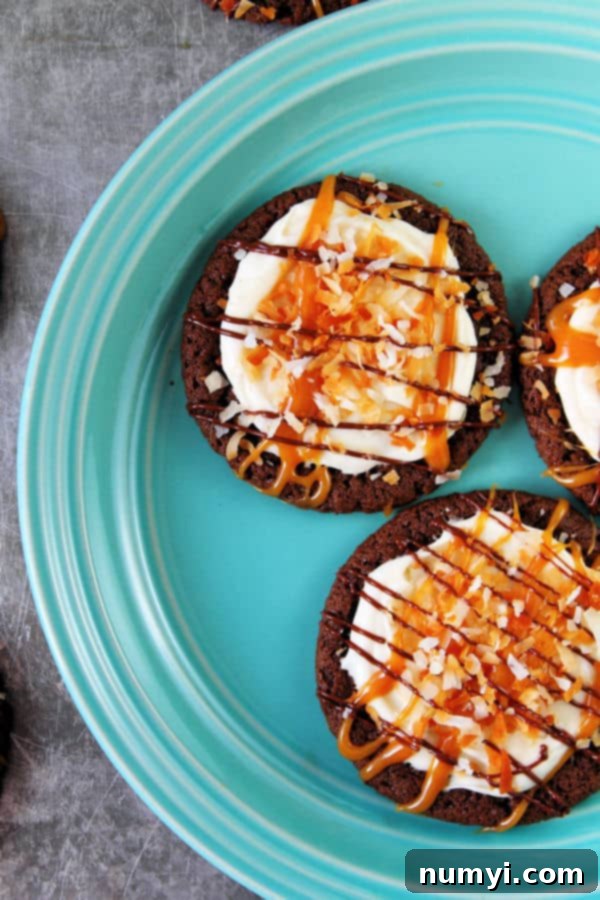
Indulge in the magic of homemade Samoa cookies! This recipe elevates your favorite Girl Scout treat with even more rich chocolate, luscious caramel, and delightful toasted coconut. Say goodbye to the hole in the middle – this version means more delicious cookie goodness in every single bite. Get ready for chewy, sweet perfection that’s easier to make than you think!

Discovering My Perfect Homemade Samoa Cookie Recipe
There’s a universal truth for many of us: the sudden, overwhelming craving for Girl Scout cookies. It hits hard, and often, it’s a Samoa cookie that calls your name. Recently, I found myself in the grip of such a craving, only to discover that many online “copycat” recipes felt overly complicated or time-consuming. I was determined to find a simpler, yet equally delicious, way to recreate this iconic treat. And now, you get to benefit from my mission!
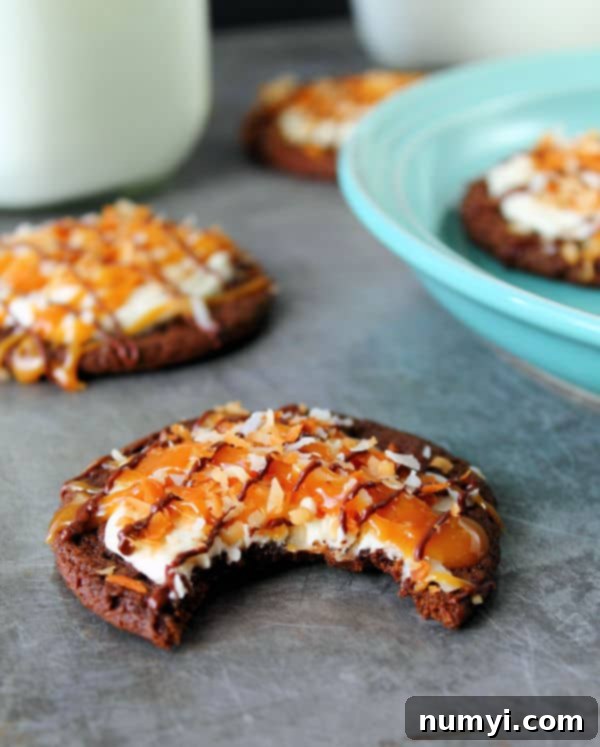
My recipe offers a straightforward, homemade rendition of the beloved chocolate Samoa. The genius of this version lies in its simplicity: we skip the traditional hole in the middle, which not only streamlines the baking process but also gives you a more substantial, satisfying cookie with every bite. You’ll find all the familiar, irresistible flavors and textures in my whole, chewy chocolate cookie base, perfectly complemented by the decadent toppings we all adore.
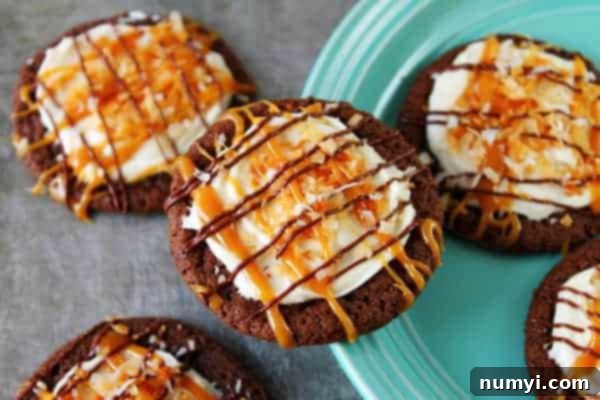
The foundation of these cookies is a rich, perfectly chewy chocolate cookie. Each one is then lovingly dipped and drizzled with a generous layer of sweet caramel, a sprinkle of golden toasted coconut flakes, and a final flourish of melted chocolate. If you’re planning ahead for a party or just want to spread out the baking joy, you can even prepare the cookie base a day in advance and decorate them just before serving. Prepare to impress everyone at your next gathering with these absolutely yummy homemade Samoa cookies!
Why You’ll Fall in Love with This Samoa Cookie Recipe
Beyond satisfying those intense Girl Scout cookie cravings, this homemade Samoa recipe offers several advantages that make it a must-try for any dessert lover:
- No Special Equipment Needed: Forget about needing a doughnut cutter for the traditional hole. Our recipe embraces the full cookie, making the process much simpler and less fussy.
- Superior Flavor & Texture: By making them at home, you have control over the quality of ingredients, resulting in a richer, chewier chocolate base that perfectly balances the sweetness of the caramel and coconut.
- More Cookie in Every Bite: Eliminating the center hole means more of that delightful chocolate cookie to enjoy, enhancing the overall experience.
- Freshness You Can Taste: There’s nothing quite like a freshly baked cookie. These Samoas will taste infinitely better than any pre-packaged version.
- Customizable: While this recipe aims for a classic taste, it’s also a fantastic canvas for your own culinary creativity (more on that in our variations section!).
Essential Ingredients for Crafting Your Own Samoa Cookies
Gathering your ingredients is the first step to Samoa cookie bliss. This recipe uses readily available pantry staples to create layers of exquisite flavor.
For the Rich Chocolate Cookie Base:
- Butter (Softened): Unsalted is preferred for better control over salinity. Softened butter creams beautifully with sugar, incorporating air for a lighter, tender cookie.
- Brown Sugar (Packed): Contributes to the cookies’ signature chewiness and adds a deeper, molasses-rich flavor.
- Granulated Sugar (White Sugar): Balances the brown sugar and helps with the cookie’s structure and slight crispness around the edges.
- Large Eggs: Act as a binder, adding moisture and richness to the dough. Ensure they are at room temperature for better emulsion with the butter and sugar.
- All-Purpose Flour: The primary structural component of our cookies.
- Cocoa Powder: The star of the chocolate flavor. Using a good quality unsweetened cocoa powder will make a big difference.
- Baking Soda & Baking Powder: Our leavening agents, working together to give the cookies a perfect rise and tender crumb.
- Cream of Tartar: A lesser-known but crucial ingredient for chocolate cookies! It reacts with baking soda to give a unique chewiness and helps stabilize the cocoa powder’s color, making the cookies beautifully dark.
- Salt: Essential for balancing sweetness and enhancing all the other flavors.
For the Luscious Caramel Frosting:
- Butter (Softened): Provides a rich base for the frosting.
- Powdered Sugar: Creates a smooth, fine texture for the frosting that melts in your mouth.
- Caramel Ice Cream Topping: The secret to quick and easy caramel flavor in the frosting. Choose a high-quality topping for the best taste.
- Milk: Used to achieve the perfect consistency for spreading. Start with less and add more if needed.
- Vanilla Extract: Enhances the sweetness and adds a warm, aromatic note to the caramel.
- Pinch of Salt: A tiny bit of salt perfectly offsets the sweetness, creating that irresistible salted caramel effect.
For the Signature Toppings:
- Toasted Coconut Flakes: The quintessential Samoa topping. Toasting them brings out their nutty flavor and irresistible crunch. Don’t skip this step!
- Soft Caramels (Unwrapped): Used for the caramel drizzle. Soft, chewy caramels melt smoothly.
- Water: Helps thin the melted caramels for easy drizzling.
- Semi-Sweet Chocolate Chips: For the final chocolate drizzle. Semi-sweet offers a lovely contrast to the other sweet elements.

Step-by-Step Guide: How To Make These Decadent Homemade Samoa Cookies
Follow these detailed steps to create your own batch of delicious Samoa cookies. Precision and patience are key for the best results!
Step 1: Preheat Your Oven and Prepare Your Baking Sheets
Before you begin mixing, preheat your oven to 350 degrees F (175 degrees C). This ensures the oven is at the correct temperature when your dough is ready, promoting even baking. Line your baking sheets with parchment paper or silicone baking mats to prevent sticking and for easy cleanup. This is crucial for achieving perfectly baked cookies.
Step 2: Cream Wet Cookie Dough Ingredients
In a large mixing bowl, using an electric mixer or a stand mixer fitted with the paddle attachment, cream together the softened butter, packed brown sugar, and granulated white sugar on medium speed. Beat until the mixture is light, fluffy, and noticeably paler in color. This process typically takes about 2-3 minutes and is vital for incorporating air into the dough, which contributes to a tender cookie texture. Next, add your eggs one at a time, beating well after each addition until thoroughly combined. Scrape down the sides of the bowl as needed to ensure everything is fully incorporated.
Step 3: Combine Dry Cookie Dough Ingredients and Integrate
In a separate, small bowl, whisk together all the dry cookie dough ingredients: all-purpose flour, cocoa powder, baking soda, cream of tartar, and salt. Make sure these are well combined to ensure even distribution of leavening. Gradually add this dry mixture to your creamed wet ingredients, mixing on low speed until just combined. Be careful not to overmix the dough once the flour is added, as overmixing can develop too much gluten, resulting in tougher cookies. Mix until no streaks of dry ingredients remain.
Step 4: Bake Your Delicious Chocolate Cookie Dough
Using a small cookie scoop (about 1.5 tablespoons) or two rounded teaspoons, drop uniform portions of dough onto your prepared baking sheets, leaving about 2 inches between each cookie. This ensures they have space to spread without merging. Bake in the preheated oven for 8-10 minutes. The cookies will look slightly soft in the center when done, and the edges will be just set. Do not overbake! Allow the cookies to cool on the baking sheet for 2 minutes before carefully transferring them to a wire rack to cool completely. Cooling completely is essential before frosting and topping.
Step 5: Prepare Your Creamy Caramel Frosting
While your cookies are cooling, prepare the indulgent caramel frosting. In a small bowl, cream the softened butter until it is pale and smooth. Gradually add the powdered sugar, caramel ice cream topping, milk (start with 2 tablespoons and add more if needed, a teaspoon at a time), vanilla extract, and a pinch of salt. Beat the mixture with your electric mixer until it is light, fluffy, and well combined, reaching a smooth, spreadable consistency. Once the cookies are completely cool, use an offset spatula or a butter knife to frost the top of each cookie with a generous layer of this delicious caramel frosting.
Step 6: Toast the Coconut to Golden Perfection
To enhance the flavor and texture of your Samoas, toast the coconut flakes. Spread the coconut flakes in a thin, even layer on a clean baking pan. Bake them in the same 350 degrees F (175 degrees C) oven for 7-10 minutes, stirring frequently to ensure even browning. Keep a very close eye on them, as coconut can go from perfectly golden to burnt in a matter of seconds. Once beautifully toasted and fragrant, remove them from the oven and let them cool slightly. Then, generously sprinkle the toasted coconut over the top of each frosted cookie, gently pressing to adhere.
Step 7: Melt and Drizzle Caramels & Chocolate Chips
Now for the finishing touches! For the caramel drizzle, place the unwrapped caramels and 1-2 tablespoons of water in a microwave-safe bowl. Heat in the microwave for 45 seconds, then stir well. If the caramel isn’t completely melted and smooth, continue heating in 15-second intervals, stirring thoroughly after each, until it reaches a pourable consistency. Using a spoon or a fork, drizzle the melted caramel decoratively over each coconut-topped cookie.
For the chocolate drizzle, place the semi-sweet chocolate chips in a separate microwave-safe bowl. Heat them in 20-second intervals, stirring vigorously after each, until the chocolate is completely melted and smooth. Be careful not to overheat the chocolate, as it can seize. Drizzle the melted chocolate over the cookies in a crisscross pattern, mimicking the classic Samoa look. Allow both the caramel and chocolate drizzles to set completely before serving. This can be done at room temperature or in the refrigerator for about 10-15 minutes to speed up the process. Enjoy your homemade masterpiece!
Expert Tips for the Best Homemade Samoa Cookies
Achieving bakery-quality Samoa cookies at home is easy with a few simple tips:
- Room Temperature Ingredients are Key: Ensure your butter and eggs are at room temperature. This allows them to cream together properly, creating a smooth, emulsified batter and frosting.
- Measure Flour Correctly: For accurate measurements, spoon your flour into the measuring cup and then level it off with a straight edge. Don’t scoop directly from the bag, as this can compact the flour and lead to dry cookies.
- Don’t Overmix the Dough: Once you add the dry ingredients to the wet, mix only until just combined. Overmixing develops gluten, which can make your cookies tough rather than tender.
- Watch the Coconut Closely: Toasted coconut adds incredible flavor, but it burns quickly! Stir frequently and remove from the oven as soon as it turns golden brown and fragrant.
- Achieving Perfect Drizzles: For the caramel, if it’s too thick, add a tiny bit more water (1/2 teaspoon at a time). For the chocolate, if it’s too thick, a tiny bit of coconut oil or vegetable oil (1/4 teaspoon) can help thin it out for a smoother drizzle. A ziploc bag with a snipped corner or a fork can be used for easy drizzling.
- Let Them Set: Resist the urge to dive in immediately! Allowing the chocolate and caramel to fully set will prevent a sticky mess and ensure the cookies hold their beautiful shape and layers.
Samoa Cookie Variations & Creative Customizations
While this recipe nails the classic Samoa taste, feel free to experiment and make them your own!
- Chocolate Choices: Instead of semi-sweet chocolate chips for drizzling, try dark chocolate for a more intense cocoa flavor, or milk chocolate for extra sweetness. White chocolate would also create a beautiful visual contrast.
- Nutty Additions: For an extra layer of crunch and flavor, finely chop some pecans or almonds and sprinkle them over the caramel and coconut layer before the final chocolate drizzle. This adds a delicious texture contrast.
- Homemade Caramel: If you’re feeling ambitious, you can make your own dulce de leche or a classic homemade caramel sauce instead of using store-bought ice cream topping or unwrapped caramels. Just ensure it’s thick enough to spread and drizzle.
- Coconut Alternatives: While toasted coconut is iconic, if you’re not a fan, you could substitute it with finely crushed pretzels for a salty crunch, or even finely chopped nuts.
- Spice It Up: Add a pinch of cinnamon or a tiny dash of espresso powder (about 1/2 teaspoon) to the chocolate cookie dough to deepen its flavor profile.
Frequently Asked Questions About Homemade Samoa Cookies
It’s easy to adjust the texture to your liking! If you follow my recipe, the cookies will have wonderfully chewy centers with slightly crispy edges – a perfect balance. However, if you prefer a firmer, crispier Samoa throughout, simply bake them for an additional 2-3 minutes. Keep a close eye on them to prevent burning, as ovens vary. The longer baking time will reduce moisture, resulting in a crispier texture. Allow them to cool completely to achieve maximum crispness.
Absolutely! This is my take on the classic Samoa cookie, but baking is all about personal preference and creativity. Feel free to experiment! Chopped roasted nuts (like pecans, almonds, or walnuts) would add a fantastic crunch and earthy flavor. You could also mix mini chocolate chips directly into the cookie dough for an extra chocolatey base, or even add a sprinkle of sea salt flakes over the caramel for a gourmet touch. Don’t be afraid to get creative and tailor them to your taste!
Yes, they are! It’s a fun quirk of the Girl Scout cookie world. There are two primary licensed bakeries that produce Girl Scout cookies: ABC Bakers and Little Brownie Bakers. Depending on where you live in the United States, your local Girl Scout council will work with one of these bakers. Little Brownie Bakers calls their version “Samoas,” while ABC Bakers calls theirs “Caramel deLites.” Despite the different names, they are essentially the same cookie – a vanilla or shortbread cookie base (though mine is chocolate!), coated in caramel and toasted coconut, and striped with chocolate. I grew up calling them Samoas, which is why I use that name for my recipe!
Once the chocolate and caramel have fully set, store your homemade Samoa cookies in an airtight container at room temperature for up to 3-5 days. If your kitchen is particularly warm, you might want to store them in the refrigerator to prevent the caramel and chocolate from becoming too soft. Just be sure to let them come back to room temperature for the best texture before serving.
Yes, these cookies freeze beautifully! Once the chocolate and caramel are completely set, arrange the cookies in a single layer on a baking sheet and freeze until solid (about 1-2 hours). Then, transfer them to an airtight freezer-safe container or a heavy-duty freezer bag, separating layers with parchment paper to prevent sticking. They can be frozen for up to 2-3 months. Thaw at room temperature for a few hours before enjoying.
More Decadent Caramel and Chocolate Recipes to Enjoy
If you loved these Samoa cookies, you’re in for a treat! Here are more recipes featuring that irresistible combination of chocolate and caramel, perfect for satisfying any sweet tooth:
- Chocolate Caramel Oatmeal Bars
- Caramel Pretzel Sticks
- Chocolate Turtle Cake
- Caramel S’more Dip
Thank you so much for exploring this recipe and for joining me in creating these incredible chocolate and caramel treats, inspired by a timeless classic! I truly hope you enjoy making and devouring them. Don’t forget to let me know what you think!
HUNGRY FOR MORE? Subscribe to my newsletter and follow along on Pinterest, Facebook, and Instagram for all my latest updates!
Chocolate Samoa Cookies

Ingredients
- For the Chocolate Cookie Base:
- 1 cup (2 sticks) unsalted butter softened
- 1 cup packed brown sugar
- 1/2 cup granulated sugar
- 2 large eggs at room temperature
- 2 cups all-purpose flour
- 2/3 cup unsweetened cocoa powder
- 1 teaspoon baking soda
- 1/2 teaspoon cream of tartar
- 1/4 teaspoon baking powder
- 1/4 teaspoon salt
- For the Creamy Caramel Frosting:
- 1/2 cup (1 stick) unsalted butter softened
- 3 cups powdered sugar
- 1/4 cup caramel ice cream topping
- 2-3 tablespoons milk as needed
- 1 teaspoon vanilla extract
- pinch of salt
- For the Signature Toppings:
- 1 cup coconut flakes toasted
- 16 soft caramels unwrapped
- 1-2 tablespoons water
- 1/2 cup semi-sweet chocolate chips
Instructions
-
Preheat your oven to 350°F (175°C). Line baking sheets with parchment paper or silicone mats.
-
In a large bowl with an electric mixer, cream together softened butter, brown sugar, and granulated sugar on medium speed until light and fluffy (2-3 minutes). Beat in eggs one at a time until well combined. Scrape down bowl sides as needed.
-
In a small separate bowl, whisk together flour, cocoa powder, baking soda, cream of tartar, and salt. Gradually add this dry mixture to the wet ingredients, mixing on low speed until just combined. Do not overmix.
-
Drop dough by small cookie scoops (approx. 1.5 tbsp) onto prepared baking sheets, leaving 2 inches between cookies. Bake for 8-10 minutes. Cookies will be slightly soft in the center. Cool on sheets for 2 minutes, then transfer to a wire rack to cool completely.
-
While cookies cool, prepare frosting: Cream softened butter until pale. Add powdered sugar, caramel ice cream topping, milk (start with 2 tbsp, add more if needed), vanilla extract, and salt. Beat until smooth and spreadable. Frost the top of each completely cooled cookie.
-
Toast coconut: Spread flakes in a thin layer on a baking pan. Bake at 350°F (175°C) for 7-10 minutes, stirring frequently until golden. Watch carefully to prevent burning. Sprinkle generously over each frosted cookie, gently pressing to adhere.
-
Melt caramels: Place caramels with water in a microwave-safe bowl. Heat for 45 seconds, stir. If not melted, continue heating in 15-second intervals, stirring after each. Drizzle over the top of each cookie.
-
Melt chocolate: Place chocolate chips in a separate microwave-safe bowl. Heat in 20-second intervals, stirring vigorously after each until completely melted and smooth. Drizzle over the top of each cookie in a crisscross pattern. Allow both caramel and chocolate to set completely before serving.
