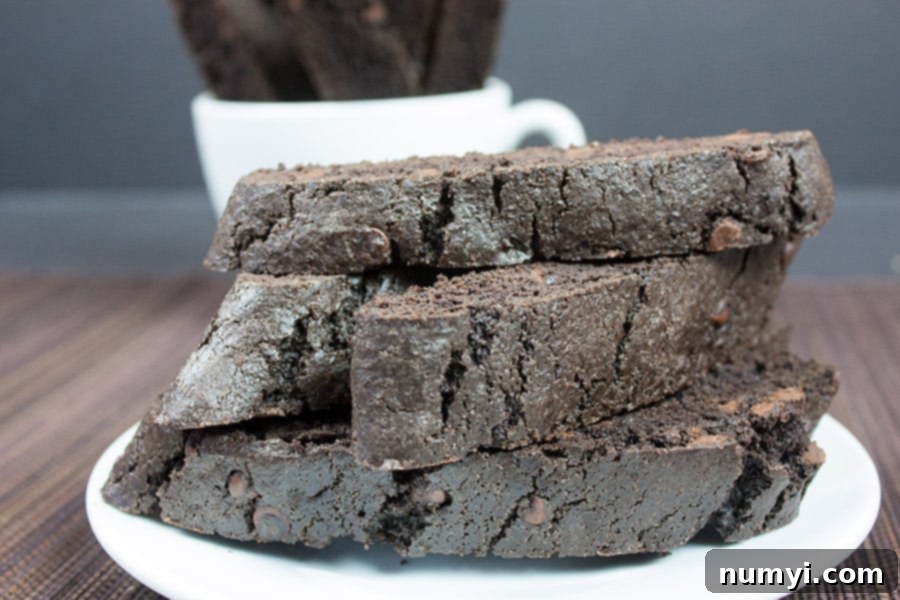
Irresistible Double Dark Chocolate Biscotti: Your Ultimate Guide to a Perfect Crunchy Treat
Move over, holiday treats! While dark chocolate biscotti certainly makes an exquisite gift during the festive season, its rich flavor and satisfying crunch deserve to be enjoyed all year round. Imagine starting your day or taking a delightful afternoon break with a cup of freshly brewed coffee or a warm mug of hot chocolate, perfectly complemented by a piece of homemade, intensely chocolatey biscotti. These Italian twice-baked cookies are not just a simple snack; they’re an experience, a moment of indulgent bliss that’s surprisingly easy to create right in your own kitchen.
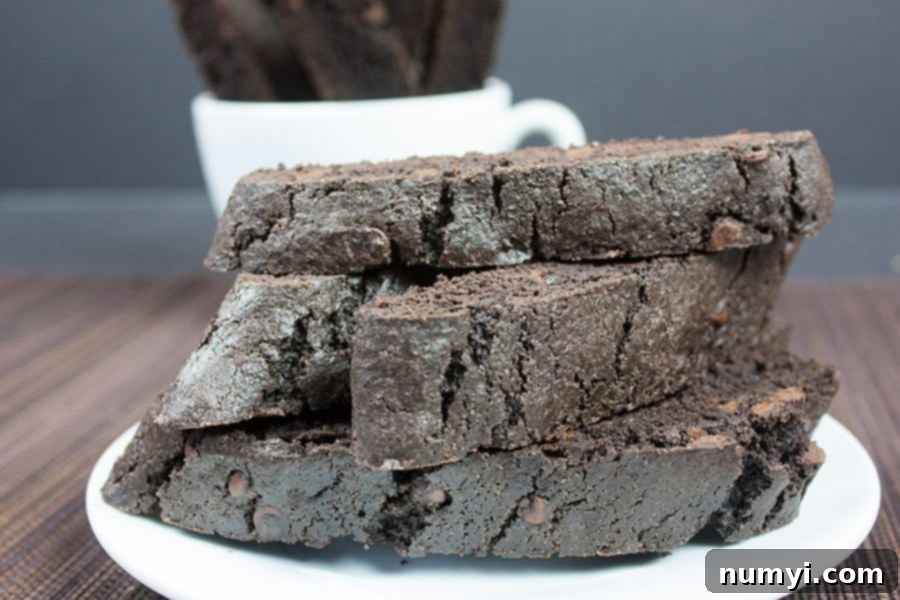
This recipe for dark chocolate biscotti, studded with even more decadent chocolate chips, offers a truly scrumptious and indulgent treat. My personal journey into the world of biscotti began with the simple revelation of how incredibly easy they are to bake from scratch. Since then, I’ve been captivated by their versatility and the sheer joy of creating various flavor combinations. You can expect to see many more delightful variations of this divine little cookie making their way onto the blog in the future, but for now, let’s dive into the ultimate double chocolate version!
Watch How to Make Dark Chocolate Biscotti
To help you visualize each step and ensure your biscotti turns out perfectly crunchy and delicious, we’ve prepared a comprehensive video guide. Follow along with the visual instructions to master the art of twice-baking these delightful cookies, making your dark chocolate biscotti experience as smooth and enjoyable as possible.
Why You’ll Fall in Love with This Dark Chocolate Biscotti Recipe
There are countless reasons to adore this dark chocolate biscotti recipe, but here are the top highlights that make it an absolute must-try for any baking enthusiast or chocolate lover:
- Designed for Dunking: These double chocolate biscotti are truly made for pairing with your favorite hot beverages. Their firm, crunchy texture is specifically engineered to absorb just the right amount of liquid without falling apart, making them the ultimate companion for a rich espresso, a frothy cappuccino, a soothing cup of tea, or a comforting mug of hot chocolate. The way they soften slightly and release their intense chocolate flavor into your drink is simply unparalleled.
- The Perfect Crunchy Texture, Loaded with Chocolate: Forget dry, brittle biscotti! This recipe delivers that ideal crisp, snappy texture that defines a truly great biscotti, yet it’s packed with a generous amount of dark cocoa powder and luscious chocolate chips. Each bite offers a harmonious balance of deep cocoa notes and pockets of melted (then re-hardened) chocolate, creating a rich, satisfying, and utterly indulgent experience.
- Makes Thoughtful & Delicious Gifts: While they’re perfect for personal enjoyment, these dark chocolate biscotti also shine as fantastic homemade gifts during the holidays or for any special occasion. Baked with love, they convey a personal touch that store-bought treats simply can’t match. Package them elegantly in cellophane bags tied with festive ribbons, or arrange them in a charming tin. They’re a wonderful way to show appreciation to neighbors, teachers, friends, and family, and they hold up well, making them ideal for gifting in advance.
- Biscotti is Super Easy to Make!: Don’t be intimidated by the idea of “twice-baked” cookies. The process for making biscotti is surprisingly straightforward and doesn’t require any fancy equipment beyond a standard mixer and baking sheets. It’s a simple dough to mix, shape, and bake, making it an excellent project for both novice and experienced bakers alike. Once you try it, you’ll wonder why you didn’t start making your own biscotti sooner!
Essential Tips for Baking Perfect Dark Chocolate Biscotti
Achieving bakery-quality biscotti at home is entirely possible with a few key techniques and considerations. Pay close attention to these tips for the best possible results:
- Measure Flour Correctly: This is perhaps one of the most crucial steps in baking. For accurate measurements, do not scoop flour directly from the bag. Instead, gently aerate your flour by fluffing it with a spoon or whisk. Then, spoon the flour into your measuring cup until it overflows. Finally, use a straight edge (like the back of a knife or a flat ruler) to level off the excess flour. This method prevents compacting the flour, which can lead to a dense, dry dough and a tough biscotti.
- Use Room Temperature Eggs and Butter: Ensuring your eggs and butter are at room temperature is vital for achieving a smooth, well-emulsified dough. Room temperature butter creams together with sugar more effectively, creating a light and fluffy base that traps air, contributing to the biscotti’s texture. Similarly, room temperature eggs incorporate more easily into the butter mixture, preventing curdling and promoting a uniform batter. Take them out of the fridge at least 30-60 minutes before you plan to start baking.
- The Art of Twice-Baking and Slicing: Biscotti gets its signature crunch from being baked twice. The first bake cooks the dough logs through, setting their shape. After this initial bake, it’s crucial to let the biscotti logs cool for only about 5-10 minutes. They should still be warm to the touch when you slice them. If the logs cool completely, the chocolate within will harden too much, making them prone to crumbling and cracking when you try to slice them. A slight warmth keeps the dough flexible enough for clean cuts.
- Slice with a Bread Knife Using a Sawing Motion: For perfectly clean and even slices, a serrated bread knife is your best friend. Use a gentle sawing motion rather than pressing straight down. This technique helps to cut through the biscotti without crushing it, especially important when dealing with the chocolate chips that might otherwise cause breakage. Aim for slices approximately 3/4-inch thick on the bias for that classic biscotti shape.
- Don’t Forget to Flip the Biscotti for the Second Bake: During the second bake, you’re essentially drying out and crisping up the sliced biscotti. To ensure even browning and crunchiness on both sides, remember to flip the biscotti pieces halfway through the second baking time. This allows both cut sides to toast beautifully, contributing to their enduring crispness.
- Cool Completely on a Wire Rack: Once the second bake is complete, transfer the hot biscotti to a wire rack to cool down entirely. Air circulation around each piece is essential for them to harden fully and achieve that perfect, unmistakable biscotti snap. Resist the urge to try them too soon, as they will continue to firm up as they cool.
Creative Add-Ins & Variations for Your Dark Chocolate Biscotti
While this double dark chocolate biscotti recipe is fantastic on its own, it also serves as an excellent base for various delicious additions. Experimenting with different mix-ins can transform your biscotti into an even more personalized treat:
- Toasted Almonds: For a classic Italian touch, gently toast some chopped almonds before adding them to your dough. The warmth enhances their nutty flavor, which pairs wonderfully with dark chocolate. You can also use other nuts like walnuts, pecans, or hazelnuts for different flavor profiles and textures.
- White Chocolate Drizzle: Once your dark chocolate biscotti have cooled completely, melt some white chocolate (or even milk chocolate) and drizzle it artistically over the tops. This not only adds a beautiful visual contrast but also introduces another layer of sweetness and flavor that complements the rich dark chocolate.
- Orange Zest: For a bright, citrusy counterpoint to the deep chocolate, add a teaspoon or two of fresh orange zest to your dough along with the vanilla extract. Chocolate and orange are a match made in heaven!
- Espresso Powder: To intensify the chocolate flavor without making it taste explicitly like coffee, incorporate 1-2 teaspoons of instant espresso powder or finely ground coffee into your dry ingredients. It acts as a flavor enhancer, deepening the cocoa notes.
- Dried Cherries or Cranberries: For a burst of fruity tang, fold in a handful of dried cherries or cranberries. Their chewy texture and tartness provide a delightful contrast to the rich chocolate.
A Detailed Guide: How to Make Dark Chocolate Biscotti from Scratch
Making your own dark chocolate biscotti is a rewarding process that results in a truly gourmet cookie. Follow these step-by-step instructions carefully to ensure perfect results every time:
Step 1: Prepare Your Workspace and Oven
Begin by preheating your oven to 350 degrees F (175 degrees C). While the oven heats, prepare a large baking sheet by lining it with parchment paper. This will prevent sticking and make cleanup much easier. If you don’t have parchment paper, a silicone baking mat works wonderfully too. Otherwise, you can lightly grease and flour your baking sheet.
Step 2: Combine Dry Ingredients
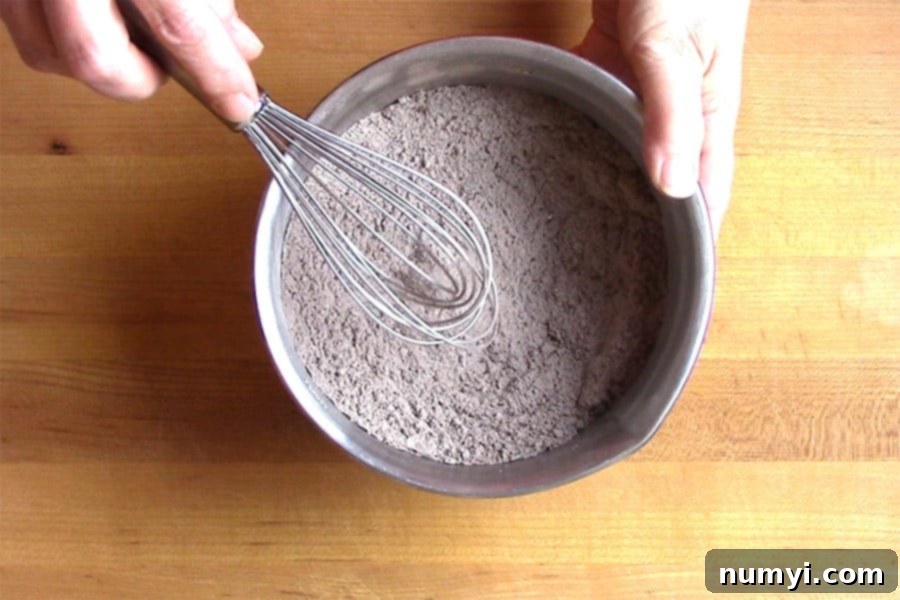
In a medium-sized mixing bowl, combine all your dry ingredients: the accurately measured all-purpose flour, unsweetened dark cocoa powder (which gives these biscotti their deep, rich color and flavor), baking soda, and salt. Use a whisk to thoroughly combine these ingredients, ensuring the cocoa powder is evenly distributed and there are no lumps. Set this bowl aside.
Step 3: Cream Wet Ingredients
In a separate, larger bowl, using an electric mixer (either a stand mixer with a paddle attachment or a hand mixer), beat together the softened salted butter and granulated sugar. Beat on medium-high speed until the mixture becomes light, fluffy, and pale in color, typically taking 2-3 minutes. This creaming process incorporates air, which is essential for the biscotti’s texture.
Step 4: Incorporate Eggs and Vanilla
Crack the two large room temperature eggs into the butter and sugar mixture. Beat on medium speed until the eggs are fully combined and the mixture is smooth and cohesive. Next, add the vanilla extract. Vanilla enhances the chocolate flavor beautifully. Beat again briefly until well combined.
Step 5: Form the Dough
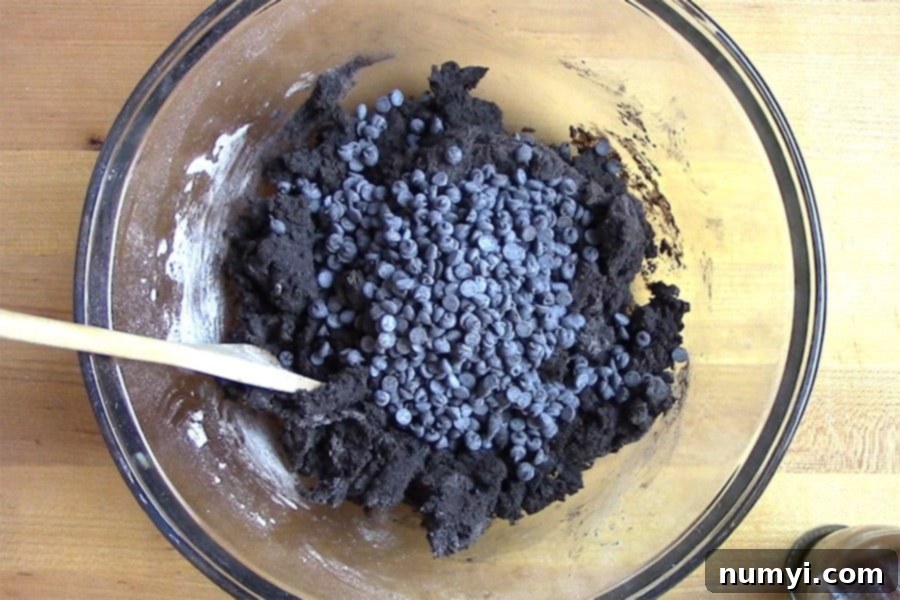
Gradually add the whisked flour mixture to the wet butter mixture, mixing on low speed until a stiff dough begins to form. Be careful not to overmix; stop once no dry streaks of flour remain. Once the dough has come together, gently fold in the semi-sweet mini chocolate chips. Use a spatula or your hands to ensure the chocolate chips are evenly distributed throughout the dense, dark dough.
Step 6: Shape the Dough Logs
Transfer the dough onto a lightly floured surface or directly onto your prepared baking sheet. Divide the stiff dough into two equal halves. Lightly flour your hands or slightly dampen them with water to prevent sticking. Shape each half of the dough into a log, approximately 12 inches long and 2 inches wide, and about 3/4 to 1 inch tall. Gently flatten the tops of the logs slightly. Ensure there is enough space between the two logs on the baking sheet for even baking.
Step 7: First Bake
Place the baking sheet with the dough logs into the preheated oven. Bake for 30-35 minutes, or until the logs are slightly firm to the touch, and the edges just begin to show signs of browning. The logs will expand slightly and feel mostly set. Remove them from the oven.
Step 8: Cool and Slice
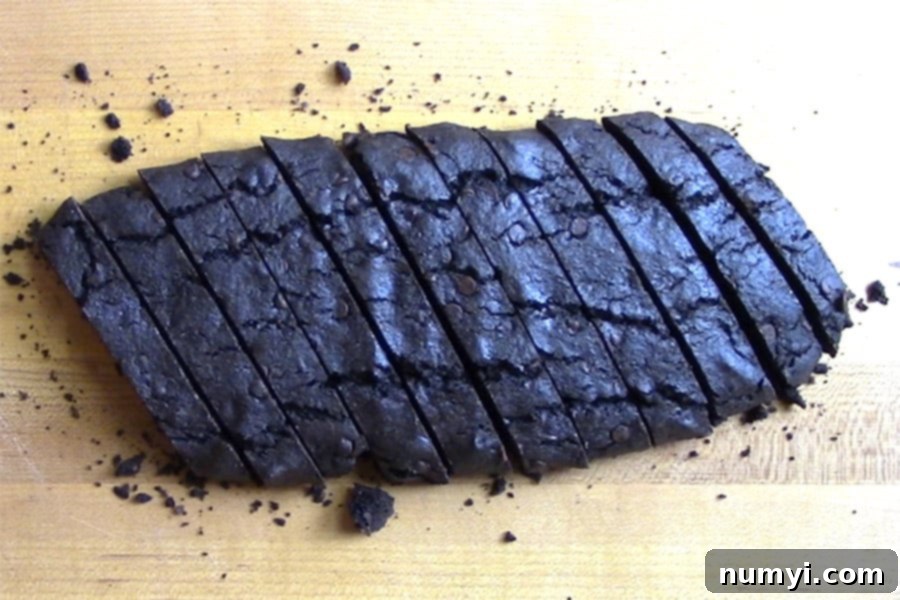
Allow the baked logs to cool on the baking sheet for 5-10 minutes. This cooling period is crucial: the logs should still be warm and slightly pliable, but firm enough to handle without falling apart. If they cool too much, the chocolate will harden, making them difficult to slice. Carefully transfer one log to a cutting board. Using a serrated bread knife and a gentle sawing motion, slice the log diagonally (on the bias) into pieces approximately 3/4-inch thick. Repeat with the second log. The diagonal cut gives biscotti its distinctive shape.
Step 9: Second Bake for Crispness
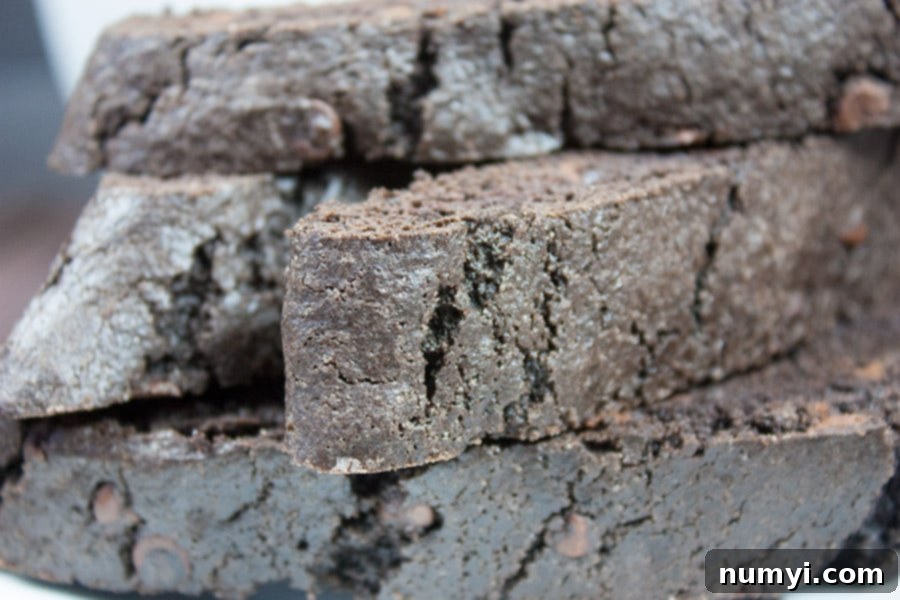
Arrange the sliced biscotti pieces back on the baking sheet, cut sides down. Ensure they are spaced out to allow for even crisping. Return the baking sheet to the oven and bake for another 10-12 minutes, or until the biscotti are firm and crisp to the touch. For even browning, you can flip them halfway through this second bake. Keep a close eye on them to prevent burning, as chocolate can make it hard to gauge doneness by color alone.
Step 10: Final Cooling and Enjoyment
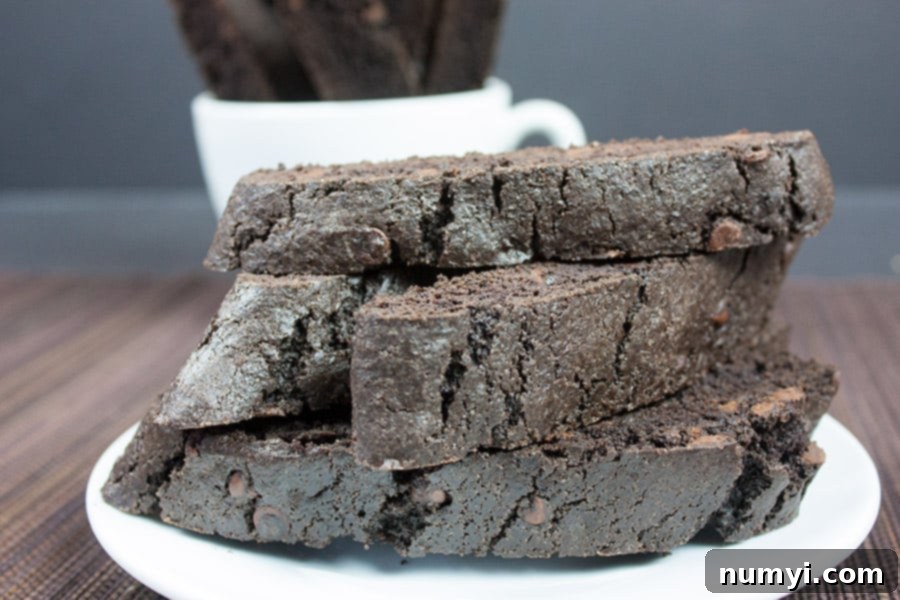
Once baked to perfection, transfer the dark chocolate biscotti to a wire rack to cool completely. As they cool, they will continue to harden and develop their characteristic crunchy texture. Once cooled, brew your favorite cup of coffee, espresso, or hot chocolate, and savor these wonderfully rich, homemade Italian cookies!
Frequently Asked Questions About Dark Chocolate Biscotti
The ultimate secret to achieving that signature crunchy texture of biscotti lies in its unique baking process: it’s baked twice. The first bake cooks the dough through and sets its shape. The second bake, performed after the logs are sliced, is a crucial drying stage. This second exposure to heat removes moisture from the cookies, making them incredibly crisp and firm, perfect for dunking without falling apart. This double-baking method is what differentiates biscotti from other cookies and gives it its extended shelf life.
Once your dark chocolate biscotti have completely cooled to room temperature and hardened, proper storage is key to maintaining their crispness. Store them in an airtight container, such as a cookie tin or a sealed plastic container, at room temperature. Kept this way, they will remain wonderfully fresh and crunchy for up to 2 weeks. Avoid storing them in the refrigerator, as the moisture can soften them.
Absolutely! Biscotti freezes beautifully, making it an excellent candidate for meal prep or for having a stash of treats readily available. Once the biscotti are completely cooled and hardened, transfer them to a freezer-safe, airtight container or a heavy-duty freezer bag. Be sure to remove as much air as possible to prevent freezer burn. They can be frozen for up to 3 months. When you’re ready to enjoy them, simply thaw them in the refrigerator overnight, or for quicker enjoyment, you can leave them at room temperature for a few hours. No need to re-bake, they’ll retain their delightful crunch once thawed.
Explore More Delicious Biscotti Recipes
If you’ve enjoyed making this dark chocolate biscotti, you’ll be thrilled to discover the wide world of biscotti flavors! Here are some other fantastic biscotti recipes to expand your baking repertoire:
- Cranberry Pistachio Biscotti: A vibrant and nutty option, perfect for any time of year.
- Almond Biscotti: The classic Italian variety, simple yet exquisitely flavorful.
- Pumpkin Spice Latte Biscotti: A seasonal favorite, bringing cozy autumn flavors to your coffee break.
- Espresso Biscotti: For the true coffee lover, an intense coffee-flavored biscotti that’s a perfect match for any brew.
Dark Chocolate Biscotti Recipe
Print
Pin
Rate
Ingredients
- 2 cups all-purpose flour
- 1/2 cup unsweetened dark cocoa powder
- 1 teaspoon baking soda
- 1 teaspoon salt
- 6 tablespoons salted butter, softened
- 1 cup granulated sugar
- 2 large eggs
- 1 1/2 teaspoons vanilla extract
- 1 cup semisweet mini chocolate chips
Instructions
-
Preheat oven to 350-degrees F (175°C). Prepare a large baking sheet by lining it with parchment paper or a silicone baking mat. Alternatively, lightly grease and flour the baking sheet.
-
In a medium bowl, whisk together the all-purpose flour, unsweetened dark cocoa powder, baking soda, and salt until well combined and lump-free. Set aside.
-
In a separate large bowl, using an electric mixer, beat the softened butter and granulated sugar together until light and fluffy (about 2-3 minutes). Add the room temperature eggs, one at a time, beating well after each addition until fully incorporated. Stir in the vanilla extract until combined.
-
Gradually add the dry flour mixture to the wet butter mixture, mixing on low speed until a stiff dough forms. Be careful not to overmix. Fold in the semi-sweet mini chocolate chips until evenly distributed throughout the dough.
-
Divide the dough in half. Lightly flour your hands or dampen them slightly, then form each half of the dough into two flattened logs on the prepared baking sheet. Each log should be approximately 12 inches long, 2 inches wide, and about 3/4 to 1 inch tall. Leave space between them for expansion.
-
Bake the logs for 30-35 minutes, or until they are slightly firm to the touch and the edges are just beginning to brown. Remove from the oven and let them cool on the baking sheet for 5-10 minutes. The logs should still be warm enough to handle and slice easily.
-
Carefully transfer one warm log to a cutting board. Using a serrated bread knife, slice the log diagonally into 3/4-inch thick pieces. Repeat with the second log.
-
Arrange the sliced biscotti pieces, cut sides down, back on the baking sheet. Return to the oven and bake for another 10-12 minutes, or until the biscotti are crisp and firm. You may flip them halfway through for even crisping.
-
Transfer the baked biscotti to a wire rack to cool completely. They will harden further as they cool. Store in an airtight container once cooled.
