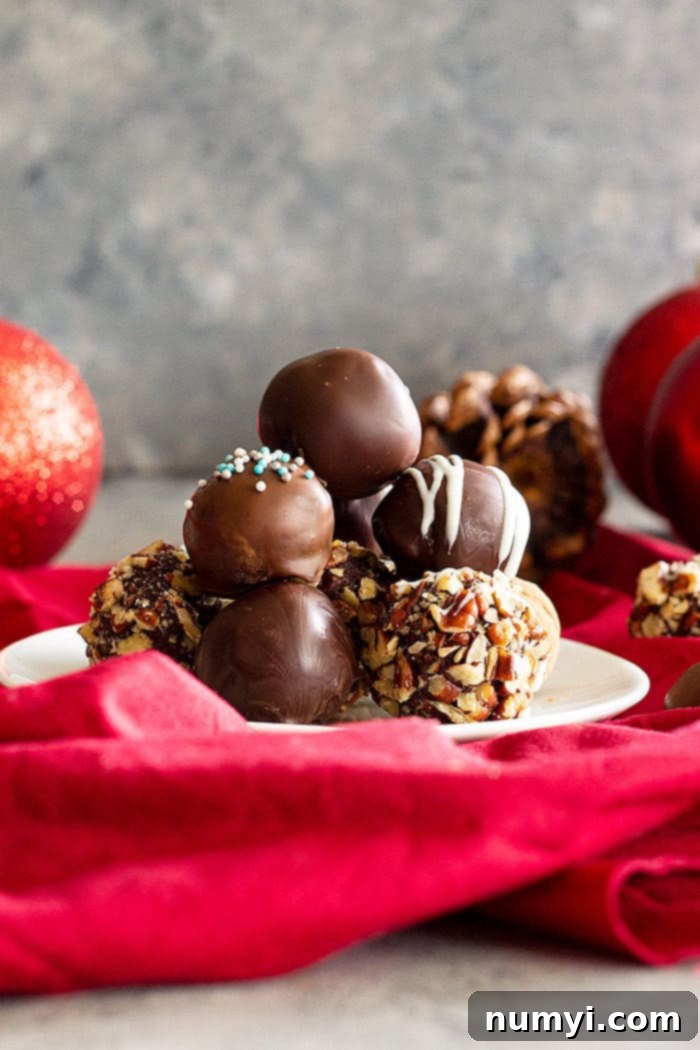
Decadent Homemade Dark Chocolate Truffles: Your Easy Guide to Creamy Perfection
Indulge in the luxurious world of homemade dark chocolate truffles! This incredibly easy recipe allows you to create rich, creamy, and decadent ganache truffles right in your own kitchen with just a few simple ingredients. Forget expensive store-bought boxes – these show-stopping treats are surprisingly simple to master.
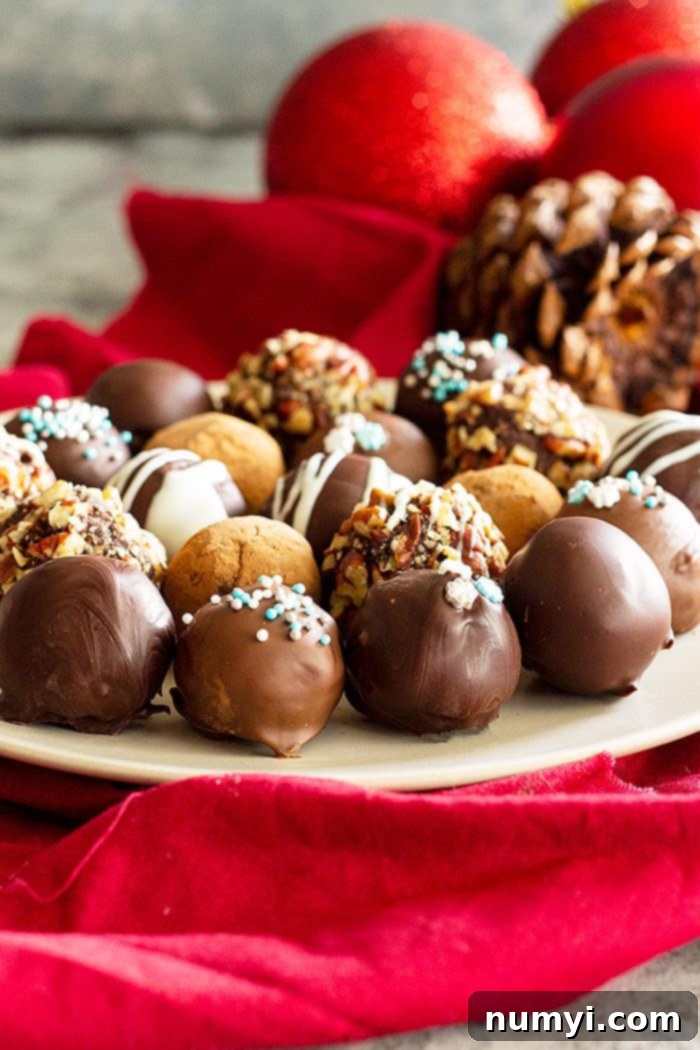
Imagine biting into a smooth, melt-in-your-mouth chocolate truffle, crafted with love and care by your own hands. This isn’t a pipe dream; it’s an achievable reality with our foolproof recipe for indulgent dark chocolate truffles. These luxurious treats are not only sumptuously creamy and intensely rich but also incredibly easy to make, proving that gourmet doesn’t have to mean complicated. Perfect for a special dessert, a thoughtful homemade gift, or simply to satisfy your deepest chocolate cravings, these truffles are guaranteed to impress anyone who loves high-quality chocolate.
Homemade truffles are also an excellent choice for gifting. Package these exquisite chocolate balls in a beautiful box and create a truly memorable present. You can elevate your gift even further by pairing them with other homemade delights like Homemade Dark Chocolate Hot Cocoa Mix, delightful Peanut Butter Ritz Cracker Cookies, or a batch of these savory Sweet and Spicy Pecans. A customized gift like that shows true thoughtfulness and is sure to be cherished!
The best part? You’ll be amazed at how affordable it is to create these high-end confections at home. The steep prices charged for dark chocolate truffles at specialty stores become entirely understandable when you realize they are made with just a few, yet crucial, ingredients: premium quality chocolate, rich heavy whipping cream, a touch of butter, and a hint of vanilla. While you can technically make a basic ganache truffle without the butter and vanilla, I’ve found that these two additions elevate the flavor and texture to an even more divine level, making them truly unforgettable.
Why You’ll Love This Homemade Chocolate Truffle Recipe
This recipe isn’t just about making truffles; it’s about creating an experience. Here’s why you’ll adore making these dark chocolate delights:
- Unbelievably Rich and Creamy: Each truffle boasts a silky smooth ganache center that melts delightfully in your mouth, delivering an intense chocolate experience.
- Budget-Friendly Gourmet: Achieve luxurious, gourmet-quality truffles at a fraction of the cost of store-bought boxed chocolates, allowing you to indulge more often.
- Effortlessly Simple: Despite their sophisticated appearance, these truffles are incredibly easy to make, requiring minimal active prep time and basic kitchen skills.
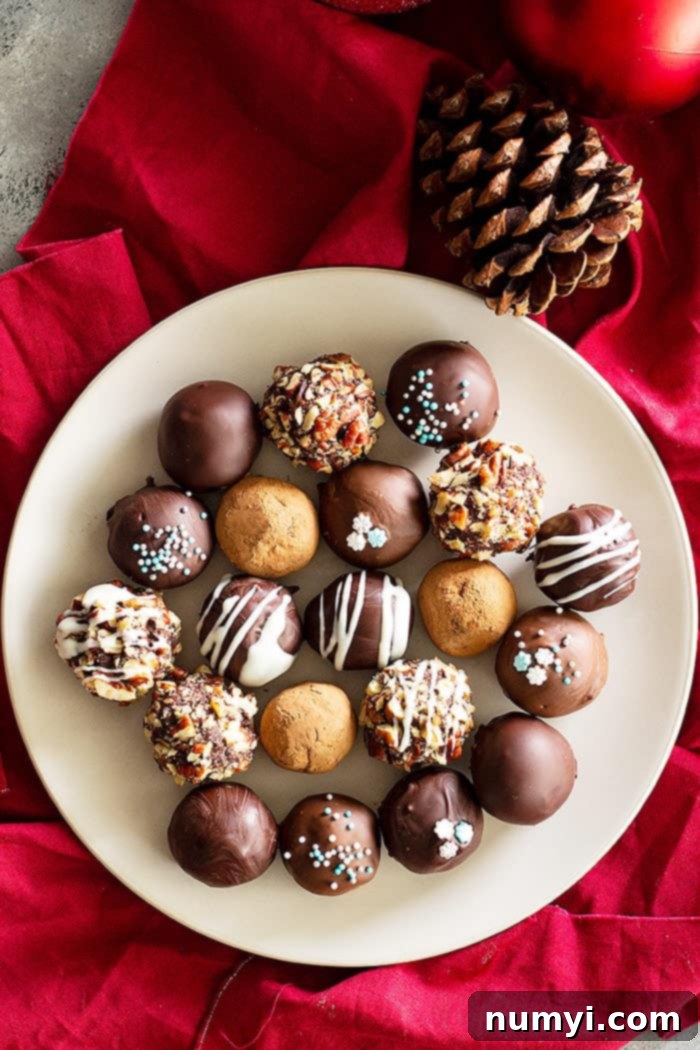
- Stunning Presentation: With endless options for coatings and decorations, these truffles always look impressive, whether served at a party or given as a gift.
- Customization King: Easily adapt the flavors and toppings to suit any preference or occasion, making each batch uniquely yours.
- Perfect for Gifting: Homemade truffles are a thoughtful and highly appreciated gift for holidays, birthdays, or just to show someone you care.
Essential Ingredients for Perfect Dark Chocolate Truffles
The magic of these truffles lies in the quality of their few ingredients. Here’s what you’ll need and why:
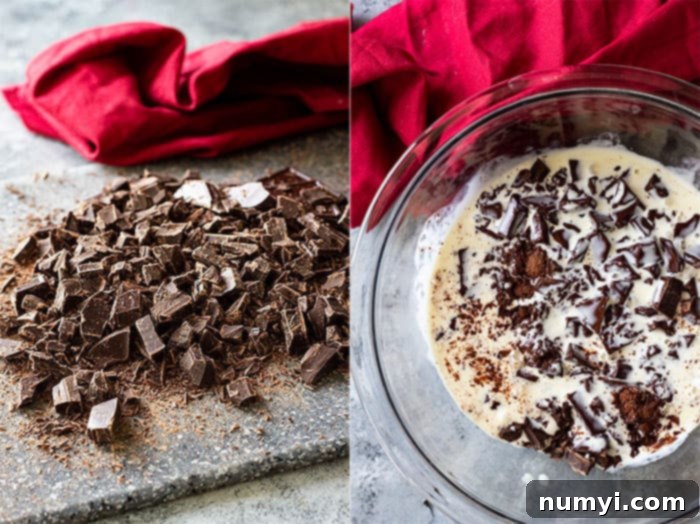
- CHOCOLATE: This is the star of the show, so its quality is paramount. Do NOT use standard chocolate chips, as they often contain stabilizers that prevent them from melting smoothly into a ganache. Instead, opt for high-quality baking chocolate bars or blocks. Look for brands like Guittard, Lindt, or Ghirardelli for excellent results. If you’re feeling indulgent, splurge on premium options like Scharffen Berger or Valrhona for an unparalleled chocolate experience. Aim for dark chocolate with at least 60% cacao for that rich, intense flavor that defines a true dark chocolate truffle. Read on for more tips on choosing the best chocolate.
- HEAVY WHIPPING CREAM: This is the foundation of your ganache. Ensure you use heavy cream or heavy whipping cream with a minimum of 30% milk fat. The higher fat content is crucial for achieving that luscious, creamy texture that sets truffles apart. Lower-fat creams will result in a less stable and less decadent ganache.
- UNSALTED BUTTER: While listed as optional, a tablespoon of unsalted butter significantly enhances the texture and sheen of your truffles. It adds a subtle richness and helps create an even smoother, melt-in-your-mouth feel, making your chocolate balls truly dreamy.
- VANILLA EXTRACT: Another optional but highly recommended ingredient. A hint of pure vanilla extract brightens and rounds out the chocolate flavor, adding a layer of complexity that makes these truffles extra special.
Mastering the Art: How to Choose Quality Chocolate for Truffles
Selecting the right chocolate is perhaps the most critical step in making exceptional truffles. Think of it like choosing a fine wine – it involves engaging multiple senses to ensure you get the best product. While personal taste is ultimately king, these tips will guide you to a superior chocolate:
- Start with Personal Preference: My “best” might not be your “best.” Experiment with different reputable brands until you find one whose flavor profile truly speaks to you. What matters most is that *you* enjoy the taste.
- The Visual Test: Begin by examining the chocolate. High-quality chocolate should be smooth, uniformly colored, and possess a beautiful, natural sheen. Avoid any bars that appear dull, streaky, or have a grayish “bloom” on the surface. A bloom usually indicates that the chocolate has been exposed to extreme temperature changes or is old, which can negatively affect its texture and flavor.
- The Snap Test: Break a piece of the chocolate. A good quality chocolate, especially dark chocolate, should produce a distinct, crisp “snap” when broken. If it bends, crumbles softly, or feels waxy, it’s often a sign of lower quality ingredients or improper storage.
- The Aroma Test: Close your eyes and take a deep, slow sniff of the chocolate. It should have a rich, complex aroma that is distinctly chocolatey, perhaps with hints of fruit, nuts, or earthiness depending on the bean. If you detect any off-odors, chemical smells, or a weak aroma, it may be an inferior product or have absorbed unwanted scents from its environment.
- The Taste Test (Mouthfeel is Key!): Finally, the most important step! Break off a small piece, close your eyes, and let it slowly melt on your tongue. Pay close attention to the mouthfeel. A high-quality chocolate will melt smoothly and luxuriously, coating your palate with a silky, velvety sensation. It should feel clean and pleasant as it melts. If it leaves a greasy, waxy, or gritty residue in your mouth, those are indicators of lower quality chocolate, often due to added vegetable fats or poor processing. Choose the one that provides the most delightful, lingering melt and flavor – that’s the secret to the best truffle dessert possible.
How To Make This Easy Chocolate Truffle Recipe: Step-by-Step
Creating these gourmet chocolate truffles is a straightforward process. Follow these steps for perfect results every time:
1. CHOP THE CHOCOLATE: Using a sharp chef’s knife, finely chop your good quality chocolate bars into very small, uniform pieces. This is a critical step, as smaller pieces melt more quickly and evenly, ensuring a smooth, lump-free ganache. Place the chopped chocolate into a heatproof bowl. Add the unsalted butter to the bowl with the chocolate and set aside.
2. HEAT HEAVY CREAM: Pour the heavy whipping cream into a microwave-safe bowl or a small saucepan. Heat the cream until it just begins to bubble gently around the edges – do not bring it to a rolling boil or overheat it, as this can scorch the cream and potentially “break” your ganache, leading to a greasy, separated texture. This usually takes 1-2 minutes in a microwave on high power.
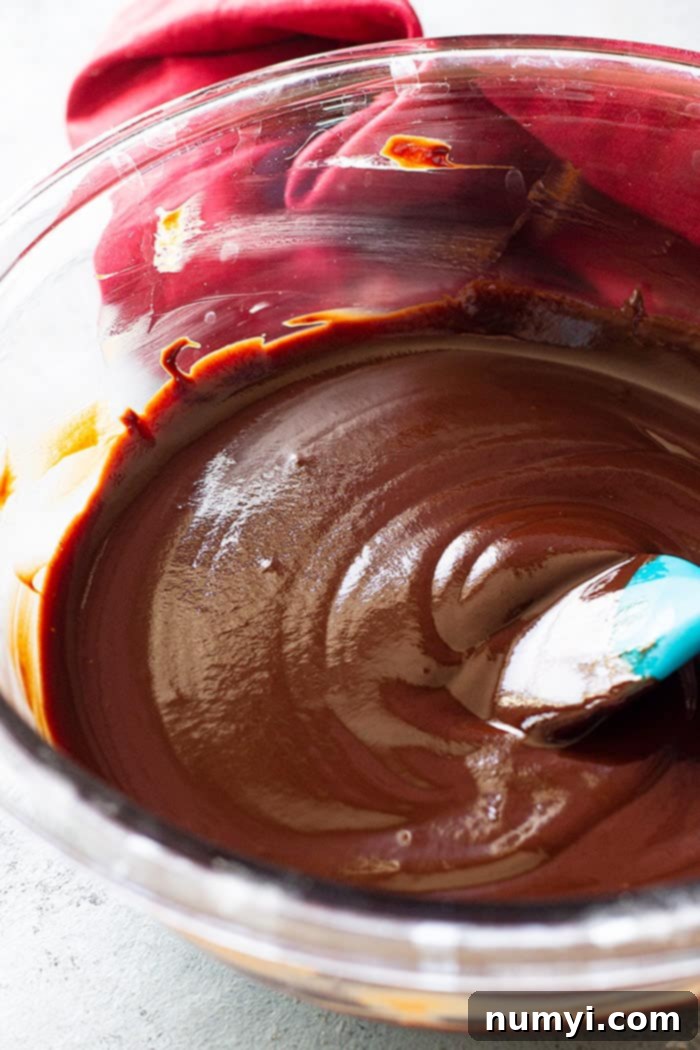
3. COMBINE INGREDIENTS TO FORM GANACHE: Carefully pour the hot heavy cream directly over the chopped chocolate and butter in the heatproof bowl. Do not stir immediately! Let the mixture sit undisturbed for 5 minutes. This allows the hot cream to gently melt the chocolate and butter, initiating the ganache formation. After 5 minutes, add the vanilla extract. Now, slowly and gently stir the mixture with a whisk or spatula, starting from the center and gradually working your way outwards. Continue stirring until the chocolate is completely melted and the mixture is smooth, glossy, and perfectly creamy. Cover the bowl with plastic wrap, pressing it directly onto the surface of the ganache to prevent a skin from forming. Refrigerate for at least 1 hour, or until firm enough to roll.
4. FORM CHOCOLATE BALLS: Once the ganache is firm, use a small cookie scoop (a 2-teaspoon size is ideal for truffles) to scoop out portions of the ganache. If the ganache is too sticky to roll immediately, scoop all the portions onto a parchment-lined tray and refrigerate for another 15-20 minutes to firm up slightly. Then, gently roll each scooped portion between your palms to form smooth, round chocolate balls. For easier handling and to keep your hands clean, you can lightly dust your hands with cocoa powder or wear food-safe plastic gloves.
5. ADD DESIRED TOPPINGS AND SERVE: Immediately roll the freshly formed truffles in your chosen toppings (see “How to make your truffles look extra special” below for ideas). Place the coated truffles back on a parchment-lined tray and allow them to set completely in the refrigerator for another 15-30 minutes before serving. Enjoy your homemade gourmet dark chocolate truffles!
Truffle Troubleshooting Tips: Solving Common Problems
Even experienced bakers encounter challenges. Here are solutions to common truffle-making dilemmas:
- Chocolate Ganache Looks Greasy or is Separating: This is almost always a sign that your cream was too hot when poured over the chocolate. The excessive heat can cause the fat in the chocolate and butter to separate from the cocoa solids, resulting in a greasy, broken ganache. Unfortunately, it’s very difficult to salvage a truly broken ganache; it’s best to discard it and start over. Remember to heat the cream just until small bubbles appear around the edges, then remove it from the heat immediately.
- Chocolate Ganache is Too Hard to Roll: Don’t panic! If your ganache has been chilling for too long or is simply too firm, simply leave the bowl at room temperature for 15-30 minutes. The ganache will gradually soften to a workable consistency. You can also knead small portions between your palms to warm it slightly before rolling.
- Ganache is Too Sticky to Roll: This is a common issue. My favorite trick is to scoop all the ganache into uniform portions using a small cookie scoop first. Place these scooped portions on a parchment-lined baking sheet and refrigerate for about 15-20 minutes. This extra chill time firms them up just enough to make rolling much easier without them becoming too hard. Alternatively, wear food-safe plastic gloves, which helps prevent sticking and keeps your hands clean.
- Ganache is Persistently Too Soft to Roll: If your ganache remains stubbornly soft even after extended chilling, the cream-to-chocolate ratio might be off (perhaps too much cream or not enough chocolate). You can attempt to correct this by gently reheating the ganache. The best method is to do this over a double boiler, stirring constantly until it’s just melted. Then, add a small amount of finely chopped quality chocolate (start with 1-2 ounces) and stir until completely smooth. Re-chill and test its consistency. Repeat if necessary.
Frequently Asked Questions About Homemade Chocolate Truffles
Do I have to use dark chocolate?
Not at all! While I personally love the intense richness that dark chocolate brings to these ganache truffles, the recipe is wonderfully versatile. You can absolutely use other types of chocolate, such as milk chocolate or white chocolate, to suit your preference. Just remember to use high-quality baking bars and adjust the sweetness of your toppings accordingly. If using milk or white chocolate, note that the ganache might be slightly softer due to different fat-to-sugar ratios, so you might need a little extra chilling time.
How do you make your truffles dessert look extra special?
This is where the fun begins! Elevating the presentation of your homemade truffles is easy and adds a truly professional touch:
- Elegant Packaging: For a sophisticated gift, place each finished truffle into a small paper baking cup or mini cupcake liner. Arrange these in a cute candy box or a decorative tin for a gift that looks as good as it tastes.
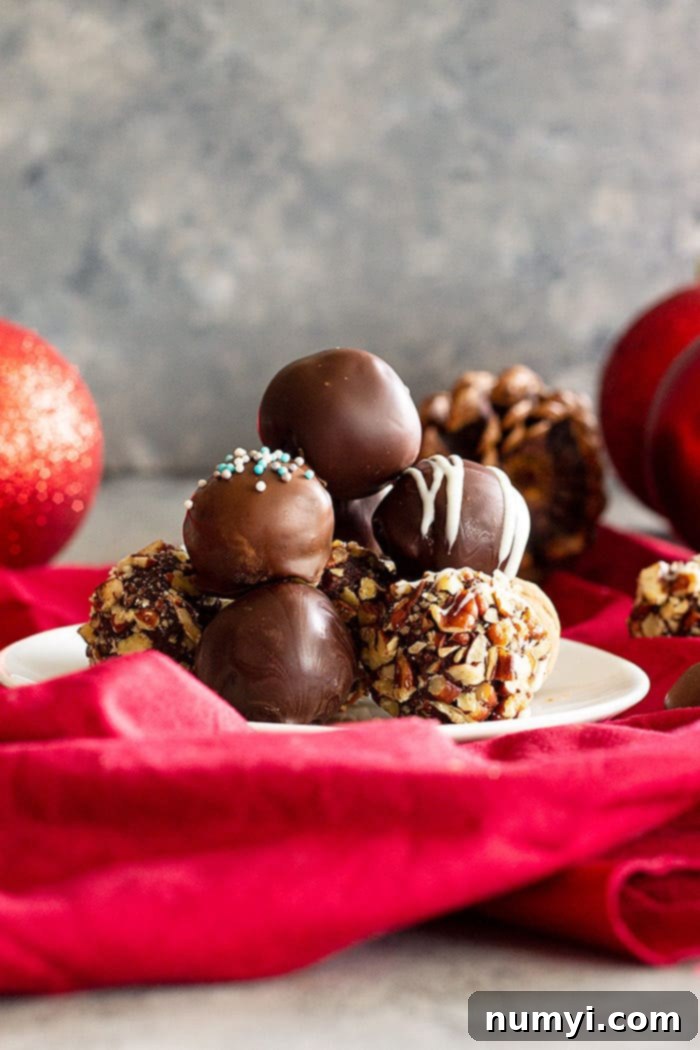
- Creative Coatings: The simplest way to add flair is with coatings. Roll your truffles in finely chopped nuts (pistachios, pecans, almonds, walnuts), colorful sprinkles, crushed candy canes (for holidays!), shredded coconut, or a generous dusting of cocoa powder or powdered sugar. For a contrasting texture, roll them in finely crushed freeze-dried raspberries or espresso powder for a gourmet touch.
- Dipping in Melted Chocolate: For a classic, professional finish, dip your truffles in a second layer of melted chocolate. To do this, place a truffle on a dinner fork, then spoon melted tempered chocolate over it, allowing excess to drip off. Alternatively, carefully drop the truffle into a deep container of melted chocolate, quickly swirl, and lift out with the fork. Gently slide the dipped truffle onto a piece of wax paper or parchment paper to dry and set. This creates that beautiful, smooth outer shell.
- Artful Drizzles: Once your dipped truffles have set for at least 10-15 minutes, you can add decorative drizzles. Melt a contrasting chocolate (like white chocolate over dark truffles, or vice-versa). Spoon the melted chocolate into a small Ziploc bag, snip a tiny corner off, and gently squeeze the bag to drizzle fine lines back and forth across the tops of your truffles.
- Edible Decorations: Consider adding a single edible gold leaf, a small candied violet, or a tiny sprig of fresh mint to each truffle for a truly luxurious presentation.
Can I make this chocolate truffle recipe for a crowd?
Absolutely! This recipe is perfectly scalable and excellent for large gatherings. Each batch yields approximately 20 delectable chocolate balls, making it easy to calculate how many batches you’ll need. Simply multiply the ingredients to make as many as desired. They are a fantastic, elegant, yet easy-to-manage dessert for family reunions, work parties, weddings, holiday celebrations, and any event where you want to impress with a homemade treat.
How long do ganache truffles last?
The excellent news is that homemade chocolate truffles have a good shelf life, making them ideal for preparing in advance. When stored in an airtight container in the refrigerator, they will maintain their freshness and quality for up to 2 weeks. For longer storage, you can freeze them for up to 5-6 months. To thaw, simply transfer them from the freezer to the refrigerator overnight, then bring them to room temperature before serving for the best flavor and texture.
What tools will I need for making truffles?
You’ll only need a few basic kitchen tools:
- Sharp chef’s knife and cutting board (for chopping chocolate)
- Heatproof mixing bowls (glass or stainless steel)
- Small saucepan or microwave-safe bowl (for heating cream)
- Whisk or rubber spatula
- Measuring cups and spoons
- Plastic wrap
- Small cookie scoop (2-teaspoon size)
- Parchment paper or wax paper
- Baking sheets or trays
Can I add flavor variations to the ganache?
Yes, absolutely! This is one of the best ways to customize your truffles. Beyond vanilla, you can incorporate a variety of flavorings into the warm ganache before chilling. Consider adding:
- Liqueurs: A tablespoon of your favorite liqueur like Grand Marnier (orange), Kahlúa (coffee), Frangelico (hazelnut), or a raspberry liqueur.
- Extracts: Peppermint extract, almond extract, orange extract, or even a touch of rum extract can add distinct flavors.
- Spices: A pinch of cayenne pepper for a Mexican hot chocolate kick, cinnamon, or cardamom.
- Citrus Zest: Finely grated orange or lemon zest for a bright, aromatic twist.
- Coffee: A teaspoon of instant espresso powder will deepen and enhance the chocolate flavor without making it taste overtly like coffee.
Experiment with small amounts, tasting as you go, to achieve your desired flavor intensity.
HUNGRY FOR MORE? Subscribe to my newsletter and follow along on Pinterest, Facebook, and Instagram for all my latest updates!
Homemade Chocolate Truffles

Ingredients
- 8 ounces (227g) good quality chocolate (use at least 60% cacao)
- 1 tablespoon unsalted butter
- ½ cup (120ml) heavy whipping cream
- ½ teaspoon vanilla
Instructions
-
Finely chop the chocolate bars (this is important so it melts smoothly!) and place in a heatproof bowl. Add butter to the chocolate and set aside.
-
Heat the heavy cream in a microwave-safe bowl just until it starts to bubble and no more. If you heat the cream to hot it will ruin the chocolate.
-
Pour heated cream over the chocolate and butter and let sit for 5 minutes. Add the vanilla and stir until the chocolate is completely melted and smooth. Place a piece of plastic wrap over the chocolate pressing it against the surface of the chocolate. Refrigerate for 1 hour.
-
Scoop the chocolate using a small cookie scoop (2 teaspoon size). Scoop all the chocolate first and place it into the refrigerator to harden a little if they are too soft to roll. If not roll into balls.
-
Roll each into desired toppings.
Notes
- Storage- Store truffles at room temerature for up to 7 days. Store in the refrigerator for up to 3 weeks. Freeze for up to 3 months. To thaw place in the refrigerator.
- Always bring chocolate to room temperature before serving. Chocolate tastes best at room temperature.
- Nutrition Facts: Since different brands of ingredients have different nutritional information, the information shown is just an estimate. Nutrition not calculated with toppings.
- Please be sure to read the post about choosing quality chocolate, how to dress up the truffles, and other tips.
Nutrition
