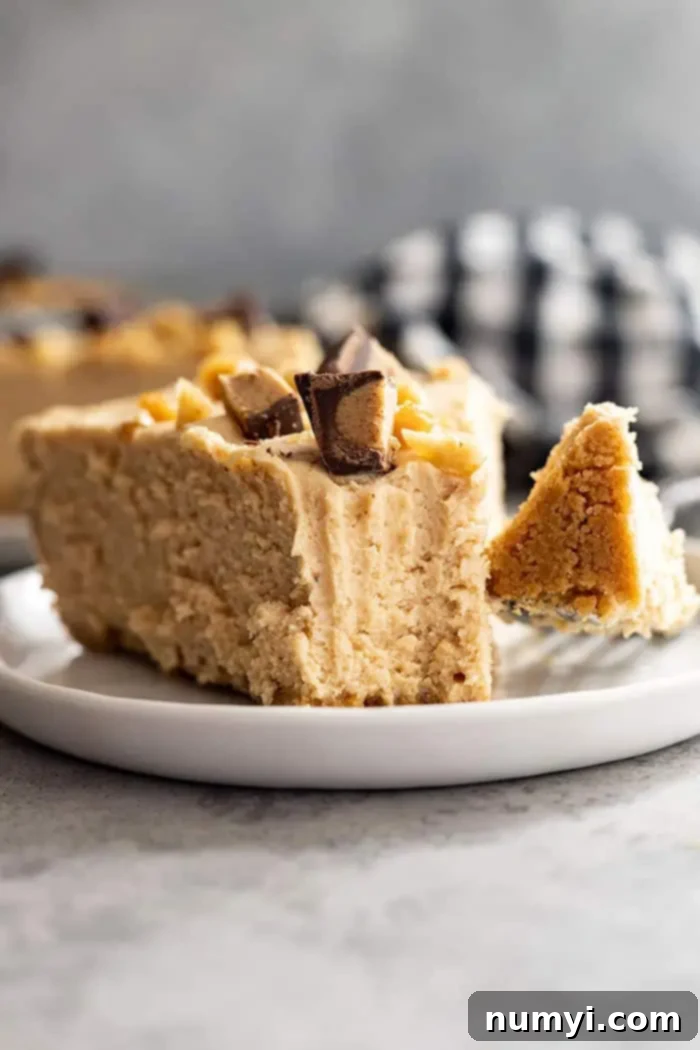
Creamy & Easy No-Bake Peanut Butter Pie: Your Ultimate Dessert Recipe
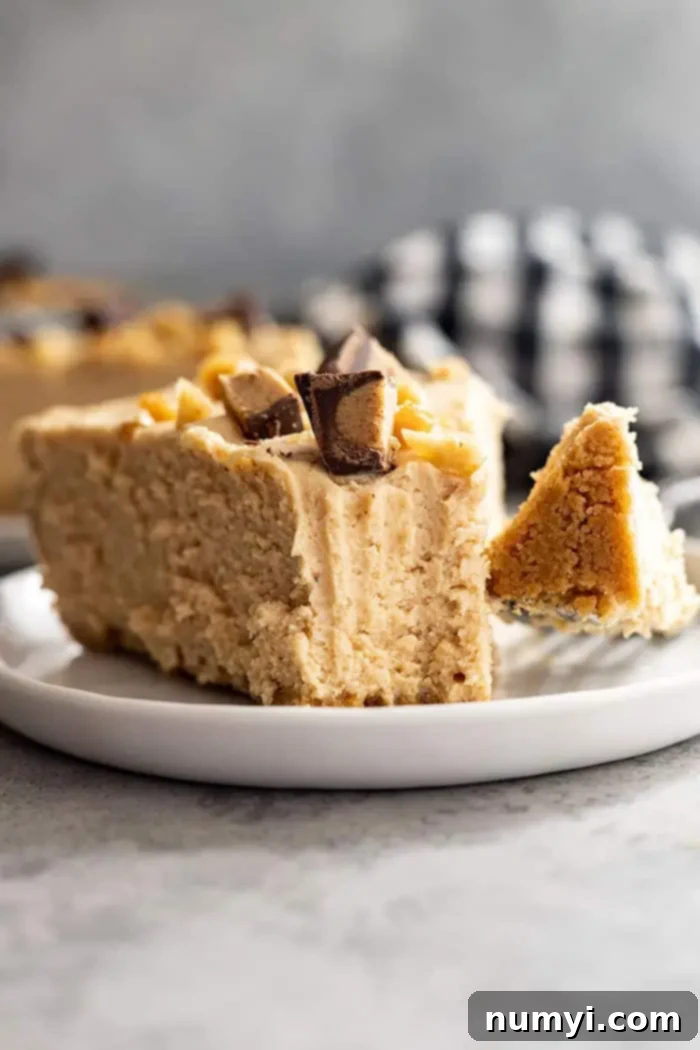
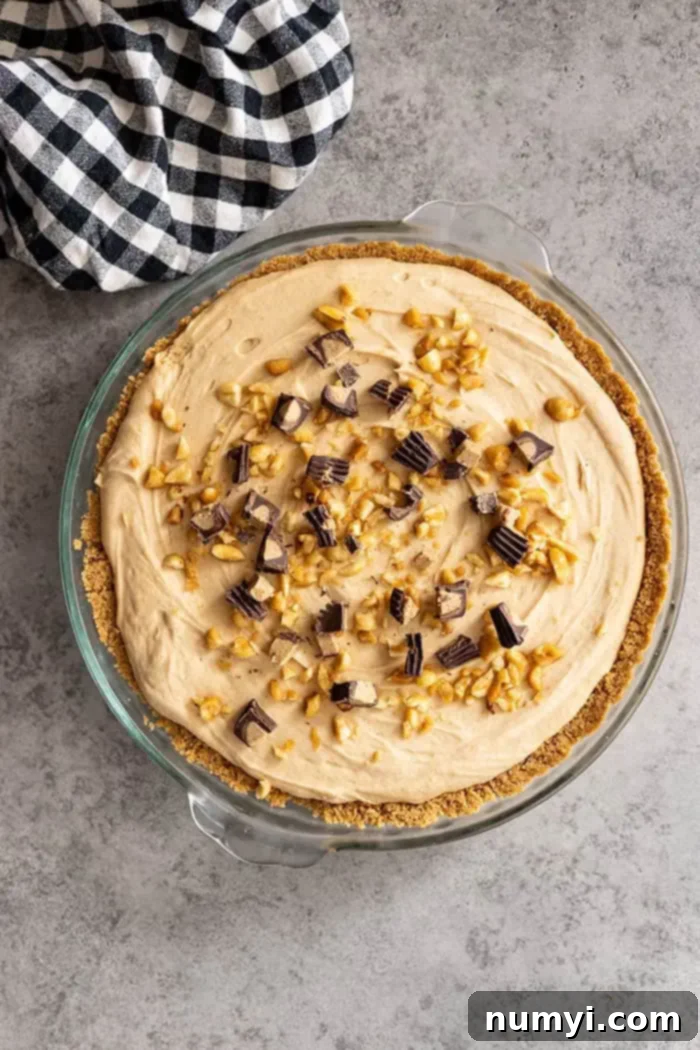
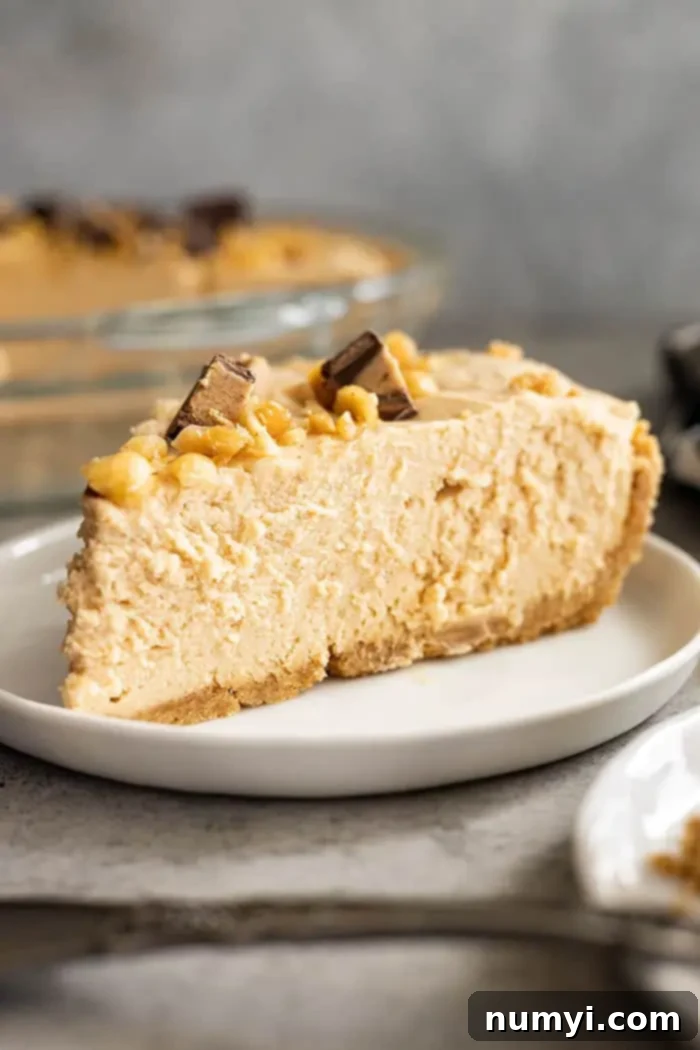
Get ready to discover your new favorite dessert! This Easy Peanut Butter Pie is an absolute dream for anyone who loves the rich, nutty flavor of peanut butter combined with a luxuriously creamy texture. Imagine a crunchy peanut butter cookie crust, piled high with a light and fluffy peanut butter mousse-like filling, then perfectly chilled until it’s ready to melt in your mouth. It’s the kind of dessert that looks incredibly impressive but requires minimal effort, making it ideal for entertaining guests or simply treating yourself and your family.
Forget complicated baking techniques; this homemade peanut butter pie recipe is designed for ease and maximum enjoyment. It delivers all the homemade goodness without the stress, making it a go-to for busy bakers or those just starting their culinary journey. If you’re searching for an easy dessert that truly wows, you’ve found it!
While this peanut butter pie is a showstopper, don’t miss out on other fan favorites like our Old Fashioned Chocolate Meringue Pie, a reader’s choice since 2019. Or, for a refreshing no-bake option, try our delightful Fresh Strawberry Pie.
Why You’ll Love This Easy Peanut Butter Pie
This isn’t just another pie recipe; it’s a game-changer! Here’s why this creamy peanut butter pie will quickly become a staple in your dessert rotation:
- Effortlessly Delicious: The “easy” in Easy Peanut Butter Pie isn’t just a suggestion—it’s a promise! This recipe simplifies the baking process without compromising on flavor or decadence. It’s largely a no-bake affair, perfect for warm days or when you simply want a quick yet impressive dessert.
- Perfectly Make-Ahead & Freezer-Friendly: Need a dessert that fits into your busy schedule? This pie can be prepared in advance, allowing you to focus on other tasks. Plus, it freezes beautifully, meaning you can enjoy a slice whenever a craving strikes!
- Irresistible Texture Contrast: Enjoy the delightful crunch of the peanut butter cookie crust perfectly complemented by the airy, light, and incredibly fluffy peanut butter filling. Each bite offers a satisfying mix of textures that keeps you coming back for more.
- Highly Customizable: This recipe is a fantastic base for your creativity. Easily adapt it with different crusts, mix-ins, and toppings to suit your taste or occasion. Make it truly your own!
- Mousse-Like Indulgence: While it shares similarities with a no-bake peanut butter cheesecake, this pie’s filling is distinctly lighter and more mousse-like, offering a melt-in-your-mouth experience that is simply divine.
- Crowd-Pleaser Guaranteed: Peanut butter lovers, rejoice! This pie is a surefire hit at potlucks, family gatherings, or any celebration. Its rich flavor and appealing presentation will have everyone asking for the recipe.
- Simple Ingredients, Incredible Flavor: You won’t need any exotic ingredients for this pie. Common pantry staples transform into a sophisticated dessert that tastes like it came from a gourmet bakery.
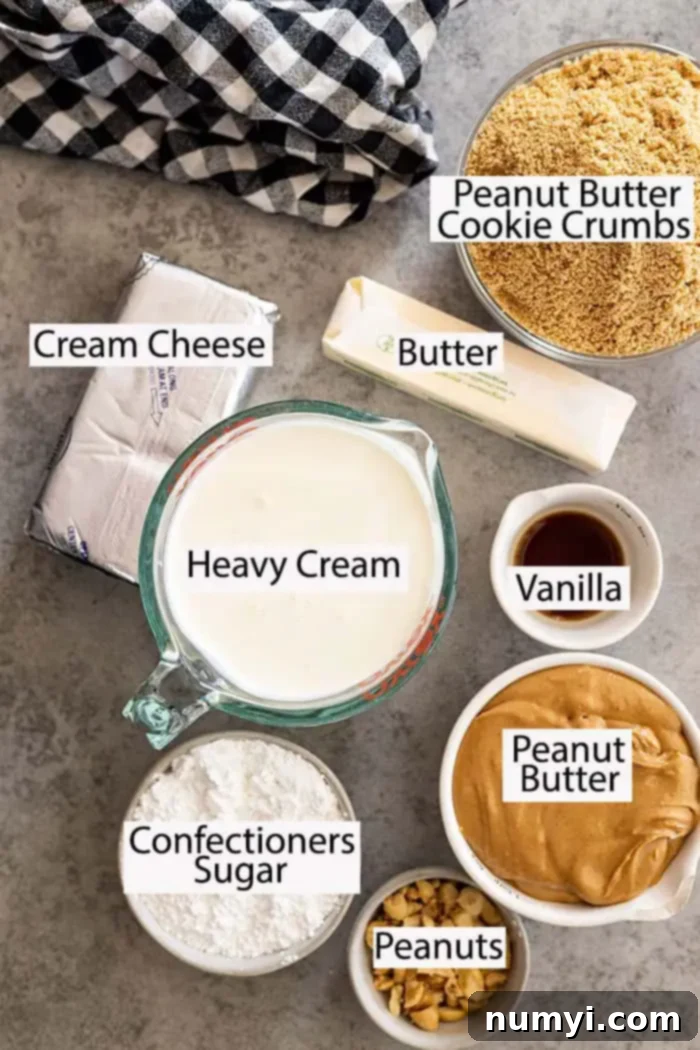
Essential Ingredients for Your Peanut Butter Pie
Creating this irresistible peanut butter pie starts with a few simple, high-quality ingredients. Here’s a closer look at what you’ll need and why each component is crucial:
PEANUT BUTTER COOKIES: Often referred to as Nutter Butters, these specific cookies are fantastic for the crust due to their intense peanut butter flavor and excellent crumb texture. When crushed into fine crumbs and mixed with butter, they create a perfectly solid and flavorful base that holds up beautifully. If Nutter Butters aren’t available, you can use other store-bought peanut butter cookies or even a classic graham cracker crust for a different twist.
BUTTER: Essential for binding the cookie crumbs together to form a firm crust. Make sure to use unsalted butter if you want more control over the saltiness, though salted butter works well too, especially if you enjoy a sweet and salty contrast with the peanut butter.
PEANUT BUTTER: This is the star of the show! I highly recommend using a creamy, processed peanut butter like Jif or Skippy for the filling. These types of peanut butter are stable and contribute to the smooth, consistent texture of the mousse. While you *can* use crunchy peanut butter for added texture, or even natural peanut butter, be aware that natural peanut butter might result in a slightly less firm filling due to its oil separation. If using natural, stir it very well before measuring.
HEAVY CREAM: This is what gives the filling its incredibly light, airy, and fluffy texture. It’s crucial that your heavy cream is very cold. Cold cream whips up faster and achieves better volume, resulting in a stable and delightful mousse. Don’t substitute with half-and-half or milk, as they lack the fat content needed for whipping.
CREAM CHEESE: Use full-fat, block-style cream cheese, and ensure it is significantly softened to room temperature. This is vital for achieving a smooth, lump-free filling. Softened cream cheese blends seamlessly with the peanut butter and confectioners sugar, contributing to the pie’s rich, tangy balance and creamy structure.
CONFECTIONERS SUGAR: Also known as powdered sugar, this fine sugar is used to sweeten the pie filling. Its fine texture dissolves easily, ensuring a silky-smooth consistency without any graininess, which granulated sugar would cause. It also helps to stabilize the whipped cream and cream cheese mixture.
VANILLA EXTRACT: A dash of pure vanilla extract enhances all the other flavors, adding a subtle warmth and complexity that rounds out the richness of the peanut butter.
PEANUTS: Used as a delightful garnish, chopped peanuts add a wonderful textural contrast and an extra burst of nutty flavor to the top of the pie. Feel free to use roasted, salted, or unsalted, depending on your preference.
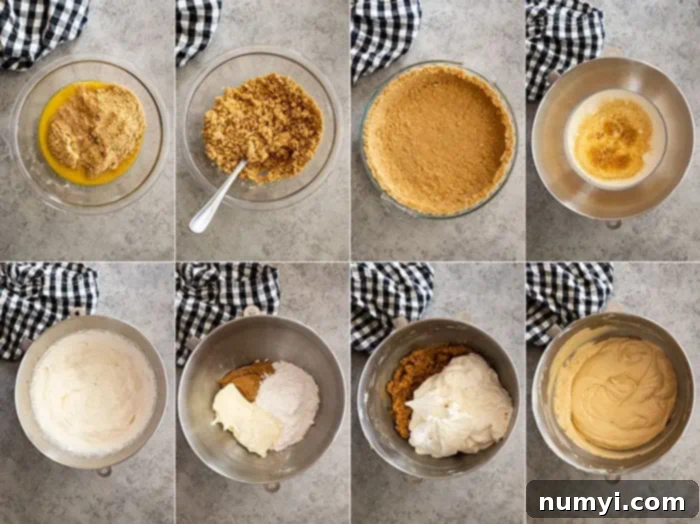
How To Make This Dreamy Peanut Butter Pie Step-by-Step
Creating this decadent peanut butter pie is straightforward. Just follow these detailed steps for a perfect result:
Pie Crust: The Crunchy Foundation
- Prepare Your Oven: Preheat your oven to 375 degrees F (190 degrees C). This ensures your crust bakes evenly to a perfect golden crisp.
- Crush the Cookies: Place your peanut butter cookies (Nutter Butters work best!) into a food processor and pulse until they form fine, even crumbs. If you don’t have a food processor, you can place them in a zip-top bag and crush them with a rolling pin or the bottom of a heavy glass.
- Mix and Press: In a medium bowl, combine the fine cookie crumbs with the melted butter. Mix well until all crumbs are moistened. Press this mixture firmly and evenly into a 9-inch deep-dish pie plate. You can use the bottom of a measuring cup or your fingers to create a smooth, compact layer, pressing it up the sides as well.
- Bake to Perfection: Bake the crust in the preheated oven for exactly 10 minutes. This slight bake helps to set the crust and deepen its flavor.
- Cool Completely: Remove the crust from the oven and let it cool completely on a wire rack before adding the filling. A warm crust will melt the filling, so patience is key here!
Peanut Butter Filling: The Fluffy Cloud of Flavor
- Whip the Cream: In the clean, chilled bowl of a stand mixer (or using a hand mixer), combine the very cold heavy cream and vanilla extract. Whip on high speed until soft peaks form. Soft peaks hold their shape but curl over slightly at the tip when the beater is lifted. Be careful not to over-whip, or it will become grainy. Gently set this whipped cream aside.
- Cream the Base: In a separate large bowl, combine the softened cream cheese, creamy peanut butter, and confectioners sugar. Using an electric mixer, beat these ingredients together on medium to high speed until they are thoroughly combined, smooth, and lump-free. Scrape down the sides of the bowl as needed to ensure everything is incorporated.
- Combine for Fluffiness: Gently fold the reserved whipped cream into the peanut butter and cream cheese mixture. Use a spatula and fold until just combined and smooth. Be careful not to overmix, as this will deflate the airy texture of the whipped cream. The goal is a light, mousse-like consistency.
- Fill the Crust: Pour the luscious peanut butter filling into your completely cooled pie crust. Spread it evenly with a spatula.
- Chill for Setting: Refrigerate the pie for at least 3 hours. This crucial chilling time allows the filling to firm up and set properly, making it easy to slice and ensuring its creamy, stable texture. For best results, an overnight chill is even better.
- Garnish and Serve: Once chilled, garnish your pie with chopped peanuts, chocolate shavings, or mini peanut butter cups just before serving. Slice and enjoy this incredibly easy and creamy peanut butter pie!
Frequently Asked Questions About Peanut Butter Pie
This peanut butter pie is wonderfully freezer-friendly! To freeze, first place the uncovered pie in the freezer for 2-3 hours, or until it’s completely solid. This step prevents the plastic wrap from sticking to the delicate filling. Once frozen solid, wrap the pie tightly in plastic wrap, followed by a layer of heavy-duty aluminum foil. Label with the date and freeze for up to 3 months. To thaw, simply transfer the wrapped pie to the refrigerator overnight. It will be ready to serve the next day. Remember, if you plan to freeze the pie, it’s best to leave off any fresh or delicate toppings until serving.
Proper storage is key to keeping your peanut butter pie fresh and delicious. Store the pie covered tightly with plastic wrap or in an airtight pie carrier in the refrigerator for up to 3 days. Ensure it’s well-covered to prevent it from absorbing any odors from other foods in your fridge and to maintain its creamy texture.
Absolutely! While this is a peanut butter pie, you can certainly experiment with other nut butters for a delightful variation. Almond butter, cashew butter, or even a sunflower seed butter (for a nut-free option) can work beautifully. If you choose a different nut butter, consider pairing it with a complementary crust, such as a classic graham cracker or an Oreo crust, rather than a peanut butter cookie crust, to avoid an overwhelming flavor or mismatched textures.
Yes, for an entirely no-bake peanut butter pie, you can skip baking the crust! Simply mix the crushed cookies with melted butter and press into the pie plate as directed. Then, instead of baking, chill the crust in the refrigerator for at least 30 minutes (or in the freezer for 15 minutes) to firm up before adding the filling. This makes the recipe even quicker and perfect for hot weather!
There are a few common reasons why your filling might not set. The most frequent culprit is not whipping the heavy cream to firm enough peaks, or overmixing it until it becomes deflated. Another reason could be using cream cheese that wasn’t softened enough, leading to lumps, or not using full-fat cream cheese which provides the necessary structure. Lastly, insufficient chilling time is a major factor. Make sure the pie chills for the full recommended 3 hours, or even longer (up to overnight) for optimal firmness.
Delicious Variations to Customize Your Pie
This easy peanut butter pie recipe is incredibly versatile! Feel free to get creative and customize it with these delicious variations:
CRUST OPTIONS: While the peanut butter cookie crust is fantastic, don’t hesitate to try other bases for a different flavor profile:
- Graham Cracker Crust: A classic choice that offers a sweet, buttery counterpoint to the peanut butter.
- Oreo Crust: For chocolate and peanut butter lovers, an Oreo crust creates an unforgettable flavor combination. Crush whole Oreos (creme and all) and mix with melted butter.
- Regular Pie Crust: A traditional butter pie crust can also be used for a more classic, flaky texture. Just be sure to pre-bake it until golden.
FABULOUS TOPPINGS: The sky’s the limit when it comes to garnishing your pie! A beautiful topping not only adds visual appeal but also enhances the flavor and texture:
- Chopped Peanuts: A simple and effective way to add crunch and extra peanut flavor.
- Melted Peanut Butter Drizzle: Warm a little peanut butter until drizzly and artfully swirl it over the top.
- Salted Caramel Sauce: A drizzle of rich salted caramel creates a luxurious sweet and salty dynamic.
- Chocolate Chips or Shavings: Mini chocolate chips, chocolate curls, or a generous sprinkle of shaved chocolate are always a good idea.
- Peanut Butter Chips: For an extra boost of peanut butter goodness.
- Chopped Peanut Butter Cups: Miniature or chopped full-sized peanut butter cups make for an ultimate indulgence.
- Hot Fudge Sauce: A warm or chilled drizzle of hot fudge takes this pie to another level of decadence.
- Whipped Cream: A dollop of extra whipped cream is a classic and delightful addition.
You can also stir in some chopped treats directly into the peanut butter filling before pouring it into the crust. Consider adding chopped peanut butter cups, chocolate chips, peanut butter chips, or even chopped Snickers bars for an even richer, more textured filling!
HUNGRY FOR MORE? Don’t miss out on more delicious recipes and baking tips! Subscribe to my newsletter and follow along on Pinterest, Facebook, and Instagram for all my latest updates and culinary adventures!
Peanut Butter Pie
8
Malinda Linnebur
Save Recipe
Saved!
30 minutes
3 hours
3 hours 30 minutes
Prevent your screen from going dark
Ingredients
CRUST:
-
2 cups (230g) crushed peanut butter cookies (nutter butters) -
4 tablespoons butter, melted
PEANUT BUTTER FILLING:
-
2 cups (475ml) heavy whipping cream -
1 teaspoon vanilla -
1¼ cups (325g) peanut butter -
1 (8oz) (226g) package cream cheese, very soft -
1 cup (120g) confectioners sugar
Instructions
CRUST:
-
Preheat oven to 375°F (190°C).
-
Process the peanut butter cookies until fine crumbs are formed. In a bowl, combine the crumbs with the melted butter. Press this mixture firmly into a 9-inch deep dish pie plate. Use a measuring cup or your hands to create a smooth and even layer. Bake for 10 minutes, then cool completely on a wire rack before proceeding.
PEANUT BUTTER FILLING:
-
In the bowl of a stand mixer (or using a hand mixer), whip the very cold heavy cream and vanilla extract until soft peaks form. Set aside.
-
In a separate large bowl, combine the peanut butter, very soft cream cheese, and confectioners sugar. Beat at medium to high speed until the mixture is well combined, smooth, and lump-free. Gently fold in the whipped cream until just combined and smooth. Pour the filling into the cooled pie crust and spread evenly. Refrigerate for at least 3 hours (preferably overnight) to allow the filling to set completely. Garnish as desired before serving.
Notes
- FREEZER FRIENDLY: To freeze, place the pie uncovered in the freezer for 3 hours until solid. Then, wrap tightly in plastic wrap and then in heavy-duty foil. Freeze for up to 3 months. Thaw overnight in the refrigerator before serving. Leave off any fresh or delicate toppings if freezing.
- PRO TIP FOR CREAM CHEESE: Ensure your cream cheese is very soft! Take it out of the refrigerator at least 1-2 hours before you start, or microwave it for 15-30 seconds on low power to soften it quickly. This prevents lumps in your filling.
- WHIPPING CREAM: For best results, use a chilled bowl and beaters when whipping heavy cream. This helps the cream whip up faster and achieve maximum volume and stability.
Nutrition
Did you make this?
Let me know by sharing a picture and tagging @countryside_cravings on Instagram
