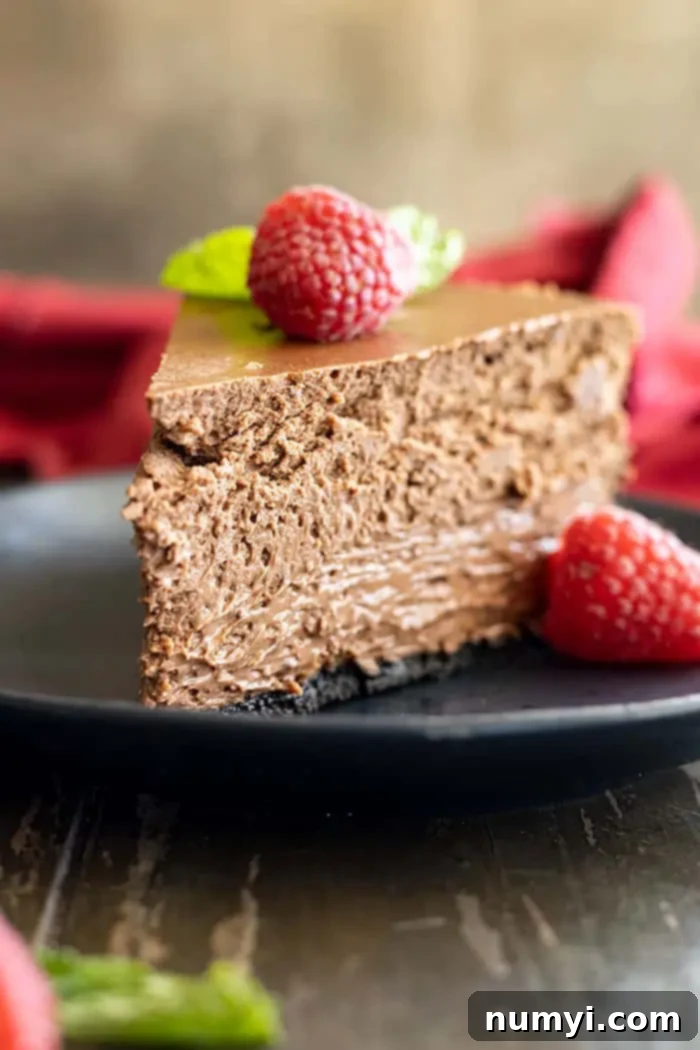
Decadent Homemade Chocolate Cheesecake with Oreo Crust: The Ultimate Guide
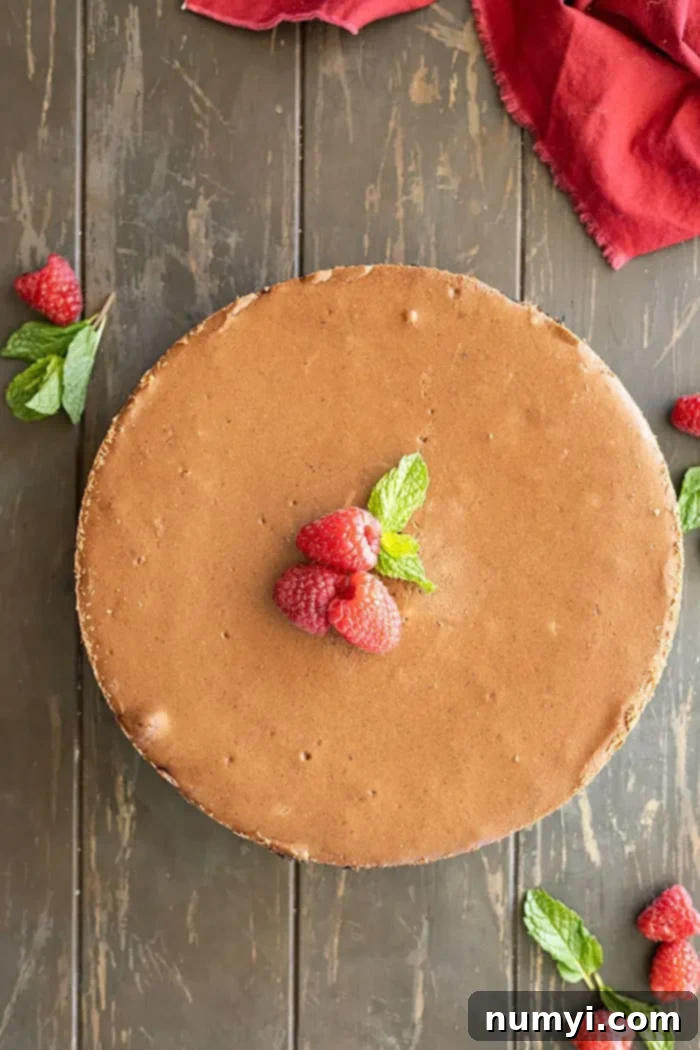
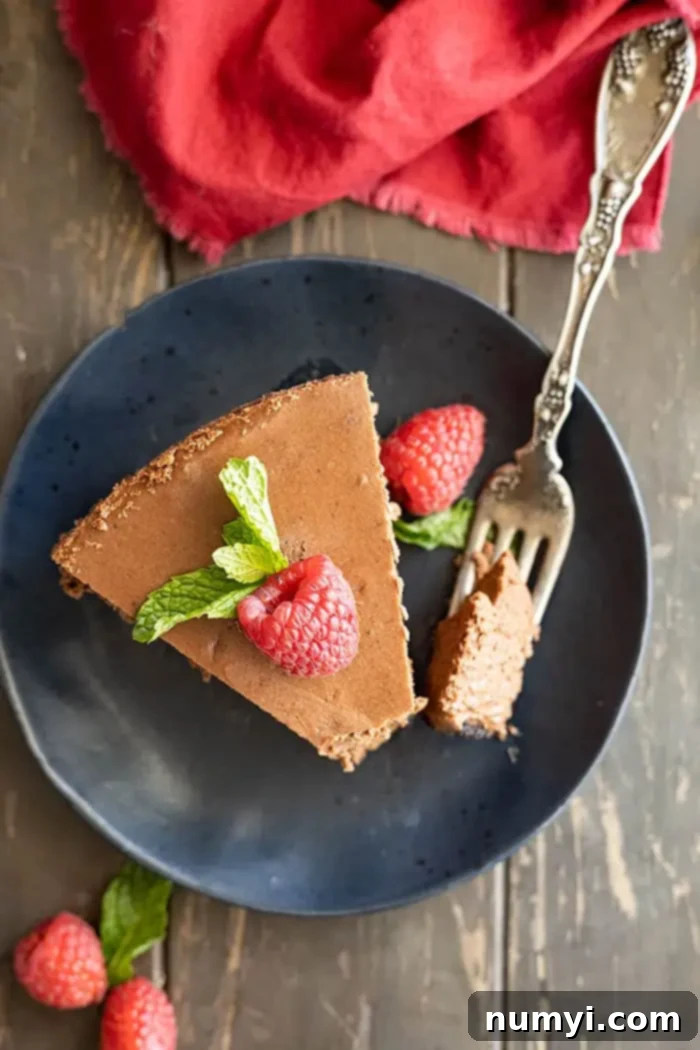
Prepare to be amazed by this incredibly rich, smooth, and deeply satisfying chocolate cheesecake. Featuring a crunchy Oreo crust and a velvety thick chocolate filling, it’s truly a chocolate lover’s dream come true – perfect for any occasion!
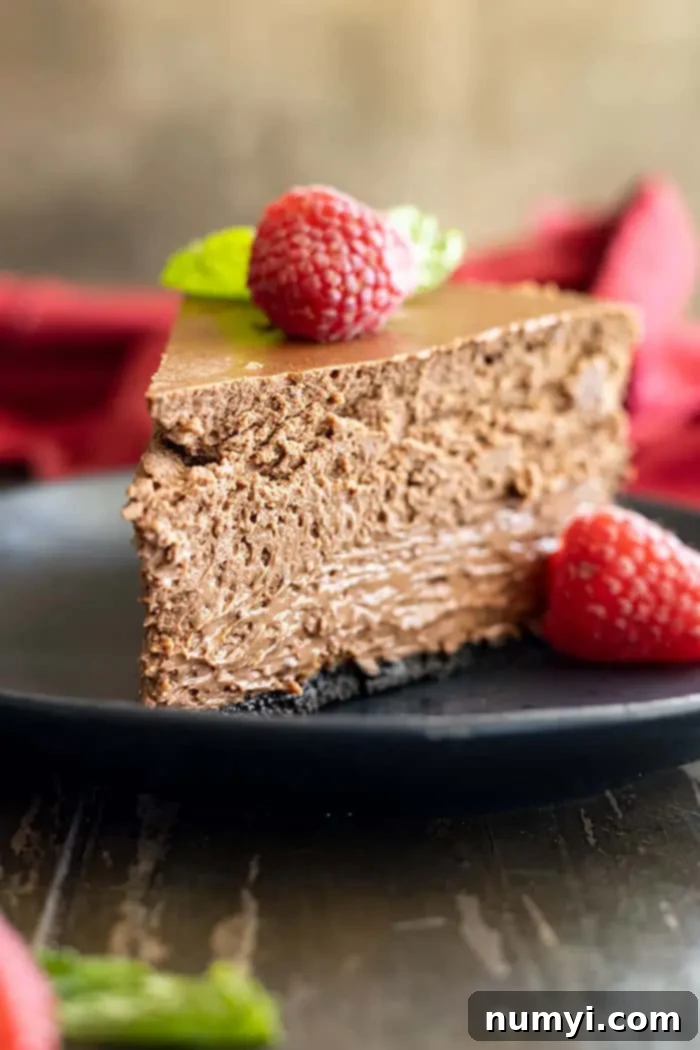
Indulge in the Ultimate Chocolate Cheesecake Experience
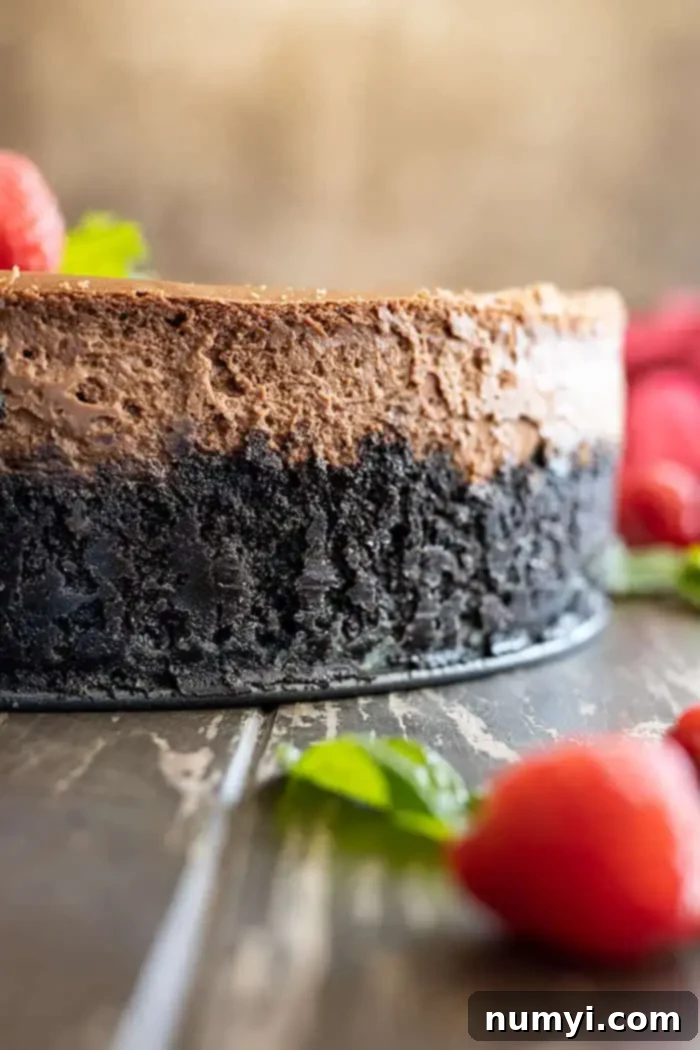
For those who find vanilla cheesecake a tad too simple, get ready to elevate your dessert game with this phenomenal chocolate cheesecake recipe. This isn’t just any chocolate cheesecake; it’s bursting with an intense chocolate flavor, complemented by a perfectly sweet and crumbly Oreo cookie crust. We promise it will delight even the most discerning chocolate enthusiasts.
Despite its luxurious taste and appearance, this dessert is surprisingly straightforward to prepare. You’ll bake the simple Oreo crust while you effortlessly whip up the rich chocolate filling. Then, it’s baked gently in a water bath until it sets into a creamy, dreamy masterpiece. A little foresight is required – this indulgent dessert needs to chill in the refrigerator for at least 6 hours (or ideally, overnight) to achieve its signature firm, yet silky texture. But trust us, every moment of waiting is absolutely worth it for that first incredible bite!
If your chocolate cravings extend beyond cheesecake, you absolutely must try our Fudge Banana Cake. It’s incredibly easy to make and features delightful pockets of warm fudge throughout. Pure bliss! Or, if you’re a pie connoisseur, our popular Chocolate Meringue Pie offers another fantastic way to get your chocolate fix.
Why This Chocolate Cheesecake Recipe Will Become Your Favorite
There are countless reasons to adore this homemade chocolate cheesecake. It’s designed to be both simple to execute and spectacularly delicious, making it a staple for any home baker.
- Unrivaled Rich Chocolate Flavor: This cheesecake is packed with such deep chocolate intensity that you won’t even need an extra ganache topping (though you certainly could add one if you desire!). The combination of quality bittersweet chocolate and cocoa powder ensures a profoundly satisfying flavor.
- Simple, Accessible Ingredients: You won’t need to hunt for exotic items. All the ingredients for this recipe are readily available at your local grocery store, making it easy to whip up whenever a craving strikes.
- Perfectly Freezer-Friendly: Planning ahead for a party or just want to have a slice of heaven on standby? This cheesecake freezes beautifully, allowing you to prepare it in advance and enjoy it whenever you wish.
- Creamy and Silky Smooth Texture: Thanks to the careful balance of ingredients and the magic of a water bath, this cheesecake boasts an unbelievably smooth and luxurious texture that melts in your mouth. Say goodbye to dry, crumbly cheesecakes!
- Ideal for Any Celebration: Whether it’s a holiday gathering, a birthday, or just a special weeknight treat, this generous 9-inch cheesecake comfortably serves 16 people, making it perfect for sharing.
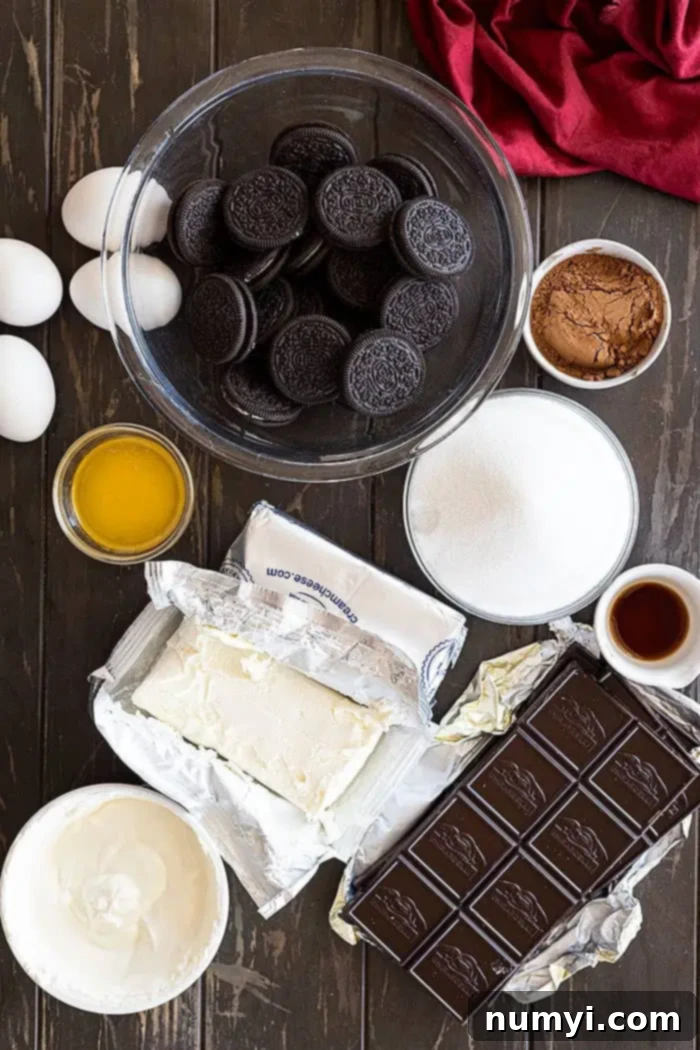
Essential Ingredients for Your Double Chocolate Cheesecake
Crafting the perfect chocolate cheesecake starts with understanding the role of each key ingredient. Here’s a closer look at what you’ll need and why it matters:
- OREOS & BUTTER (for the Crust): The foundation of this cheesecake is its iconic Oreo crust. Crushed Oreos provide a wonderful chocolatey base with a satisfying crunch. Melted butter binds the crumbs together, ensuring a firm, sliceable crust. A pinch of salt is highly recommended to enhance both the sweetness of the cookies and the depth of the chocolate, creating that irresistible sweet and salty contrast. Feel free to omit if you prefer a purely sweet crust.
- BITTERSWEET CHOCOLATE (for the Filling): This is where the magic happens! For an truly exceptional chocolate cheesecake, it is absolutely critical to use high-quality bittersweet chocolate bars, like Ghirardelli or Lindt, and not chocolate chips. Chocolate chips contain stabilizers that prevent them from melting smoothly and also lack the profound flavor profile that bar chocolate offers. Bittersweet chocolate provides a deep, complex chocolate taste that is balanced by the sugar in the recipe, preventing it from being overly sweet.
- CREAM CHEESE: The backbone of any great cheesecake! Always opt for full-fat, block-style cream cheese. Cream cheese found in tubs has a higher water content and added stabilizers that can drastically alter the texture of your cheesecake, leading to a less creamy and potentially runny result. Similarly, reduced-fat cream cheese will compromise the luxurious texture we’re aiming for. Ensure it’s at room temperature for a lump-free, perfectly smooth batter.
- SOUR CREAM: The unsung hero! Adding sour cream to the chocolate cheesecake filling serves a couple of crucial purposes. It introduces a subtle tang that beautifully complements the richness of the chocolate, preventing the cheesecake from tasting heavy. More importantly, it helps to lighten the texture, making the filling wonderfully creamy and less dense than it would be otherwise. Like the cream cheese, ensure it’s at room temperature.
- SUGAR: Regular granulated sugar is used to sweeten this decadent dessert. It not only provides sweetness but also contributes to the cheesecake’s structure and helps achieve that desirable smooth texture.
- COCOA POWDER & VANILLA: These ingredients work in harmony to amplify and deepen the chocolate flavor, transforming a mere “chocolate cheesecake” into a “double chocolate cheesecake.” Cocoa powder intensifies the dark chocolate notes, while vanilla extract rounds out the flavors, adding warmth and complexity.
- EGGS: Eggs are essential for binding all the ingredients together, providing structure and stability to the cheesecake as it bakes. They are also key contributors to the cheesecake’s fluffy yet silky-smooth texture, ensuring it sets beautifully without being rubbery. Ensure your eggs are at room temperature for optimal incorporation into the batter.
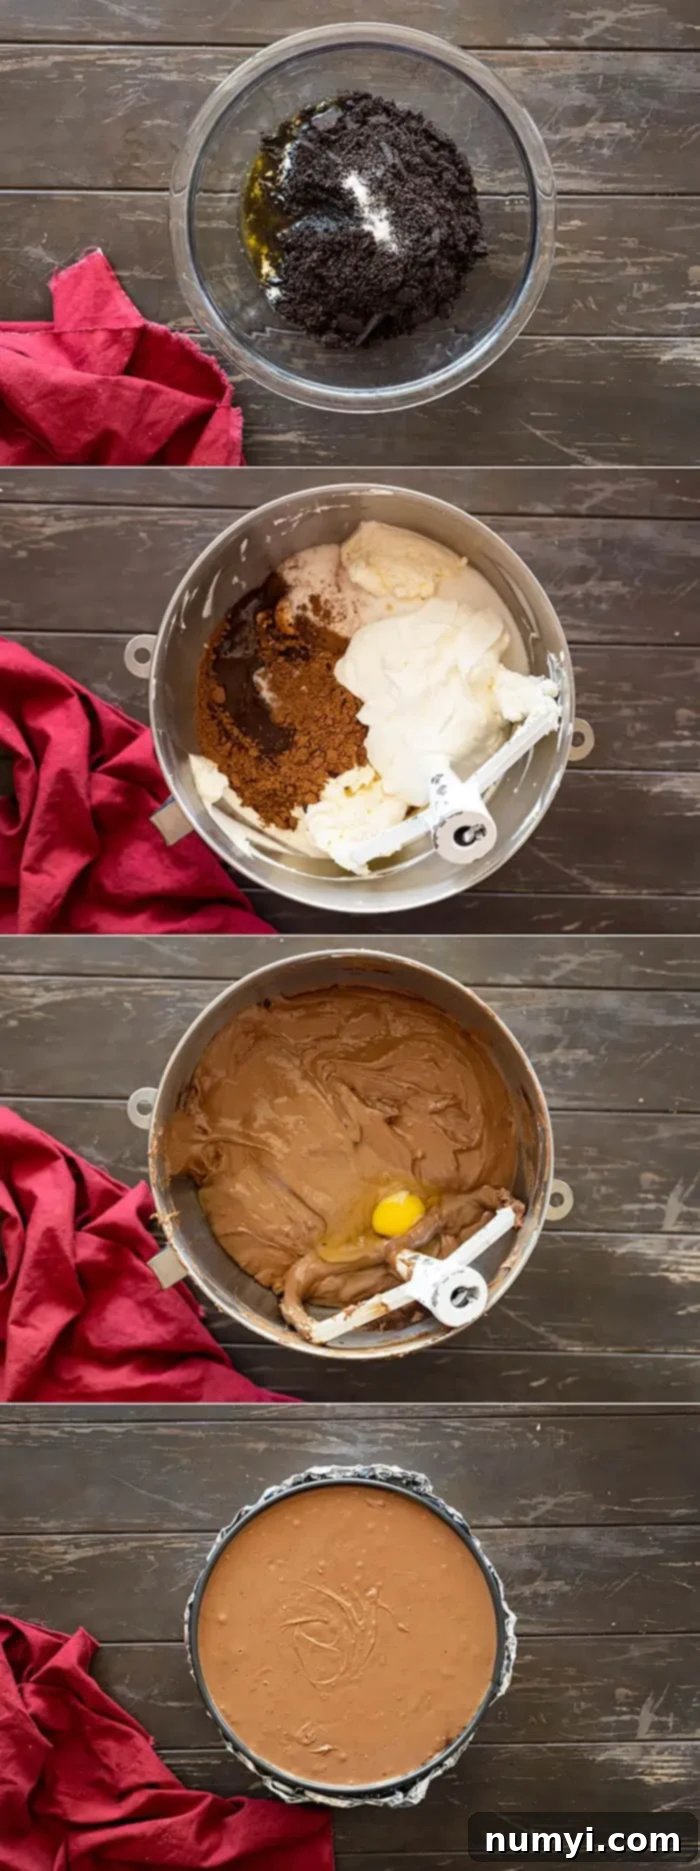
Step-by-Step Instructions: Creating Your Chocolate Cheesecake with Oreo Crust
Follow these detailed steps to ensure a flawless, delicious chocolate cheesecake every time. Remember, precision and patience are your best friends in cheesecake baking!
CRUST:
- PREPARE FOR BAKING: Begin by preheating your oven to 350°F (175°C). It’s crucial to prepare your springform pan properly to prevent water from entering the crust during the water bath. Wrap the entire outside of a 9-inch springform pan snugly with two layers of heavy-duty aluminum foil. Make sure the foil extends all the way up the sides to create a watertight barrier. Set this prepared pan aside.
- MAKE THE CRUST: In a medium bowl, combine the finely crushed Oreo crumbs, melted butter, and a pinch of salt (if using). Stir until the crumbs are thoroughly moistened and evenly coated. Press this mixture firmly into the bottom of the prepared springform pan and extend it about halfway up the sides. Packing it tightly is key to a sturdy crust that won’t crumble when sliced. Bake in the preheated oven for 10 minutes. This helps to set the crust and prevent it from becoming soggy.
CHEESECAKE FILLING:
- MELT THE CHOCOLATE: In a medium, heatproof bowl, melt the chopped bittersweet chocolate. You can do this over a double boiler (a bowl set over a saucepan of simmering water, ensuring the water doesn’t touch the bottom of the bowl) or carefully in the microwave. If using the microwave, heat in short intervals of 20-30 seconds, stirring well after each interval, until the chocolate is completely smooth and lump-free. Be careful not to overheat it.
- MIX THE CHOCOLATE CHEESECAKE FILLING: In the bowl of a stand mixer fitted with the paddle attachment (or using a hand mixer), combine the room temperature cream cheese, melted chocolate, granulated sugar, cocoa powder, room temperature sour cream, and vanilla extract. Beat on medium-low speed until the mixture is completely smooth and creamy. This step might take a few minutes. Make sure to stop frequently and scrape down the sides and bottom of the bowl with a rubber spatula to ensure all ingredients are thoroughly incorporated and there are no lumps of cream cheese remaining.
- ADD THE EGGS: With the mixer still on low speed, add the eggs one at a time. Mix each egg just until it is combined with the batter. Avoid overmixing once the eggs are added, as this can incorporate too much air, which can lead to cracks in your cheesecake. Scrape the sides of the bowl often, even during this step, to ensure even mixing.
- ASSEMBLE AND BAKE: Carefully pour the rich chocolate filling into the pre-baked Oreo crust in the springform pan. Now, prepare your water bath: Place the springform pan inside a larger roasting pan. Carefully slide the roasting pan (with the cheesecake inside) into the preheated oven. Once in the oven, carefully pour hot water into the roasting pan until it comes about halfway up the sides of the springform pan. This method prevents splashing and makes it easier to move. Bake for 70 minutes.
- COOL GRADUALLY: Once the baking time is complete, turn off the oven but do not remove the cheesecake. Crack the oven door open slightly and leave the cheesecake inside for 1 hour. This gradual cooling process is vital for preventing cracks in the cheesecake’s surface due to sudden temperature changes.
- CHILL COMPLETELY: After 1 hour in the cooling oven, carefully remove the roasting pan from the oven and transfer the springform pan to a wire rack. Allow the cheesecake to cool completely at room temperature for at least 2 hours. Once it has reached room temperature, transfer the chocolate cheesecake with its Oreo crust to the refrigerator to finish chilling for a minimum of 6 hours, or ideally, overnight. Complete chilling is essential for the cheesecake to firm up properly and achieve its perfect texture.
- SERVE: Once thoroughly chilled, gently run a thin, sharp knife around the edge of the springform pan before releasing the outer ring. Slice into 16 generous portions and serve. Garnish with fresh raspberries or a dusting of cocoa powder if desired.
Frequently Asked Questions About Chocolate Cheesecake
The short answer is an emphatic YES! A water bath is absolutely crucial for baking cheesecake, especially this rich chocolate version. I have attempted countless times to bake cheesecakes without one, and they inevitably crack and lack the signature creamy, silky texture that makes cheesecake so irresistible. The dry heat of a hot oven can cause the edges of the cheesecake to bake faster and dry out, leading to cracks as the center continues to cook and expand. A water bath creates a humid environment within the oven, ensuring the cheesecake bakes slowly and evenly, resulting in a perfectly smooth, crack-free, and sumptuously creamy dessert. It’s a small extra step that makes a world of difference.
Yes, this chocolate cheesecake is wonderfully freezer-friendly, making it an excellent dessert to prepare in advance! To freeze, first allow the cheesecake to cool completely at room temperature, then remove the outer ring of the springform pan. For best results and to prevent freezer burn, wrap the entire cheesecake (or individual slices) in a couple of layers of plastic wrap, ensuring it’s sealed tightly. Then, wrap it again in a layer of heavy-duty aluminum foil. Label with the date. It can be frozen for up to 3 months. To thaw, simply transfer the wrapped cheesecake to the refrigerator overnight. Once thawed, it will be as delicious as freshly baked!
Once baked and fully chilled, this decadent chocolate cheesecake will keep beautifully in the refrigerator for up to 10 days. To maintain its freshness and prevent it from absorbing other odors, ensure it is tightly wrapped in plastic wrap or stored in an airtight container. If you are planning to make this chocolate cheesecake recipe ahead of a special occasion or holiday, we recommend preparing it no more than 1 to 2 days before you intend to serve it for optimal freshness and taste.
Mastering the Water Bath for Perfect Cheesecake
Using a water bath (also known as a bain-marie) is the secret to a creamy, crack-free cheesecake. Here’s how to set it up correctly:
If you’re using a springform pan (which is highly recommended for cheesecake), it is absolutely essential to wrap the outside of the pan with heavy-duty aluminum foil. Use at least two layers, ensuring there are no gaps for water to seep in. Water leaking into your cheesecake will result in a soggy crust and a ruined dessert. Wrap it tightly from the bottom all the way up the sides.
While you are preparing your cheesecake filling, bring a pot of water to a boil on the stovetop. This ensures you have hot water ready. Once your cheesecake is assembled in its foil-wrapped springform pan, place it into a larger roasting pan. Choose a roasting pan that is tall enough (or almost as tall as your springform pan) and leaves at least 1.5 inches of space around the outside of the cheesecake. This allows for even heat distribution.
Carefully transfer the roasting pan (with the cheesecake inside) to the oven. Once it’s securely on the oven rack, carefully pour the hot, boiled water into the roasting pan. Pour enough water so that it comes at least halfway up the side of your springform pan. I find it much easier and safer to place the roasting pan in the oven first before adding the hot water, as it prevents you from having to carry a heavy pan full of hot water and cheesecake.
Easy Chocolate Cheesecake Recipe: Pro Tips for Success
Achieve cheesecake perfection with these invaluable tips and tricks:
- Ensure All Ingredients Are at Room Temperature: This is a golden rule for cheesecake baking! Room temperature cream cheese, sour cream, and eggs emulsify much more easily, resulting in a perfectly smooth, lump-free batter. Cold ingredients will lead to lumps and an overmixed batter trying to get them smooth.
- Scrape the Sides and Bottom of the Mixing Bowl Often: During every stage of mixing, make it a habit to stop your mixer and thoroughly scrape down the bowl. This ensures that all ingredients are fully incorporated, preventing pockets of unmixed cream cheese or sugar, and guaranteeing an evenly textured cheesecake.
- Mix on Low Speed – Always: When preparing the cheesecake filling, resist the urge to crank up the mixer speed. Using the lowest speed possible on your mixer is critical. High speeds incorporate too much air into the batter, which can cause the cheesecake to puff up excessively during baking and then collapse and crack as it cools.
- Alternative Water Bath Setup (If You Lack a Roasting Pan): If you don’t have a roasting pan large enough for a water bath, don’t despair! You can still create a humid baking environment. Simply place any large, oven-safe pan filled with hot water on the oven rack directly below your cheesecake. While not as effective as a direct water bath, it will significantly help with humidity.
- Avoid Sudden Temperature Changes: Cheesecakes are sensitive to abrupt changes in temperature, which often lead to cracks. Once your chocolate cheesecake is done baking, do not remove it from the oven immediately. Instead, turn off the oven completely and slightly crack the door open. Let the cheesecake cool down slowly inside the oven for at least 1 hour. This gentle cooling prevents thermal shock and keeps your cheesecake surface smooth.
- Chill Completely Before Slicing: This step cannot be overstated for the best results! A cheesecake needs ample time to set and firm up in the refrigerator. Attempting to slice a warm or insufficiently chilled cheesecake will result in a messy, crumbly slice. For beautifully clean cuts and the perfect creamy texture, allow it to chill for a minimum of 6 hours, or ideally, overnight.
Explore More Irresistible Chocolate Dessert Recipes
If this chocolate cheesecake has sparked your love for all things chocolate, be sure to explore these other fantastic recipes from our collection:
- Chocolate Turtle Cake: A rich cake featuring pecans, caramel, and chocolate.
- Black Forest Cake: A classic combination of chocolate, cherries, and whipped cream.
- Chocolate Cream Pie: A silky, smooth, and deeply chocolatey pie.
- Frosted Brownies: Chewy, fudgy brownies topped with a decadent frosting.
Thank you for diving into this easy chocolate cheesecake recipe! I hope it brings joy to your kitchen and your taste buds. Don’t hesitate to let me know what you think – your feedback is always appreciated!
HUNGRY FOR MORE? Subscribe to my newsletter and follow along on Pinterest, Facebook, and Instagram for all my latest updates and delicious recipes!
Easy Chocolate Cheesecake
This easy-to-make Chocolate Cheesecake is rich, creamy, smooth, and big on chocolate flavor. With an Oreo crust and a thick layer of filling, it’s a chocolate lover’s dream dessert!
Servings: 16
Author: Malinda Linnebur
Save Recipe
Prep Time: 35 mins
Cook Time: 1 hr 10 mins
Chill Time: 9 hrs
Total Time: 10 hrs 45 mins
Ingredients
CRUST:
- 2 cups finely crushed Oreos
- 2 tablespoons butter, melted
- ¼ teaspoon salt (optional)
CHEESECAKE:
- 12 ounces (454g) bittersweet chocolate, chopped
- 4 (8 ounce) (226g) block style cream cheese, room temperature
- 1½ cups (335g) granulated sugar
- ¼ cup (25g) cocoa powder
- ¾ cup (180g) sour cream, room temperature
- 1½ teaspoon vanilla extract
- 4 large eggs, room temperature
Instructions
CRUST:
- Preheat oven to 350°F (175°C). Wrap a 9-inch springform pan with heavy-duty foil to prevent water from leaking into the cheesecake; set aside.
- In a medium bowl, combine the Oreo crumbs, melted butter, and salt. Press firmly into the prepared pan and halfway up the sides. Ensure it’s packed tightly to prevent crumbling when slicing. Bake for 10 minutes.
CHEESECAKE:
- In a medium bowl, melt the chopped chocolate. This can be done over a double boiler or in the microwave in short 20-second intervals, stirring well after each, just until melted and smooth.
- In the bowl of a stand mixer fitted with the paddle attachment, mix the room temperature cream cheese, melted chocolate, granulated sugar, cocoa powder, room temperature sour cream, and vanilla extract on medium-low speed until smooth and creamy. Scrape the sides of the bowl often.
- Add the eggs one at a time, mixing on low speed just until combined. Do not overmix. Scrape the sides of the bowl frequently.
- Pour the filling into the pre-baked crust. Place a large roasting pan in the oven and set the cheesecake (in its foil-wrapped springform pan) in the middle. Carefully pour hot water into the roasting pan until it comes halfway up the springform pan. Bake for 1 hour and 10 minutes. Turn off the oven and crack the door open. DO NOT remove or disturb the cheesecake for 1 hour.
- Remove from the oven and carefully run a thin, sharp knife around the edge of the pan to loosen the cheesecake. Allow to cool for 2 hours at room temperature, then transfer to the refrigerator to chill for a minimum of 6 hours, or overnight. To serve, remove the outer ring and slice into 16 slices.
Notes
- STORAGE: Store leftover cheesecake, covered tightly, in the refrigerator for up to 10 days.
- FREEZER-FRIENDLY: Wrap the completely cooled cheesecake in plastic wrap, then in heavy-duty foil. Freeze for up to 3 months. Thaw overnight in the refrigerator before serving.
- WATER BATH ALTERNATIVE: If a large roasting pan isn’t available, place a large pan filled with water on the oven rack below the cheesecake while baking to provide humidity.
Nutrition
- Calories:
- 363kcal
- Carbohydrates:
- 50g
- Protein:
- 5g
- Fat:
- 17g
- Saturated Fat:
- 9g
- Polyunsaturated Fat:
- 1g
- Monounsaturated Fat:
- 6g
- Trans Fat:
- 0.1g
- Cholesterol:
- 58mg
- Sodium:
- 140mg
- Potassium:
- 257mg
- Fiber:
- 4g
- Sugar:
- 39g
- Vitamin A:
- 191IU
- Vitamin C:
- 0.1mg
- Calcium:
- 42mg
- Iron:
- 5mg
*Nutritional information is an estimate based on ingredients and methods, and may vary.
Did you make this? Let me know by sharing a picture and tagging @countryside_cravings on Instagram
