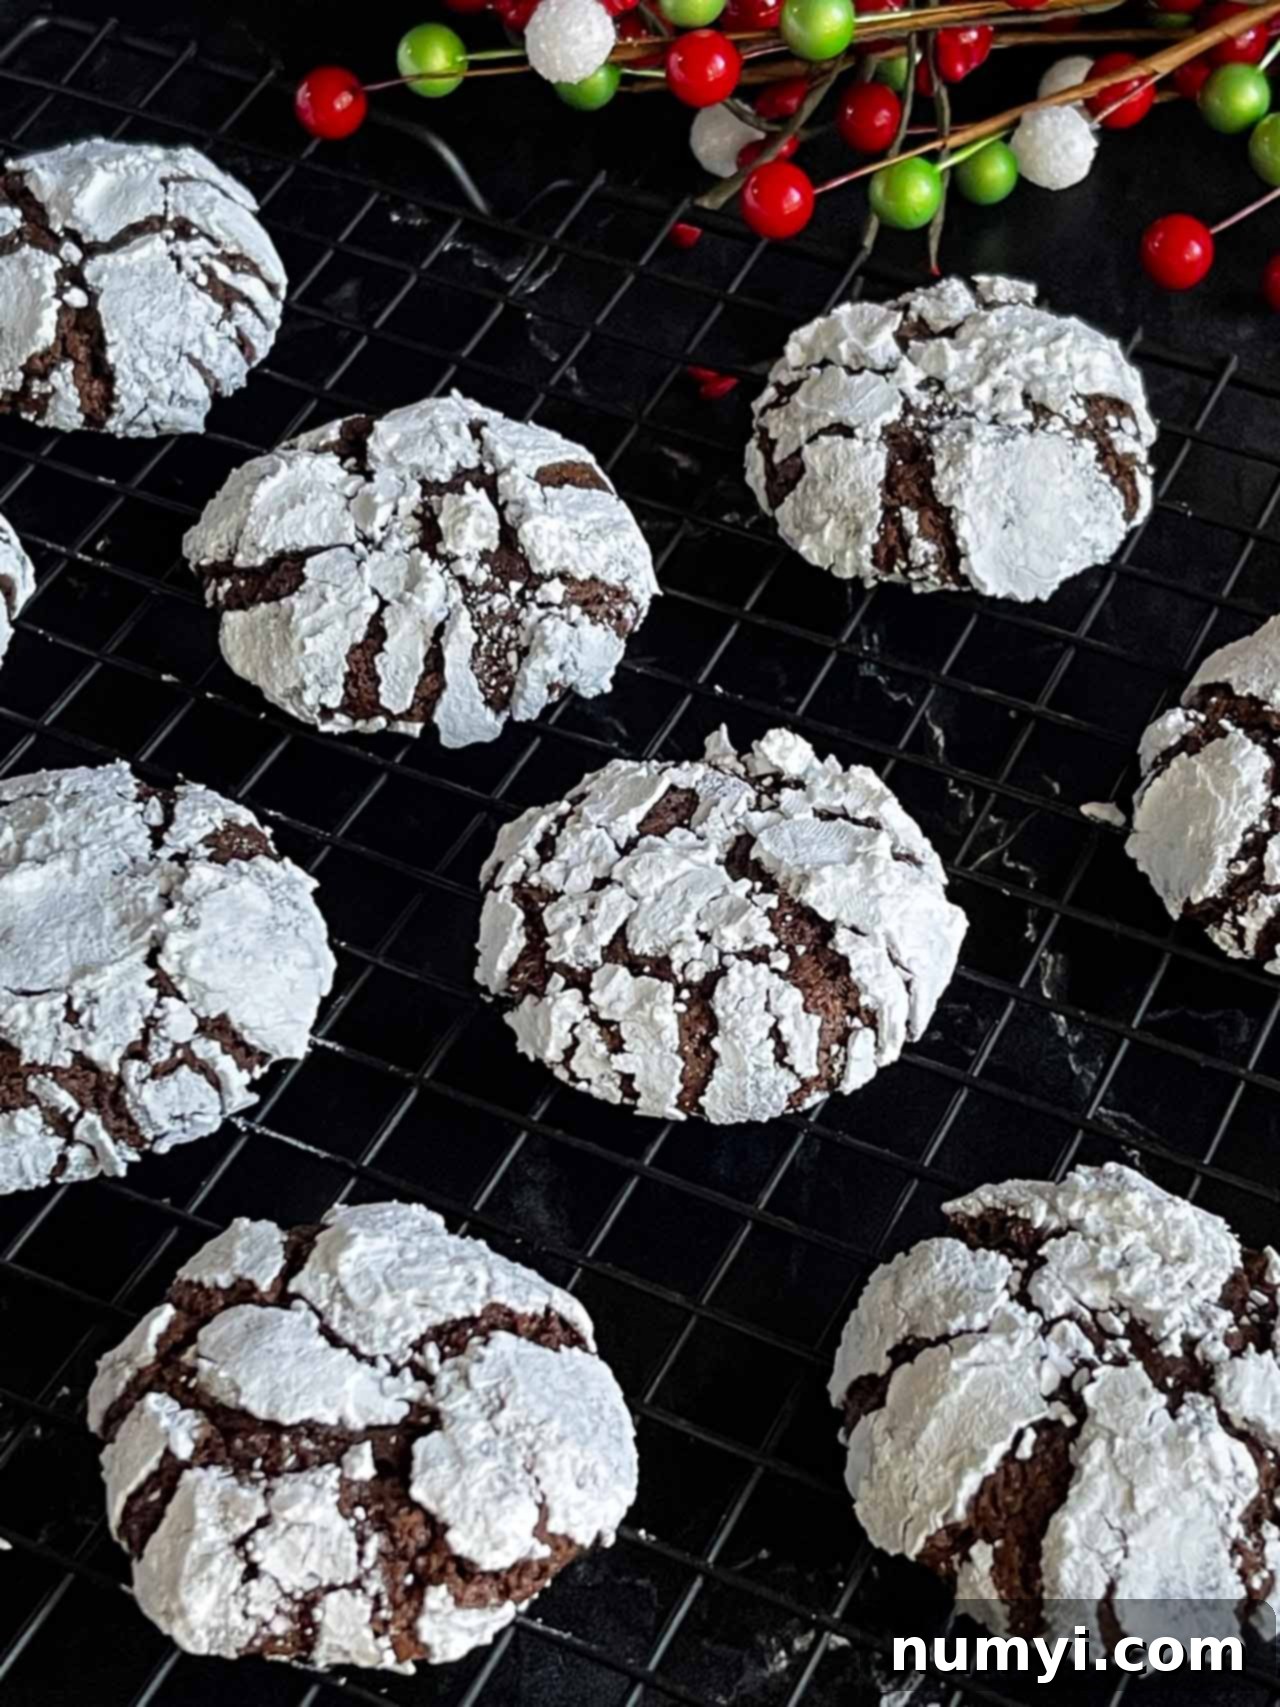
Irresistibly Fudgy Chocolate Crinkle Cookies: Your Ultimate Guide to a Holiday Classic
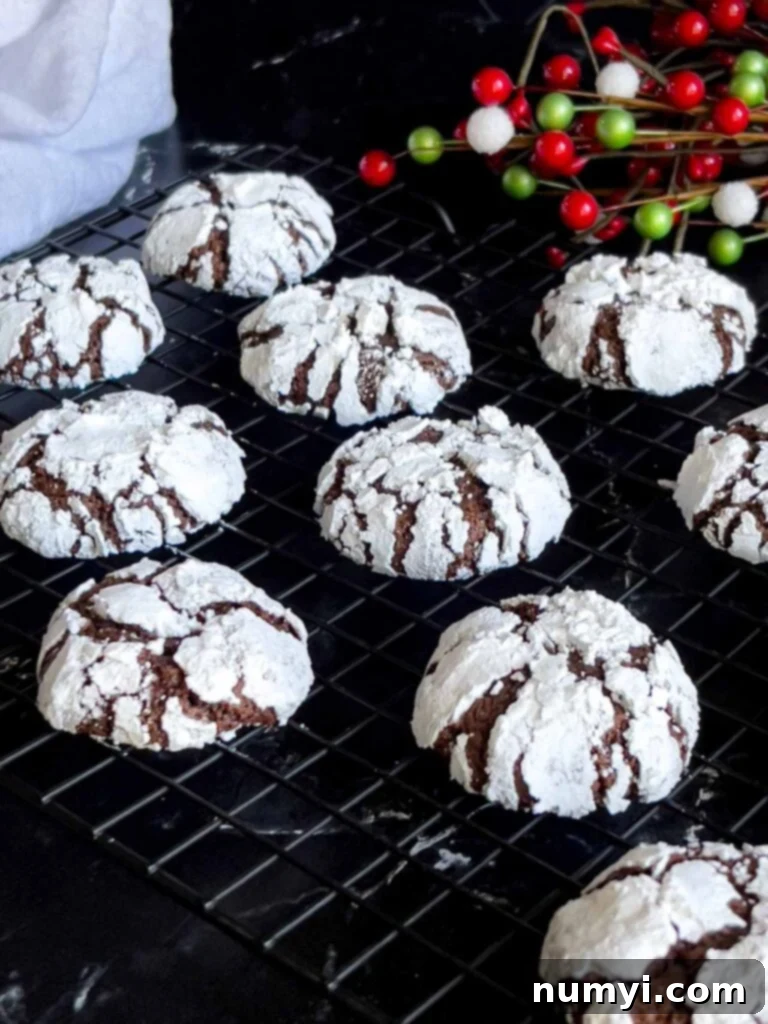
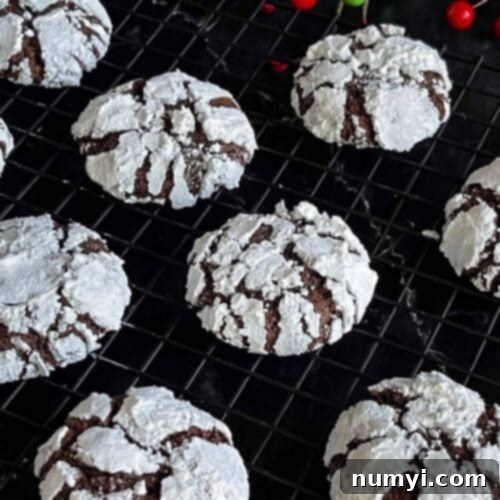
There’s something truly magical about a batch of freshly baked chocolate crinkle cookies. These timeless treats are a staple on holiday cookie trays and a cherished delight for good reason. Imagine a cookie with a luxurious, fudgy, brownie-like center perfectly complemented by a crisp outer edge and those signature snowy cracks. This recipe delivers exactly that: a soft, decadent core wrapped in a delightful crackled shell, making them absolutely perfect for festive gatherings, gifting, or simply enjoying with a warm cup of cocoa.
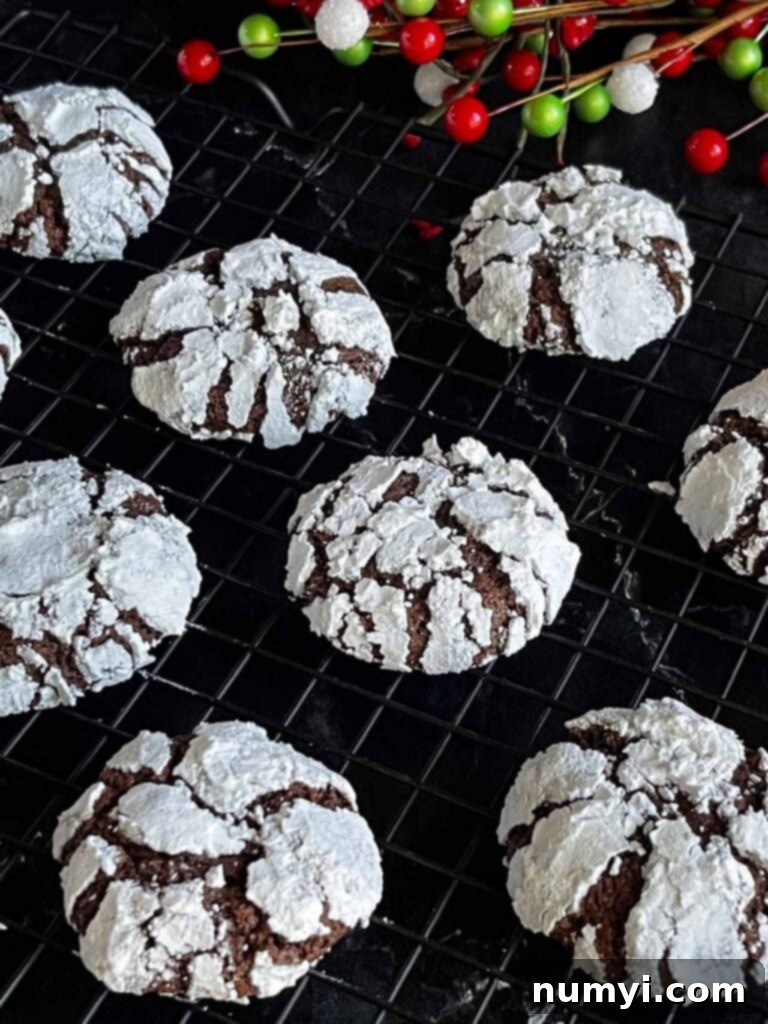
Why You’ll Fall in Love with This Chocolate Crinkle Cookie Recipe
These chocolate crinkle cookies aren’t just a treat; they’re an experience. Here’s why this recipe will quickly become a cherished part of your baking repertoire:
- Effortlessly Delicious: This is a Christmas cookie recipe that’s surprisingly easy to make and universally loved. Forget complicated steps or fancy equipment; the rich, chocolate flavor shines through with minimal fuss.
- Brownie-Like Indulgence: Each bite delivers a sensational textural contrast. The interior is wonderfully soft, moist, and fudgy – much like a perfectly baked brownie – while the exterior boasts a delicate crispness. It’s a truly decadent delight.
- The Secret to Perfect Crinkles: Achieving that iconic cracked top is simpler than you think, and this recipe has perfected the technique. The key lies in a two-stage rolling process: first in granulated sugar, followed by a generous, heavy coating of powdered sugar. The granulated sugar draws moisture from the surface, creating an ideal environment for the dough to crack beautifully as it expands during baking, revealing the dark, rich cookie beneath.
- No Special Equipment Needed: You don’t need a stand mixer or even a hand mixer to whip up these delicious cookies. A few bowls, a whisk, and a spatula are all you require, making this recipe accessible for every home baker.
- A Holiday Must-Have: These festive cookies are a visual stunner and a taste sensation, making them perfect for any holiday cookie tray or party. They stand out among other treats and are always a crowd-pleaser.
If you enjoy baking holiday cookies, you might also love some of our other favorite recipes like thumbprint cookies, cut out sugar cookies, gingerbread cookies, and our chewy snickerdoodle recipe. But for truly fudgy, deeply chocolatey goodness, these crinkle cookies are in a league of their own!
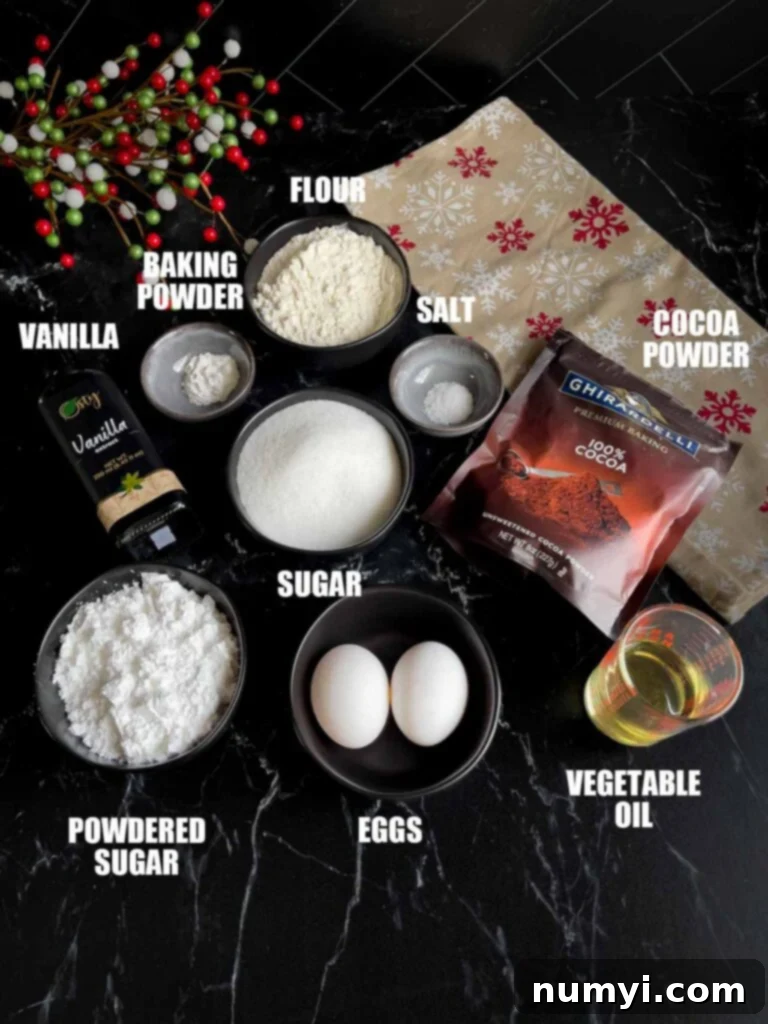
How to Make Perfect Chocolate Crinkle Cookies: A Step-by-Step Guide
During the development of this recipe, I initially struggled to get that perfect crackle effect, even though the cookies tasted absolutely scrumptious. It was a journey of trial and error, but the discovery of using granulated sugar first, then powdered sugar, was a game-changer. That simple addition was the key to unlocking the signature crinkles! Here’s how to achieve them every time:
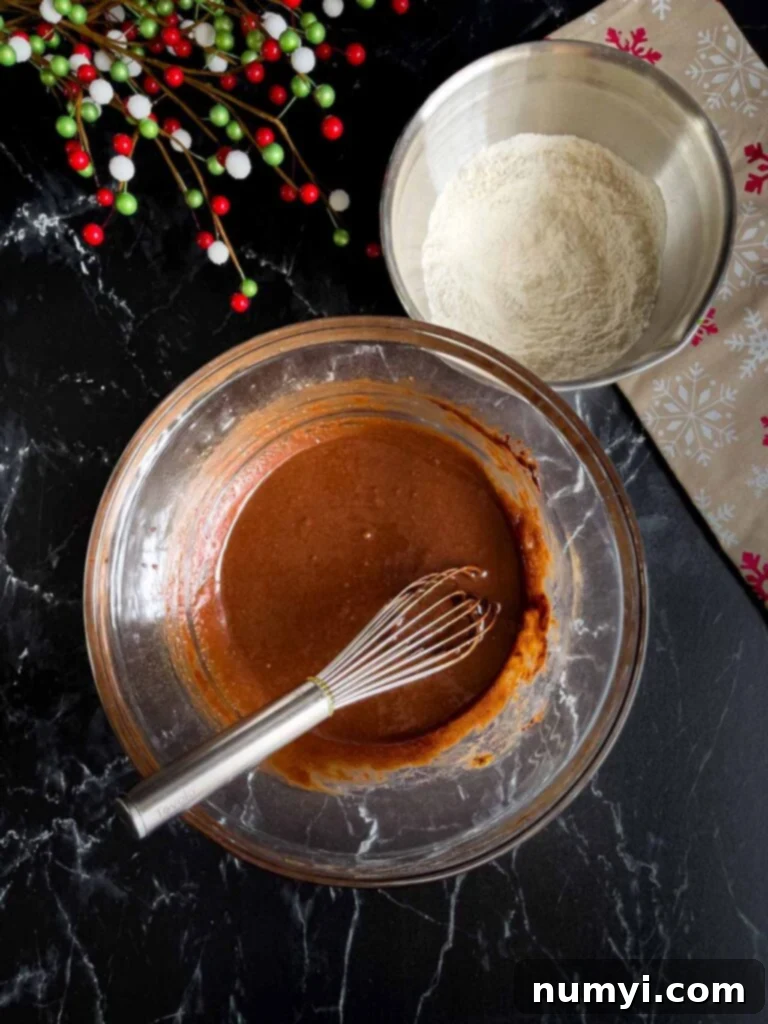
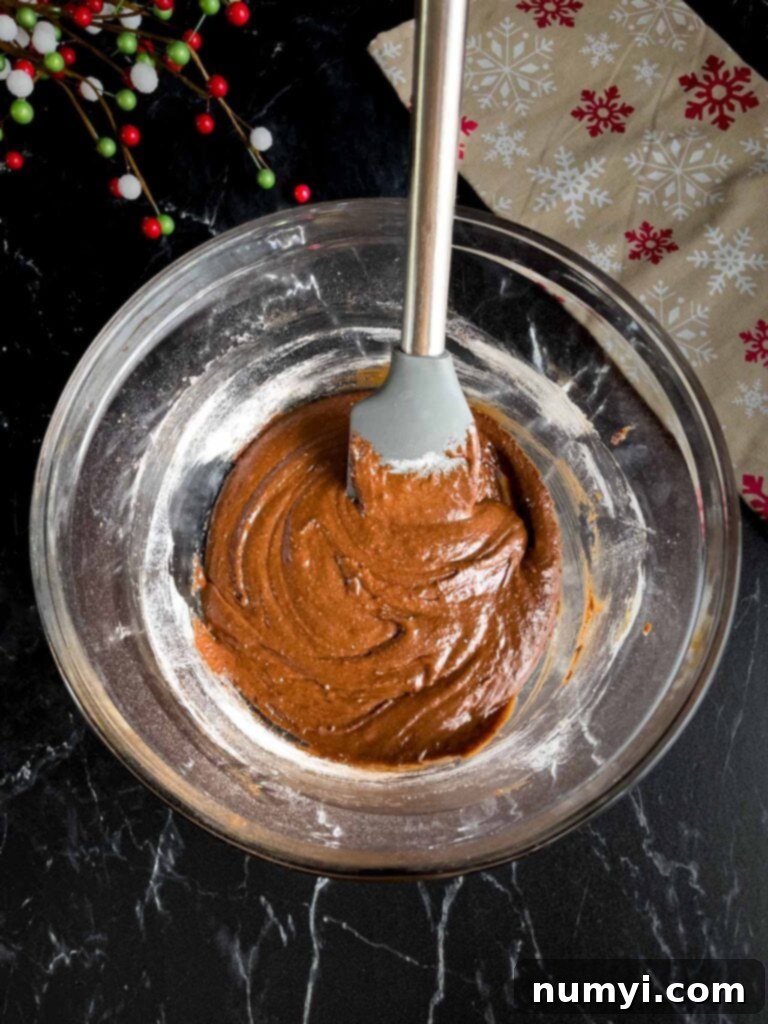
1. Prepare the Dry Ingredients: In a medium bowl, whisk together the all-purpose flour, baking powder, and salt. Whisking ensures that the leavening agents and salt are evenly distributed throughout the flour, which is crucial for a consistent texture and rise in your cookies.
2. Combine the Wet Ingredients: In a separate, large bowl, whisk together the cocoa powder, granulated sugar, and vegetable oil. Once these are well combined, beat in the eggs one at a time. Adding them individually allows for better emulsification, contributing to the fudginess of the cookies. Finally, add the vanilla extract and mix until everything is thoroughly incorporated. Vanilla is essential for enhancing the deep chocolate flavors.
3. Mix Wet and Dry: Gradually add the whisked dry ingredients to the wet ingredients. Stir just until a cohesive dough forms and you no longer see any streaks of dry flour. Be careful not to overmix, as this can lead to tough cookies.
4. Chill the Dough: Cover the bowl tightly with plastic wrap and refrigerate the dough for at least 4 hours, or preferably overnight. This chilling period is crucial: it firms up the dough, making it much easier to handle and preventing excessive spreading during baking. More importantly, it allows the flavors to deepen and the sugars to fully hydrate, which is key for achieving that ultimate fudgy texture and a more pronounced crinkle effect.
5. Prepare for Baking: When you’re ready to bake, preheat your oven to 350 degrees F (175 degrees C). Line two baking sheets with parchment paper to prevent sticking and ensure even baking.
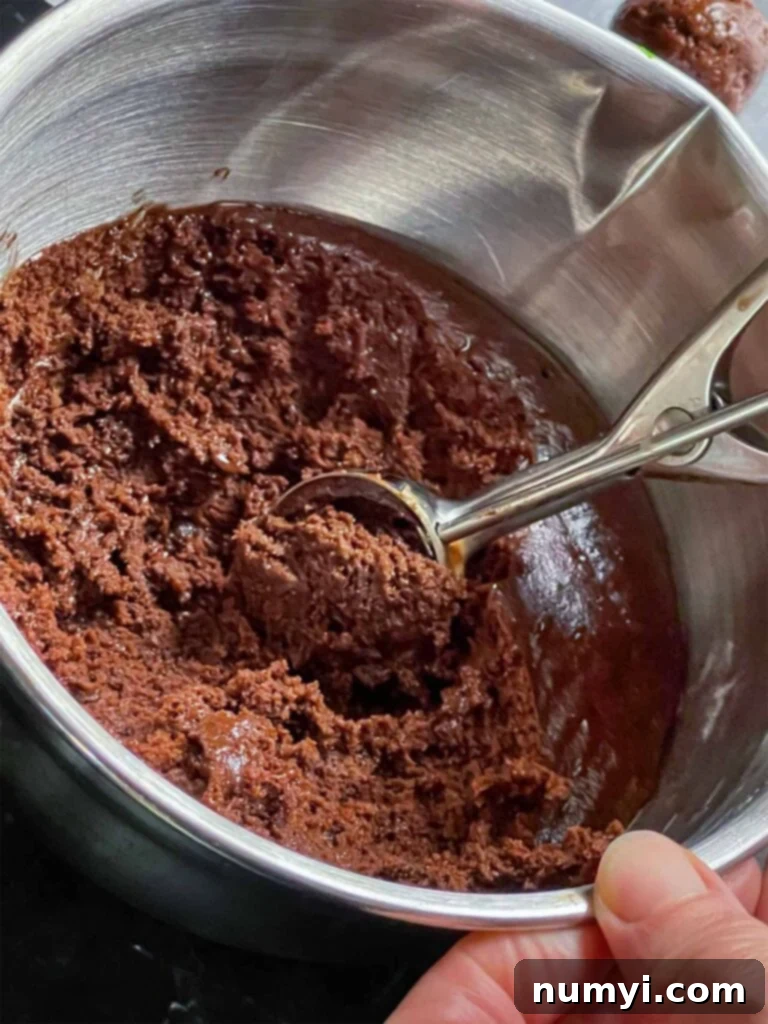
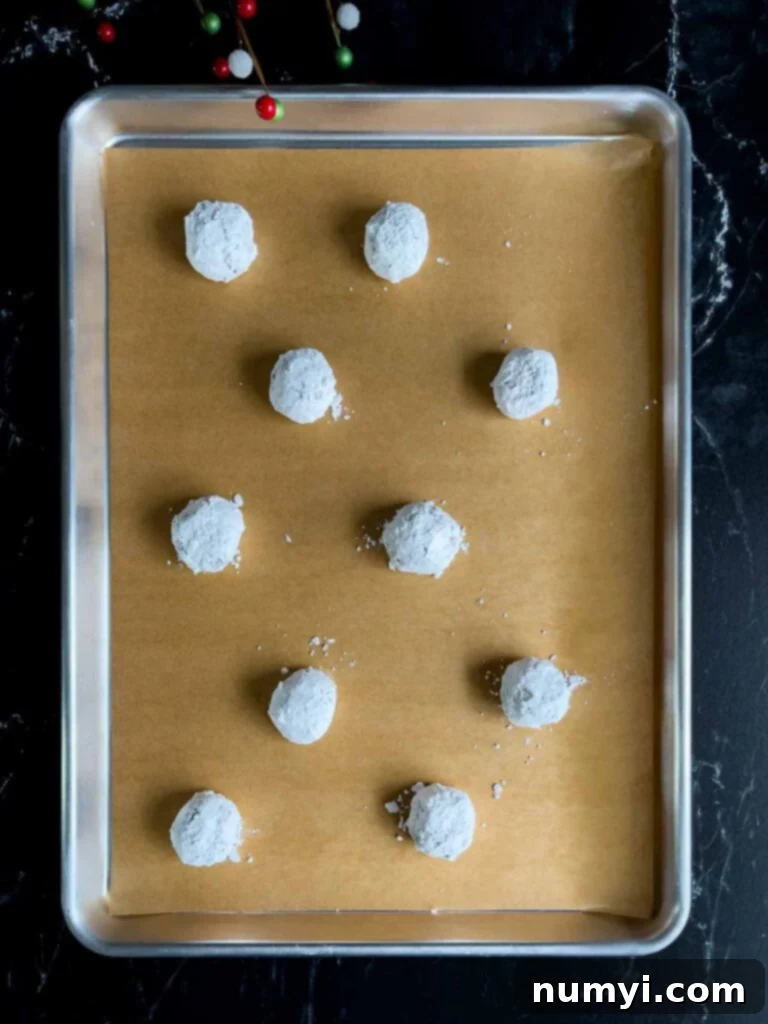
6. Roll in Sugar: Place the granulated sugar and powdered sugar in two separate, shallow bowls. Using a cookie scoop (about 1 tablespoon for standard cookies), form balls of the chilled dough. First, roll each dough ball lightly in the granulated sugar. This initial layer creates a coarse surface that helps the powdered sugar adhere. Then, and this is crucial, roll them *heavily* in the powdered sugar, ensuring the entire surface of the dough ball is thickly and completely coated. Don’t leave any chocolate dough showing! Place the coated dough balls on your prepared baking sheets, leaving about 2 inches of space between each to allow for spreading.
7. Bake to Perfection: Bake the cookies for 10-12 minutes. The exact baking time can vary slightly depending on your oven. You’ll know they’re done when the edges are set, but the centers still look soft and slightly underbaked. This ensures a perfectly fudgy interior. Let the baked cookies cool on the baking sheet for about 5 minutes before carefully transferring them to a wire cooling rack to cool completely. They will firm up considerably as they cool.
Expert Tips for the Best Chocolate Crinkle Cookies
Follow these tips to ensure your chocolate crinkle cookies turn out perfectly every time:
- Measure Flour Properly: Accurate flour measurement is critical for cookie texture. Avoid scooping flour directly from the bag, as this compacts it. Instead, aerate the flour by fluffing it with a fork or spoon, then spoon it into your measuring cup, leveling off the top with a straight edge. This prevents adding too much flour, which can lead to dry, crumbly cookies.
- Don’t Overmix the Dough: Once you combine the wet and dry ingredients, stir just until the flour is fully incorporated and no dry streaks remain. Overmixing develops gluten, resulting in tougher, chewier cookies rather than the desired soft and fudgy ones.
- Choose Quality Cocoa Powder: For the most intense and rich chocolate flavor, use unsweetened cocoa powder of good quality. Dutch-processed cocoa powder works well for a darker color and a slightly milder, less acidic chocolate flavor, but natural unsweetened cocoa also produces fantastic results with a fruitier note.
- Use a Cookie Scoop: A cookie scoop is your best friend for consistency. It ensures all your cookie dough balls are the same size, which leads to more even baking and a uniform appearance for all your crinkles.
- Sticky Dough is Normal: The dough for these cookies is naturally a bit sticky, even after chilling. Don’t be alarmed! If you find it too challenging to roll, slightly dampen your hands with a little water before handling the dough. This will help prevent it from sticking to your palms.
- Generously Coat with Powdered Sugar: This is arguably the most important step for the signature crinkle effect. Do not skimp on the powdered sugar! Ensure each dough ball is heavily and completely covered, without any chocolate showing through. A thick coating creates the beautiful white cracks as the cookie expands.
- Do Not Overbake: Overbaking is the enemy of a fudgy cookie. The cookies should still look soft in the center when you remove them from the oven. They will continue to cook slightly and firm up as they cool on the baking sheet and wire rack.
- Cool Before Moving: When you first pull them from the oven, crinkle cookies are delicate. Let them set on the hot baking sheet for about 5 minutes before transferring them to a wire cooling rack. This allows them to firm up enough to prevent breaking.
- Refrigerate Dough Overnight for Best Results: While a minimum of 4 hours chilling is required, refrigerating the dough overnight (8-12 hours) is highly recommended. This extended chill time allows the ingredients to fully meld, resulting in a thicker, more full-flavored cookie with an even better texture and more pronounced crinkles.
- Cool Baking Trays Between Batches: Placing cookie dough on a warm baking sheet will cause it to spread too quickly, leading to flatter cookies with less distinct crinkles. Always ensure your baking trays are completely cool before placing the next batch of dough.
Delicious Variations to Try
Get creative with your chocolate crinkle cookies! Here are a few ideas to customize this classic recipe:
- Small Batch Cookies: For smaller treats, use one tablespoon of dough per cookie and bake for approximately 10 minutes.
- Large Bakery-Style Cookies: If you prefer larger, more substantial cookies, use two tablespoons of dough for each. Increase the baking time slightly to about 12 minutes.
- Double Chocolate Crinkle Cookies: Elevate the chocolate factor by folding 1 cup of mini chocolate chips into the dough along with the dry ingredients.
- Mint Chocolate Crinkle Cookies: For a refreshing twist, swap 1/2 teaspoon of vanilla extract for peppermint extract. This creates a delightful cool mint flavor perfect for the holidays.
- Chocolate Orange Crinkle Cookies: Add a zesty citrus note by substituting 1/2 teaspoon of vanilla extract with orange extract. The combination of chocolate and orange is truly divine.
Frequently Asked Questions About Chocolate Crinkle Cookies
Flat crinkle cookies are a common issue, often due to a few key factors. The most frequent culprits include improper flour measurement (too little flour, or flour that has been compacted), insufficient chilling time for the dough, or working with dough that has become too warm. To prevent this, ensure you measure your flour accurately (aerate, spoon, and level). Chilling the dough for a minimum of 4 hours is absolutely crucial for the cookies to hold their shape; I personally recommend refrigerating all my cookie dough overnight for the best results. Also, don’t let the portioned dough balls sit at room temperature for too long before baking, and keep any remaining dough refrigerated between batches to maintain its firmness.
Yes, you can substitute butter for vegetable oil in this recipe. I have tested these cookies using both melted and slightly cooled melted butter. While butter will lend a richer, more buttery flavor, I found that I personally preferred the uniquely fudgy and moist texture that vegetable oil provided. Oil also tends to keep cookies softer for a longer period. Feel free to use melted butter if desired, but be aware that the final texture might be slightly different – perhaps a bit chewier than with oil.
Absolutely! These chocolate crinkle cookies are excellent for making ahead. You can freeze unbaked and uncoated cookie dough balls: simply scoop them into balls, place them in a single layer on a parchment-lined baking sheet, and freeze until hard. Once solid, transfer the dough balls into a freezer-safe bag or airtight container and freeze for up to 2 months. To bake, thaw the frozen dough balls on the counter for about 30 minutes, then roll them in both sugars as directed and bake. You may need to add 1-2 minutes of additional baking time. Alternatively, the dough can be prepared and refrigerated for up to 24 hours before baking.
Once your chocolate crinkle cookies have completely cooled, transfer them to an airtight container. They will stay fresh and delicious at room temperature for 3-4 days. For optimal freshness, consider placing a slice of bread in the container to help keep them soft, though the fudgy nature of these cookies usually keeps them moist on their own.
To freeze baked chocolate crinkle cookies for longer storage, ensure they are thoroughly cooled. Layer them between sheets of parchment paper or wax paper in a freezer-safe airtight container. They can be frozen for up to 2 months while maintaining their best quality. To thaw, remove the cookies from the container and arrange them in a single layer on a wire rack at room temperature. It’s important not to thaw them in the container or on a plate, as trapped moisture can make them soggy and diminish their delightful texture.
Double Chocolate Peppermint Cookies
Amaretti Cookies Recipe
Italian Butterball Cookies
Chocolate Crinkle Cookies
Print
Pin
Rate
Ingredients
- 1 cup All-purpose flour
- 1 tsp Baking powder
- 1/2 tsp Kosher salt
- 1/2 cup Cocoa powder unsweetened
- 1 cup Granulated sugar
- 1/4 cup Vegetable oil (neutral oil)
- 2 large Eggs room temperature
- 1 1/2 tsp Pure vanilla extract
- 1/4 cup Granulated sugar for rolling
- 1/2 cup Powdered sugar or more as needed
Instructions
-
In a medium bowl, whisk together the all-purpose flour, baking powder, and kosher salt. Ensure these dry ingredients are thoroughly combined for even leavening.1 cup All-purpose flour, 1 tsp Baking powder, 1/2 tsp Kosher salt
-
In a large bowl, whisk the cocoa powder, granulated sugar, and vegetable oil until smooth. Then, beat in the room temperature eggs one at a time, making sure each is fully incorporated before adding the next. Stir in the pure vanilla extract and mix again until well combined.1/2 cup Cocoa powder, 1 cup Granulated sugar, 1/4 cup Vegetable oil, 2 large Eggs, 1 1/2 tsp Pure vanilla extract
-
Gradually stir the flour mixture into the wet ingredients. Mix just until a dough forms and you no longer see any dry flour. Be careful not to overmix. Cover the bowl tightly with plastic wrap and refrigerate for a minimum of 4 hours, or ideally overnight, to allow the dough to firm up and flavors to develop.
-
When ready to bake, preheat your oven to 350 degrees F (175 degrees C). Line two large baking sheets with parchment paper for easy cleanup and consistent baking.
-
Place the granulated sugar and powdered sugar in two separate, shallow bowls. Scoop one tablespoon of chilled cookie dough and roll it into a ball. First, roll the ball lightly in the granulated sugar, ensuring a thin coating. Then, roll the ball heavily and completely in the powdered sugar, making sure the entire surface is covered for the best crinkle effect. Place the dough balls on the prepared baking trays, spaced about 2 inches apart.1/4 cup Granulated sugar, 1/2 cup Powdered sugar
-
Bake for 10-12 minutes. The cookies will be soft in the center when removed from the oven, and the edges should be just set. Let the baked cookies cool on the baking sheet for about 5 minutes to firm up slightly, then carefully transfer them to a wire cooling rack to cool completely.
Notes
— The dough is sticky even after chilling, don’t be alarmed. You can dampen your hands with a little water to help roll the dough.
— The cookies will be soft when you remove them from the oven. But as they cool they will firm up.
Make Ahead – This recipe is perfect for making ahead! The dough can be refrigerated for up to 24 hours. For longer storage, freeze unbaked and uncoated cookie dough balls in a single layer on a parchment lined baking sheet until hard. Once frozen, transfer the dough balls into a freezer safe bag or airtight container and freeze for up to 2 months.
To bake from frozen, thaw on the counter for about 30 minutes, then roll in both sugars, and bake as directed. You may need to add 1-2 minutes of additional baking time.
Storing – Place the completely cooled cookies in an airtight container and keep them at room temperature for 3-4 days.
Freezing – Layer the thoroughly cooled cookies between parchment paper or wax paper in a freezer safe airtight container and freeze for up to 2 months for the best quality. To thaw, remove them from the container to a wire rack in a single layer at room temperature. Do not thaw in the container or on a plate, as they will become soggy from condensation.
Nutrition
These Classic Chocolate Crinkle Cookies are more than just a dessert; they’re a festive tradition waiting to happen. With their perfect balance of crisp edges, gloriously fudgy centers, and stunning cracked tops elegantly dusted with powdered sugar, they are sure to be a showstopper on any holiday cookie tray or a beloved treat any time of year. Follow these simple steps and expert tips, and you’ll be baking batches of these irresistible beauties that everyone will rave about. Happy baking!
