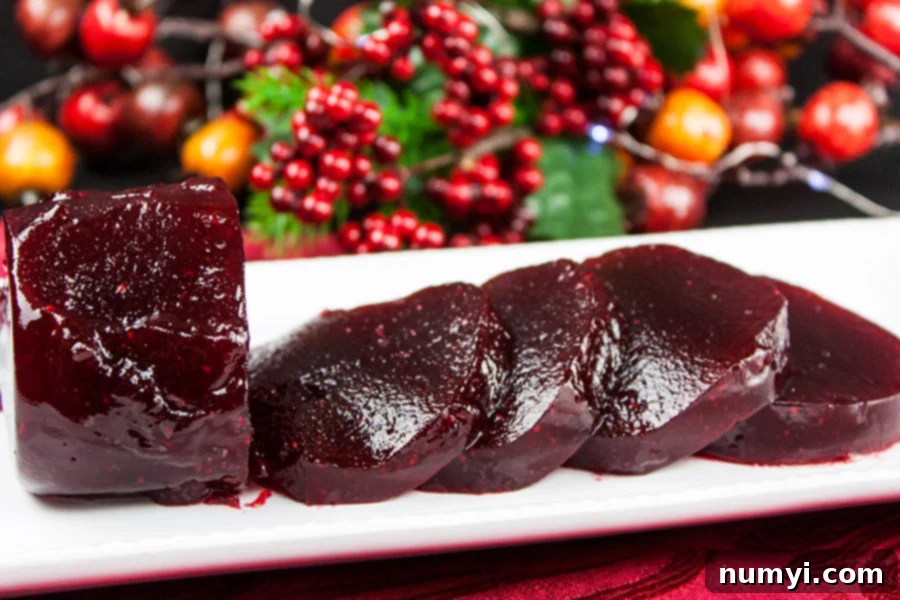
Easy Homemade Cranberry Sauce: The Essential Recipe for Jellied or Whole Berry Perfection
Forget everything you thought you knew about cranberry sauce from a can. Making homemade cranberry sauce is not only incredibly simple but also yields a flavor that is vastly superior – a vibrant, fresh, and customizable delight that will elevate any meal. This comprehensive guide will show you how to craft the perfect cranberry sauce from scratch, whether you prefer a smooth, jellied texture or a rustic, whole-berry style. Get ready to transform your holiday table or everyday meals with this surprisingly easy recipe.
Why You’ll Adore This Homemade Cranberry Sauce Recipe
Once you experience the rich, natural flavors of homemade cranberry sauce, you’ll never look back at the canned varieties. This recipe stands out for several compelling reasons, making it a beloved staple for countless kitchens during the holidays and beyond.
-
Unbeatable Flavor and Freshness: The most significant difference between homemade and canned cranberry sauce is the taste. Our recipe uses fresh or frozen cranberries, natural sugars, and a hint of vanilla to create a sauce bursting with authentic fruit flavor. It’s bright, tangy, sweet, and incredibly aromatic – a stark contrast to the often overly sweet and artificial taste of store-bought alternatives. The depth of flavor is simply unparalleled, offering a delightful counterpoint to savory dishes.
-
Customizable Texture: This recipe gives you complete control over the final texture. Do you prefer a chunky sauce with burst cranberries that provide a delightful pop in every bite? Or perhaps a silky-smooth, elegant jelly that holds its shape beautifully? We’ll guide you through both options, ensuring your cranberry sauce is exactly how you like it. This versatility makes it perfect for various culinary applications, from a traditional Thanksgiving side to a gourmet accompaniment.
-
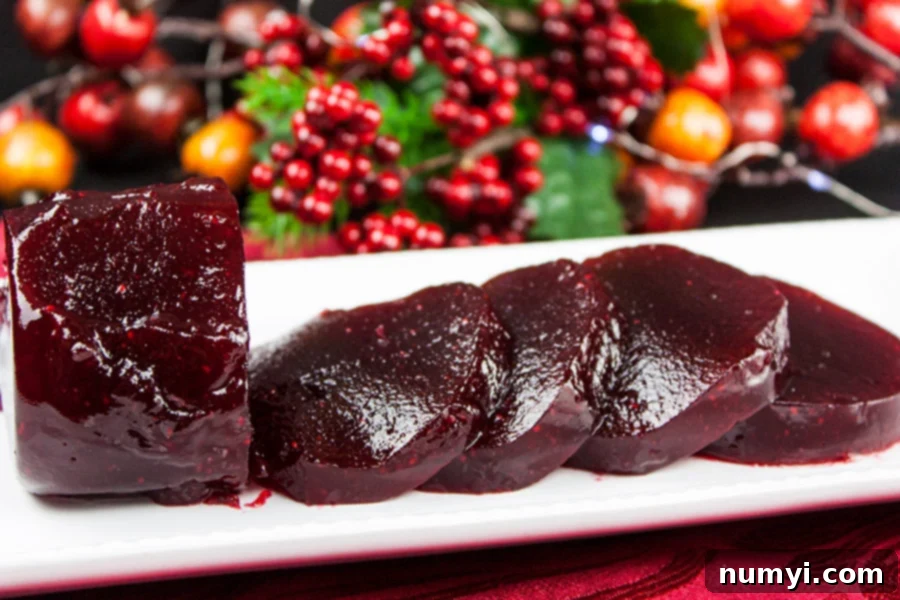
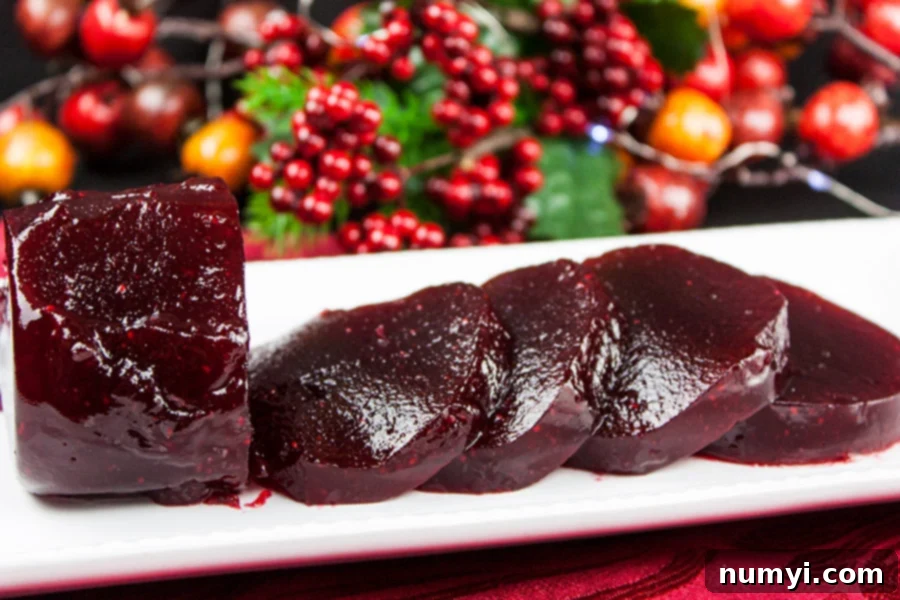
The “Can-Shaped” Surprise: For those family members or guests who are staunch defenders of the wobbly, canned cranberry jelly, we have a fun trick! You can mold your homemade jellied cranberry sauce into the shape of a can. This playful presentation often fools even the most skeptical palates, proving that homemade can be just as familiar and even more delicious. It’s a fantastic way to introduce them to the superior taste of fresh ingredients without them knowing until they take that first delightful bite.
-
Only Five Simple Ingredients: You might be surprised to learn that such an exquisite sauce requires only five basic ingredients: cranberries, granulated sugar, dark brown sugar, water, and vanilla. These readily available items combine to create a truly magical condiment, proving that the best dishes don’t need a long list of exotic components. This simplicity also makes it incredibly budget-friendly.
-
Effortless Preparation: This is a hands-off recipe that requires minimal effort and time. With just about 5 minutes of prep and 15 minutes of cook time, you can have a batch of delicious cranberry sauce ready. It’s perfect for busy holiday schedules, allowing you to prepare it in advance and free up precious kitchen time on the main event day. Once you try it, you’ll realize just how easy it is to make and wonder why you ever bought it in a can!
Alongside other holiday classics like fresh green bean casserole, southern cornbread dressing, pecan crusted sweet potato casserole, and pumpkin pie with a gingersnap crust, homemade cranberry sauce always secures its spot on our Thanksgiving and Christmas dinner menus. It’s a truly essential component that brightens and balances the rich flavors of a festive feast.
How to Make Homemade Cranberry Sauce (Jellied or Whole Berry)
Creating this delicious cranberry sauce is a straightforward process, requiring just a few simple steps. The magic happens as the cranberries burst and release their natural pectin, which is responsible for the sauce’s lovely texture. You can easily adapt this method to achieve either a chunky, whole-berry sauce or a smooth, elegant jelly.
Gather Your Ingredients:
Before you begin, ensure you have your five key ingredients ready: fresh or frozen cranberries, granulated sugar, dark brown sugar, water, and vanilla extract. The combination of granulated and dark brown sugar provides a balanced sweetness with a hint of caramel depth, perfectly complementing the tartness of the cranberries. Using both fresh and frozen cranberries works equally well, offering flexibility based on availability.
The Cooking Process:
-
Combine Ingredients: Begin by adding your fresh or frozen cranberries, both granulated and dark brown sugars, and water to a medium-sized saucepan. The saucepan should be large enough to allow for bubbling as the mixture cooks. Place the saucepan over medium heat.
-
Bring to a Boil: Gradually bring the mixture to a boil, stirring occasionally. This helps dissolve the sugars and prevents them from sticking to the bottom of the pan. As the mixture heats, you’ll notice the cranberries starting to soften.
-
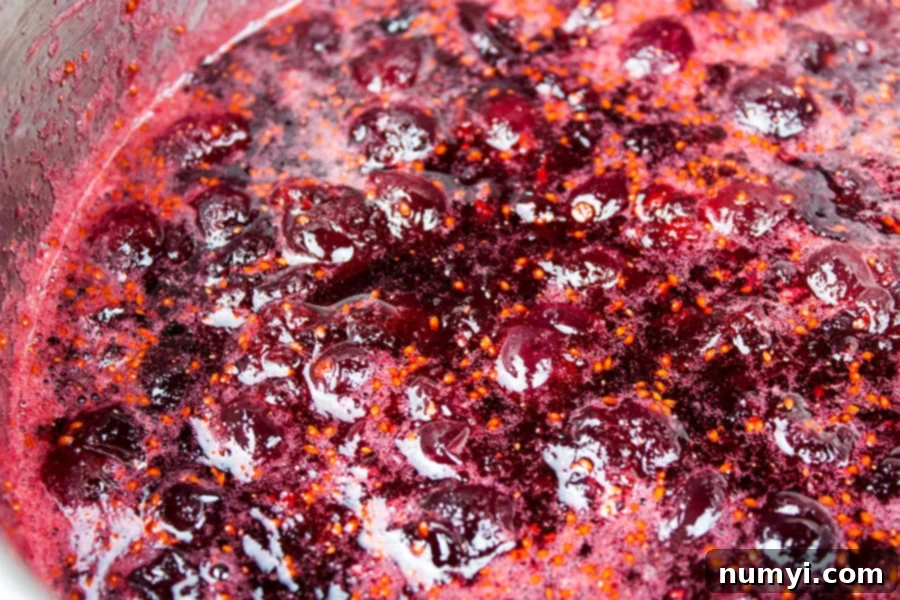
Simmer and Pop: Once it reaches a rolling boil, reduce the heat to a gentle simmer. Continue cooking, uncovered, stirring every so often, until all the cranberries have popped open. This is a crucial step where the cranberries release their juices and natural pectin, which thickens the sauce. You’ll hear the delightful popping sound as they burst. This usually takes about 10-15 minutes, depending on the heat and the cranberries.
-
Stir in Vanilla: Remove the saucepan from the heat. Stir in the vanilla extract. Vanilla adds a wonderful aroma and enhances the overall flavor profile, adding a touch of warmth and complexity. At this point, your kitchen will smell absolutely divine!
Achieving Your Desired Texture:
Now, this is where you decide between chunky and jellied:
-
For Whole Berry (Chunky) Cranberry Sauce: If you prefer a more rustic, textured sauce, you can simply smash some of the berries with the back of a spoon directly in the saucepan. This will release more pectin and thicken the sauce slightly while still leaving plenty of whole or half-berries for a delightful bite. Pour the sauce into your chosen container – a bowl, jar, or serving dish – and let it cool completely before refrigerating. The sauce will continue to thicken as it cools.
-
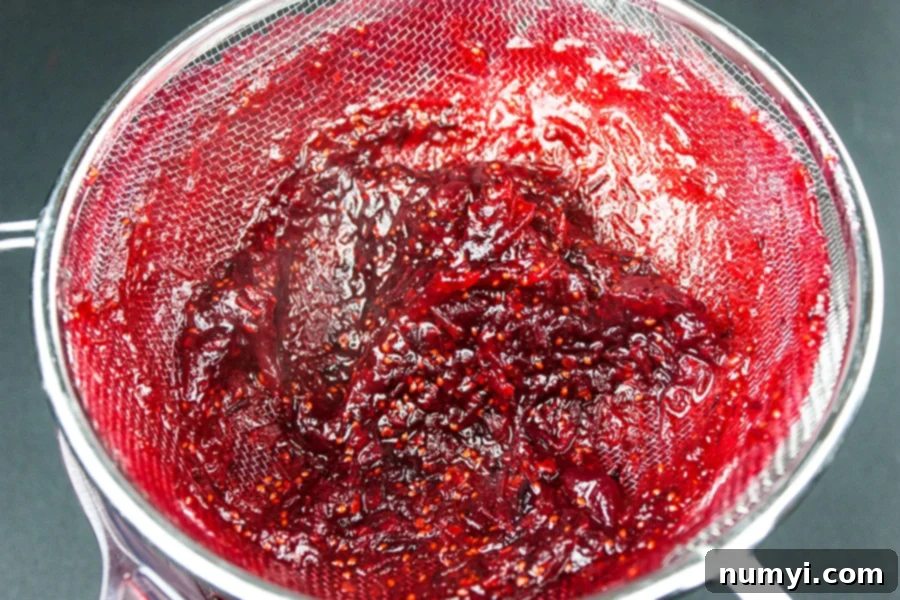
For Jellied Cranberry Sauce (Smooth and Creamy): To achieve that classic smooth, creamy, jellied texture, a little extra effort goes a long way. After stirring in the vanilla, use an immersion (stick) blender to crush the berries directly in the saucepan until smooth. Alternatively, carefully transfer the cooked cranberry mixture to a regular blender or food processor and blend until silky. Once blended, pour the mixture through a fine-mesh strainer set over a clean bowl. Using the back of a spoon or a flexible spatula, press the sauce through the strainer. This step removes any remaining cranberry skins and seeds, leaving you with a perfectly smooth, velvety sauce. Be sure to scrape the bottom and sides of the strainer to get all the precious pulp that clings to it – this is where much of the flavor and thickening power resides. The final result will be a beautifully smooth and creamy jellied cranberry sauce, ready to be molded or simply poured into a serving dish.
Cooling and Setting:
Once you’ve achieved your desired texture, pour the cranberry sauce into your chosen container – whether it’s a decorative bowl, mason jars for gifting, or a container that will allow you to unmold it later. Allow the sauce to cool completely to room temperature before transferring it to the refrigerator. This gradual cooling process is essential for the pectin to properly set, giving the jellied sauce its firm, sliceable consistency. It typically needs several hours, or ideally, overnight, to set completely in the refrigerator.
When Ready to Serve: The Unmolding Trick
Serving your homemade jellied cranberry sauce can be a delightful presentation, especially if you want to replicate the iconic can shape. This technique is simple and always impresses!
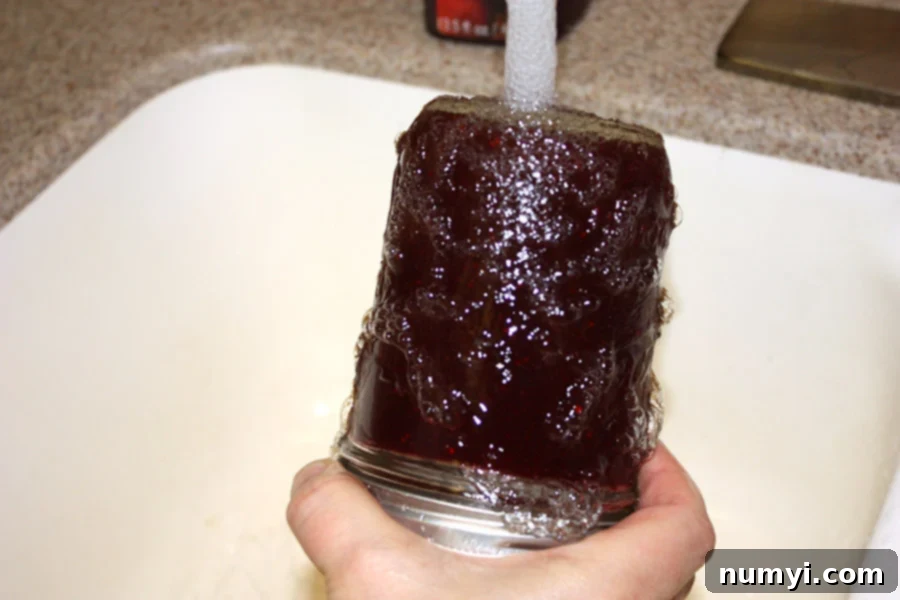
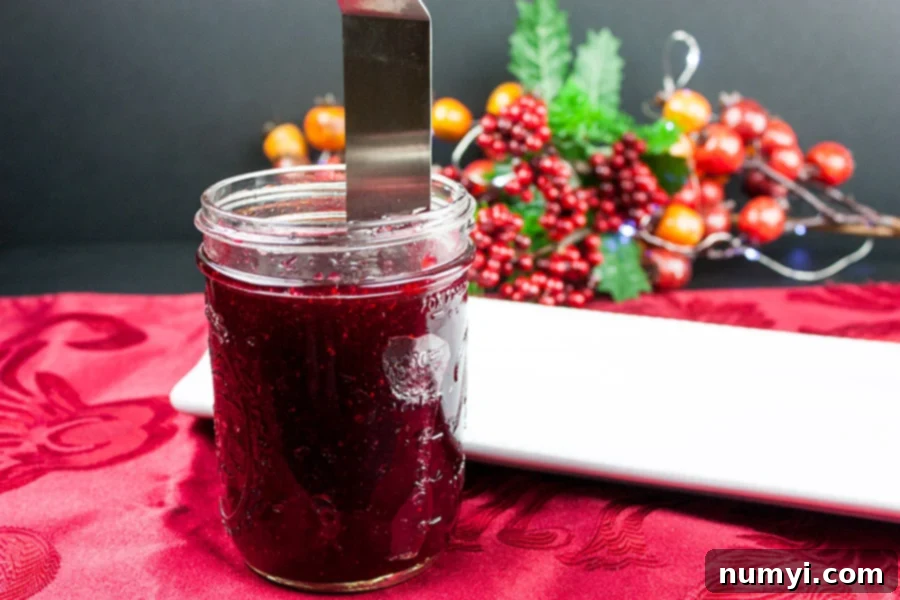
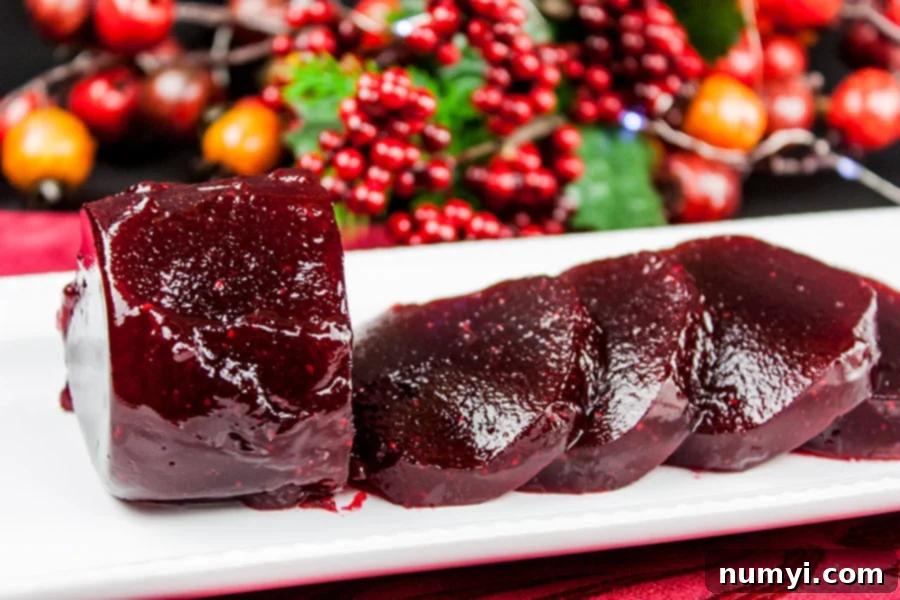
If you’ve chilled your jellied cranberry sauce in a jar or mold, follow these steps to unmold it perfectly:
-
Warm the Jar: With the lid still on, run hot tap water over the bottom and sides of the jar for about 30 seconds to a minute. This gently warms the outer layer of the sauce, helping it release from the glass.
-
Loosen the Edges: Remove the lid. Take a thin, flexible spatula or a butter knife and carefully run it tightly around the inside edge of the jar, pressing against the glass. This creates a small gap between the sauce and the jar, allowing air to enter and break the vacuum seal.
-
Release onto Platter: Place your serving platter upside down over the opening of the jar. In one swift motion, invert the jar and platter together. Give the bottom of the jar a gentle tap, and the perfectly molded cranberry sauce should slide out onto the platter. Voila! You’ve successfully created that iconic “canned” look with your superior homemade sauce.
-
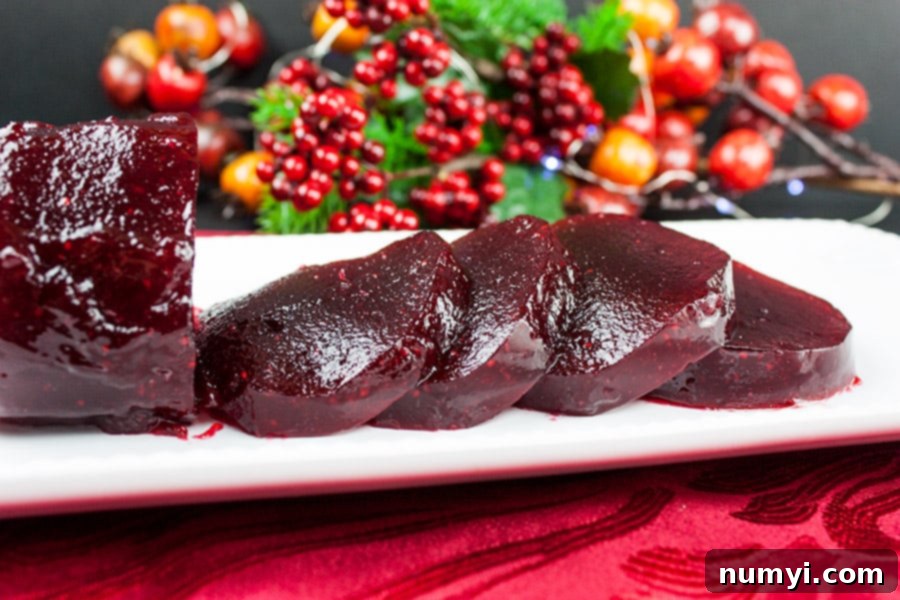
Slice and Serve: Use a sharp, non-serrated knife to slice the jellied cranberry sauce into neat rounds, just like its canned counterpart. Arrange the slices attractively on your platter. For whole berry sauce, simply spoon it into a serving bowl. Serve chilled and enjoy! This impressive yet easy recipe will ensure you never reach for the canned stuff again.
How To Can Cranberry Sauce for Long-Term Storage
Canning homemade cranberry sauce is an excellent way to preserve its delicious flavor for months, allowing you to enjoy the taste of the holidays long after the season ends. This method ensures your sauce is shelf-stable and ready to enjoy whenever you crave it.
-
Prepare Jars and Lids: While your cranberry sauce is still hot, sterilize your canning jars (pint, pint-and-a-half, or quart sizes work well) and prepare new, unused canning lids according to manufacturer instructions. Sterilization is crucial for safe canning.
-
Fill Jars: Ladle the hot cranberry sauce into the hot, sterilized jars, leaving about 1/4-inch of headspace at the top. This headspace is vital for proper sealing and to prevent jars from breaking during processing.
-
Clean Rims and Seal: Wipe the rims of the jars clean with a damp cloth to remove any sauce residue. This ensures a proper seal. Place a new, prepared lid on each jar, and then screw the rings on until they are just “finger-tight.” Avoid overtightening, as this can prevent air from escaping and compromise the seal.
-
Water Bath Processing: Carefully place the filled jars into a water bath canner rack. Lower the rack into the canner, ensuring that the jars are completely covered with at least 1-2 inches of hot water. Bring the water to a rolling boil.
-
Process Jars: Once the water is boiling, process pint, pint-and-a-half, or quart-size jars for 15 minutes. Adjust processing time if you live at a higher altitude (consult a canning guide for specific adjustments).
-
Cool Down: After 15 minutes, turn off the heat. Carefully remove the canner lid and allow the jars to remain in the hot water for another 5 minutes. This helps prevent “siphoning” (loss of liquid from the jars) and encourages a stronger seal.
-
Final Cooling: Using a jar lifter, carefully remove the hot jars from the canner and place them upright on a towel-lined counter. Leave them undisturbed overnight, or until they have cooled completely to room temperature. You should hear the satisfying “ping” sound as each jar seals. Check for proper seals by pressing on the center of the lid – it should not flex up or down.
-
Store: Label the sealed jars with the contents and date. Store them in a cool, dark place for up to one year. Any jars that didn’t seal properly should be refrigerated and consumed within 2-3 weeks.
Freezing Homemade Cranberry Sauce
If canning isn’t your preferred method, freezing is another excellent way to extend the shelf life of your homemade cranberry sauce. Simply spoon the cooled sauce into freezer-safe containers, leaving about an inch of headspace to allow for expansion. Mason jars, plastic freezer containers, or even heavy-duty freezer bags (laid flat) work well. Ensure the containers are airtight to prevent freezer burn. Frozen cranberry sauce can be stored for up to 3 months. When ready to use, thaw it in the refrigerator overnight. It will be just as delicious as when it was first made!
Beyond the Holidays: Creative Uses for Cranberry Sauce
While homemade cranberry sauce is the perfect accompaniment to your rich and savory Thanksgiving or Christmas dinner, its versatility extends far beyond festive feasts. Don’t let those delicious leftovers go to waste! Here are some fantastic ways to enjoy your cranberry sauce:
-
Leftover Turkey Sandwiches: This is a classic for a reason! A generous spread of cranberry sauce on a leftover turkey sandwich adds a burst of tart-sweet flavor that cuts through the richness of the meat and bread.
-
Cheese Boards and Appetizers: Pair cranberry sauce with soft cheeses like brie or goat cheese, or hard cheeses like aged cheddar, on a charcuterie board. Its bright flavor is a wonderful complement.
-
Breakfast Topping: Swirl a spoonful into your morning yogurt, oatmeal, or spread it on pancakes, waffles, or French toast for a delightful fruity twist.
-
Glazes and Marinades: Whisk a bit of cranberry sauce with some orange juice or balsamic vinegar to create a savory-sweet glaze for roasted chicken, pork, or even salmon.
-
Dessert Enhancement: Use it as a topping for vanilla ice cream, cheesecake, or even mix it into muffin batter for a festive baked good.
Flavorful Add-Ins to Elevate Your Sauce
While our basic recipe is absolutely delicious on its own, you can easily customize your homemade cranberry sauce with various add-ins to match your personal taste or holiday theme. These additions are best incorporated during the cooking process to allow their flavors to meld beautifully with the cranberries.
-
Citrus Zest: The most popular addition, orange zest (or even lemon zest) adds a bright, aromatic lift that perfectly complements cranberries. Simply grate the zest of half an orange into the pot at the beginning of cooking, or stir in a tablespoon of fresh zest with the vanilla for a more pronounced aroma.
-
Spices: Warm spices can transform your cranberry sauce. Consider adding a cinnamon stick, a few whole cloves, a pinch of ground ginger, or even a star anise pod to the saucepan along with the cranberries and sugars. Remember to remove whole spices before straining for jellied sauce.
-
Liquor: For an adult twist, a splash of orange liqueur (like Grand Marnier or Cointreau), port wine, or even a bit of bourbon can add depth and sophistication to your sauce. Add it in the last few minutes of simmering to allow the alcohol to cook off slightly while leaving its distinct flavor.
-
Other Fruits: Experiment with adding a handful of chopped apples, pears, or even a few dried apricots or cherries to the mix for additional texture and flavor complexity. Add them at the beginning of cooking so they soften along with the cranberries.
Expert Tips for Perfect Cranberry Sauce Every Time
Follow these simple tips to ensure your homemade cranberry sauce is a resounding success, whether it’s your first time making it or you’re a seasoned pro.
-
Make it Ahead: Cranberry sauce is one of those fantastic dishes that tastes even better the next day, once the flavors have had time to fully meld. Plus, making it ahead of time is a huge time-saver, freeing you up on busy holiday cooking days. It can be prepared up to a week in advance and stored in the refrigerator.
-
Fresh vs. Frozen Cranberries: This recipe works beautifully with both fresh and frozen cranberries. There’s no need to thaw frozen cranberries beforehand; simply add them directly to the saucepan with the other ingredients. Stock up on fresh cranberries during peak season (fall) and freeze them in their original bags for year-round use.
-
Consistent Stirring: During the cooking process, especially as the mixture begins to simmer, stir frequently. This prevents the sugars from scorching at the bottom of the saucepan and ensures that the cranberries cook evenly.
-
Thorough Straining (for jellied sauce): If you’re aiming for a smooth, jellied sauce, don’t rush the straining process. Use a sturdy fine-mesh strainer and really work the sauce through with a spatula or the back of a spoon. You want to extract as much of the flavorful pulp as possible, leaving only the skins and seeds behind. This also contributes to the sauce’s thickening.
-
Choose Your Container Wisely: Whether you opt for a decorative serving bowl, individual ramekins, or a mason jar for that classic canned shape, ensure your container is clean and ready. Glass jars are excellent for presentation and for the unmolding trick.
-
Patience with Cooling: For the best texture, especially with jellied sauce, allow it to cool completely to room temperature before refrigerating. Rushing this step by placing hot sauce directly into the fridge can sometimes inhibit proper setting and affect the final consistency.
-
Taste and Adjust: Once the sauce is cooked and off the heat, taste it! Depending on the natural tartness of your cranberries and your personal preference, you might want to add a tiny bit more sugar. Stir it in until dissolved. Remember, you can always add more sweetness, but you can’t take it away.
Frequently Asked Questions About Homemade Cranberry Sauce
Here are answers to some common questions about making and storing this delightful holiday staple.
Jellied cranberry sauce is primarily made of cranberries, sugar (usually a combination of granulated and brown sugar for depth), and water. A touch of vanilla is often added for flavor, and the natural pectin in the cranberries is what causes the sauce to set into a jelly-like consistency.
When covered tightly and stored in the refrigerator, homemade cranberry sauce will last for up to 2 weeks. This makes it a perfect make-ahead dish for holiday entertaining.
Yes, absolutely! You can freeze homemade cranberry sauce for up to 3 months. To do so, pour the cooled sauce into a mason jar or an airtight freezer-safe container, leaving about an inch of headspace at the top to allow for expansion during freezing. Thaw overnight in the refrigerator before serving.
If your cranberry sauce seems too thin after cooking, you can try simmering it for a few more minutes to reduce the liquid further. Cranberry sauce also thickens considerably as it cools, so ensure it’s completely chilled before determining its final consistency. If it’s still too thin, you can add a tiny bit of cornstarch slurry (1 tsp cornstarch mixed with 1 tsp cold water) and simmer for another minute until thickened.
Yes, you can experiment with reducing the sugar slightly, but cranberries are very tart. We recommend tasting the sauce as it cools and adding more sugar to taste if needed. Significantly reducing sugar can also affect the sauce’s ability to gel, as sugar contributes to the texture and acts as a preservative.
Look for fresh cranberries that are firm, plump, and bright red. Avoid any that are soft, shriveled, or discolored. If using frozen, ensure the bag is sealed and the berries aren’t clumped together, which can indicate thawing and refreezing.
More Delicious Holiday Side Dish Recipes
Easy Pecan Roasted Sweet Potato Casserole
Fresh Green Bean Casserole From Scratch (no soup)
Decadent Whipped Potatoes (Dutchess Potatoes)
Are you on Pinterest? Click the button below to add this recipe to one of your boards!
Easy Homemade Cranberry Sauce Recipe (jellied or whole)
Print
Pin
Rate
Ingredients
- 12 oz fresh or frozen cranberries
- 1 cup granulated sugar
- 1/2 cup dark brown sugar packed
- 1 cup water
- 1/2 teaspoon vanilla
Instructions
-
Place the cranberries, sugars, and water in a medium saucepan.12 oz fresh or frozen cranberries, 1 cup granulated sugar, 1/2 cup dark brown sugar, 1 cup water
-
Over medium heat bring to a boil, stirring occasionally. Reduce the heat and simmer uncovered until all the cranberries have popped open.
-
Remove from the heat and stir in the vanilla.1/2 teaspoon vanilla
-
To make it jellied, pour through a fine-mesh strainer and push through with the back of a spoon or spatula until there is only pulp and seeds remaining.
-
Pour into a jar and allow to cool before refrigerating to set completely.
Notes
Storing – Covered tightly in the refrigerator for up to 2 weeks.
Freezing – Freeze in the mason jar or an air-tight freezer container, leaving room at the top to expand slightly, for up to 3 months.
Canning – See above in the post.
Nutrition
Making homemade cranberry sauce is a tradition worth starting. Its vibrant flavor, easy preparation, and versatility make it a standout addition to any meal, especially during the festive season. Say goodbye to the canned stuff and hello to a fresh, delicious experience that will delight your taste buds and impress your guests. Enjoy the simple pleasure of crafting this classic condiment from scratch!
