Indulge in Homemade Elegance: The Ultimate Fig and Walnut Tart Recipe for Any Occasion
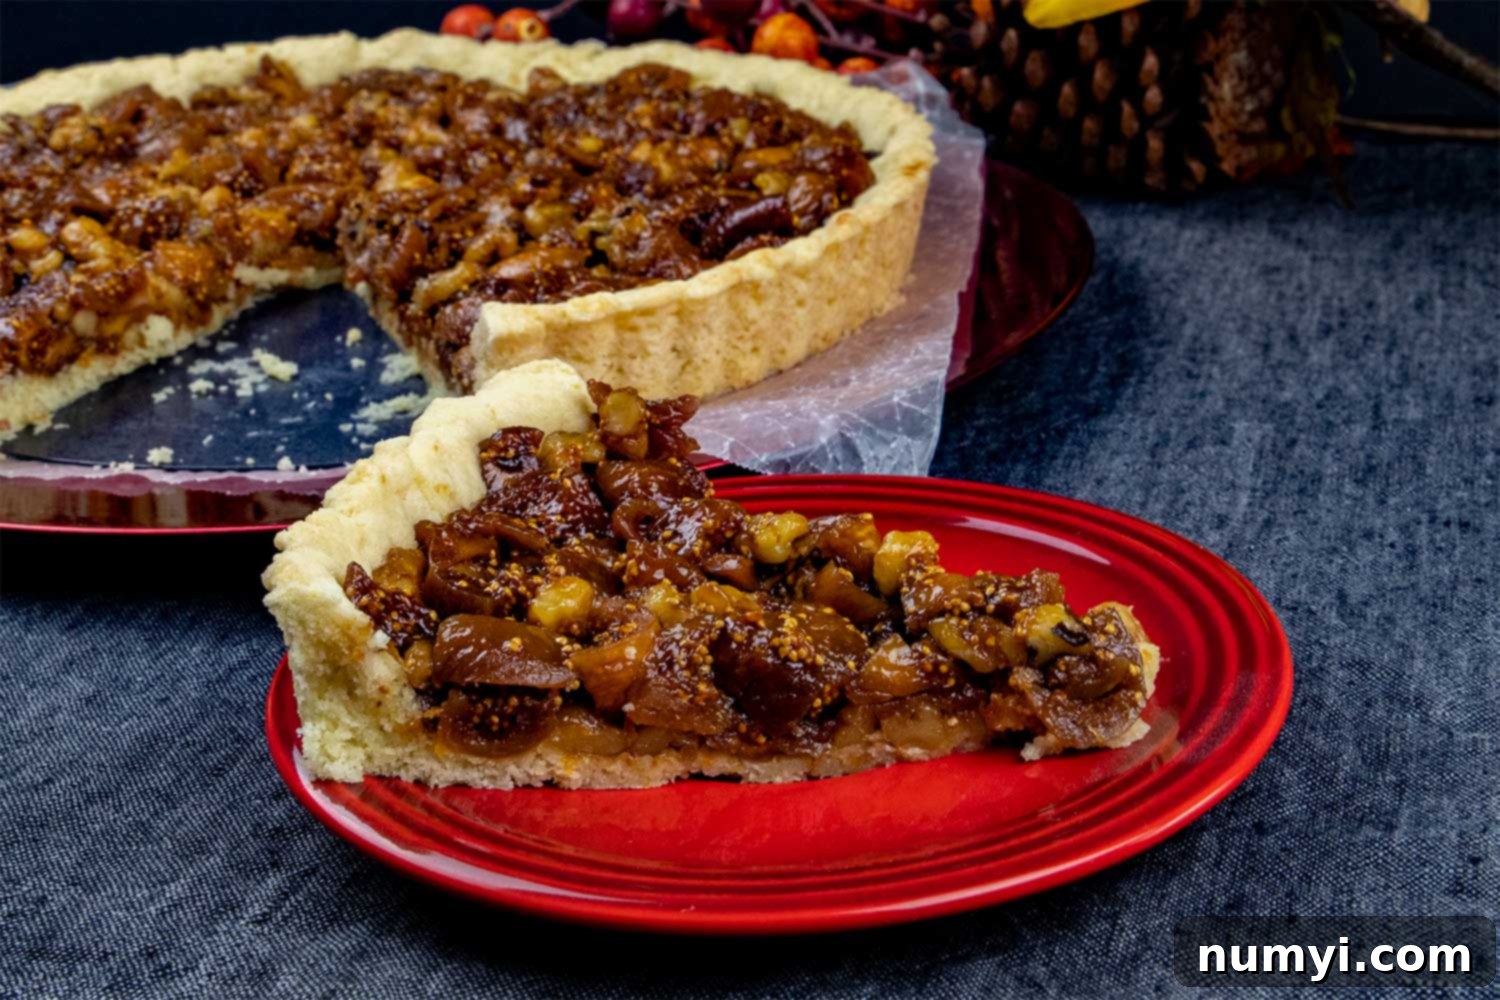
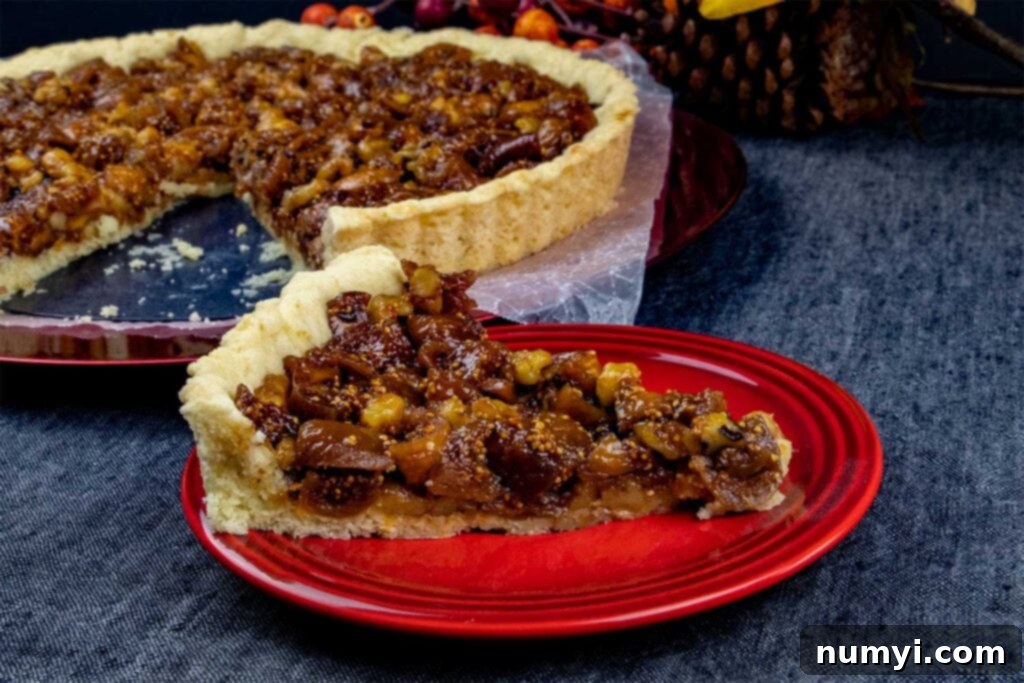
Imagine a dessert that perfectly balances rich, earthy sweetness with a delightful crunch, all encased in a tender, buttery crust. This fig tart with walnuts is precisely that – a simple yet incredibly fancy way to impress your holiday guests, or simply to treat yourself to something truly special. It’s a luscious combination of deeply flavored dried figs, a delicious nutty texture from toasted walnuts, and a slightly sticky sweet base, all nestled in a rich, crispy Italian butter tart shell known as Pasta Frolla. While it looks sophisticated, this recipe is surprisingly straightforward, making it an accessible showstopper for any gathering.
The Irresistible Appeal of Fig and Walnut Tart
There’s something inherently luxurious about figs, and when paired with the robust flavor of walnuts, they create a symphony of tastes and textures. This fig tart isn’t just a dessert; it’s an experience. The filling, made from plump, rehydrated dried figs, develops a jam-like consistency that’s both sweet and complex, enhanced by a hint of citrus from orange zest and the warming notes of brandy. The walnuts provide a crucial textural contrast, offering a satisfying crunch that complements the soft fig interior. All of this goodness rests on a foundation of homemade Pasta Frolla, a sweet shortcrust pastry that bakes to a perfect golden crisp without the need for pre-baking, simplifying your holiday baking considerably.
Recipe Ingredients for the Luscious Filling
Crafting the perfect fig and walnut filling starts with selecting the right ingredients. Each component plays a vital role in achieving the desired flavor and texture.
- Dried Turkish Figs: These are paramount for this tart. Unlike fresh figs, dried figs offer a concentrated sweetness and a chewier texture that holds up beautifully during baking. Using fresh figs is not recommended as they contain too much moisture and will not achieve the desired jammy consistency or hold their shape well within the tart. Look for soft, pliable dried figs for the best results. Calimyrna figs are also an excellent choice.
- Brandy: Brandy adds a wonderful depth of flavor and helps to soften the dried figs, infusing them with a rich, aromatic warmth. If you prefer a non-alcoholic option, apple juice or orange juice can be substituted, though the flavor profile will be slightly different.
- Water: Essential for rehydrating the dried figs and creating the moist, tender filling.
- Granulated Sugar: A touch of sugar enhances the natural sweetness of the figs and balances the other flavors.
- Orange Zest: This provides a bright, citrusy counterpoint to the sweetness of the figs and the richness of the brandy, lifting the overall flavor of the tart.
- Walnuts: Coarsely chopped walnuts introduce a delightful nutty crunch, complementing the soft fig filling and adding another layer of texture. You can lightly toast them before adding for an even deeper flavor, but it’s not strictly necessary as they will bake in the tart.
Ingredients Needed for the Perfect Pasta Frolla Pastry
The foundation of any great tart is its crust, and for this fig tart, we use a classic Italian sweet shortcrust pastry known as Pasta Frolla. This dough is famed for its tender, crumbly texture and sweet flavor.
- All-purpose flour: The structural base of the tart pastry, providing the necessary gluten for a cohesive yet tender crust.
- Baking powder: A small amount of baking powder helps to lighten the dough and contributes to a slightly more tender crumb.
- Granulated sugar: Adds sweetness to the pastry, making it a perfect complement to the fig filling. It also helps with browning.
- Salt: A crucial ingredient that balances the sweetness and enhances all the other flavors in the crust.
- Unsalted butter: This is arguably the most important ingredient for a flaky, tender Pasta Frolla. It must be cold and cut into small cubes. Keeping the butter cold ensures that it doesn’t fully incorporate into the flour, creating pockets of butter that melt during baking, resulting in a delightfully flaky texture.
- Egg: Acts as a binder, helping the dough come together and providing richness.
- Water: Used sparingly, water helps to bring the dough to the correct consistency, allowing it to form without becoming tough.
- Vanilla extract: Adds a warm, sweet aroma and flavor that perfectly complements the butter and sugar in the pastry.
Expert Tips for a Flawless Fig and Walnut Tart
Achieving a perfectly tender crust and a delectable filling is easier with a few key techniques. These tips will guide you to success, ensuring your fig tart is nothing short of amazing:
- Choose the Right Figs: Always use dried Turkish or Calimyrna figs for this recipe. Their inherent sweetness and texture are ideal for creating the jammy filling, unlike fresh figs which release too much moisture and can make the tart watery.
- Don’t Overwork the Dough: When making the Pasta Frolla, be cautious not to add too much liquid or over-process the dough. Add the initial tablespoon of water, pulse, then test its consistency by squeezing a small amount between your fingers. It should just barely come together.
- Avoid Over-Processing Pastry Dough: This is critical for a tender crust. Only process the dough in the food processor until it just starts to come together into a shaggy mass. If you process it until it forms a cohesive ball, the gluten will develop too much, resulting in a tough and chewy baked crust rather than a delicate, crumbly one.
- Handle the Tart Pan with Care: After pressing the dough into the tart pan, always place it on a flat plate or a baking sheet before freezing or moving it. The bottom of most tart pans is removable, and carelessly lifting from the center bottom piece can cause the dough to crack or separate. If cracks do appear, gently press them to seal and refreeze for about 5 minutes to firm up again.
- No Pre-Baking Needed: One of the beauties of Pasta Frolla is that it cooks through beautifully before browning completely, eliminating the need to prebake or “blind bake” the tart shell, saving you time and effort.
- Ensure Your Butter is Ice Cold: For the flakiest, most tender Pasta Frolla, the butter must be very cold and cut into small cubes. This creates pockets of butter throughout the dough that release steam during baking, yielding a tender, crumbly texture.
- Chill Dough Thoroughly: The dough requires at least 2 hours of refrigeration, or even overnight, to allow the gluten to relax and the butter to firm up. This makes it much easier to roll out and prevents shrinking during baking. Don’t skip the second chilling step after rolling and forming the crust either!
- Cool the Fig Filling Completely: Before spreading the fig filling into the tart shell, ensure it has cooled completely to room temperature. Adding warm filling to a cold pastry can cause the butter in the dough to melt prematurely, affecting the crust’s texture.
- Use Parchment Paper for Rolling: Rolling the dough between two sheets of floured parchment paper is a game-changer. It prevents sticking, makes it easier to achieve an even thickness, and simplifies the transfer of the rolled dough to the tart pan.
- Don’t Rush the Cooling Process: After baking, allow the tart to cool completely on a wire rack before attempting to slice or serve. This allows the filling to set properly and the crust to become perfectly crisp.
How to Make the Irresistible Fig Tart Filling
The heart of this tart is its deeply flavorful, jammy fig filling. It’s a simple process that transforms dried figs into a luxurious concoction:
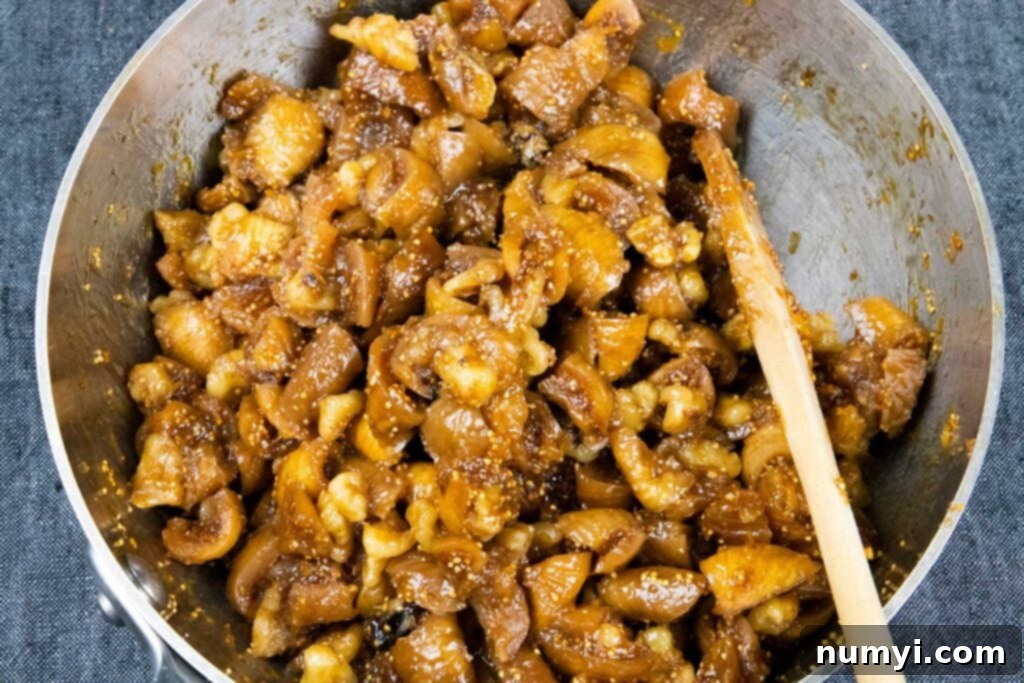
Begin by combining the coarsely chopped dried figs, brandy, water, and granulated sugar in a medium-sized saucepan. Place the saucepan over medium heat and bring the mixture to a gentle simmer. Once simmering, reduce the heat to low and cook, stirring occasionally, for about 10 minutes. During this time, the liquid will gradually evaporate, and the figs will absorb the moisture, becoming incredibly soft and tender. They’ll take on a beautiful, jam-like consistency. Once the liquid has mostly evaporated and the figs are very soft, remove the saucepan from the heat.
Stir in the fresh orange zest and the coarse chopped walnuts. The orange zest adds a bright, zesty note that cuts through the richness of the figs and brandy, while the walnuts introduce that essential textural crunch. Set the filling aside and allow it to cool completely to room temperature. This step is crucial, as a warm filling can negatively impact the integrity of your tart crust when assembled.
What is Pasta Frolla (tart dough)?
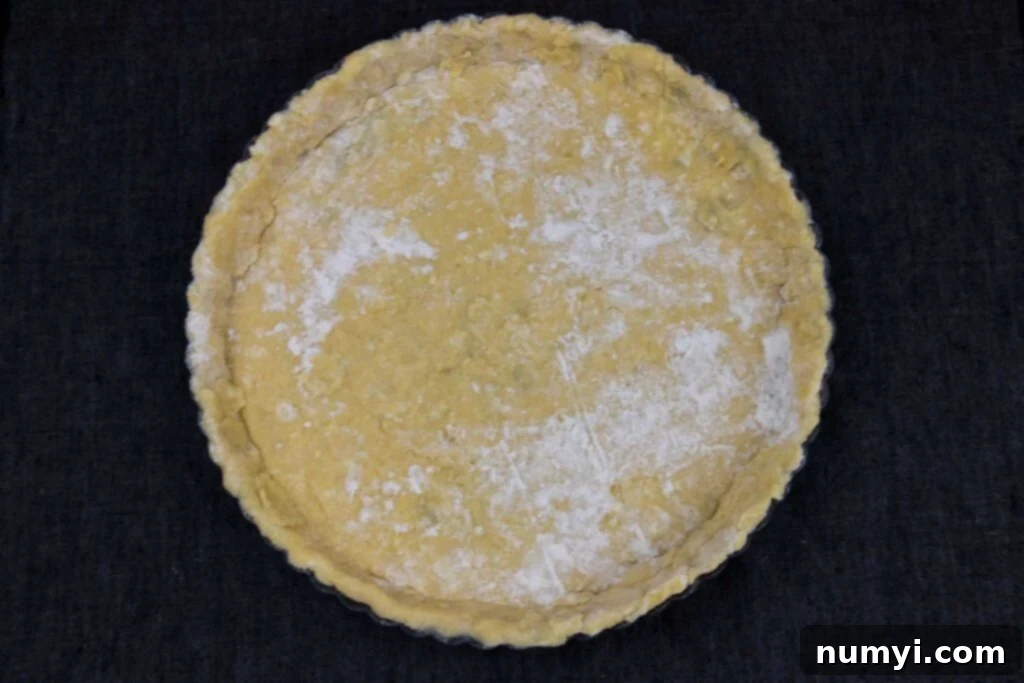
Pasta Frolla is a beloved Italian sweet shortcrust pastry, renowned for its tender, crumbly texture and rich, buttery flavor. The name itself, “pasta frolla,” literally translates to “fragile paste” or “crumbly dough,” perfectly describing its delicate characteristics. It’s a versatile dough used extensively in Italian baking for a wide array of treats, including various pies, delightful cookies (like crostata cookies), and, of course, tarts. What makes Pasta Frolla particularly suitable for this fig tart is its unique baking property: it cooks through beautifully and achieves a lovely golden hue without requiring pre-baking. This means you can add your filling directly into the raw crust, simplifying the entire process and ensuring a perfectly integrated tart.
How to Make the Perfect Pasta Frolla
Creating this tender Italian tart dough is straightforward, especially with the aid of a food processor:
Start by combining the dry ingredients: all-purpose flour, granulated sugar, salt, and baking powder in the bowl of your food processor. Pulse these ingredients for about 5 seconds to ensure they are well incorporated and evenly distributed.
Next, spread the cold, cubed unsalted butter evenly over the flour mixture. Pulse the food processor in short bursts, about 7-8 times, until the mixture resembles coarse cornmeal. It’s crucial not to over-process at this stage; you want distinct, small pieces of butter throughout the flour, which will create the tender, flaky texture when baked.
In a small separate bowl, whisk together the large egg, 1 tablespoon of cold water, and the pure vanilla extract. With the food processor running, gradually add the egg mixture through the feed tube. Continue to process just until the dough begins to come together and form a shaggy mass, typically about 10-12 seconds. Avoid letting it form a solid ball. If, after this time, the dough still seems too dry and crumbly to hold together when squeezed, add the other 1 tablespoon of water and pulse another 3-5 times. The goal is a dough that is just cohesive.
Once the dough is formed, pour it out onto a sheet of plastic wrap. Gently gather it and form it into a flattened 5-inch disk. Wrap the disk tightly in the plastic wrap, ensuring no air can get in. Refrigerate the dough for at least 2 hours, or ideally, overnight. This chilling period is vital as it allows the gluten to relax, making the dough easier to roll, and it firms up the butter, which contributes to the crust’s incredible texture.
When you’re ready to form the tart crust, remove the dough from the refrigerator and let it sit at room temperature for at least 10 minutes. This slight warming will make the dough more pliable and easier to roll without cracking.
Now, prepare your rolling surface: place the dough between two large sheets of lightly floured parchment paper. Roll the dough evenly into a 13-inch round. If you find the dough starts to stick to the parchment, carefully lift the sticky area with a bench scraper, dust a little more flour under the parchment, and continue rolling.
Once rolled, carefully slide the dough, still sandwiched between the parchment paper, onto a baking sheet. Refrigerate it again for about 15-20 minutes. This second chill firms up the rolled dough, making it much easier to transfer to the tart pan without tearing.
After chilling, remove the top layer of parchment paper. Carefully roll the dough loosely around your rolling pin, then gently unroll it over a 10-inch tart pan that has a removable bottom. Allow the excess dough to hang over the edges of the pan.
Carefully ease the dough into the pan. Use one hand to gently lift the edge of the dough while using your other hand to press it into the corners and against the fluted sides of the pan. Work gently to avoid stretching the dough. If you notice any sections of the edge are thinner than others, you can reinforce them by folding some of the excess dough back onto itself and pressing it against the thinner spots.
To trim the excess dough, run your rolling pin firmly over the top edge of the tart pan. The sharp edge of the pan will neatly cut away any overhang. Place the tart pan on a large plate to protect the removable bottom and wrap it with plastic wrap. Freeze the formed tart shell for at least 30 minutes, or until the dough is thoroughly chilled and firm. This final freeze helps the crust hold its shape perfectly during baking.
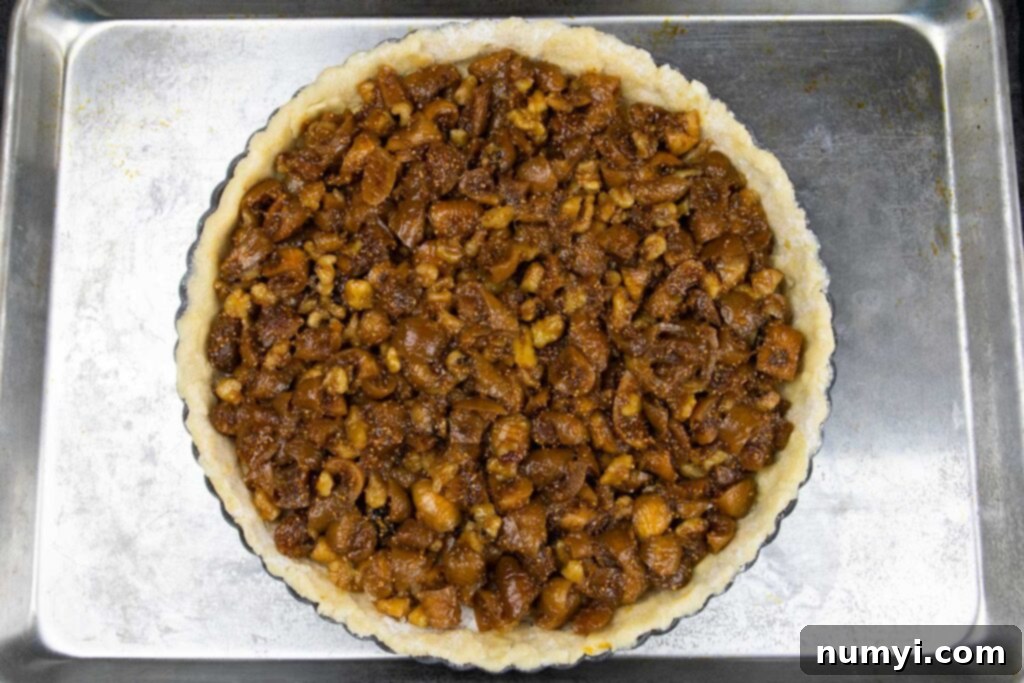
How to Assemble and Bake a Fig and Walnut Tart
With your crust perfectly chilled and your filling cooled, it’s time to bring everything together for baking.
First, preheat your oven to 325 degrees F (160 degrees C). A slightly lower temperature helps ensure the Pasta Frolla bakes through evenly without over-browning too quickly.
Remove the tart pan from the freezer and unwrap it. When baking, always place the tart pan on a rimmed baking sheet. This provides stability, makes it easier to transfer in and out of the oven, and catches any potential drips, though this tart is unlikely to leak.
Evenly spread the completely cooled fig and walnut filling over the bottom of the chilled tart shell. Make sure the filling is distributed from edge to edge.
Bake for 25 to 30 minutes. Keep an eye on the tart; it’s done when the edges of the tart crust are lightly golden brown. The filling will be bubbling slightly and set. Avoid over-baking to maintain the tender texture of the crust and the moistness of the filling.
Once baked, carefully transfer the entire tart (still in its pan) to a wire rack. Allow it to cool completely to room temperature. This step is crucial for the filling to fully set and for the crust to achieve its crisp, non-soggy texture. Attempting to remove or slice the tart while warm may result in it crumbling.
To remove the outer ring from the tart pan, place the tart on a sturdy surface. Gently push up the removable bottom from underneath. The outer ring should slide down easily. Then, use a thin metal spatula to carefully slide the tart from its bottom base onto a beautiful serving platter. This technique ensures a clean release and a beautifully presented tart.
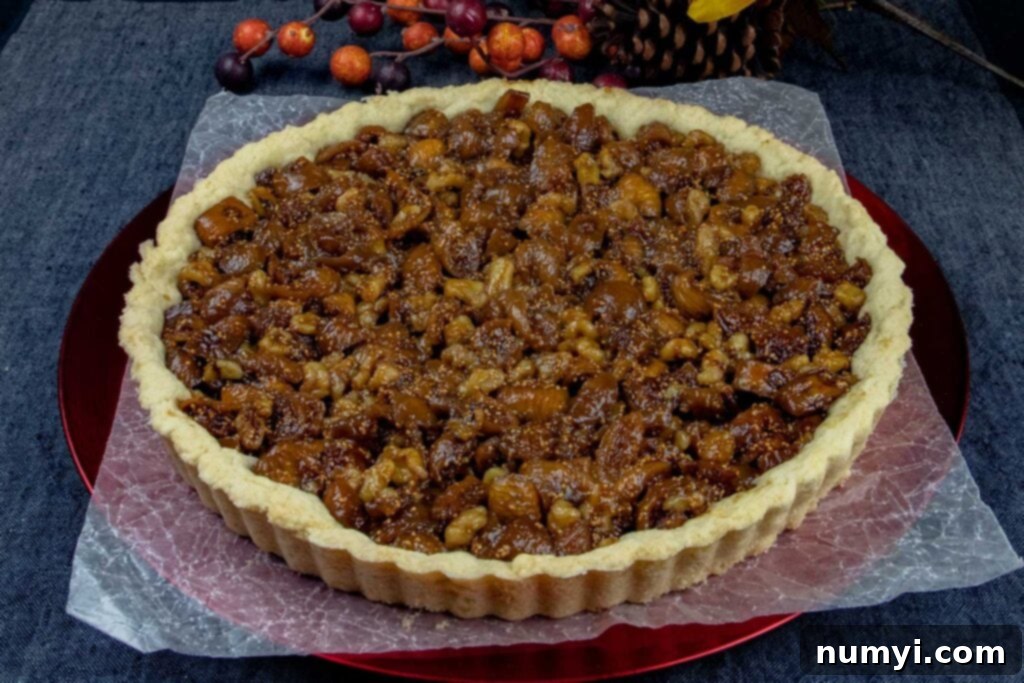
Serving Suggestions
This Fig and Walnut Tart is exquisite on its own, but it can also be elevated with a few simple accompaniments. A dollop of freshly whipped cream, a scoop of vanilla bean ice cream, or even a drizzle of honey can enhance its rich flavors. It pairs wonderfully with a warm cup of coffee or a glass of dessert wine, making it the perfect end to any meal or a delightful treat for an afternoon tea. The tart can be served at room temperature or slightly warmed for an extra cozy touch.
This fig tart recipe consistently receives rave reviews, and once you try it, you’ll understand why!
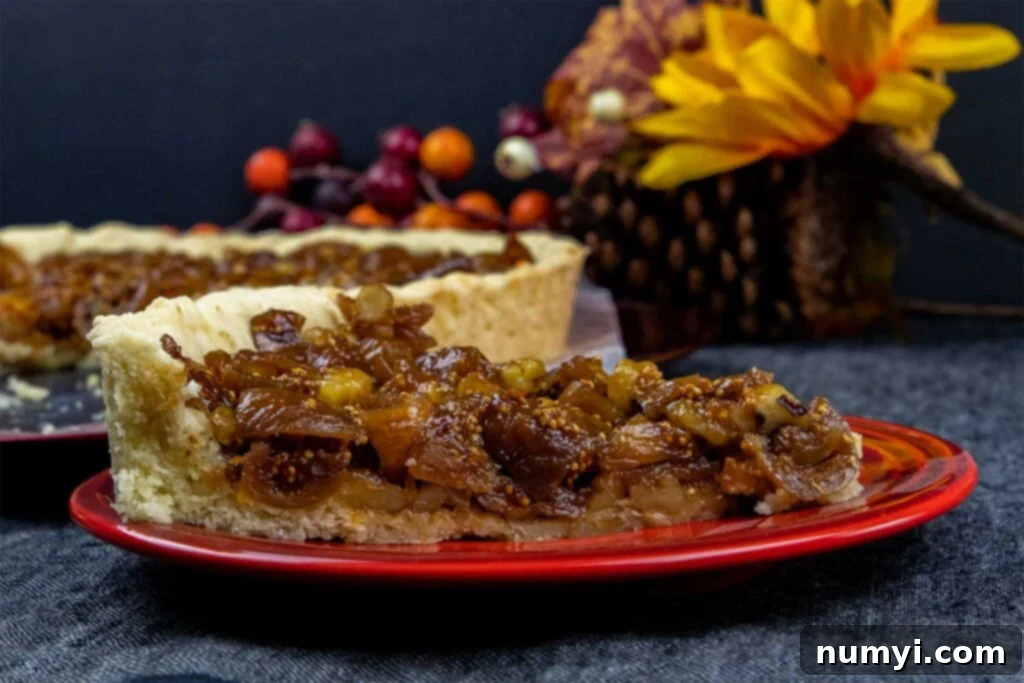
Frequently Asked Questions About Fig Tart
Once completely cooled, store the fig tart covered tightly in plastic wrap at room temperature for up to 4 days. If your kitchen is particularly warm, or if you want to extend its freshness, you can also store it in the refrigerator. Just remember to bring it back to room temperature before serving for the best flavor and texture.
While I haven’t personally tested freezing a fully baked fig tart for an extended period, you can certainly give it a try! For best results, allow the tart to cool completely. Then, wrap it tightly in several layers of plastic wrap, followed by a layer of aluminum foil, to prevent freezer burn. It should freeze well for up to a month or so. To serve, thaw overnight in the refrigerator, then bring to room temperature before enjoying. You might gently warm it in a low oven (around 250°F or 120°C) for 10-15 minutes to refresh the crust.
No, it is highly recommended to use dried figs for this recipe. Fresh figs contain a much higher water content, which will result in a watery filling and may make the tart crust soggy. Dried figs, when rehydrated and cooked, develop a concentrated, jammy texture that is ideal for this tart.
Absolutely! While walnuts provide a classic pairing, you can experiment with other nuts like pecans or almonds. Simply coarse chop them and add them to the fig filling as directed for walnuts. Each will offer a slightly different, but equally delicious, flavor profile.
If you prefer a non-alcoholic option, you can substitute the brandy with an equal amount of orange juice, apple juice, or even a flavorful non-alcoholic sparkling cider. These alternatives will still help rehydrate the figs and add a pleasant depth of flavor to the filling.
More Delicious Dessert Recipes To Try
- Walnut Fig Bread
- Italian Fig Cookies (Cucidati)
- Eggnog Cheesecake with Gingersnap Crust
- Gingersnap Crust Pumpkin Pie
- Bread Pudding with Bourbon Sauce
- Italian Butterball Cookies
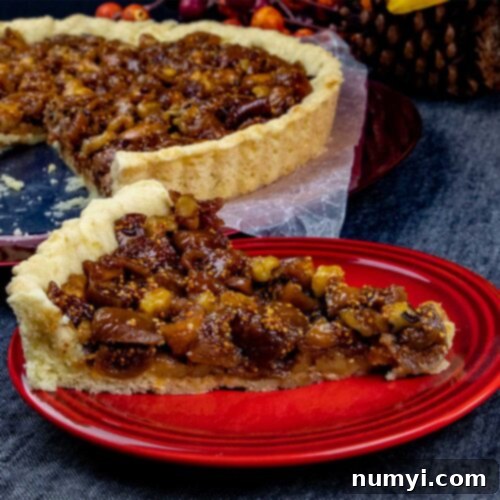
Fig Tart Recipe (with Walnuts)
Print
Pin
Rate
Ingredients
Filling
- 1 lb Dried Turkish figs, stemmed and coarse chopped
- 1/2 cup Brandy (or orange juice for non-alcoholic)
- 1 cup water
- 1/4 cup granulated sugar
- 1 1/2 tbsp fresh orange zest
- 1 cup Walnuts, coarse chopped
Tart Dough (Pasta Frolla)
- 1 1/3 cup All-purpose Flour
- 1/3 cup Granulated sugar
- 1/2 tsp Salt
- 1 1/4 tsp Baking powder
- 7 tbsp unsalted butter, very cold and cut into 1/4-inch cubes
- 1 large egg
- 1 tsp pure vanilla extract
- 1-2 tbsp cold water
Instructions
Fig and Walnut Filling
-
In a medium saucepan, combine the stemmed and coarse chopped figs, brandy (or preferred liquid), water, and granulated sugar. Bring the mixture to a gentle simmer, then reduce heat and cook, stirring occasionally, until the liquid fully evaporates and the figs become very soft and jam-like, about 10 minutes.
-
Stir in the fresh orange zest and coarse chopped walnuts. Set the filling aside to cool completely to room temperature before assembling the tart.
Pasta Frolla Tart Dough
-
In the bowl of a food processor, combine the all-purpose flour, granulated sugar, salt, and baking powder. Pulse for about 5 seconds until well incorporated.
-
Evenly spread the very cold butter cubes over the flour mixture. Pulse the food processor 7-8 times until the mixture resembles coarse cornmeal. Do not over-process.
-
In a small bowl, whisk the egg, 1 tablespoon of cold water, and vanilla extract. With the food processor running, gradually add the egg mixture. Process until the dough just starts to come together into a shaggy mass, about 10-12 seconds. If it’s too dry, add the other 1 tablespoon of water and pulse 3-5 more times until it barely holds together.
-
Pour the dough onto a sheet of plastic wrap, form it into a 5-inch disk, wrap tightly, and refrigerate for at least 2 hours (or up to overnight).
-
When ready to use, remove the dough from the refrigerator and let it warm up slightly for about 10 minutes to make it easier to roll.
-
Between 2 large sheets of lightly floured parchment paper, roll the dough into a 13-inch round. If sticking occurs, lift, reflour, and continue.
-
Slide the rolled dough (still in parchment) onto a baking sheet and refrigerate for another 15-20 minutes to chill thoroughly.
-
Remove the top parchment layer. Carefully roll the dough around a rolling pin and gently unroll it onto a 10-inch tart pan with a removable bottom, allowing excess dough to hang over the edge.
-
Ease the dough into the pan by gently lifting the edges with one hand and pressing it into the corners and fluted sides with the other. Reinforce any thin sections by folding excess dough back onto them.
-
Run the rolling pin over the top edge of the pan to cleanly cut and remove excess dough. Place the tart pan on a large plate and wrap with plastic wrap. Freeze for at least 30 minutes until the dough is firm and well-chilled.
Assemble and Bake
-
Preheat the oven to 325 degrees F (160°C).
-
Remove the tart pan from the freezer, unwrap, and place it on a rimmed baking sheet for stability. Spread the completely cooled fig filling evenly over the bottom of the chilled tart shell.
-
Bake for 25 to 30 minutes, or until the edges of the tart crust are lightly golden brown and the filling is set. Carefully transfer the tart (still in its pan) to a wire rack to cool completely to room temperature.
-
To remove the outer ring of the tart pan, gently push up the removable bottom. Then, slide a thin metal spatula between the tart shell and the bottom of the pan, and carefully slide the tart onto a serving platter. Slice and serve!
Notes
Nutrition
Adapted from America’s Test Kitchen
