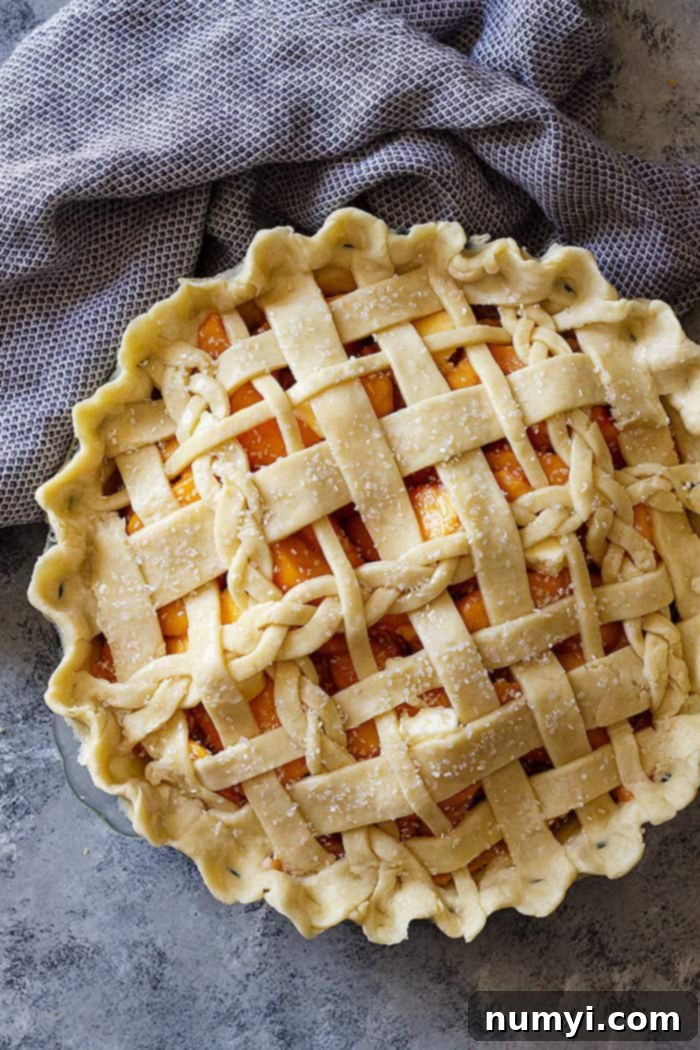
Mastering the Flaky All-Butter Pie Crust: Your Ultimate Guide to Perfect Homemade Pies
Creating a truly exceptional pie starts with a stellar crust. While many home bakers find pie dough intimidating, this all-butter flaky pie crust recipe is designed to be straightforward and rewarding. Using just a few simple ingredients, it produces a remarkably easy-to-roll dough that bakes into magnificent, delicate layers. Forget tough, bland, or crumbly crusts; prepare to impress yourself and your loved ones with pies that are not only delicious inside but also encased in a perfectly golden, buttery shell that melts in your mouth.
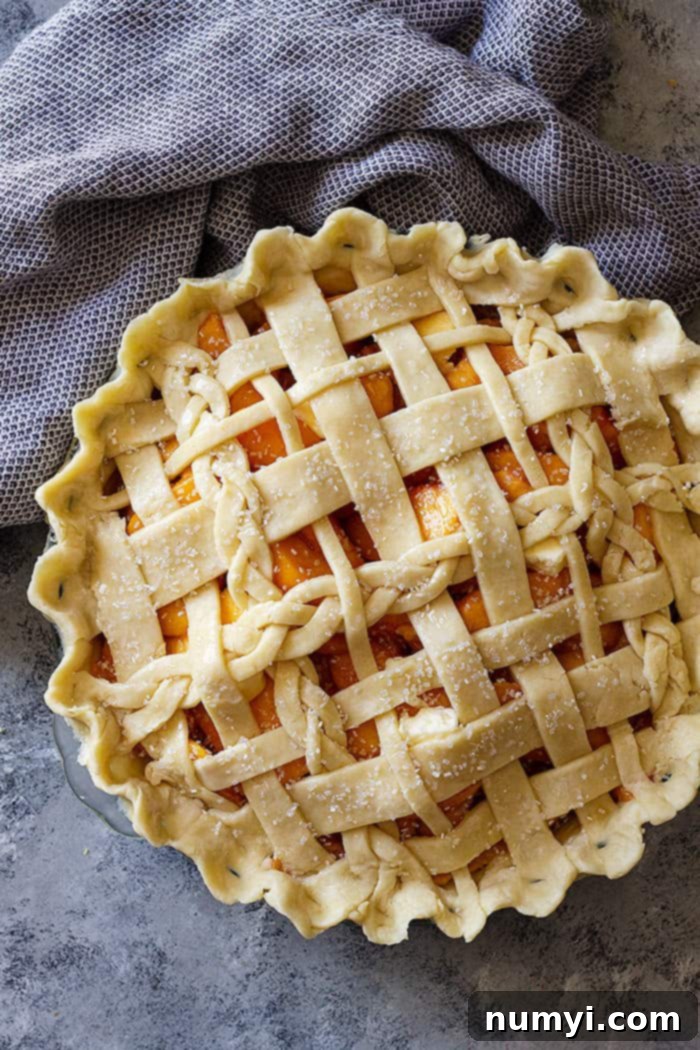
Why Choose All-Butter for Your Pie Crust? The Unrivaled Flavor and Texture
The arrival of fall often signals the start of pie season, bringing delightful aromas of peach, apple, pumpkin, and pecan pies. For many years, perfecting pie dough felt like an elusive quest for me. It’s a common struggle to achieve a consistently flaky, tender all-butter pie crust, a challenge I and my family know well! However, through countless attempts and a passion for homemade baking, I’ve gathered invaluable insights that I’m excited to share with you, ensuring your journey to perfect pie crusts is much smoother than mine was.
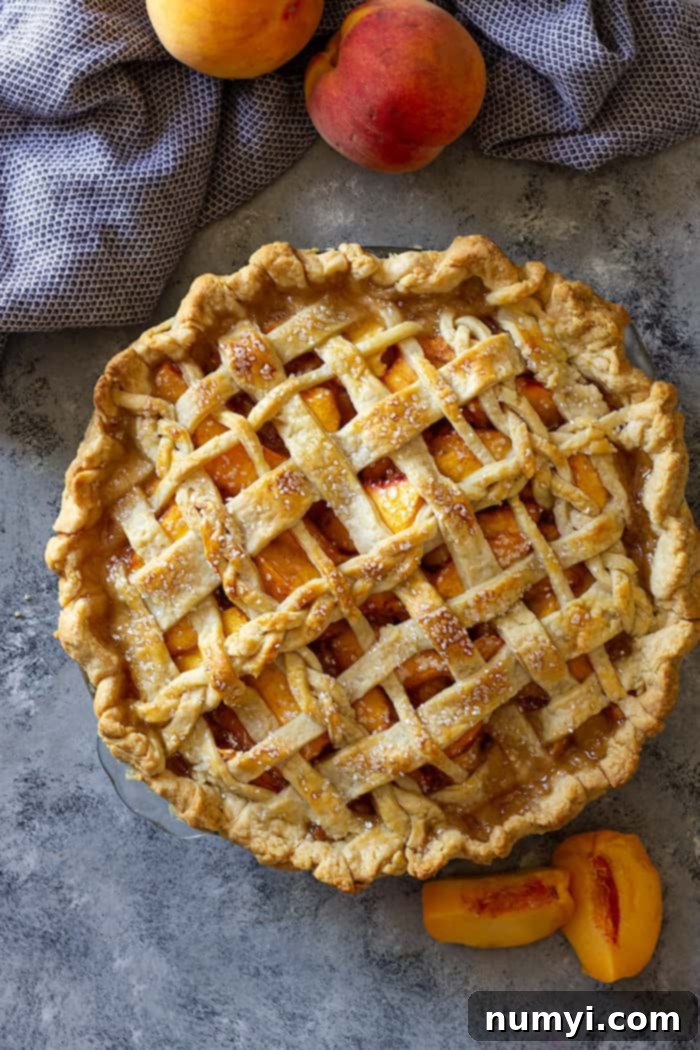
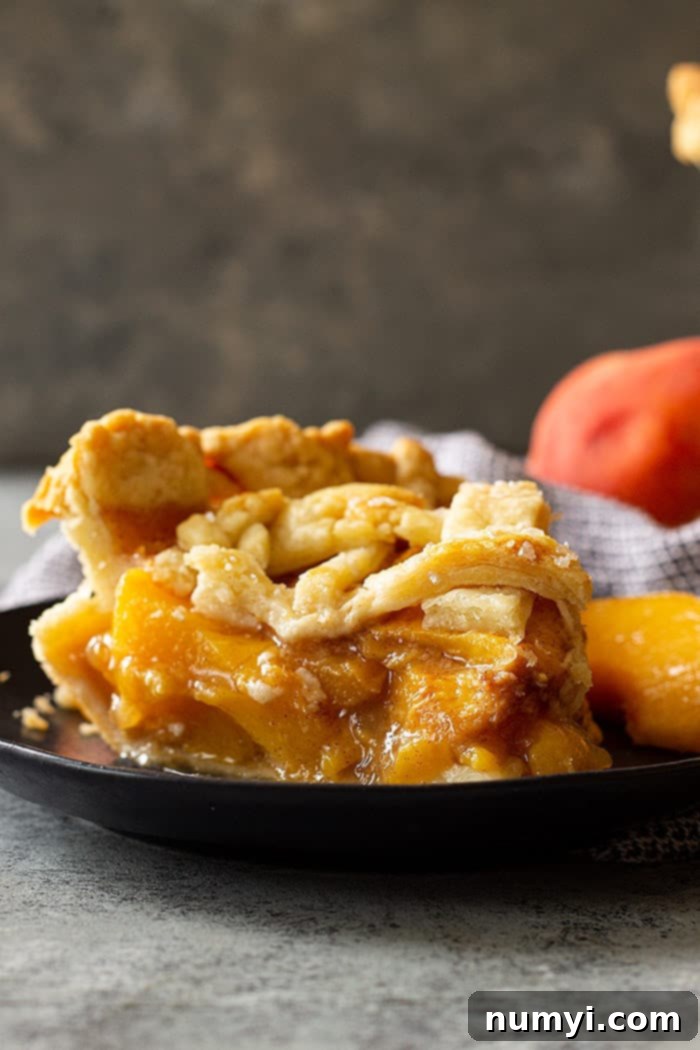
This versatile pie crust is perfect for a wide array of recipes, from rustic savory pot pies and quiches to luscious sweet fruit tarts and classic berry pies. Imagine a golden, crisp crust holding a rich chicken pot pie or elegantly complementing the sweet-tart filling of a classic peach pie. The possibilities are endless when you have a reliable, delicious crust recipe at your fingertips. And for those times you need to pre-bake your crust, don’t forget to explore our comprehensive guide on how to blind bake pie crust for a perfectly crisp and sturdy foundation.
Butter vs. Shortening: Understanding the Flaky Difference
When it comes to pie crusts, a fundamental debate often arises among bakers: butter, shortening, or a blend? My unequivocal preference, and what I believe to be the superior choice for both flavor and texture, is an all-butter pie crust. The reasons are simple yet profound: exceptional taste and unparalleled flakiness. The rich, nuanced flavor of real butter infuses the crust with a depth that complements any filling, transforming what could be a mere vessel into an integral and delicious part of the dessert’s appeal. Unlike the often-bland or neutral flavor profile of shortening or lard, butter adds a luxurious quality that truly elevates the entire pie experience.
The secret to butter’s flakiness lies in its unique composition. Butter contains a significant amount of water, typically around 15-20%, whereas shortening and traditional lard are almost 100% pure fat. When a butter-laden crust bakes in a hot oven, this water rapidly converts into steam. This steam then pushes apart the layers of flour and fat, creating countless delicate, airy pockets throughout the dough. These pockets are what give the crust its signature light, brittle, and distinctly flaky texture. Shortening or lard, lacking this water content, tend to produce a more tender but crumbly crust, with less defined layers.
While a pie dough made with shortening or lard might initially seem easier to handle due to its higher plasticity and slower melting point, it often falls short on flavor. Furthermore, shortening can sometimes leave an unappetizing greasy sensation in your mouth, which can detract from the overall enjoyment of the pie. As for lard, finding good quality, pure, and neutral-tasting lard is incredibly difficult for the average home cook, and the hydrogenated varieties commonly found in most grocery stores are best avoided for both flavor and texture reasons. For a truly gourmet, melt-in-your-mouth crust that boasts both incredible flavor and an ethereal flakiness, butter remains the undisputed champion.
The Secrets to a Truly Flaky Pie Crust
Achieving a perfectly flaky, tender pie crust is a culinary art that, while demanding precision, is entirely within reach for any home baker. By understanding and adhering to a few key principles, you can consistently prevent tough, dense, or crumbly crusts and ensure those coveted layers develop beautifully in the oven. Here are the foundational techniques that will elevate your pie game.
Essential Techniques for Perfect Pie Dough
- Keep Everything Cold! The Absolute Golden Rule: This cannot be stressed enough. Very cold butter and ice-cold water are absolutely non-negotiable for a truly flaky crust. If your butter is too warm, it will melt into the flour too quickly, creating a homogeneous mixture instead of distinct fat pockets. These intact pockets of butter are what expand into steam and separate into flaky layers during baking. Warm butter also encourages excessive gluten development, which can lead to a tough, inelastic crust. For best results, consider chilling your flour and even your mixing bowl in the refrigerator for 15-30 minutes, especially if you’re baking on a warm day or if your kitchen runs hot.
- Embrace the Pastry Cutter (or Your Hands) for Optimal Butter Distribution: While a food processor can speed up the process of cutting in butter, a pastry cutter offers unparalleled control over the size of your butter pieces. I strongly prefer it because it allows me to leave a varied range of butter chunk sizes within the flour mixture. You want some pieces as small as cornmeal, a significant portion around the size of large peas, and even a few larger chunks, about almond-sized. These larger, distinct pieces of butter are crucial; they create larger steam pockets during baking, which in turn lead to more pronounced, beautiful, and airy flaky layers. A food processor often pulverizes all the butter into tiny, uniform pieces, which can diminish overall flakiness. If using your hands, work very quickly, using your fingertips to rub the butter into the flour.
- Mix Lightly and Avoid Overworking the Dough at All Costs: Overmixing is the ultimate enemy of a tender pie crust. When flour and water are combined, gluten strands begin to develop. The more you mix, knead, or handle the dough, the stronger and tougher these gluten strands become. This is another reason a pastry cutter is advantageous; it helps you incorporate ingredients without excessive handling. Gentle mixing ensures the butter pieces remain intact and the gluten development is minimized, resulting in a wonderfully tender, rather than chewy, crust. Stop mixing as soon as the dough just barely comes together into shaggy clumps.
- Add Liquid Slowly and Judiciously: Precision is paramount when adding liquid to your pie dough. Cold liquid needs to be incorporated gradually, a tablespoon or two at a time. Adding too much water all at once can quickly lead to an overly hydrated, sticky, and tough dough that is difficult to roll. Observe your mixture carefully: drizzle the ice water (which usually contains a touch of vinegar, acting as a tenderizer) around the outer edge of the bowl. After each addition, use a fork to gently toss the damp flour from the edges towards the center. This technique ensures even distribution of moisture without over-saturating any one area. Continue until the flour mixture starts to form larger, shaggy clumps that hold their shape when squeezed. The exact amount of water can vary based on flour type, humidity, and even the butter’s moisture content, so trust your judgment over strict measurements here. It’s better to err on the side of slightly too dry than too wet.
Step-by-Step Guide to Crafting Your All-Butter Pie Dough
Follow these detailed steps to create a beautiful, flaky pie crust from scratch. Attention to detail at each stage will significantly increase your chances of success and yield a crust you’ll be proud of.
- Combine Dry Ingredients: In a large, spacious mixing bowl, whisk together the all-purpose flour and salt until thoroughly combined. The salt is crucial not only for enhancing flavor but also acts as a tenderizer, helping to relax the gluten in the dough and preventing it from becoming too tough.
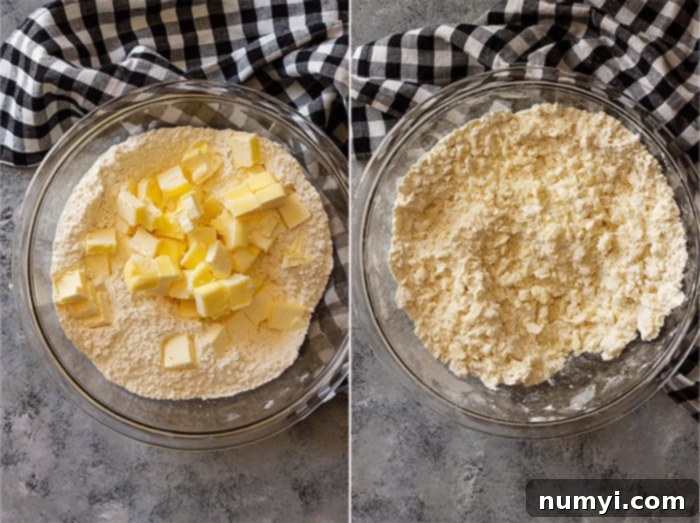
- Incorporate Cold Butter Effectively: Take your unsalted butter, which should be very cold (straight from the refrigerator), and cut it into small, ½-inch cubes. This pre-cubing helps the butter distribute more evenly and speeds up the process of cutting it into the flour without warming it too much with your hands. Using a pastry blender (or your fingertips, working very quickly), cut the butter into the flour mixture. Work efficiently, stopping when the mixture has a varied, sandy texture: you should see some butter pieces resembling cornmeal, a significant portion around the size of large peas, and a few larger chunks, about almond-sized. This range of sizes is key to achieving optimal flakiness.
- Gradually Add Liquid for Perfect Consistency: Prepare your liquid by adding the tablespoon of vinegar (white or apple cider) to 6-10 tablespoons of ice water. The vinegar acts as a tenderizer, further inhibiting gluten development. Add this cold liquid slowly, one to two tablespoons at a time, drizzling it evenly around the outer edge of the bowl. After each addition, use a fork to gently toss the damp flour from the edges towards the center. This ensures even distribution of moisture without over-saturating any one area. Continue this process until the flour mixture starts to form larger, shaggy clumps that just barely hold together.
- Test for Proper Hydration: To confirm if your dough has enough liquid, gather a small handful (about the size of a golf ball) and firmly press it together. If it holds its shape and doesn’t crumble apart when you gently break it in half, it’s sufficiently hydrated. If it’s still too crumbly and falls apart easily, add a little more ice water, one tablespoon at a time, and mix gently with a fork before testing again. Remember, it’s easier to add more liquid than to remove it, so err on the side of slightly drier dough initially.
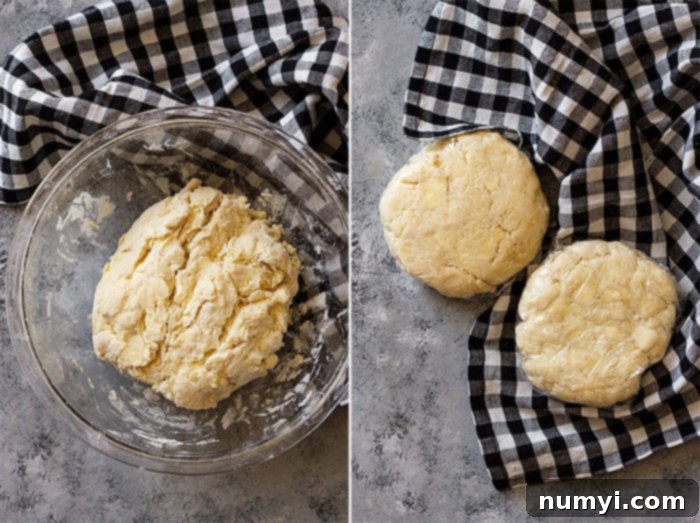
- Form and Chill the Dough Properly: Once the dough is properly hydrated, divide it into two equal portions. Gently form each portion into a round, flat disk. Avoid kneading or overworking the dough at this stage, as this will develop gluten and make your crust tough. Wrap each disk tightly in plastic wrap to prevent drying and refrigerate for a minimum of 1 hour, or preferably longer (up to 1 week). This chilling period is vital as it allows the flour to fully hydrate, the butter to firm up again, and the gluten strands to relax, making the dough much easier to roll out without shrinking or tearing. If you’ve chilled your dough for more than an hour (or even overnight), let it sit on the counter for 10-15 minutes before rolling to allow it to soften slightly and become more pliable.
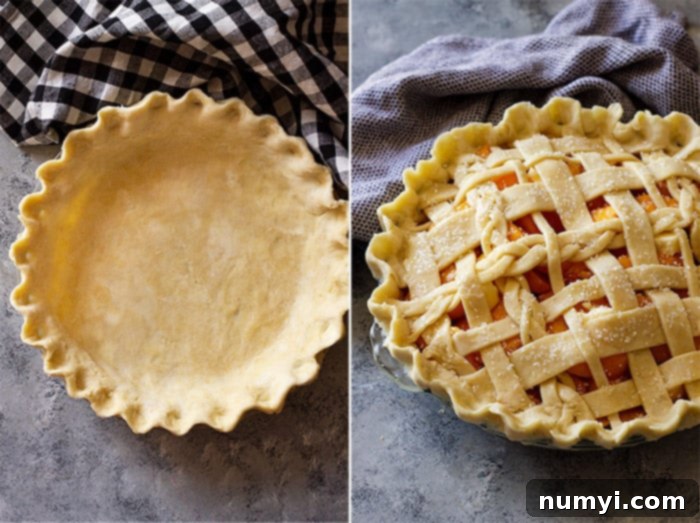
- Roll Out and Transfer with Care: Lightly flour a clean work surface and your rolling pin. Place one chilled dough disk on the floured surface. Starting at the center, roll outwards, applying even pressure. After each roll, give the dough a quarter turn (90 degrees). Continue this until the dough is around 1/8 to 1/4 inch thick, forming a circle large enough for your pie plate. If your dough starts to crack at the edges, don’t worry! With a slightly damp fingertip, gently press the cracks back together. To transfer the dough to the pie plate, gently fold it in half, then in half again (into a quarter circle). Carefully lift it and place the point into the center of your pie plate. Unfold the dough and ease it into the pan, making sure it sits snugly in all corners without stretching. Stretching will cause shrinkage during baking. Trim and crimp the edges as desired.
- Final Chill Before Baking: After you’ve assembled your pie in its crust (whether filled or blind-baking), place the entire pie in the freezer for 5-10 minutes (or in the refrigerator for 20-30 minutes) before baking. This final chill is a game-changer! It ensures the butter is intensely cold just before hitting the hot oven, maximizing steam production for flakiness and preventing the crust from shrinking significantly or losing its shape during baking.
Expert Tips for Baking Your Flaky Pie Crust to Perfection
Beyond the meticulous dough preparation, a few crucial tips during the rolling and baking phases can dramatically improve your pie crust results, ensuring it’s both visually stunning and exquisitely delicious. These details can make all the difference between a good pie and an unforgettable one.
- Reiterate with Emphasis: KEEP EVERYTHING COLD! I cannot emphasize this enough. Cold butter is the cornerstone of a truly flaky crust. If your kitchen is warm, or if you feel the butter in your dough starting to soften, work quickly. Don’t hesitate to pop the dough (or even your entire assembled pie) back into the refrigerator for 10-15 minutes if it starts to feel soft or sticky while you’re working with it.
- Maintain a Light Hand When Mixing and Rolling: Just like with the initial mixing of ingredients, a gentle approach is paramount when rolling out your dough. Excessive pressure or heavy-handed rolling can toughen the crust by further developing gluten. When you’re tossing the flour and liquid with a fork, use a light touch to prevent overworking the gluten and to keep those vital butter pieces distinct.
- Chill, Chill, and Chill Again: The Triple Chill Method: As highlighted in the step-by-step guide, chilling the dough is critical at multiple stages: first, after mixing and forming the disks (to hydrate flour and relax gluten); second, after placing the dough into the pie dish and crimping the edges (to prevent shrinkage); and finally, just before it enters the oven (to ensure the butter is as cold as possible for maximum flakiness). These three chilling steps are non-negotiable for a truly professional result.
- Opt for a Glass or Ceramic Pie Dish: Glass or ceramic pie dishes are often superior to metal ones for baking pie crusts. These materials conduct heat more evenly, which is essential for achieving a uniformly browned and wonderfully crisp bottom crust. Metal pans, especially lighter ones, can sometimes lead to uneven baking, particularly leaving the bottom crust pale or soggy due to inconsistent heat distribution. Dark metal pans can sometimes over-brown the crust, so watch carefully.
- Master the Rolling Technique for Even Thickness: To prevent sticking and ensure your dough has a consistent, even thickness, always roll your dough from the center outwards. After each roll, give the dough a quarter turn (90 degrees). This technique helps to expand the dough uniformly in all directions and prevents it from sticking excessively to your work surface. If the dough starts to crack at the edges while rolling, don’t fret! Simply moisten your fingertip with a tiny bit of ice water and gently press the cracks back together.
- Prevent Over-Browning with a Pie Shield: The delicate edges of a pie crust often brown much faster than the center of the pie, sometimes burning before the rest of the pie is fully cooked. A pie shield (a metal ring that covers the crust edges) or a homemade foil ring is an invaluable tool for protecting these susceptible areas. You can place it over the crust once it’s reached your desired golden brown. I’ve only needed mine a couple of times, but when I did, I was incredibly grateful to have it on hand!
- Practice Makes Perfect: The Baker’s Mantra: I know it’s not what everyone wants to hear, but truly mastering pie crust, like many baking skills, simply takes practice. Don’t be discouraged by imperfections; view each pie you make as a valuable learning opportunity. The more you bake, the more intuitive the process will become. You’ll develop a better feel for the dough’s correct texture and consistency, and your confidence will soar with every beautifully baked crust.
Frequently Asked Questions About All-Butter Pie Crust
Troubleshooting Common Pie Crust Issues
- Why is my pie crust tough? This is almost always a sign of overworking the dough, which develops too much gluten. Ensure you handle the dough minimally, mixing just until it comes together. Using warm ingredients can also contribute to a tough texture, as butter melts faster and promotes gluten formation.
- How do I prevent a soggy bottom crust? A soggy bottom is a common frustration, but preventable with these tips:
- Blind baking: For pies with very wet fillings (like pumpkin or quiche), always blind bake your crust first.
- Hot oven: Ensure your oven is fully preheated to the correct temperature. A hotter oven sets the crust faster.
- Glass/Ceramic pie dish: These materials conduct heat more evenly to the bottom crust.
- Pre-bake chilling: Chilling the assembled pie helps the butter firm up, creating a more robust structure that resists moisture.
- Hot baking sheet: For an extra boost of heat to the bottom, place your pie dish on a preheated baking sheet when it goes into the oven.
- Why does my pie crust shrink in the oven? Shrinkage is almost always due to the gluten in the dough not being relaxed enough. Ensure you chill your dough adequately (at least 1 hour, preferably longer) after forming the disks, and again after placing it in the pie dish and crimping the edges. Crucially, do not stretch the dough into the pie plate; gently ease it in to prevent it from snapping back during baking.
- What if my dough is cracking when I roll it? This typically means the dough is either too cold or slightly too dry. If too cold, let the dough sit at room temperature for an extra 5-10 minutes to soften slightly. If it’s too dry, gently moisten any cracks with a tiny bit of ice water using your fingertip, then continue rolling.
Make-Ahead and Storage Tips for Convenience
- Storing Unbaked Dough Disks: Tightly wrapped in plastic wrap, unbaked pie dough disks can be stored in the refrigerator for up to 5 days. For longer storage, you can freeze the wrapped disks for up to 3 months. When ready to use, thaw them in the refrigerator overnight before rolling.
- Storing Unbaked Pie Shells: You can press the dough into pie plates, crimp the edges, and then freeze the unbaked shells for future use. Wrap them tightly first in plastic wrap, then in aluminum foil to prevent freezer burn. They can be frozen for up to 1 month. When ready to use, you can bake them directly from frozen; just add an extra 5-10 minutes to the specified baking time.
- Freezing Baked Pie Crusts: If you’ve blind-baked a pie crust and want to get a head start, you can also freeze it. Once completely cooled, wrap it well in plastic wrap and aluminum foil and freeze for up to 1 month. Thaw at room temperature before filling and baking according to your recipe.
HUNGRY FOR MORE? Subscribe to my newsletter and follow along on Pinterest, Facebook, and Instagram for all my latest updates!
All Butter Pie Crust
2
pie crusts
Malinda Linnebur
Save Recipe
Saved!
20 minutes
1 hour
1 hour
20 minutes
Prevent your screen from going dark
Ingredients
-
2½ cups (330g) all-purpose flour -
1 teaspoon salt -
1 cup (230g) unsalted butter, COLD and cut into cubes -
1 tablespoon vinegar (white or apple cider) -
6-10 tablespoons ice water
Instructions
-
Mix the flour and salt together in a large bowl. Add the COLD cubed butter.
-
With a pastry blender (cutter) cut the butter into the flour. Do this until you have a wide variety of chunks in the flour. Some should look like cornmeal, a large portion should look like the size of large peas, and some should be the size of almonds.
-
Add the vinegar and ice water 1-2 tablespoons at a time. Drizzle it around the edge of the bowl and after each addition use a fork to toss the damp flour towards the center of the bowl. You have added enough water when the flour begins to make large clumps. You can also test by taking a large handful and squeeze into a ball. If it is too crumbly to make into a ball or falls apart when you break it in half you need to add more water.
-
Divide the dough in half and shape each into a round disk. Cover each with plastic wrap and refrigerate for a minimum of 1 hour and up to 1 week.
-
Lightly flour a work surface and place one dough disk on the floured surface. Starting at the center roll out to the edge and give the dough a slight turn and continue until the dough is around 1/8 to 1/4″ thick. If your dough starts to crack don’t worry. With a slightly damp finger join the cracks together.
-
Fold the dough in half and in half again and place into pie plate. Unfold dough and ease it into the pan. Never stretch the dough. Continue with your pie per your recipe’s directions.
Notes
- Can store tightly wrapped dough in the refrigerator for up to 1 week or freeze for up to 1 month.
- Please read the post for additional tips and tricks on making pie dough.
- Nutrition Facts: Since different brands of ingredients have different nutritional information, the information shown is just an estimate. Nutrition is for a single pie crust.
Nutrition
Carbohydrates: 226g |
Protein: 32g |
Fat: 99g |
Saturated Fat: 61g |
Cholesterol: 254mg |
Sodium: 1184mg |
Potassium: 345mg |
Fiber: 8g |
Sugar: 1g |
Vitamin A: 2956IU |
Calcium: 73mg |
Iron: 14mg
Did you make this?
Let me know by sharing a picture and tagging @countryside_cravings on Instagram
