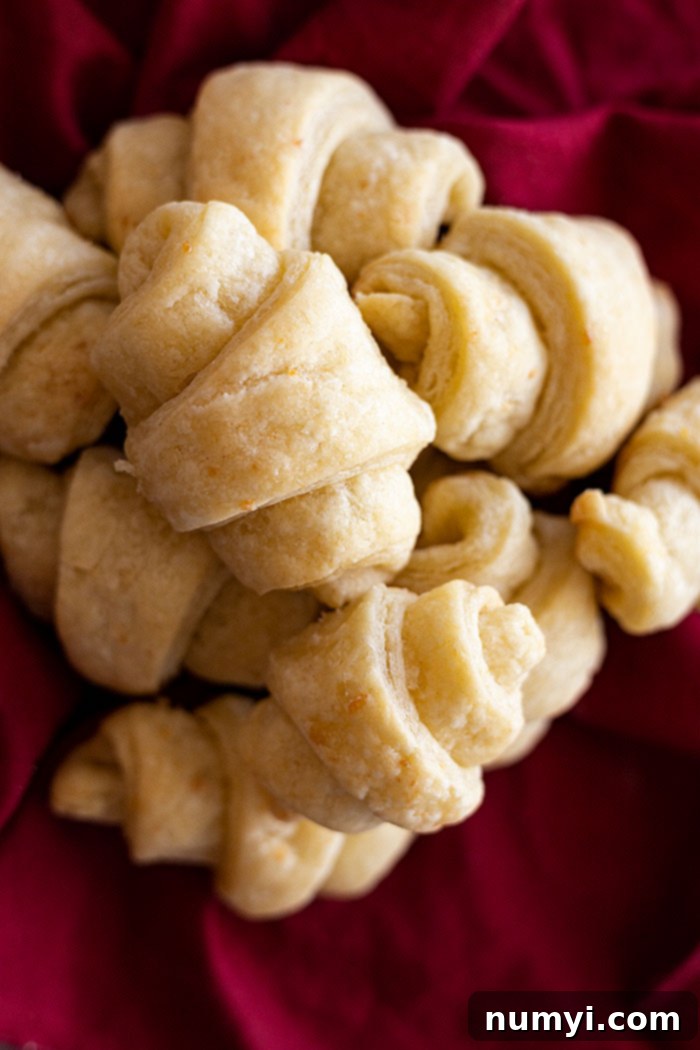
Easy 3-Ingredient Cottage Cheese Crescent Rolls: Flaky & Delicious!
Imagine warm, tender, and irresistibly flaky dinner rolls emerging from your oven with minimal effort. These incredible cottage cheese crescent rolls are exactly that! Requiring just three simple ingredients, they are a testament to easy homemade baking. Whether you’re a seasoned baker or a complete beginner, you’ll be amazed at how quickly you can create these buttery, soft rolls that perfectly complement any main meal. They’re not only incredibly simple to master but also wonderfully versatile – easily adaptable for savory dishes or transformed into a delightful sweet treat. Plus, their make-ahead and freezer-friendly nature makes them a convenient choice for any occasion!
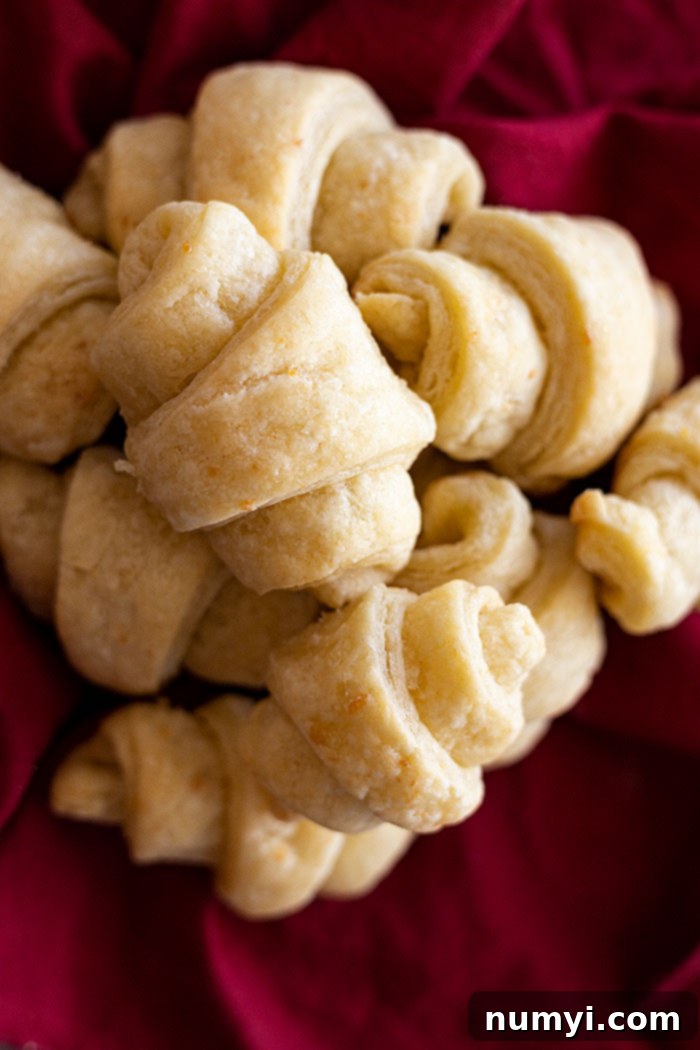
There’s nothing quite like the aroma and taste of freshly baked homemade bread or rolls. That warm, comforting bite is often hard to resist, making it nearly impossible to stop at just one. Am I right? However, the thought of spending hours in the kitchen, dealing with multiple proofs, and complex steps can often deter even the most enthusiastic home cooks. This is where our sensational 3-ingredient cottage cheese crescent rolls come to the rescue! This recipe is designed to solve that very problem, offering you the joy of homemade bread without the time commitment. These rolls are exceptionally easy to prepare, brimming with countless flaky layers, and wonderfully adaptable to be either savory companions for dinner or sweet delights for breakfast or dessert. Get ready to impress your family and friends with these delectable, no-fuss rolls!
Unveiling the Magic of These Cottage Cheese Crescent Rolls
Let’s dive deeper into what makes these rolls a must-try in your kitchen:
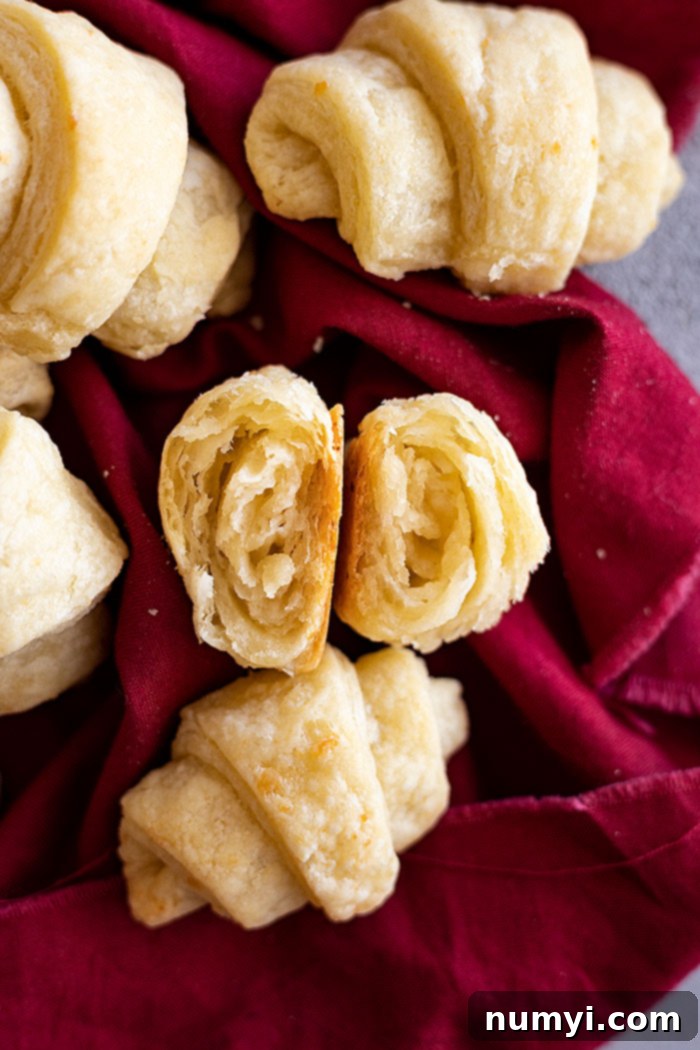
- Flavor Profile: Let’s address the elephant in the room first: no, these rolls absolutely do not taste like cottage cheese! Many people are initially hesitant, thinking the prominent ingredient will dominate the flavor. Rest assured, the cottage cheese acts as a magical component, contributing immense moisture, richness, and an incredibly tender texture to the dough, without imparting any discernible “cottage cheese” taste. Instead, you’ll experience a pure, buttery, and slightly tangy flavor that is simply divine. It’s truly one of the most surprising and delightful aspects of this recipe.
- Time Efficiency: One of the most fantastic benefits of these particular rolls is the complete absence of any rising time. Unlike traditional yeast breads that demand hours of waiting for the dough to proof, these cottage cheese rolls skip that step entirely. In fact, this recipe uses no leavening agent whatsoever, relying on the butter and cottage cheese to create its unique structure and flakiness. From start to finish, you’re looking at approximately 30 minutes of active prep and shaping, followed by a quick 25-30 minute bake time. This means you can have warm, fresh rolls on your table in under an hour – perfect for weeknight dinners or last-minute gatherings!
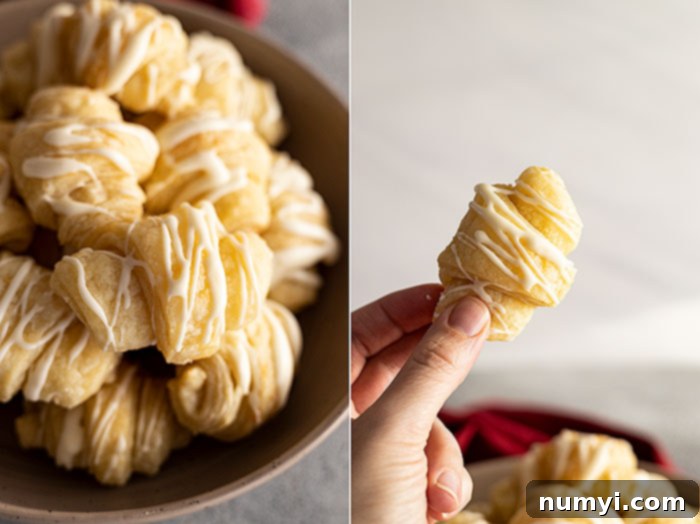
- Savory or Sweet Versatility: These little gems offer incredible flexibility. Leave them plain, and they become a wonderfully savory addition to any meal. Their rich, buttery flavor pairs beautifully with hearty soups, stews, roasted meats, or a simple green salad. But if you’re craving something a little different, they transform effortlessly into a delightful sweet treat. A simple drizzle of a vanilla-infused glaze after cooling can turn them into a breakfast pastry or a light dessert. We’ll cover more exciting variations further down!
- Beginner-Friendly Baking: If the thought of tackling yeast breads or complicated baking techniques has always seemed daunting, these cottage cheese crescent rolls are the perfect starting point to build your confidence. There’s no yeast to activate, no complex kneading schedules, and minimal precise timing involved. The dough comes together easily, and the shaping is intuitive. It’s an ideal recipe for anyone looking to dip their toes into the world of homemade baking without the intimidation factor.
The Super-Short Ingredient List: Only 3!
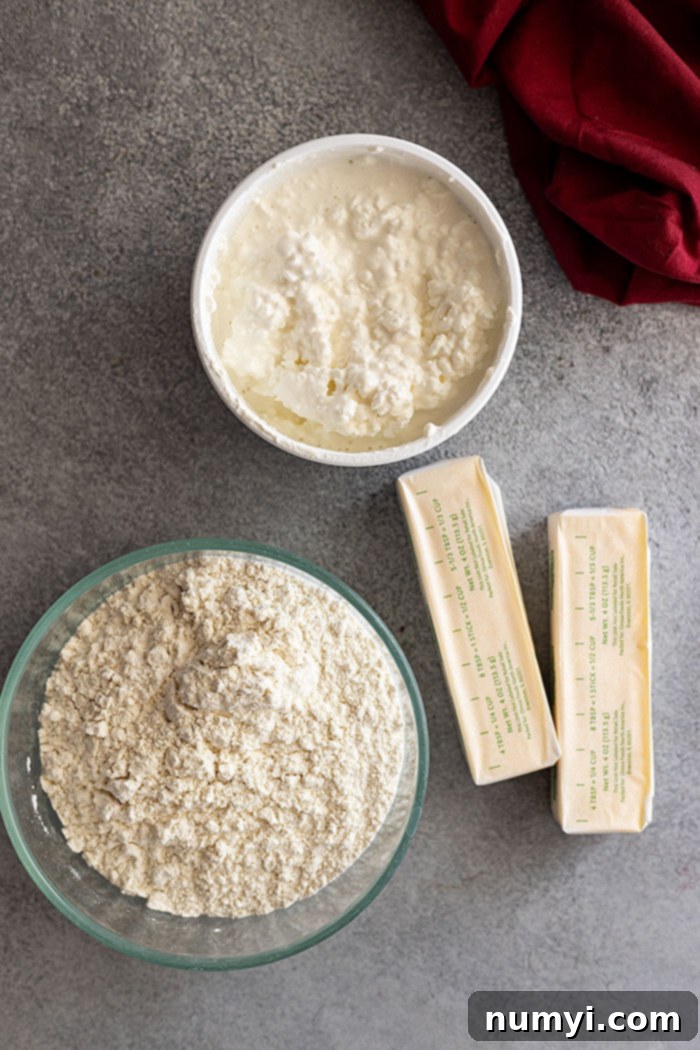
As highlighted, the beauty of this recipe lies in its simplicity. You truly only need three core ingredients, making it accessible and easy to whip up anytime you have a craving for fresh rolls. These ingredients are likely staples you already have in your kitchen, or can easily find at any grocery store:
- All-Purpose Flour: The foundation of our rolls, providing structure and body. Standard all-purpose flour works perfectly for achieving that desired tender texture.
- Cottage Cheese: This is the secret star ingredient! It’s crucial for lending unparalleled moisture and richness to the dough, which contributes to the rolls’ incredible softness and slight tang without tasting like cheese. For the best results in terms of texture and flavor, aim to use 2% or whole-fat cottage cheese. The higher fat content will yield a more tender and flavorful roll. Avoid low-fat or fat-free varieties as they can result in a drier, less rich final product. Be sure your cottage cheese is cold when you start!
- Butter: The key to those coveted flaky layers and irresistible buttery flavor. There are no substitutes here – real butter is essential for the success of this recipe. The quality of your butter will directly impact the taste and texture, so use a good quality unsalted butter if possible. Like the cottage cheese, the butter should be cool but slightly softened (not melted) for optimal mixing and dough consistency.
Key Steps for Perfect Cottage Cheese Crescent Rolls
Follow these straightforward steps, and you’ll have beautifully flaky rolls in no time:
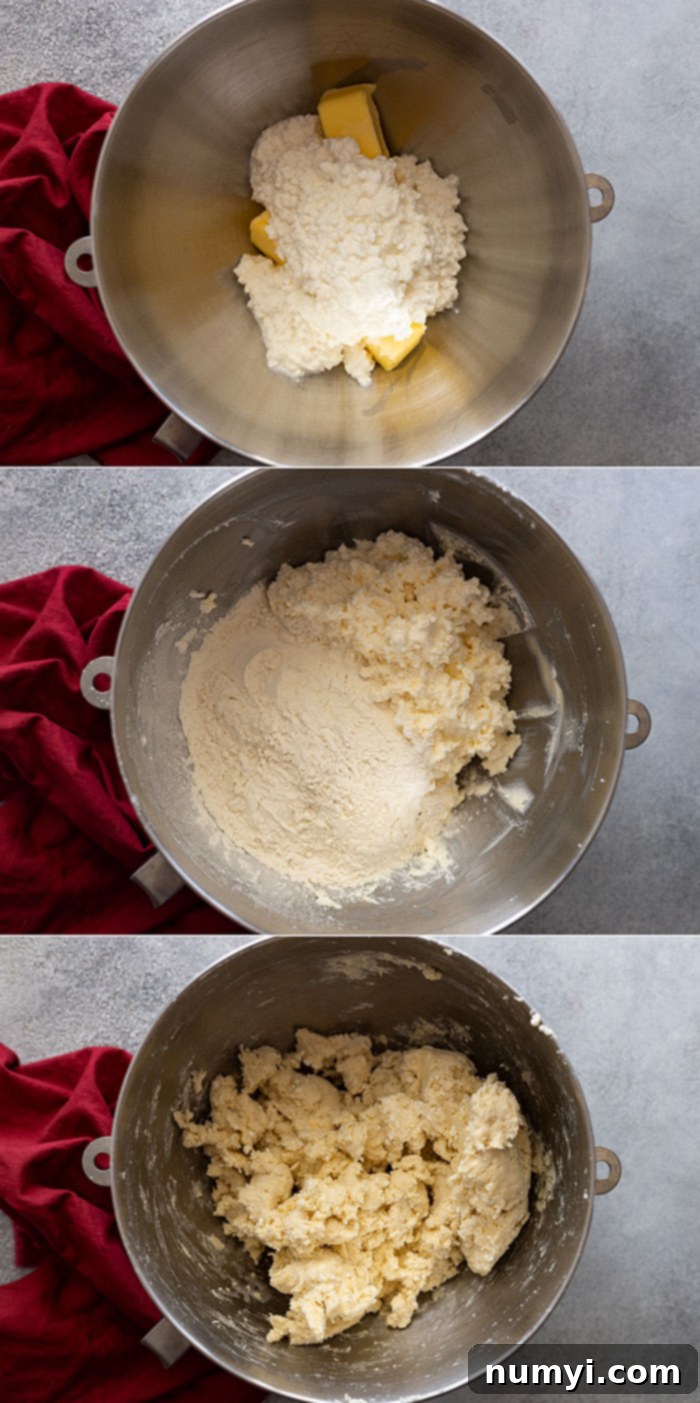
MAKING THE DOUGH: The first step is critical for developing the right texture. You’ll want your butter to be slightly softened – think pliable, but still cool to the touch, not melted or greasy. Similarly, your cottage cheese should be cold, straight from the refrigerator. Combine the softened butter and cold cottage cheese in the bowl of your stand mixer, fitted with the paddle attachment. Mix on medium speed until these two ingredients are mostly combined. It’s important to note that it won’t be a perfectly smooth mixture; if you look closely at the photos above, you can see it retains a slightly curdled appearance. The goal is to mix until there are no large, distinct chunks of butter remaining, but rather a relatively uniform, slightly lumpy mixture. Once that’s achieved, gradually add the all-purpose flour and mix just until it’s combined and a cohesive dough forms. Be careful not to overmix, as this can develop the gluten too much and lead to tougher rolls. The dough should feel cool and slightly soft to the touch.
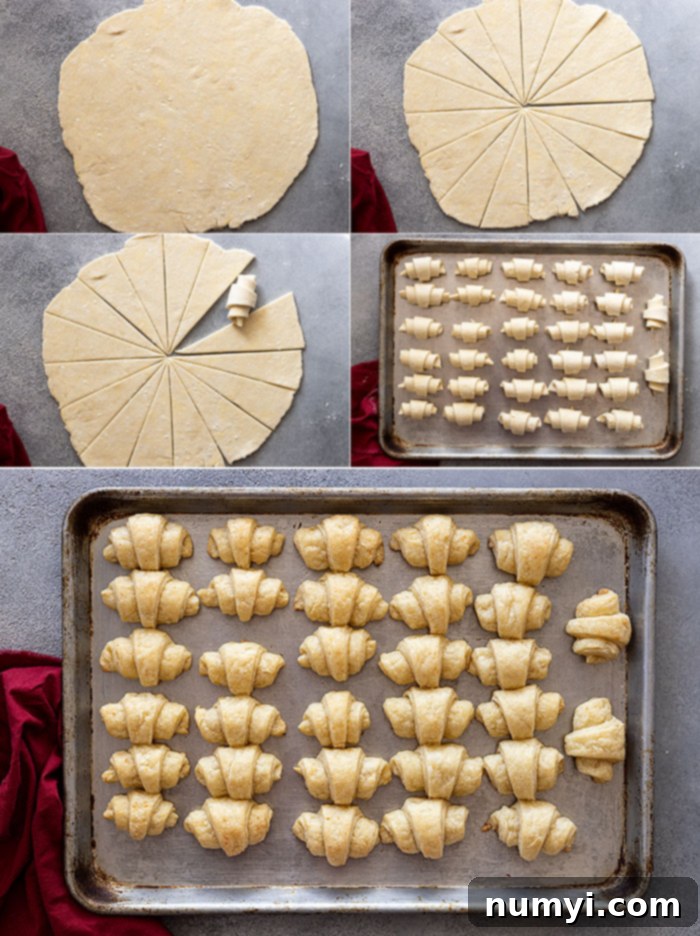
SHAPING THE ROLLS: Once your dough is mixed, gently form it into a ball and then divide it in half. It’s essential that the dough still has a slight chill at this stage; warm dough will be much harder to handle and more prone to sticking. Lightly dust your clean work surface with a small amount of flour. Take one half of the dough and roll it out into a circle, aiming for a diameter of 12-13 inches and a thickness of about 1/8 to 1/4 inch. Using a pizza cutter or a sharp knife, cut the circle into 16 equal wedges, much like you would slice a pizza. This traditional method yields smaller, delicate rolls, just like my grandma always made them, a tradition I proudly continue! If you prefer larger, more substantial rolls, simply cut the circle into 12 wedges instead of 16. To shape each crescent, start at the wide end of a wedge and roll it tightly towards the pointed tip. This creates the classic crescent shape. Place the shaped rolls onto an ungreased cookie sheet, leaving a little space between them. Repeat the process with the second half of your dough. Bake the rolls in a preheated 350°F (175°C) oven for 25-30 minutes, or until they are beautifully puffed up and lightly golden brown on top.
Frequently Asked Questions About Cottage Cheese Crescent Rolls
While a stand mixer makes the process incredibly easy and hands-off, it’s not strictly necessary. You can absolutely mix the dough by hand in a large bowl. However, be prepared to use a bit of arm muscle, especially when combining the butter and cottage cheese. The key is to ensure that there aren’t any large, unincorporated chunks of butter left in the mixture before adding the flour. The good news is that this recipe doesn’t require any extensive kneading, so a bit of thorough mixing by hand will get the job done!
Once completely cooled, store your homemade cottage cheese crescent rolls in an airtight container at room temperature. They will maintain their delicious freshness and soft texture for up to 4 days. For optimal freshness beyond that, freezing is highly recommended.
Absolutely! These rolls are wonderfully freezer-friendly, making them perfect for meal prep or having fresh rolls on demand. After they have completely cooled, arrange them in a single layer on a baking sheet and flash freeze for about an hour until solid. Then, transfer the frozen rolls to a freezer-safe container or a heavy-duty freezer bag, ensuring as much air is removed as possible. They can be frozen for up to 3 months. To enjoy, simply thaw them overnight at room temperature. You can gently warm them in the oven for a few minutes before serving for that freshly baked feel.
For the best results, we highly recommend using 2% or whole-fat cottage cheese as specified in the recipe. The fat content in these varieties is crucial for contributing to the rolls’ incredibly tender crumb, rich flavor, and overall flaky texture. Low-fat or fat-free options tend to have a higher water content and lack the richness needed, which can lead to a drier, less flavorful, and potentially tougher roll. While you might be able to make them, the resulting texture and taste won’t be as exceptional as when using full-fat versions.
Dough consistency can sometimes vary based on factors like humidity and the exact moisture content of your cottage cheese. If your dough feels overly sticky and difficult to handle after mixing, add a tiny bit more flour (half a tablespoon at a time) until it’s workable but still soft. If it feels too dry and crumbly, and isn’t coming together, you might need to add a small amount of liquid, like a teaspoon of cold milk, and mix just until it forms a cohesive ball. Always err on the side of caution and add very small amounts to avoid overcorrection. Remember, the dough should be soft but manageable, and most importantly, cool to the touch before rolling.
Top Tips and Exciting Variations for Awesome Crescent Rolls
These rolls are fantastic on their own, but here are some brilliant tips and variations to elevate them even further or customize them to your liking:
- How to Make Them Sweet: To transform these savory rolls into a delightful sweet treat, prepare a simple glaze. In a small bowl, whisk together 1 cup of powdered sugar, 1 teaspoon of vanilla extract, and 1-2 tablespoons of milk (or cream) until smooth and pourable. Once the rolls have completely cooled, generously drizzle the glaze over them. This is perfect for breakfast, brunch, or an afternoon treat.
- Change Up the Sweet Flavor: For an extra layer of bright, zesty flavor in your sweet rolls, consider adding citrus zest. Incorporate 1-2 teaspoons of finely grated orange or lemon zest directly into the dough when you add the flour. You can also replace the milk in the glaze with an equal amount of fresh orange or lemon juice for a more pronounced citrus punch. Imagine a lemon poppy seed variation!
- Another Yummy Savory Option: For a delightful cheesy crust, sprinkle the top of each unbaked roll with a generous pinch of finely grated Parmesan cheese just before they go into the oven. As they bake, the cheese will melt and crisp up, adding a fantastic savory dimension and a beautiful golden finish.
- Endless Savory Flavor Combinations: Honestly, the possibilities for savory variations are limitless! Get creative by adding 1 tablespoon of dried Italian seasoning, dried dill, or dried chives to the dough for an herby twist. For a garlic bread-like experience, brush each warm, baked roll with a little melted garlic butter as soon as they come out of the oven. A sprinkle of Everything Bagel seasoning before baking also adds incredible flavor and texture. Feel free to experiment with your favorite dried herbs and spices – a little black pepper or a touch of cayenne can even add a subtle kick!
- Dough Temperature is Key: This is a crucial tip for successful rolling and shaping. Before you begin rolling out the dough, ensure it is still cool to the touch, and ideally, slightly chilled. This particular dough is on the softer side, and if it becomes too warm, it will be very difficult to handle, sticky, and prone to tearing. Furthermore, warm dough tends to spread too much during baking, resulting in flatter, less attractive rolls. If your kitchen is warm or the dough has sat out for a while, pop it back into the refrigerator for 15-20 minutes before rolling.
- Make-Ahead Convenience: These rolls are fantastic for preparing in advance! The dough itself can be made up to 2 days ahead of time. Simply prepare the dough as instructed, form it into a ball, wrap it tightly in plastic wrap, and store it in the refrigerator. When you’re ready to bake, just take the dough out, let it sit at room temperature for about 10-15 minutes to make it slightly more pliable, then roll, shape, and bake as usual. This is a game-changer for entertaining or busy mornings!
- Serving Suggestions: Beyond being a perfect dinner roll, these cottage cheese crescents are excellent for a variety of meals. Serve them alongside a hearty chili or stew, use them to sop up gravy, or enjoy them with your favorite spread – be it butter, jam, or even a savory herb cream cheese. For a special breakfast, serve the glazed sweet rolls with fresh fruit and coffee.
Craving More Easy Homemade Bread Options?
If you loved how simple and rewarding these cottage cheese crescent rolls were, you might be looking for other straightforward bread recipes to add to your repertoire. Here are a few other easy-to-make bread options that are just as delicious and satisfying:
- Classic Cornbread Muffins: A staple for any meal, these quick muffins are moist and flavorful.
- Flaky Buttermilk Biscuits: Master the art of flaky biscuits with this simple yet impressive recipe.
- The Best Easy Banana Bread: A timeless favorite, perfect for using up ripe bananas.
- Traditional Irish Soda Bread: A rustic, quick bread that requires no yeast and is surprisingly easy to make.
- Simple No-Knead Beer Bread: Another no-yeast wonder that comes together with minimal effort and great flavor.
HUNGRY FOR MORE? Don’t miss out on our latest delicious recipes and kitchen tips! Subscribe to my newsletter for exclusive content straight to your inbox. You can also follow along on Pinterest, Facebook, and Instagram for daily inspiration, behind-the-scenes glimpses, and all my latest updates! Happy baking!
Cottage Cheese Crescent Rolls
Ingredients
- 1 cup (226g) unsalted butter, slightly softened (should still have a slight chill to it)
- 1 (16oz)(453g) cold 2% or whole-fat cottage cheese
- 2¼ cups (300g) all-purpose flour
Instructions
-
Preheat your oven to 350°F (175°C). Prepare a large baking sheet by lining it with parchment paper or leaving it ungreased.
-
In a large mixing bowl, or the bowl of a stand mixer fitted with the paddle attachment, combine the slightly softened butter and the cold cottage cheese. Mix on medium speed until the ingredients are well combined and there are no large lumps of butter visible. The mixture will still have a slightly lumpy, curdled appearance, which is normal. Add the all-purpose flour and mix on low speed just until a cohesive dough forms. Be careful not to overmix. The dough should be soft but cool to the touch.
-
Divide the dough in half. Lightly flour your work surface and roll out one half of the dough into a 12-13 inch circle. Using a pizza cutter or knife, cut the circle into 16 wedges (for smaller rolls) or 12 wedges (for larger rolls). Take each wedge and starting from the wide end, roll it up tightly towards the pointed tip to form a crescent shape. Place the shaped rolls onto your prepared baking sheet. Repeat with the second half of the dough.
-
Bake for 25-30 minutes, or until the rolls are beautifully golden brown on top and cooked through. Serve warm and enjoy immediately, or cool completely for later use.
Notes
- Serve these rolls plain as a delicious savory dinner roll with any main meal or soup.
- For a sweet version, allow the rolls to cool completely, then drizzle with a glaze made from whisking together 1 cup powdered sugar, 1 teaspoon vanilla extract, and 1-2 tablespoons milk.
- Flavor Variations for Sweet Rolls: To add a bright, zesty flavor, incorporate 1-2 teaspoons of finely grated orange or lemon zest into the dough. You can also replace the milk in the glaze with fresh orange or lemon juice for a more intense citrus flavor.
- Savory Enhancements: Before baking, sprinkle the top of each roll with a little Parmesan cheese for a cheesy crust. Alternatively, add 1 tablespoon of Italian seasoning, dried dill, or dried chives to the dough for an herbaceous touch. Brushing the baked rolls with a little melted garlic butter also creates a wonderful savory treat. Experiment with your favorite spices!
- Dough Consistency Tip: Ensure the dough is cool to the touch before rolling. If it gets too warm, it will be soft and difficult to handle, and the rolls may spread excessively during baking, losing their crescent shape. If needed, chill the dough for 15-20 minutes in the refrigerator before rolling.
- MAKE AHEAD: The dough is excellent for preparing in advance. Make the dough up to 2 days ahead, wrap it tightly, and store it in the refrigerator. Allow it to sit at room temperature for about 10-15 minutes to soften slightly before rolling and baking.
- FREEZER FRIENDLY: Freeze completely cooled rolls in a freezer-safe container or bag for up to 3 months. Thaw overnight at room temperature before serving. If desired, warm gently in the oven and drizzle with glaze after thawing.
Nutrition
