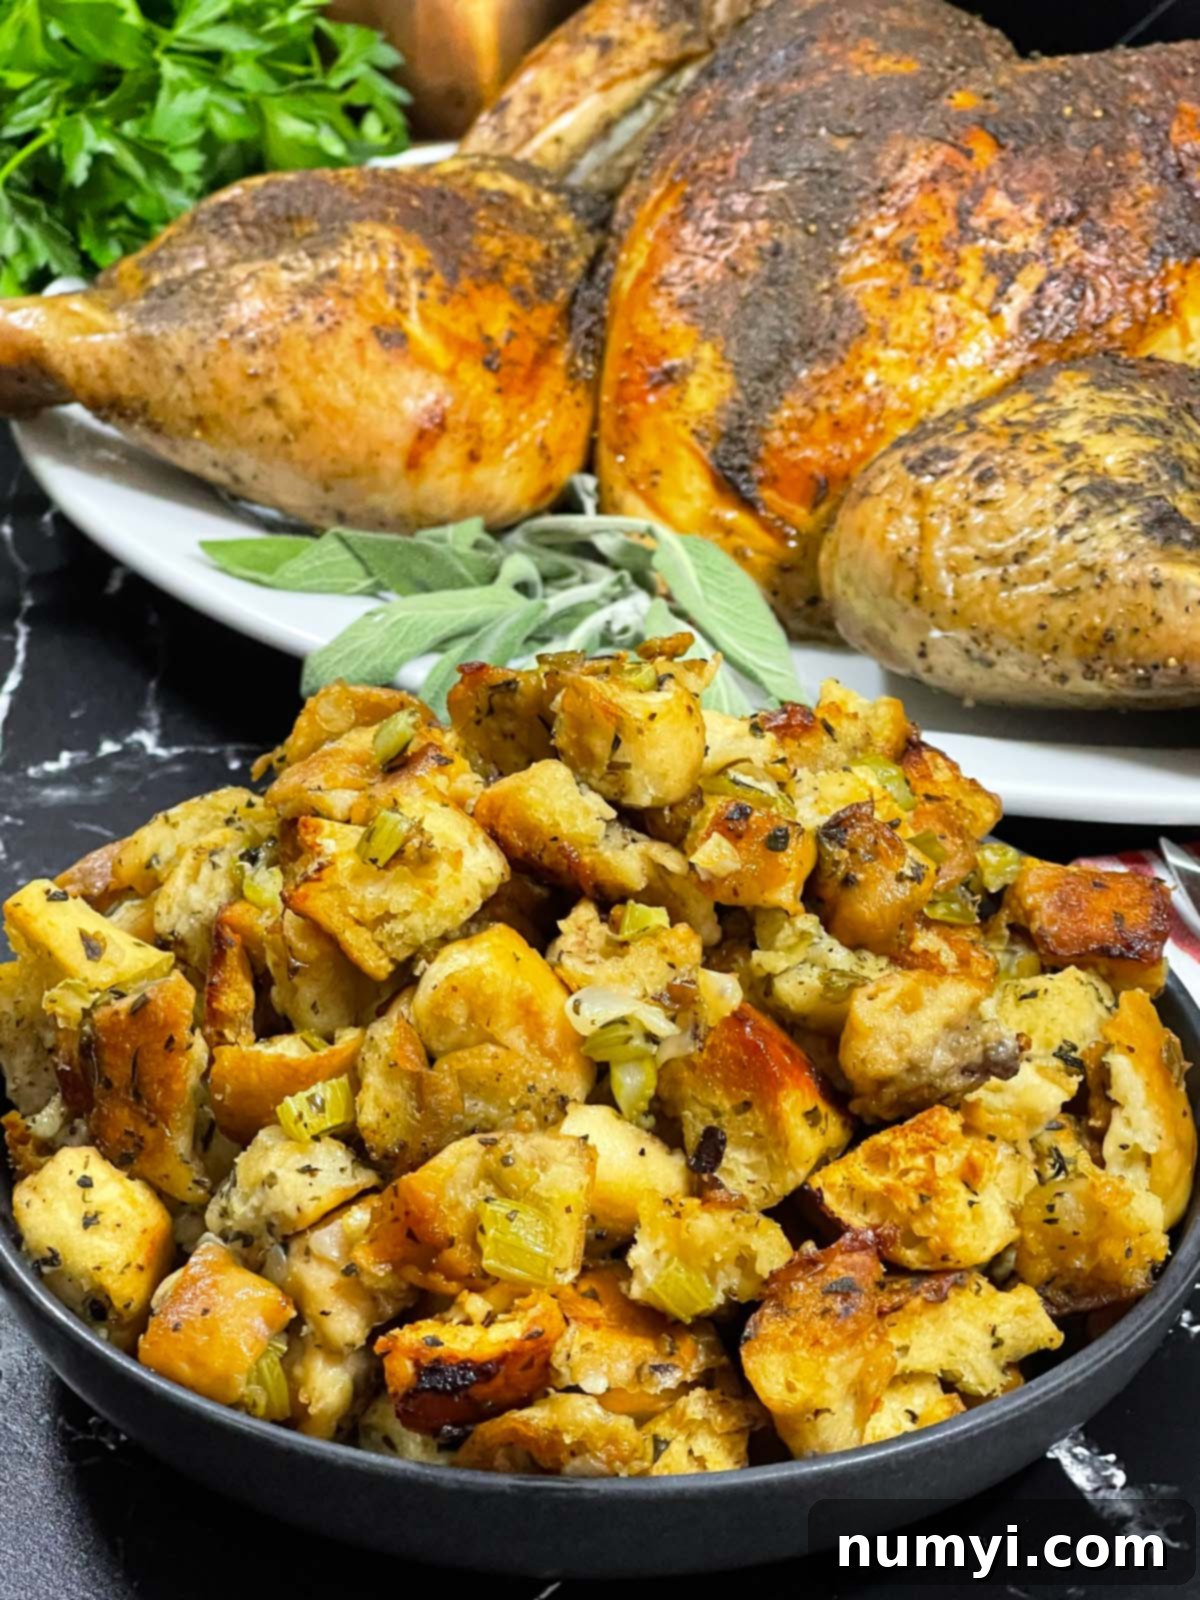
Perfect Spatchcock Turkey with Savory Pan-Dripping Stuffing
Prepare to transform your holiday meal with this incredible **one-pan spatchcock turkey and stuffing recipe**. Imagine a perfectly roasted, incredibly juicy turkey with irresistibly crispy, golden skin, all while a pan of rich, deeply flavored stuffing cooks right underneath it. This ingenious method ensures every bite of stuffing is infused with those precious, savory turkey drippings, creating an unparalleled taste experience that will delight your family and guests.
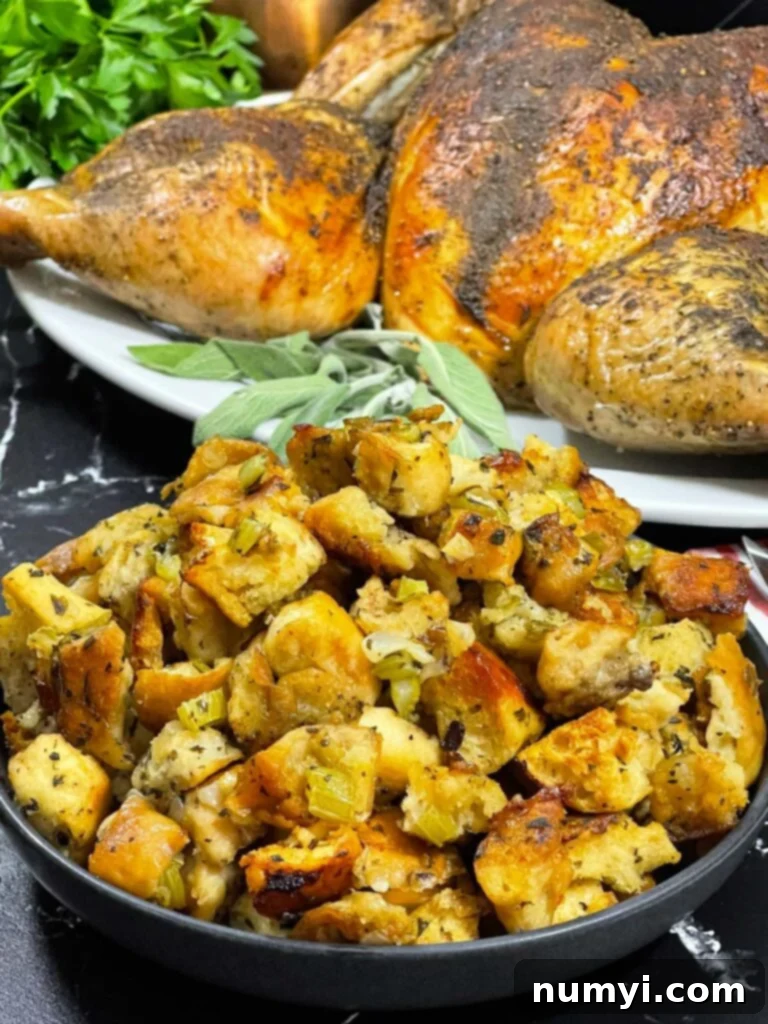
The result is a show-stopping centerpiece that simplifies your holiday cooking without compromising on flavor. Say goodbye to dry turkey and bland stuffing – this recipe delivers tender, succulent meat, beautifully golden-brown, crispy skin, and a stuffing that is profoundly rich with turkey essence, all achieved effortlessly from a single baking sheet. It’s an efficient, elegant, and utterly delicious way to handle your main holiday dish, freeing up oven space and reducing cleanup.
New to the spatchcocking technique? Don’t let the name intimidate you! For a complete, detailed guide on how to spatchcock a turkey, including step-by-step instructions and helpful visual aids, please see our dedicated Spatchcock Turkey Guide. You’ll quickly discover that once your turkey is flattened, the rest of this impressive recipe comes together surprisingly fast and easily, making holiday cooking less stressful and more enjoyable.
More Essential Thanksgiving Favorites
Complete your festive holiday menu with these universally loved side dishes and comforting desserts, ensuring a truly unforgettable feast:
- Decadent Whipped Potatoes: Experience the ultimate in creamy, smooth, and utterly luxurious mashed potatoes – a truly essential side dish that everyone adores.
- Homemade Cranberry Sauce: Bright, tangy, and bursting with fresh, vibrant fruit flavor, this homemade version is lightyears beyond anything you’d find in a can.
- Classic Cornbread Dressing: A beloved Southern staple, this dressing offers a delightful crumbly yet moist texture and deep, comforting, savory flavors that perfectly complement turkey.
- Indulgent Pumpkin Bread Pudding: Conclude your holiday feast with a warm, spiced, and wonderfully comforting dessert – the perfect sweet ending to a perfect meal.
Why This One-Pan Spatchcock Turkey & Stuffing Recipe Is a Holiday Game Changer
This innovative cooking method isn’t just a recipe; it’s a solution to many common holiday cooking challenges, offering a host of benefits that will undoubtedly make it your new go-to for special occasions and festive entertaining:
- Unrivaled Juiciness and Flavor in Every Bite: By employing the spatchcocking technique (removing the backbone and flattening the turkey), the bird cooks much more evenly and significantly faster than a traditional whole turkey. This uniform cooking prevents the delicate breast meat from drying out while ensuring the dark meat reaches its tender perfection. The magic truly happens when the turkey roasts directly atop the stuffing, allowing every single savory, aromatic drop of turkey drippings to seep into the bread. This passive basting creates an incredibly flavorful and moist stuffing that simply cannot be replicated when cooked in a separate dish.
- Achieve Consistently Crispy, Golden Skin: Flattening the turkey exposes a much larger surface area of the skin to the direct, circulating heat of the oven. This direct exposure guarantees an irresistibly crispy, deeply golden-brown skin across the entire bird, from breast to thigh. Say goodbye to frustratingly soggy skin and uneven browning – this method ensures a perfectly crisp exterior every time.
- The Ultimate One-Pan Wonder for Easy Cleanup: One of the most significant advantages of this recipe is its efficiency. By preparing both the star of the show (the turkey) and a beloved side (the stuffing) on a single baking sheet, you streamline your holiday cooking process. This not only saves invaluable oven space during a busy cooking day but also dramatically reduces the amount of post-meal cleanup, giving you more precious time to spend enjoying the company of your loved ones rather than scrubbing pans.
- Faster Cooking Time and Increased Efficiency: Spatchcocked turkeys are renowned for cooking considerably faster than their traditional, whole counterparts. This means less time tethered to the kitchen and more time to enjoy the festivities, without having to compromise on the impressive quality or exquisite taste of your holiday centerpiece. It’s a win-win for both the cook and the guests.
- Deeply Infused Stuffing with Authentic Turkey Flavor: The stuffing in this recipe serves a dual purpose: it’s not just a side dish but an integral part of the cooking process. It acts as a flavorful sponge, perfectly positioned to absorb all the aromatic fats, savory juices, and rich caramelization released by the turkey as it roasts. This results in a stuffing that is not merely seasoned but truly brimming with authentic, deep-seated turkey flavor, elevating it from a simple side to a star dish in its own right.
Once the turkey is perfectly roasted and has had its essential resting period, the stuffing receives a final, quick bake. This allows you to achieve your desired level of crispness and moisture, ensuring every component of your meal is absolutely perfect. It’s an elegant, efficient, and deeply satisfying way to serve a complete holiday centerpiece with minimal fuss and maximum flavor impact.
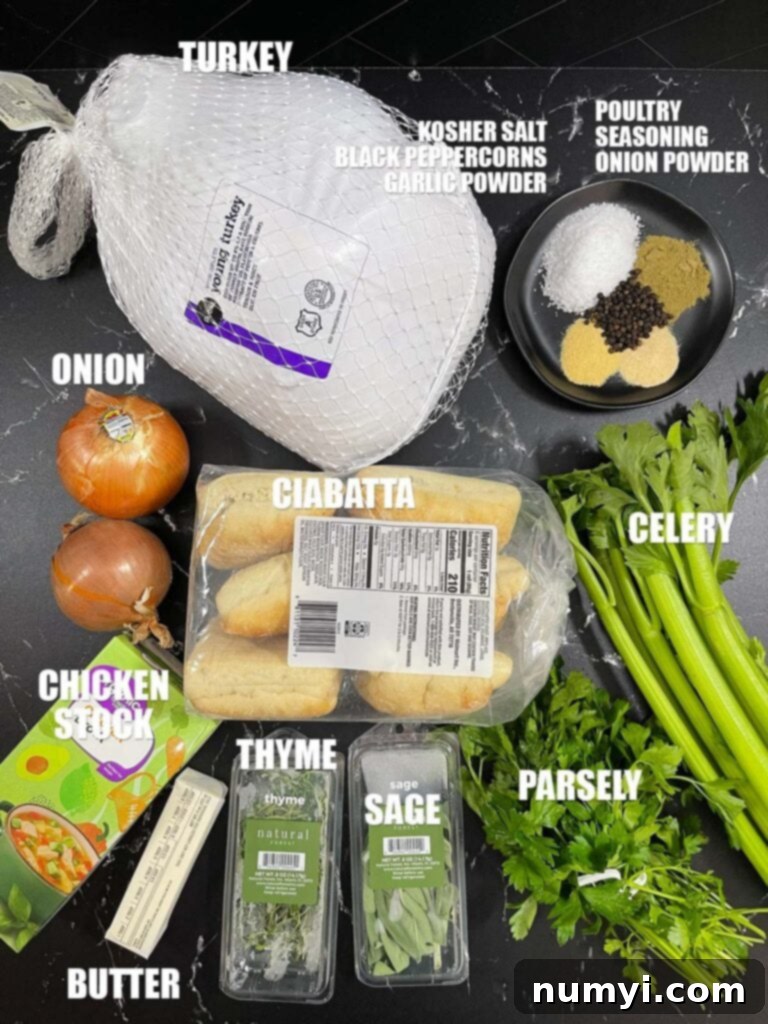
Step-by-Step: Crafting Your Perfect Spatchcock Turkey and Dripping-Infused Stuffing
Follow these straightforward and detailed steps to create a truly memorable and impressive holiday meal with ease:
1. Prepare the Turkey with a Flavorful Dry Brine
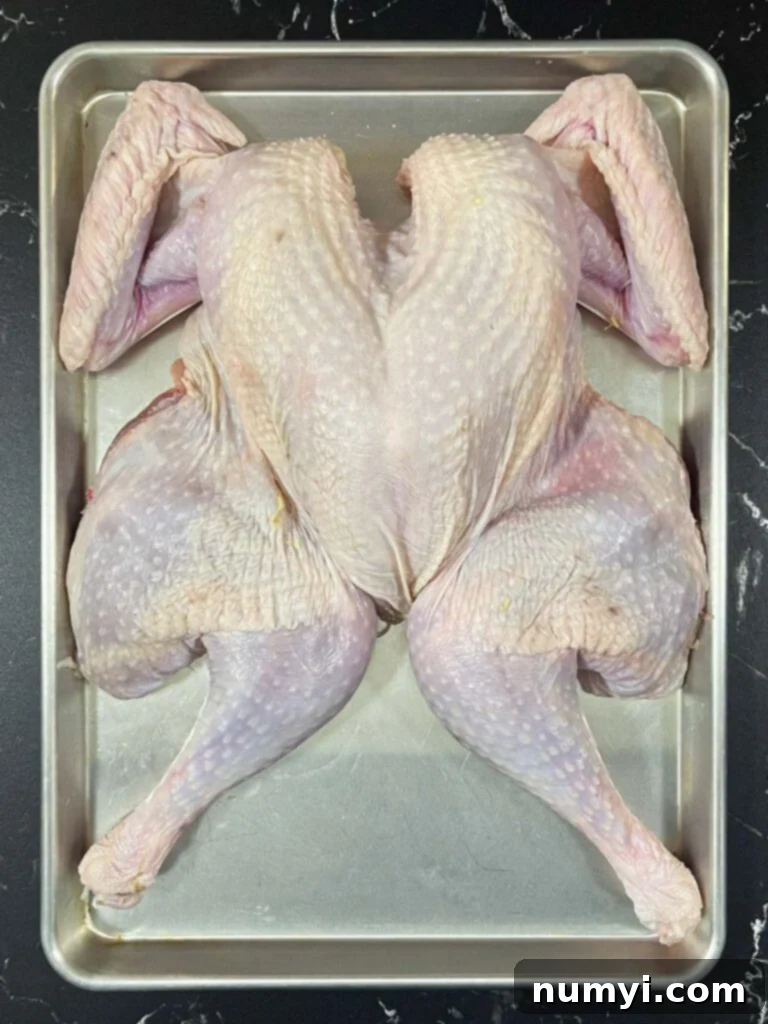
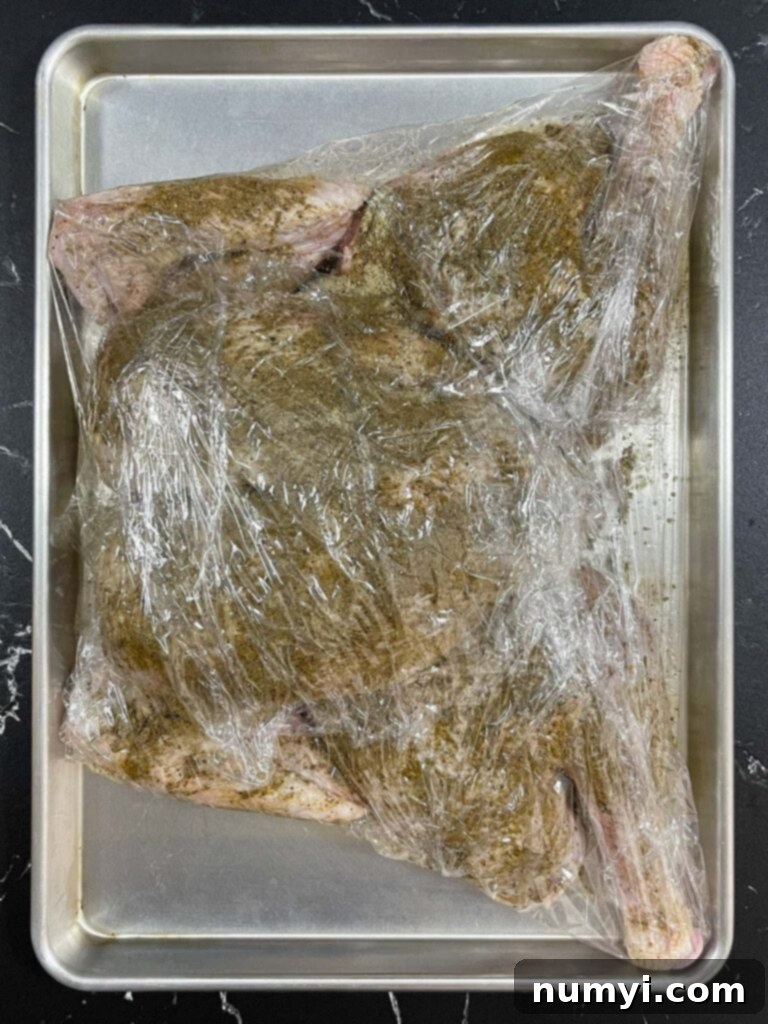
Begin by preparing your turkey using the spatchcocking method. This crucial step involves carefully removing the backbone with sturdy kitchen shears (cutting along both sides) and then pressing firmly on the breastbone until the turkey lays completely flat. This technique ensures that the entire bird cooks evenly and efficiently, and is key to achieving that coveted crispy skin. Once flattened, it’s vital to pat the entire turkey, inside and out, very dry with paper towels – any excess moisture will hinder the crisping process. Next, create your potent dry brine mixture: combine kosher salt, black peppercorns, poultry seasoning, garlic powder, and onion powder. For best results, use a spice grinder to grind these ingredients into a fine, consistent rub. Liberally apply this savory rub all over the bird, ensuring both the top (skin side) and bottom are thoroughly seasoned, working it into every crevice. Finally, place the seasoned turkey on a wire rack set over a baking sheet and refrigerate it, uncovered, for 24 to 48 hours. This dry brining process not only deeply flavors the meat but also helps to further dry out the skin, guaranteeing an exquisitely crispy exterior.
Don’t Sweat The Recipe is supported by its readers. We may earn a commission if you purchase through a link on our site. Learn more.
2. Toast the Bread and Create the Stuffing Base
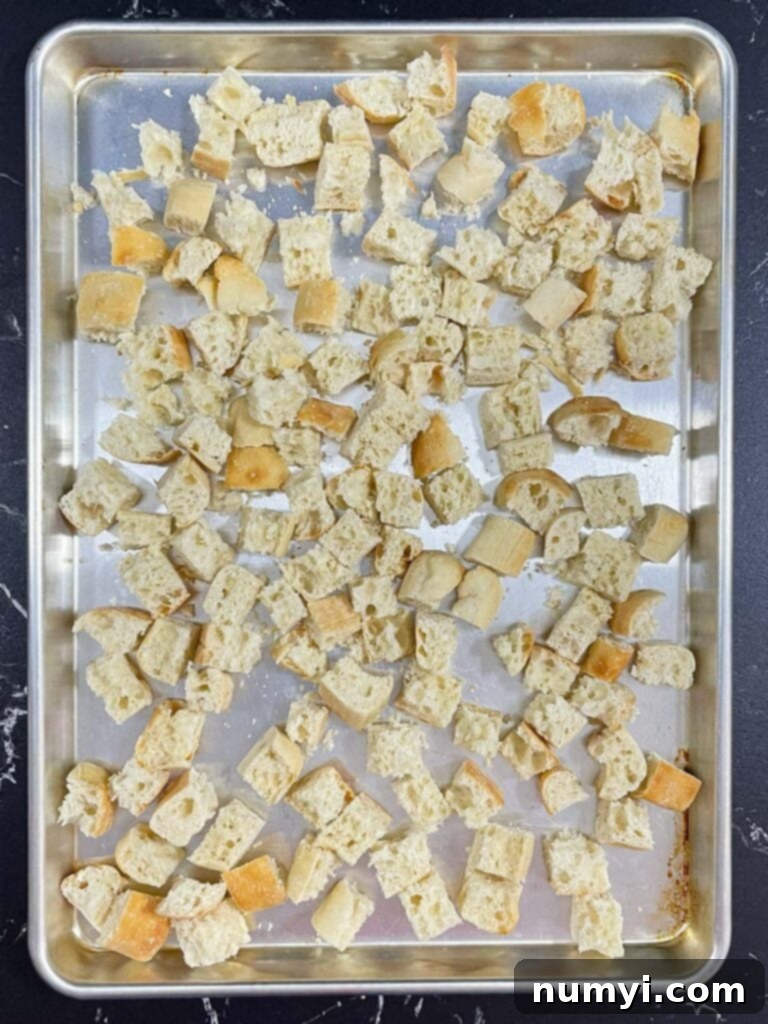
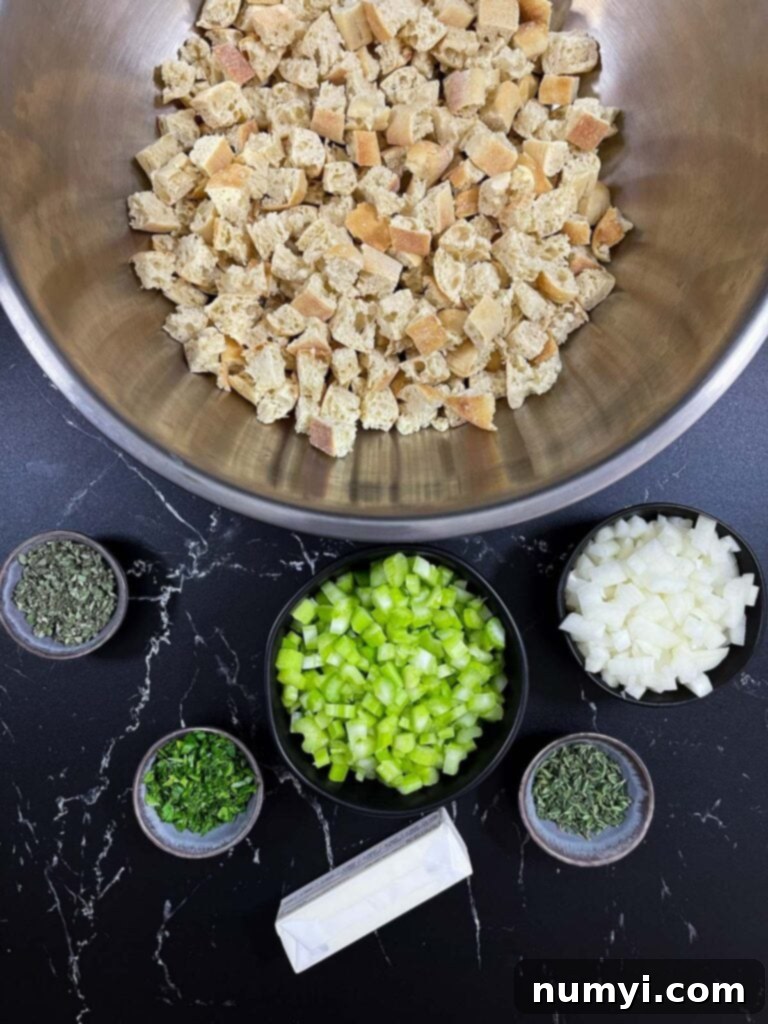
Preheat your oven to a low 250°F (120°C). Select 1½ pounds of sturdy, preferably day-old bread, such as ciabatta, sourdough, or a robust French baguette. Avoid soft, fluffy sandwich bread, as it tends to become mushy under the turkey drippings. Cut the bread into uniform ½-inch cubes. Spread these cubes in a single layer across two large baking sheets to ensure optimal air circulation and even drying. Bake for 45–50 minutes, making sure to stir them halfway through to promote even toasting. The objective is for the bread cubes to be completely dried out and firm, but not browned or burnt. Once adequately toasted, transfer the dried bread cubes to a very large mixing bowl. Drizzle them lightly but evenly with ½ cup of chicken stock, tossing gently to moisten. This initial moistening prepares the bread to absorb additional flavors and moisture evenly later in the process.
3. Gently Cook the Aromatic Vegetables
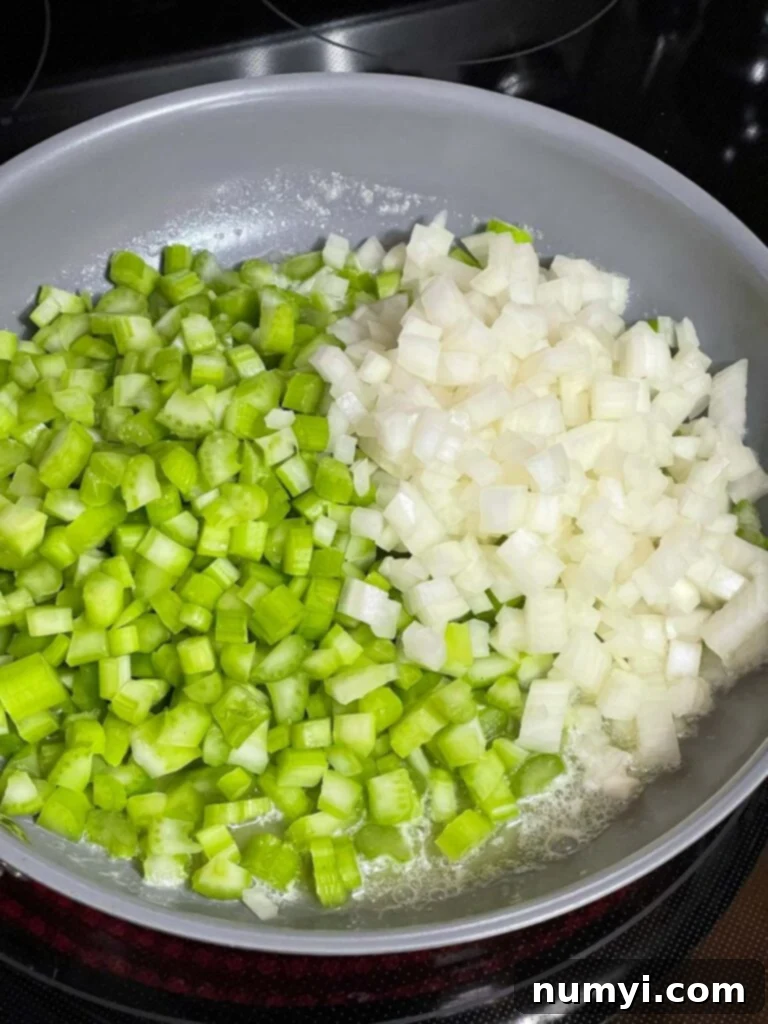
In a large, heavy-bottomed skillet, melt four tablespoons of unsalted butter over medium-low heat. Add 1½ cups of finely diced onion and six finely diced celery ribs to the melted butter. Sauté these aromatic vegetables for approximately 10 minutes, stirring occasionally. The objective here is to gently soften and “sweat” the vegetables until they are translucent and tender, without allowing them to brown or caramelize. Browning would introduce a stronger, sweeter flavor that might detract from the classic savory profile of the stuffing. Once softened, stir in the fresh, finely chopped parsley, sage, and thyme, along with ½ teaspoon of kosher salt and ½ teaspoon of freshly ground black pepper. Continue to cook for an additional 1–2 minutes, allowing the heat to release the fragrant oils from the herbs. This step creates the essential aromatic foundation for your deeply flavorful stuffing.
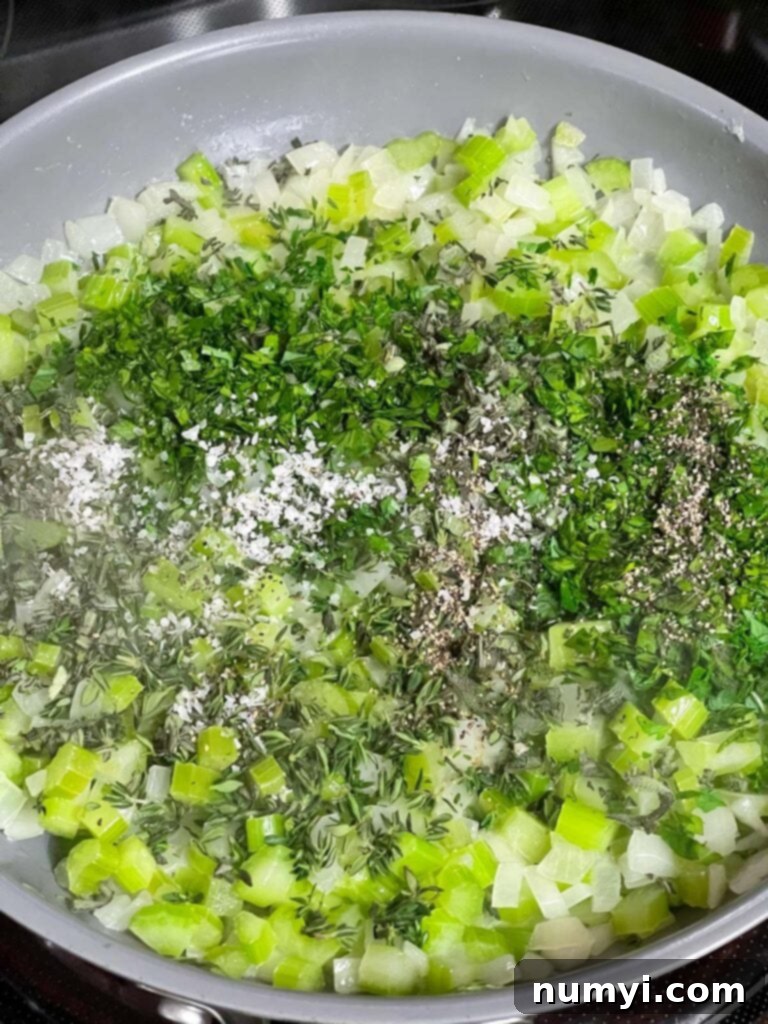
4. Thoroughly Combine the Stuffing Ingredients
Carefully transfer the entire cooked vegetable and herb mixture from the skillet into the very large mixing bowl that holds your dried, stock-drizzled bread cubes. Using your hands (which allows for the best feel and mixing) or a large, sturdy spoon, gently but thoroughly toss all the ingredients together. Take your time with this step, ensuring that the aromatic vegetables, fragrant herbs, and chicken stock are uniformly distributed and that all the bread cubes are evenly moistened. The goal is a consistent blend of flavors and moisture throughout the stuffing base, preparing it perfectly to absorb the forthcoming turkey drippings.
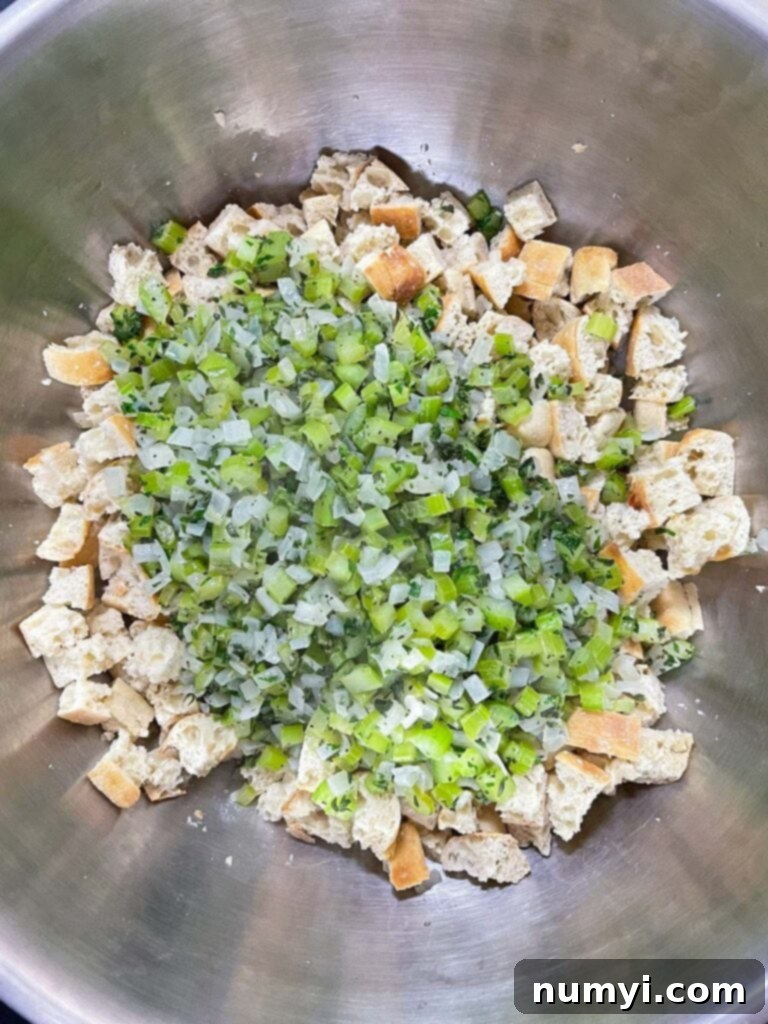
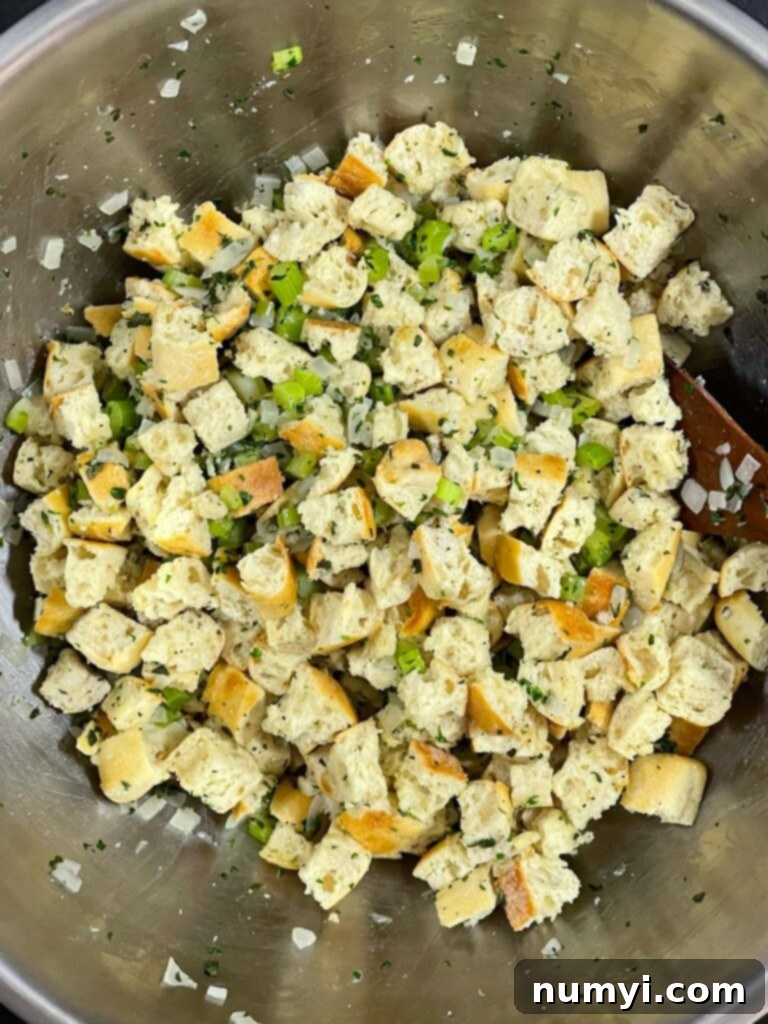
5. Shape the Stuffing Base & Position the Turkey
Increase your oven temperature to 350°F (175°C). Line a large, sturdy baking sheet with aluminum foil. This simple step will make cleanup significantly easier after roasting. Take your prepared stuffing mixture and firmly shape it into a tight, compact square or rectangle directly on the foil-lined baking sheet. This shape should roughly correspond to the overall footprint of your flattened, spatchcocked turkey, providing a stable and evenly distributed bed for the bird. Carefully transfer the spatchcocked turkey and place it on top of the shaped stuffing, ensuring the skin side is facing upwards. Gently press down on the turkey to ensure full and consistent contact between the bird and the stuffing. This maximizes the absorption of those delicious turkey drippings into the stuffing, which is the key to its exceptional flavor.
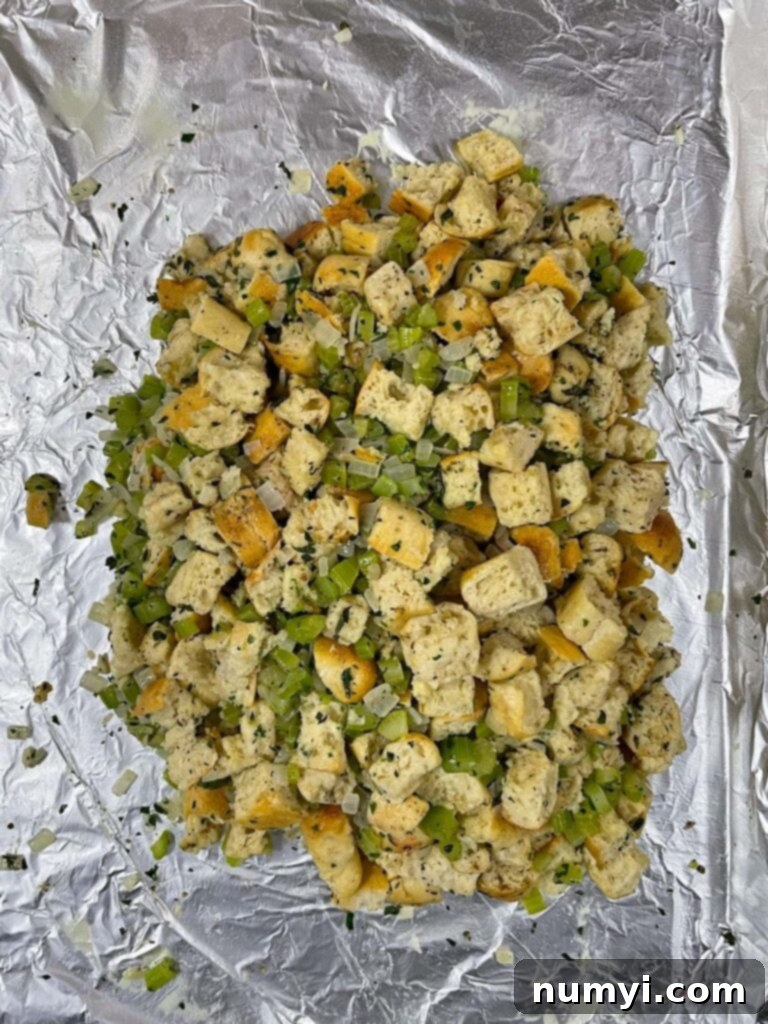
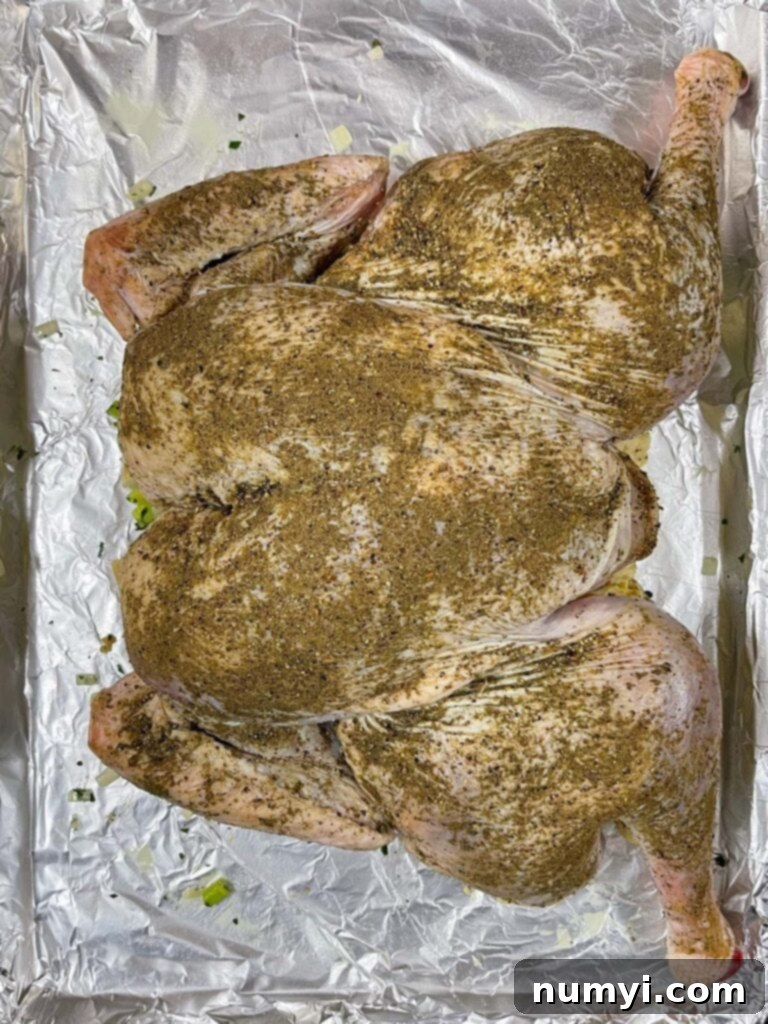
6. Roast the Turkey to Golden Perfection
Carefully place the baking sheet, with your turkey and its stuffing bed, into the preheated 350°F (175°C) oven. Roast the turkey for approximately 2 hours. As a helpful guideline for spatchcocked turkeys at this temperature, you can generally estimate about 1 hour of roasting time per 6 pounds of turkey. Around 1 hour into the roasting process, take a moment to baste the turkey generously with 1 tablespoon of melted butter; this adds moisture and promotes a beautiful golden color. Throughout the roasting, keep a close eye on your turkey’s browning. If you notice any parts of the turkey (such as the legs, wing tips, or particularly exposed areas of skin) or any corners of the exposed stuffing beginning to brown too quickly, loosely cover those specific areas with small pieces of aluminum foil. This prevents overcooking or burning while allowing the rest of the bird and stuffing to catch up. Continue roasting until an instant-read thermometer inserted into the thickest part of the breast meat (without touching bone) registers approximately 162°F (72°C), and the thickest part of the thighs reaches 175–180°F (79–82°C). Remember, the turkey’s internal temperature will naturally continue to rise by about 5 degrees as it rests, ensuring the breast meat finishes perfectly at the USDA-recommended 165°F (74°C) without ever becoming dry.
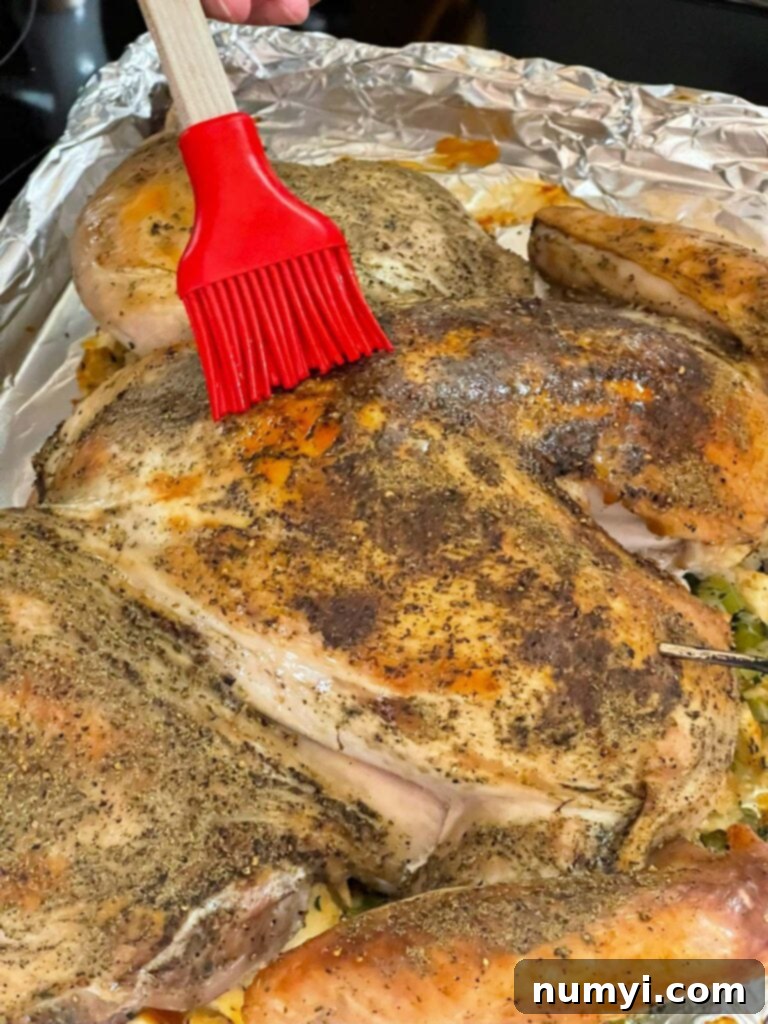
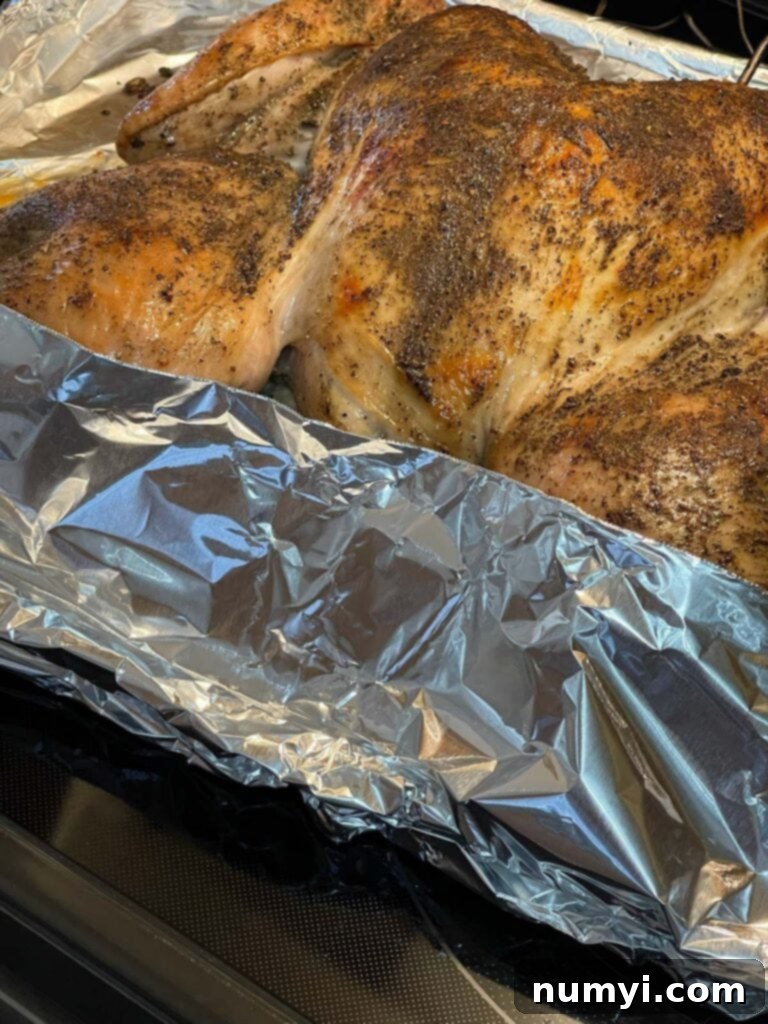
7. Rest the Turkey & Perfectly Finish the Stuffing
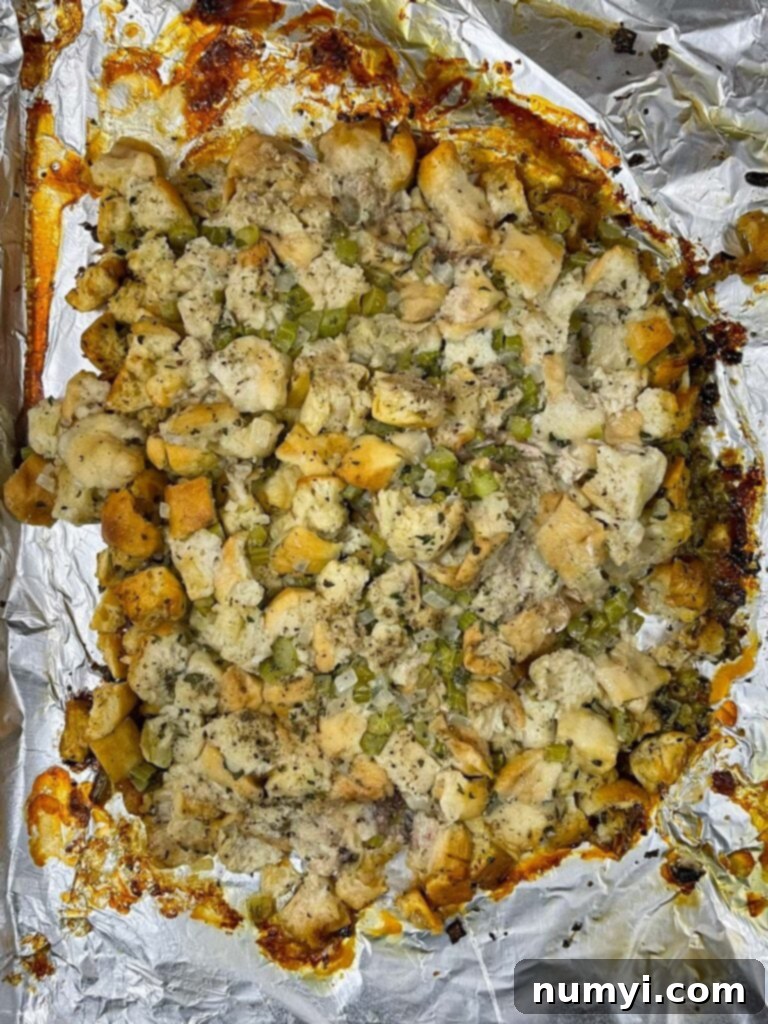
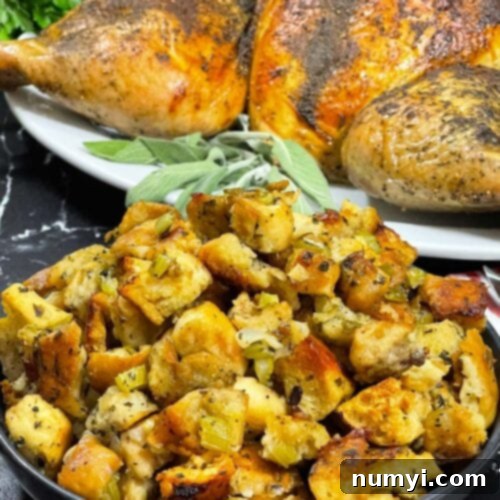
Once your turkey has reached its ideal internal temperatures, carefully transfer the entire bird from the baking sheet to a clean cutting board. Allow the turkey to rest, uncovered, for a crucial 20–30 minutes. This resting period is non-negotiable; it’s essential for allowing the muscle fibers to relax and reabsorb the juices, ensuring that every slice of meat is wonderfully tender, incredibly moist, and bursting with flavor. While the turkey rests, take the opportunity to stir the stuffing directly on the baking sheet. This helps to loosen it up and redistribute all those delicious, absorbed pan drippings. Return the stuffing to the oven for an additional 20–30 minutes. The exact timing here is flexible and depends entirely on your personal preference: a shorter bake will result in a moister, softer-centered stuffing, while a longer bake will yield a drier stuffing with deliciously crisp, golden edges.
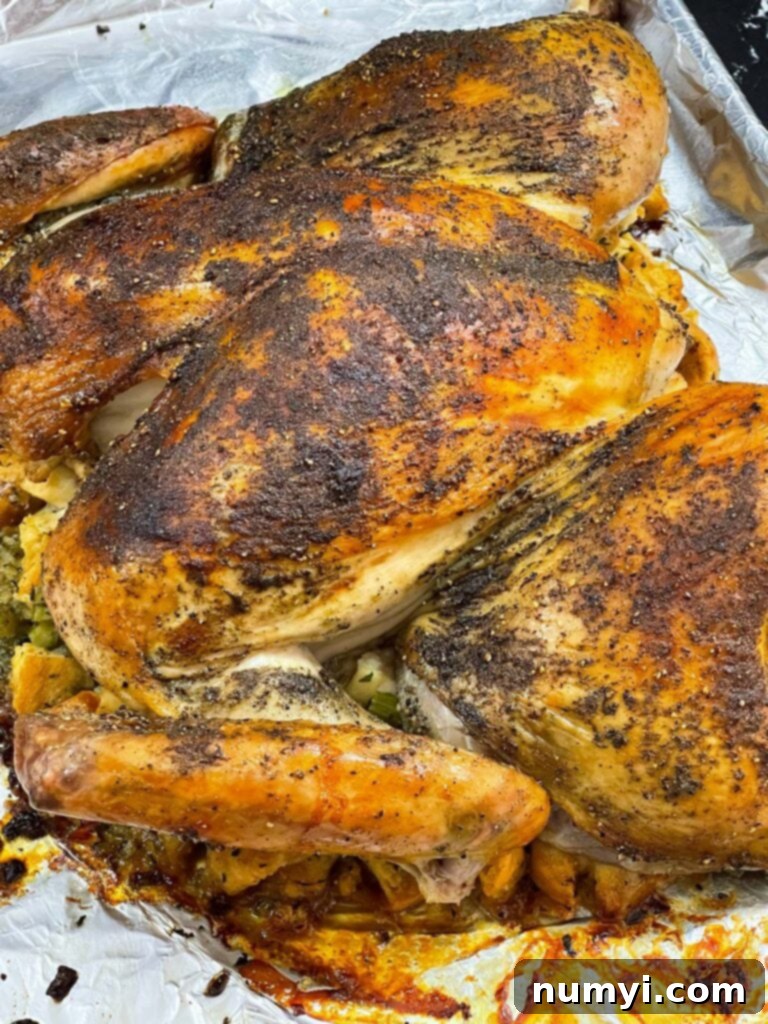
8. Customize Your Stuffing’s Crispiness
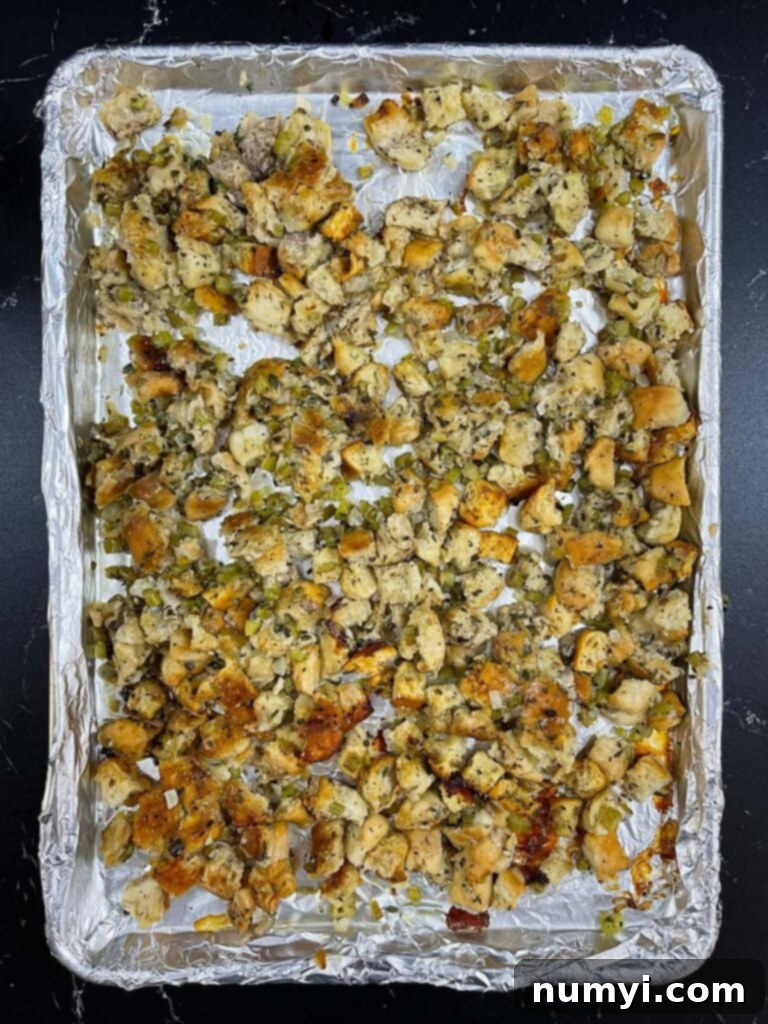
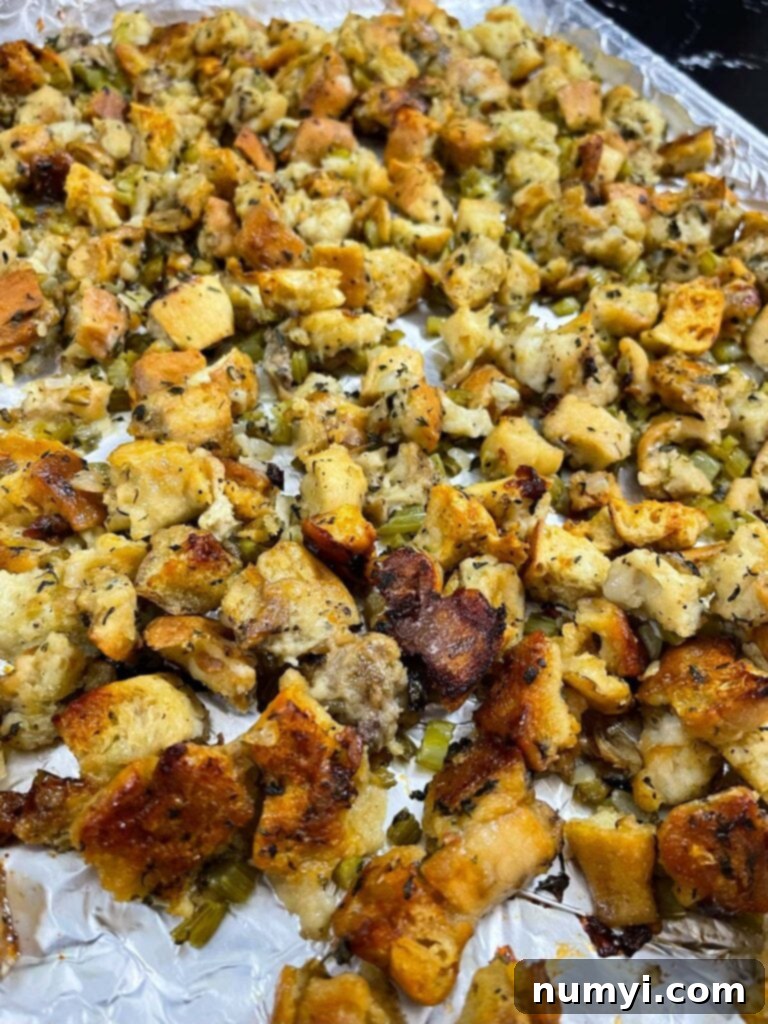
To further enhance the crispiness of your stuffing and achieve that delightful textural contrast, consider spreading it out slightly more on the baking sheet. This increases the surface area exposed to the oven’s heat, allowing more edges to become golden and crunchy. Continue baking according to your desired texture preference:
- Baking for 20 minutes will result in a moist, tender stuffing with a soft, yielding center, perfect for those who appreciate a less crispy texture.
- Baking for a full 30 minutes will yield a drier stuffing with delightfully crisp, golden edges, offering a satisfying crunch and richer, more concentrated flavor.
Feel free to sample a small portion after 20 minutes and adjust the remaining baking time as needed to achieve your ideal stuffing consistency.
9. Carve & Serve Your Magnificent Holiday Feast
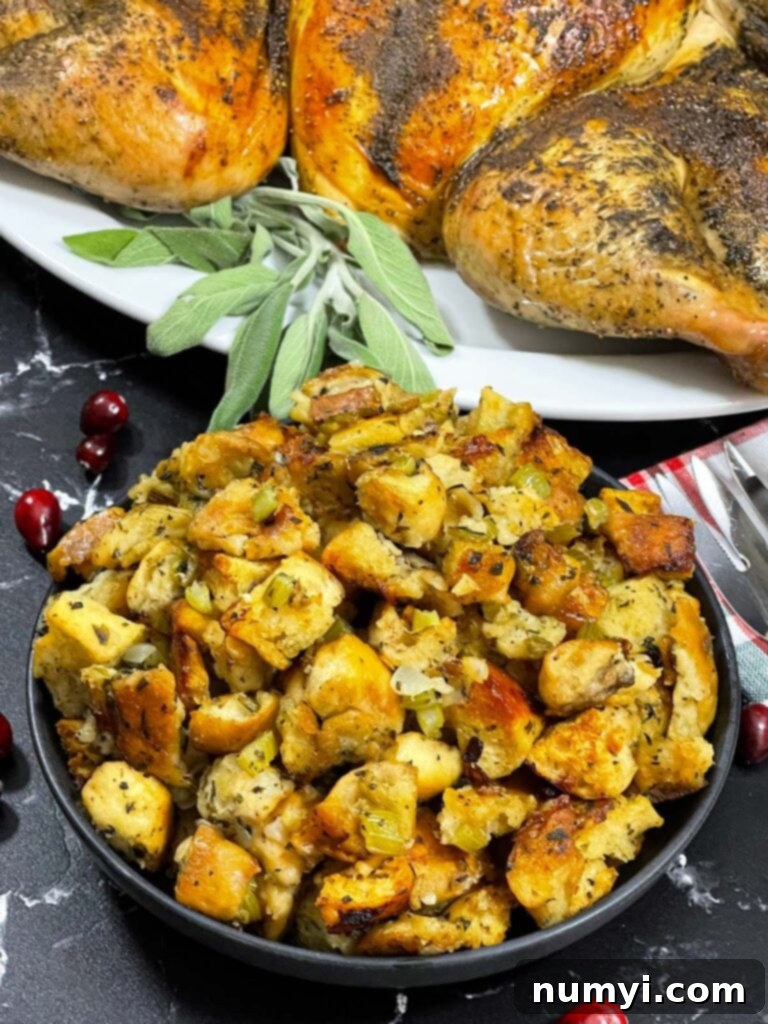
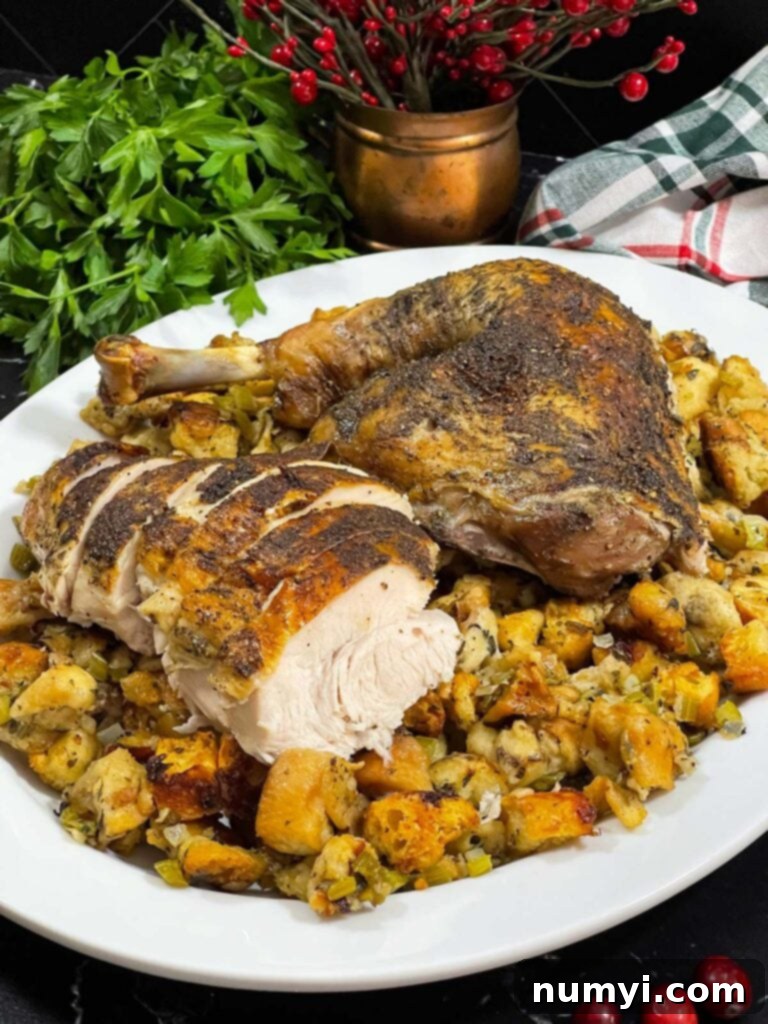
Once the turkey has completed its essential resting period, it’s ready to be carved. Slice the succulent turkey into your preferred pieces, whether thin slices of breast meat or hearty portions of dark meat. Artfully arrange the carved turkey alongside or atop the steaming, perfectly crisped, and deeply flavorful stuffing. This magnificent dish is truly a revelation – the meat remains wonderfully tender and incredibly juicy, the skin achieves an enviable, crackling crispness, and the stuffing, having soaked up all those rich, savory turkey drippings, transforms into a deeply satisfying and utterly unforgettable dream. Prepare for an outpouring of compliments and rave reviews from your dinner guests, as this recipe has a unique way of encouraging everyone at the table to go back for “just one more bite.” Make it once, and you might just find that this one-pan spatchcock turkey and stuffing recipe quickly becomes your cherished new Thanksgiving or holiday tradition, simplifying your cooking while elevating your feast to extraordinary levels.
Expert Tips for Crafting the Best Spatchcock Turkey & Stuffing
Master this recipe with these invaluable tips, designed to ensure a consistently perfect and delicious outcome:
- Embrace the Dry Brine for Maximum Flavor and Crispness: A full 24–48 hours of dry brining, applied evenly and with the turkey uncovered in the refrigerator, is absolutely essential for achieving the crispiest skin imaginable and infusing deep, all-over seasoning into every fiber of the turkey meat. The salt works by drawing out moisture, which then reabsorbs back into the meat, seasoned, leading to a much more flavorful and remarkably tender result. Even if you’re short on time, a minimum of 12 hours will still yield a noticeable improvement in both flavor and texture.
- Choose Sturdy Bread Wisely for the Stuffing: When selecting bread for your stuffing, opt for robust, day-old varieties such as ciabatta, sourdough, or a good quality French baguette. These types of bread possess a firmer, denser crumb structure that holds up exceptionally well to the turkey drippings and the moisture from the sautéed vegetables, critically preventing the stuffing from becoming mushy or soggy. Avoid soft, fluffy sandwich bread, as it tends to disintegrate under these conditions.
- Thoroughly Toast the Bread Cubes: This initial step is paramount to the success of your stuffing. The bread cubes must be dried out completely and thoroughly toasted before they are mixed with the other stuffing ingredients. If they retain too much moisture, the stuffing will inevitably turn out soggy, especially after it begins to absorb the succulent turkey drippings. The cubes should feel firm, dry, and lightly crisp, not just soft or stale.
- Gently Sweat Your Vegetables—Avoid Browning: When cooking the diced onion and celery, it’s crucial to maintain a medium-low heat. The goal is to gently soften them and coax out their natural sweetness (a process known as “sweating”), rather than allowing them to brown or caramelize. Browning would introduce a different, often stronger and slightly bitter flavor profile that could overpower the delicate and classic herb notes in your stuffing.
- Shape the Stuffing Thoughtfully for Even Drippings: Forming the stuffing mixture into a tight, compact square or rectangle that closely matches the overall footprint of your flattened turkey ensures uniform coverage under the bird. This strategic shaping is key; it allows the turkey’s savory drippings to distribute evenly across the entire stuffing base, maximizing flavor absorption and ensuring that every single portion of stuffing is equally delicious and rich.
- Keep Aluminum Foil Handy for Perfection: Throughout the roasting process, remain vigilant and closely monitor your turkey and stuffing. If certain parts of the turkey (such as the delicate wing tips or protruding drumsticks) or any exposed corners of the stuffing begin to brown too rapidly or appear to be getting too dark, don’t hesitate to loosely cover those specific areas with small pieces of aluminum foil. For overall browning control, you can also consider tenting the entire turkey with foil for the last 20–30 minutes of roasting once it has achieved your desired golden color, preventing further darkening while the meat finishes cooking through.
- Trust Your Instant-Read Thermometer (It’s Your Best Friend): The only foolproof way to guarantee a perfectly cooked, incredibly juicy turkey without the risk of overcooking is by utilizing an instant-read thermometer. Always insert the thermometer into the thickest part of the turkey breast and the thickest part of the thigh, taking care to avoid touching any bones, as bones can give misleadingly high readings. This precision in temperature monitoring prevents both dry, tough breast meat and dangerously undercooked dark meat.
- Tailor the Stuffing Finish to Your Personal Preference: After the turkey is removed for resting, the stuffing returns to the oven for an additional 20–30 minutes. The duration of this final bake directly impacts the stuffing’s texture. A 20-minute bake will yield a moister, more tender stuffing with softer centers, perfect for those who prefer a gentler texture. Extending it to 30 minutes will result in a drier stuffing with delightfully crisp, golden edges, offering a satisfying textural contrast. Adjust this final baking time based entirely on how you and your guests enjoy your stuffing.
- Prioritize Turkey Resting Time – It’s Crucial: Allowing the turkey to rest, uncovered, for a full 20–30 minutes after it comes out of the oven is an absolutely non-negotiable step. This critical period permits the muscle fibers to relax and, most importantly, allows the precious internal juices to redistribute evenly throughout the meat. The result is a tender, incredibly moist, and flavorful bird. As an added bonus, this resting time conveniently provides you with the perfect window to finish crisping the stuffing to perfection.
Delicious Variations to Customize Your Dish for Any Palate
Feel free to unleash your culinary creativity and adapt this spatchcock turkey and stuffing recipe to your specific taste preferences and dietary needs:
- Herb Swaps for a Fresh and Distinctive Twist: While the classic combination of parsley, sage, and thyme is undeniably wonderful, consider experimenting with other fresh herbs to introduce different flavor profiles. Rosemary adds a pungent, piney, and slightly woody note; marjoram offers a sweeter, milder, and more delicate flavor; and tarragon brings a distinctive anise-like essence that pairs beautifully with poultry. You can use these herbs in place of, or in addition to, the traditional trio. Always opt for fresh herbs for the most vibrant and aromatic results.
- Hearty Sausage-Infused Stuffing: For a richer, more substantial, and even more satisfying stuffing, consider adding cooked sausage. Brown ½–1 pound of your favorite breakfast or Italian sausage (mild or spicy, depending on your preference) in a skillet before you begin cooking your vegetables. Drain any excess fat thoroughly, then simply fold the cooked sausage crumbles into the bread mixture before shaping it on the pan. This addition brings a deeper, savory, and traditionally beloved Thanksgiving depth of flavor.
- Sweet and Savory Fruit Additions: Introduce a delightful touch of sweetness and a pleasant textural contrast to your stuffing by stirring in ½ cup of dried cranberries, golden raisins, or finely chopped dried apricots. The fruit will plump up slightly during cooking and infuse the stuffing with a hint of festive sweetness, creating a beautiful balance of flavors.
- Earthy Mushroom Stuffing Base: Elevate the savory and umami profile of your stuffing by incorporating mushrooms. Sauté 8 ounces of thinly sliced or chopped mushrooms (cremini or button mushrooms work exceptionally well) along with the onion and celery. Mushrooms add an earthy depth and a wonderful savory aroma, transforming your stuffing into a more sophisticated and complex side dish.
- Traditional Cornbread Stuffing Option: If you are a fan of Southern-style dressing, you can easily swap the sturdy ciabatta bread for dried cornbread cubes. It’s important to keep in mind that cornbread typically has a more porous and absorbent texture than wheat bread. Therefore, you might need to keep a closer eye on the moisture levels in your stuffing mixture, potentially adjusting the amount of chicken stock, and be prepared to modify the final baking time as needed to prevent it from becoming too dry.
- Infused Butter & Citrus Turkey Enhancements: For an extra layer of bright flavor directly on the turkey meat, tuck thin slices of lemon or orange under the skin before roasting. The citrus oils will permeate the meat, adding a subtle tang. Alternatively, create an aromatic herb butter by mixing softened unsalted butter with finely chopped fresh herbs (such as rosemary, thyme, or sage) and brush this fragrant butter over the turkey when basting, rather than using plain melted butter. This will further enhance the skin’s crispness and flavor.
- Gluten-Free Perfection: This recipe is easily adaptable for those following a gluten-free diet. Simply substitute your favorite high-quality gluten-free bread for the ciabatta. The most important tip remains consistent: ensure the gluten-free bread is thoroughly toasted and dried before mixing it into the stuffing base. This will help it maintain a good, sturdy texture and prevent it from becoming mushy under the turkey.
Frequently Asked Questions About Spatchcock Turkey & Stuffing
Yes, spatchcocking the turkey is a fundamental and non-negotiable requirement for this specific recipe to achieve its intended results. The entire method relies on the turkey being flattened so it cooks uniformly and quickly, allowing for perfectly even heat distribution across all parts of the bird. This technique ensures that both the delicate white meat and the richer dark meat cook to perfection without the breast meat drying out. Furthermore, a flattened bird provides a stable, expansive, and even surface to rest directly on top of the stuffing, maximizing the crucial absorption of savory pan drippings. Attempting this recipe with a whole, unflattened turkey would unfortunately result in highly uneven cooking, and the stuffing would not benefit from the direct, flavor-infusing contact with the bird.
Absolutely! To significantly help manage your busy holiday cooking schedule and reduce stress on the main day, you can prepare certain key components of the stuffing a day or even two in advance. You can toast the bread cubes until they are perfectly dried, and separately cook the aromatic vegetables (onion, celery, and herbs) until softened. Store both the toasted bread and the cooked vegetables separately in airtight containers at room temperature for the bread, and refrigerated for the vegetables. On the day of cooking, simply mix all the prepared components together with the chicken stock right before you shape the stuffing on the baking sheet and position the turkey on top. This strategic preparation saves a significant amount of time when it matters most.
No, not if you meticulously follow the instructions outlined in this recipe! The most crucial step to prevent soggy stuffing is to ensure the bread cubes are fully dried and toasted before they are mixed with any other ingredients. This process creates a sturdy, absorbent base that can effectively soak up the delicious turkey drippings without becoming waterlogged or mushy. Furthermore, the brilliant two-stage cooking method, with a final bake after the turkey is removed, allows you complete control over the stuffing’s final texture. You can crisp it up to your desired level, from wonderfully moist and tender to delightfully crunchy on the edges.
For optimal results and practical fit on most standard large baking sheets when spatchcocked, a turkey in the range of 10–14 pounds is ideal for this recipe. We successfully used a 12-pound bird for testing, which roasted to absolute perfection in approximately 2 hours at 350°F (175°C). If you plan to use a larger turkey, you might need a very large, commercial-grade baking sheet to accommodate its size, or you may need to divide the stuffing onto two sheets. Always remember to rely on an instant-read thermometer for precise cooking, regardless of turkey size.
While you technically could use a store-bought stuffing mix, we strongly advise against it for this particular recipe to achieve the best possible results. Store-bought mixes often contain softer, more finely crumbled bread that may not possess the necessary structure to hold up well under the weight and moisture of the turkey drippings throughout the long roasting process, potentially leading to a very mushy texture. If, despite our recommendation, you decide to use a box mix, we suggest lightly toasting it beforehand to try and give it more structure, and ensuring you shape it very tightly and compactly on the pan. For the absolute best texture, flavor, and overall success, using homemade stuffing made from sturdy, dried bread is highly preferred.
Always, and without exception, rely on an instant-read thermometer for precise and safe cooking. Insert the thermometer into the thickest part of the turkey breast (taking care to avoid touching any bones, as bones can give inaccurate readings) and also into the thickest part of the thigh. The turkey is officially done when the breast reaches approximately 162°F (72°C) and the thighs reach 175–180°F (79–82°C). It’s crucial to remember that as the turkey rests off the heat (a process known as carry-over cooking), its internal temperature will continue to rise by roughly 5 degrees. This natural rise will bring the breast meat perfectly to the USDA-safe minimum of 165°F (74°C) without any risk of overcooking and drying it out.
You certainly can choose to cook the stuffing in a separate dish if your personal preference or specific circumstances require it. However, it’s important to understand that doing so means you will unfortunately miss out on the incredible, unparalleled depth of savory flavor imparted by the turkey drippings directly infusing into the stuffing. This unique interaction, where the stuffing bakes directly beneath the turkey, is precisely what makes this specific recipe so exceptionally special and flavorful. If you do choose to cook the stuffing separately, you will need to increase the amount of chicken stock added to the mixture to approximately 2-4 cups (adjusting for desired moisture, aiming for moist but not soggy or mushy) and bake it in a covered dish for most of the cooking time, then uncovered for the last 20-30 minutes to achieve a crisp top.
It is quite common for certain parts of the turkey, especially thinner areas like the wing tips or protruding drumsticks, to brown faster than the rest of the bird. To effectively prevent these areas from getting excessively dark or even burning, simply cover them loosely with small pieces of aluminum foil as soon as you notice them browning too rapidly. For overall browning control, once the turkey has achieved a beautiful, golden-brown color but still requires a bit more cooking time to reach the target internal temperature, you can delicately tent the entire bird with foil for the last 20–30 minutes of roasting. This strategic move helps to protect the beautifully browned skin while allowing the meat to gently finish cooking through to perfection.
More Amazing Thanksgiving Recipes
Leftover Thanksgiving Pie
Decadent Whipped Potatoes (Duchess Potatoes)
Creamy Pumpkin Pie Bars
Are you on Pinterest? Click the button below to add this recipe to one of your boards!
Spatchcock Turkey And Stuffing
Print
Pin
Rate
Ingredients
- 12 lb Turkey Giblets, neck removed
Dry Brine
- 2 tbsp Kosher salt
- 1 tbsp Black peppercorns
- 2 tsp Poultry seasoning
- 1 tsp Garlic powder
- 1 tsp Onion powder
Stuffing
- 1 1/2 lb Bread Ciabatta, sourdough, or baguette – cut into 1/2 inch cubes.
- 1/2 cup Chicken stock
- 6 rib Celery finely diced
- 1 1/2 cup Onion finely diced
- 2 tbsp Parsley fresh, chopped
- 2 tbsp Thyme fresh, chopped
- 2 tbsp Sage fresh, chopped
- 1/2 tsp Kosher salt
- 1/2 tsp Black pepper
Instructions
The Turkey
-
Pat the turkey dry with paper towels. Remove the backbone with kitchen shears and press firmly on the breastbone so the bird lays completely flat.12 lb Turkey
-
Add the kosher salt, black peppercorns, poultry seasoning, garlic powder, and onion powder to a spice grinder and grind into a fine rub. Season the turkey on all sides. Refrigerate uncovered for 24–48 hours.2 tbsp Kosher salt, 1 tbsp Black peppercorns, 2 tsp Poultry seasoning, 1 tsp Garlic powder, 1 tsp Onion powder
The Stuffing
-
Preheat the oven to 250°F (120°C). Spread the cubed bread on two baking sheets and bake for 45–50 minutes, stirring halfway through, until fully dried but not browned. Transfer to a large mixing bowl and drizzle with the chicken stock.1 1/2 lb Bread, 1/2 cup Chicken stock
-
Melt the butter in a large skillet over medium-low heat. Add the diced onion and celery and cook for about 10 minutes, until softened and sweated but not browned. Stir in the parsley, sage, thyme, 1/2 teaspoon kosher salt, and 1/2 teaspoon black pepper. Cook 1–2 minutes more, then add the mixture to the bowl of bread and toss to combine.6 rib Celery, 1 1/2 cup Onion, 2 tbsp Parsley, 2 tbsp Thyme, 2 tbsp Sage, 1/2 tsp Kosher salt, 1/2 tsp Black pepper
-
Increase oven temperature to 350°F (175°C). Line a large baking sheet with foil. Shape the stuffing into a tight square or rectangle that roughly matches the size of the flattened turkey. Place the spatchcocked turkey skin-side up directly on top of the stuffing.
-
Roast for about 2 hours (or roughly 1 hour per 6 pounds at this temp), basting once with melted butter about 1 hour in. If the legs or any exposed stuffing begin to brown too quickly, cover those areas with foil. Continue roasting until the breast reaches about 162°F (72°C) and the thighs reach 175–180°F (79–82°C). The temperature will rise about 5 degrees as the turkey rests.
-
Transfer the turkey to a cutting board to rest for 20–30 minutes. Stir the stuffing and return it to the oven for 20–30 minutes, depending on how moist or crisp you prefer it.
-
Slice the turkey and serve with the stuffing.
Notes
Nutrition
