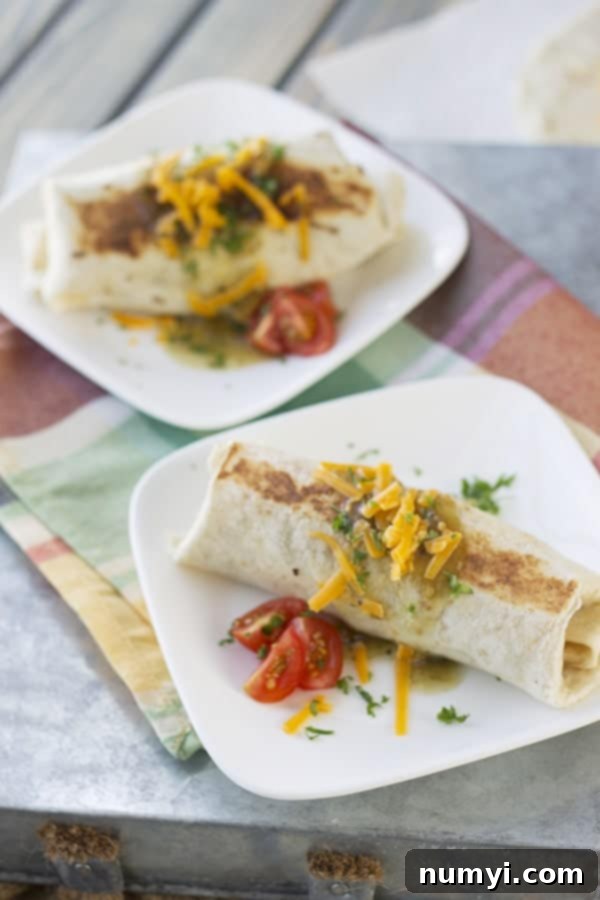
Easy & Delicious Meal Prep Breakfast Burritos: Your Ultimate Make-Ahead Breakfast Solution
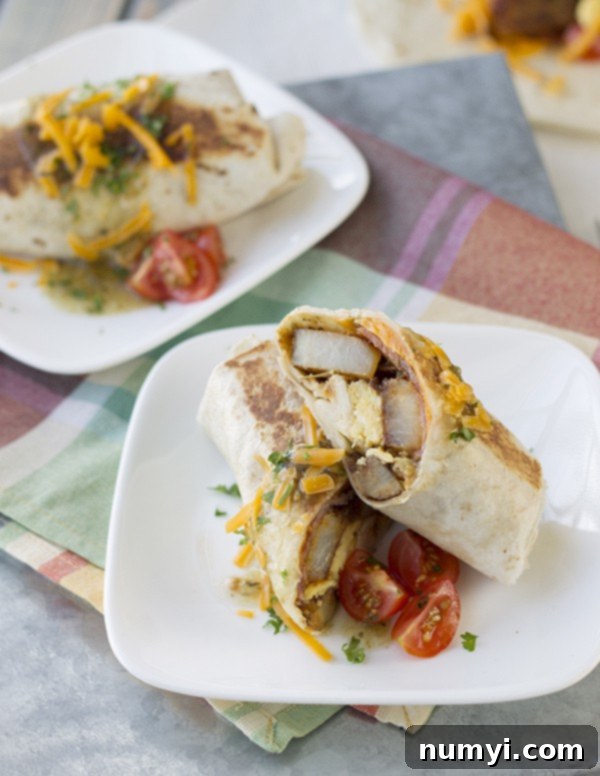
These meal prep breakfast burritos are an absolute game-changer for anyone looking to conquer busy mornings with a delicious, satisfying, and incredibly convenient meal. Imagine waking up, grabbing a pre-made burrito from the freezer, and having a hot, flavorful breakfast ready in minutes! You’re going to fall in love with the combination of perfectly custardy scrambled eggs, rich smoky bacon, and irresistibly fluffy, seasoned potatoes, all enveloped with a generous layer of melted sharp cheddar cheese. Whether you enjoy them fresh off the skillet or store them for a future quick meal, these burritos are designed to simplify your life without sacrificing flavor or quality.
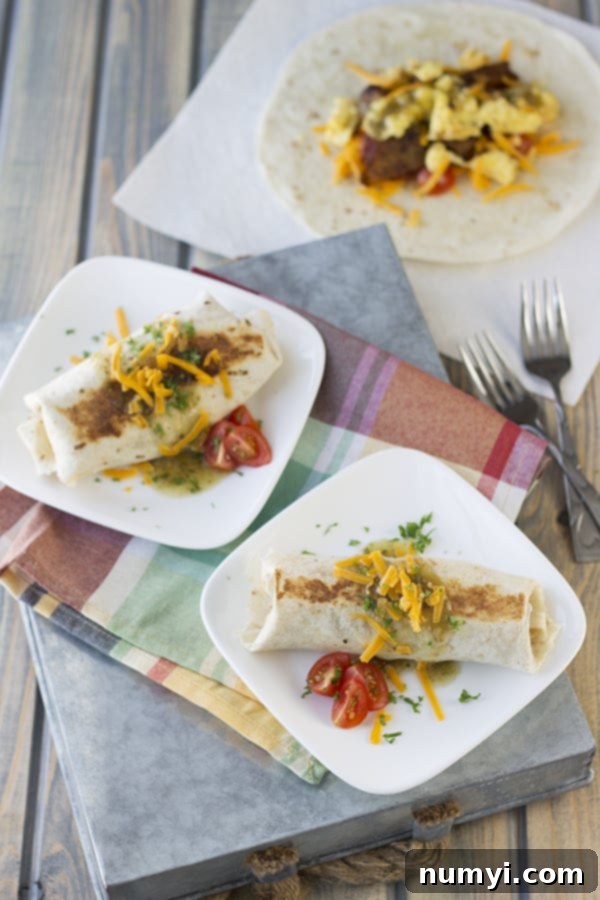
Why You’ll Love These Freezer-Friendly Meal Prep Breakfast Burritos
If you’re constantly on the go, struggle with making breakfast a priority, or just want a hassle-free start to your day, these breakfast burritos are your new best friend. Here’s why they’ve become a cherished staple in my kitchen and why I know you’ll adore them too:
- Ultimate Convenience & Time-Saver: This recipe is specifically designed for meal prepping. You can make a large batch on a Sunday afternoon and enjoy homemade, wholesome breakfasts for days or even weeks! They are the epitome of grab-and-go convenience, eliminating morning cooking stress.
- Incredibly Delicious & Satisfying: Forget bland, uninspired frozen burritos. Our recipe ensures every single bite is packed with incredible flavor and satisfying textures. From the perfectly seasoned, crispy potatoes to the savory bacon and creamy, custardy eggs, all tied together with gooey melted cheese, these burritos are pure comfort food.
- Highly Customizable for Every Palate: Think of this recipe as a flexible template, not a rigid set of rules. It’s a true “kitchen sink” meal where you can effortlessly incorporate whatever vegetables, proteins, cheeses, or spices you have on hand or that your family loves. We provide a wealth of ideas below to spark your creativity and cater to various dietary preferences!
- Perfect for Any Occasion: Need a super quick meal before work or school? Just pop one in the microwave. On a more relaxed weekend morning, serve them as a sit-down breakfast, dressed up with fresh, vibrant toppings like a dollop of sour cream, a spoonful of fresh pico de gallo, extra tangy salsa verde, or a sprinkle of chopped cilantro.
- Freezer-Friendly & No More Soggy Burritos: Our detailed instructions ensure your burritos can be frozen without succumbing to sogginess. This means you can count on a delightful texture and taste even after they’ve been stored, making them the ideal make-ahead solution for even the busiest households.
These burritos are more than just a meal; they’re a smart strategy to reclaim your mornings, reduce food waste, and ensure you always have a wholesome, hearty, and satisfying breakfast within arm’s reach.
Essential Ingredients for Crafting the Best Breakfast Burritos
Our foundational recipe creates incredibly flavorful burritos, striking a perfect balance of savory, creamy, and satisfying elements. However, the true beauty of this dish lies in its remarkable adaptability. This list includes the ingredients for my most commonly prepared version, providing a delicious base. Feel absolutely free to adjust these components based on your personal preferences, dietary needs, or simply what you have readily available in your pantry. Don’t forget to check out our extensive customization suggestions further down for even more inspiration to make these burritos uniquely yours!
- Bacon: Crispy, smoky bacon is a cornerstone of this recipe, adding a fantastic depth of savory flavor and a delightful crunch. For a lighter alternative, feel free to use turkey bacon, or for an extra rich flavor, you can try thinly sliced pancetta.
- Baked Potato: Utilizing a pre-baked large potato, cut into small 1/2-inch chunks, is a game-changer. It ensures the potatoes achieve a wonderfully fluffy interior and beautifully crispy edges when fried, while also significantly cutting down on your overall preparation time.
- Classic Seasonings: A carefully chosen blend of paprika (for warmth and color), chili powder (for an earthy, mild kick), and cumin (for a distinct, aromatic depth) gives the potatoes an irresistible flavor profile. Essential salt and freshly ground black pepper are crucial for enhancing and balancing all the robust flavors in the burrito.
- Eggs: Fresh large eggs, scrambled until they reach a custardy and soft consistency, are the tender, protein-packed heart of these burritos. Cook them gently to avoid dryness.
- Fresh Tomatoes: Finely diced fresh tomatoes contribute a vibrant pop of color, a refreshing acidity, and a touch of juiciness that beautifully balances the richness of the other ingredients.
- Flour Tortillas: Large (preferably 10-12 inch) flour tortillas are ideal for these hearty burritos. Their flexibility and sturdiness are key for wrapping a generous amount of filling without tearing, ensuring a neatly packaged, portable meal.
- Salsa Verde: A spoonful or two of zesty, tangy salsa verde woven into the filling or served on the side brightens up each bite with its characteristic vibrant flavor. Choose a mild or spicy version based on your preference.
- Shredded Sharp Cheddar Cheese: A generous amount of shredded sharp cheddar cheese is essential. When melted, it adds a creamy, sharp, and utterly delicious element that binds all the components together with its comforting, gooey texture.
Endless Customization: What Other Delights Go Well in a Breakfast Burrito?
The beauty of these breakfast burritos is their incredible versatility. You can truly make them your own by experimenting with various add-ins and substitutions. Get creative and use this section as a comprehensive guide to endless culinary possibilities:
- Alternate Proteins:
- Sausage: Elevate the flavor by swapping bacon for spicy chorizo sausage (either traditional pork or a plant-based alternative), savory breakfast sausage links, or crumbles.
- Ham: Diced leftover ham adds a delightful salty and hearty touch.
- Pulled Pork/Chicken: If you have leftovers, shredded seasoned pork or chicken can be a fantastic, savory addition.
- Boost with Vegetables:
- Leafy Greens: Wilted spinach, kale, or Swiss chard are excellent for adding nutrients and a fresh, slightly earthy note.
- Onions & Peppers: Sautéed bell peppers (use a mix of colors for visual appeal!) and sweet onions offer wonderful sweetness and a pleasant, tender crunch.
- Mushrooms: Sliced and sautéed mushrooms bring an umami depth that complements the other savory flavors.
- Root Vegetables: Consider diced sweet potatoes (roasted or pan-fried) instead of regular potatoes for a different flavor profile and added nutrients.
- Other Veggies: Corn kernels, black olives, roasted asparagus, or even finely diced zucchini can be delicious additions.
- Cheese Variations:
- Pepper Jack: For those who love a spicy kick, pepper jack cheese is a fantastic choice.
- Monterey Jack: A mild and incredibly melty cheese that blends seamlessly.
- Cotija Cheese: Crumbly and salty, cotija is excellent for sprinkling inside or on top after reheating.
- Dairy-Free Options: Easily make these burritos dairy-free by incorporating your favorite plant-based shredded cheese alternative.
- Enhanced Spices & Flavor Boosters:
- Aromatics: A pinch of garlic powder or onion powder can significantly enhance the savory notes of the eggs and potatoes.
- Smoky Flavor: For an extra layer of smoky goodness, try smoked paprika or a dash of chipotle powder.
- Heat Enthusiasts: If you crave more heat, add a generous dash of your favorite hot sauce directly into the eggs or a few finely diced fresh or pickled jalapeños.
- Fresh Herbs: A sprinkle of freshly chopped cilantro or parsley at the assembly stage provides a burst of invigorating freshness.
- Creamy & Tangy Additions:
- Avocado: Creamy diced avocado or a smear of fresh guacamole adds healthy fats, a smooth texture, and a rich flavor.
- Sour Cream/Greek Yogurt: A dollop inside the burrito or on the side offers a cool, tangy contrast that brightens the whole dish.
- Heartier Additions:
- Beans: Start your day with a boost of fiber and plant-based protein by adding a scoop of seasoned black beans, pinto beans, or refried beans.
- Rice: A small amount of cooked rice (like white or brown rice) can make the burritos even more substantial and filling.
- Dietary Considerations:
- Gluten-Free: For a gluten-free option, use large corn tortillas. Be aware that corn tortillas can be more prone to cracking, so warm them very thoroughly and consider using two overlapping tortillas per burrito for extra durability. Always ensure other ingredients are also certified gluten-free.
- Vegetarian/Vegan: See our FAQ section for specific tips on making these burritos meat-free or completely plant-based.
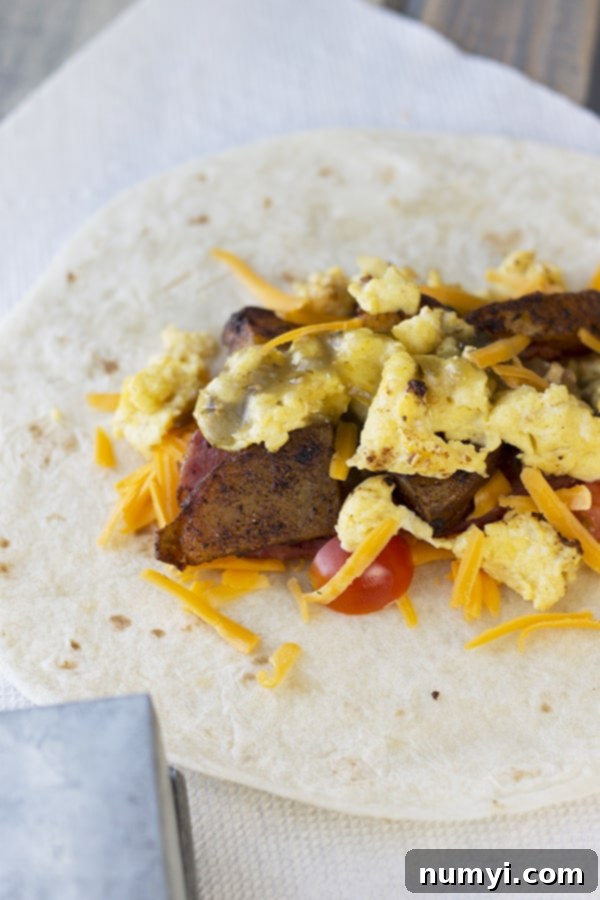
How To Prepare Your Delicious Meal Prep Breakfast Burritos: A Detailed Step-by-Step Guide
Making these burritos is a straightforward and rewarding process. Following these detailed instructions carefully will ensure they are perfectly delicious whether you plan to eat them immediately or freeze them for a convenient meal later. Pay special attention to the cooling step for optimal meal prep results!
Step 1: Cook the Bacon & Potatoes to Crispy Perfection
- Fry the Bacon: In a large, sturdy skillet (a cast iron pan is excellent for even heat), fry the bacon over medium heat until it reaches your desired level of crispness. This usually takes between 5-8 minutes, depending on the thickness of your bacon. Once cooked, use tongs to remove the bacon and place it on a plate lined with paper towels to drain any excess grease. This helps maintain its crisp texture.
- Prepare the Potatoes: Carefully drain most of the bacon grease from the skillet, leaving approximately 1-2 tablespoons. This residual grease adds incredible flavor to the potatoes. If you prefer, you can drain all the bacon grease and use a neutral cooking oil of your choice (such as olive oil or avocado oil) to fry the potatoes. Add the pre-cut 1/2-inch potato chunks to the hot skillet. Fry them, stirring occasionally, until they are beautifully golden brown and crispy on the outside, with a tender and fluffy interior. This process typically takes 8-12 minutes.
- Season the Potatoes: While the potatoes are frying and nearing completion, sprinkle them generously with paprika, chili powder, cumin, salt, and freshly ground black pepper. Stir well to ensure every potato piece is evenly coated with the fragrant seasonings. Once done, remove the seasoned, crispy potatoes from the pan and set them aside to cool.
Step 2: Scramble the Eggs to a Delightfully Custardy Consistency
- Cook the Eggs: Using the same skillet (no need to wash it; the residual flavors from the bacon and potatoes are a delicious bonus!), reduce the heat to medium-low. Pour in your beaten eggs. Cook them gently, stirring and folding with a rubber spatula, until they are just set, soft, and beautifully custardy. The key here is to avoid overcooking, as dry, rubbery eggs will lead to a less enjoyable burrito.
- Set Aside: As soon as the eggs reach that perfect soft-scramble consistency, remove them from the heat and set them aside to cool.
Step 3: Thoughtful Assembly of Your Breakfast Burritos
This is where your delicious burritos truly come to life! For the absolute best results, especially if you plan on freezing these burritos, it is crucial to allow all your cooked ingredients (bacon, potatoes, and scrambled eggs) to cool completely to room temperature before you begin assembling. This step is vital for preventing sogginess later on.
- Lay the Tortilla: Lay a large flour tortilla (10-12 inches works best) flat on a clean, dry surface.
- Layer the Cheese: Begin by sprinkling a generous layer of shredded sharp cheddar cheese down the center of the tortilla. This initial cheese layer not only adds flavor but also acts as a protective barrier, helping to prevent the tortilla from becoming soggy from the other fillings.
- Add the Fillings: Next, add a large spoonful or two of salsa verde. Follow this with a portion of chopped fresh tomatoes, a good serving of the perfectly scrambled eggs, a scoop of the crispy seasoned potatoes, and one strip of bacon (or your chosen protein). Distribute the fillings evenly but avoid overfilling.
- The Art of Rolling: To properly roll the burrito, first fold in the two shorter sides of the tortilla (the left and right edges) over the filling. Then, starting from the side closest to you, tightly roll the tortilla upwards and away from you. As you roll, use your fingers to gently tuck in the filling and ensure the burrito is rolled as snugly as possible to prevent it from unraveling.
- Repeat: Continue this process for the remaining tortillas until all 6 burritos are expertly assembled.
Step 4: Optional Browning for an Extra Crunch and Seal
- Prepare Skillet: For an extra layer of delicious flavor and texture, and to help seal the burrito, heat a clean skillet (or the same skillet after quickly wiping it out) over medium-low heat.
- Brown the Burritos: Place each assembled burrito seam-side down in the heated skillet. Cook for about 1-2 minutes per side, or until the tortilla is lightly golden brown and develops a slightly crispy exterior. This step not only adds a lovely crunch but also helps to secure the roll, making the burritos less likely to unroll.
- Serve or Store: At this point, you can serve your delicious breakfast burritos immediately and savor your efforts! Alternatively, if you’re meal prepping, proceed directly to the detailed storage instructions provided below.
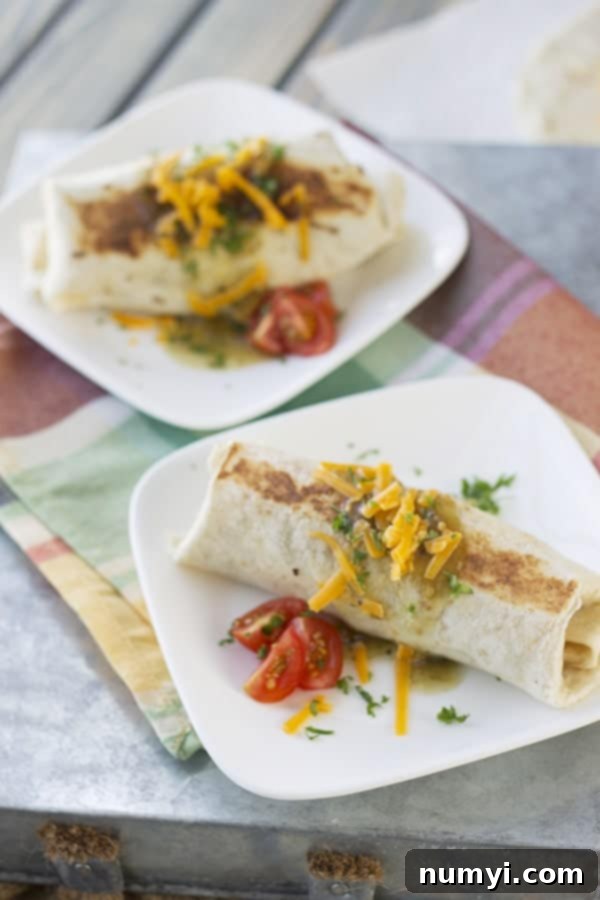
Storage and Reheating Tips for Your Convenient Meal Prep Burritos
The true magic of these breakfast burritos lies in their incredible versatility for meal prepping. To fully capitalize on their make-ahead potential, understanding the proper storage and reheating techniques is absolutely crucial. These methods will ensure you can enjoy your homemade burritos tasting as fresh and delicious as possible, whether it’s days or even weeks after their initial preparation.
How to Freeze Breakfast Burritos for Long-Term Storage
- Crucial Cooling Step: This is arguably the most important step to prevent soggy burritos! Ensure all cooked components of your assembled burritos – the bacon, potatoes, eggs, and any sautéed vegetables – are completely cooled to room temperature before you even begin the wrapping process. Any residual heat will create steam, which then turns into condensation once wrapped and frozen, leading to an undesirable soggy texture when thawed and reheated.
- Wrap Tightly: Individually wrap each thoroughly cooled burrito tightly in aluminum foil. Make sure there are no gaps or loose edges for air to enter, as air is the enemy of frozen food quality. For an extra layer of protection against freezer burn, you can first wrap them in parchment paper, then in foil.
- Use a Freezer Bag: Once wrapped in foil, place the burritos into a large, freezer-safe zip-top bag. Before sealing the bag, try to squeeze out as much air as possible. Label the bag clearly with the date of preparation.
- Storage Duration: When stored correctly, these freezer-friendly breakfast burritos can be kept in the freezer for up to 2-3 months without a significant loss in quality, texture, or flavor.
How to Refrigerate Breakfast Burritos for Short-Term Storage
- If you anticipate consuming your burritos within a shorter timeframe, typically within a week, refrigeration is a perfectly suitable option.
- Simply wrap each burrito tightly in plastic wrap or aluminum foil.
- Store them in the refrigerator, where they will generally remain fresh and delicious for 3-5 days.
Effective Reheating Methods for Frozen Breakfast Burritos
- Microwave (Quickest Method):
- Remove the aluminum foil completely.
- For best results and to prevent drying out, loosely wrap the burrito in a damp paper towel.
- Microwave on high for 2-3 minutes, flipping the burrito halfway through, or until it is heated through to your desired temperature. Please note that cooking times may vary significantly depending on your microwave’s wattage.
- Allow it to rest for a minute before eating, as the filling will be very hot.
- Oven (Best for Crispy Tortilla):
- Preheat your oven to 375°F (190°C).
- Keep the burrito wrapped in its aluminum foil (this helps to prevent the tortilla from drying out).
- Place the foil-wrapped burrito directly on a baking sheet.
- Bake for 30-40 minutes, or until the burrito is thoroughly heated through to the center. For an extra crispy exterior, unwrap the burrito for the last 5-10 minutes of baking.
- Air Fryer (Excellent for Maximum Crispiness):
- Remove the aluminum foil completely.
- Place the burrito directly into the air fryer basket (single layer for best results).
- Air fry at 350°F (175°C) for 15-20 minutes, flipping halfway. This method yields a wonderfully hot and crispy exterior.
Reheating Refrigerated Breakfast Burritos
- Microwave: Remove the wrapping. Microwave for 1-2 minutes, flipping halfway, until warmed through.
- Oven: Preheat to 350°F (175°C). Wrap the burrito in foil and bake for 15-20 minutes, or until thoroughly heated.
- Skillet: Place the unwrapped burrito in a lightly oiled skillet over medium-low heat. Cook for a few minutes per side, pressing down gently, until it’s warmed through and the tortilla is slightly crispy.
Frequently Asked Questions (FAQs) About Breakfast Burritos
The absolute most critical step to prevent soggy burritos when freezing is to ensure all of your cooked ingredients—this includes the bacon, potatoes, scrambled eggs, and any sautéed vegetables—are completely cooled to room temperature before you even start assembling the burritos. Any residual heat will create steam, which then turns into condensation once wrapped and frozen, leading to an undesirable soggy texture when thawed and reheated. After assembly, wrap each burrito individually and tightly in aluminum foil, pressing out as much air as possible around the burrito. You can also add an additional layer of parchment paper for extra protection. Finally, place the foil-wrapped burritos in a larger freezer-safe zip-top bag, expelling any remaining air before sealing. This double wrapping helps to protect against freezer burn and moisture infiltration.
When stored properly, homemade breakfast burritos can last quite a while, making them ideal for efficient meal prep. In the refrigerator, tightly wrapped burritos will stay fresh and delicious for approximately 3-5 days. For significantly longer storage, freezing is the way to go! Individually wrapped in foil and then placed in an airtight freezer bag, they can effectively keep for up to 2-3 months. Beyond that timeframe, they might still be safe to eat, but you may notice a gradual decline in their optimal quality, texture, and vibrant flavor.
For these hearty meal prep breakfast burritos, large (preferably 10-12 inch) flour tortillas are generally highly recommended. They possess excellent flexibility, are robust enough to hold a generous filling without tearing, and are easy to roll tightly—qualities that are crucial for both assembly and for preventing breakage during the freezing and reheating processes. While corn tortillas can certainly be used for a gluten-free option, it’s important to note they tend to be less pliable and can crack more easily, particularly when cold. If you opt for corn tortillas, warm them thoroughly before rolling to increase their flexibility, and consider using two overlapping tortillas per burrito for enhanced durability and to prevent the filling from escaping.
Absolutely! These breakfast burritos are wonderfully adaptable to various dietary preferences. For a delicious vegetarian version, simply omit the bacon (or any other meat protein) and instead, add more flavorful vegetables like sautéed mushrooms, bell peppers, nutrient-rich spinach, or protein-packed black beans. You can also incorporate plant-based breakfast sausages. For a completely vegan version, you’ll need to make a few additional swaps: replace the eggs with a seasoned tofu scramble or a plant-based egg substitute, omit all meat products, and use your favorite brand of dairy-free shredded cheese. Always double-check that your chosen tortillas are also vegan-friendly (most flour tortillas are, but it’s good practice to verify the ingredients list).
There are several effective methods for reheating frozen breakfast burritos, each offering a slightly different result in terms of crispiness and speed. For the quickest and most convenient option, the microwave is ideal: remove the foil, wrap the burrito in a damp paper towel, and microwave on high for 2-3 minutes, flipping halfway. For a beautifully crispy tortilla, the oven is an excellent choice: keep the burrito wrapped in foil, bake at 375°F (190°C) for 30-40 minutes (unwrapping for the last 5-10 minutes to achieve extra crispness). An air fryer also works wonders for achieving maximum crispiness: remove the foil, air fry at 350°F (175°C) for 15-20 minutes, flipping halfway. Regardless of the method, the most important aspect is to ensure the internal temperature of the burrito is thoroughly heated through for food safety and enjoyment.
More Delicious Breakfast Recipes You’ll Love for Any Day of the Week
- Freezer Breakfast Ham, Egg, and Cheese Breakfast Sandwich
- Ham and Egg Breakfast Cups
- Bacon, Mushroom, and Spinach Breakfast Casserole
- Apple Cinnamon Freezer Oatmeal Cups
- Healthy Oatmeal Banana Breakfast Muffins
- Black Bean and Cheese Breakfast Tacos
- Hearty Breakfast Enchiladas
HUNGRY FOR MORE RECIPES AND INSPIRATION? Don’t miss out on my latest culinary adventures and delicious dishes! Subscribe to my newsletter today and make sure to follow along on Pinterest, Facebook, and Instagram for all my freshest updates, behind-the-scenes content, and mouth-watering recipe ideas!
Meal Prep Breakfast Burritos

Ingredients
- 6 strips bacon
- 1 large baked potato cooked and cut into 1/2″ chunks
- 1 teaspoon paprika
- 1/2 – 1 teaspoon chili powder
- 1/2 teaspoon ground cumin
- Salt and freshly ground black pepper to taste
- 6 large eggs beaten
- 2 cups shredded sharp cheddar cheese
- 1 cup diced fresh tomatoes
- 6 large (10-12 inch) flour tortillas
- Salsa verde for serving or inside the burrito
Instructions
-
1. Cook Bacon & Potatoes: In a large skillet, fry the bacon over medium heat until crispy (5-8 mins). Remove and drain on paper towels. Drain most bacon grease, leaving 1-2 tbsp. Add diced baked potatoes to skillet; fry until browned and crispy (8-12 mins). Season potatoes with paprika, chili powder, cumin, salt, and pepper. Remove from pan and set aside to cool.
-
2. Scramble Eggs: In the same skillet, reduce heat to medium-low. Scramble beaten eggs until just set and custardy (do not overcook). Remove from heat and set aside to cool completely.
-
3. Cool Ingredients (Crucial for Freezing!): Ensure all cooked ingredients (bacon, potatoes, eggs) are completely cooled to room temperature before assembling. This prevents sogginess when freezing.
-
4. Assemble Burritos: Lay a large flour tortilla flat. Place a layer of shredded cheddar cheese down the center. Add 1-2 spoonfuls of salsa verde, some chopped tomatoes, scrambled eggs, seasoned potatoes, and one strip of bacon. Fold in the short sides of the tortilla, then tightly roll it up from the bottom. Repeat for the remaining 5 tortillas.
-
5. Optional Browning: For extra crunch and to help seal, brown each assembled burrito seam-side down in a clean skillet over medium-low heat for 1-2 minutes per side until lightly golden. Serve immediately or proceed to storage instructions.
Notes
Reheating Frozen: Remove foil. Microwave for 2-3 minutes (wrapped in damp paper towel), or bake at 375°F (190°C) in foil for 30-40 minutes (unwrap last 5-10 mins for crispness), or air fry at 350°F (175°C) for 15-20 minutes.
Reheating Refrigerated: Remove wrapping. Microwave for 1-2 minutes, bake at 350°F (175°C) in foil for 15-20 minutes, or heat in a lightly oiled skillet for a few minutes per side.
Sogginess Prevention: The key is to cool all ingredients completely before assembly and wrapping. Also, avoid excessively watery salsas or overfilling.
