Easy Raspberry Thumbprint Cookies: Your Guide to a Classic Jam-Filled Delight
Step into the delightful world of baking with our ultimate guide to creating the most exquisite Raspberry Thumbprint Cookies. These charming treats are a symphony of textures and flavors: a soft, delicate, and slightly crisp cookie base cradling a luscious dollop of sweet, tangy red raspberry jam. Often cherished as a festive Christmas tradition, these versatile cookies are truly a joy to bake and share any time the craving strikes. With their inviting appearance and irresistible taste, they are always a welcome addition to any dessert spread, coffee break, or special occasion.

While many associate thumbprint cookies with the holiday season, their simple charm and delightful flavor make them a perfect year-round indulgence. Imagine the warmth of freshly baked cookies filling your home, or the smiles these delicate morsels bring to friends and family. This recipe is designed to be straightforward and rewarding, making it accessible for bakers of all skill levels. Forget the complicated steps; we’ll guide you through each stage to ensure your cookies turn out perfectly every time. From selecting the right ingredients to mastering the perfect indentation, every detail is covered to help you achieve bakery-quality results right in your own kitchen.
The Irresistible Appeal of Raspberry Thumbprint Cookies
What makes Raspberry Thumbprint Cookies so universally beloved? It’s their unique combination of simplicity and sophistication. The tender, buttery shortbread-like dough, enriched with cream cheese for an extra soft crumb, provides the perfect canvas for the vibrant burst of raspberry jam. The slight crispness on the exterior gives way to a melt-in-your-mouth interior, creating a textural experience that is utterly delightful. And let’s not forget the visual appeal – those little pools of glistening ruby-red jam are simply enchanting, making them as pretty to look at as they are delicious to eat. Their humble origins, often traced back to Scandinavian baking traditions (like Swedish Hallongrotta), speak to a timeless comfort that transcends cultures and generations.
This recipe isn’t just about baking; it’s about creating cherished moments. Whether you’re baking with children, preparing a thoughtful treat for a potluck, or simply indulging in a quiet afternoon snack, these cookies offer a heartwarming experience. They’re also incredibly adaptable. While raspberry jam is a classic choice, don’t hesitate to experiment with other fruit preserves like apricot, strawberry, blueberry, or even a citrus marmalade to discover your own favorite variation. The foundational cookie dough is versatile, allowing for endless creative possibilities. We believe that good food should be easy to make and bring immense joy, and these homemade thumbprint cookies certainly deliver on both fronts, making them a staple in any baker’s repertoire.

Mastering the Art of Thumbprint Cookies: Step-by-Step Guide
Creating these beautiful cookies is a rewarding process, and with our detailed instructions, you’ll achieve perfect results. Let’s walk through each step, ensuring you understand the ‘why’ behind the ‘how’ for a truly successful bake, transforming simple ingredients into extraordinary treats.
Preparation and Dry Ingredients
- **Preheat Oven and Prepare Baking Sheets:** Begin by preheating your oven to a precise 350 degrees F (175 degrees C). An accurately preheated oven is critical for even baking and prevents the cookies from spreading too much or baking unevenly. Line two baking sheets with parchment paper. Parchment paper is a non-stick hero, ensuring your delicate cookies release easily and makes cleanup an absolute breeze, guaranteeing your cookies retain their beautiful shape.
- **Whisk Dry Ingredients:** In a medium-sized bowl, combine and whisk together the all-purpose flour, baking soda, baking powder, and salt. Whisking thoroughly ensures that these leavening agents and the salt are evenly distributed throughout the flour. This prevents pockets of unmixed ingredients and contributes to a uniform rise, consistent texture, and balanced flavor in every delicious bite. Set this perfectly combined mixture aside.
Creaming the Wet Ingredients for a Tender Dough
- **Cream Butter and Sugar:** In a large bowl, combine the room temperature unsalted butter and granulated sugar. The butter should be soft enough to indent with a finger but not melted. Using an electric stand mixer or a handheld mixer at medium speed, cream these ingredients together until the mixture transforms into a light and fluffy consistency. This crucial process typically takes about 4 to 6 minutes. Proper creaming incorporates air into the butter and sugar, which is vital for the cookies’ tender, airy texture and helps achieve that desirable slight crispness on the edges.
- **Add Cream Cheese, Egg, and Vanilla:** Next, add the softened cream cheese, the large egg, and vanilla extract to the creamed butter and sugar. Continue mixing at medium speed until all ingredients are just combined, usually about 30 seconds. Be mindful not to overmix at this stage. Throughout this process, remember to scrape down the sides of the bowl as needed to ensure everything is thoroughly incorporated and no unmixed ingredients are clinging to the bowl. The cream cheese is a secret weapon here, adding an incredible richness and an extra tender crumb to the dough, truly setting these thumbprint cookies apart from simpler versions.

Combining Dry and Wet Ingredients and Forming the Cookies
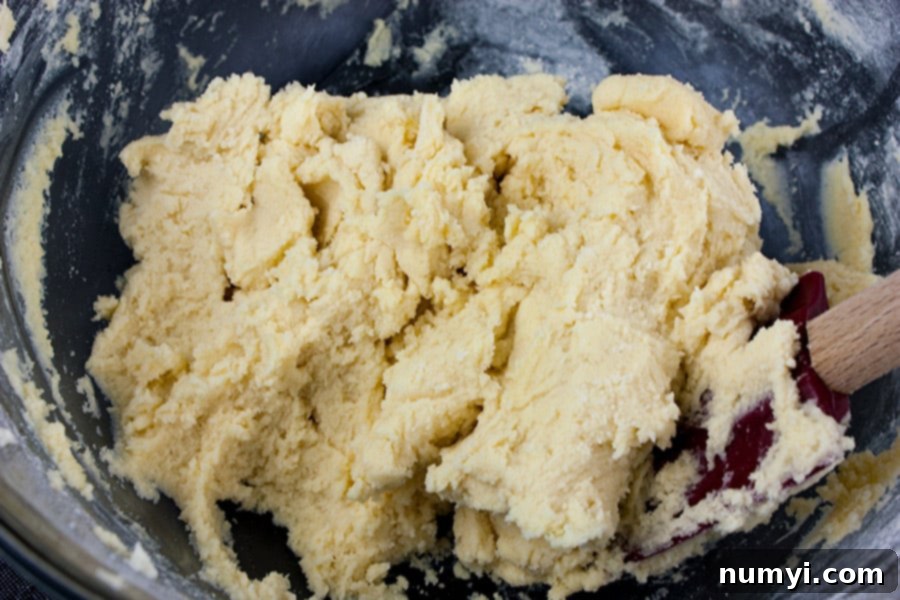
- **Incorporate Dry Ingredients:** Reduce the mixer speed to low and gradually add the dry ingredients (the flour mixture you prepared earlier) to the wet ingredients in the large bowl. Mix until just incorporated. This step requires a delicate touch; be careful not to overmix the dough, as overworking the gluten in the flour can lead to tough, chewy cookies instead of the desired tender and delicate texture. Stop mixing as soon as no dry streaks of flour remain visible.
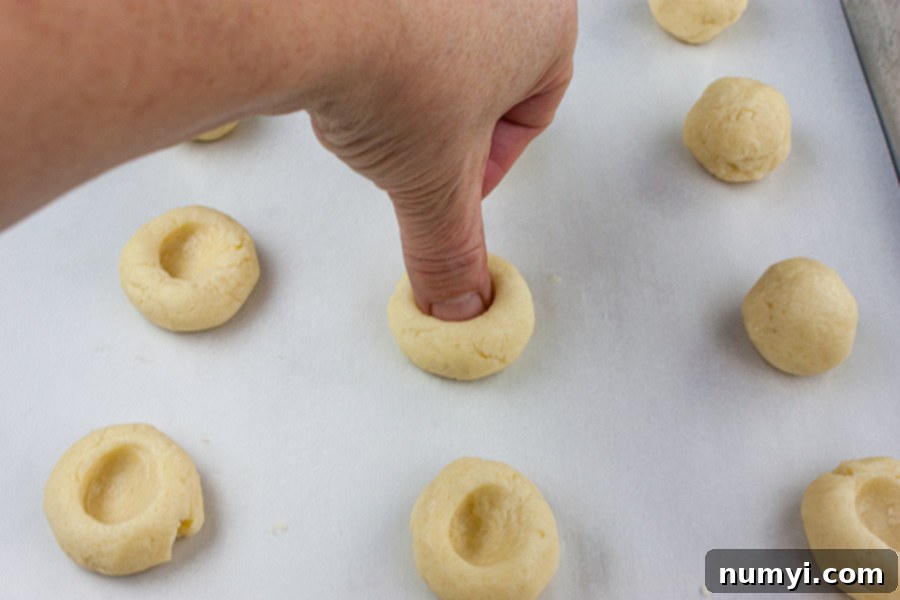
- **Forming and Indenting the Cookies:** Take about 1 1/2 teaspoons of dough for each cookie. Gently roll this portion into a smooth, even ball between your palms. This ensures uniform size and even baking. Place the dough balls approximately 1 1/2 inches apart on the prepared baking sheets. This spacing is important to allow for slight spreading during baking without the cookies merging into one another. To create the signature “thumbprint,” dampen your thumb slightly (this helps prevent the dough from sticking to your finger) and gently press an indentation into the center of each dough ball. Alternatively, the back of a rounded teaspoon can be used for a more uniform and perfectly circular cavity.

Baking and Filling for Perfection
- **Initial Bake:** Place the baking sheets in the preheated oven and bake the cookies for approximately 10 minutes, or until the edges begin to appear lightly browned. This initial bake is crucial as it helps set the cookie structure, making the dough stable enough to hold its shape and prevent the jam from sinking or boiling over when it’s added later.
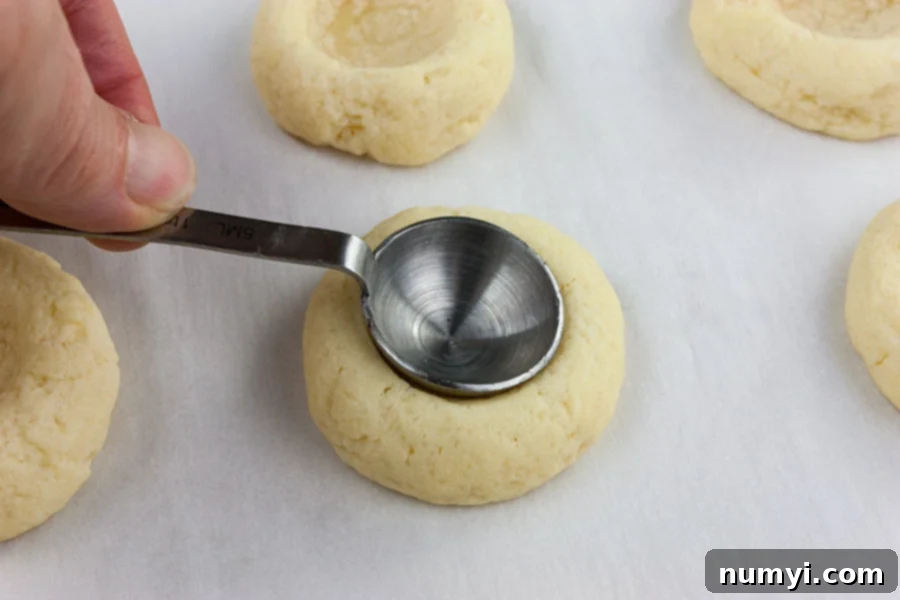
- **Reshape Indentations:** Carefully remove the baking sheets from the oven. While the cookies are still warm and pliable, gently press to reshape the center indentation of each cookie. The dough tends to puff up slightly during the first bake, so using the back of a rounded teaspoon measure works perfectly for this, creating a deeper, neater well that will beautifully hold the jam.
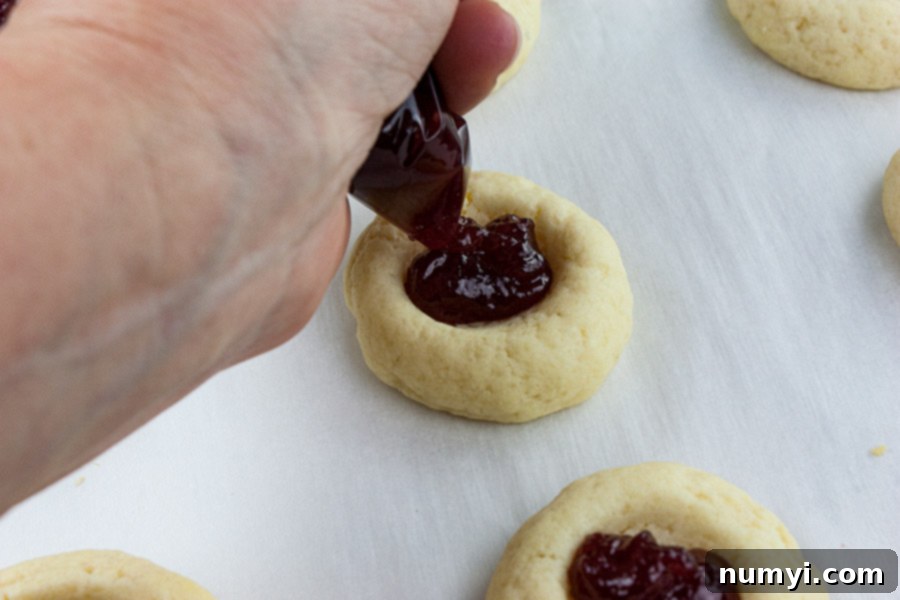
- **Prepare the Jam:** For easy and clean filling, spoon your chosen raspberry jam into a zip-top bag. Using a pair of kitchen scissors, snip a small corner off the bag to create a makeshift piping bag. This method allows for precise control when filling, preventing messy spills and ensuring each cookie gets an even, attractive dollop of jam.

Final Bake and Cooling
- **Fill and Final Bake:** Fill each cookie indentation with about 1/2 teaspoon of jam. Be generous but avoid overfilling, which could cause the jam to bubble over the edges. Rotate the baking sheet (this helps with even baking, especially if your oven has hot spots) and return it to the oven. Bake for another 12 to 14 minutes, or until the cookies are beautifully golden brown around the edges and the jam is bubbly and appears set. The jam will firm up further as it cools.
- **Cooling Process:** Once fully baked, carefully remove the cookies from the oven. Let them cool on the hot baking sheet for about 10 minutes. This initial cooling period allows the cookies to set further and become more stable, preventing them from breaking when you move them. After 10 minutes, carefully transfer the cookies to a wire rack to cool completely. Cooling completely on a rack is essential for achieving that delightful, slightly crisp base and preventing sogginess from trapped steam.

Tips for Perfect Thumbprint Cookies Every Time
- **Room Temperature Ingredients are Non-Negotiable:** This is arguably the most important tip. Ensure your butter, cream cheese, and egg are all at room temperature before you start mixing. This allows them to cream together smoothly and emulsify properly, creating a uniform, cohesive dough that will bake beautifully and yield a tender texture. Cold ingredients will result in a lumpy, inconsistent batter and a denser cookie.
- **Don’t Overmix the Dough:** Once you add the dry ingredients to the wet, mix only until they are just combined and no streaks of flour remain. Overmixing develops the gluten in the flour, which leads to tough, dense, and less tender cookies instead of the desired delicate crumb. Mix on low speed and stop as soon as it comes together.
- **Choose Your Jam Wisely:** A good quality, seedless raspberry jam is ideal for this recipe. Seedless prevents a gritty texture, and a slightly thicker jam will hold its shape better during baking, resulting in neat, attractive centers. If your chosen jam seems too thin, you can gently warm it in a small saucepan over low heat to reduce it slightly, stirring constantly, before filling the cookies.
- **Uniform Cookie Size:** For consistent baking and a professional-looking presentation, use a measuring spoon (like the 1 1/2 teaspoon specified in the recipe) to scoop the dough for each cookie. This ensures all your cookies are roughly the same size and thickness, which leads to even baking throughout the batch.
- **Re-indentation is Key:** Don’t skip the step of re-indenting the cookies after the initial bake. The dough naturally puffs up slightly in the oven, and reshaping the well ensures there’s ample, perfectly shaped space for the jam filling and a clean, defined look for your finished cookies.
- **Proper Storage Extends Freshness:** Store cooled thumbprint cookies in an airtight container at room temperature for up to 3-5 days to maintain their freshness and delicate texture. For longer storage, they can be frozen for up to 2-3 months. To enjoy, simply thaw them at room temperature for a few hours before serving.
- **Creative Flavor Variations:** While raspberry is a beloved classic, feel free to experiment with other fruit preserves like apricot, strawberry, blueberry, or even zesty lemon curd for a different flavor profile. For a decadent chocolate twist, fill the baked and cooled cookies with a small dollop of melted chocolate ganache or a spoonful of Nutella. A sprinkle of finely chopped toasted nuts (like pecans or walnuts) around the edge of the indentation before baking also adds a lovely texture and nutty flavor dimension.

Serving and Enjoying Your Homemade Thumbprint Cookies
These exquisite Raspberry Thumbprint Cookies are perfect for almost any occasion, effortlessly elevating any spread. They make a wonderful addition to a festive holiday cookie platter, a delightful and elegant treat for an afternoon tea, or simply a sweet, comforting bite to enjoy with your morning coffee or evening cup of herbal tea. Their vibrant color, inviting texture, and enticing aroma will surely gather compliments from anyone fortunate enough to try them. Arrange them artfully on a serving dish, and watch with satisfaction as these irresistible homemade beauties quickly disappear!
We genuinely encourage you to try this straightforward yet incredibly rewarding recipe and experience the profound joy of baking these classic, jam-filled cookies. The harmonious blend of a tender, buttery base with the bright, fruity tang of raspberry jam is truly a match made in culinary heaven. Share them generously with your loved ones, package them as thoughtful gifts, or perhaps, keep a secret stash all to yourself – we certainly won’t tell! Happy baking!
Craving more delightful cookie ideas? Don’t forget to explore our Cut-Out Sugar Cookies recipe for another fun and festive baking adventure! Or, if you’re feeling adventurous and want a warm, comforting dessert, try our bread pudding recipe with a decadent bourbon sauce – it’s a true crowd-pleaser!
Easy Thumbprint Cookie Recipe

Thumbprint Cookies Recipe
Print
Pin
Rate
Ingredients
- 2 1/4 cups all-purpose flour
- 1/2 tsp baking soda
- 1/4 tsp baking powder
- 1/2 tsp salt
- 3/4 cup unsalted butter, softened
- 2/3 cup granulated sugar
- 3 oz cream cheese, softened
- 1 large egg
- 1 tsp vanilla extract
- 1/2 cup seedless raspberry jam
Instructions
-
Preheat oven to 350 degrees F. Line a baking sheet with parchment paper.
-
Whisk flour, baking soda, baking powder, and salt together in a medium-size bowl. Set aside.
-
Cream the softened butter and sugar together using an electric mixer at medium speed until light and fluffy, 4 – 6 minutes. Beat in the softened cream cheese, egg, and vanilla extract until combined, about 30 seconds. Scraping down the bowl as needed.
-
Reduce the speed to low and slowly add the flour mixture. Mix until incorporated.
-
Roll 1 1/2 teaspoons of dough and into a ball. Place about 1 1/2 inches apart on the prepared baking pan. Dampen your thumb and make an indentation in the center of each ball.
-
Place the jam into a zip-top bag and snip a small corner off.
-
Bake for about 10 minutes, or until the edges are lightly browned. Remove from the oven and reshape the center indentation of each cookie using and rounded teaspoon measure.
-
Fill each cookie indentation with about 1/2 teaspoon of jam. Rotate the baking sheet and bake another 12 to 14 minutes, or until golden.
-
Cool the cookies on the sheet pan for about 10 minutes, then transfer to a wire rack to cool completely.
Nutrition
