Mastering Homemade Garlic Knots: An Easy Recipe for Fluffy, Flavorful Rolls
There’s something truly magical about the aroma of freshly baked bread filling your home, and these homemade garlic knots take that experience to a whole new level. They’re not just rolls; they’re delightful, savory twists of dough infused with rich garlic butter and fresh herbs, promising to elevate any meal from ordinary to extraordinary. Forget the plain old dinner rolls; these beautifully knotted wonders are a fantastic way to impress your family and guests without spending hours in the kitchen.
I stumbled upon this incredible recipe on A Kitchen Addiction when I was searching for something a little different, yet simple, to grace our Easter table this year. What immediately drew me in was the promise of ease, especially for those of us who appreciate a little help from modern kitchen gadgets. If you’re lucky enough to own a bread machine, it becomes your best friend for this recipe, handling all the dough work while you focus on other things. But even without one, the process is straightforward and incredibly rewarding.
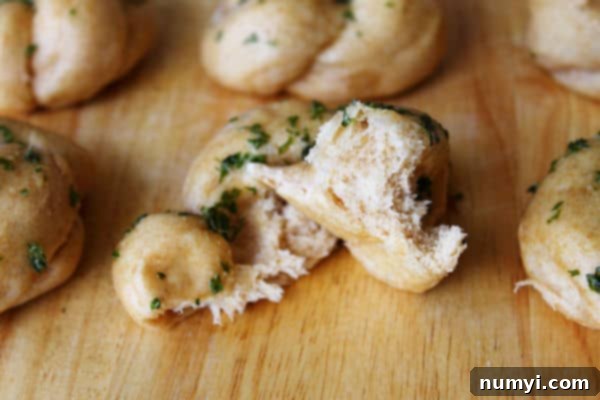
One of the beauties of this recipe is its flexibility. Life happens, and sometimes you don’t have every ingredient on hand. In my case, fresh garlic and parsley were missing, so I opted for garlic powder and dried parsley. And let me tell you, the results were absolutely wonderful! The knots still came out bursting with flavor, golden brown, and perfectly tender. This adaptability means you can whip up a batch of these delectable rolls whenever the craving strikes, making them a definite staple on our Easter table and many other meals to come.
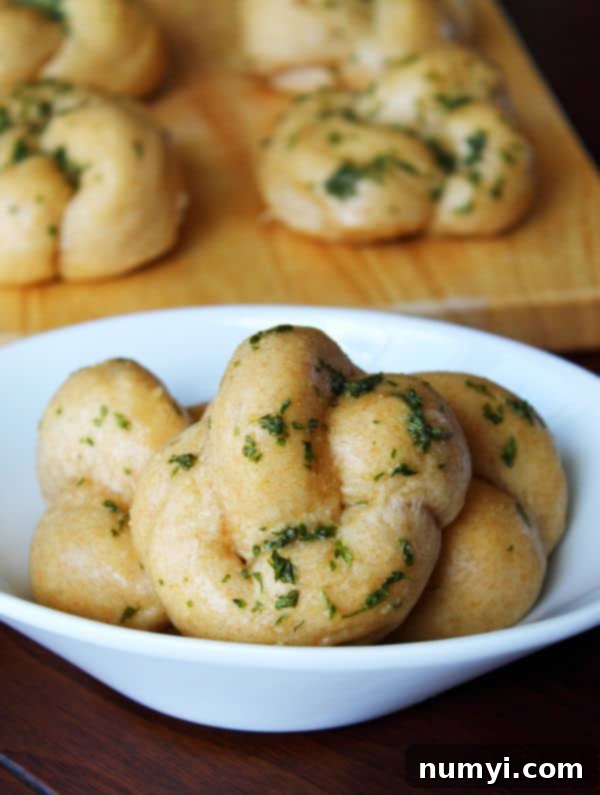
These garlic knots aren’t just a side dish; they’re a conversation starter. Their intricate knotted shape makes them visually appealing, hinting at the deliciousness within. Each bite offers a perfect balance of soft, airy bread and a vibrant, garlicky, herbaceous butter glaze that will have everyone reaching for more. They pair wonderfully with a hearty pasta dish, a comforting soup, a crisp salad, or even as a standalone snack. Once you try them, you’ll understand why they quickly become a family favorite.

Garlic Knots

Ingredients
- FOR THE ROLLS:
- 1 1/4 c. bread flour
- 1 c. whole wheat flour
- 2 tsp yeast
- 1 tsp salt
- 2 tsp sugar
- 1 TBSP butter melted
- 3/4 c. warm milk about 120 degrees F
- FOR THE GLAZE
- 1/4 c butter melted
- 1/2 tsp garlic powder
- 1 TBSP dried parsley
- 1/4 tsp salt
Instructions
-
In a large bowl, combine the flour, yeast, salt and sugar.
-
Add in butter and milk. Mix together until it starts to come together.
-
Dump onto a greased counter top and knead for 5-8 minutes. You may need more flour if your dough is too sticky.
-
Shape the dough into a ball and place in a greased bowl and cover. Let rise in a warm place until doubled. About 1 hour.
-
Turn dough out onto a floured or oiled surface and gently roll into a 4×12 inch rectangle. Cut into 16 strips.
-
Take each strip and roll into a rope. Tie each rope into a knot and place on a greased baking sheet. Cover and let rise until nearly doubled.
-
Preheat oven to 375 degrees F.
-
Bake for 12-15 minutes or until lightly browned.
-
Combine melted butter, garlic, dried parley and salt. Brush over each roll.
The Magic Behind the Dough: Tips for Perfect Rolls
Creating delicious bread, like these irresistible garlic knots, starts with understanding your dough. This recipe cleverly combines bread flour for structure and whole wheat flour for a subtle nutty flavor and added depth. The yeast is the lifeblood, responsible for that beautiful rise and airy texture, while sugar feeds the yeast and contributes to the golden-brown crust. Salt, of course, enhances all the flavors.
Mixing and Kneading: The Foundation of Flavor
Whether you’re using a bread machine or tackling it by hand, the initial mixing is crucial. Combining the dry ingredients first ensures an even distribution of yeast, salt, and sugar throughout the flour. When you introduce the melted butter and warm milk, watch as the ingredients begin to transform into a shaggy dough. The milk’s temperature is key; too hot, and it kills the yeast; too cold, and the yeast won’t activate properly. Aim for around 120°F (49°C) for optimal results.
Kneading is where the magic truly happens. For a bread machine, it’s a set-and-forget affair – just select the dough cycle. If you’re kneading by hand, embrace the process! It might feel sticky at first, but with a well-greased countertop and consistent kneading for 5-8 minutes, you’ll feel the dough transform. It will become smooth, elastic, and less sticky, indicating that the gluten has properly developed. Don’t be afraid to add a little extra flour, a tablespoon at a time, if the dough is still too wet to handle, but resist adding too much, as it can result in dense knots.
The Art of Rising: Patience is a Virtue
After kneading, shaping the dough into a ball and placing it in a greased bowl to rise is the next critical step. Cover it snugly and find a warm, draft-free spot in your kitchen. This could be near a sunny window, in a slightly warm (but turned off) oven, or even on top of your refrigerator. The goal is to let the dough double in size, which usually takes about an hour. This first rise develops incredible flavor and ensures your knots will be light and fluffy.
Shaping Your Beautiful Garlic Knots
Once your dough has gloriously doubled, it’s time for the fun part: shaping! Gently turn the dough out onto a lightly floured or oiled surface. The key is to handle it carefully to avoid deflating all that precious air. Roll the dough into an approximate 4×12 inch rectangle. Precision isn’t necessary here; roughly this size will give you good strips. Then, using a sharp knife or a pizza cutter, slice the rectangle into 16 even strips.
Now, for the knot. Take each strip and gently roll it between your palms to form a thin rope, about 6-8 inches long. Then, simply tie each rope into a loose knot. It doesn’t have to be perfect; the rustic charm of homemade knots is part of their appeal. Place these cute little knots on a greased baking sheet, leaving a little space between them for expansion. Cover them again and let them rise for a second time until they are nearly doubled. This second rise, often called proofing, is essential for the final light and airy texture.
Baking to Golden Perfection and the Irresistible Glaze
While your knots are enjoying their final rise, preheat your oven to 375°F (190°C). A properly preheated oven ensures an even bake and helps the knots achieve that beautiful golden crust. Bake them for 12-15 minutes, keeping a close eye on them. They should be lightly browned and sound hollow when tapped on the bottom.
The final touch is what truly defines these garlic knots: the glaze. While the knots are still warm, combine melted butter, garlic powder (or minced fresh garlic if you have it!), dried parsley (or fresh, finely chopped parsley), and a pinch of salt. The warmth of the knots will help the butter mixture soak in, creating an intensely fragrant and flavorful coating. Brush this aromatic glaze generously over each warm roll. The butter will melt into every crevice, carrying the savory garlic and herbaceous parsley deep into the bread, creating an utterly irresistible bite.
Tips for Success and Delicious Variations
To ensure your garlic knots are always a hit, here are a few extra tips:
- Don’t Rush the Rise: Yeast needs time and warmth. Patience during the rising stages will reward you with lighter, fluffier knots.
- Adjust Flour as Needed: Humidity and flour type can affect dough consistency. Always start with the recipe’s amount, but be prepared to add a tablespoon or two more if it’s too sticky, or a tiny bit more liquid if it’s too stiff.
- Even Baking: Ensure your oven is fully preheated. If your oven has hot spots, rotate the baking sheet halfway through the baking time for uniform browning.
- Serve Warm: While delicious at room temperature, garlic knots are truly at their best when served warm, straight from the oven, with the melted garlic butter glistening.
Creative Customization Ideas:
These garlic knots are fantastic as-is, but don’t hesitate to experiment with variations:
- Cheesy Garlic Knots: Before or after brushing with the glaze, sprinkle a little grated Parmesan or mozzarella cheese over the knots and pop them back into the oven for a minute or two until melted and bubbly.
- Herb Variations: Try adding a pinch of dried oregano, Italian seasoning, or a tiny bit of red pepper flakes to the garlic glaze for an extra kick. Fresh rosemary or thyme, finely chopped, would also be a delightful addition.
- Everything Bagel Seasoning: For a unique twist, sprinkle some everything bagel seasoning over the knots before baking for added crunch and flavor.
- Dipping Sauces: Serve them with a side of warm marinara sauce, a creamy ranch dip, or even a simple olive oil and balsamic vinegar mixture for an appetizer spread.
No matter how you choose to make and serve them, these garlic knots are guaranteed to disappear quickly. They offer that perfect balance of homemade comfort and gourmet flavor, making them suitable for casual weeknight dinners and special holiday feasts alike. So, roll up your sleeves, embrace the delightful process of bread making, and prepare to enjoy the most delicious garlic knots you’ve ever tasted!

