Irresistible Pumpkin Cinnamon Swirl Bread: Your Ultimate Fall Baking Guide
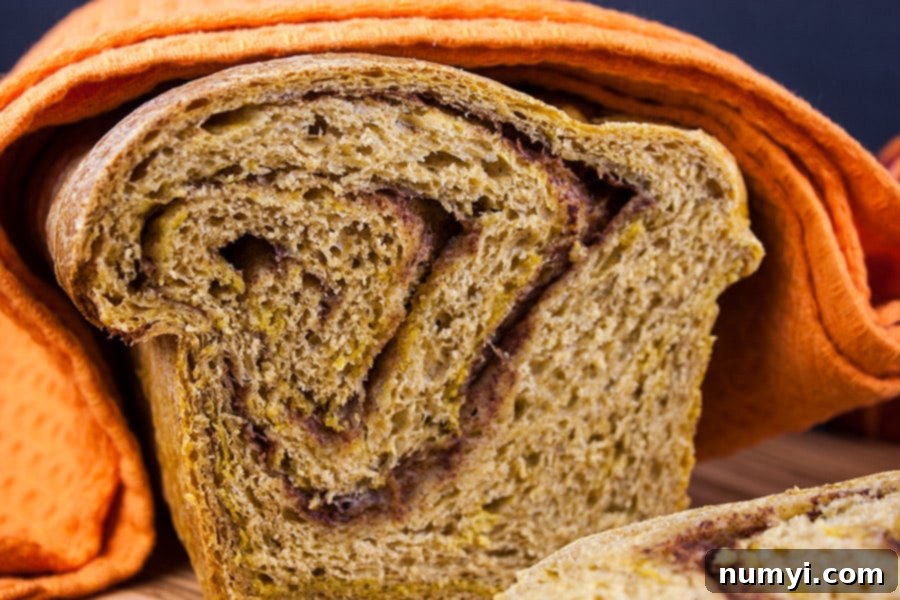
As autumn leaves begin to paint the landscape with fiery hues and a crisp chill fills the air, there’s nothing quite as comforting and inviting as the aroma of freshly baked bread wafting through your home. This **Pumpkin Cinnamon Swirl Bread** is the epitome of fall baking: a soft, tender, and richly flavored pumpkin loaf, beautifully intertwined with a decadent cinnamon sugar swirl. It’s more than just a bread; it’s an experience, a delightful treat that captures the very essence of the season in every warm, spice-infused slice.
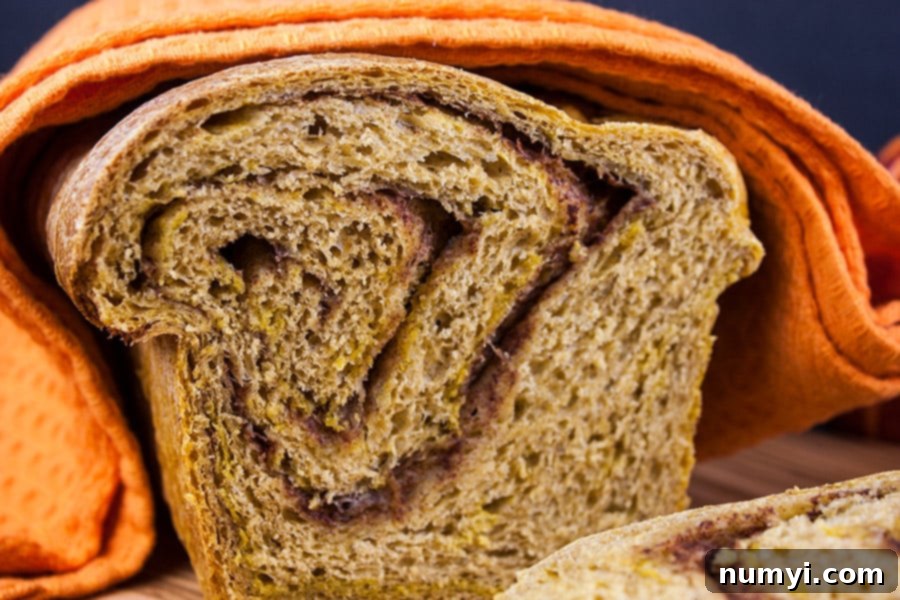
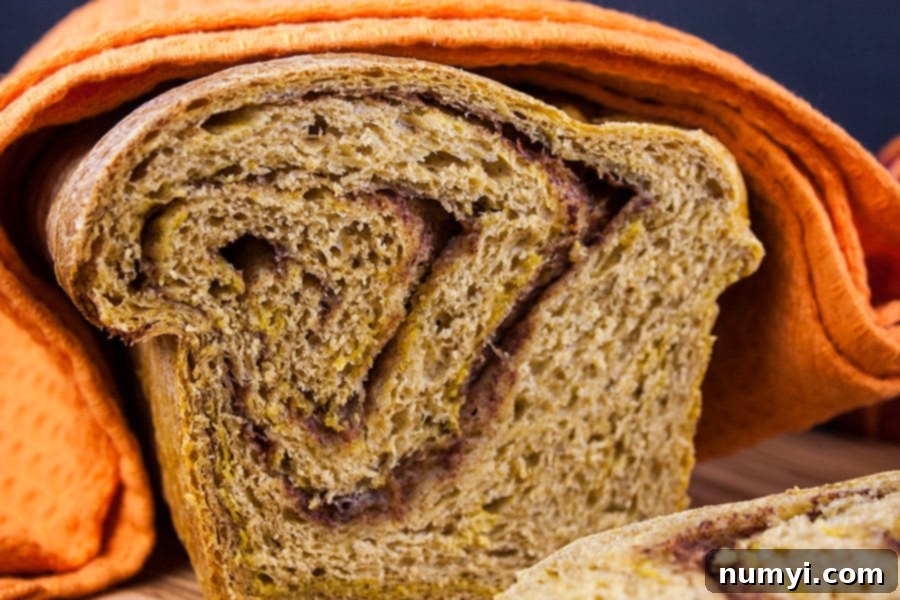
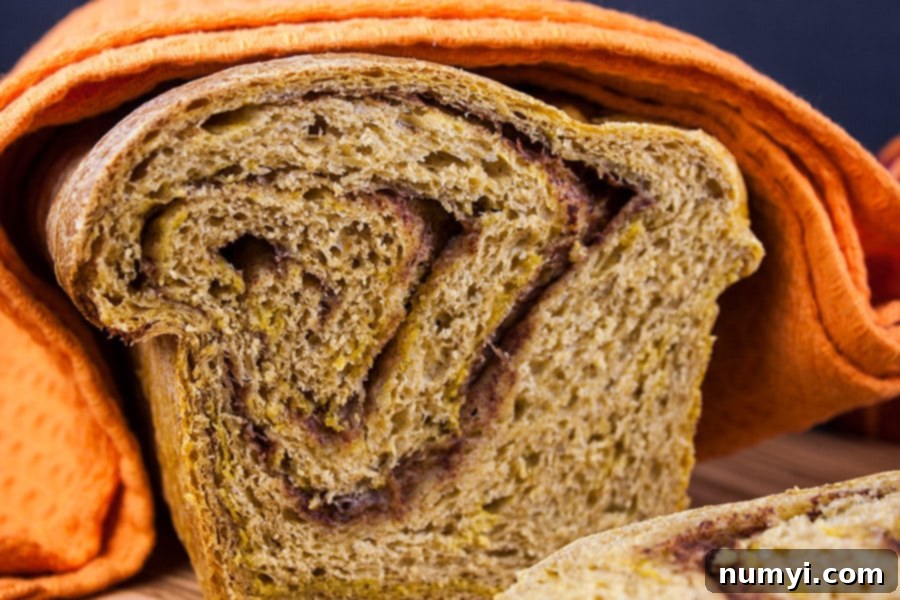
Imagine pulling a golden-brown loaf from the oven, its fragrant steam promising warmth and indulgence. Each slice reveals a mesmerizing ribbon of sweet cinnamon, perfectly complementing the moist, subtly sweet pumpkin dough. Whether enjoyed straight from the oven, slathered with butter, or transformed into an unforgettable French toast, this yeasted pumpkin bread is destined to become a cherished part of your fall traditions. Forget the quick breads; this is a truly satisfying, deeply flavored loaf that’s worth every moment of its creation.
Why You’ll Adore This Pumpkin Cinnamon Swirl Bread
This isn’t just another loaf; it’s a comforting hug in bread form, perfect for those chilly mornings and cozy evenings. Here’s why this Pumpkin Cinnamon Swirl Bread will quickly become a cherished recipe in your kitchen:
- **Unbeatable Flavor Profile:** Each bite offers a harmonious blend of earthy pumpkin, warm cinnamon, fragrant nutmeg, and subtle cloves. The natural sweetness of the pumpkin is beautifully enhanced by the granulated sugar, creating a complex yet comforting taste that screams “fall.”
- **Perfect Texture:** Unlike many quick breads, this is a yeasted loaf, meaning it bakes up incredibly light, fluffy, and tender. The yeast creates a wonderfully airy crumb that holds up well, whether you’re slicing it thick or thin.
- **Versatile Serving Options:**
- **Breakfast Delight:** Enjoy a slice toasted and slathered with softened butter, cream cheese, or a dollop of apple butter. It’s the ideal companion for your morning coffee or tea.
- **Gourmet French Toast:** Leftovers? Transform them into the most incredible pumpkin French toast! The rich pumpkin flavor and cinnamon swirl make for a truly decadent breakfast or brunch. Trust me, it’s to-die-for.
- **Scrumptious Bread Pudding:** Don’t let any stale slices go to waste. This bread forms an excellent base for a rich and flavorful pumpkin bread pudding, offering another layer of deliciousness.
- **Simple Snack:** A plain slice is wonderfully satisfying on its own, providing a burst of seasonal flavor for an afternoon treat.
- **Incredible Aroma:** The scent of pumpkin and cinnamon baking in your oven is truly heavenly. It fills your home with an inviting, autumnal fragrance that instantly creates a cozy atmosphere – perfect for welcoming guests or simply enjoying a peaceful morning.
- **Visually Stunning:** The distinct cinnamon swirl running through the loaf is not only delicious but also visually appealing, making it a beautiful centerpiece for any breakfast table or holiday spread.
It’s a bread that brings joy, comfort, and the quintessential taste of autumn into your home. Get ready to fall in love!
Mastering Homemade Yeasted Pumpkin Cinnamon Swirl Bread: A Step-by-Step Guide
Baking this delightful pumpkin cinnamon swirl bread is a rewarding experience, and with these detailed steps, you’ll achieve a perfect loaf every time. Precision and patience are key for yeasted breads, so let’s walk through the process:
1. Activating the Yeast (Proofing)
In a glass measuring cup, carefully measure out 1/2 cup of milk. Warm the milk in the microwave until its temperature reaches between 110-115°F (43-46°C). This temperature range is crucial: too cold, and the yeast won’t activate; too hot, and it will kill the yeast. For reference, my microwave typically takes about 20 seconds, but oven wattages vary, so always use a thermometer for accuracy. Once warmed, stir in the active dry yeast and one teaspoon of granulated sugar. The sugar acts as food for the yeast, helping it to become active. Set this mixture aside for 5-10 minutes. During this time, the yeast should “proof,” meaning it will become foamy and bubbly on the surface. This indicates that your yeast is alive and active, ready to work its magic in your bread.
2. Preparing the Dough Base
In the spacious bowl of a stand mixer, fitted with the paddle attachment, combine the remaining 1/3 cup of granulated sugar, the large room-temperature egg, the rich pumpkin puree (ensure it’s pure pumpkin, not pumpkin pie mix which contains added spices and sugar), and all the wonderful spices: one teaspoon of cinnamon, 1/4 teaspoon of freshly grated nutmeg, and 1/8 teaspoon of dried ground cloves. These spices are what give this bread its signature fall flavor. Mix these ingredients on low speed until they are well combined and smooth.
3. Combining Wet and Dry Ingredients
With the mixer still on low speed, slowly pour in the proofed milk and yeast mixture. Once incorporated, add the vanilla extract. Then, switch from the paddle attachment to the dough hook. Gradually add the salt and 3 1/2 cups of bread flour. Begin mixing on low speed until the ingredients come together and form a cohesive dough. Continue mixing, gradually increasing the speed to medium-low, until the dough pulls away cleanly from the sides of the bowl. This indicates that gluten development is starting.
4. Kneading for Perfection
Continue to knead the dough in the stand mixer with the dough hook for 3-5 minutes. Kneading is vital for developing the gluten structure, which gives the bread its characteristic chewiness and elasticity. The dough will feel slightly sticky to the touch; this is perfectly normal and desired. Resist the urge to add more flour at this stage, as too much flour can result in a dry, dense loaf. The stickiness ensures a moist and tender final product.
5. First Rise (Bulk Fermentation)
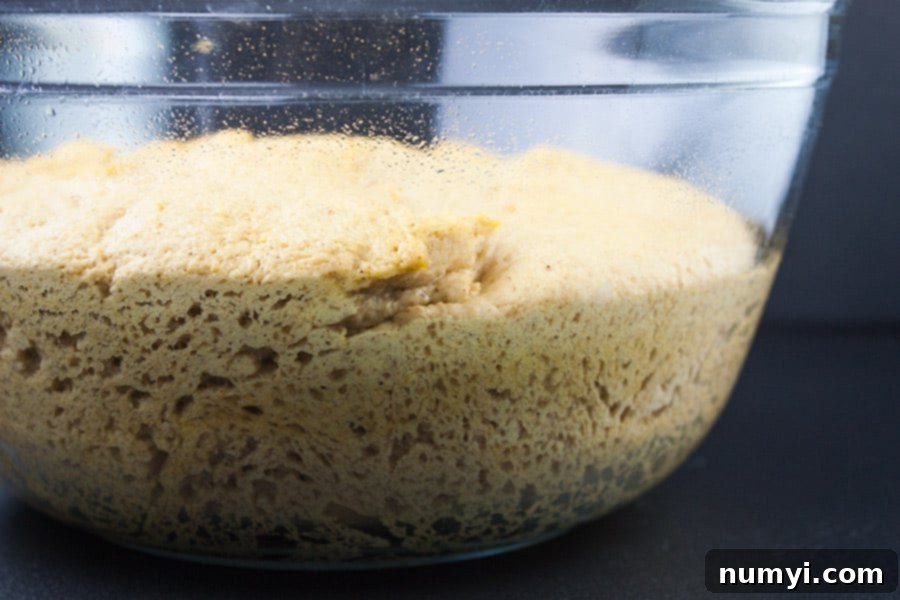
Lightly grease a large bowl with a neutral oil or non-stick spray. Transfer the slightly sticky dough into the greased bowl, turning it once to coat all sides. Cover the bowl tightly with plastic wrap or a clean kitchen towel. Place the bowl in a warm, draft-free spot in your kitchen. Allow the dough to rise for approximately 1 hour, or until it has visibly doubled in size. This first rise, known as bulk fermentation, is crucial for developing flavor and creating a light texture.
6. Shaping the Cinnamon Swirl
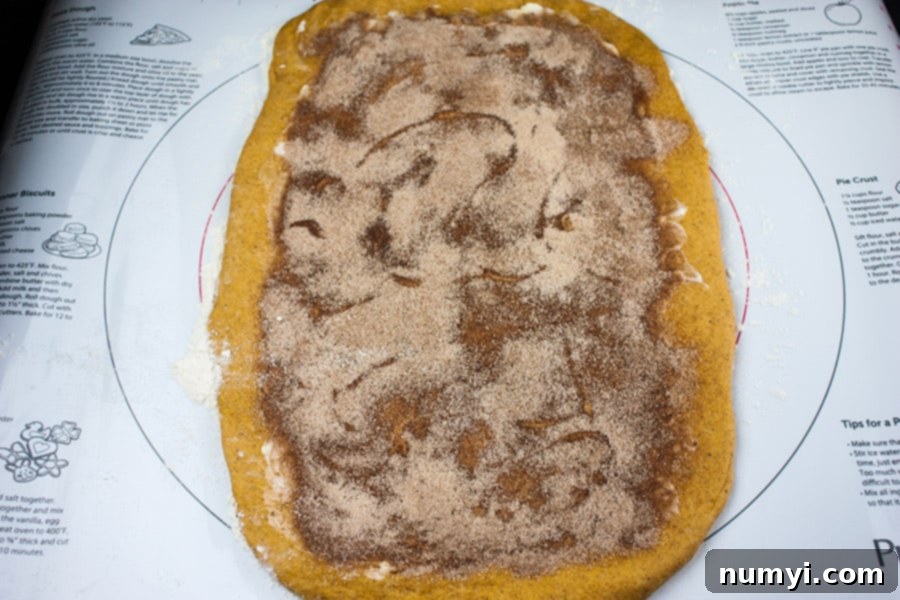
Once the dough has doubled, gently punch it down to release the air. Transfer the dough to a lightly floured surface, such as a large pastry mat or countertop. Using a rolling pin, roll the dough into a rectangular shape, roughly 9 inches by 18 inches. Aim for an even thickness across the entire surface. Next, spread the softened butter evenly over the entire rolled-out dough, going right to the edges. In a small separate bowl, combine the 1/3 cup of granulated sugar with 1 1/2 teaspoons of cinnamon. Generously sprinkle this cinnamon sugar mixture over the buttered dough, ensuring every inch is covered for a consistent swirl.
7. Rolling and Sealing
Starting from one of the shorter 9-inch edges, carefully and tightly roll the dough into a log. The tighter you roll it, the more defined and beautiful your cinnamon swirl will be. Once rolled, pinch the seam firmly along the entire length of the log to seal it completely. This prevents the filling from escaping during baking and helps maintain the loaf’s shape.
8. Second Rise (Proofing in the Pan)
Lightly grease a standard 9″x5″ loaf pan. Carefully transfer the rolled dough log into the prepared pan, placing it seam-side down. Cover the loaf pan with plastic wrap or a clean kitchen towel. Allow the dough to rise for an additional 90 minutes, or until it has risen a couple of inches above the sides of the pan. This second rise, or proofing, ensures a light and airy texture in the final baked bread. Don’t rush this step!
9. Preparing for Bake
About 15-20 minutes before the end of the second rise, preheat your oven to 350°F (175°C). In a small bowl, whisk together one large egg and two teaspoons of water to create an egg wash. Once the dough has finished its second rise, gently brush the egg wash over the exposed surface of the risen dough. This egg wash will give your bread a beautiful golden-brown, glossy crust.
10. Baking and Cooling
Place the loaf pan in the preheated oven and bake for 35-40 minutes. The bread should be deeply golden brown on top, and an instant-read thermometer inserted into the center of the loaf (avoiding the cinnamon swirl) should register an internal temperature of 190-200°F (88-93°C). If the top starts to brown too quickly, you can loosely tent it with aluminum foil. Once baked, remove the pan from the oven and let the bread cool in the pan for about 10 minutes. This allows the loaf to set slightly before transferring. After 10 minutes, carefully remove the bread from the pan and transfer it to a wire cooling rack to cool completely. Cooling completely is important for the texture and for allowing the flavors to fully develop.
11. Serve and Enjoy!
While waiting for it to cool completely is ideal for slicing, sometimes you just can’t resist a warm piece! Slice a piece, spread it with butter, and enjoy immediately. For the next morning, toast a slice or two, butter them up, and savor it with your morning coffee. Or, as mentioned, use a few pieces for an absolutely divine pumpkin cinnamon swirl French toast. Every bite is pure bliss!
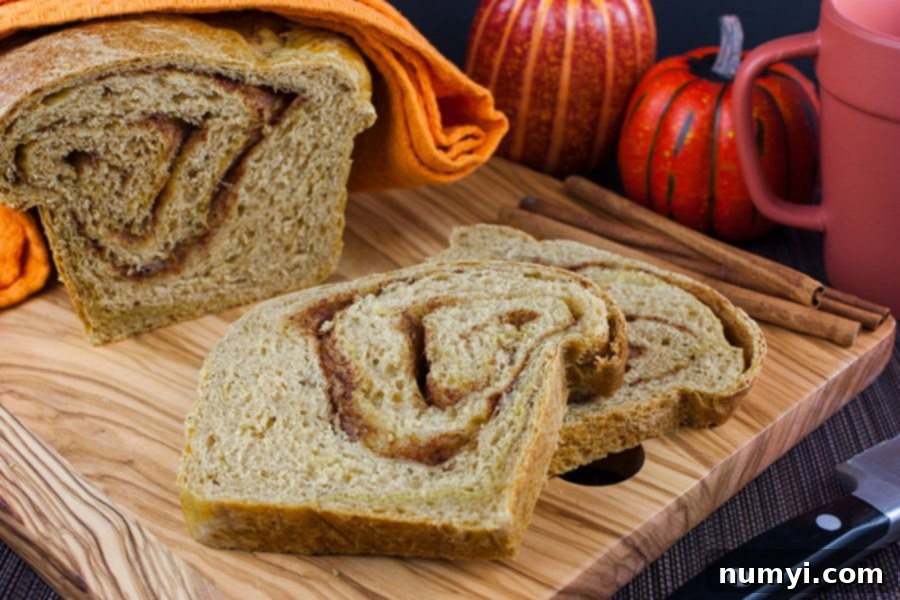
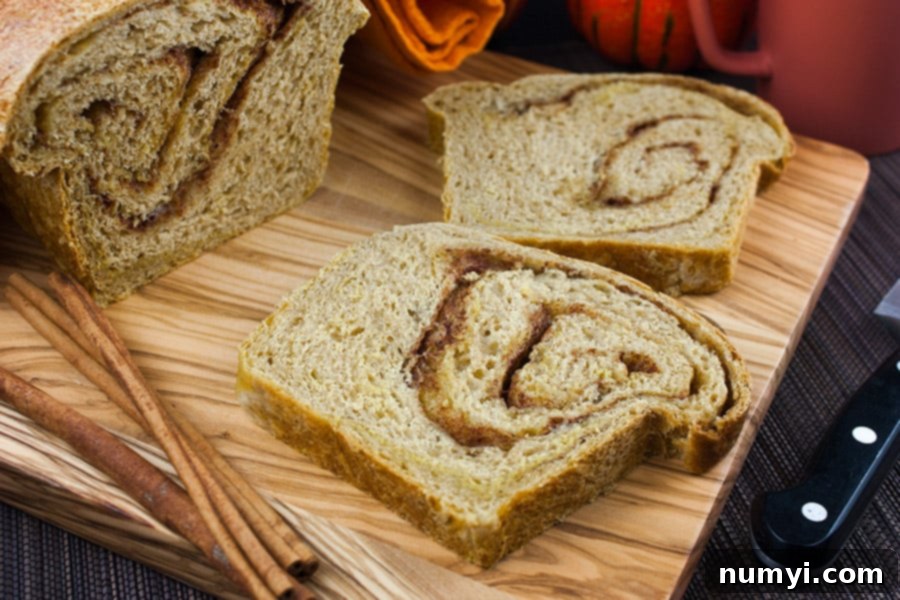
The next morning, revive your senses with toasted slices, generously buttered. Pair it with your favorite coffee for a breakfast that feels like a special occasion. For an even more indulgent treat, take a few slices of this magnificent yeasted pumpkin cinnamon swirl bread and transform them into French toast. It’s a game-changer, promising a breakfast experience that is truly to-die-for!
Expert Tips & Creative Variations for Your Pumpkin Cinnamon Swirl Bread
Elevate your baking experience and personalize your pumpkin cinnamon swirl bread with these helpful tips and exciting variations:
- **Accurate Flour Measurement is Key:** Always measure your flour properly. Instead of scooping directly from the bag (which compacts the flour and leads to too much), aerate the flour by fluffing it with a spoon, then spoon it into your measuring cup, and finally, level it off with a straight edge. This “spoon and level” method ensures you add the correct amount, preventing a dry and dense loaf.
- **Room Temperature Ingredients:** For the best results with yeast doughs, ensure your eggs and dairy (milk and butter) are at room temperature. This allows them to incorporate more easily into the dough, creates a smoother, more uniform mixture, and helps the yeast activate optimally.
- **Embrace the Stickiness:** The dough for this bread will be slightly sticky. This is normal and actually desirable for a moist, tender crumb. Resist the temptation to add extra flour during the kneading process. If it’s too sticky to handle, lightly oil your hands instead of dusting with more flour.
- **Spice It Up (or Down!):** While the recipe calls for cinnamon, nutmeg, and cloves, feel free to adjust to your taste. For an extra kick, add a pinch of ground ginger or allspice. If you prefer a milder spice profile, slightly reduce the quantities.
- **Delicious Add-Ins:** Get creative with what you mix into your dough or scatter over the filling:
- **Raisins:** A classic pairing with cinnamon bread. Mix them into the dough during the last minute of kneading.
- **Chocolate Chips:** Mini chocolate chips would melt beautifully into the swirl, adding a touch of sweetness and richness.
- **Chopped Nuts:** Pecans or walnuts would add a lovely crunch and nutty flavor. Sprinkle them over the cinnamon sugar filling before rolling the dough.
- **Dried Cranberries:** For a tart counterpoint to the sweet pumpkin and spice.
- **Sweetener Options:** While granulated sugar works perfectly, you can experiment with brown sugar for a deeper, molasses-rich flavor. Both work wonderfully in this pumpkin bread recipe. You could also try a touch of maple syrup in the dough for an even more autumnal essence.
- **Add a Simple Glaze:** For an extra touch of sweetness and presentation, whisk together 1 cup powdered sugar with 1-2 tablespoons of milk or orange juice until smooth. Drizzle over the cooled bread before serving.
- **Don’t Overbake:** Overbaking can lead to a dry loaf. Use an internal thermometer (aim for 190-200°F / 88-93°C) and check for a deep golden-brown crust. If the top gets too dark, loosely tent it with foil.
Frequently Asked Questions About Pumpkin Cinnamon Swirl Bread
Absolutely! This recipe is great for making in advance. You have a couple of options:
- **Overnight Dough Rise:** After the initial kneading, instead of letting the dough rise at room temperature for an hour, place the greased bowl with the dough, tightly covered, in the refrigerator overnight (8-12 hours). The cold temperature will slow down the yeast activity, allowing for a long, slow fermentation which can actually enhance flavor. The next day, take the dough out, punch it down, and proceed with shaping.
- **Overnight Loaf Rise:** You can also form the loaf, place it in the prepared loaf pan, cover it tightly with plastic wrap, and refrigerate it overnight. The next morning, remove the pan from the refrigerator and let it sit at room temperature for 1-2 hours to warm up and complete its final rise (it should rise a couple of inches above the pan) before baking.
While bread flour is recommended for this recipe, you can certainly use all-purpose flour. Bread flour has a higher protein content, which leads to better gluten development, resulting in a slightly chewier and more structured loaf. However, all-purpose flour will still yield a delicious and tender bread, though it might be slightly less chewy. If using all-purpose flour, you might need a tiny bit less, so add it gradually until the dough reaches the right consistency.
To maintain its freshness, wrap the cooled bread tightly in plastic wrap or aluminum foil, or store it in an airtight container at room temperature. It will keep well for 3-4 days. If you want to extend its shelf life, you can refrigerate it for up to 5 days, though refrigeration can sometimes make yeast breads a little drier. Reheat slices slightly before serving for the best texture.
Yes, this bread freezes beautifully! Once the loaf has cooled completely (this is crucial to prevent ice crystals), wrap it tightly first in plastic wrap, and then again in aluminum foil. Alternatively, place the plastic-wrapped loaf in a freezer-safe bag, removing as much air as possible. It can be frozen for up to 2 months. To thaw, simply unwrap and let it sit at room temperature for several hours, or gently warm slices in a toaster or oven. Freezing is a fantastic way to enjoy homemade bread long after baking!
There are a few common reasons why yeast bread might not rise:
- **Inactive Yeast:** Your yeast might be old or expired. Always proof your yeast first (step 1) to ensure it’s active. If it doesn’t get foamy, start over with fresh yeast.
- **Water/Milk Temperature:** The milk might have been too cold (yeast stays dormant) or too hot (yeast dies). Aim for 110-115°F (43-46°C).
- **Too Much Flour:** Adding too much flour can make the dough too stiff for the yeast to work, resulting in a dense loaf.
- **Cold Environment:** Yeast needs warmth to thrive. Ensure your rising spot is warm and draft-free.
A dense loaf can be caused by a few factors:
- **Lack of Kneading:** Insufficient kneading prevents gluten from developing, which is essential for creating an airy structure.
- **Too Much Flour:** As mentioned, over-flouring results in a heavy dough.
- **Insufficient Rising:** If the dough didn’t rise enough during either the first or second proof, it won’t be light and fluffy. Ensure it doubles in size for the first rise and rises significantly above the pan for the second.
- **Expired Yeast:** Inactive yeast won’t produce the gas needed for a light texture.
More Delightful Bread Recipes to Explore
If you’ve enjoyed the comforting process of baking this Pumpkin Cinnamon Swirl Bread, you’ll love venturing into more homemade bread creations. Expand your baking repertoire with these fantastic recipes:
Walnut Fig Bread
A wholesome and flavorful bread, packed with the sweetness of figs and the crunch of walnuts. Perfect for a hearty breakfast or an afternoon snack.
Spicy Gingerbread Loaf
Warm up your winter with this wonderfully spiced gingerbread loaf. It’s dense, moist, and packed with the flavors of ginger, molasses, and other festive spices.
Apple Butter Bread
Infused with the sweet and spiced essence of apple butter, this moist and flavorful bread is a comforting treat for any time of year.
Are you on Pinterest? Click the button below to add this recipe to one of your boards!
Pumpkin Cinnamon Swirl Bread Recipe
Print
Pin
Rate
Ingredients
Dough
- 1/2 cup milk
- 2 1/4 teaspoons active dry yeast
- 1/3 cup plus 1 teaspoon granulated sugar divided
- 1 teaspoon vanilla extract
- 1 large egg room temperature
- 1 cup pumpkin puree not pumpkin pie mix
- 1 teaspoon ground cinnamon
- 1/4 teaspoon freshly grated nutmeg
- 1/8 teaspoon dried ground cloves
- 1 teaspoon salt
- 3 1/2 cups bread flour (up to 4 cups, as needed)
Filling
- 3 tablespoons unsalted butter softened
- 1/3 cup granulated sugar
- 1 1/2 teaspoons ground cinnamon
Egg Wash
- 1 large egg
- 2 teaspoons water
Instructions
-
In a glass measuring cup, measure 1/2 cup of milk. Warm in the microwave until the temperature reaches 110-115°F (43-46°C). (Mine took 20 seconds, but all microwaves differ, so use a thermometer). Stir in the yeast and 1 teaspoon of sugar. Set aside and allow to proof for 5-10 minutes, until foamy.
-
In the bowl of a stand mixer with the paddle attachment, mix together the remaining 1/3 cup of sugar, the room-temperature egg, pumpkin puree, 1 teaspoon ground cinnamon, 1/4 teaspoon grated nutmeg, and 1/8 teaspoon ground cloves. Turn the mixer to low, pour in the proofed milk mixture, and add the vanilla extract.
-
Switch to the dough hook. Add the salt and 3 1/2 cups of bread flour (start with this amount, adding up to 4 cups if necessary). Mix on low speed until the dough forms and begins to pull away from the sides of the bowl. Knead in the mixer for 3-5 minutes, ensuring the dough becomes elastic. The dough will be slightly sticky; avoid adding more flour.
-
Lightly grease a large bowl. Transfer the dough to the bowl, turning once to coat. Cover tightly with plastic wrap or a clean kitchen towel and let it rise in a warm, draft-free spot for 1 hour, or until it has doubled in size.
-
Gently punch down the risen dough. On a lightly floured surface, roll the dough into a rectangle roughly 9″x18″. Spread the softened butter evenly over the entire surface of the dough. In a small bowl, mix the 1/3 cup granulated sugar with 1 1/2 teaspoons of ground cinnamon. Sprinkle this cinnamon sugar mixture generously over the buttered dough.
-
Starting at one of the shorter 9-inch edges, carefully roll the dough into a tight log. Pinch the seam firmly along the entire length to seal it closed.
-
Place the dough log, seam-side down, into a lightly greased 9″x5″ loaf pan. Cover the pan and allow the dough to rise for an additional 90 minutes, or until it has risen a couple of inches above the sides of the pan.
-
Preheat the oven to 350°F (175°C) during the last 15-20 minutes of the second rise. In a small bowl, whisk the remaining large egg and 2 teaspoons of water together to create an egg wash. Gently brush this egg wash over the exposed surface of the risen dough in the pan.
-
Bake for 35-40 minutes, or until the bread is golden brown and an internal thermometer registers 190-200°F (88-93°C).
-
Allow the bread to cool in the pan for 10 minutes. Then, carefully transfer it to a wire cooling rack to cool completely before slicing and serving.
Notes
- **Dough Consistency:** The dough will be slightly sticky. This is normal and desired for a moist, tender crumb. Avoid adding more flour when kneading unless absolutely necessary. Lightly oiling your hands can help with handling.
- **Customize Your Loaf:** Feel free to toss in some raisins, dried cranberries, or even chocolate chips with the dough during the last minute of kneading. Alternatively, you can scatter chopped nuts like pecans or walnuts over the cinnamon sugar filling before rolling for added texture and flavor.
- Storing – This bread keeps wonderfully. Wrap it tightly in plastic wrap or store in an airtight container at room temperature for 3-4 days. To extend its life, you can refrigerate it for up to 5 days, though it’s best enjoyed slightly warmed after refrigeration.
- Freezing – For longer storage, let the baked loaf cool completely. Wrap it tightly in plastic wrap, then an additional layer of aluminum foil, or place it in a freezer-safe bag. Freeze for up to 2 months. Thaw at room temperature.
Nutrition
Carbohydrates: 55g |
Protein: 9g |
Fat: 6g |
Saturated Fat: 3g |
Cholesterol: 48mg |
Sodium: 316mg |
Potassium: 165mg |
Fiber: 3g |
Sugar: 17g |
Vitamin A: 4428IU |
Vitamin C: 1mg |
Calcium: 42mg |
Iron: 1mg
This recipe was inspired by the fantastic work at TheRecipeCritic. Enjoy your baking journey!
