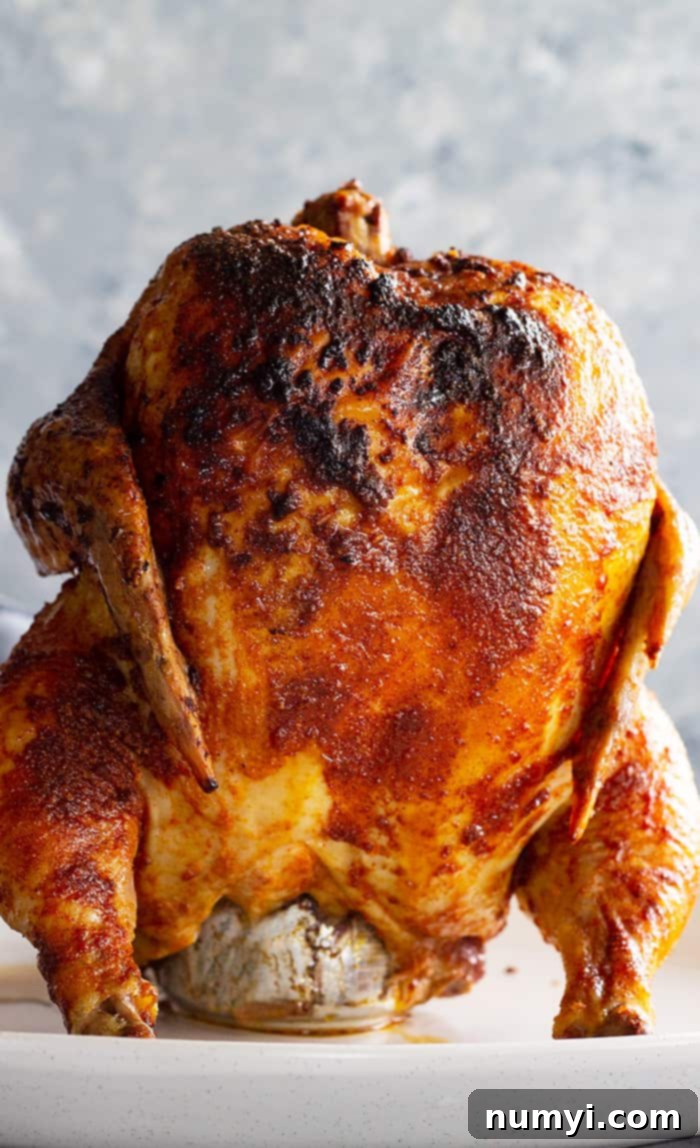
Unleash Flavor: The Ultimate Juicy & Crispy Beer Can Chicken Recipe for Grill or Oven
Get ready for the most tender, moist, and intensely flavorful Beer Can Chicken (also known as Beer Butt Chicken) you’ve ever tasted! This incredibly easy recipe promises perfectly crispy skin and succulent meat, whether you opt for grilling outdoors or roasting it to perfection in your oven. It’s a unique twist on grilled chicken that’s sure to become a family favorite!
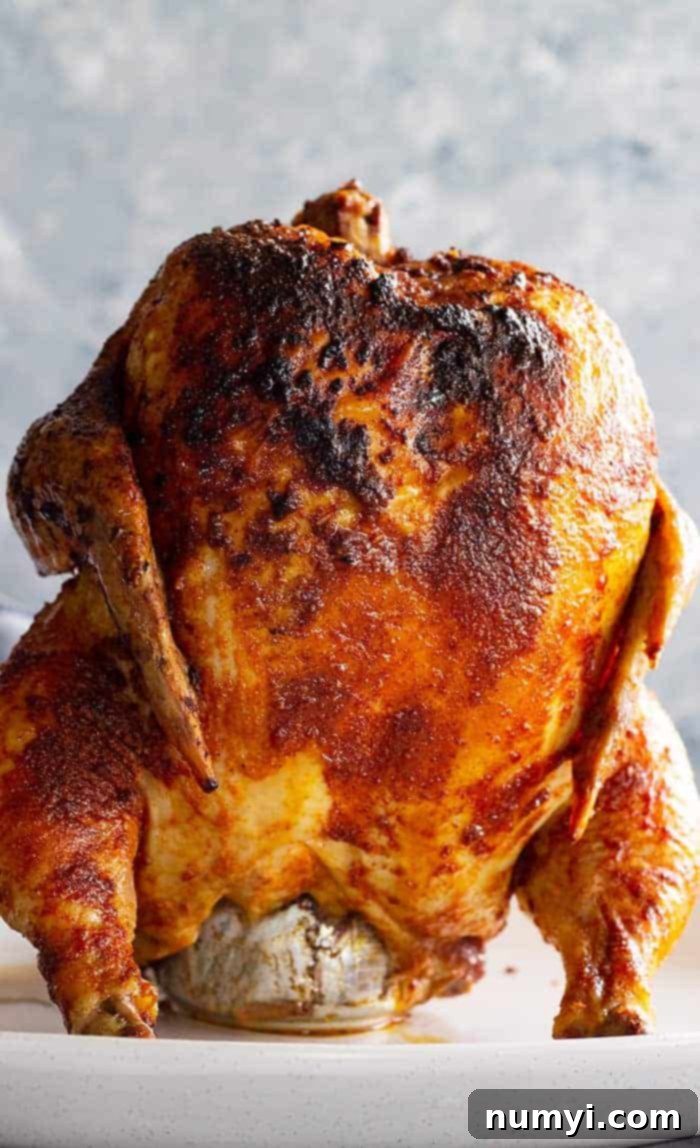
As the weather warms, many of us are drawn to the magic of the grill. While I haven’t done a ton of outdoor cooking yet this season, the craving for simple, flavorful grilled foods is always strong. And when it comes to a show-stopping yet surprisingly easy meal, Beer Can Chicken (or “Drunk Chicken” as some affectionately call it) takes center stage. This method involves cooking a whole chicken vertically over an open can of beer, which might sound a little unconventional, but trust me, it’s pure genius!
If you’ve never experienced the delight of this unique cooking technique, you’re in for an absolute treat. The beer inside the can creates a steamy, flavorful environment within the chicken, ensuring every bite is unbelievably moist. Meanwhile, the direct heat (whether from your grill or oven) works wonders on the exterior, rendering the skin incredibly crispy and delicious. The best part? The alcohol completely cooks off, leaving behind only the rich, aromatic flavors of the beer, making it perfectly safe and enjoyable for everyone, including kids.
Don’t be intimidated by the unusual setup; I’m here to guide you through every step. This recipe is designed to be straightforward, delivering impressive results with minimal fuss. So, fire up your grill or preheat your oven, because your next favorite chicken dinner is just around the corner!
Looking for more easy grilling inspiration? You might also love my BBQ Marinated Chicken Kabobs, Simple Marinade for Chicken, and Grilled Teriyaki Pork Chops!
Why You’ll Fall in Love with This Beer Can Chicken Recipe
- Family-Friendly Flavor: Forget any concerns about alcohol content! The heat from the cooking process completely evaporates the alcohol from the beer, leaving behind only its rich, malty, or hoppy flavors infused into the chicken. It’s a delicious, aromatic experience that everyone at the table can enjoy, from toddlers to adults.
- Unbeatable Texture Combo: Prepare for a culinary delight where opposites attract! The unique beer can method ensures the chicken’s interior is steamed to absolute perfection, resulting in incredibly tender and juicy meat. Simultaneously, the exterior develops a beautifully crispy, golden-brown skin thanks to our flavorful dry rub and high cooking temperatures.
- Deeply Flavorful Seasoning: Our homemade dry seasoning blend is the secret weapon, creating an explosion of savory, sweet, and subtly spicy notes. Applied generously, this rub adheres to the chicken, forming a delicious crust that elevates the entire dish and adds layers of complex flavor.
- Impressive & Effortless: This dish looks incredibly impressive when presented, yet it’s surprisingly simple to prepare. It’s the perfect recipe for entertaining guests, as it requires minimal hands-on time, allowing you to enjoy your company while the chicken cooks itself to perfection.
- Versatile Cooking Options: Whether you’re a grilling enthusiast or prefer to keep things in the kitchen, this recipe has you covered. Detailed instructions are included for both grilling and roasting your Beer Can Chicken in the oven, ensuring you can enjoy this delicious meal no matter your setup or the weather!
Essential Ingredients for Perfect Beer Butt Chicken
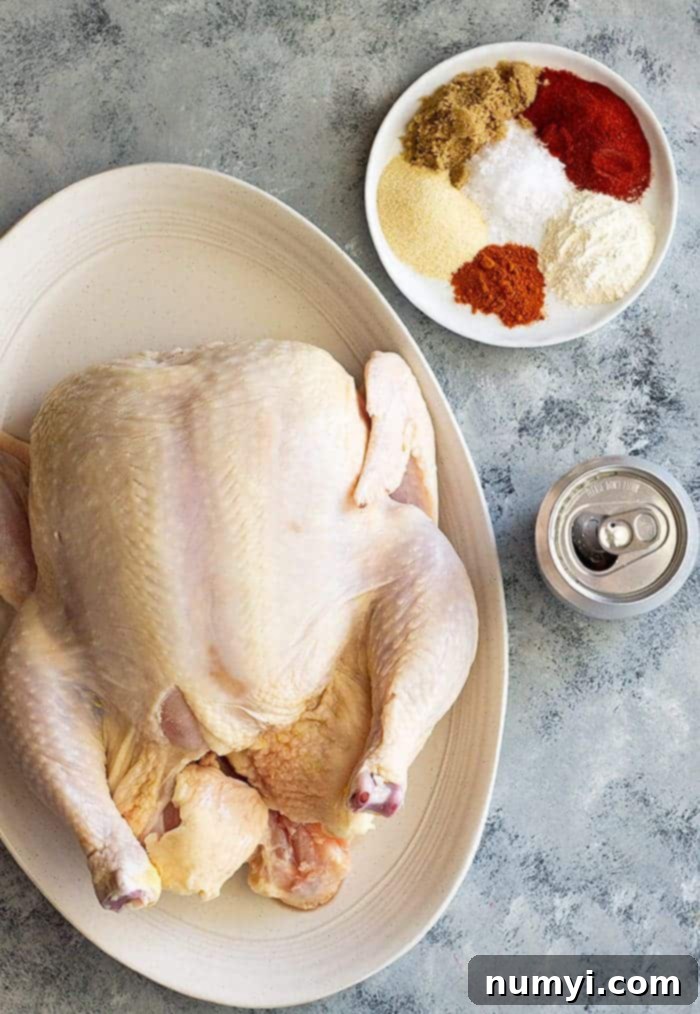
Crafting the perfect Beer Butt Chicken starts with selecting quality ingredients that will contribute to its incredible flavor and texture. Here’s a closer look at what you’ll need:
- Whole Chicken: I typically opt for a 4-5 pound bird, as it’s readily available at my local grocery store and perfectly sized to feed my family. When choosing your chicken, look for one that is fresh and has an intact skin. A good quality bird will yield the best flavor and moisture. Remember to remove the neck and giblets from the cavity before you begin!
- Beer (Your Choice!): This is where the “beer” in Beer Can Chicken comes from! The beauty of this recipe is that you can use almost any beer you enjoy drinking. Light-bodied lagers like Coors are a common choice in our home, providing a subtle, steamy infusion without overpowering the chicken. However, feel free to experiment with amber ales for a richer note, or even a citrusy IPA for a bright twist. Just ensure it’s a standard 12-ounce can. If you prefer not to use beer, see our “Pro Tips” for excellent alternatives!
- Olive Oil: A small amount of olive oil is crucial for two reasons. Firstly, it acts as a binder, helping our delicious dry rub adhere evenly to the chicken’s skin. Secondly, it contributes to that irresistible crispy skin by helping the fat render during cooking, leading to a golden, crunchy exterior.
- Brown Sugar (for the Rub): I like to include just a touch of brown sugar in our homemade dry rub. Its molasses content adds a lovely depth and subtle sweetness that beautifully caramelizes on the skin, balancing the savory and spicy notes of the other seasonings. It’s truly a game-changer for that golden crust!
- Homemade Spice Blend & Seasonings: The heart of our Beer Can Chicken’s flavor lies in this robust blend. You’ll need:
- Salt: Essential for seasoning the meat from within.
- Paprika: Adds a beautiful reddish hue and a mild, peppery flavor.
- Garlic Powder & Onion Powder: These aromatic staples provide a foundational savory base.
- Chili Powder: Contributes a warm, earthy spice.
- Cayenne Pepper: For those who love a little kick! Adjust the amount or omit if you prefer a milder flavor.
This combination creates a perfectly balanced rub that coats the chicken in deliciousness.
Step-by-Step Instructions to Make Beer Can Chicken
Making Beer Can Chicken is simpler than you might think! Follow these steps for a perfectly cooked bird:
- Step 1: Prep the Chicken for Crispy Perfection
Before you do anything else, thoroughly pat your whole chicken dry with paper towels, both inside and out. This step is non-negotiable for achieving that coveted crispy skin. Excess moisture on the skin will steam rather than crisp, so take your time here! Once dry, remove the neck and giblets from the cavity. - Step 2: Apply the Flavorful Seasoning Blend
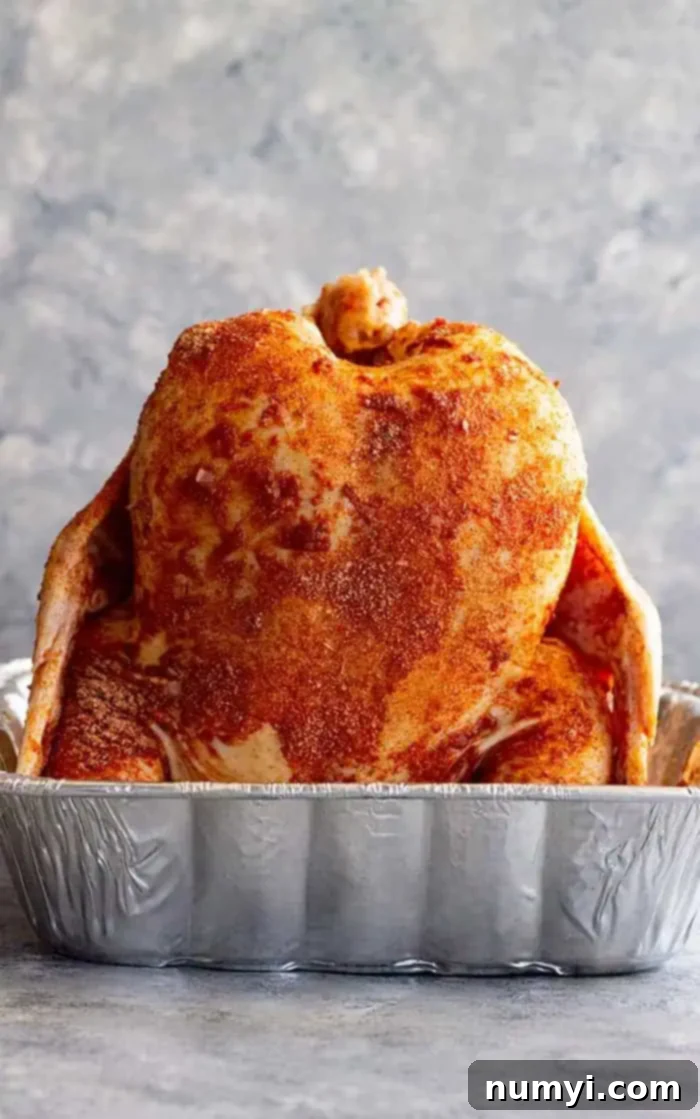
Drizzle a small amount of olive oil (or your cooking oil of choice) all over the entire bird, ensuring it’s lightly coated. This helps the dry rub stick. Next, generously sprinkle your homemade spice rub (a mix of salt, brown sugar, paprika, garlic powder, onion powder, chili powder, and cayenne) over the chicken, making sure to cover every surface. Don’t forget under the wings and around the leg joints for maximum flavor! - Step 3: Set Up the Beer Can for Cooking
This is the fun part! Open your can of beer and pour out about half of the liquid (or enjoy a few sips!). Place the partially filled, open can on a sturdy, flat surface like your counter. Carefully position the chicken over the beer can so that the can fits snugly inside the chicken’s cavity. The chicken should sit upright, with the legs forming a tripod with the can for stability. You can place the chicken directly onto a small baking pan or use a specialized beer can chicken holder if you have one. - Step 4: Grill or Roast to Juicy Perfection
- For Grilling: Preheat your grill to medium-high heat (around 375°F / 190°C). Once hot, turn off one burner (or burners, if using a multi-burner grill) to create an indirect heat zone. Place the chicken (still on its beer can and baking pan, if used) over the unlit burner. Reduce the grill temperature to medium (around 350°F / 175°C). Cook for approximately 1 ¼ – 1 ½ hours. Towards the end of cooking, if you want extra crispy skin, you can briefly increase the heat.
- For Oven Roasting: Preheat your oven to 400°F (200°C). Place the chicken setup (on the beer can, in a small baking pan) on a lower rack in the oven. Bake for about 1 ¼ – 1 ½ hours.
In both methods, the chicken is done when the juices run clear, and a meat thermometer inserted into the thickest part of the breast (without touching bone) reads 165°F (74°C).
- Step 5: Rest and Carve
Once cooked, carefully remove the chicken from the grill or oven. Transfer it, still on the can, to a cutting board. Allow the chicken to rest for at least 10 minutes before carving. This crucial resting period allows the juices to redistribute throughout the meat, ensuring a tender, more flavorful chicken. After resting, carefully remove the can (it will be hot!), carve, and serve!
Pro Tips for the Best Beer Can Chicken Ever
Take your Beer Can Chicken from great to absolutely unforgettable with these expert tips:
- Beer Alternatives: Don’t Like Beer? No Problem! If beer isn’t your preference, or you simply want to try something different, feel free to substitute the beer with other canned beverages. A can of Coke or Sprite will add a lovely sweetness and caramelization. Root beer is another fantastic option that pairs incredibly well with the savory rub, offering a unique, spiced sweetness. Even a can of chicken broth or apple cider can work wonders, infusing moisture and subtle flavor.
- Pat Dry, Pat Dry, Pat Dry! I cannot stress this enough: for genuinely crispy skin, your chicken *must* be as dry as possible before applying the oil and rub. Any residual moisture will create steam, preventing the skin from crisping up to that golden, crunchy perfection we all crave. Use plenty of paper towels and blot every surface thoroughly.
- Oven Baking is a Great Option Too! Don’t have a grill or facing bad weather? You can absolutely achieve fantastic results in your oven. Simply preheat your oven to 400°F (200°C) and bake for approximately 1 1/4 to 1 1/2 hours, or until the internal temperature reaches 165°F (74°C) in the thickest part of the breast. Ensure you use a sturdy roasting pan or a dedicated beer can chicken stand to catch any drips and keep the bird upright.
- The Importance of Resting: Once your “Drunk Chicken” is cooked through, resist the urge to carve it immediately. Transfer it to a cutting board and let it rest for at least 10-15 minutes. This resting period allows the meat’s fibers to relax and reabsorb the juices, ensuring that every slice is tender, moist, and bursting with flavor, rather than letting all those delicious juices escape onto your plate.
- Consider a Stand: While you can absolutely prop the chicken over a beer can directly in a baking pan, a dedicated beer can chicken stand offers extra stability and peace of mind, especially on a grill. These stands typically have a base to hold the can and support the chicken more securely.
- Trussing for Even Cooking: For an even more professional result, you can lightly truss the chicken. Tying the wings close to the body and the legs together helps the chicken cook more evenly, prevents the wing tips from burning, and maintains a compact, upright shape during cooking.
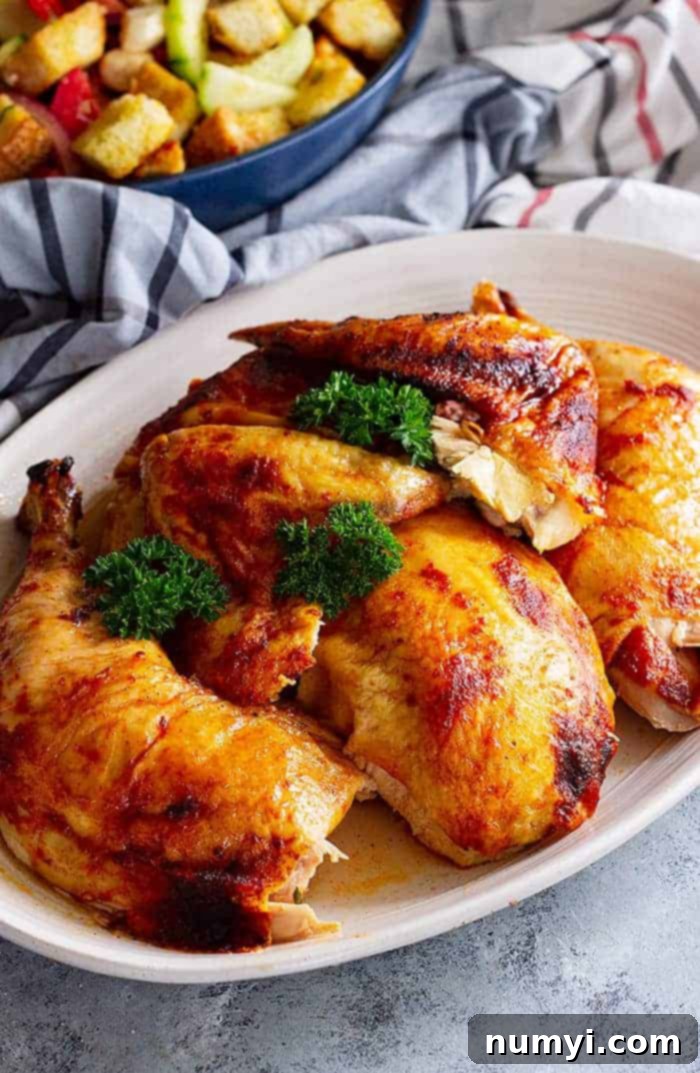
Frequently Asked Questions (FAQ) About Beer Can Chicken
While you can genuinely use whatever beer you have on hand and enjoy, I find that light to medium-bodied lagers or ales work best. They provide a subtle, aromatic steam that doesn’t overwhelm the natural flavor of the chicken. Our family often uses Coors, but feel free to experiment! Beers with hints of citrus can also add a delightful freshness that pairs wonderfully with the rub. Avoid overly dark or heavily flavored beers, as they might impart too strong a flavor.
Getting the chicken to stand upright over the beer can is easier than it looks! Simply place the partially filled can on a stable surface (like a small baking pan or directly on your grill grates) and then carefully lower the chicken’s cavity over the can. The chicken’s legs will splay out, forming a natural tripod with the can, providing stability. If you’re concerned about it toppling, a dedicated beer can chicken holder or stand offers extra support and peace of mind.
The homemade combination of spices and seasonings outlined in the recipe card below is my absolute go-to for its balanced sweet, savory, and subtly spicy profile. However, feel free to customize it to your taste! You can enhance the herb notes with additions like dried thyme, rosemary, or oregano. For a smoky flavor, a pinch of smoked paprika works wonders. If you enjoy a zestier profile, a little lemon zest in the rub can be fantastic. Don’t be afraid to get creative and make it your own!
Yes, Beer Can Chicken is widely considered safe when prepared correctly. Concerns sometimes arise regarding the can’s coating, but most modern aluminum cans are lined with a food-grade polymer that is designed to withstand higher temperatures without leaching harmful chemicals. Furthermore, the internal temperature of the chicken typically doesn’t reach temperatures high enough to cause issues with the can itself. As for the alcohol, it fully evaporates during the cooking process, leaving only the flavor behind.
The most reliable way to determine if your Beer Can Chicken is fully cooked is by using a meat thermometer. Insert the thermometer into the thickest part of the chicken breast, making sure it doesn’t touch the bone. The internal temperature should reach 165°F (74°C). You can also check if the juices run clear when you pierce the thigh meat. Avoid guessing, as undercooked chicken can be unsafe.
What to Serve with Your Delicious Drunk Chicken
Let your incredibly flavorful Drunk Chicken be the star of your meal, complemented by a selection of easy and delicious side dishes. Here are some ideas to inspire your menu:
- Creamy Coleslaw: The crisp, cool, and tangy notes of a classic creamy coleslaw provide a perfect counterpoint to the rich, savory chicken.
- Bacon Ranch Pasta Salad: A hearty and flavorful pasta salad with the irresistible combination of bacon and ranch dressing offers a satisfying, comforting side.
- Broccoli, Bacon, and Grape Salad: This unique salad offers a fantastic balance of sweet, savory, and crunchy textures, adding a refreshing element to your meal.
- Frog Eye Salad: For something a little different and delightfully sweet, this pasta fruit salad brings a playful and refreshing touch to your plate.
- Grilled Vegetables: Complement your grilled chicken with seasonal grilled veggies like asparagus, bell peppers, zucchini, or corn on the cob.
- Baked Potatoes or Sweet Potatoes: Simple, comforting, and perfect for soaking up any extra chicken juices.
- Cornbread: A warm, buttery cornbread muffin or slice is always a welcome addition to a chicken dinner.
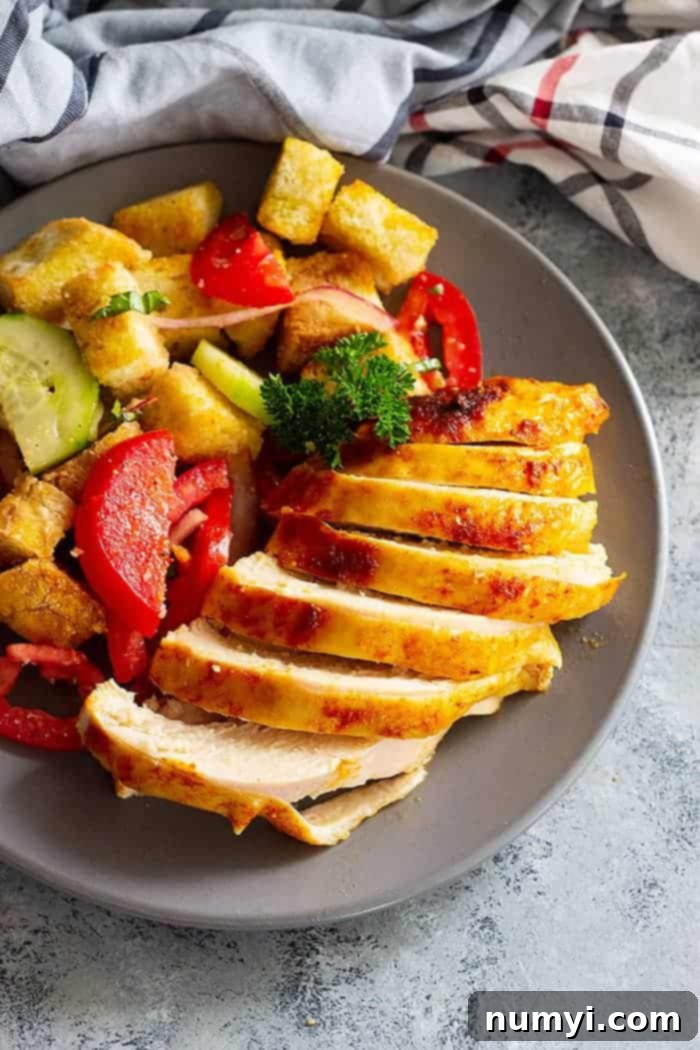
More Delicious Chicken Recipes To Try
If you loved this Beer Can Chicken, be sure to explore these other fantastic chicken recipes from my kitchen:
- Lemon Herb Roasted Chicken
- Creamy Lemon Chicken
- Green Chile Chicken Enchiladas
- Chicken Florentine Pasta Casserole
Thank you so much for stopping by and checking out this incredible Beer Can Chicken recipe! I truly hope you enjoy making and devouring this flavorful bird. It’s a classic for a reason, and once you try it, you’ll understand why it’s a favorite among grill masters and home cooks alike. Don’t forget to let me know what you think in the comments below!
HUNGRY FOR MORE? Subscribe to my newsletter and follow along on Pinterest, Facebook, and Instagram for all my latest updates and delicious recipes!
Beer Can Chicken

Ingredients
- 1 (4-5 pound)(1.8-2.2kg) whole chicken, neck and giblets removed
- 1 can beer, opened and half of the liquid removed
- 2 tablespoons olive oil
- 1 tablespoon kosher salt
- 1 tablespoon packed brown sugar, light or dark
- 1 tablespoon paprika
- 2 teaspoons garlic powder
- 2 teaspoons onion powder
- 1 teaspoon chili powder
- ½-1 teaspoon cayenne pepper
Instructions
-
Preheat grill to medium high heat (about 375 degrees F).
-
In a small bowl combine the salt, brown sugar, paprika, garlic powder, onion powder, chili powder, and cayenne; set aside.
-
Dry chicken very well using paper towels. Coat the chicken in olive oil. Sprinkle the entire chicken with the reserved spice rub. Place chicken over the can of beer and place in a small baking pan. You can also use a beer can chicken pan or holder instead.
-
Turn off one burner on the grill and place chicken over the unlit burner. Reduce heat to medium (350 degrees F) and cook for 1 ¼-1 ½ hours or until juices run clear and a meat thermometer reads 165 degrees F when inserted in the thickest part of the breast. (Towards the end of cooking I like to crank up the heat to really crisp up the skin)
-
Remove from grill and let rest for 10 minutes before carving.
Notes
- OVEN DIRECTIONS: Preheat oven to 400 degrees F. Follow steps 2-3 above. Bake for about 1 1/4- 1 1/2 hours or until juices run clear and a meat thermometer reads 165 degrees F when inserted in the thickest part of the breast.
- If you prefer not to use beer, use a can of coke, sprite, or root beer instead.
- Nutrition Facts: Since different brands of ingredients have different nutritional information, the information shown is just an estimate.
What to serve with Beer Can Chicken
- Creamy Coleslaw
- Bacon Ranch Pasta Salad
- Broccoli, Bacon, and Grape Salad
- Frog Eye Salad
Nutrition
*Originally published May 2015. Recipe, post, and pictures updated.*
